Seeeduino Nano

The Seeeduino Nano is a compact board similar to the Seeeduino V4.2/Arduino UNO, and it is fully compatible with Arduino Nano on pinout and sizes.
The same as Seeedunio V4.2, Seeeduino Nano is built around Atmega328P -- 8-bit AVR microcontroller. So you can use the same program code on both boards. However, the dimensions of the two are significantly different. Less than a quarter of the size, but with almost the same features, Seeeduino Nano will save more space for your project, more suitable for space-constrained scenes.

The Seeeduino Nano offers the same features and high-quality experience as the Arduino Nano in less than half the price. On the other hand, the Seeeduino Nano has also made the following improvements compared to the Arduino Nano. 1-Change the Mini-USB into Type-C, which is symmetrical and reversible. 2- Add one Grove I2C connector, with the help Grove system, you can play with hundreds of sensors and actuators simply by plugging.
One more thing, we know that only one on-board Grove connector may not be enough, so we made this Grove shield for Arduino Nano, which has 3 Grove digital connectors, 3 Grove analog connectors, 1 Grove I2C connector, and 1 Grove UART connector.

Feature
- 43mm*18mm Tiny board
- 16M ATmega328P
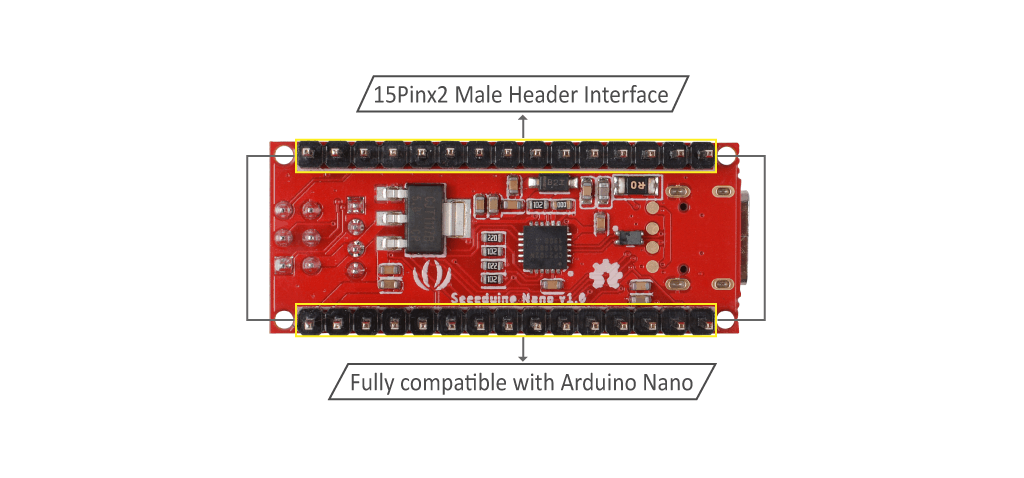
- Fully compatible with Arduino Nano
- USB Type C for Programming and power
- On-board Grove I2C connector
- Breadboard-friendly
Specification
| Item | Value |
|---|---|
| Microcontroller | ATmega328P |
| Power Input | USB Type C |
| Operating Voltage | USB:5V |
| Digital I/O Pins | 14 |
| PWM Channels | 6 |
| Analog Input Channels | 8 |
| DC Current per I/O Pin | 40 mA |
| IO Input Voltage | 5V |
| SRAM | 2 KB |
| Flash Memory | 32KB |
| Maximum CPU frequency | 16 MHz |
Hardware Overview
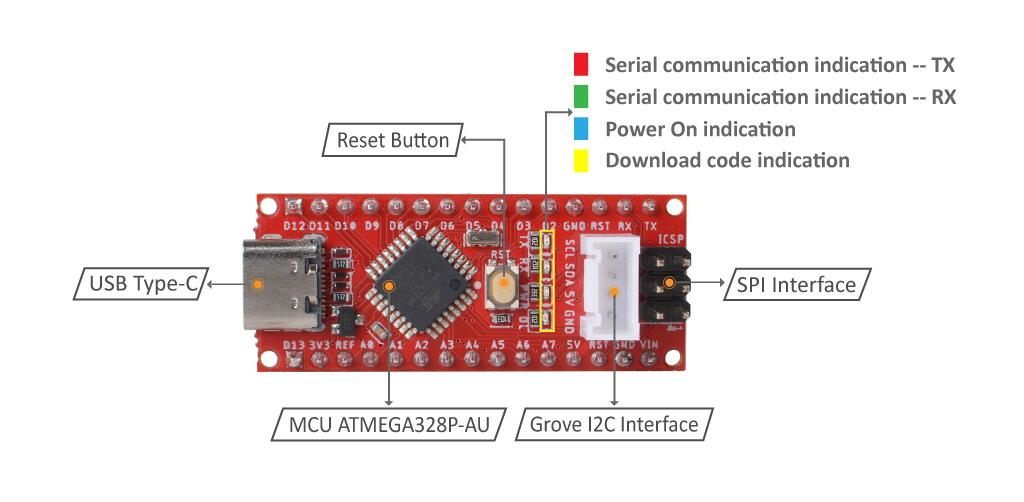
The I2C interface is not equipped with a pull-up resistor. It is recommended to use a 4.7k resistor to pull up to VCC when using it.
Power
Instead of supply power by the Type C port, you can also use the VIN and GND pins to power Seeeduino Nano. Then input range of VIN is 7V ~ 12 V.

The max power parameter
| Item | Value |
|---|---|
| The max. input circurt of USB Type C | 2A |
| The max. output circurt of VCC | 1A |
| The max. output circurt of 3V3 pin | 200mA |
Getting Started
Hardware
Materials required
- Seeeduino Nano x1
- Computer x1
- USB typc cable x1
Some USB cables can only supply power and cannot transfer data. If you don't have a usb cable or don't know if your usb cable can transmit data, you can check [seeed USB type C support USB 3.1 ](https://www.seeedstudio.com/USB-Type-C-to-A-Cable-1Meter-p-4085.html).
Connect the Seeeduino Nano to your computer using the USB cable. The blue power LED (labelled PWR) should light on.
Software
- Step 1. You need to Install an Arduino Software.

Launch the Arduino application
Double-click the Arduino application (arduino.exe) you have previously downloaded.
If the Arduino Software loads in a different language, you can change it in the preferences dialog. See the [Arduino Software (IDE) page](https://www.arduino.cc/en/Guide/Environment#languages) for details.
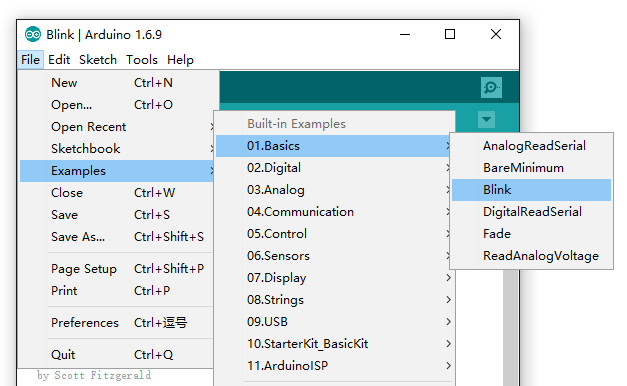
- Step 2. Open the Blink example
Open the LED blink example sketch: File > Examples >01.Basics > Blink.
- Step 3. Add the Seeed Board
Please follow the Seeed Board Intallation Guide and serch the key word Seeeduino AVR to add the Seeeduino Nano into your Arduino IDE.
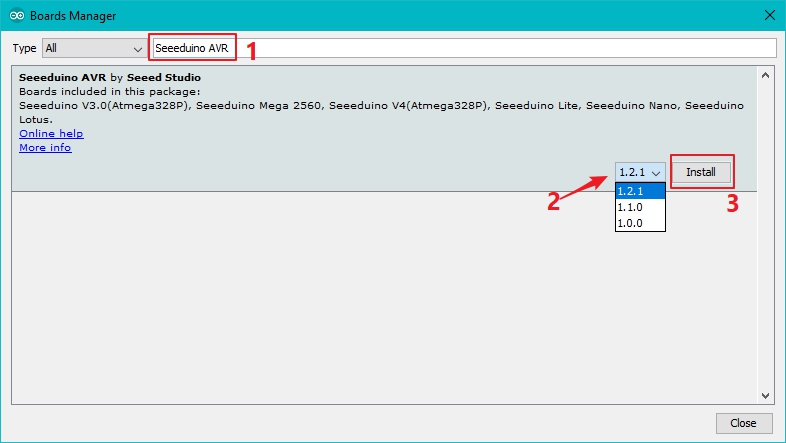
When you install the Seeeduino AVR board, please make sure to select the Version 1.2.1 or above.
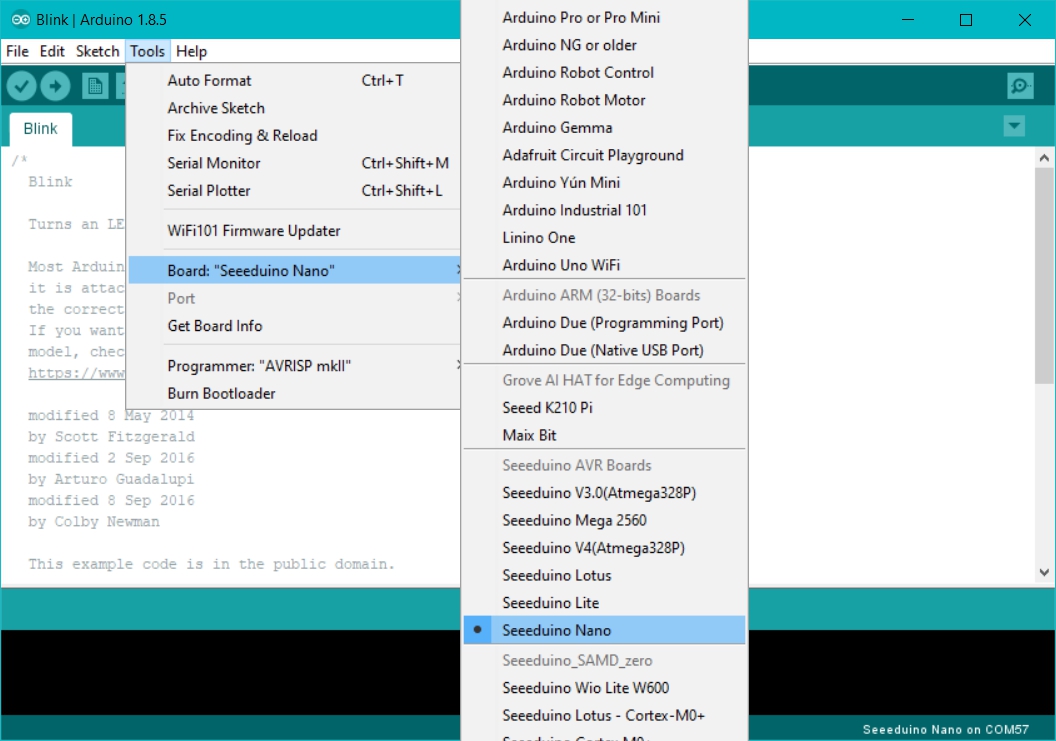
- Step 4. Select your board and port
You'll need to select the entry in the Tools > Board menu that corresponds to your Arduino. Selecting a Seeeduino Nano.
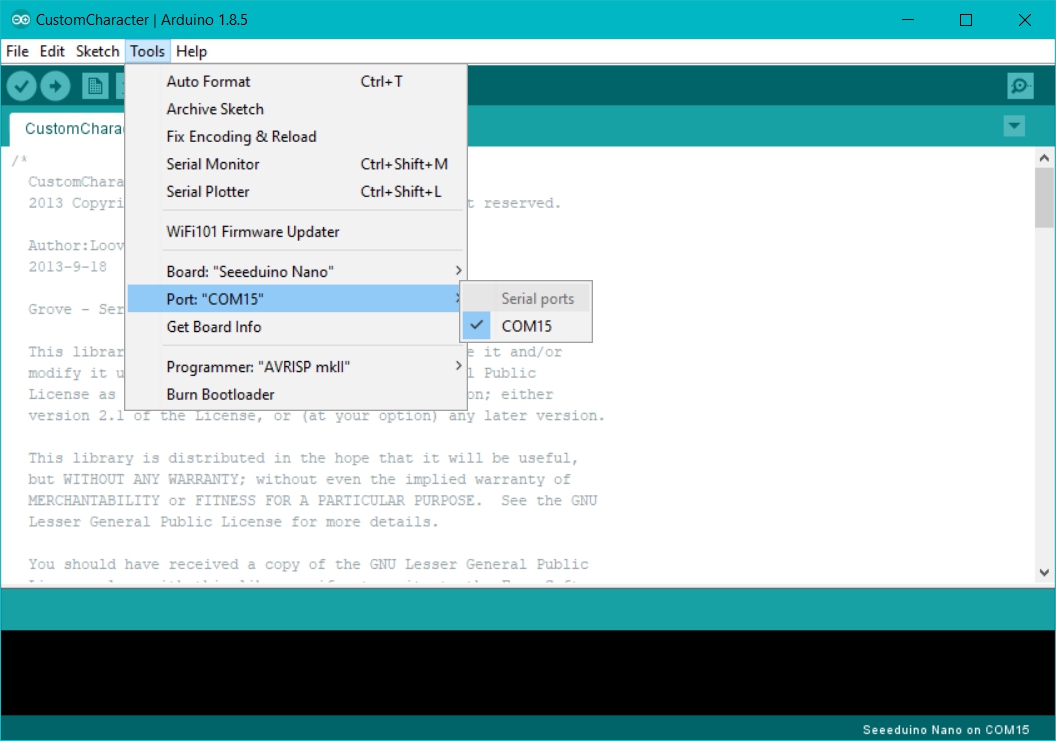
Select the serial device of the Arduino board from the Tools | Serial Port menu. This is likely to be COM3 or higher (COM1 and COM2 are usually reserved for hardware serial ports). To find out, you can disconnect your Arduino board and re-open the menu; the entry that disappears should be the Arduino board. Reconnect the board and select that serial port.
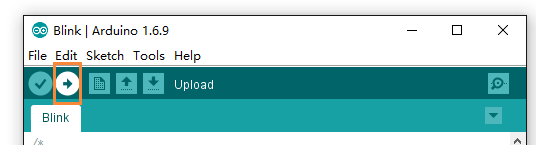
- Step 5.Upload the program
Now, simply click the "Upload" button in the environment. Wait a few seconds and if the upload is successful, the message "Done uploading." will appear in the status bar.
A few seconds after the upload finishes, you should see the pin 13 (L) LED on the board start to blink (in orange). If it does, congratulations! You've gotten Arduino up-and-running. If you have problems, please see the troubleshooting suggestions.
Schematic Online Viewer
Resources
- [ZIP] Seeeduino nano Eagle file
- [PDF] ATmega328-datasheet
Tech Support & Product Discussion
Thank you for choosing our products! We are here to provide you with different support to ensure that your experience with our products is as smooth as possible. We offer several communication channels to cater to different preferences and needs.