Grove - Button
英文 wiki:https://wiki.seeedstudio.com/Grove-Button
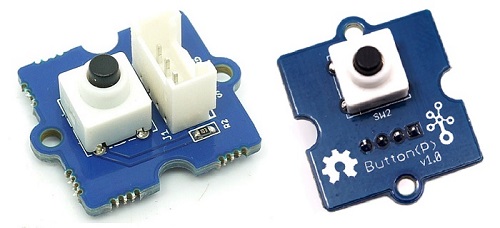
Grove - Button 是一款瞬时按键开关元件。这个产品内置了一个瞬时按键,这个瞬时按键能够在按压释放时会自动弹回。当按键按下时立即输出一个高电压的逻辑电平,释放时立即输出一个低电压的逻辑平。NC引脚在该模块没有用到,SIG 引脚为按钮的信号输出。如图所示,Grove - Button 有两个不同版本,两个版本功能一致,唯一区别在于 Grove 接口位置。

产品特性
- 易于使用的瞬时开关按钮
- 使用标准 4 针 Grove 电缆连接到其他 Grove 模块,如 Grove Power Modules 和 Grove - Base Shield
!!!Tip 关于 Grove 模块的更多信息请点击 Grove System
使用方法
单机模式
按照以下步骤,构建一个使用此模块,但不使用任何微控制器的采样电路 :
- 将按钮模块连接到电路的输入端 ( 电源模块左侧 )。 在电路的输出端,您可以使用一系列用户 接口模块 (Grove - Red LED, Grove - LED String Light, Grove - Mini Fan, Grove - Buzzer, Grove - Recorder 等等)
- 完成后启动电路
- 现在可以使用按钮模块来触发输出。 例如 :
- 当与 Grove - Red LED 输出模块配合使用时,请注意按下按钮时 LED 会亮起,当您停止按压时,LED 熄灭。

在电源模块方面,选用 Grove - USB 电源模块或 Grove - DC 插座电源模块用于 Grove 电路。
与 Arduino 一起使用
按照这些简单的步骤,使用瞬时开关按钮构建 Grove 电路 :
当将模块与 Arduino 或 Seeeduino 结合使用时,请使用 Grove - Base Shield,并使用指定的 Grove 接口将 Grove - Button 模块连接到 Grove - Base Shield。 还要附加一个输出模块,例如 Grove - Red LED,根据从按钮接收的输入将触发。 上传以下示例代码,使得根据 Grove - Button 的输入使 LED 变为 ON 和 OFF :
//Turns on and off a light emitting diode(LED) connected to digital pin 13, when pressing a pushbutton attached to pin 2.

/*
 The circuit:
 * LED attached from pin 13 to ground
 * pushbutton attached to pin 2 from +5V
 * 10K resistor attached to pin 2 from ground

 * Note: on most Arduinos there is already an LED on the board
 attached to pin 13.


 This example code is in the public domain.

 http://www.arduino.cc/en/Tutorial/Button
 */

// constants won't change. They're used here to
// set pin numbers:
const int buttonPin = 2;     // the number of the pushbutton pin
const int ledPin =  13;      // the number of the LED pin

// variables will change:
int buttonState = 0;         // variable for reading the pushbutton status

void setup() {
    // initialize the LED pin as an output:
    pinMode(ledPin, OUTPUT);
    // initialize the pushbutton pin as an input:
    pinMode(buttonPin, INPUT);
}

void loop(){
    // read the state of the pushbutton value:
    buttonState = digitalRead(buttonPin);

    // check if the pushbutton is pressed.
    // if it is, the buttonState is HIGH:
    if (buttonState == HIGH) {
        // turn LED on:
        digitalWrite(ledPin, HIGH);
    }
    else {
        // turn LED off:
        digitalWrite(ledPin, LOW);
    }
}
与 Raspberry Pi 一起使用
!!! attention 如果你正在使用 Raspberry Pi with Raspberrypi OS >= Bullseye, 你只能在 python3 中使用这个命令行.
这是 Raspberry Pi 的一个简单例子。运行程序并按按钮,将在终端上打印 1,否则打印 0。如下图所示。


# http://www.seeedstudio.com/wiki/Grove_-_Button

import time
import grovepi

# Connect the Grove Button to digital port D3
# SIG,NC,VCC,GND
button = 3

grovepi.pinMode(button,"INPUT")

while True:
    try:
        print grovepi.digitalRead(button)
        time.sleep(.5)

    except IOError:
        print "Error"
运行程序
- 找到文件的路径 (根据你自己的路径)
cd GrovePi/Software/Python/
- 运行程序
sudo python3 grove_button.py
相关 Grove Packer
标准的 Grove - Button 模块可作为以下 Grove Kit 系列的一部分使用 :
| Grove - Mixer Pack V2 | Grove - Mixer Pack | Grove - Starter Kit V1.1b |
|---|---|---|
 |  | 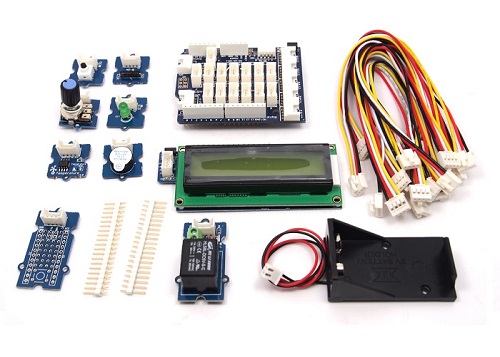 |
| 点击购买 | 点击购买 | 点击购买 |
或者,可以通过 这里 在 Seeed Studio Bazaar 独家购买。 要购买 Panel Mount 版本的模块,请转到 这里。
项目展示

受到 守望先锋 的启迪,我们已经制作了非常酷的木制激光枪玩具,玩得开心 !
木激光枪和枪瞄准器均基于 Arduino 板的一个称为 Seeeduino Lotus 的板。 激光枪上的激光发射器被控制以发射激光脉冲以使 Gun Target "活动"。 并且 Gun Target 上有 3 个光传感器来检测激光脉冲。看起来很简单对吗? 如果您对我们的项目感兴趣,请为自己或您的孩子做一个! 值得花一天 DIY 它作为圣诞礼物。

原理图在线预览
资源下载
- [Eagle文件] Grove-Button Eagle Files.
- [原理图网页版] Schematic at Easyeda
- [其他资源] How to upload code