Getting started with XIAO 2-Channel Wi-Fi AC Energy Meter In Home Assistant
Overview
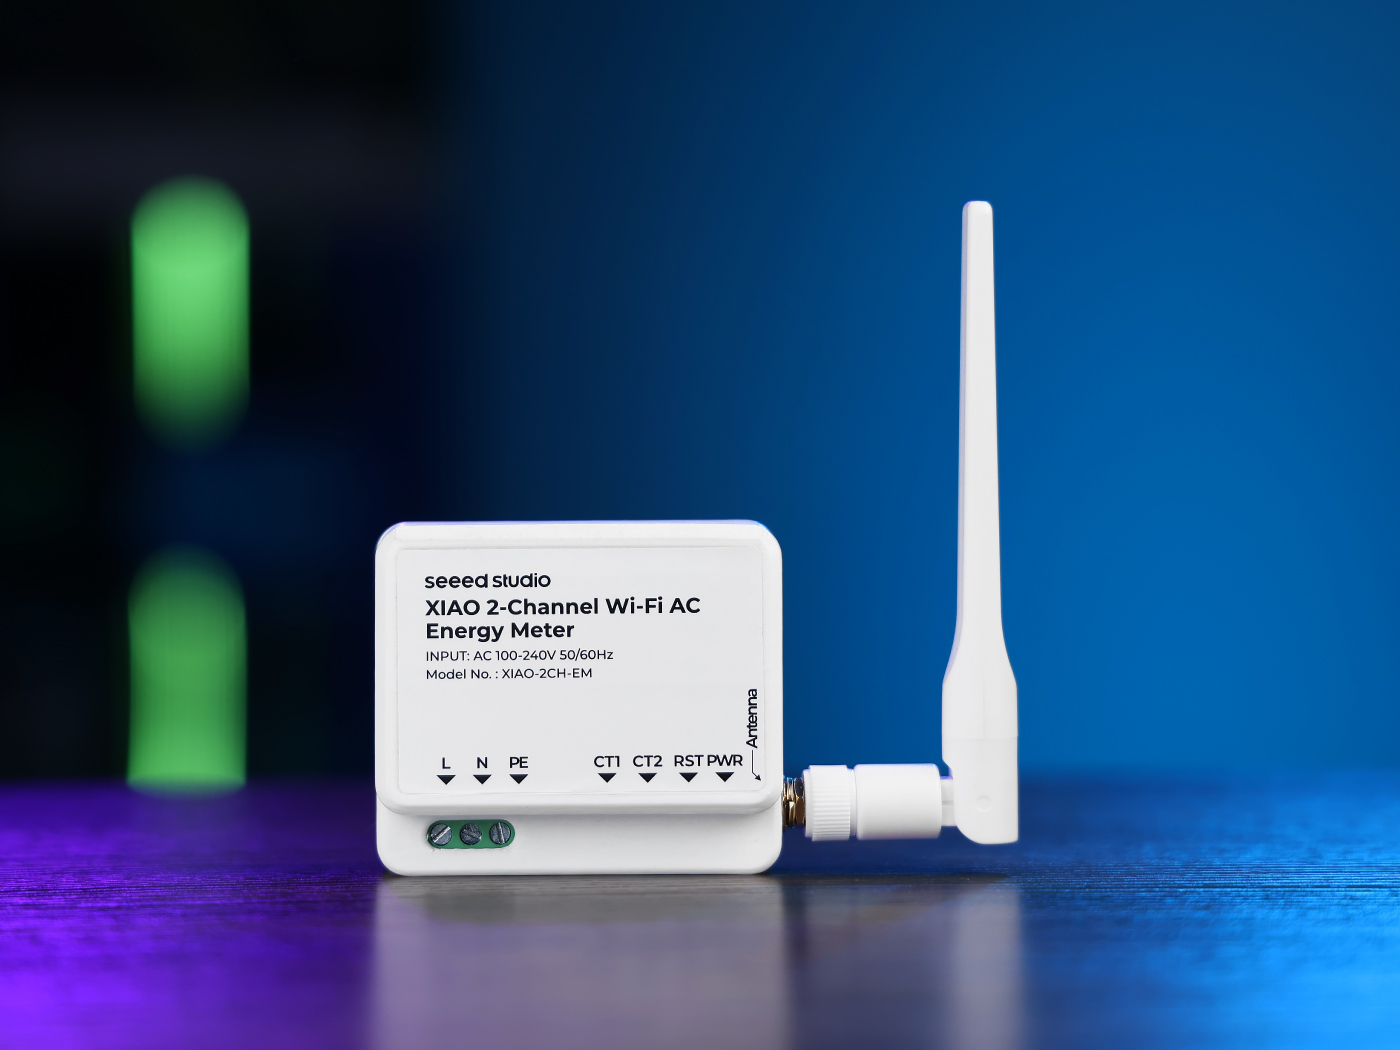
The XIAO 2-Channel Wi-Fi AC Energy Meter is a smart device from Seeed Studio designed to detect the electricity usage of AC-powered appliances. Its dual-channel configuration supports independent detect of up to two loads, making it an excellent choice for automating a variety of devices in smart home environments.
This guide provides a detailed walkthrough, including setup, integration, and advanced configuration for users ranging from beginners to smart-home enthusiasts.
Key Features and Specifications
| Feature | Details |
|---|---|
| Input Voltage | AC 100-240V, 50/60Hz |
| Channels | 2 (independent detect for each channel) |
| Connection Type | Wi-Fi |
| Input Terminals | L (Live), N (Neutral), PE (Protective Earthing) |
| Effective Range of Current Detection | 10mA-100A @ 1mΩ (CT Mode) |
| Active Electrical Energy | 1w-7700w @ 1mΩ |
Always disconnect AC power before wiring.
Physical Layout and Connections
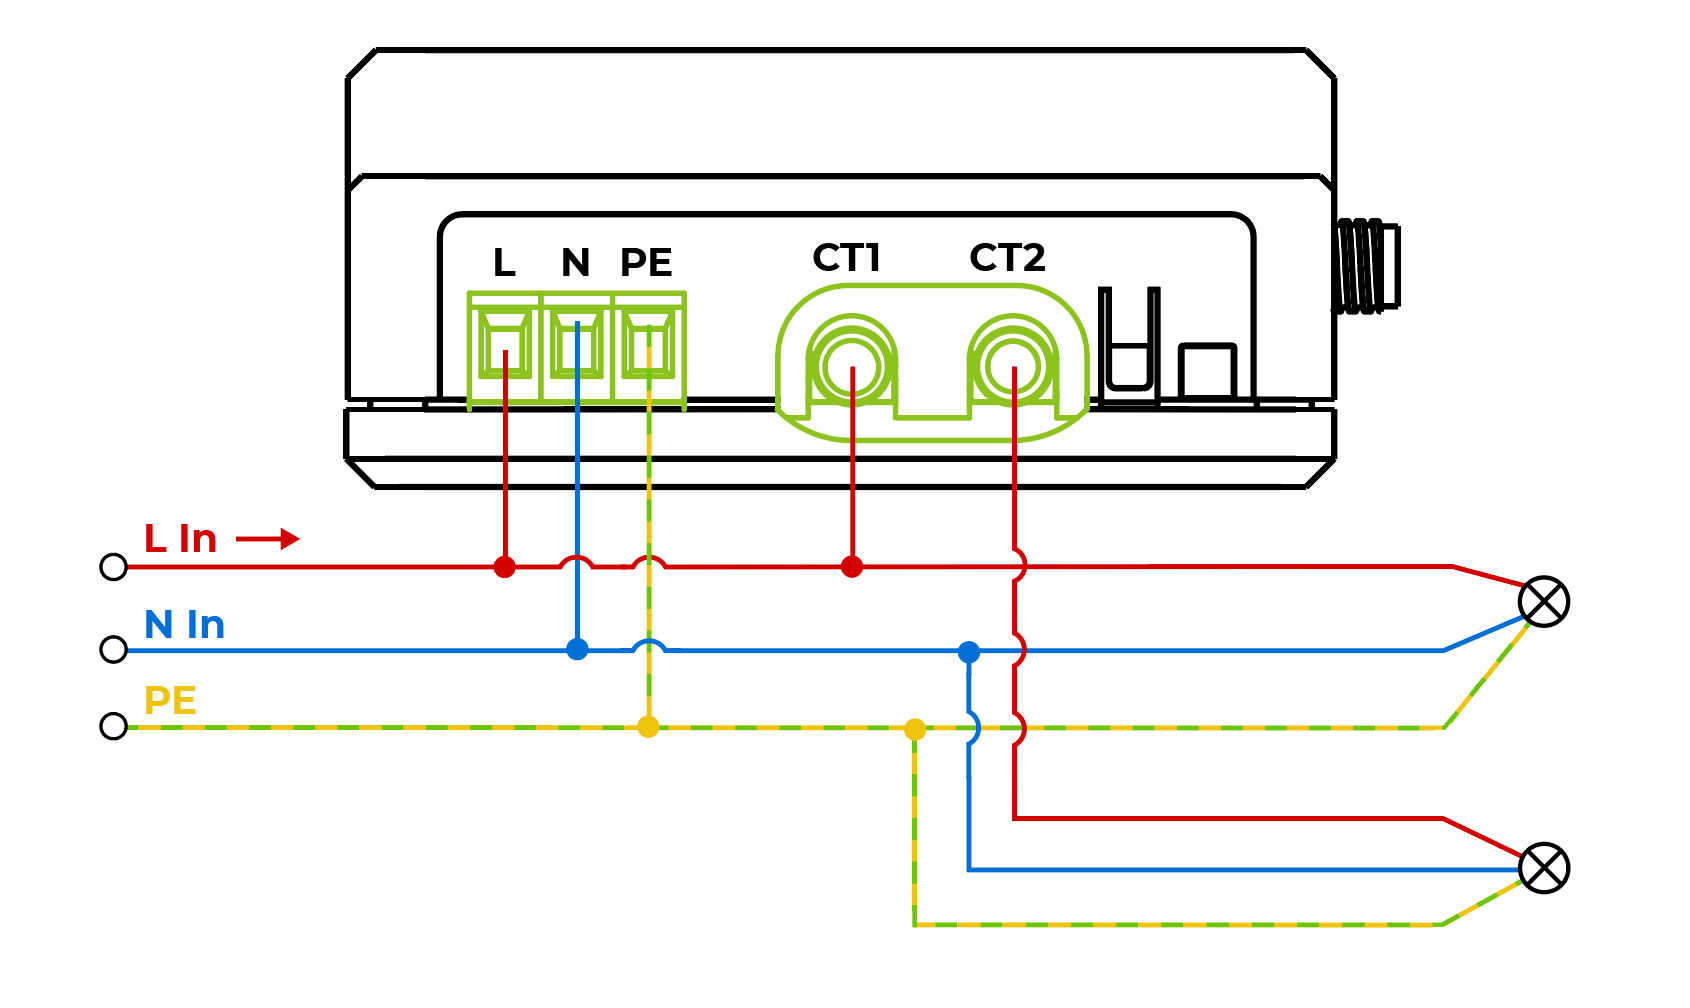
- L (Live): Connect the live wire from the AC power supply.
- N (Neutral): Connect the neutral wire from the AC power supply.
- PE (Protective Earthing): Connect the protective earthing wire from the AC power supply.
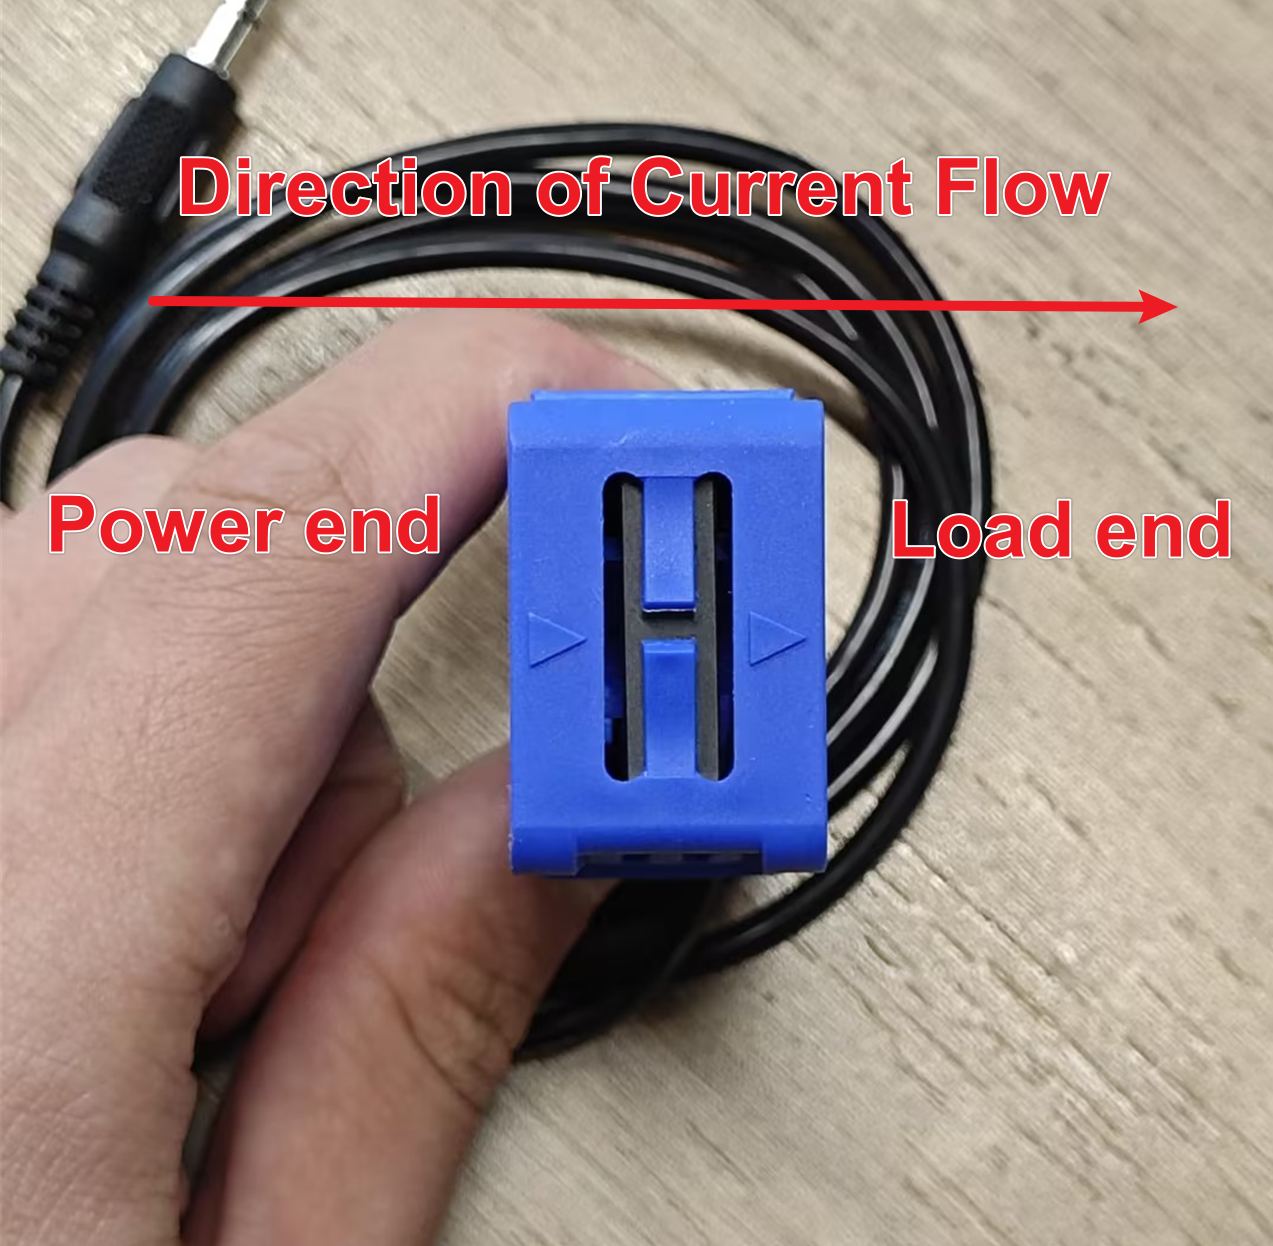
- CT1, CT2 (Current Transformer): Clamp the fixture of current transformer onto the live wire, with the arrow pointing from the power end to the load end.
Installation of Current Transformer
- Firstly, open the fixture and place the wire into its circular area.
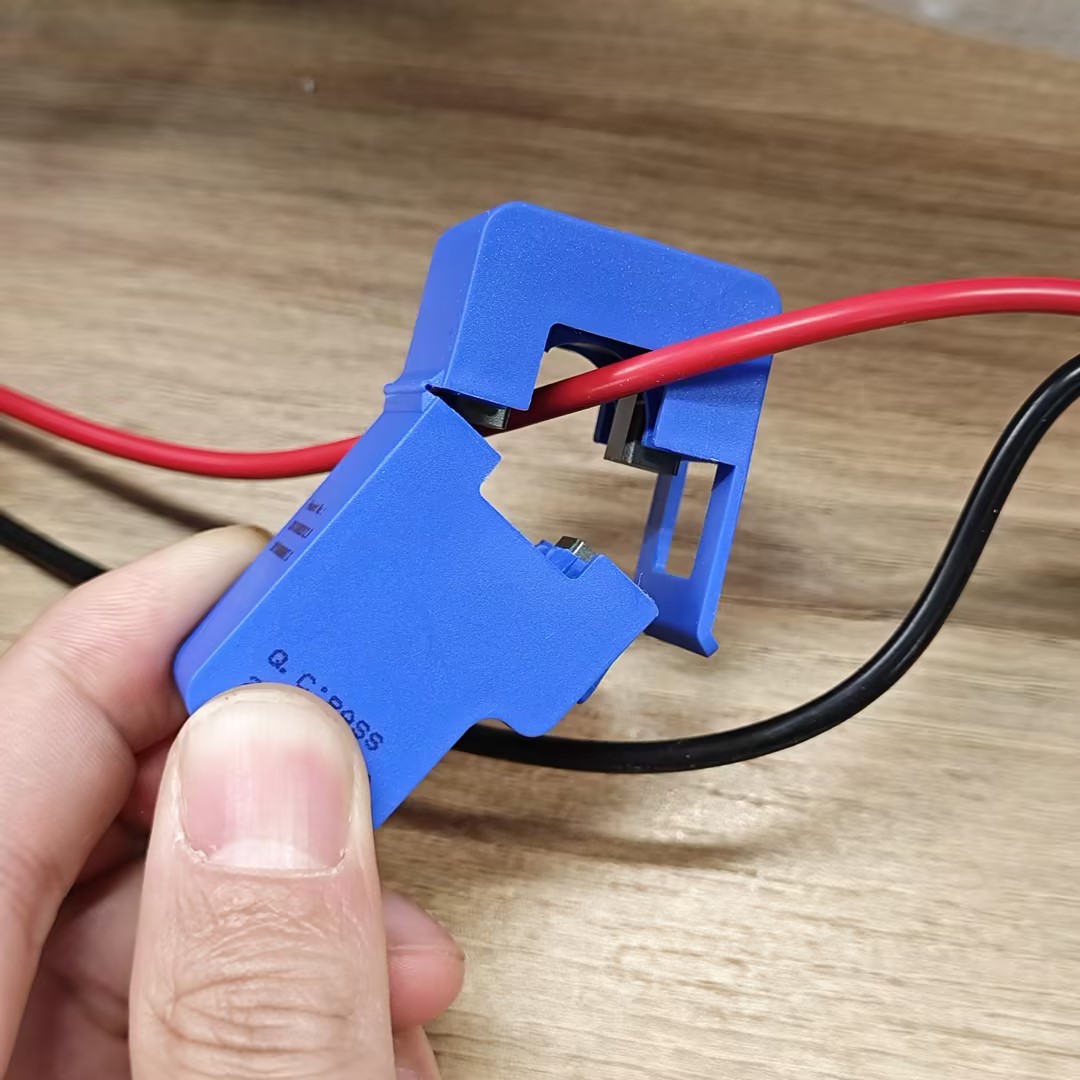
- Then fasten the buckle, press it hard and hear a "click", the installation is complete.
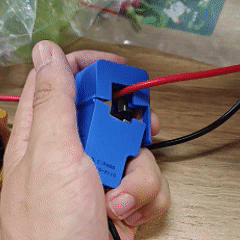
When installing the fixture, please ensure that the direction of the current matches the direction indicated by the arrow on the fixture.
Getting Started
Requirements
- Core Components:
- Network:
- Stable Wi-Fi for seamless interaction between hardware and Home Assistant.
Step 1: Setting Up Home Assistant
- Installation: homeassistant is already pre-installed in Home Assistant Green.
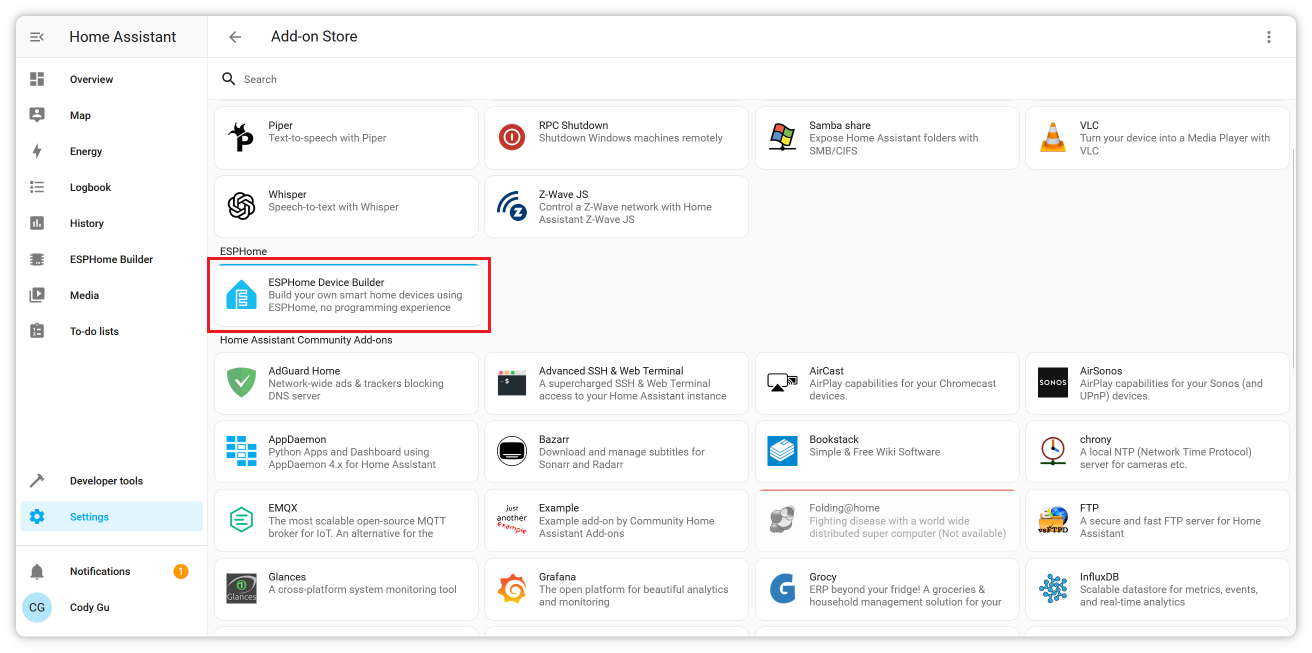
- Enabling ESPHome Add-on:
- Access the Home Assistant dashboard.
- Navigate to the "Add-ons" section and search for the ESPHome add-on.
- Click "Install" and then "Start" to enable it.
- Once installed, configure the add-on to ensure proper communication with the XIAO ESP32C6.
By gathering the necessary components and setting up Home Assistant with the ESPHome add-on, you'll be ready to proceed with the integration of the XIAO 2-Channel Wi-Fi AC Energy meter.
Step 2: Preparing the Energy Meter
By default, your device (XIAO ESP32C6) comes pre-flashed with firmware for XIAO 2-Channel Wi-Fi AC Energy Meter. However, there are two scenarios where you may need to update the firmware:
- Re-flashing the Firmware: If the existing firmware is corrupted or you need to start fresh.
- Upgrading the Firmware: If there is a newer version of the firmware with improved functionality.
There are two simple methods for flashing the firmware:
Firefox does not support flashing firmware on ESP devices. Please use Google Chrome or Microsoft Edge instead.
- Web Tool
- ESPHome Web
You can use this Web Tool for an easy and direct method to flash your firmware. Simply follow the on-screen instructions. (Please choose SeeedStuido-2CH-EM)
- Click the
CONNECTbutton to initiate the connection. The tool will automatically update the firmware.
If something goes wrong, follow the on-screen troubleshooting steps or switch to the ESPHome Web method to complete the process.
For this method, you'll need to download the bin firmware file from here(you'll need to unzip the downloaded file).
- Connect the sensor kit to your PC.
- Visit the ESPHome Web page.
- Select the firmware file with the
*.factory.binsuffix.
Watch the following video for a detailed walkthrough of flashing the firmware via ESPHome Web:
With either method, you'll have your firmware updated and ready for integration with Home Assistant.
Step 3: Network Configuration
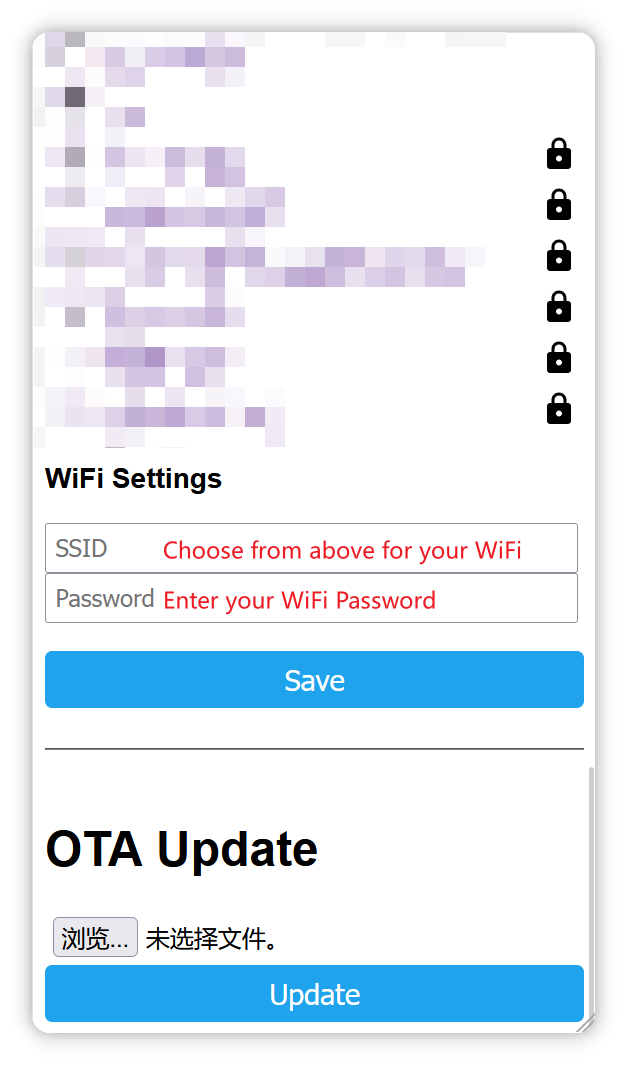
-
Enable Access Point:
- Upon powering up for the first time, the module will create a Wi-Fi network (SSID:
SeeedStudio-2CH-EM).
- Upon powering up for the first time, the module will create a Wi-Fi network (SSID:
-
Access Configuration:
- Connect to the network using a phone or PC.
- Open a browser and navigate to
http://192.168.4.1. - Enter the SSID and password of your home Wi-Fi network.
- Home Assistant Integration:
- Once connected to the home network, the module will be discoverable in Home Assistant under
Settings -> Devices & Services.
- Once connected to the home network, the module will be discoverable in Home Assistant under
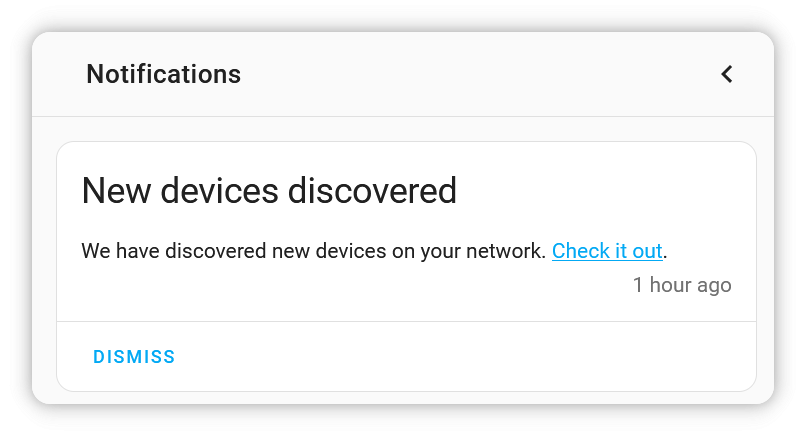
This way, you can connect the module to your Home Assistant network and let Home Assistant discover it.
Step 4: Add the module device
- Automatic Discovery:
- Ensure the ESPHome is installed in Home Assistant.
- Navigate to
Settings -> Devices & Services -> Integrationsand look for the device.
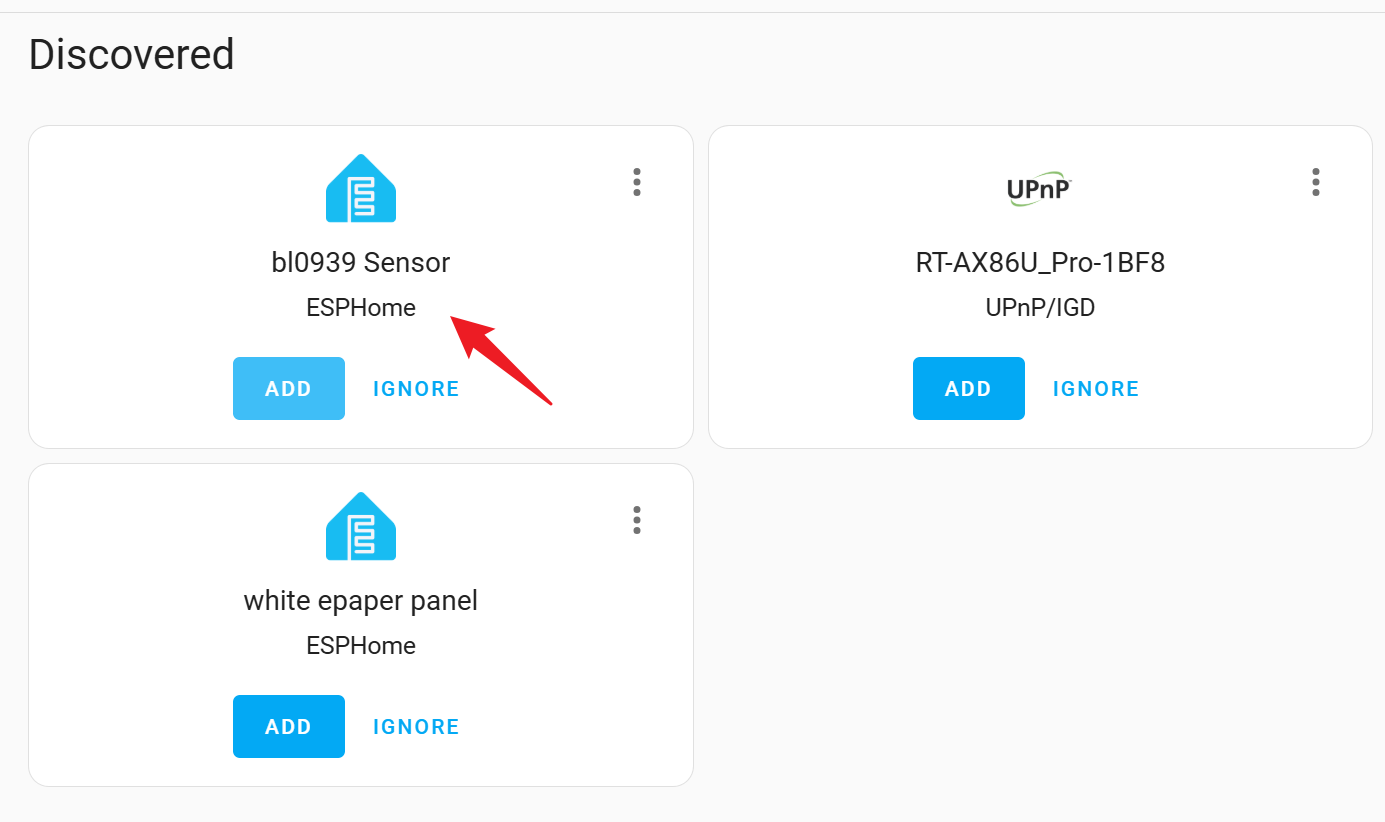
- Manual Configuration:
- If not automatically discovered, manually add the device by specifying its IP address.
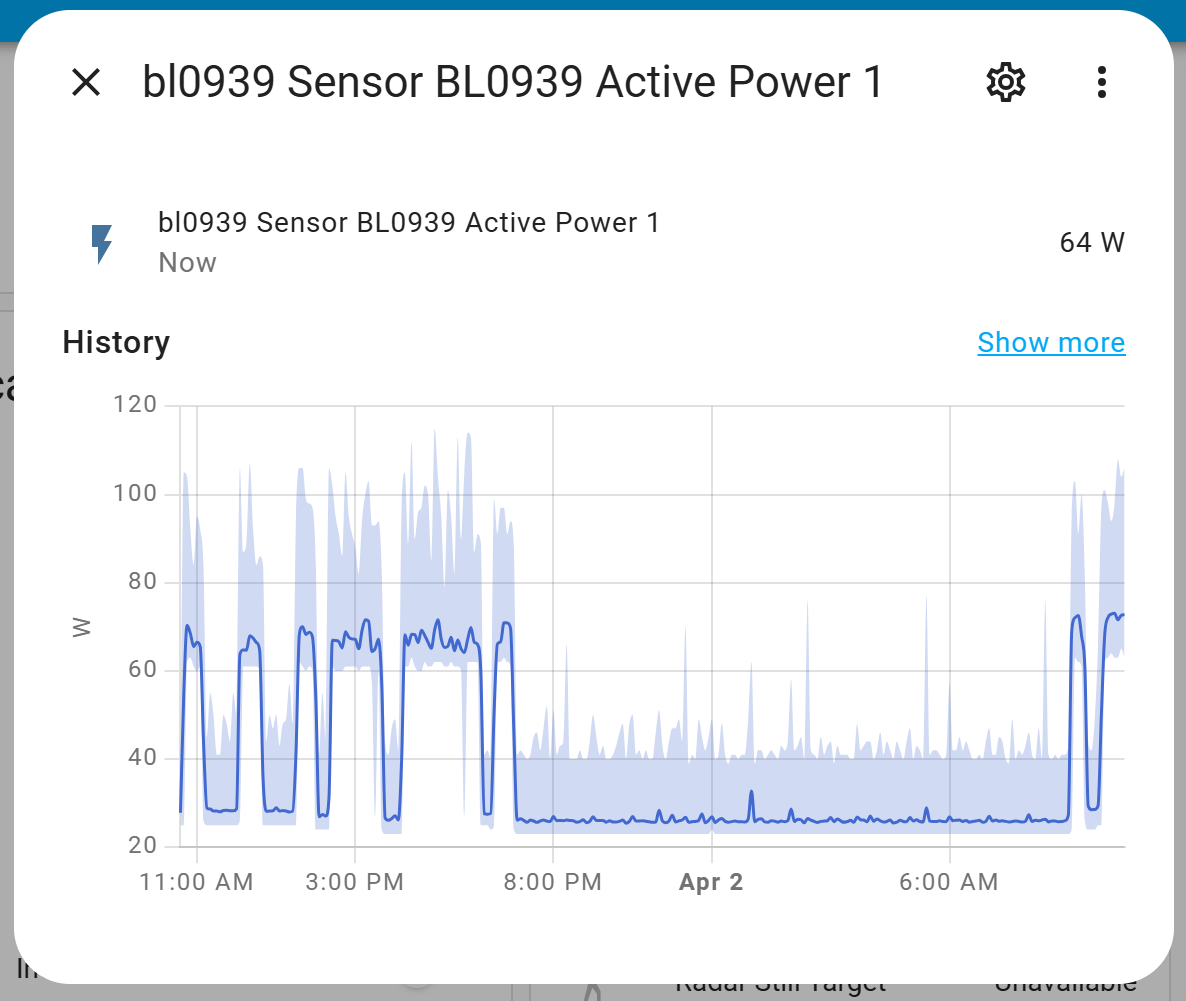
After adding the device, you can see a lighting control switch, two channels of current usage, two channels of power consumption, and the total voltage value on the Overview page.

By clicking on any row icon, you can view the corresponding values and their recent changes in more detail, which are represented by a line graph.
Safety and Maintenance
- Periodically inspect wiring for wear and tear.
- Use proper circuit protection devices, such as fuses or breakers.
- Keep the device away from water and excessive heat.
FAQs
-
What happens if the device is disconnected from Wi-Fi?
- The module will attempt to reconnect automatically. If it fails, it will enable its fallback access point for reconfiguration.
-
What should I do if the device suddenly loses power unexpectedly?
- When the device suddenly loses power, if you want to remove the fixture of current transformer, please wait until the device restarts and is operating normally before removing it, otherwise it may damage the device.
Resources
-
GitHub Repository: Access the ESPHome Firmware at the Seeed Studio Dual Channel Energy Meter GitHub page
-
Dual Channel Energy Meter Schematic: Seeed_Studio_XIAO_2-Channel_Wi-Fi_AC_Energy_Meter_V1.0.pdf
Tech Support & Product Discussion
Thank you for choosing our products! We are here to provide you with different support to ensure that your experience with our products is as smooth as possible. We offer several communication channels to cater to different preferences and needs.