Connect Grove Modules to Home Assistant using ESPHome
Introduction
This wiki will walkthrough step-by-step on how to connect Seeed Studio XIAO ESP32C3 with ESPHome running on Home Assistant and send the sensor data/ control devices after connecting Grove modules to XIAO ESP32C3. So, let's get started!
What is ESPHome?
ESPHome is a tool which aims to make managing your ESP boards as simple as possible. It reads in a YAML configuration file and creates custom firmware which it installs on your ESP device. Devices or sensors added in ESPHome’s configuration will automatically show up in Home Assistant’s UI.

Install Home Assistant
Make sure you already have Home Assistant up and running. You can follow this wiki for a step-by-step guide on installing Home Assistant on an ODYSSEY-X86 SBC.
Install ESPHome on Home Assistant
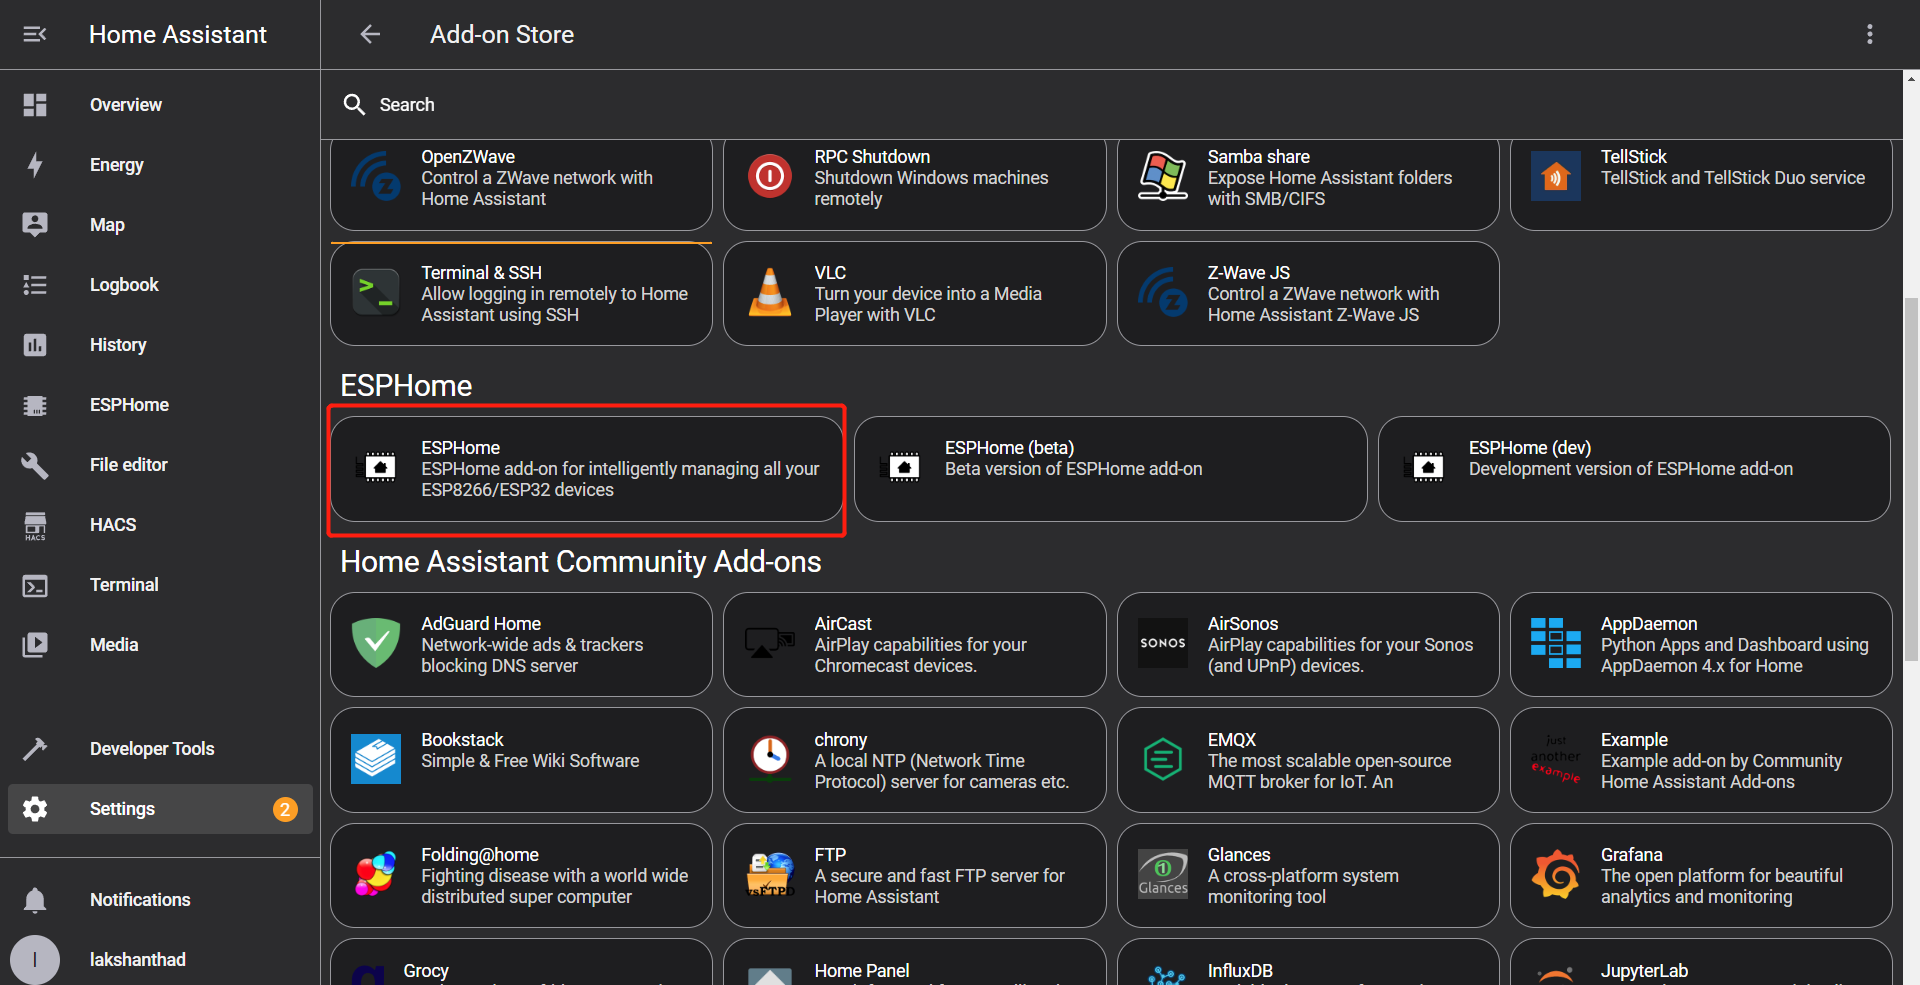
ESPHome is available as a Home Assistant Add-On and can simply be installed via the add-on store.
- Step 1. To quickly setup ESPHome on Home Asssistant, click the below button

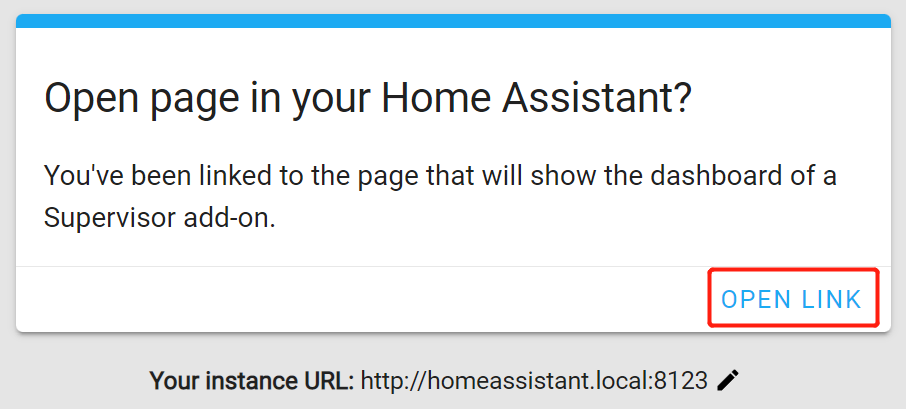
- Step 2. Once you see the following pop-up, click OPEN LINK
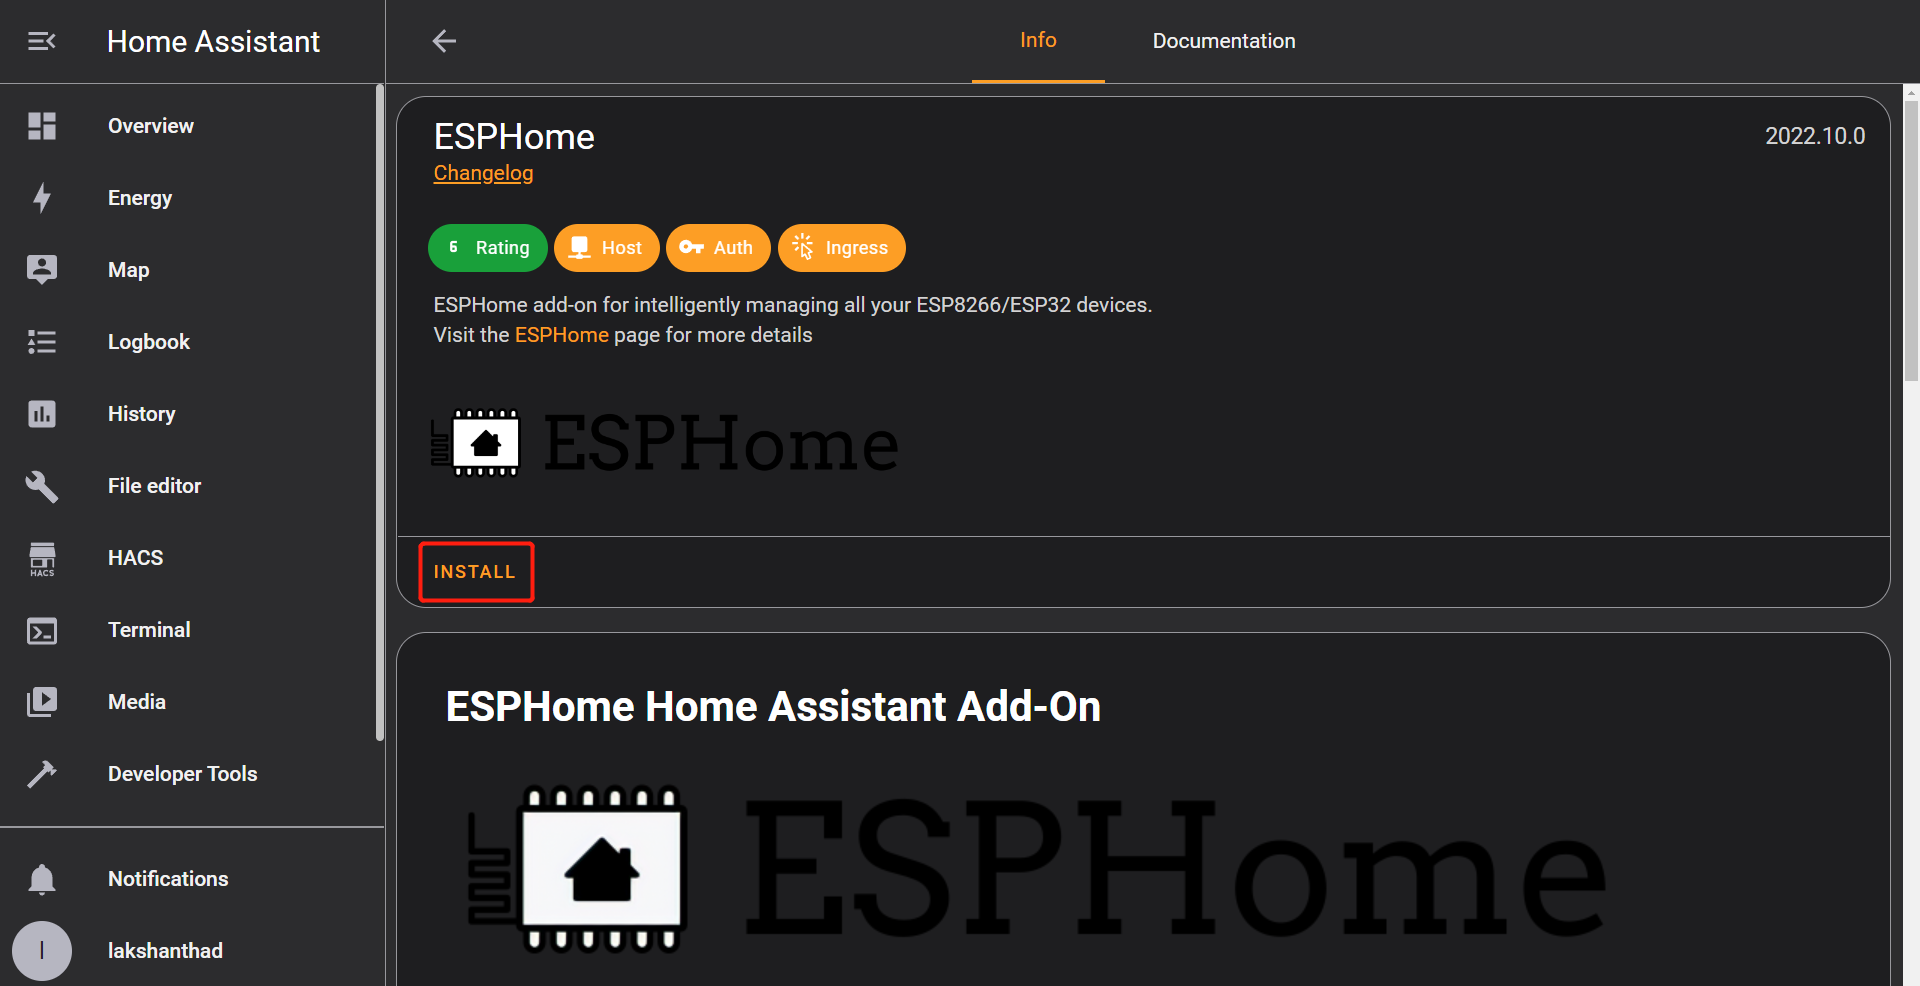
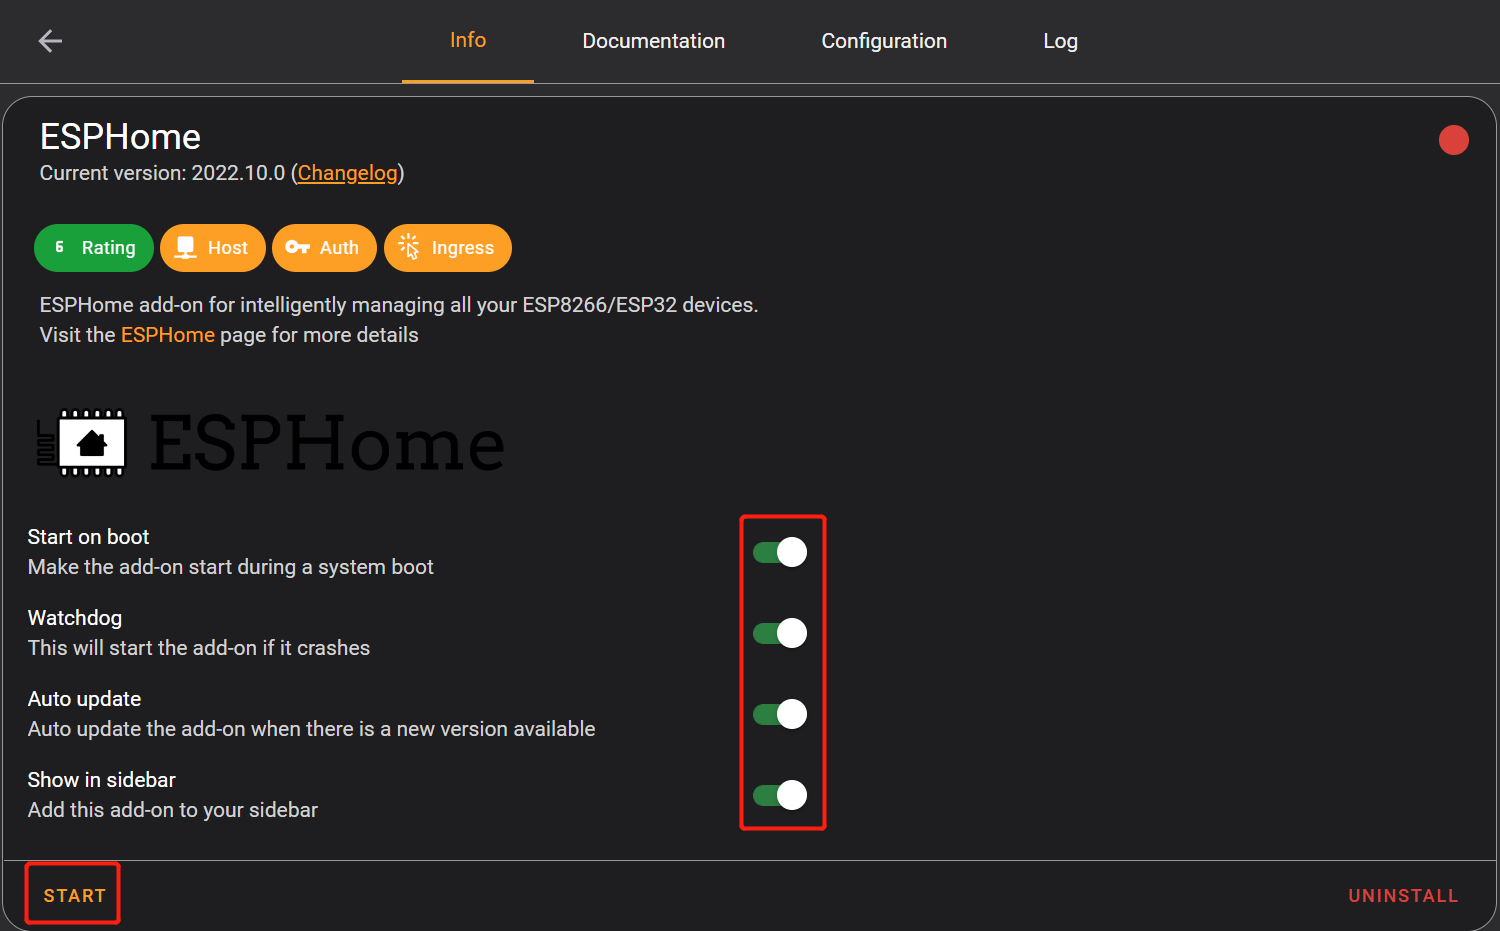
- Step 3. Click INSTALL
- Step 4. Enable all the options and click START
- Step 5. Click OPEN WEB UI or ESPHOME from the side-panel
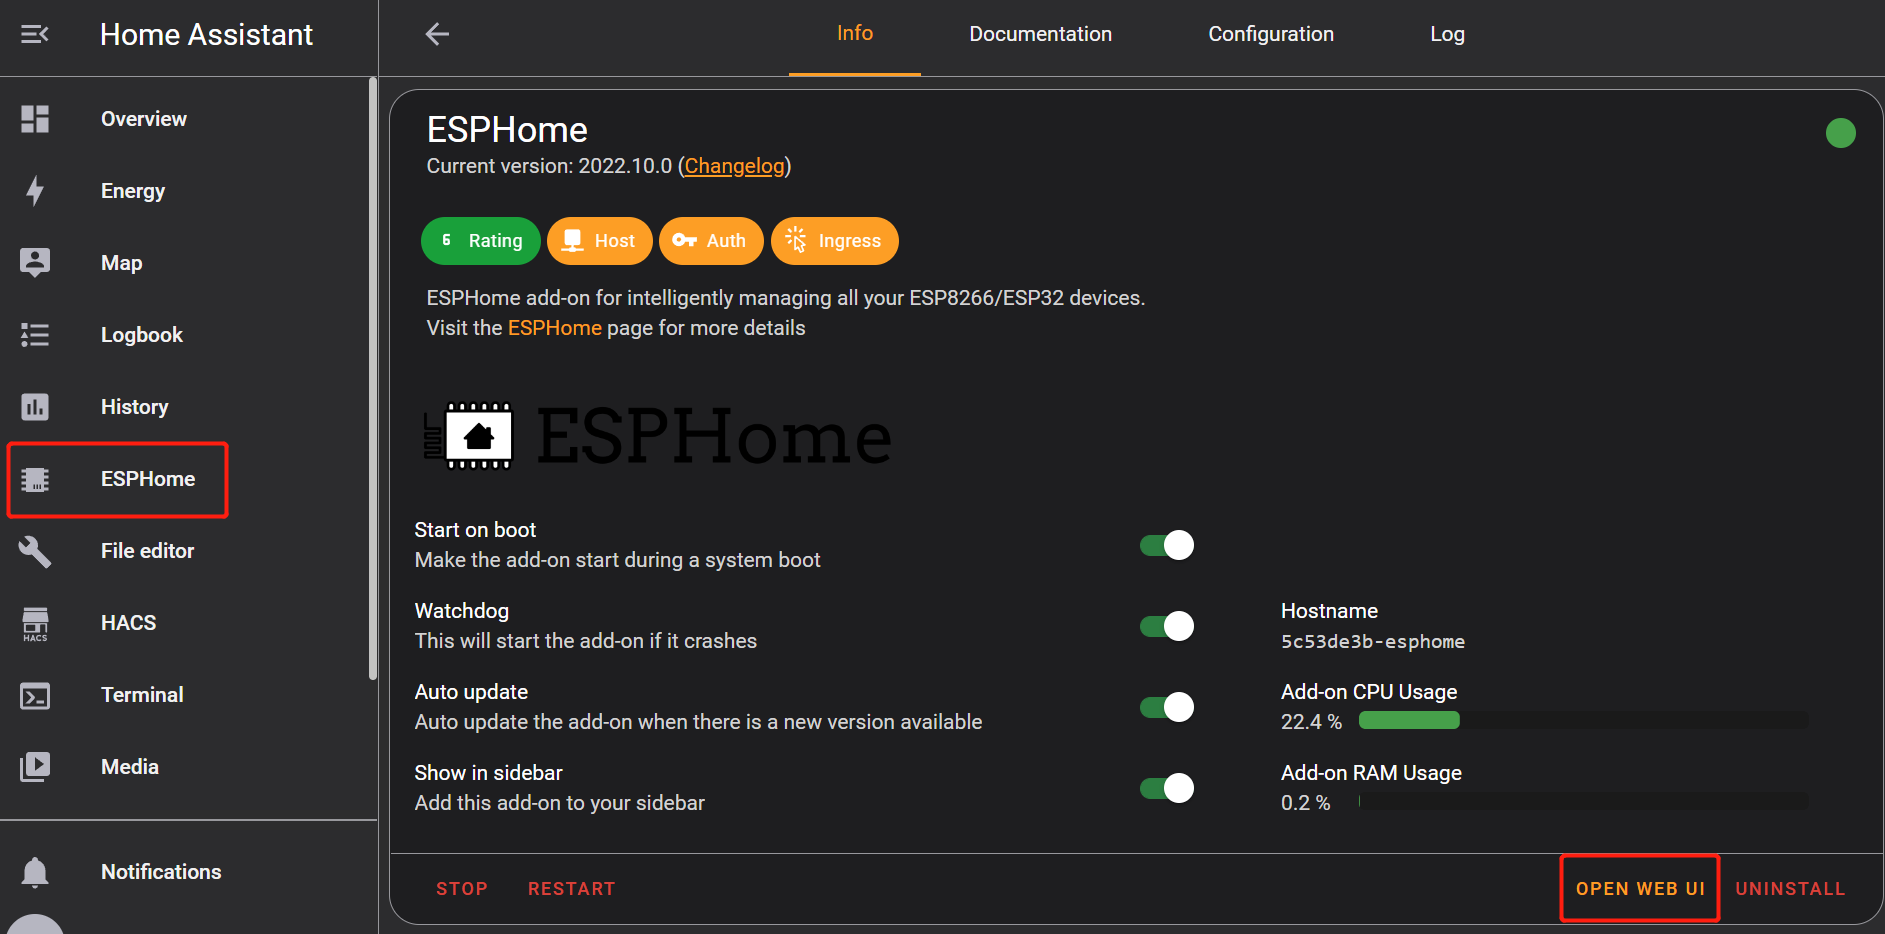
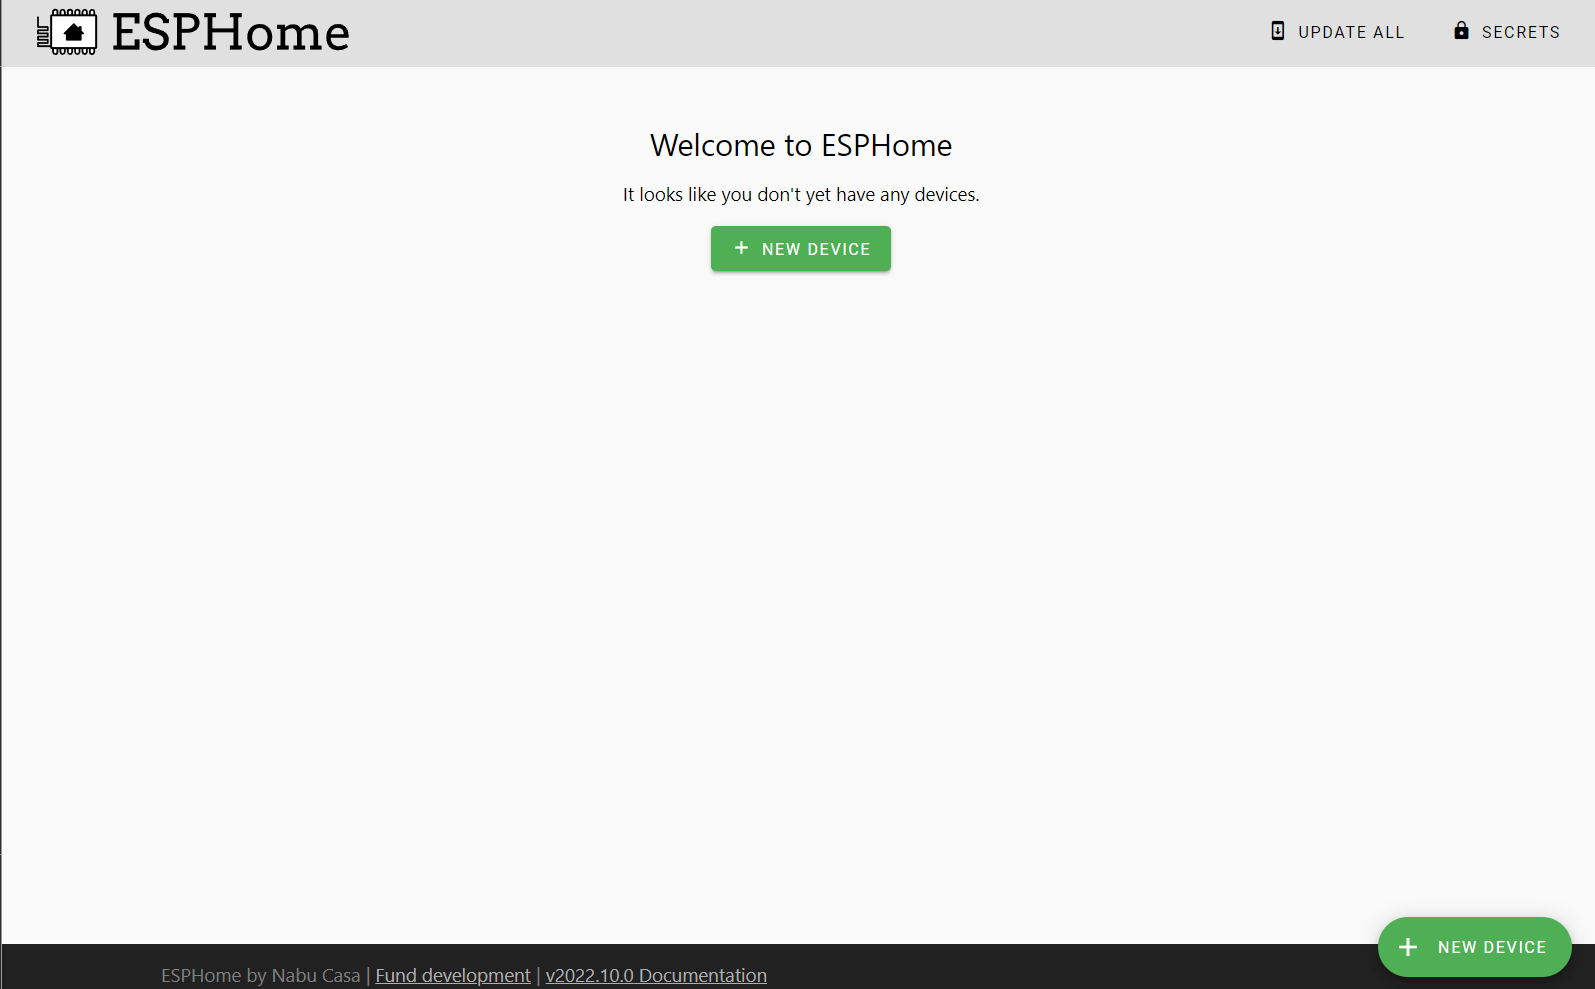
You will see the following window if ESPHome is successfully loaded
Add Seeed Studio XIAO ESP32C3 to ESPHome
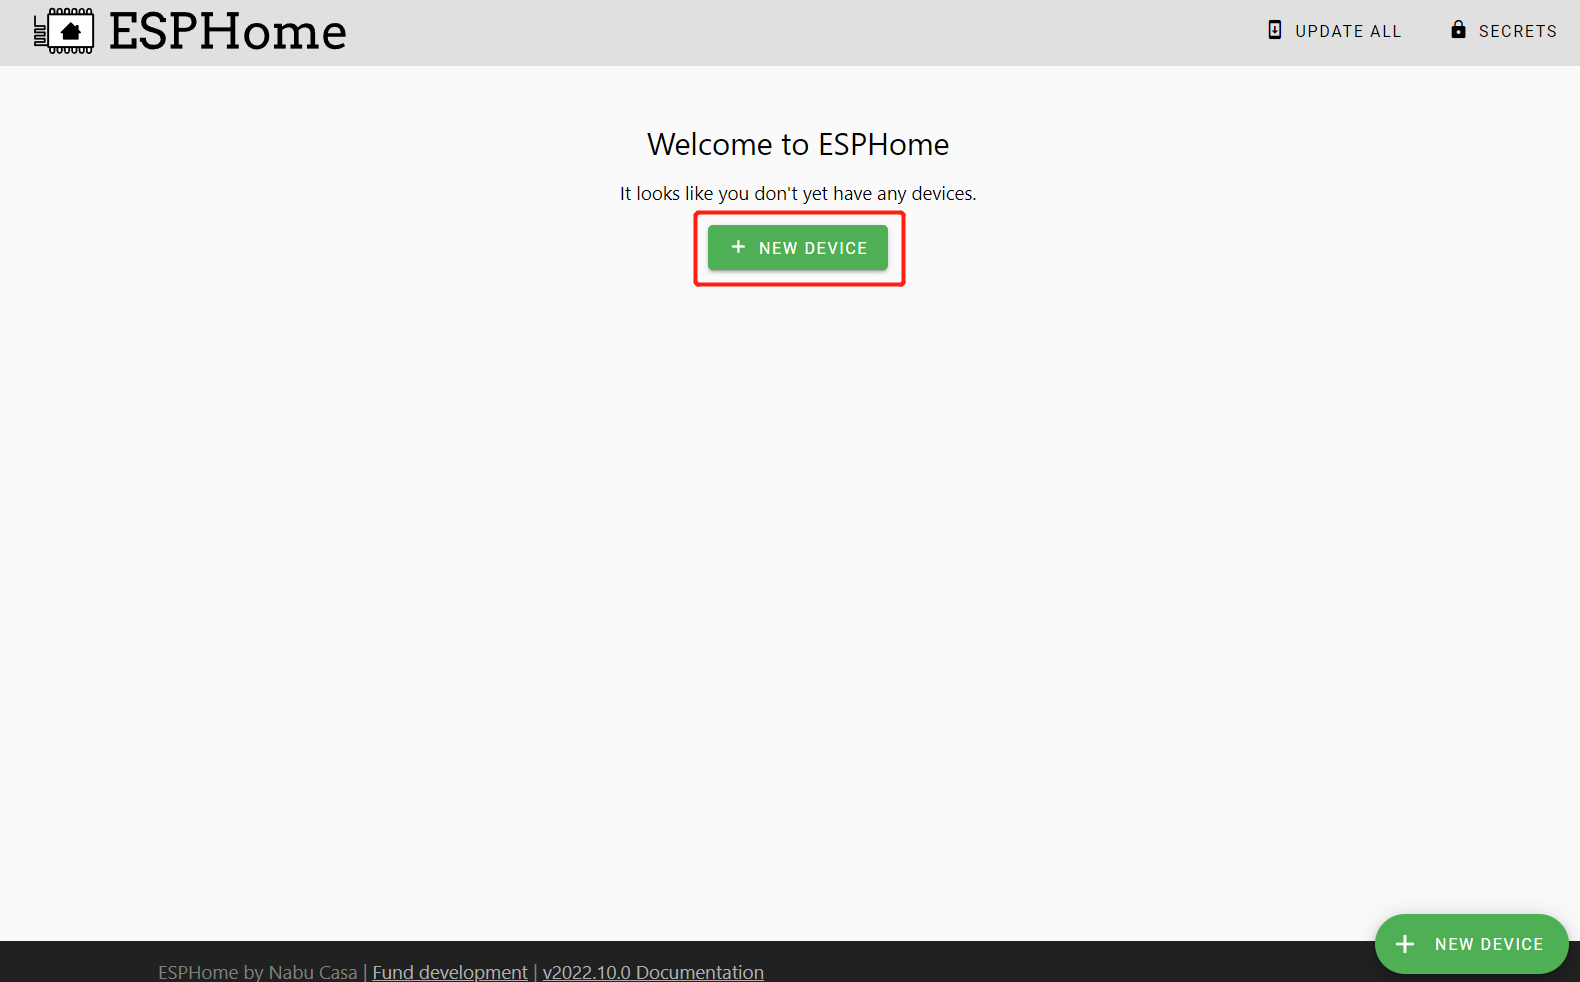
- Step 1. Click + NEW DEVICE
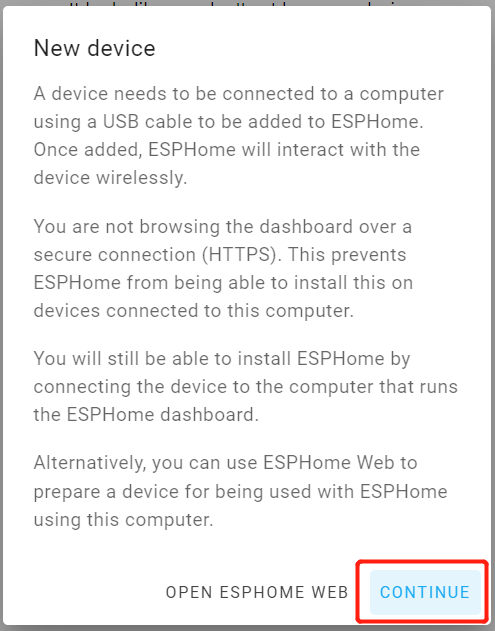
- Step 2. Click CONTINUE
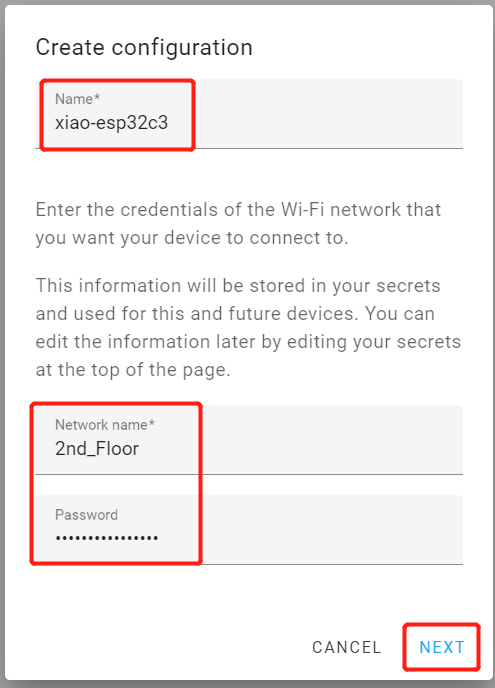
- Step 3. Enter a Name for the device and enter WiFi credentials such as Network name and Password. Then click NEXT
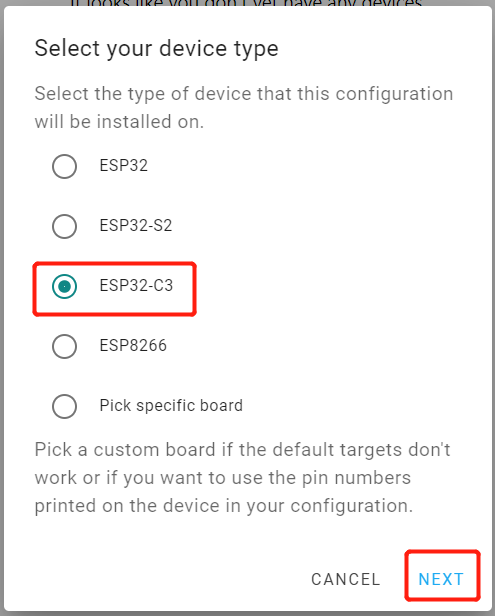
- Step 4. Select ESP32-C3 and click
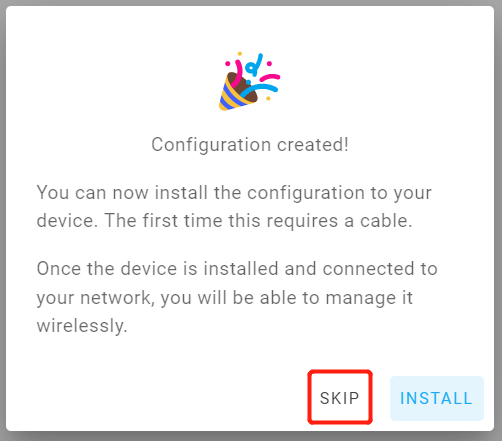
- Step 5. Click SKIP because we will configure this board manually
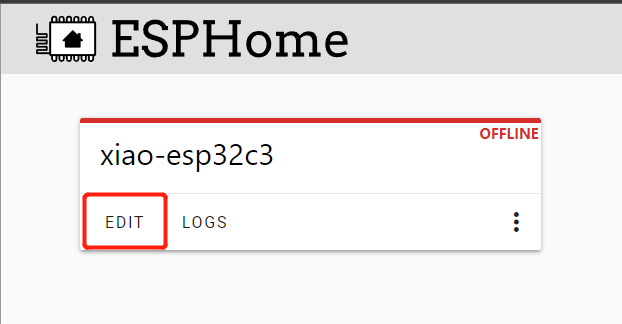
- Step 6. Click EDIT under the newly created board
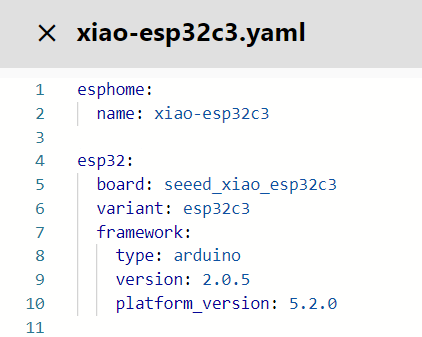
- Step 7. This will open a YAML file and this file will be used to set all the board configurations. Edit the content under esp32 as follows
esp32:
  board: seeed_xiao_esp32c3
  variant: esp32c3
  framework:
    type: arduino
    version: 2.0.5
    platform_version: 5.2.0
Note: Here we are using the latest version of Arduino core for ESP32 and ESP32 support for PlatformIO
- Step 8. Click SAVE and then click INSTALL

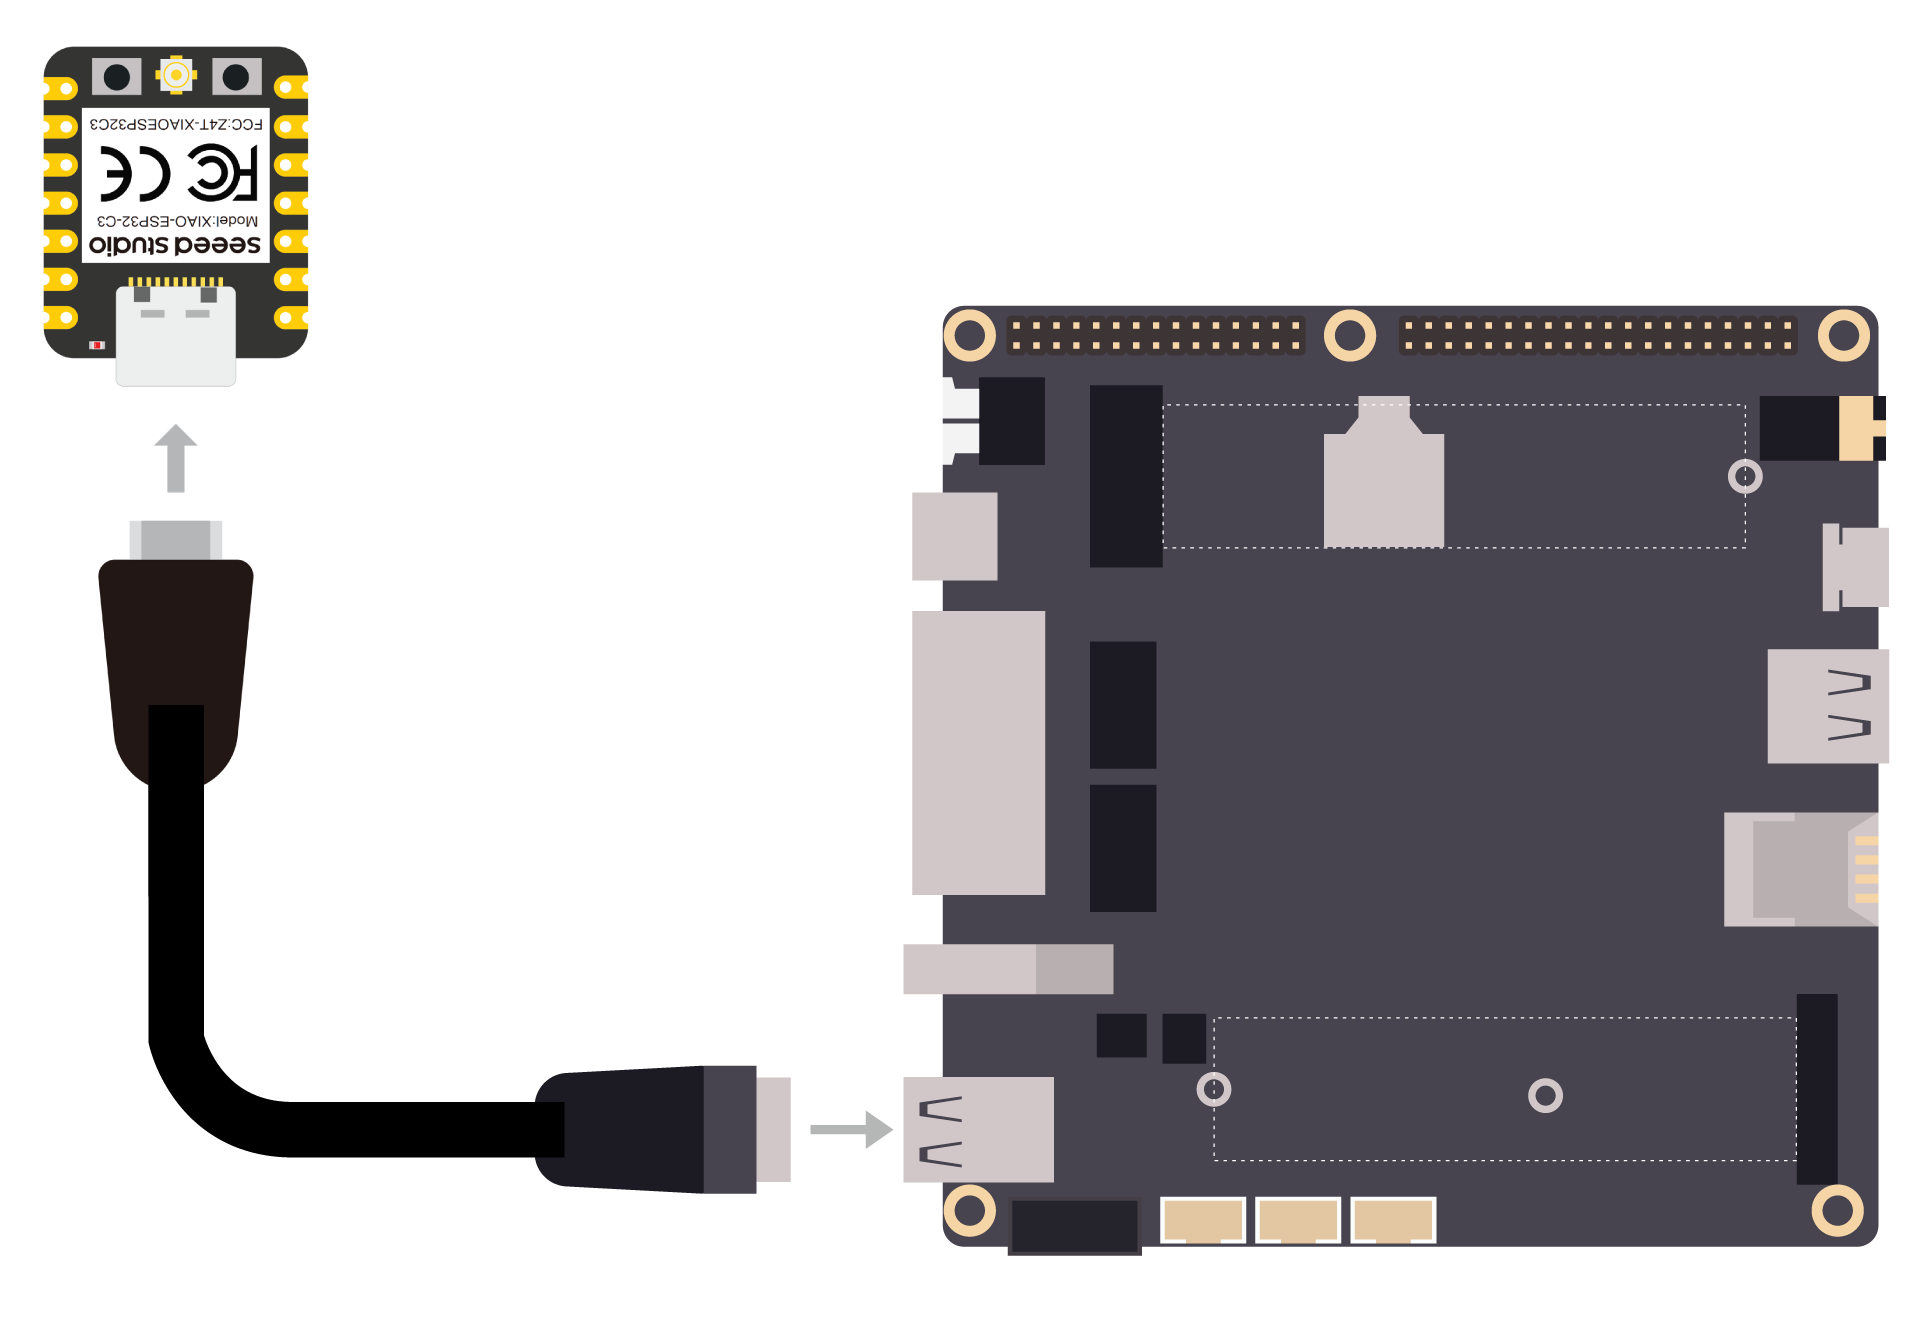
- Step 9. Connect one end of a USB Type-C cable to Seeed Studio XIAO ESP32C3 and the other end to one of the USB ports on the ODYSSEY-X86
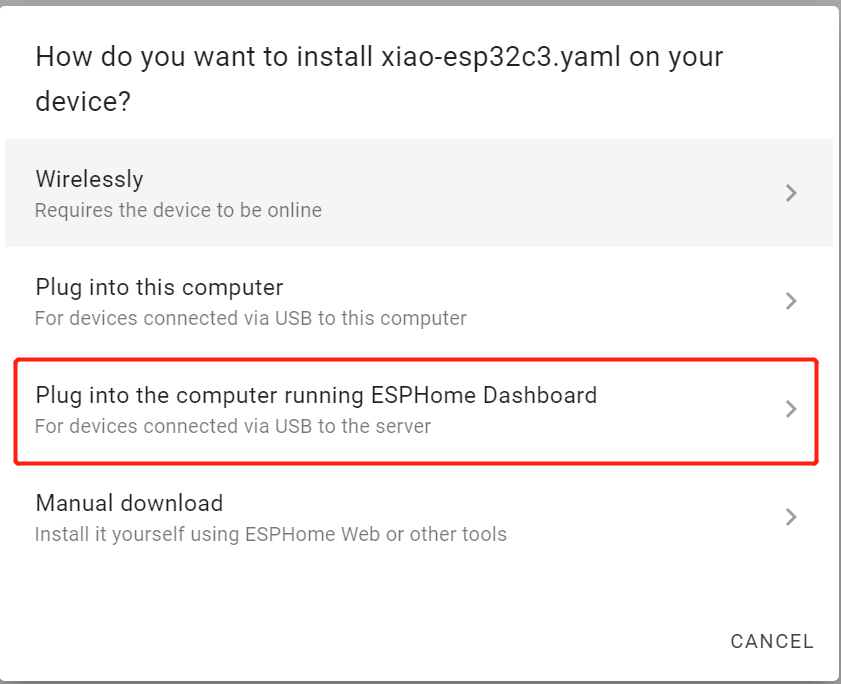
- Step 10. Click Plug into the computer running ESPHome Dashboard
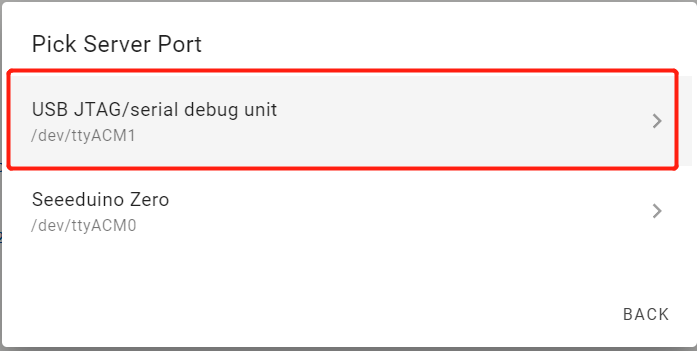
- Step 11. Select the connected port. It is likely to be /dev/ttyACM1 because /dev/ttyACM0 is connected to the onboard ATSAMD21 coprocesser on the ODYSSEY-X86
Now it will download all the necessary board packages and flash the ESPHome firmware into the XIAO ESP32C3. If the flashing is successful, you will see the following output
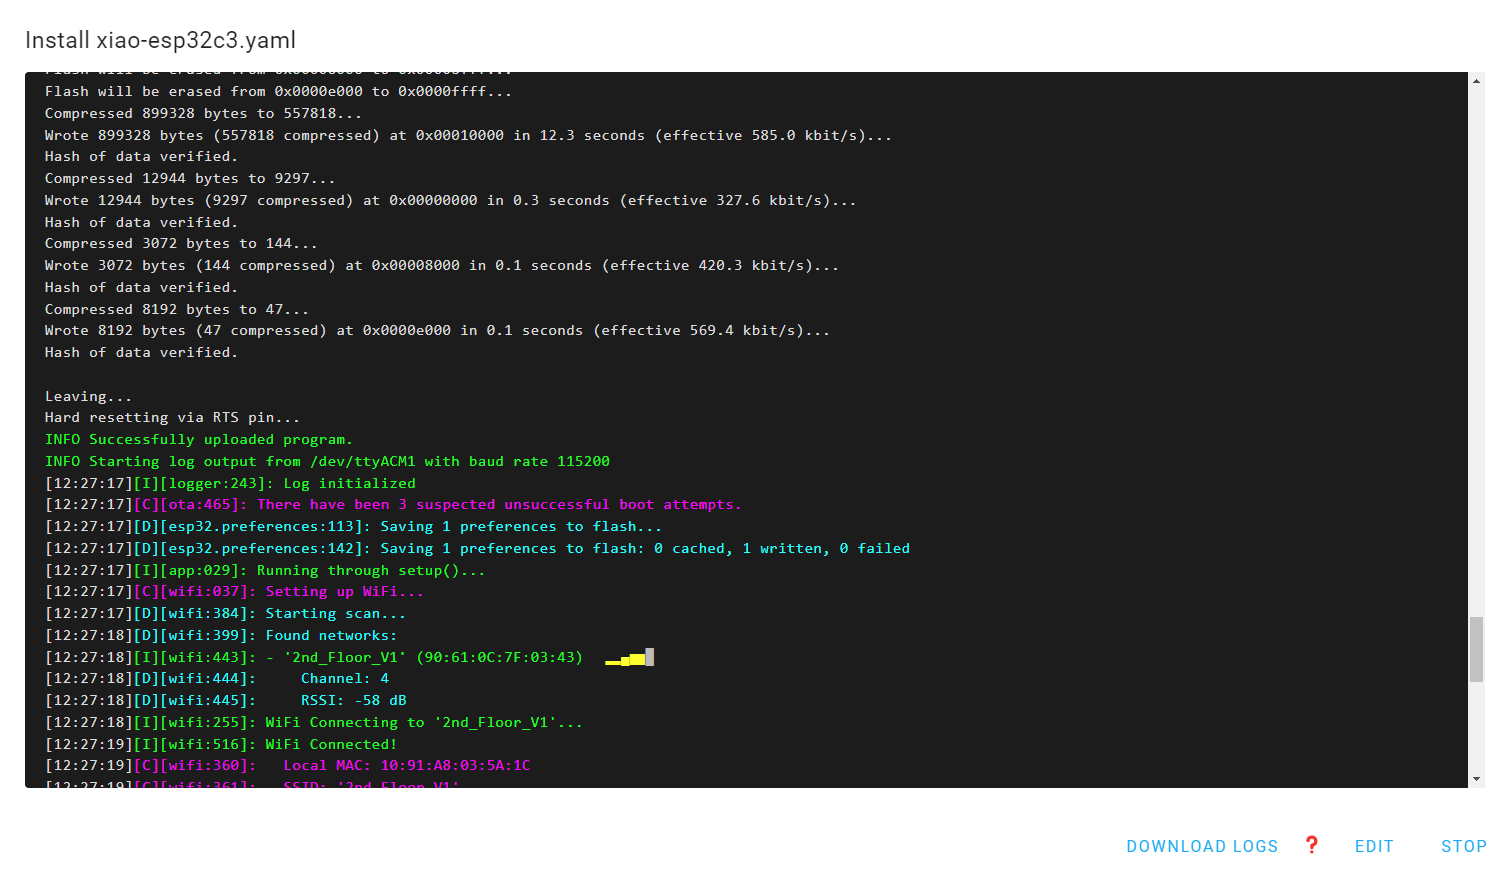
- Step 12. The above window displays the real-time logs from the connected board. Close it by clicking STOP

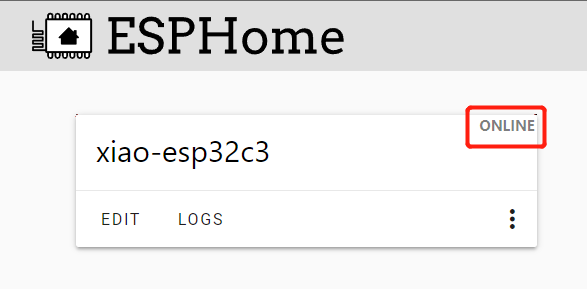
- Step 12. If you see the board status as ONLINE, that means the board is successful connected to WiFi
Now you can disconnect the XIAO ESP32C3 from the X86 board and just power it via a USB cable. This is because from now on, if you want to flash firmware to the XIAO ESP32C3, you can simply do it OTA without connecting to the X86 board via a USB cable.
- Step 13. Click the three dots and click Install
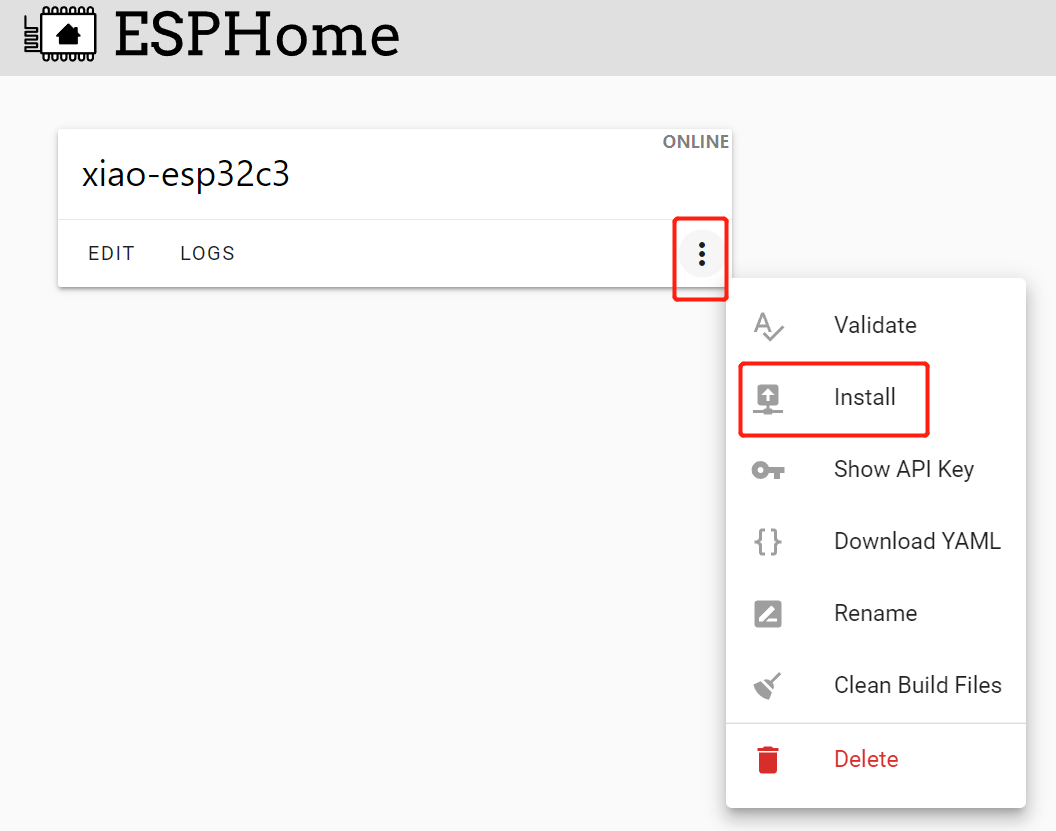
- Step 14. Click the three dots and click Install
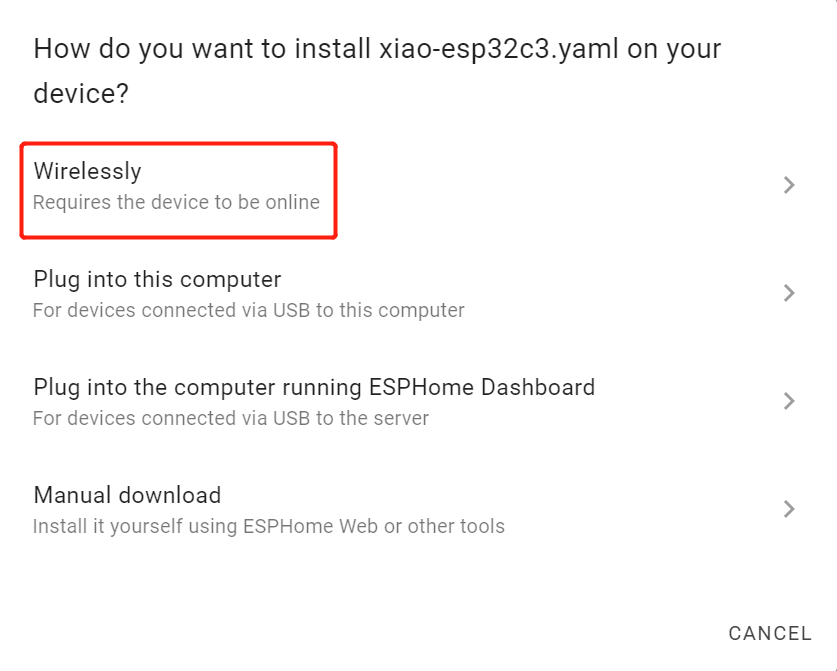
- Step 15. Select Wirelessly and it will push the changes to the board wirelessly
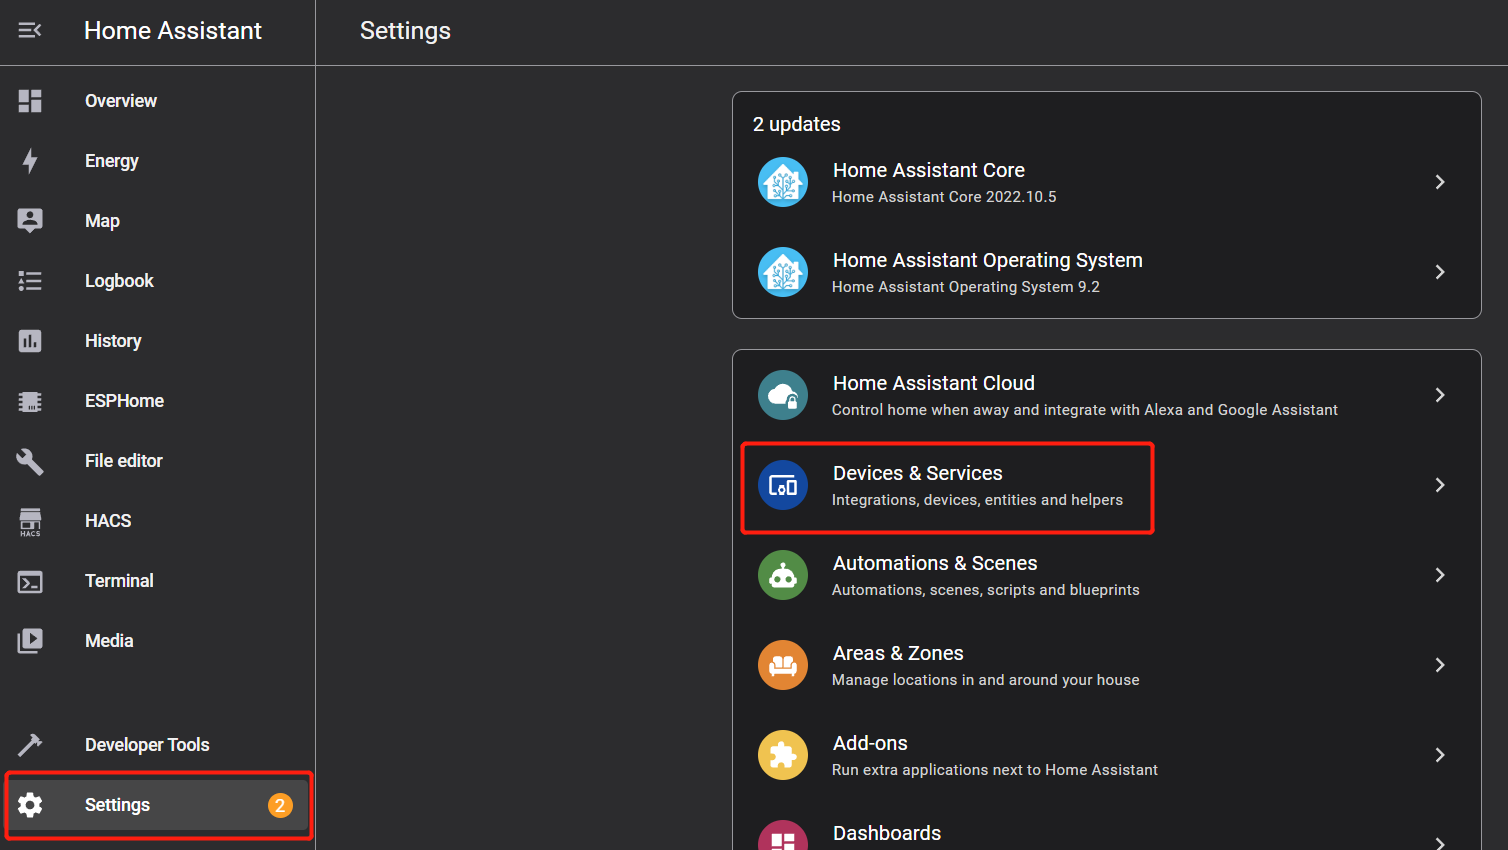
- Step 16. Go to Settings and select Devices & Services
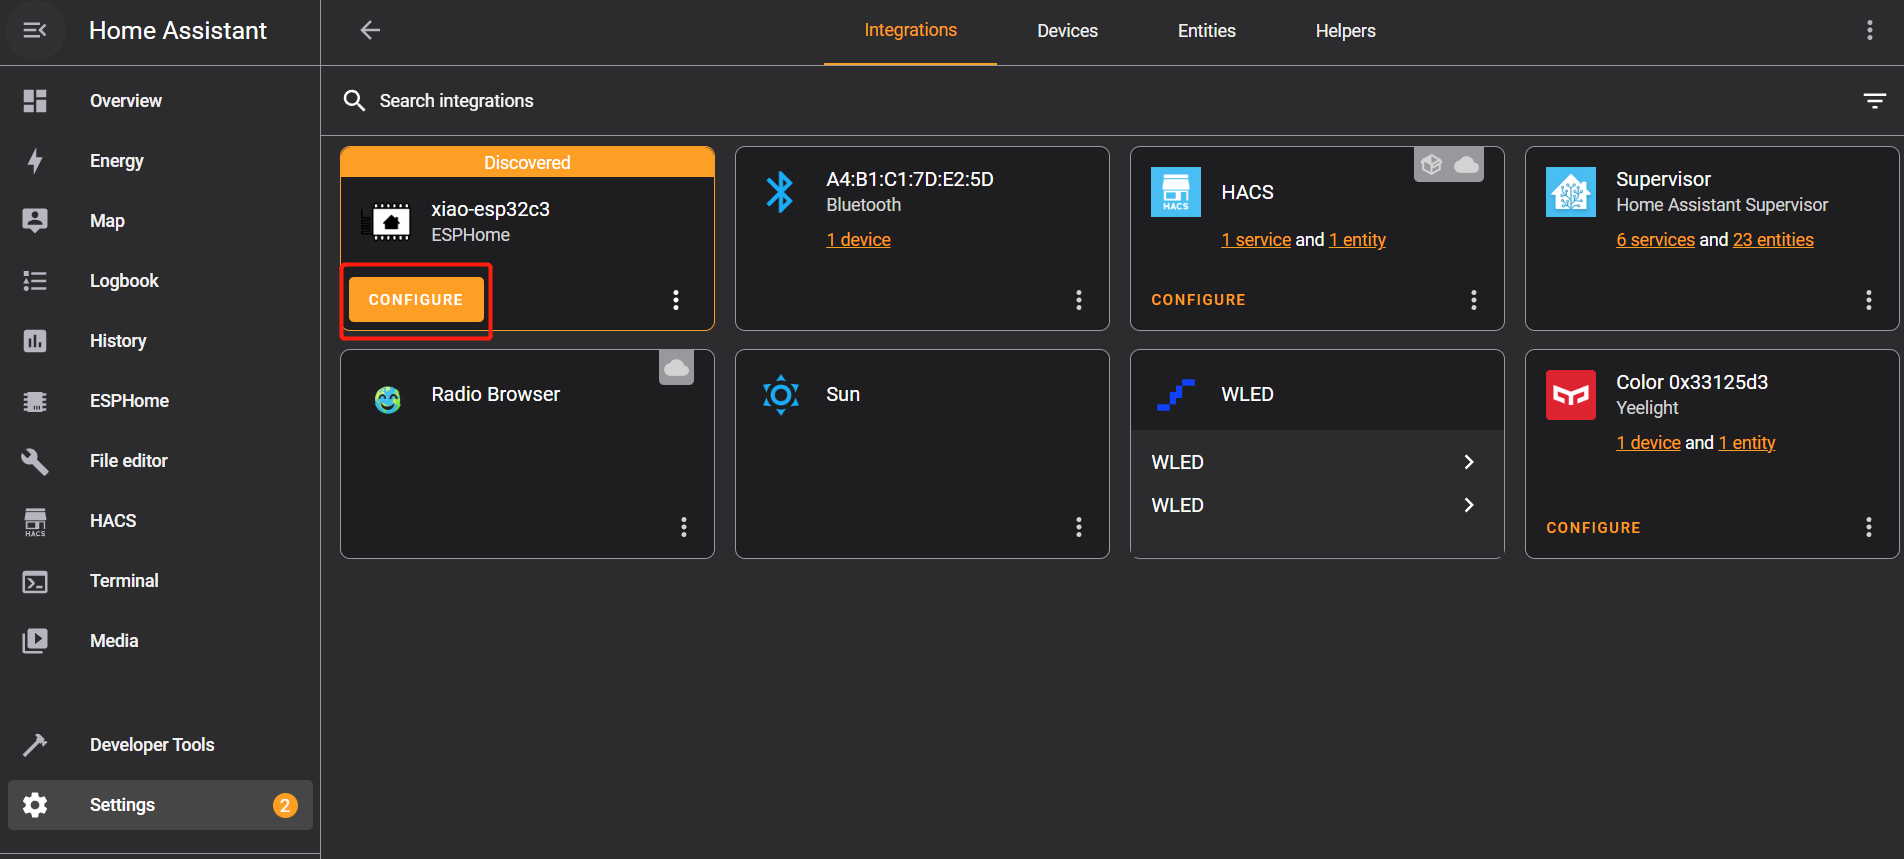
- Step 17. You will see ESPHome as a discovered integration. Click CONFIGURE
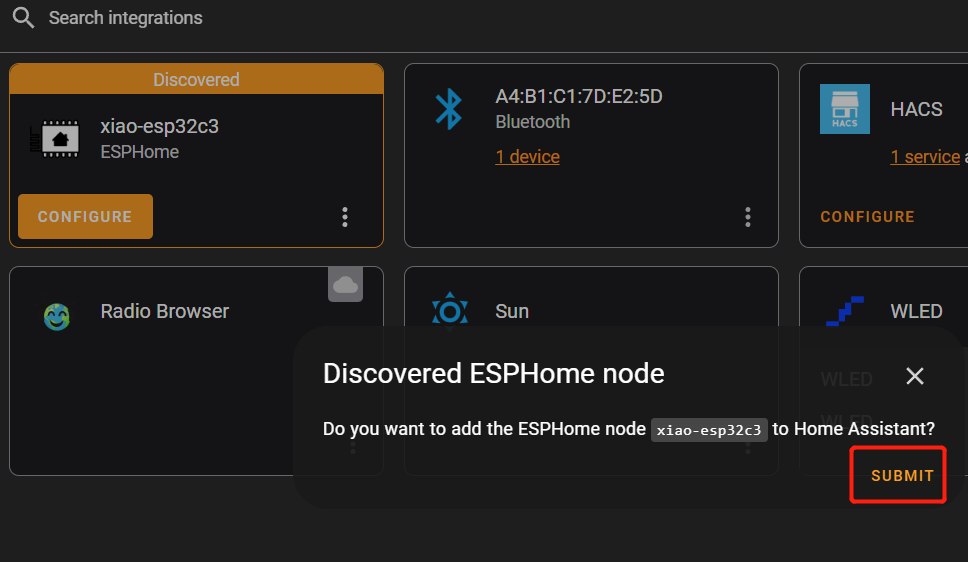
- Step 18. Click SUBMIT
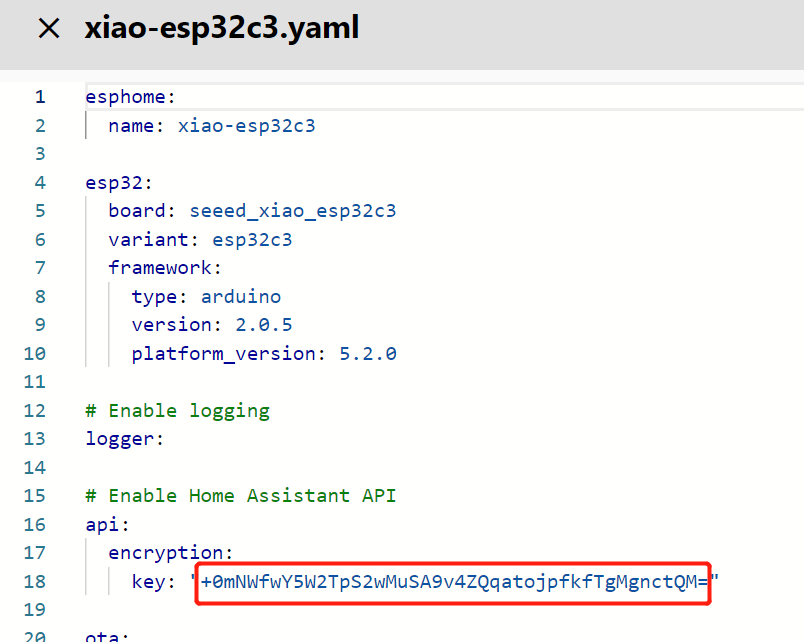
Here it will ask for the encryption key you have in your configuration for xiao-esp32c3

- Step 19. Go back to xiao-esp32c3.yaml, copy the encryption key, paste inside the above dialog box and click SUBMIT
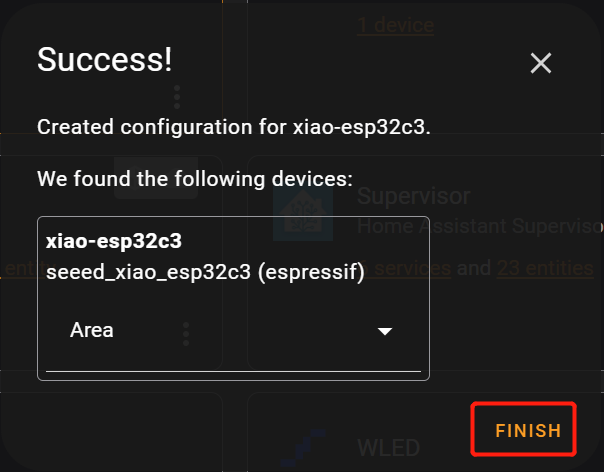
- Step 20. Click FINISH
Grove Modules with ESPHome and Home Assistant
Now we will connect Grove modules to Seeed Studio XIAO ESP32C3 so that we can display sensor data or control the devices using Home Assistant!
Connect Grove Modules to XIAO ESP32C3
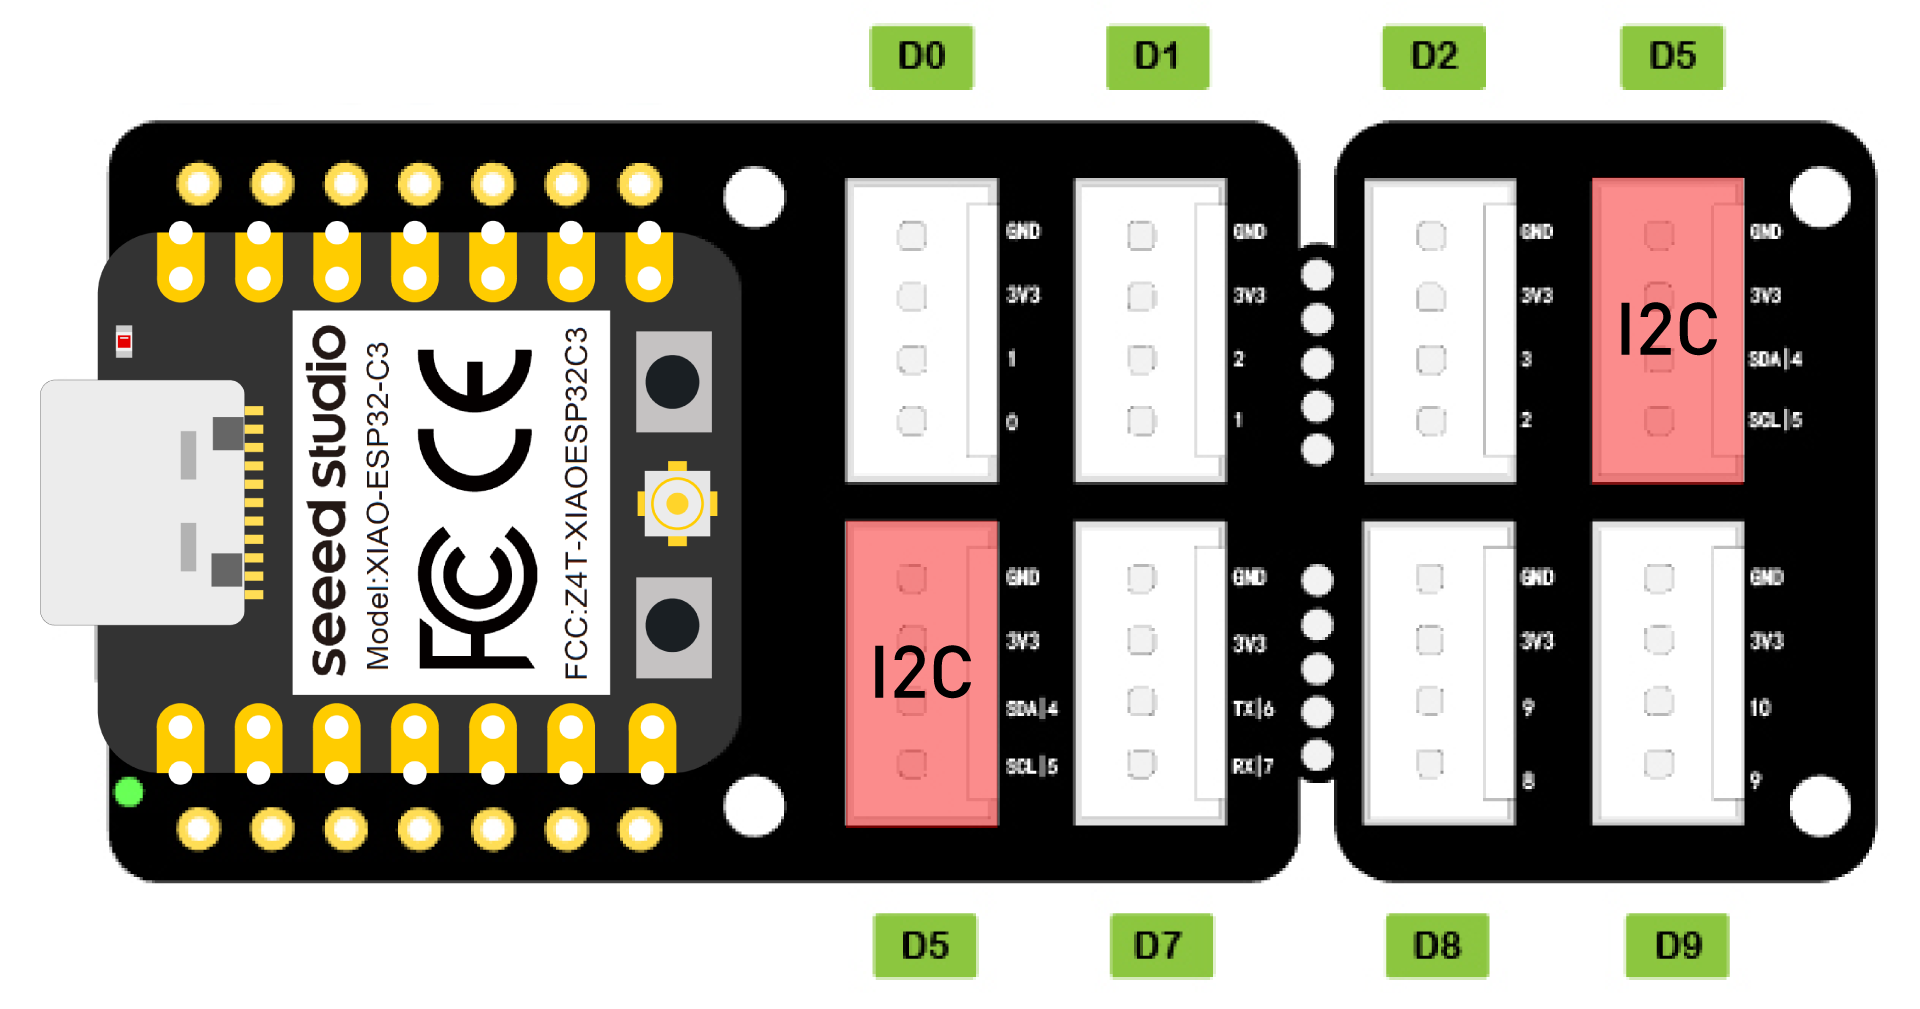
In order to use Grove modules with Seeed Studio XIAO ESP32C3, we will use a Grove Shield for Seeed Studio XIAO and connect XIAO ESP32C3 on it.
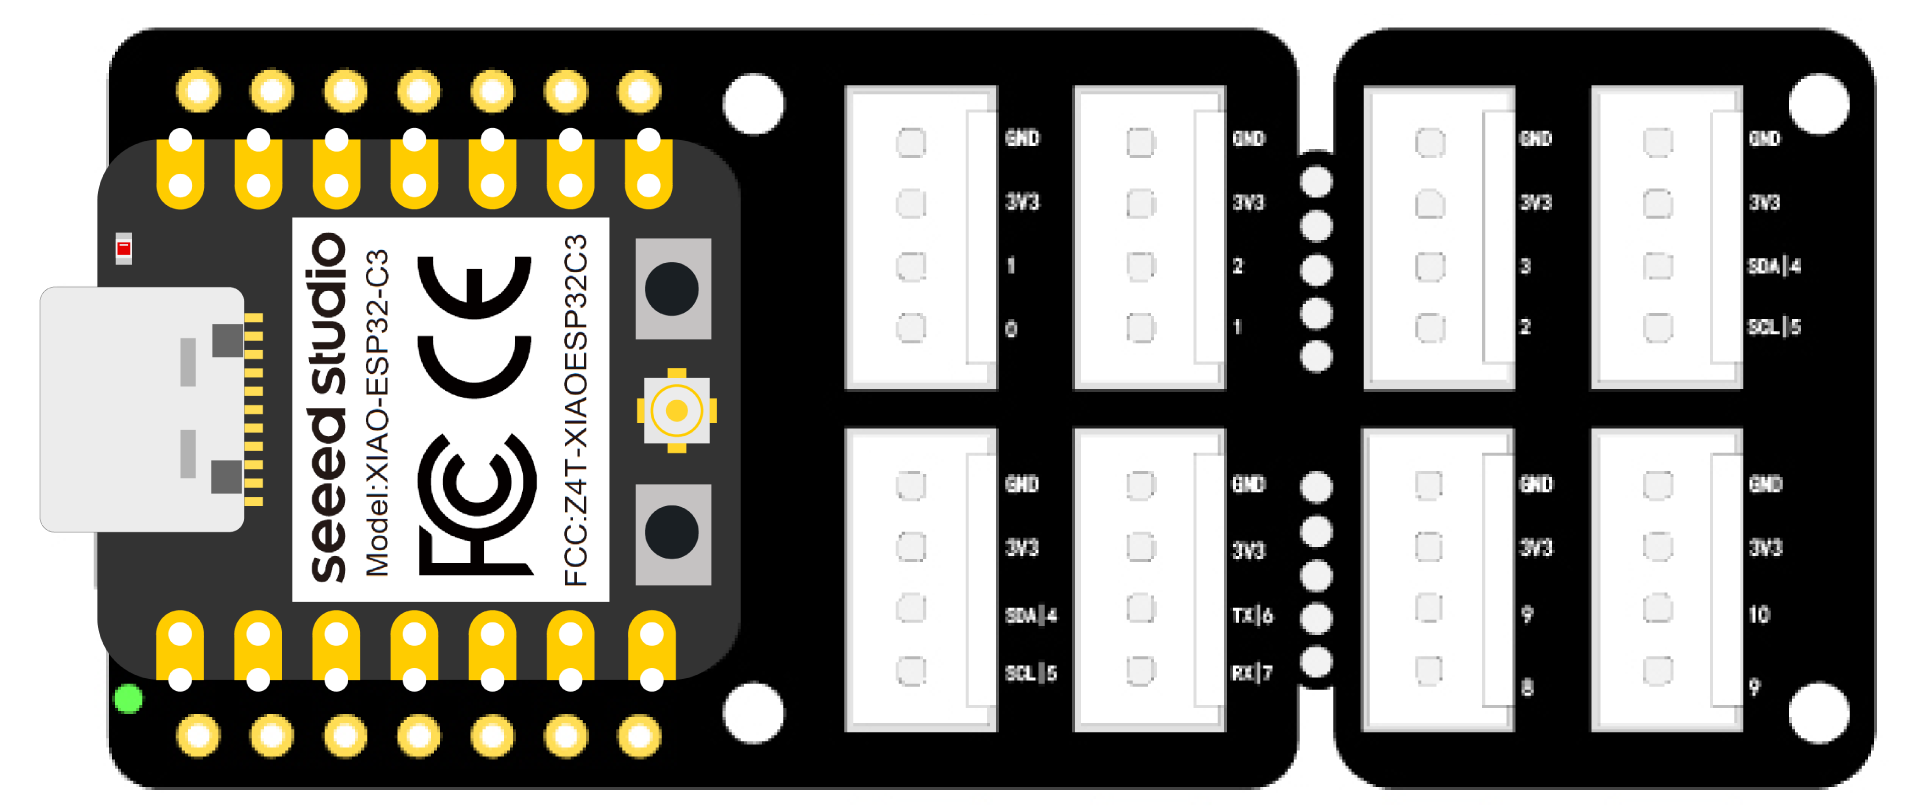
After that, the Grove connectors on the board can be used to connect Grove modules
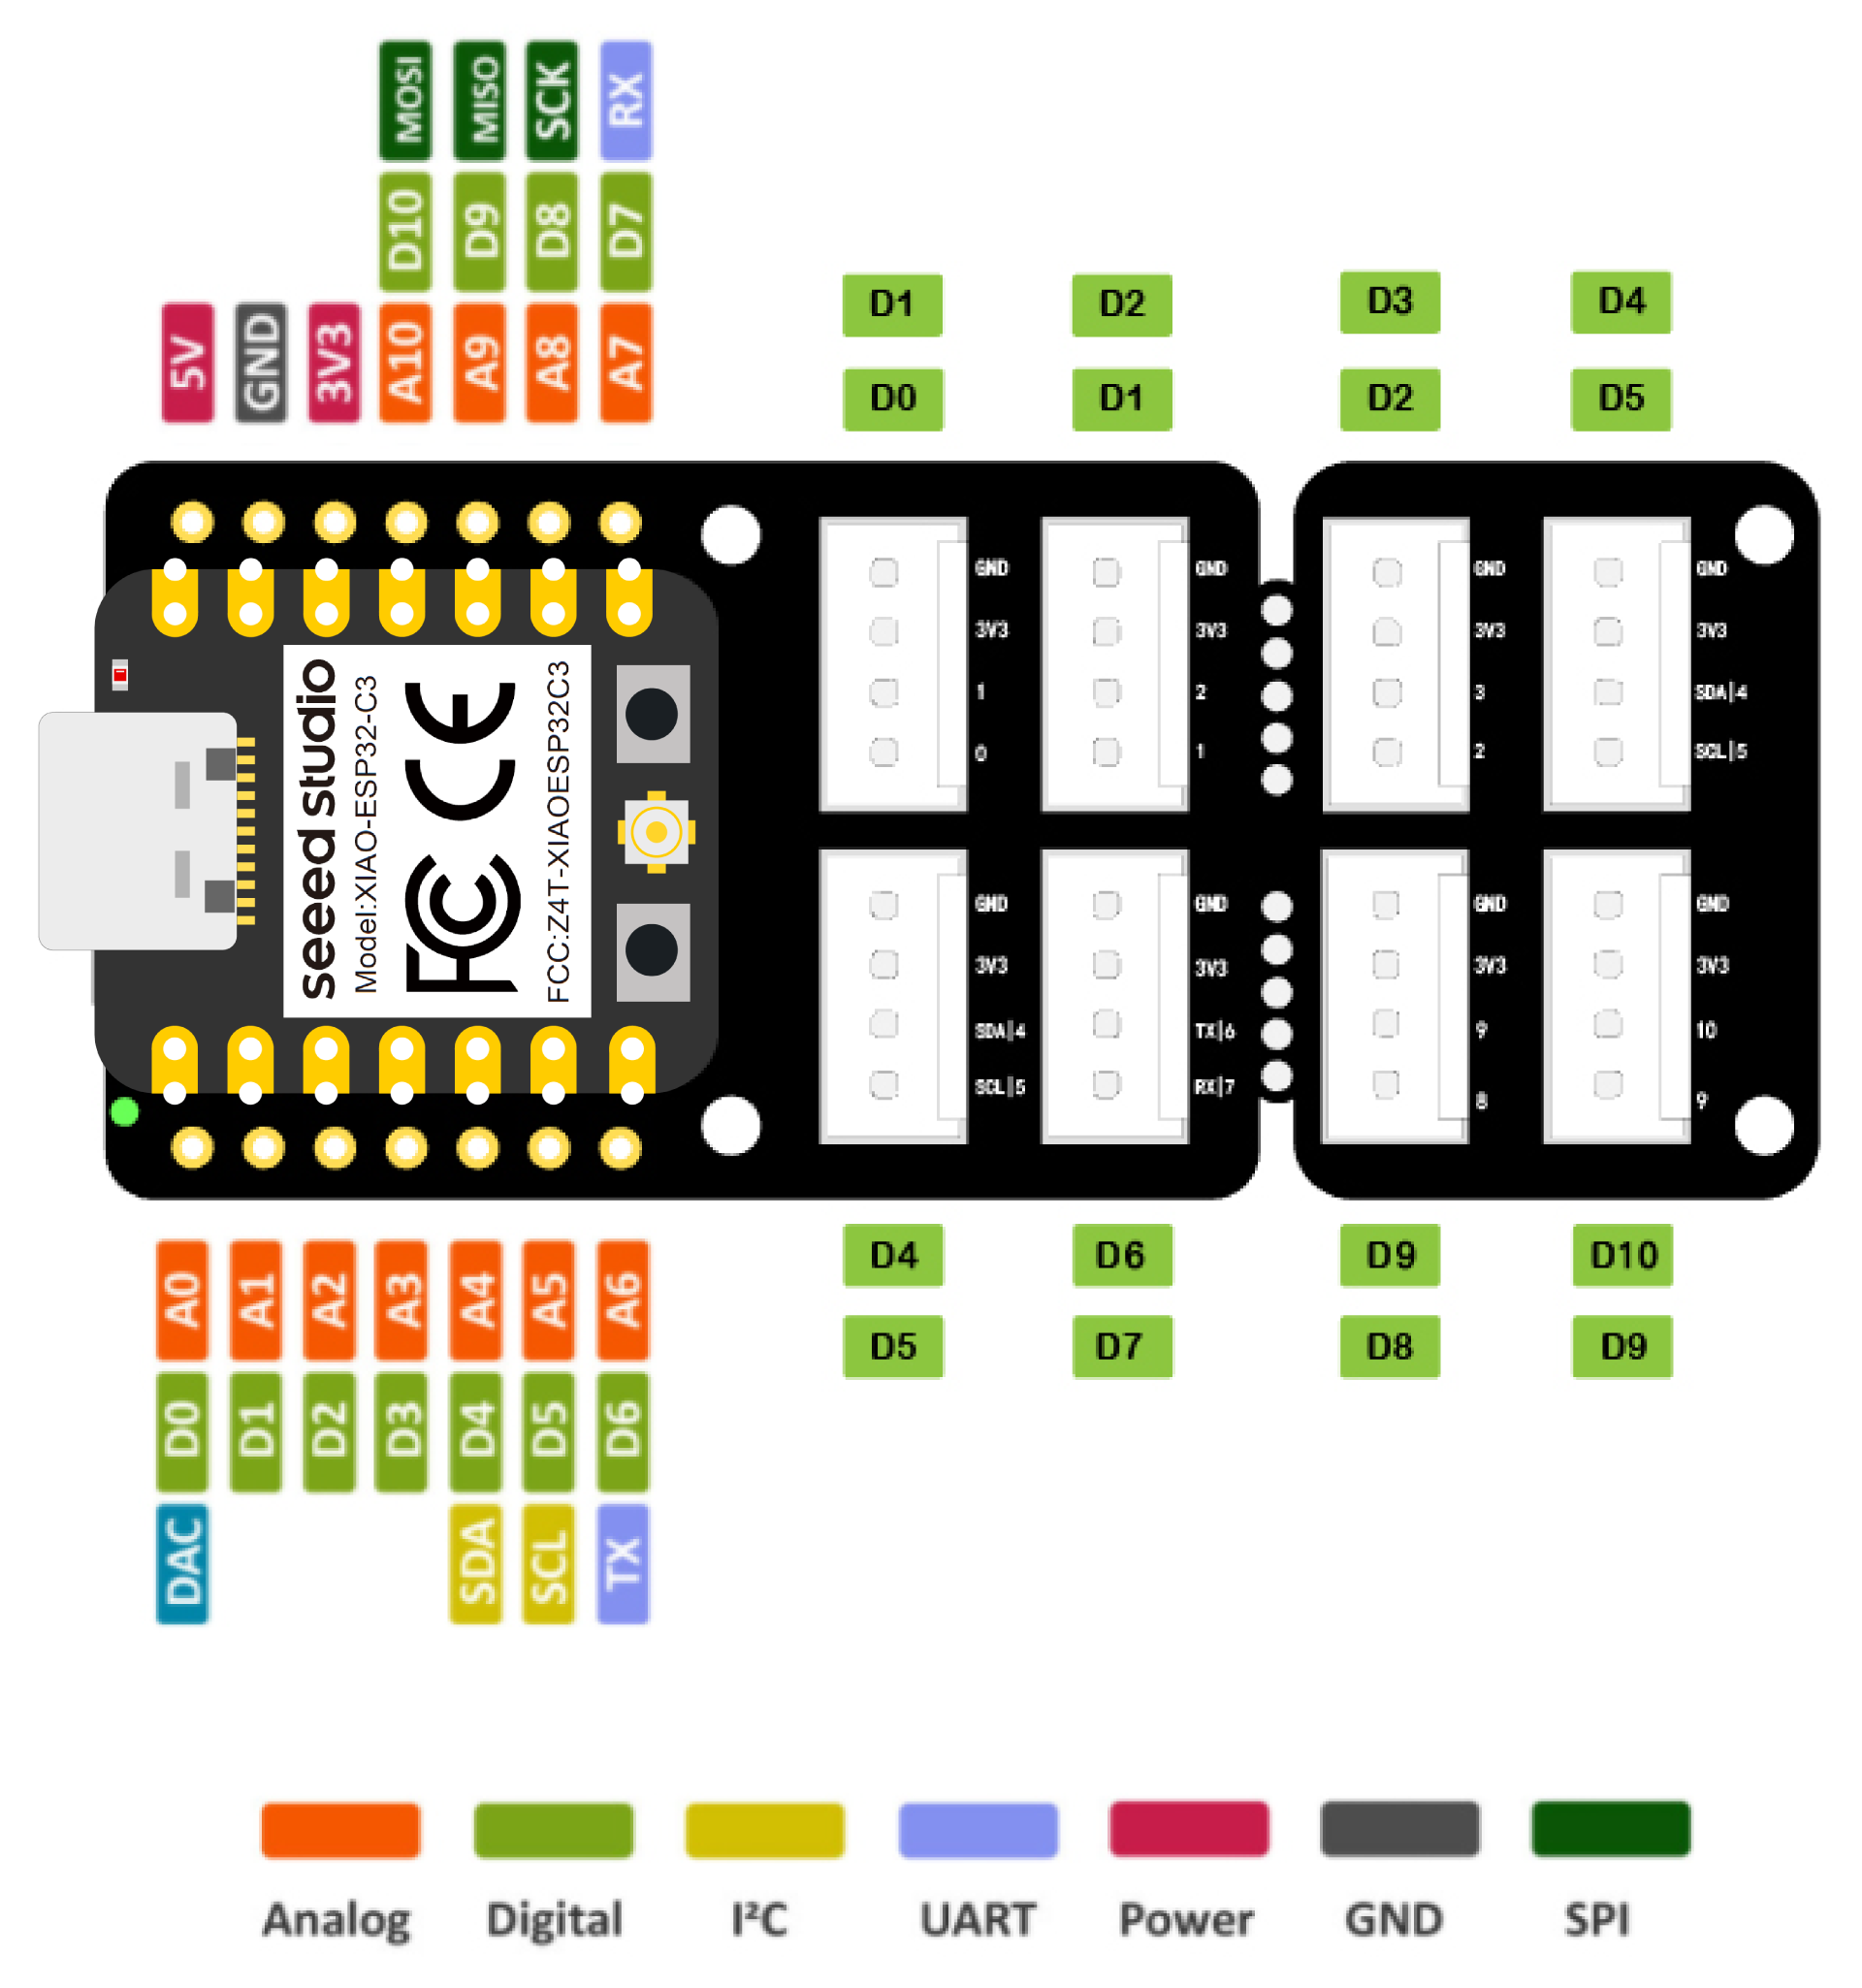
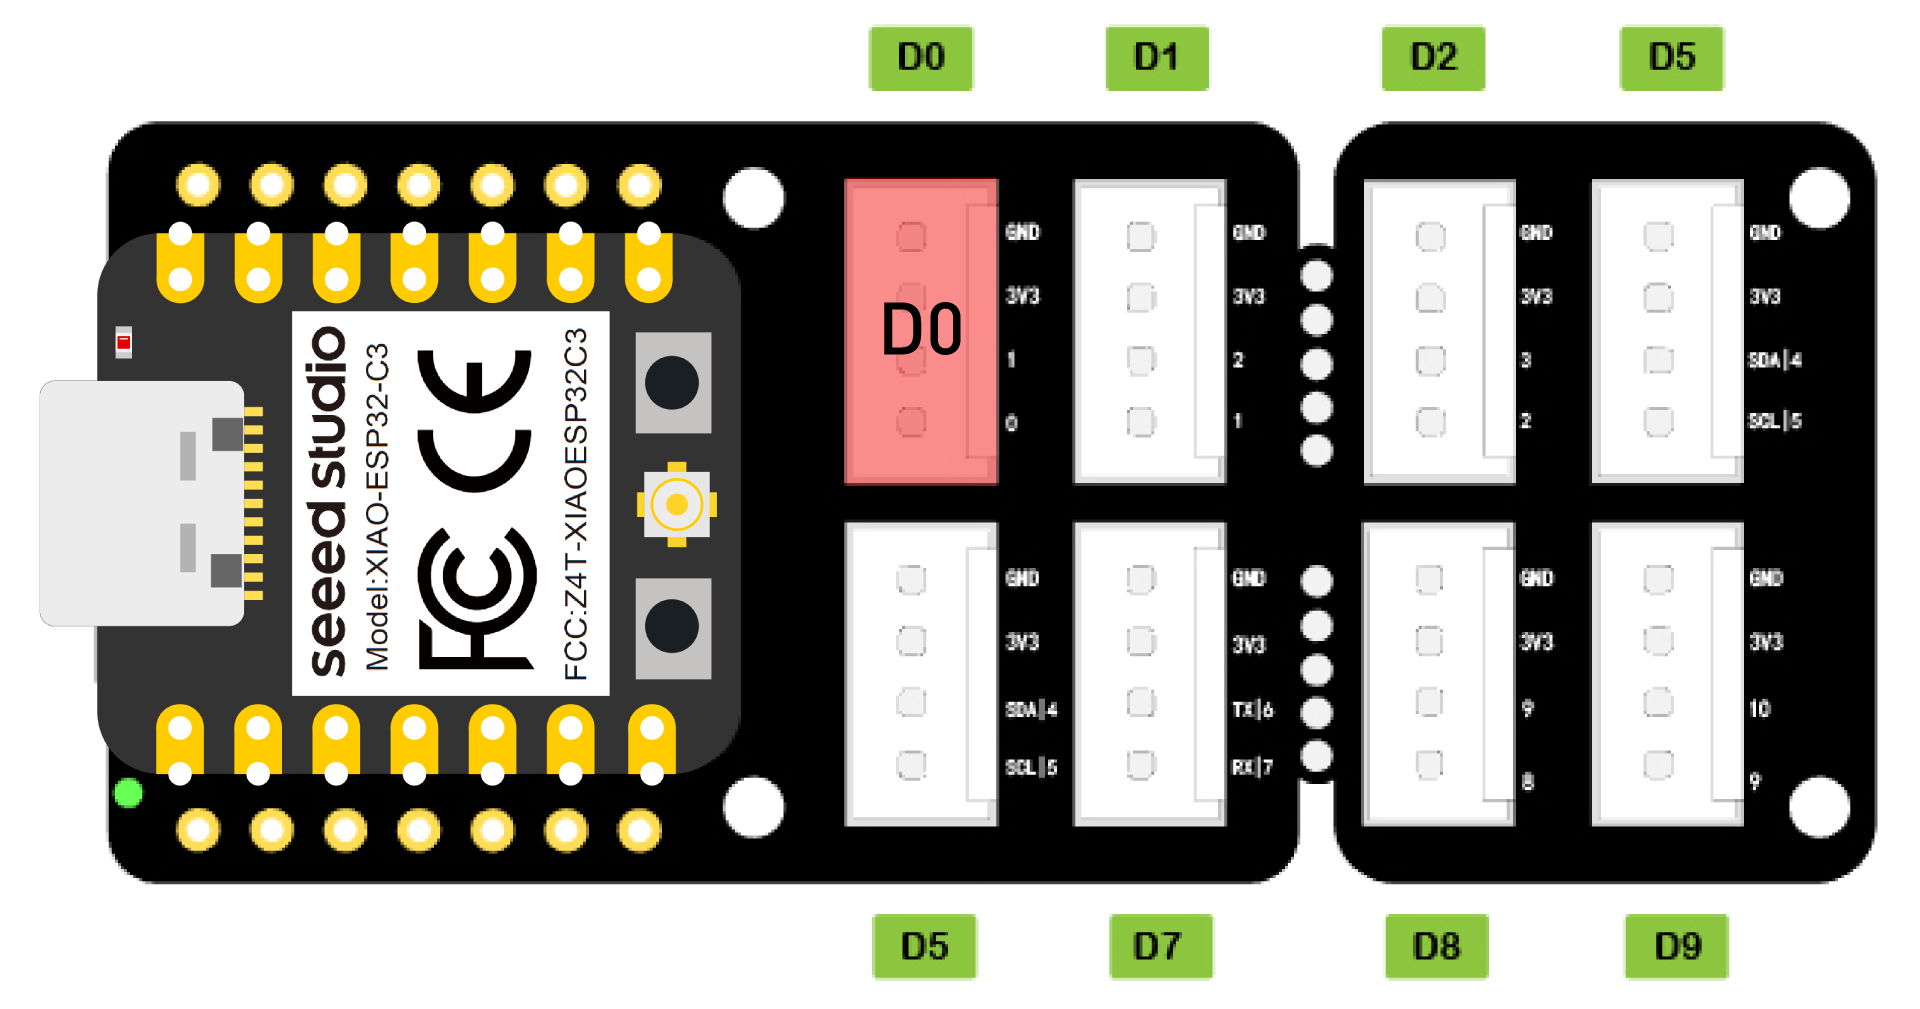
Pin Definitions
You need to follow the table below to use the appropriate internal pin numbers when connecting the Grove modules to the Grove connectors on Grove Shield for Seeed Studio XIAO.
| Internal Pin Number | Pin Mapping |
|---|---|
| 2 | D0 |
| 3 | D1 |
| 4 | D2 |
| 5 | D3 |
| 6 | D4 |
| 7 | D5 |
| 21 | D6 |
| 20 | D7 |
| 8 | D8 |
| 9 | D9 |
| 10 | D10 |
| 6 | SDA |
| 7 | SCL |
For example, if you want to connect a Grove module to D0 port, you need to define the pin on ESPHome as 2
Grove Compatibility List with ESPHome
Currently the following Grove modules are supported by ESPHome
Now we will select 6 Grove modules from the above table and explain how they can be connected with ESPHome and Home Assistant.
Grove - Temperature and Humidity Sensor (AHT20)
Setup Configuration
- Step 1. Connect Grove - Temperature and Humidity Sensor (AHT20) to one of the I2C connectors on the Grove Shield for Seeed Studio XIAO
- Step 2. Inside the xiao-esp32c3.yaml file that we created before, add the following at the end of the file and push it OTA to XIAO ESP32C3
i2c:
  sda: 6
  scl: 7

sensor:
  - platform: aht10
    variant: AHT20
    temperature:
      name: "Temperature"
    humidity:
      name: "Humidity"
You can learn more about the AHT10 component here. It allows you to use AHT10, AHT20 and AHT21 based sensors. Here we add the I²C Bus component because AHT20 communicates using I2C protocol.
Visualize on Dashboard
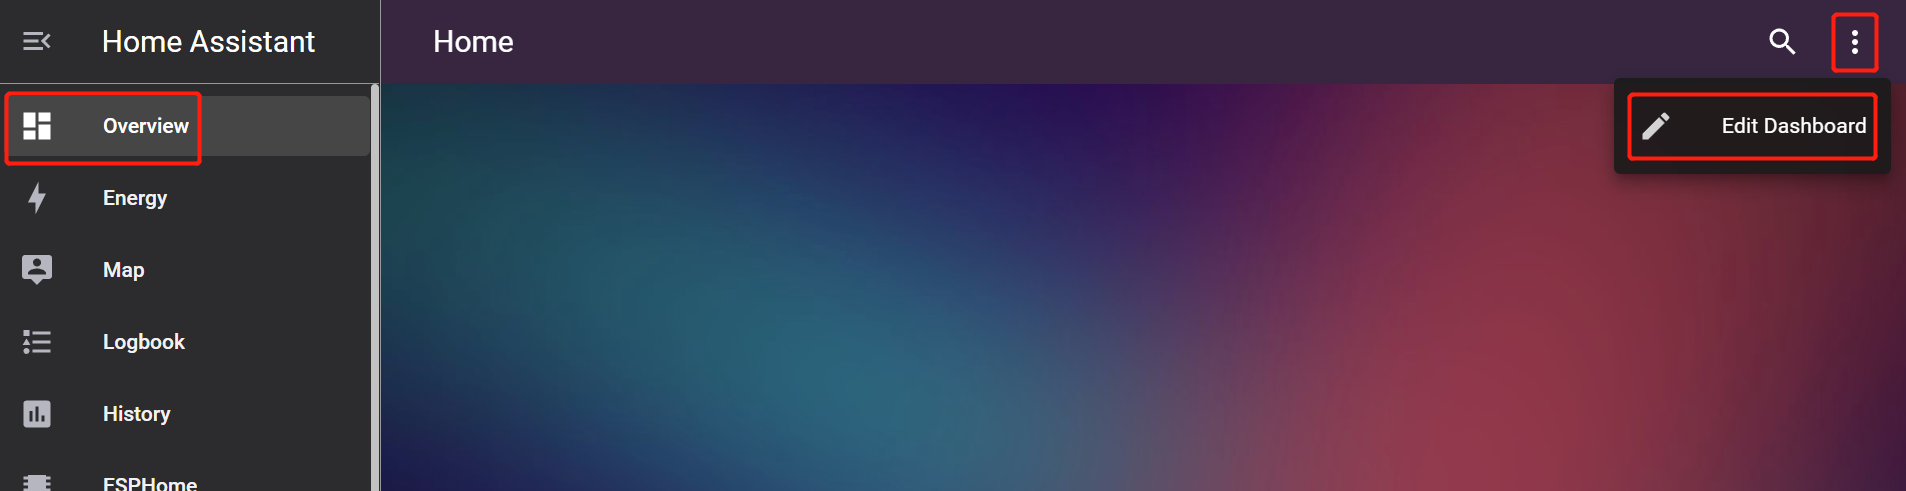
- Step 1. On the Overview page of Home Assistant, click the 3 dots and click Edit Dashboard
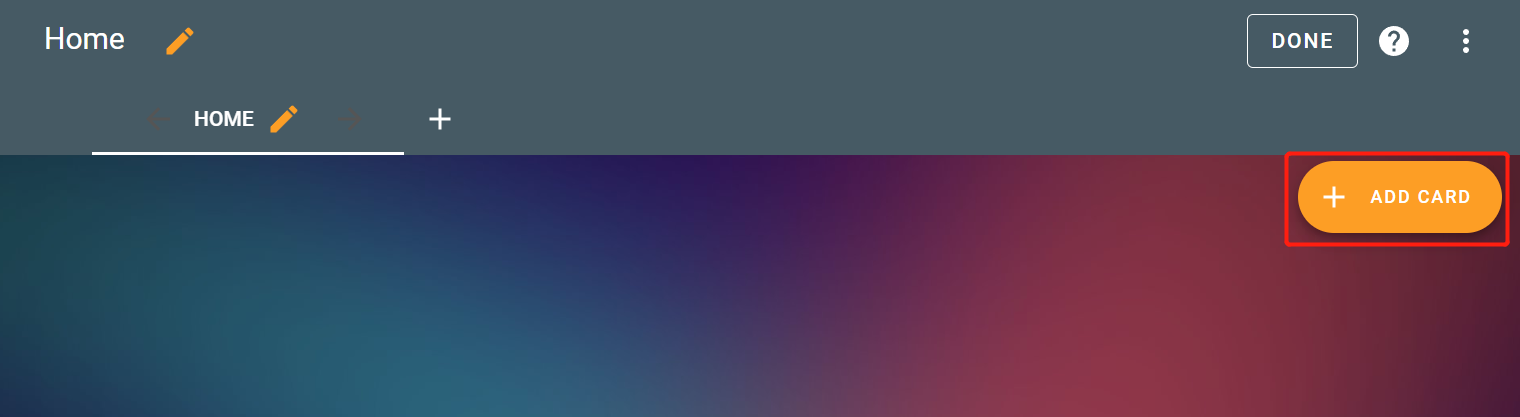
- Step 2. Click + ADD CARD
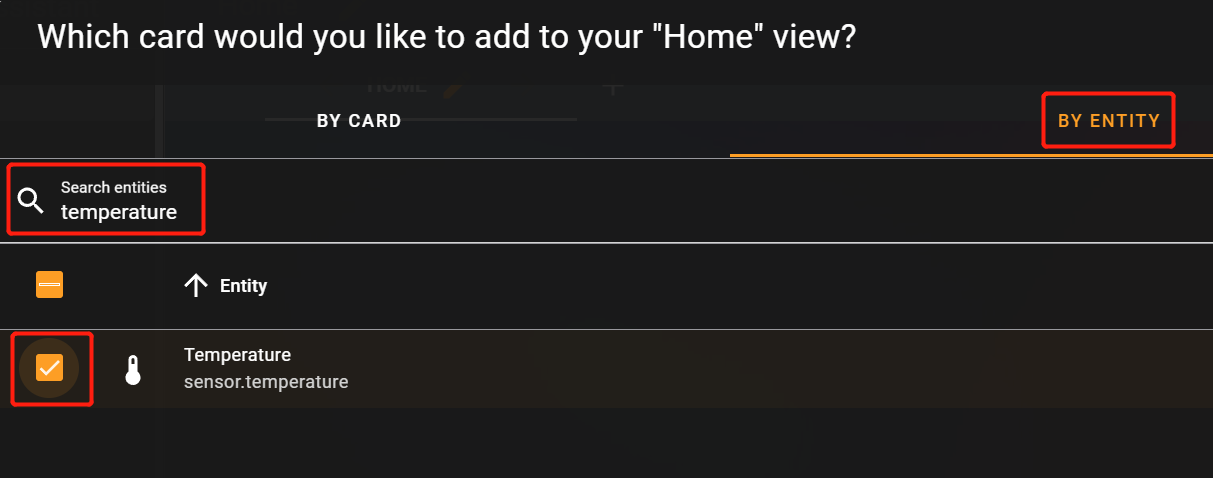
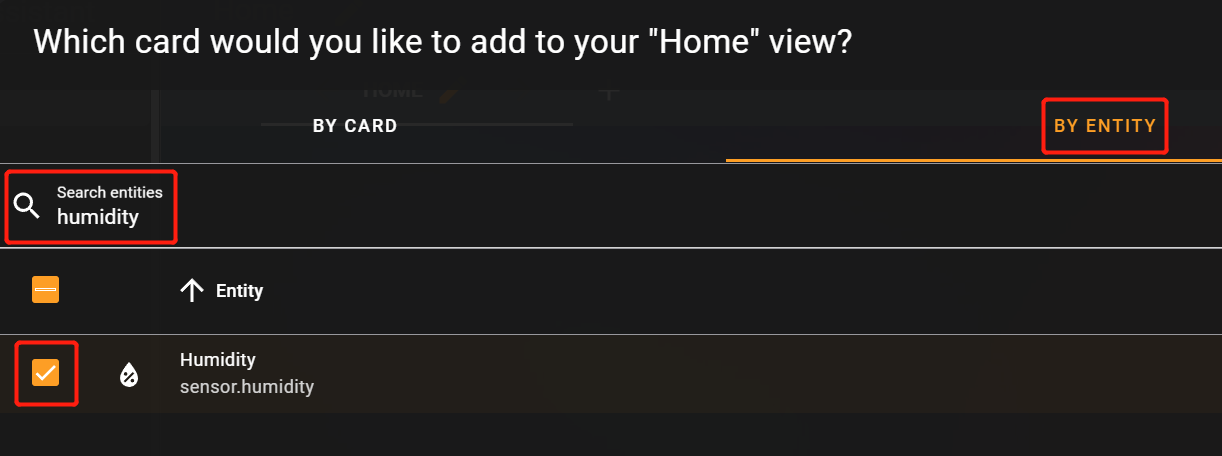
- Step 3. Select By ENTITY, type temperature and select the check box next to Temperature
- Step 4. Repeat the same for Humidity
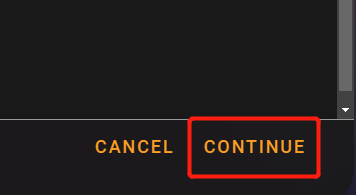
- Step 5. Click CONTINUE
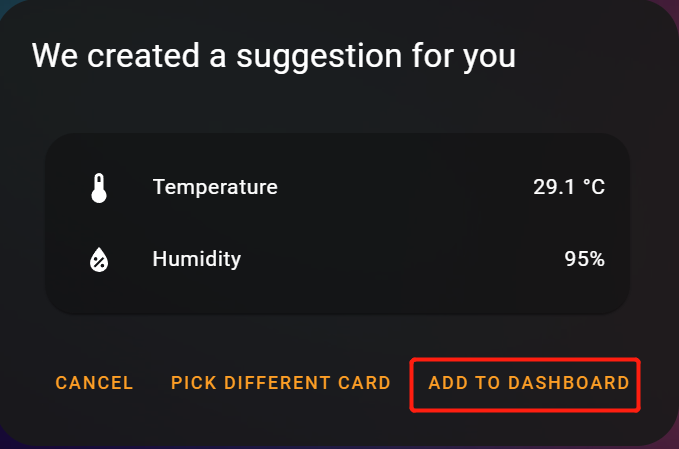
- Step 6. Click ADD TO DASHBOARD
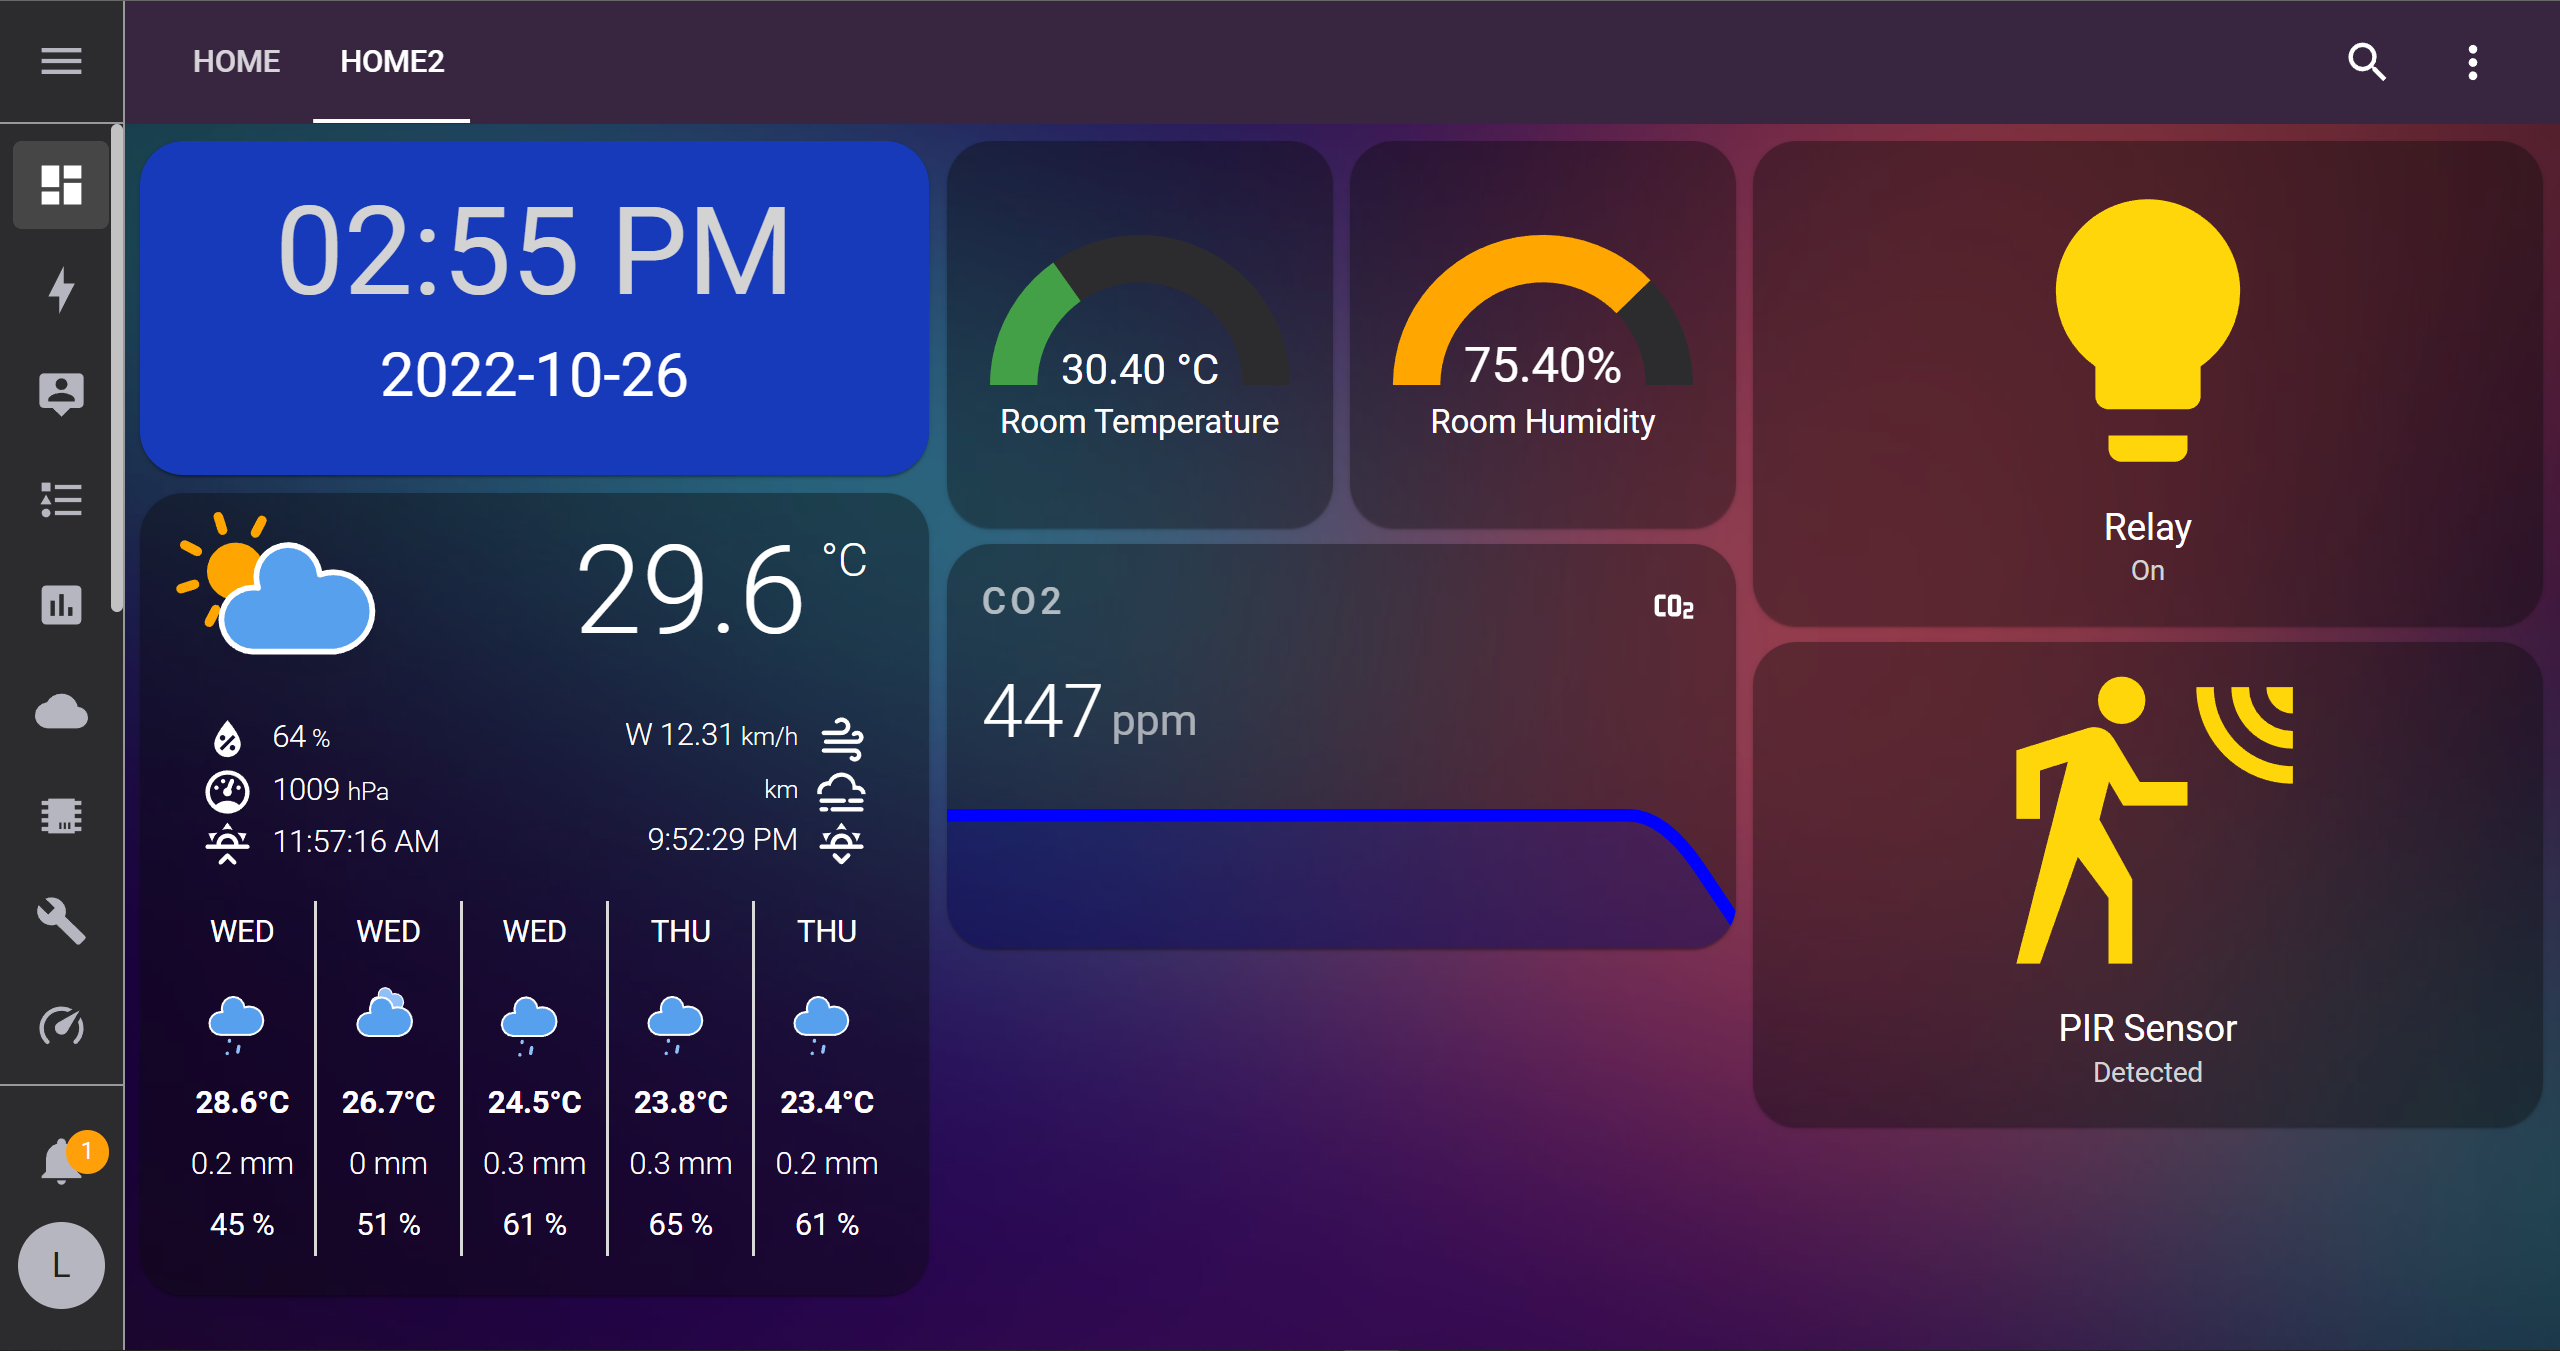
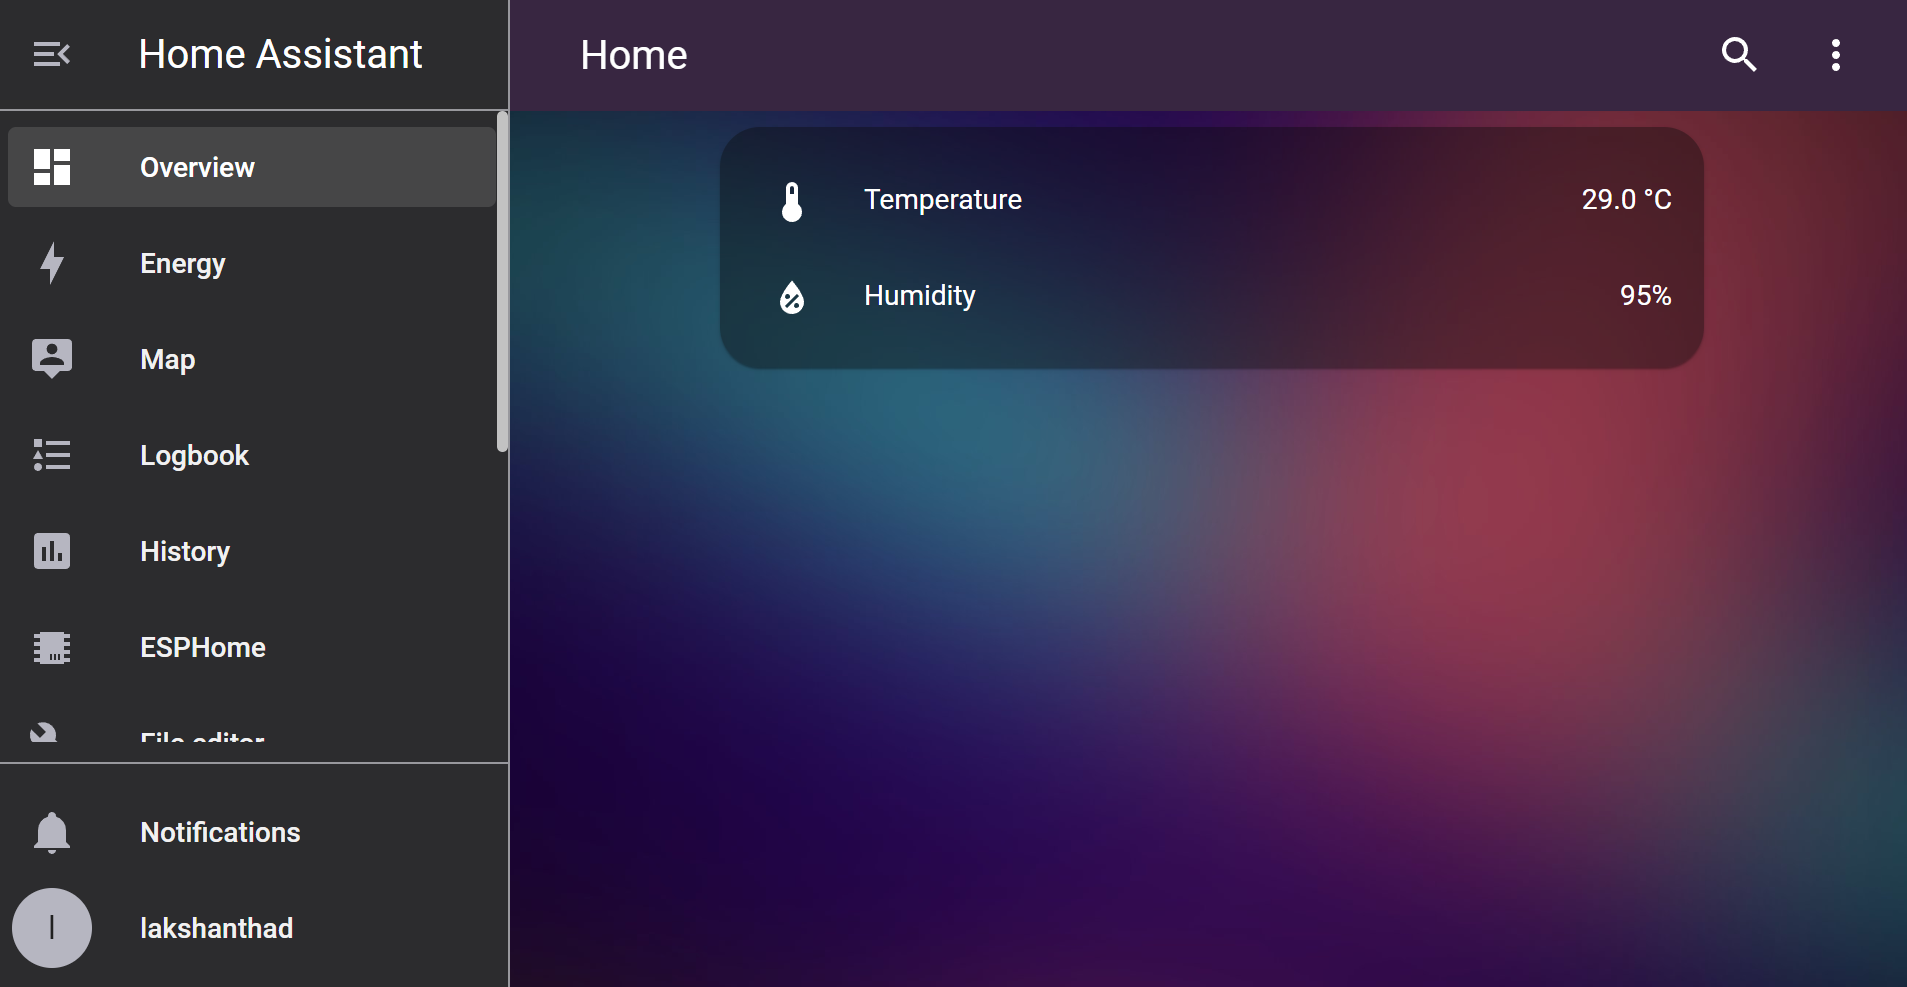
Now your Home Assistant dashboard will look like below
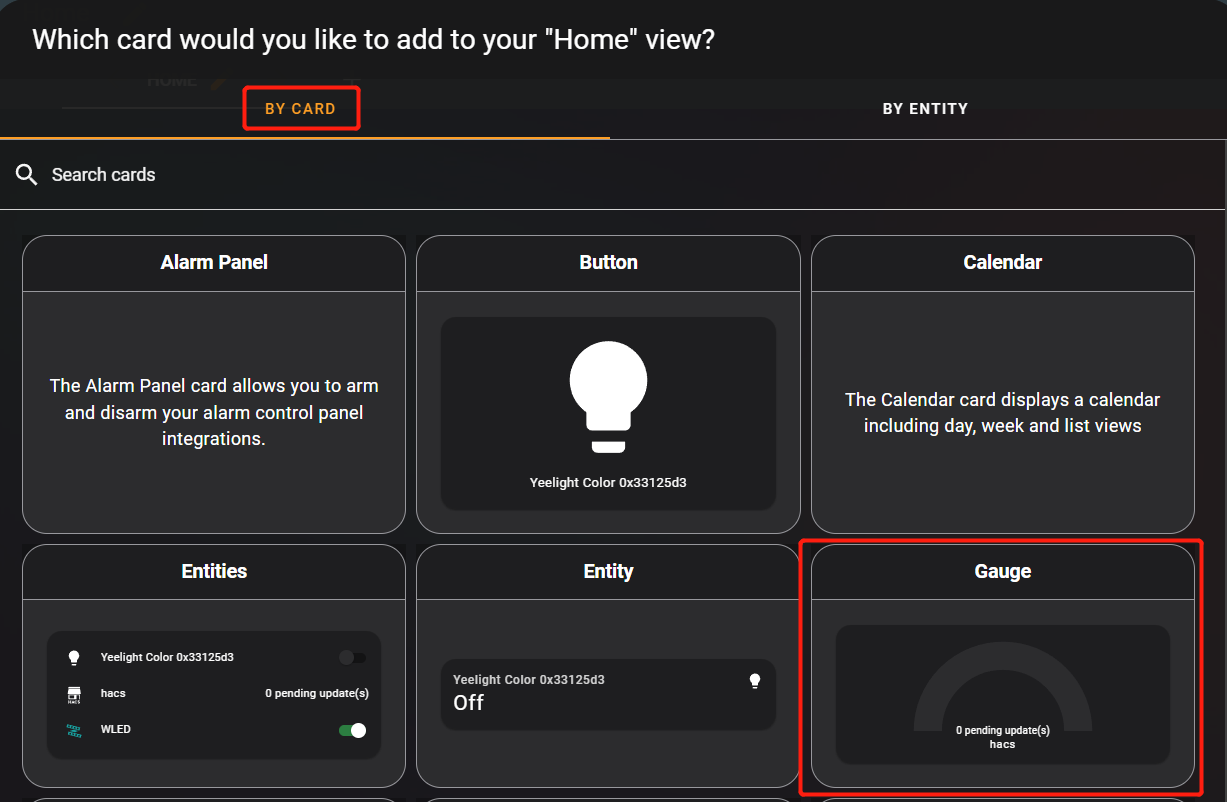
- Step 7. You can also visualize sensor data as gauges. Click Gauge under BY CARD
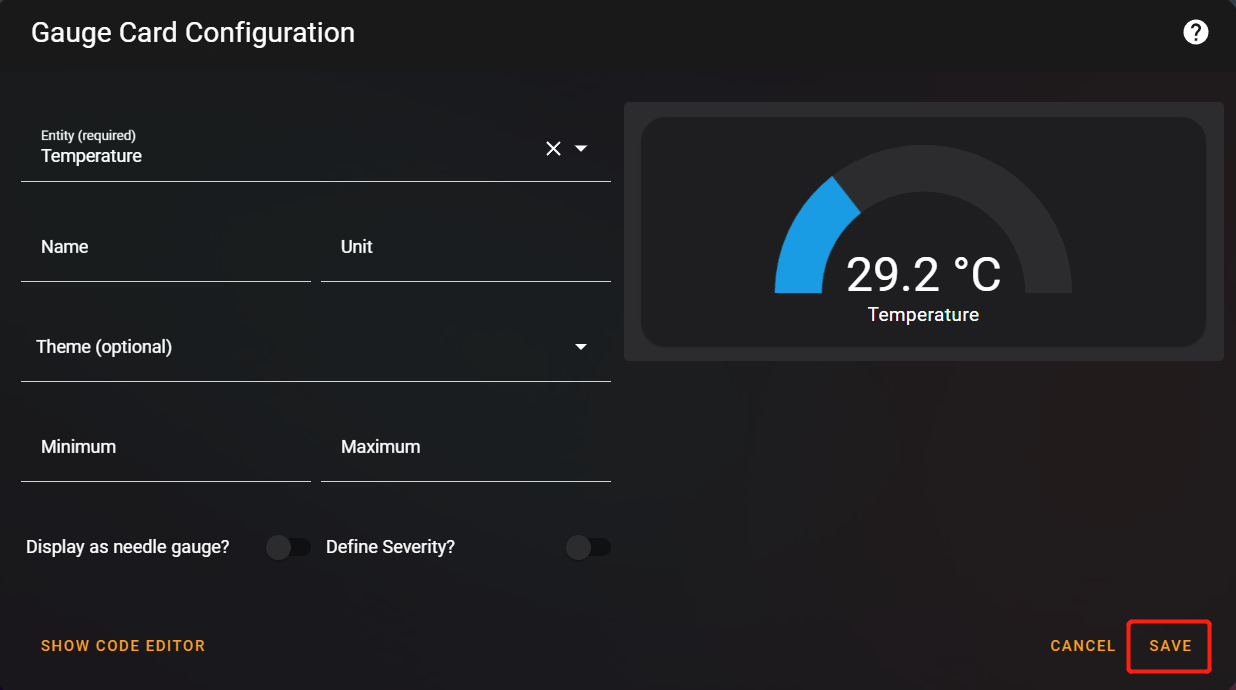
- Step 8. Select Temperature from the drop-down menu

- Step 9. Click SAVE
- Step 10. Repeat the same for Humidity
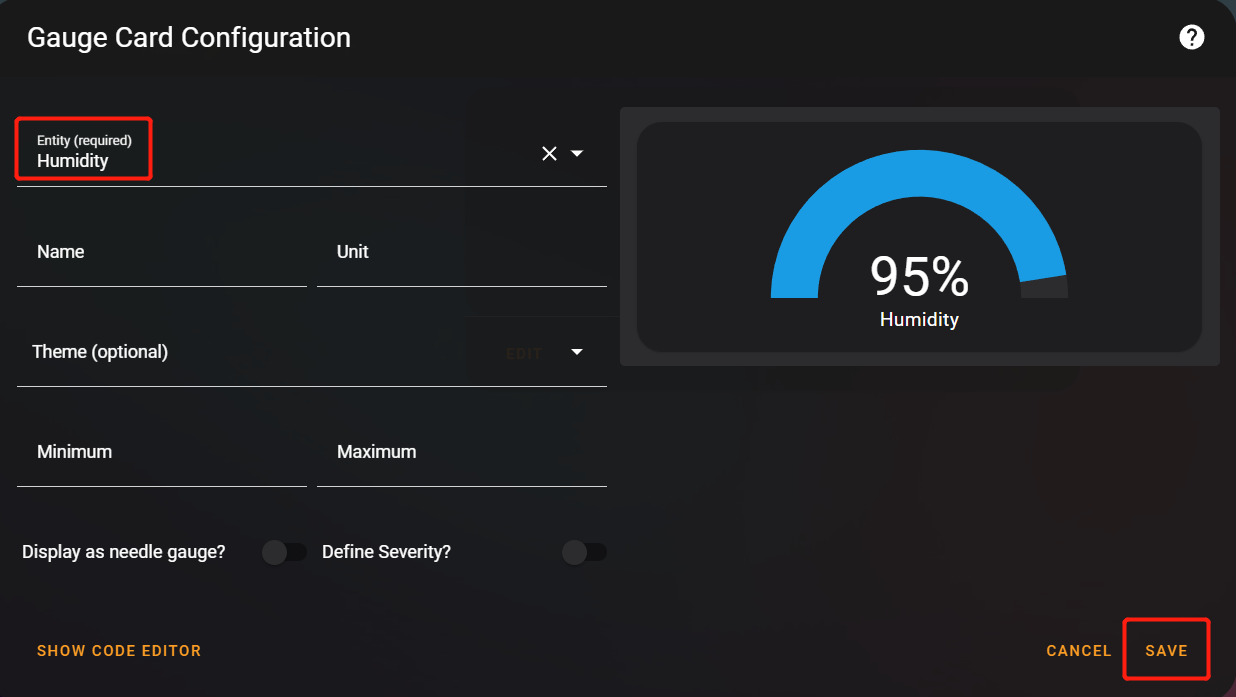
Now your dashboard will look like below

For the Grove - VOC and eCO2 Gas Sensor (SGP30) and Grove - CO2 & Temperature & Humidity Sensor (SCD41) in this wiki, you can follow a similar procedure to visualize the sensor data on the dashboard
Grove - VOC and eCO2 Gas Sensor (SGP30)
Setup configuration
- Step 1. Connect Grove - VOC and eCO2 Gas Sensor (SGP30) to one of the I2C connectors on the Grove Shield for Seeed Studio XIAO
- Step 2. Inside the xiao-esp32c3.yaml file that we created before, add the following at the end of the file and push it OTA to XIAO ESP32C3
i2c:
  sda: 6
  scl: 7

sensor:
  - platform: sgp30
    eco2:
      name: "eCO2"
      accuracy_decimals: 1
    tvoc:
      name: "TVOC"
      accuracy_decimals: 1
You can learn more about the SGP30 component here.
Grove - CO2 & Temperature & Humidity Sensor (SCD41)
Setup configuration
- Step 1. Connect Grove - CO2 & Temperature & Humidity Sensor (SCD41) to one of the I2C connectors on the Grove Shield for Seeed Studio XIAO
- Step 2. Inside the xiao-esp32c3.yaml file that we created before, add the following at the end of the file and push it OTA to XIAO ESP32C3
i2c:
  sda: 6
  scl: 7

sensor:
  - platform: scd4x
    co2:
      name: "CO2"
    temperature:
      name: "Temperature"
    humidity:
      name: "Humidity"
You can learn more about the SGP4x component here
Grove - Relay
Setup configuration
- Step 1. Connect Grove - Relay to one of the Digital ports on the Grove Shield for Seeed Studio XIAO. Here we select D0 port
- Step 2. Inside the xiao-esp32c3.yaml file that we created before, add the following at the end of the file and push it OTA to XIAO ESP32C3
switch:
  - platform: gpio
    pin: 2
    name: "Relay"
You can learn more about the Relay component here
Visualize on Dashboard
- Step 1. Under + ADD CARD that we mentioned before, select BY ENTITY, type relay, select it and click CONTINUE

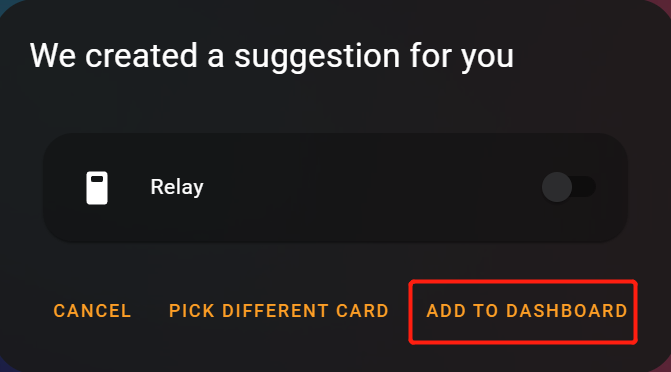
- Step 2. Click ADD TO DASHBOARD
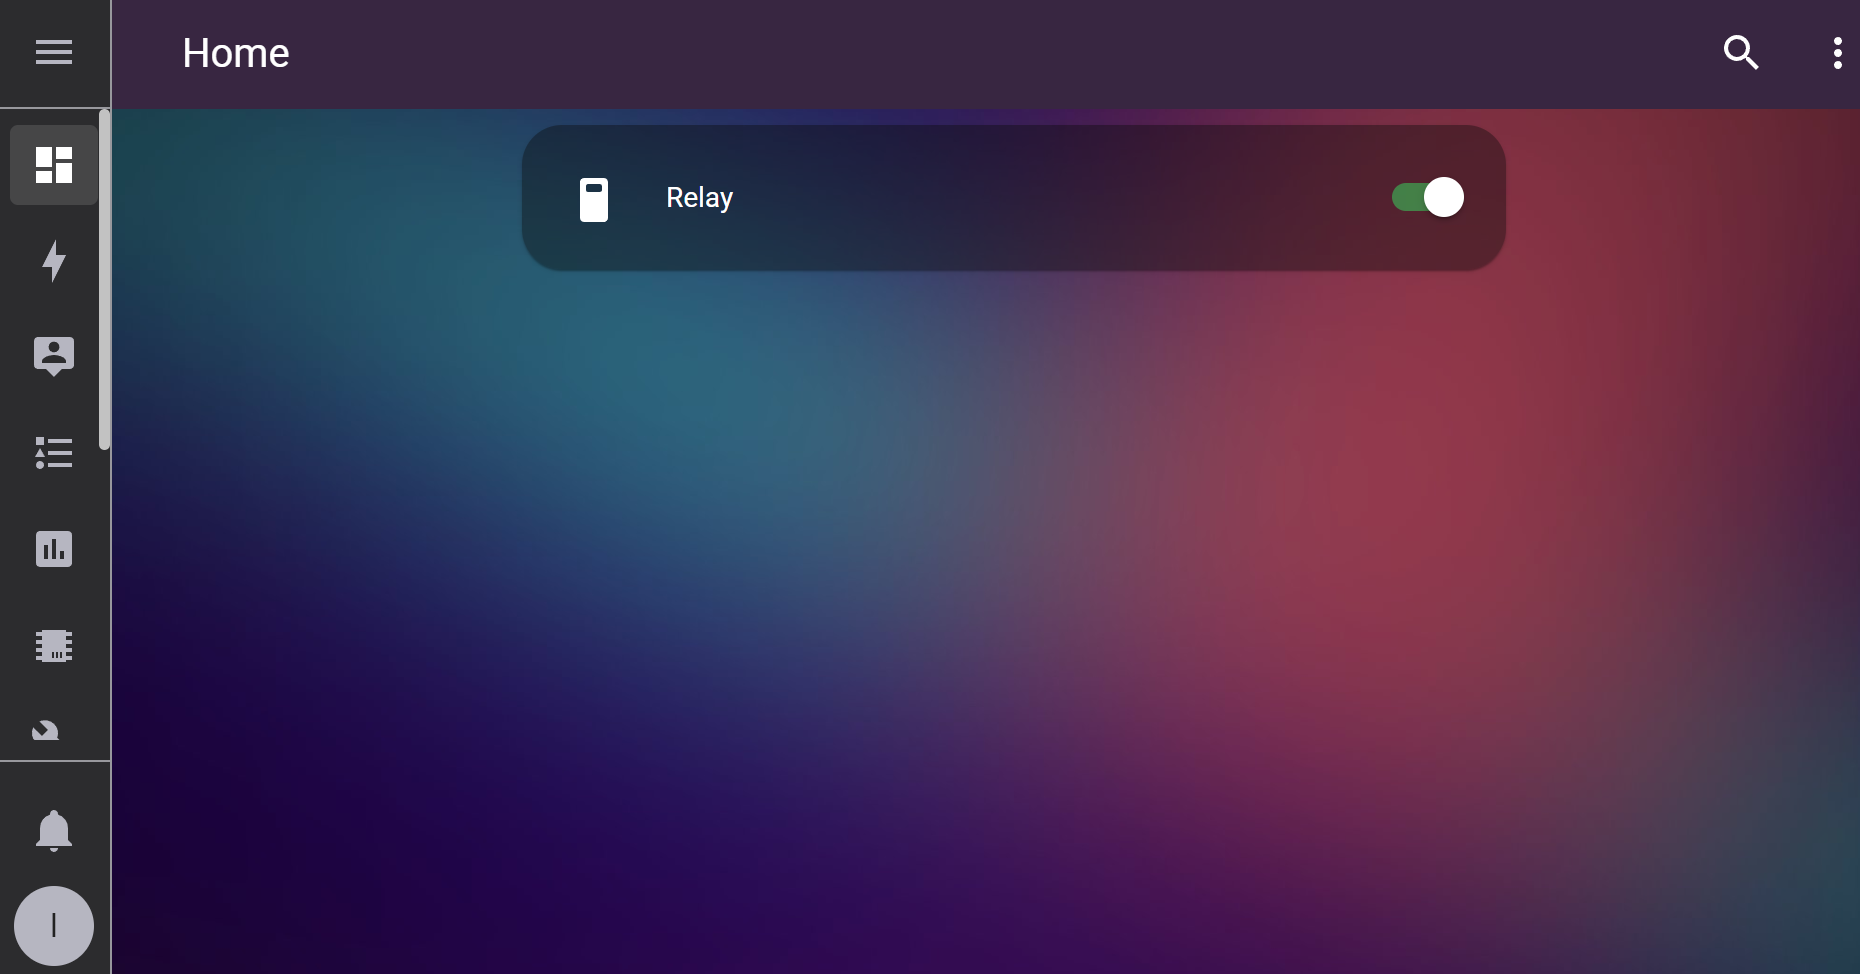
Now you can turn the relay ON/OFF using the toggle switch
Grove - mini PIR motion sensor
Setup configuration
- Step 1. Connect Grove - mini PIR motion sensor to one of the Digital ports on the Grove Shield for Seeed Studio XIAO. Here we select D0 port
- Step 2. Inside the xiao-esp32c3.yaml file that we created before, add the following at the end of the file and push it OTA to XIAO ESP32C3
binary_sensor:
  - platform: gpio
    pin: 2
    name: "PIR Sensor"
    device_class: motion
You can learn more about the PIR component here
Visualize on Dashboard
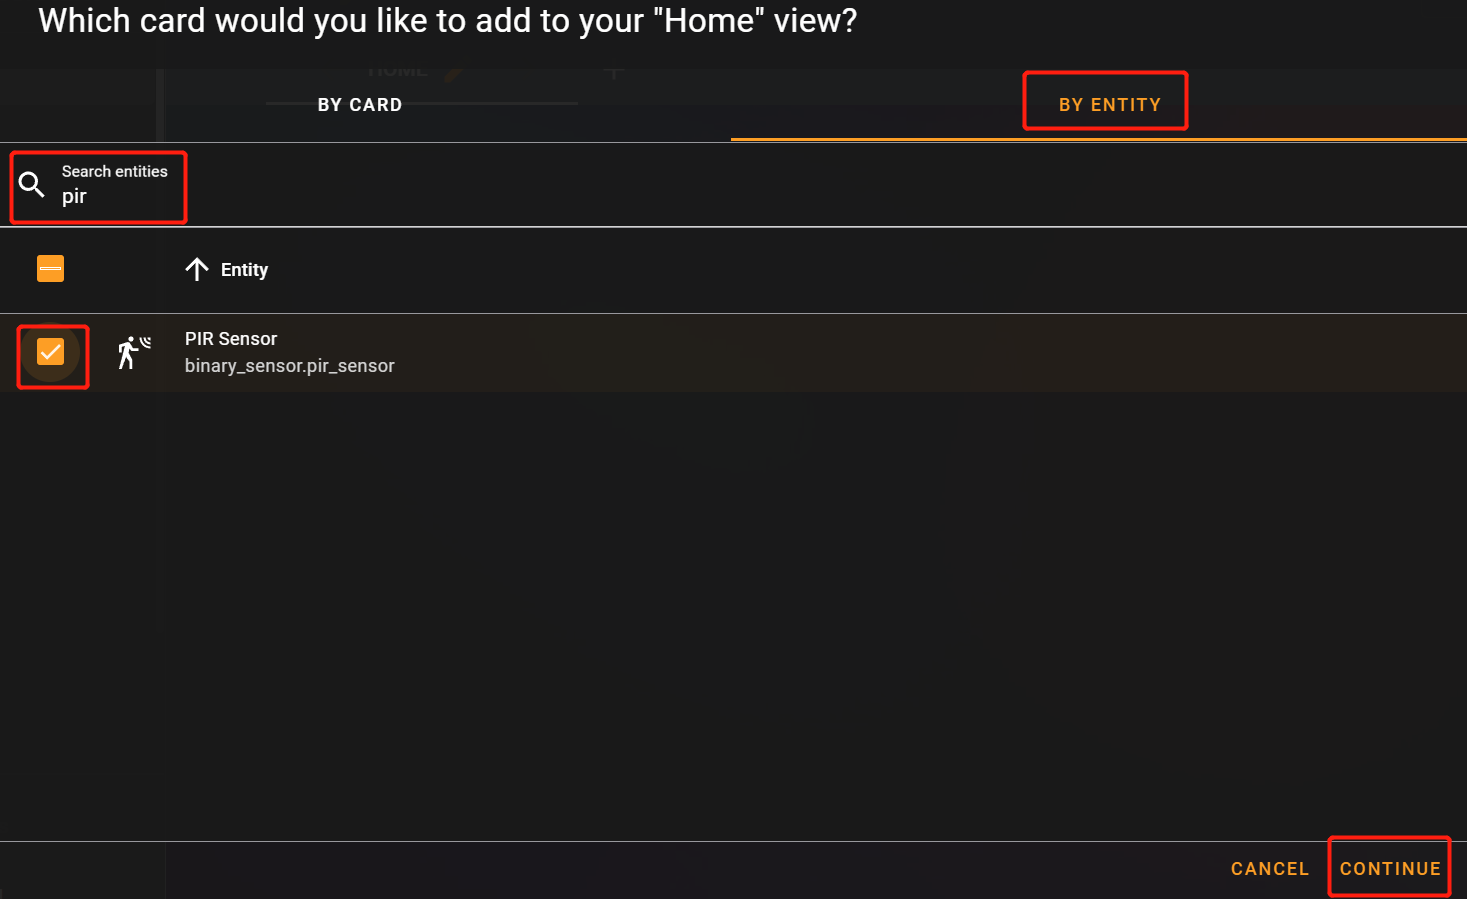
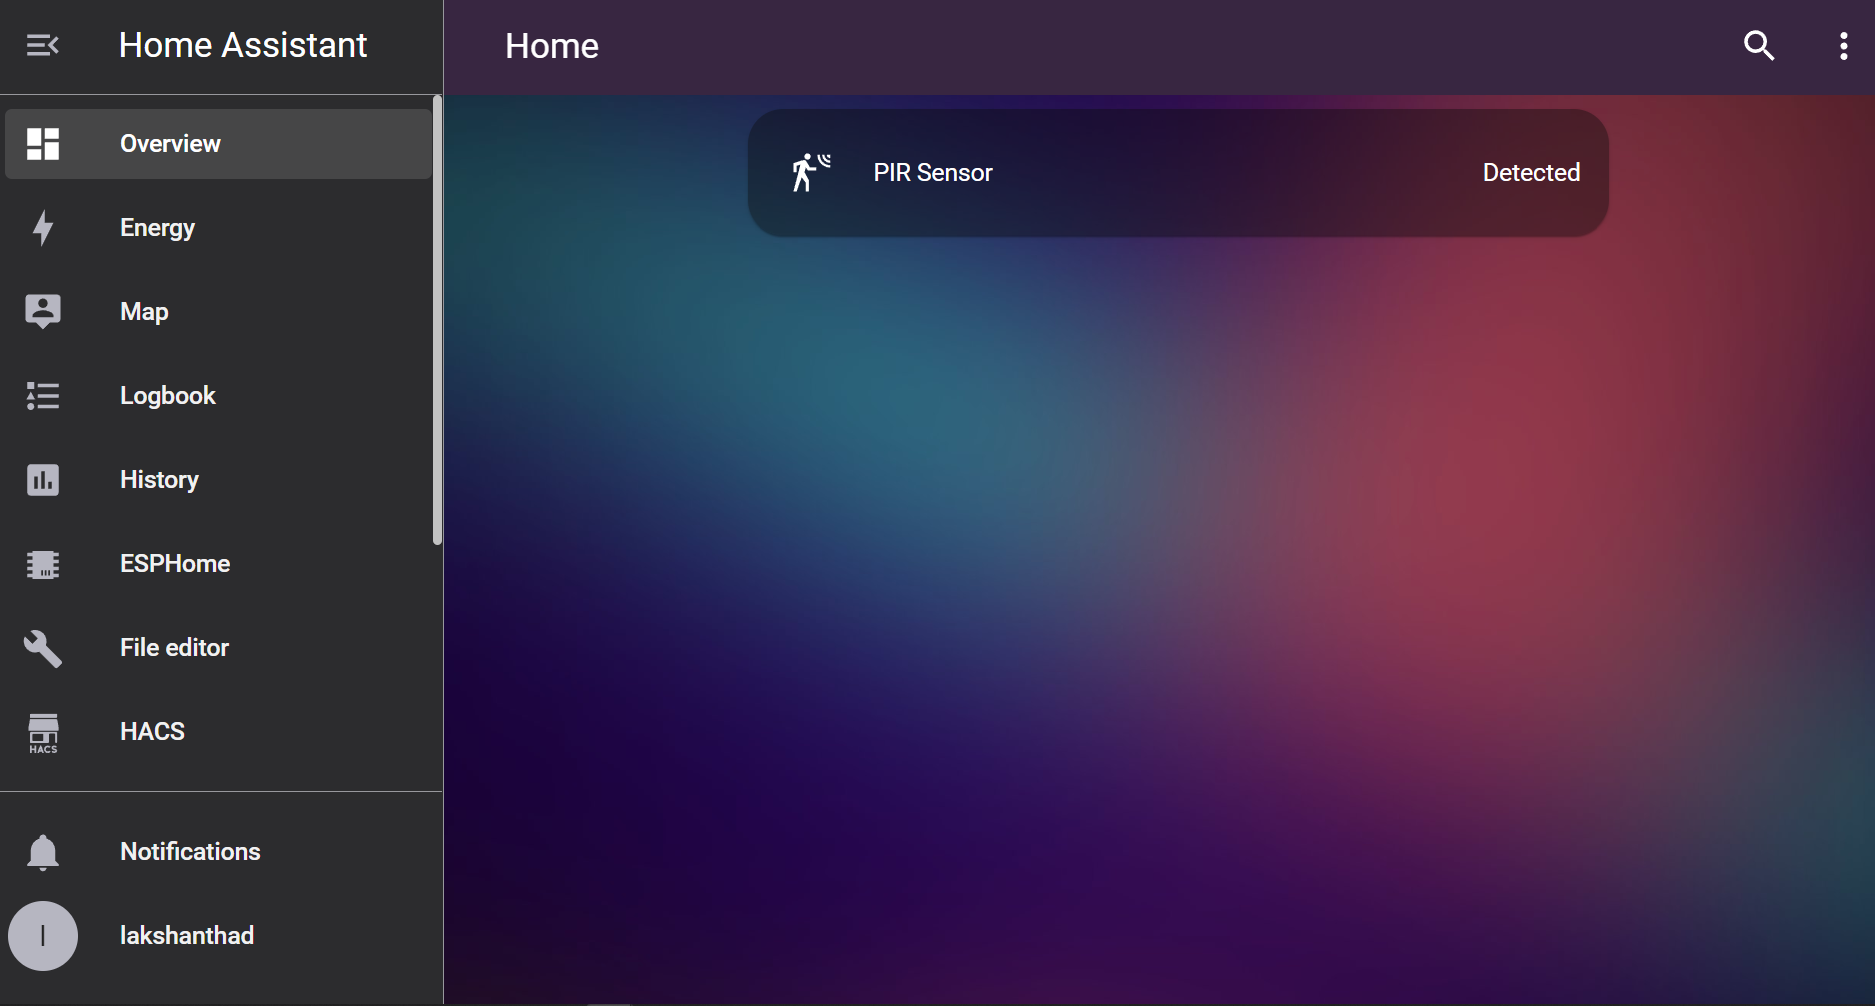
- Step 1. Under + ADD CARD that we mentioned before, select BY ENTITY, type pir, select it and click CONTINUE
- Step 2. Click ADD TO DASHBOARD
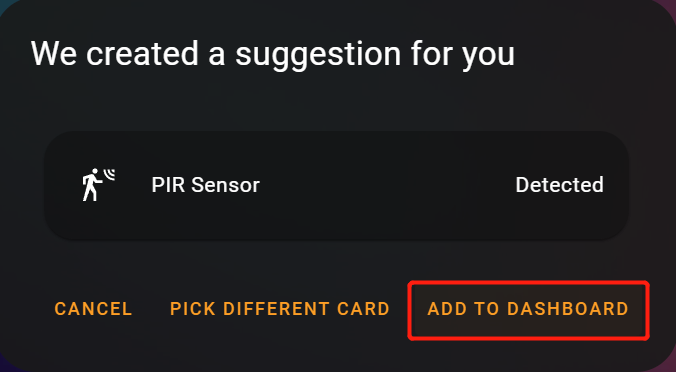
Now if a motion is detected, it will show as Detected
Tech Support & Product Discussion
Thank you for choosing our products! We are here to provide you with different support to ensure that your experience with our products is as smooth as possible. We offer several communication channels to cater to different preferences and needs.