Connect AWS IOT Core via Helium
Upgradable to Industrial Sensors
With the SenseCAP S2110 controller and S2100 data logger, you can easily turn the Grove into a LoRaWAN® sensor. Seeed not only helps you with prototyping but also offers you the possibility to expand your project with the SenseCAP series of robust industrial sensors.
The IP66 housing, Bluetooth configuration, compatibility with the global LoRaWAN® network, built-in 19 Ah battery, and powerful support from APP make the SenseCAP S210x the best choice for industrial applications. The series includes sensors for soil moisture, air temperature and humidity, light intensity, CO2, EC, and an 8-in-1 weather station. Try the latest SenseCAP S210x for your next successful industrial project.


Introduction to AWS IoT Core
AWS IoT Core provides the cloud services that connect your IoT devices to other devices and AWS cloud services. AWS IoT provides device software that can help you integrate your IoT devices into AWS IoT-based solutions. If your devices can connect to AWS IoT, AWS IoT can connect them to the cloud services that AWS provides.
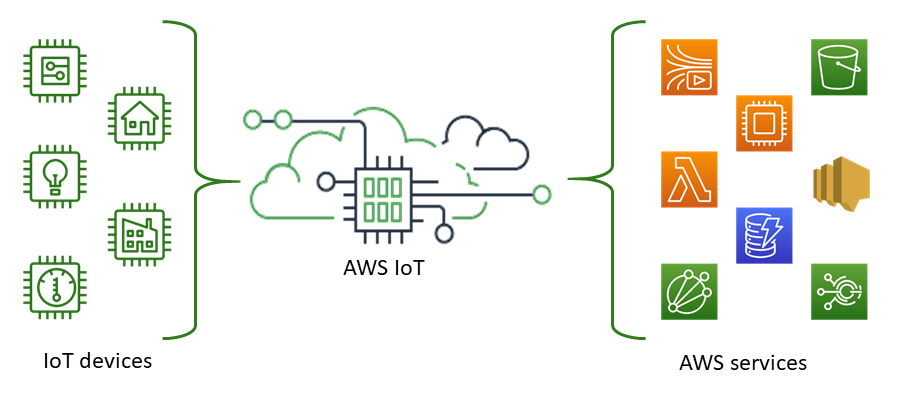
AWS IoT lets you select the most appropriate and up-to-date technologies for your solution. To help you manage and support your IoT devices in the field, AWS IoT Core supports these protocols:
- MQTT (Message Queuing and Telemetry Transport)
- MQTT over WSS (Websockets Secure)
- HTTPS (Hypertext Transfer Protocol - Secure)
- LoRaWAN® (Long Range Wide Area Network)
AWS IoT Core is a powerful offering that lets developers build device-based applications and services on the AWS Cloud. And this Integration via Helium Console automates the complexity of securely connecting your devices to AWS IoT Core.
You may need to pay for AWS IoT Core to experience the full content of this tutorial. A detailed list of payments and costs you can approximate here.
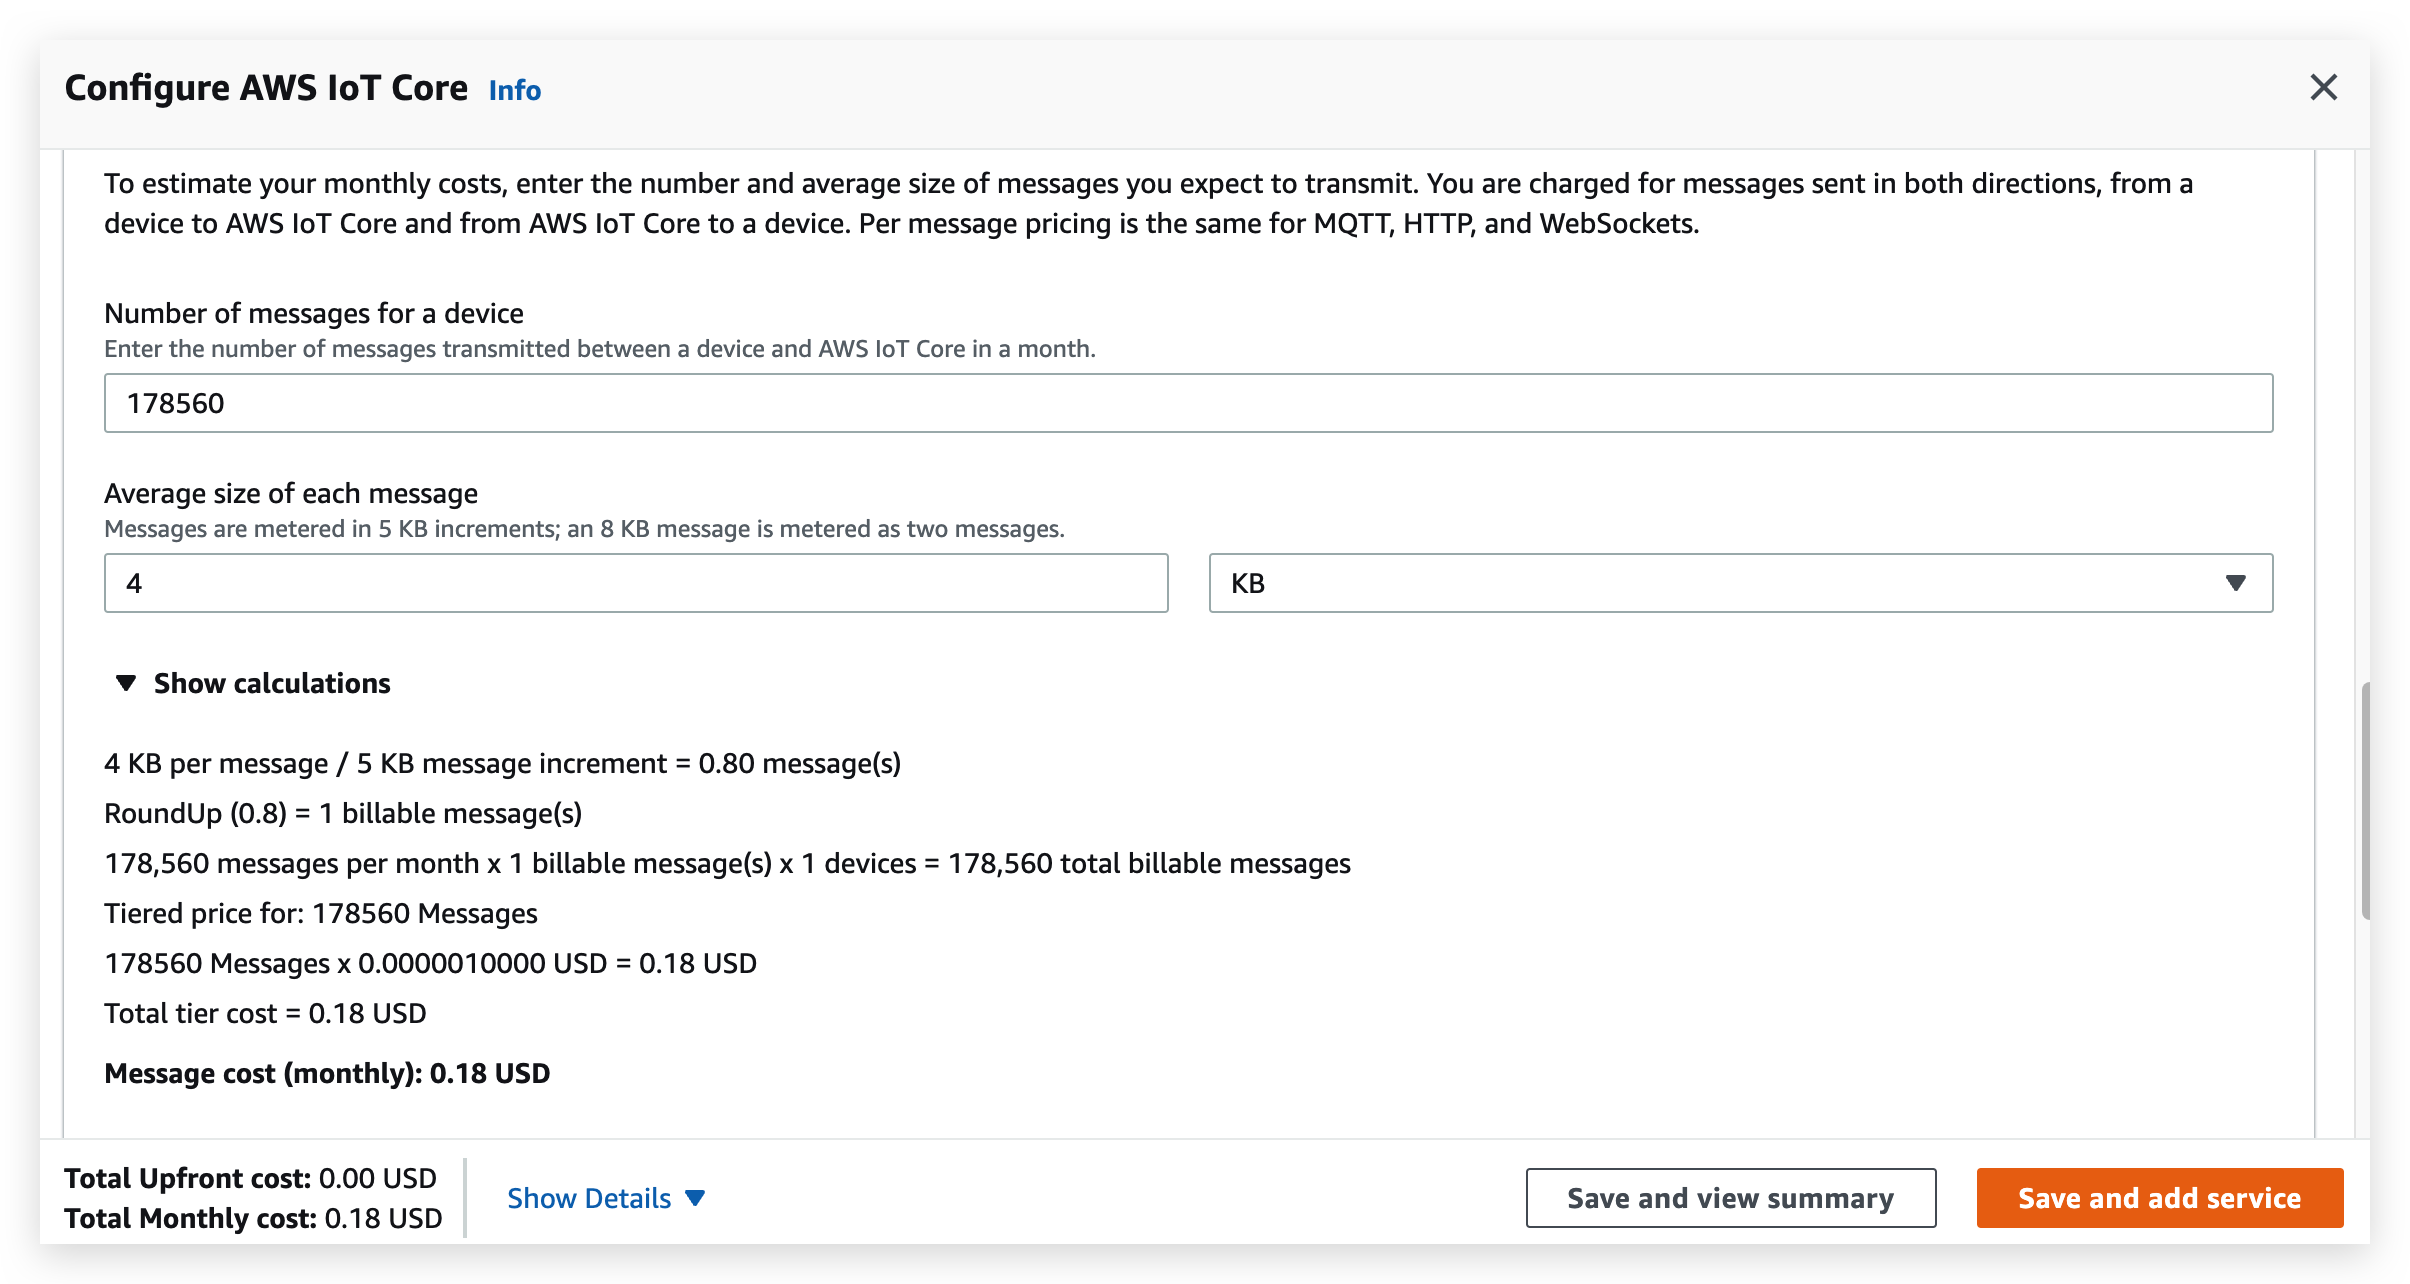
Based on the sending frequency of the code we have provided (sending data at approximately 15 second intervals), approximately 178,560 messages will be sent in a month, with a message size of approximately 3 to 4 KB and a monthly cost of 0.18 USD.
Sign up for AWS IoT Core
Please go to the AWS IoT Core website and register an account.
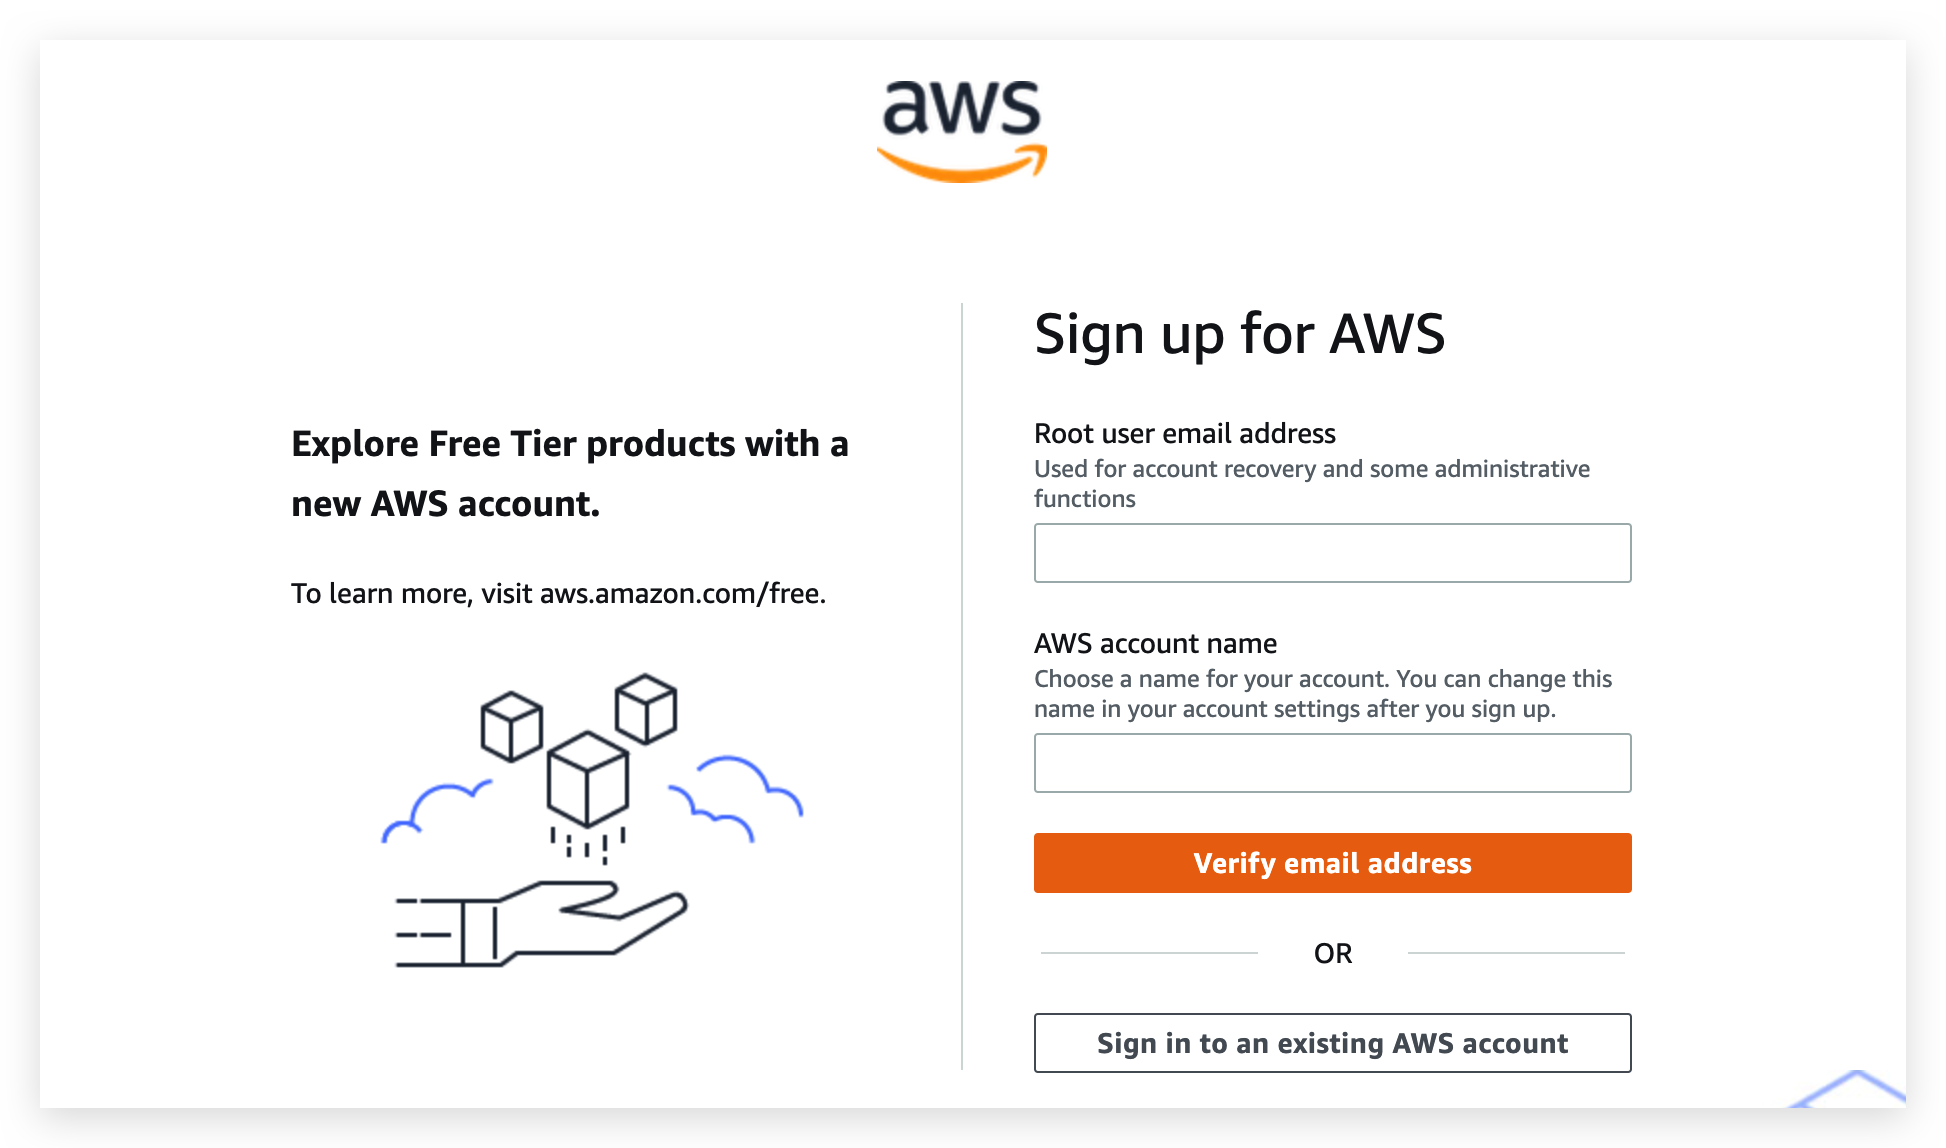
Fill out an email with your registered email address and a user name and you will receive an email from AWS with the six-digit verification code required to register.
Enter your verification code and registration is complete. Sign in to AWS IoT Core with the email address you just filled in.
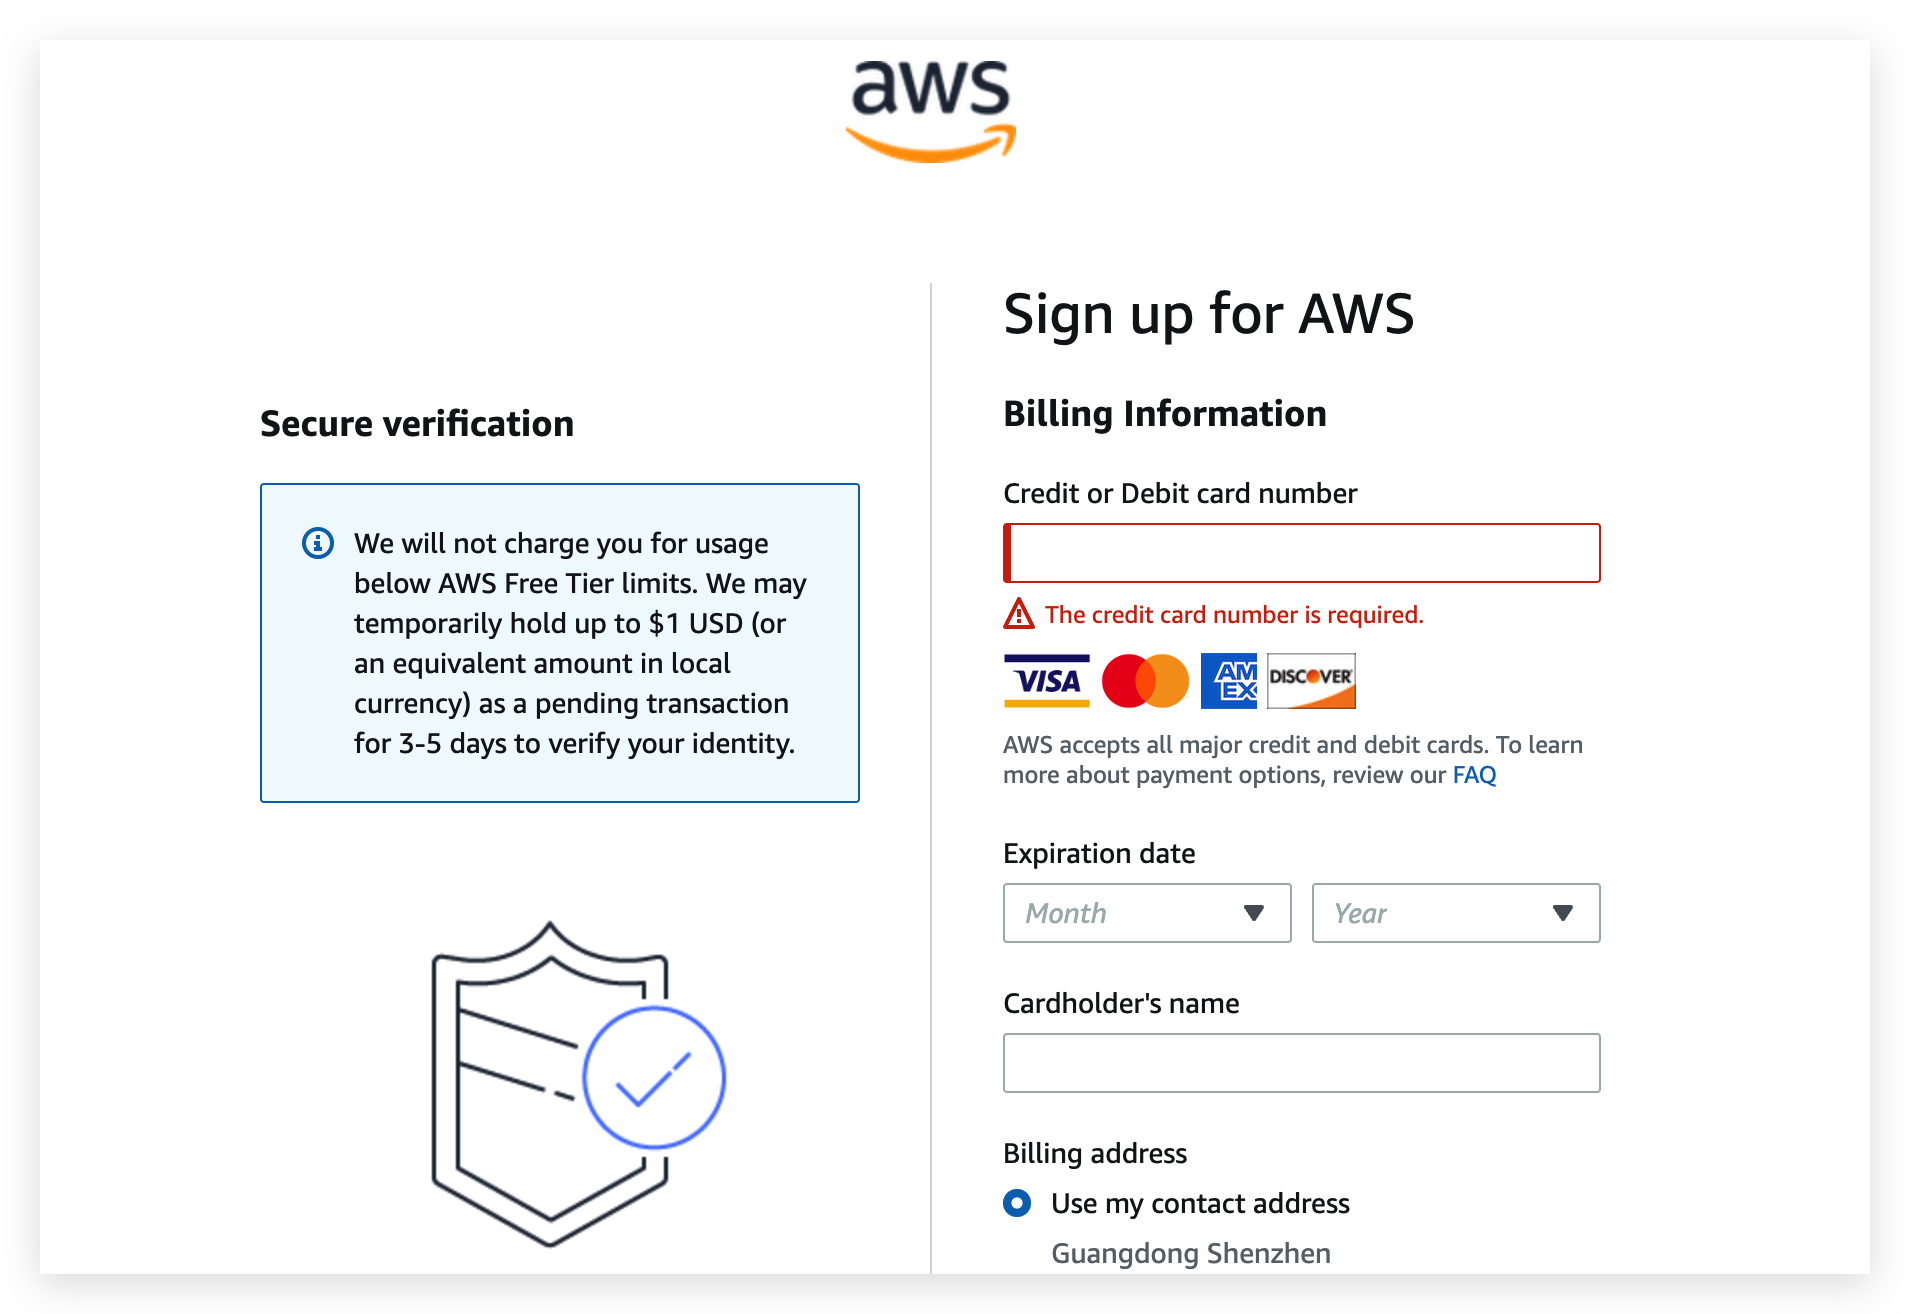
After logging in, you will need to continue filling in personal information such as passwords and contacts. You will then be required to link a credit card to verify your personal information.
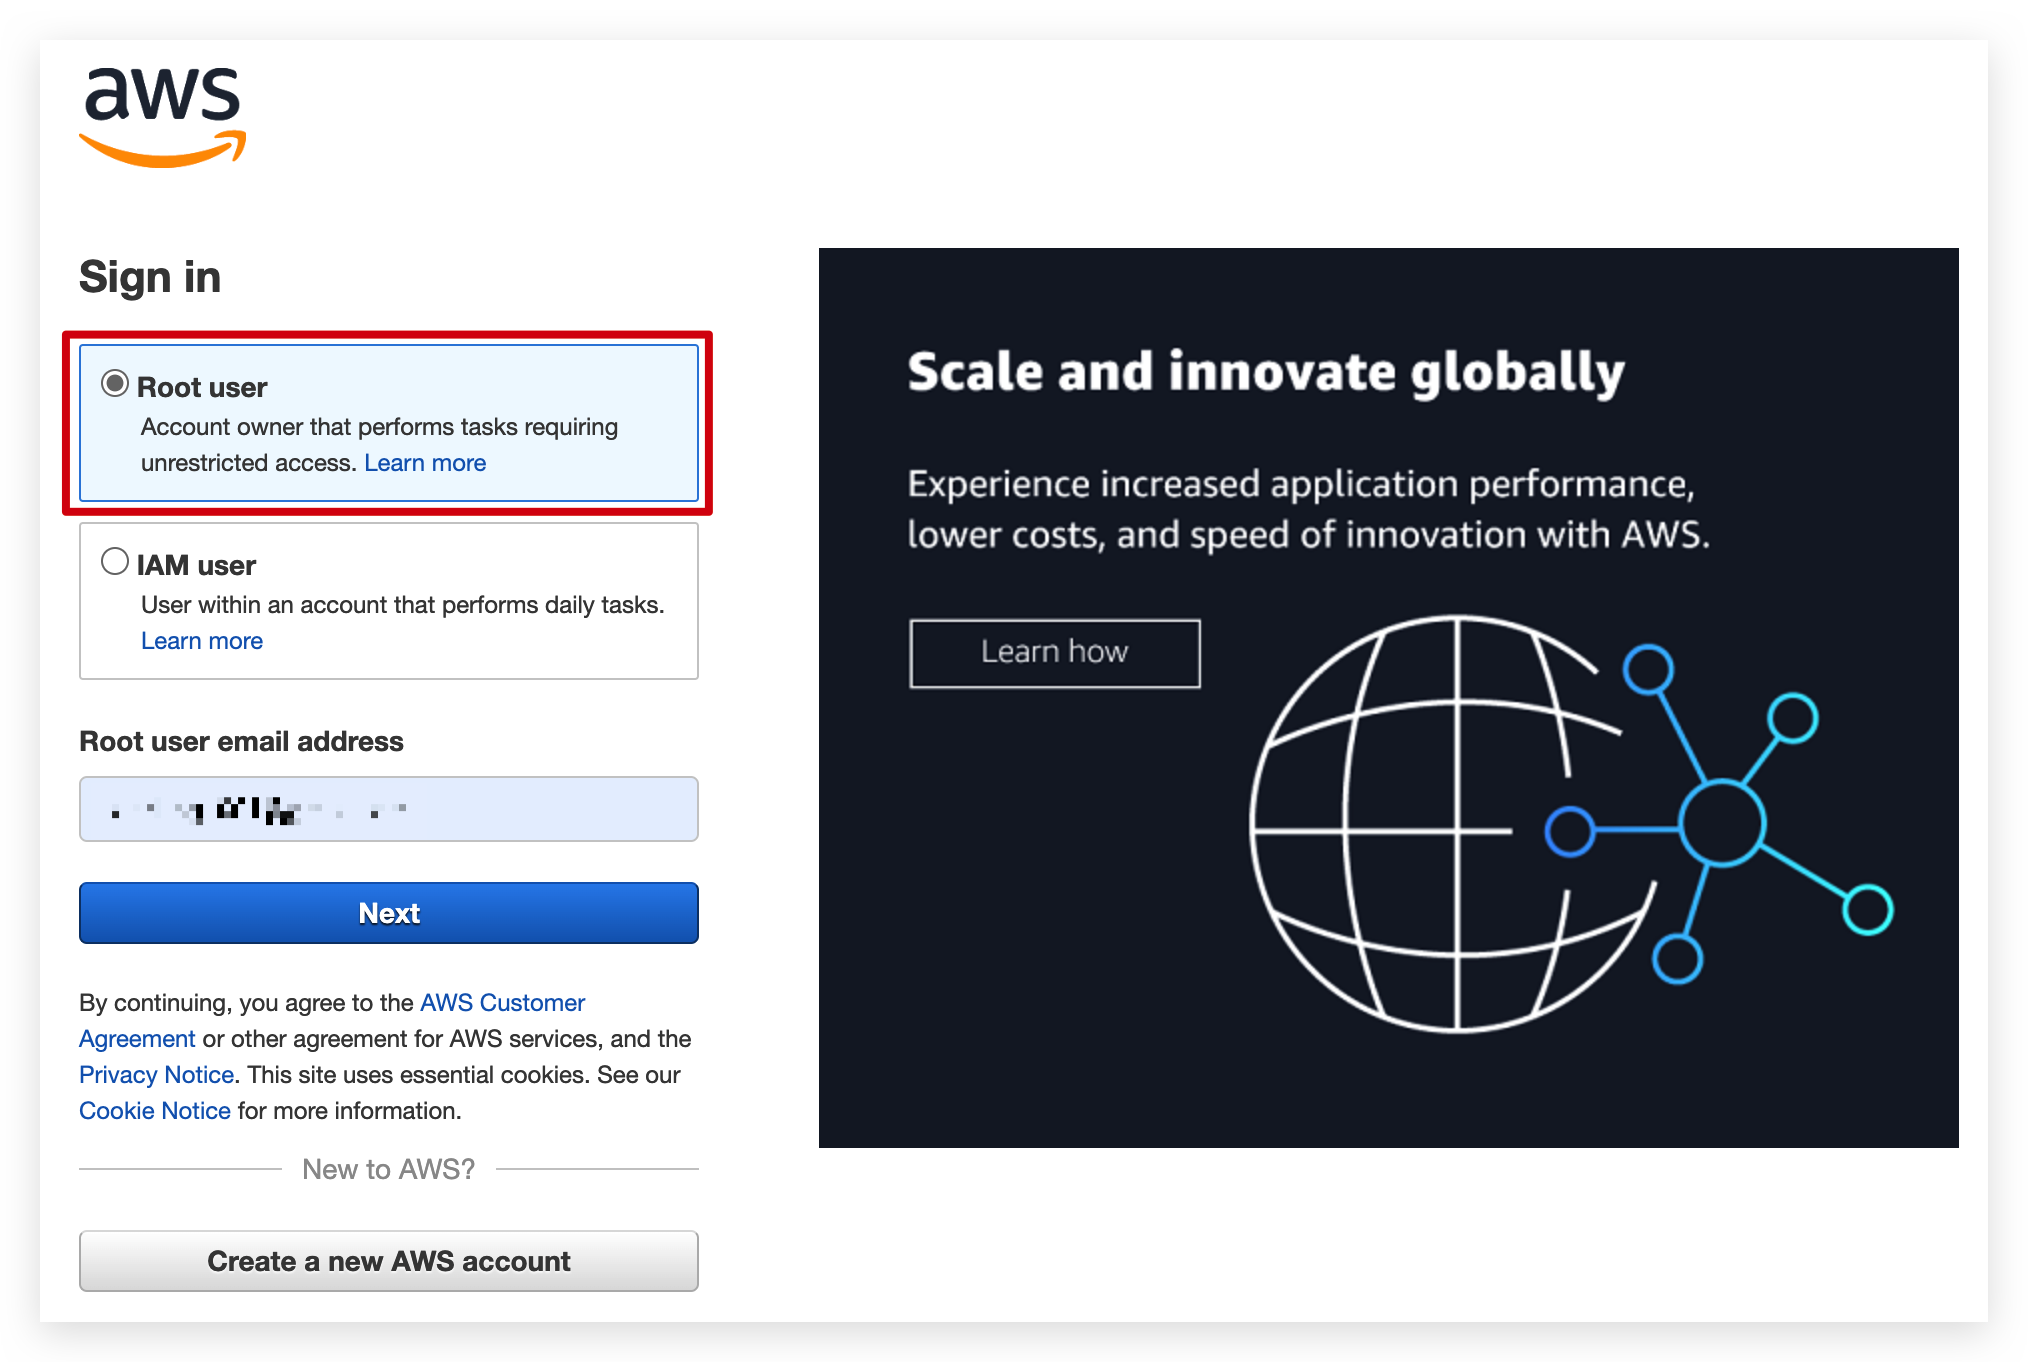
When we log in to the AWS IoT Core console, we just select the Root user to log in.
Create access to AWS IoT Core
Create a new user with limited permissions that this Integration will use on AWS.
-
Open up the AWS Console.
-
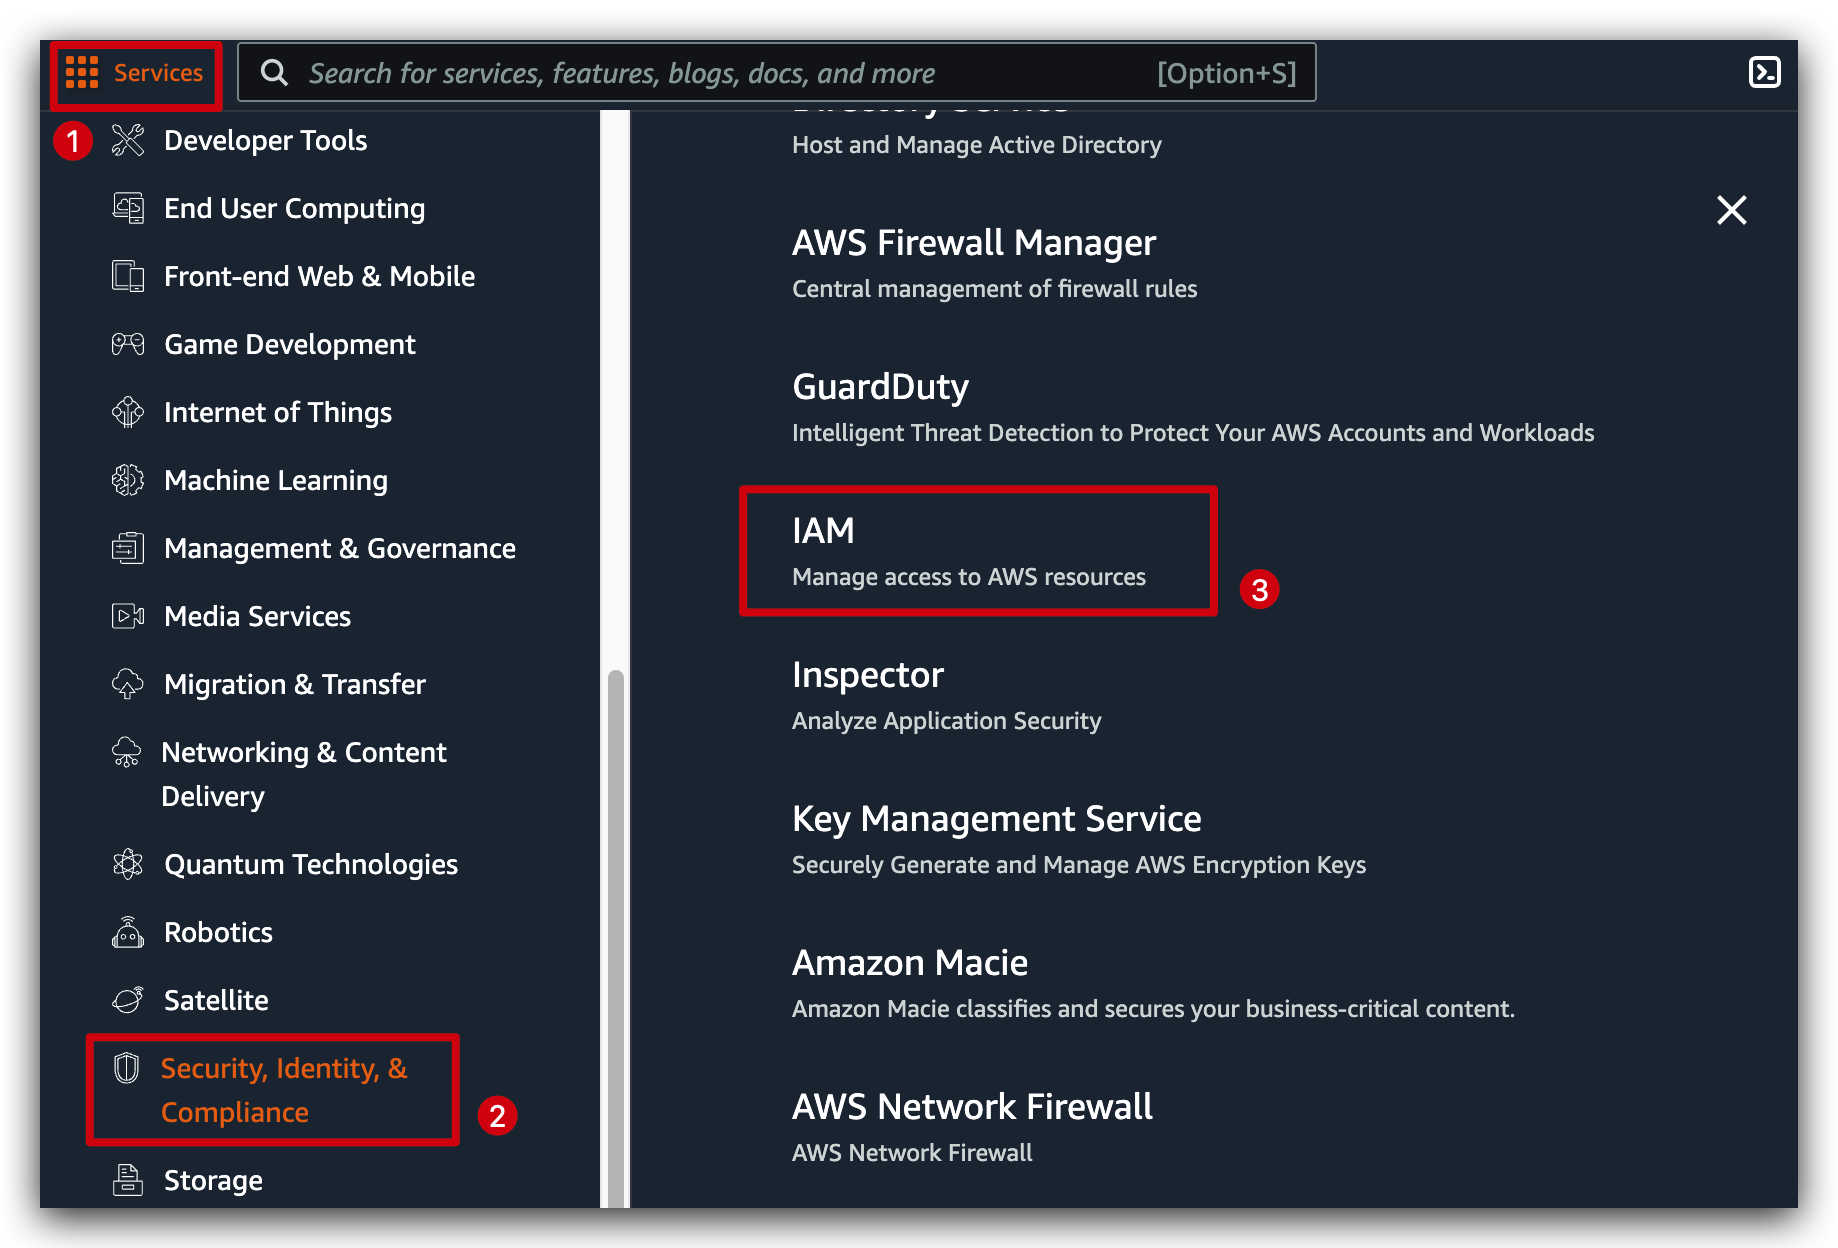
Click on Services menu in the upper-left, go to Security, Identity, & Compliance, then click IAM.
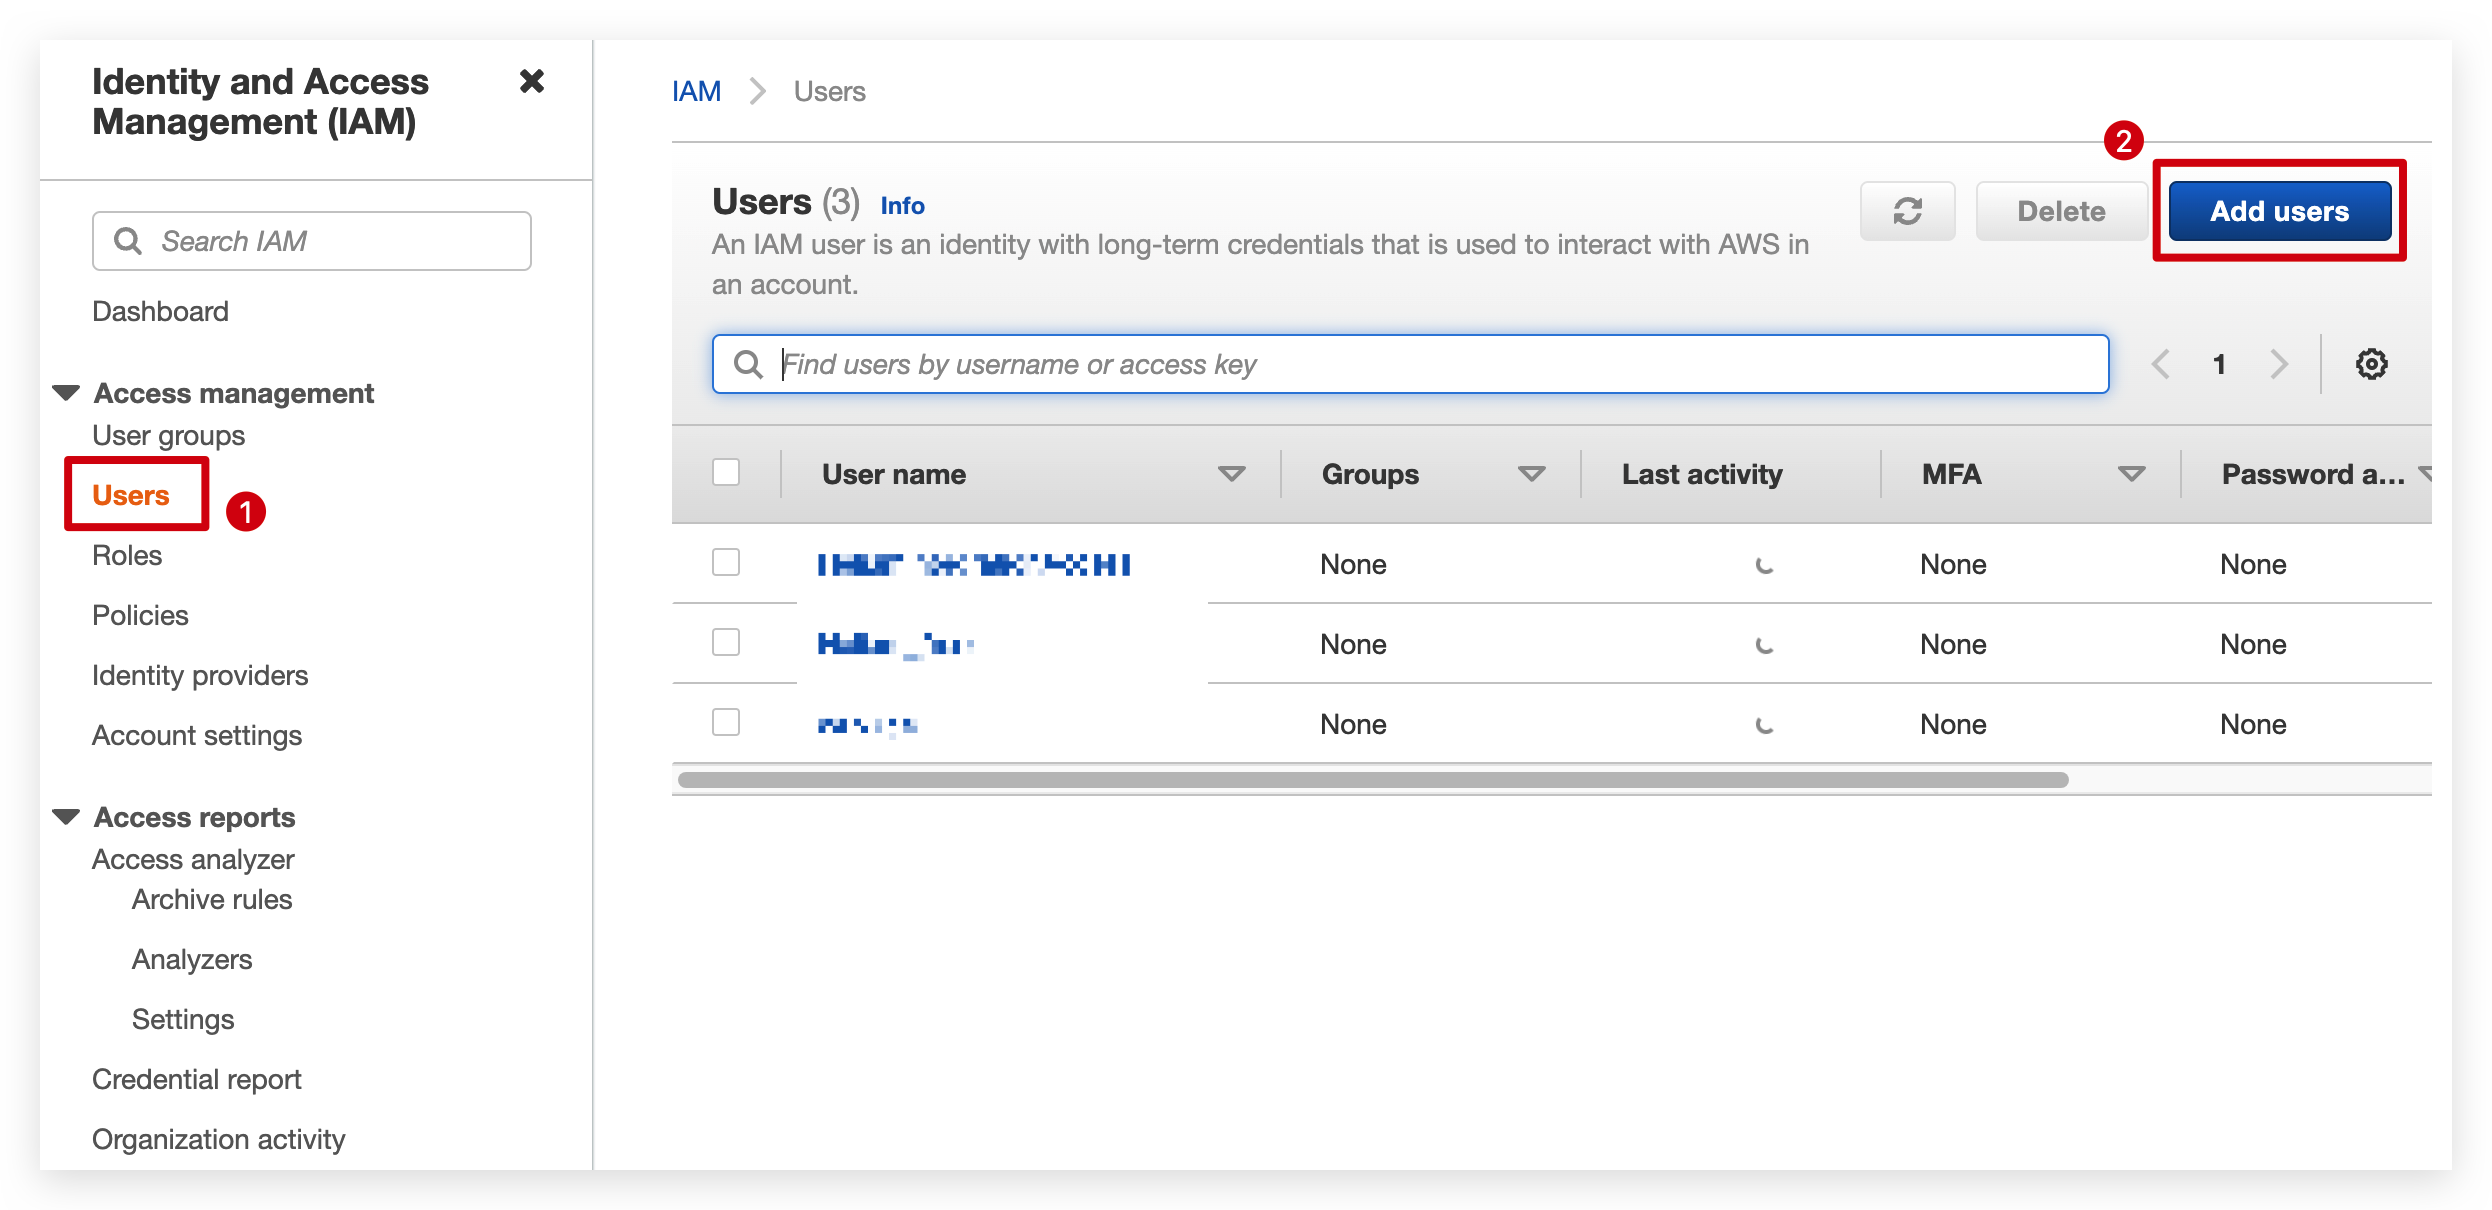
We are now going to create a new User.
Set the user name and select only Acess key - Programmatic access.
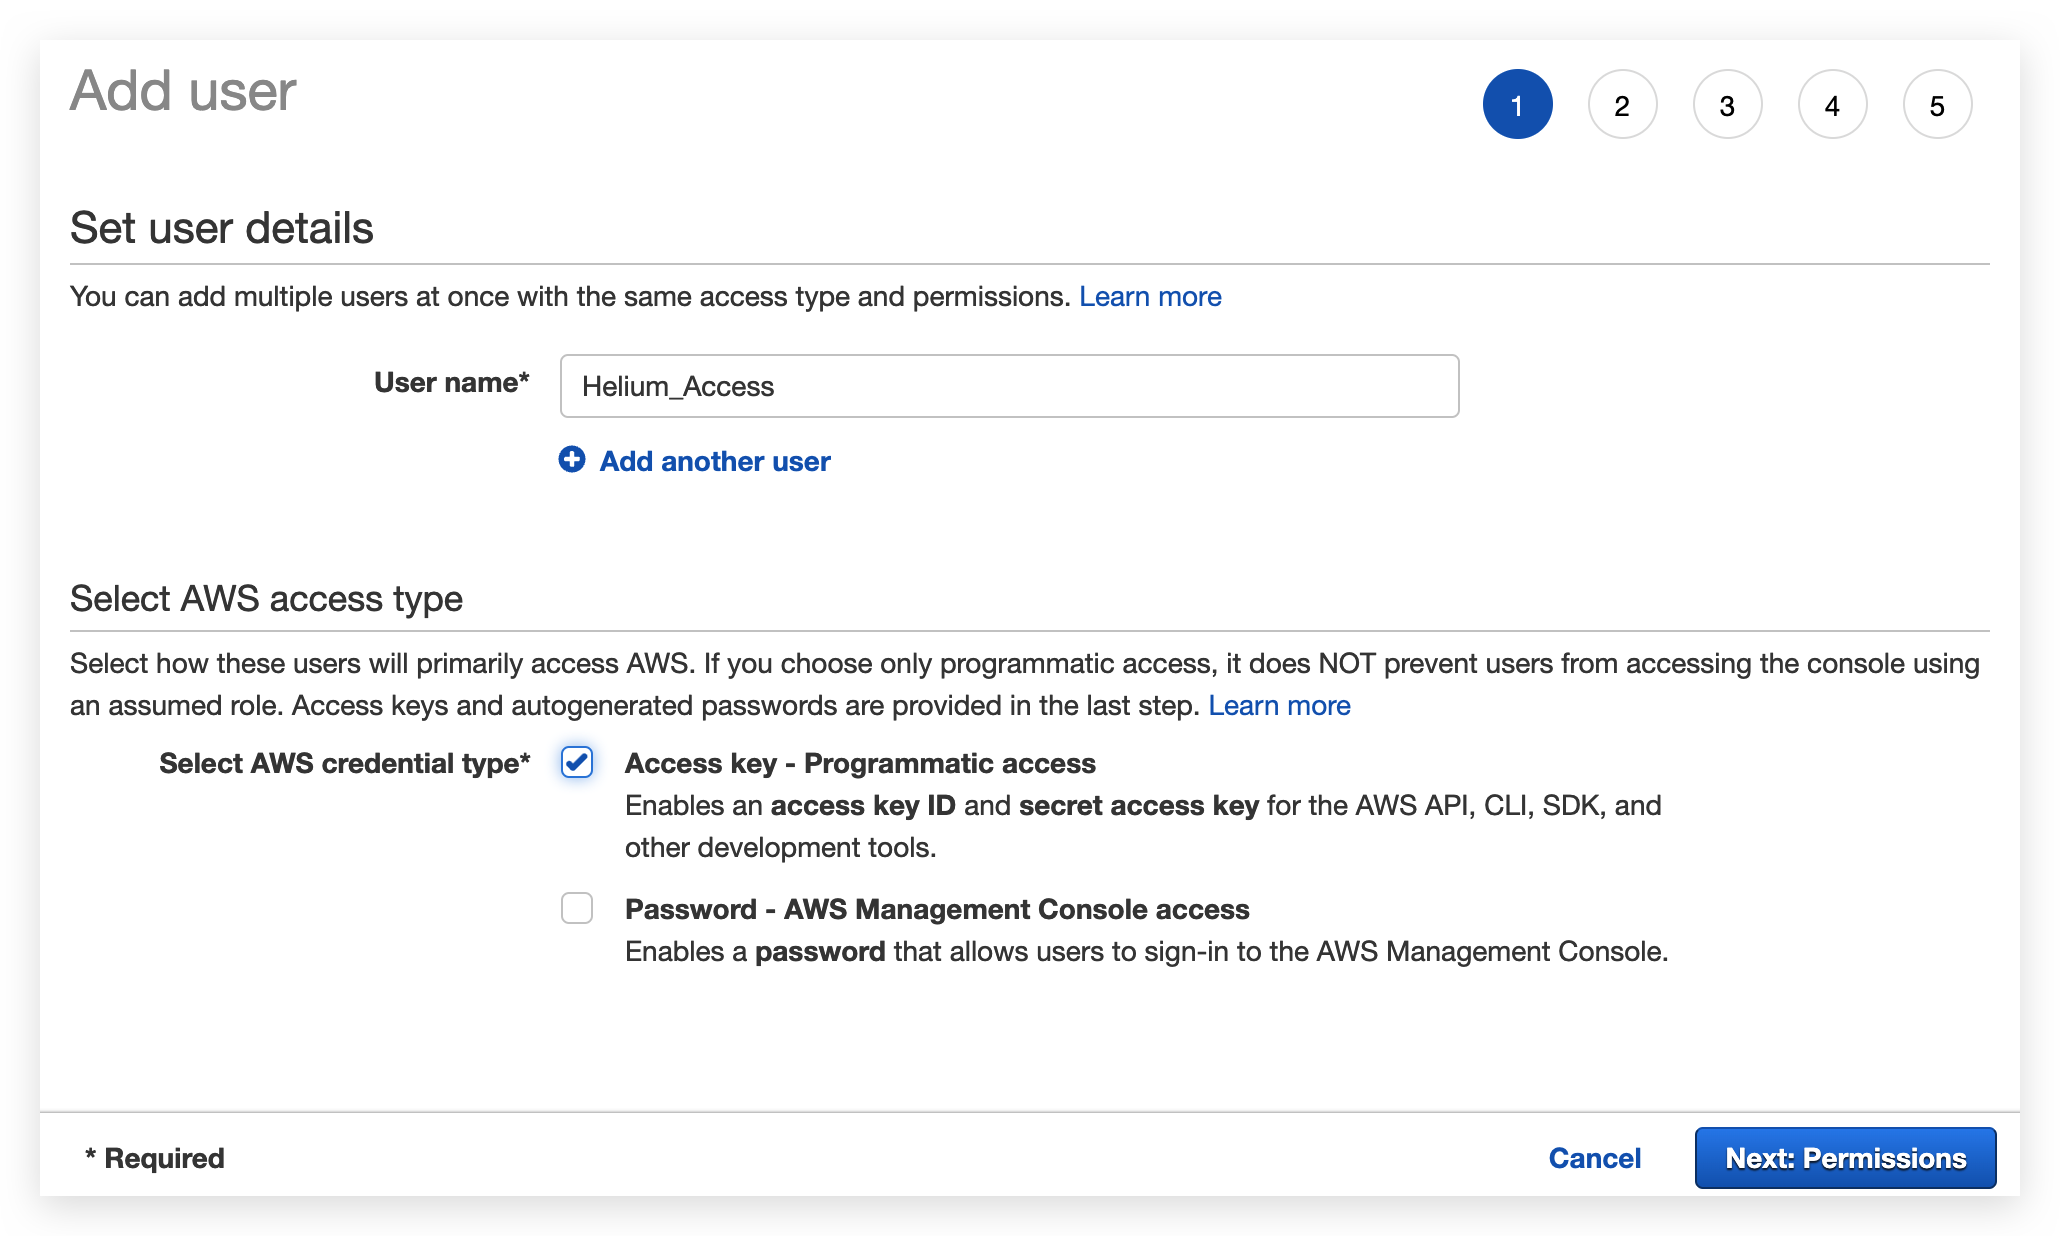
In the next page, select Attach existing policies directly and type AWSIoTConfigAccess into the Filter Policies box and check the box to the left of the row.

For other pages we leave the default or leave it empty and just keep clicking Next in the bottom right corner.

We now attach a policy to the newly created user that defines what permissions they hold.
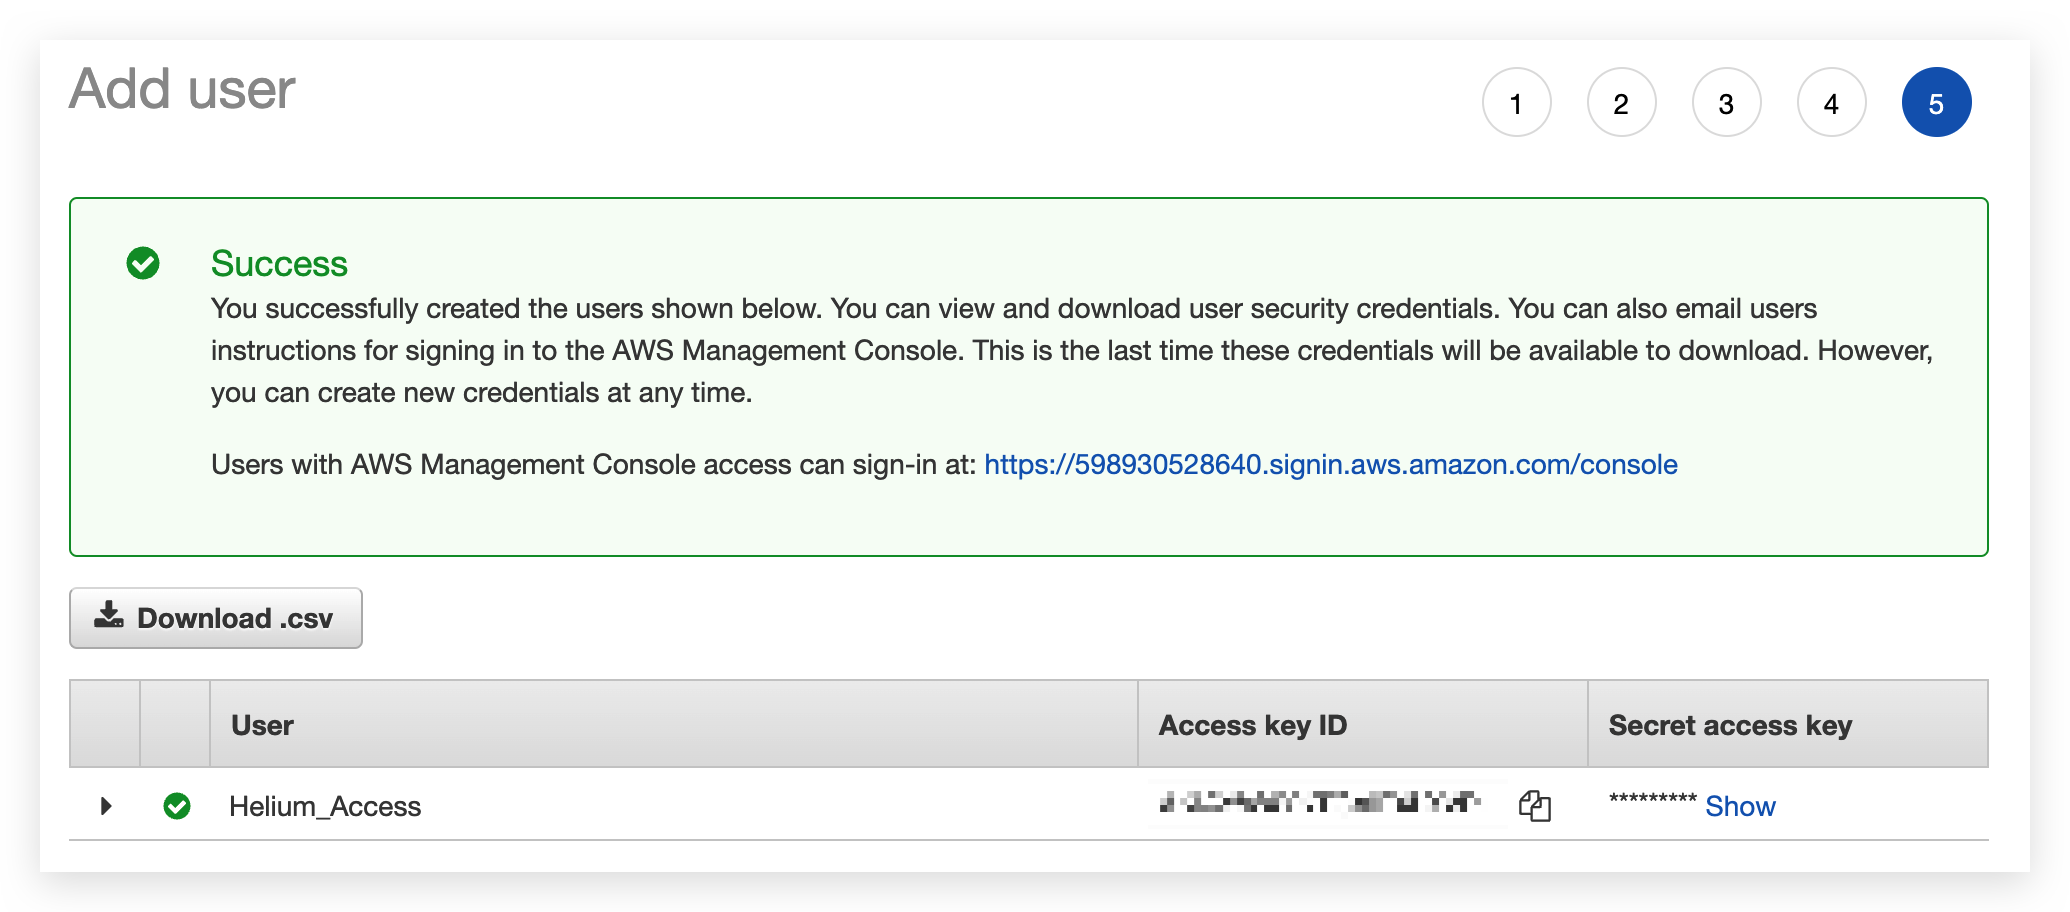
Ensure you record and store these keys securely, as you will not have an opportunity to get access to them again!
Add AWS IoT Core Integration in Helium
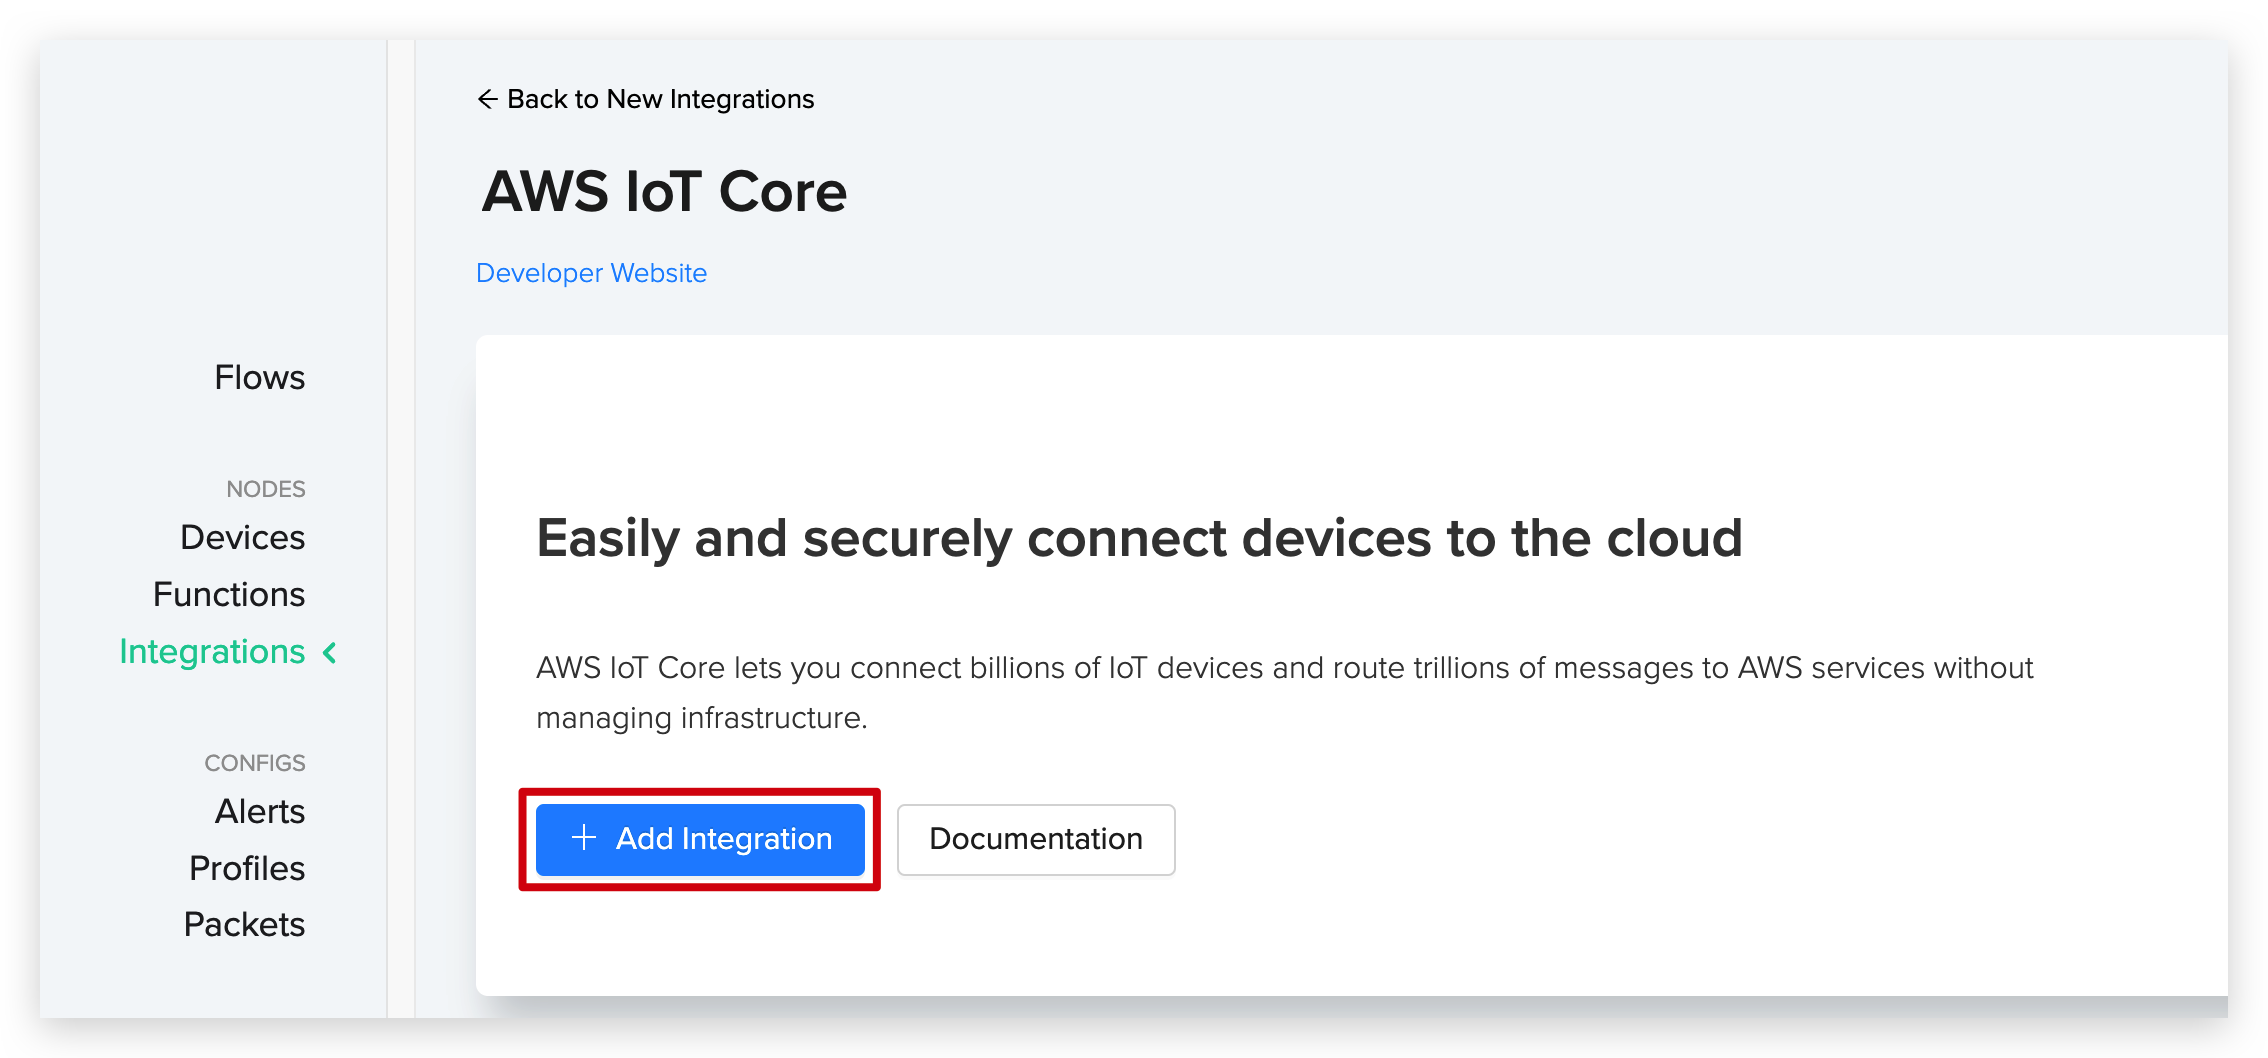
We can go back to the Helium console and create the AWS IoT Core to Helium integration.

Click Add Integration in the new page.
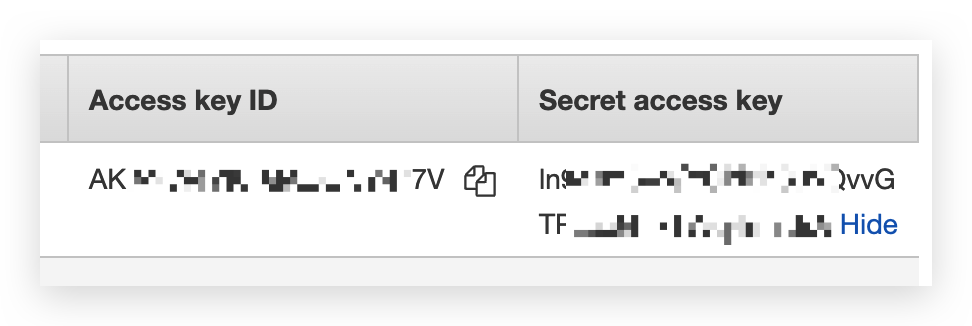
Fill in the Helium AWS IoT Core integration with the Access Key and Secret Key respectively, which are generated in the content of the Create access to AWS IoT Core.
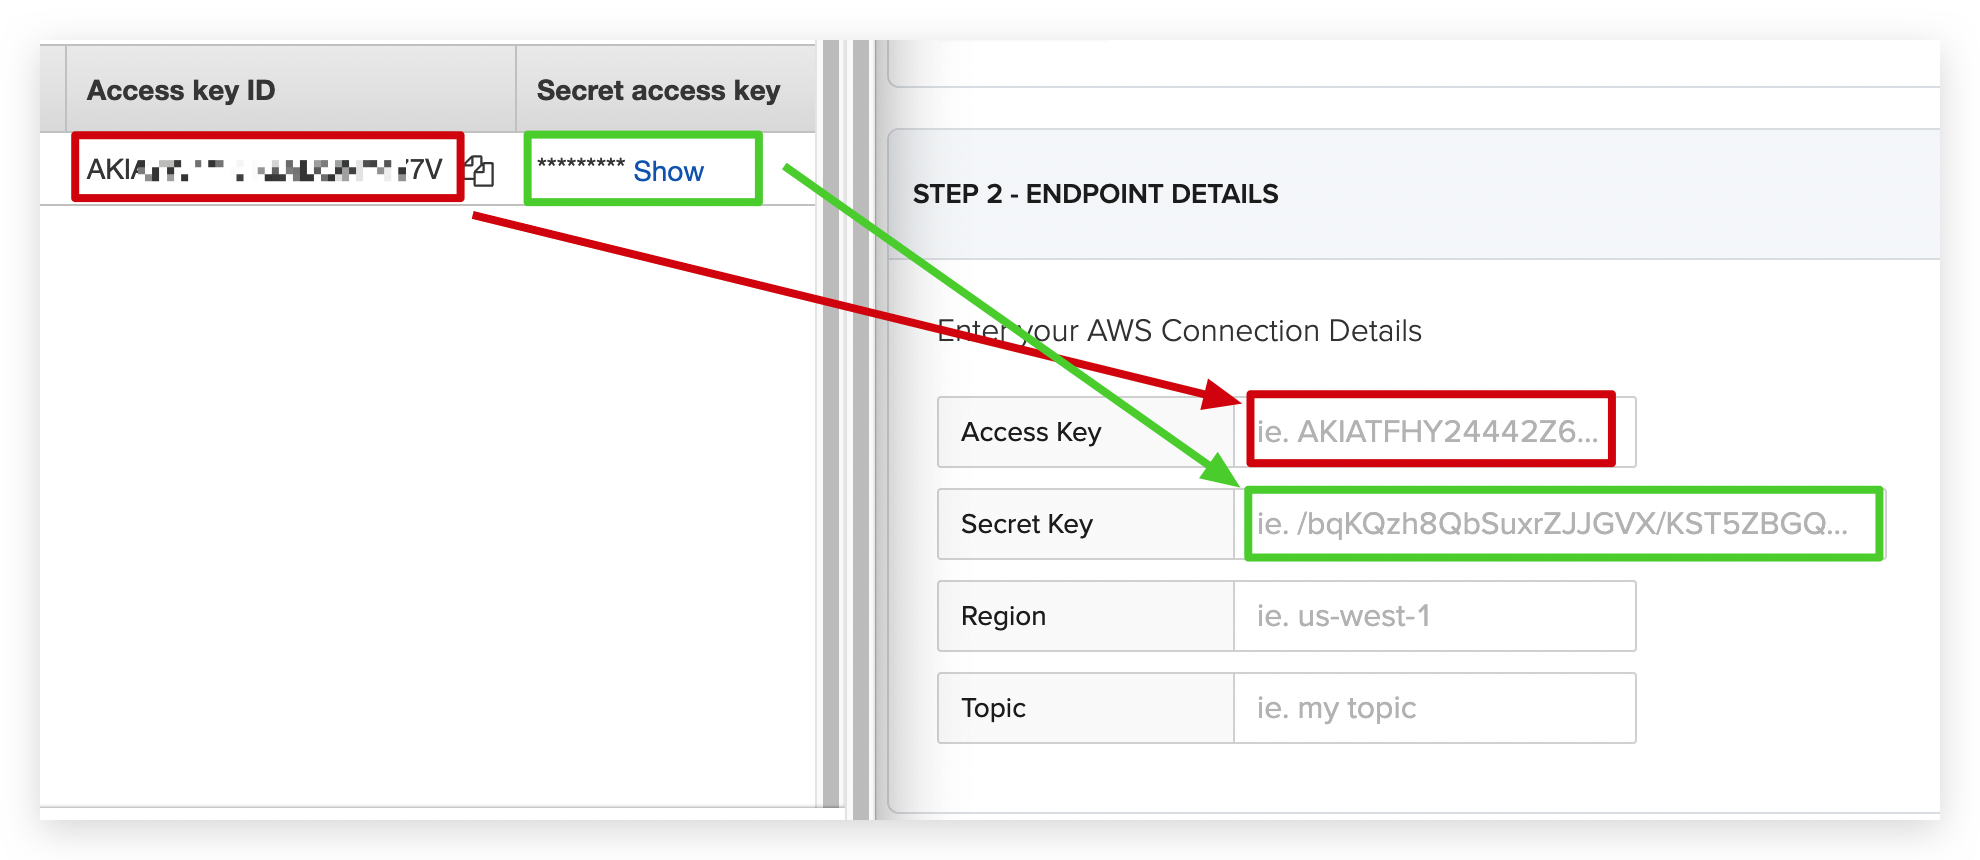
In Region, you need to fill in the same region code as the address where the AWS IoT Core server is located. This is in the top right hand corner of the AWS IoT Core console at the username.
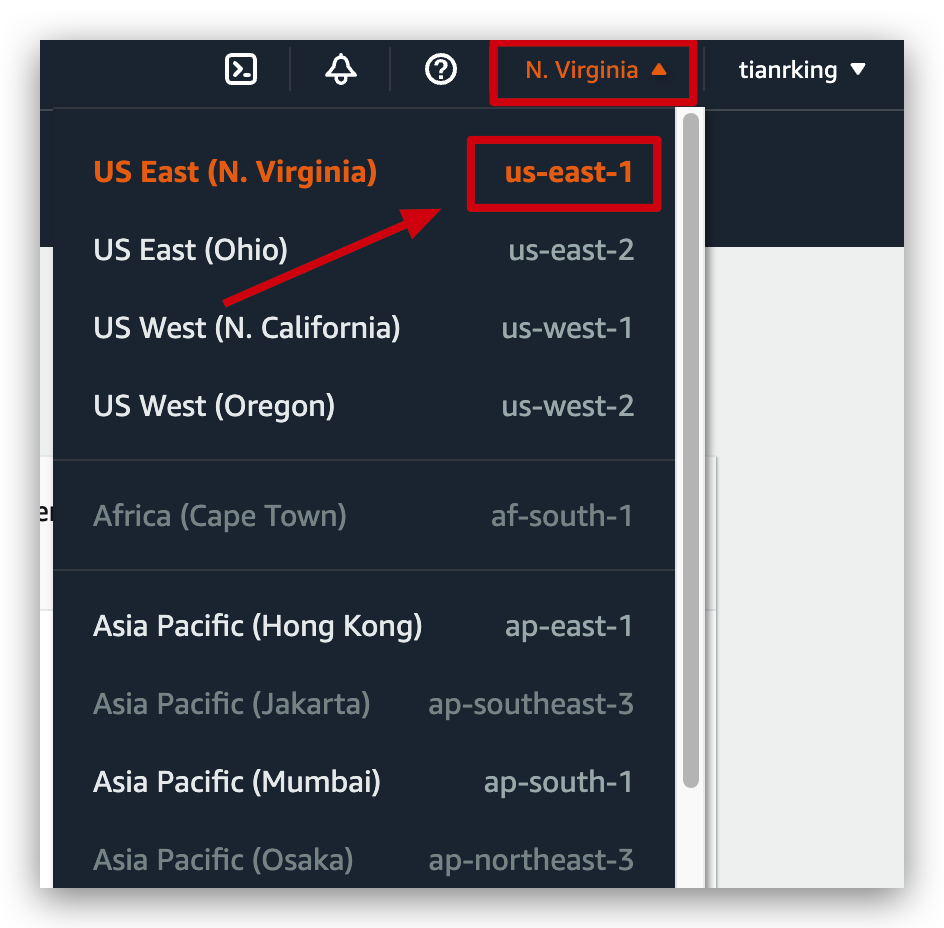
The highlighted area is allowed to be adjusted by the user. Here, for example, I have selected the region where the server is located as US East (N. Virginia) and the region code as us-east-1. Correspondingly, in Helium's Region I need to fill in the us-east-1.
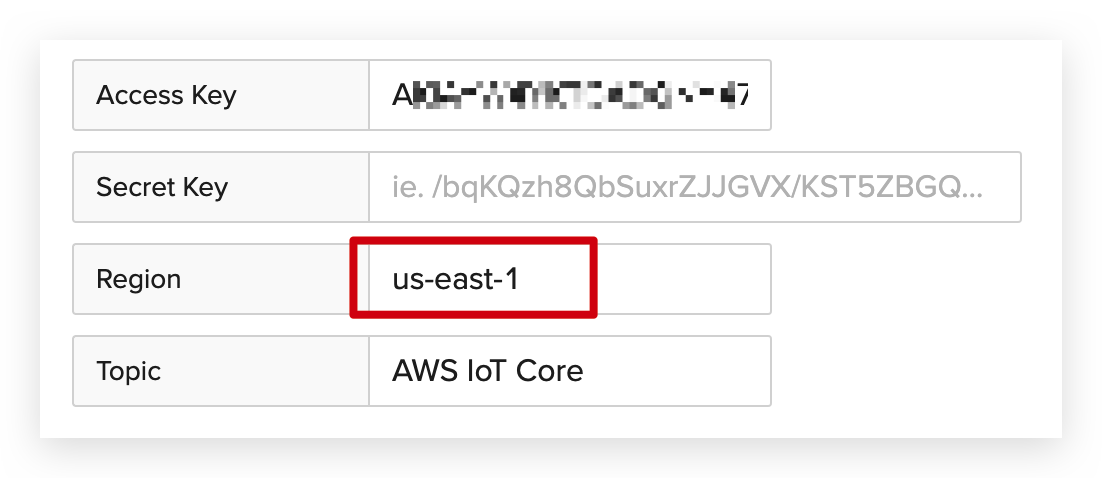
The Topic field is the AWS IoT MQTT topic that this integration will publish uplink messages to, from devices.
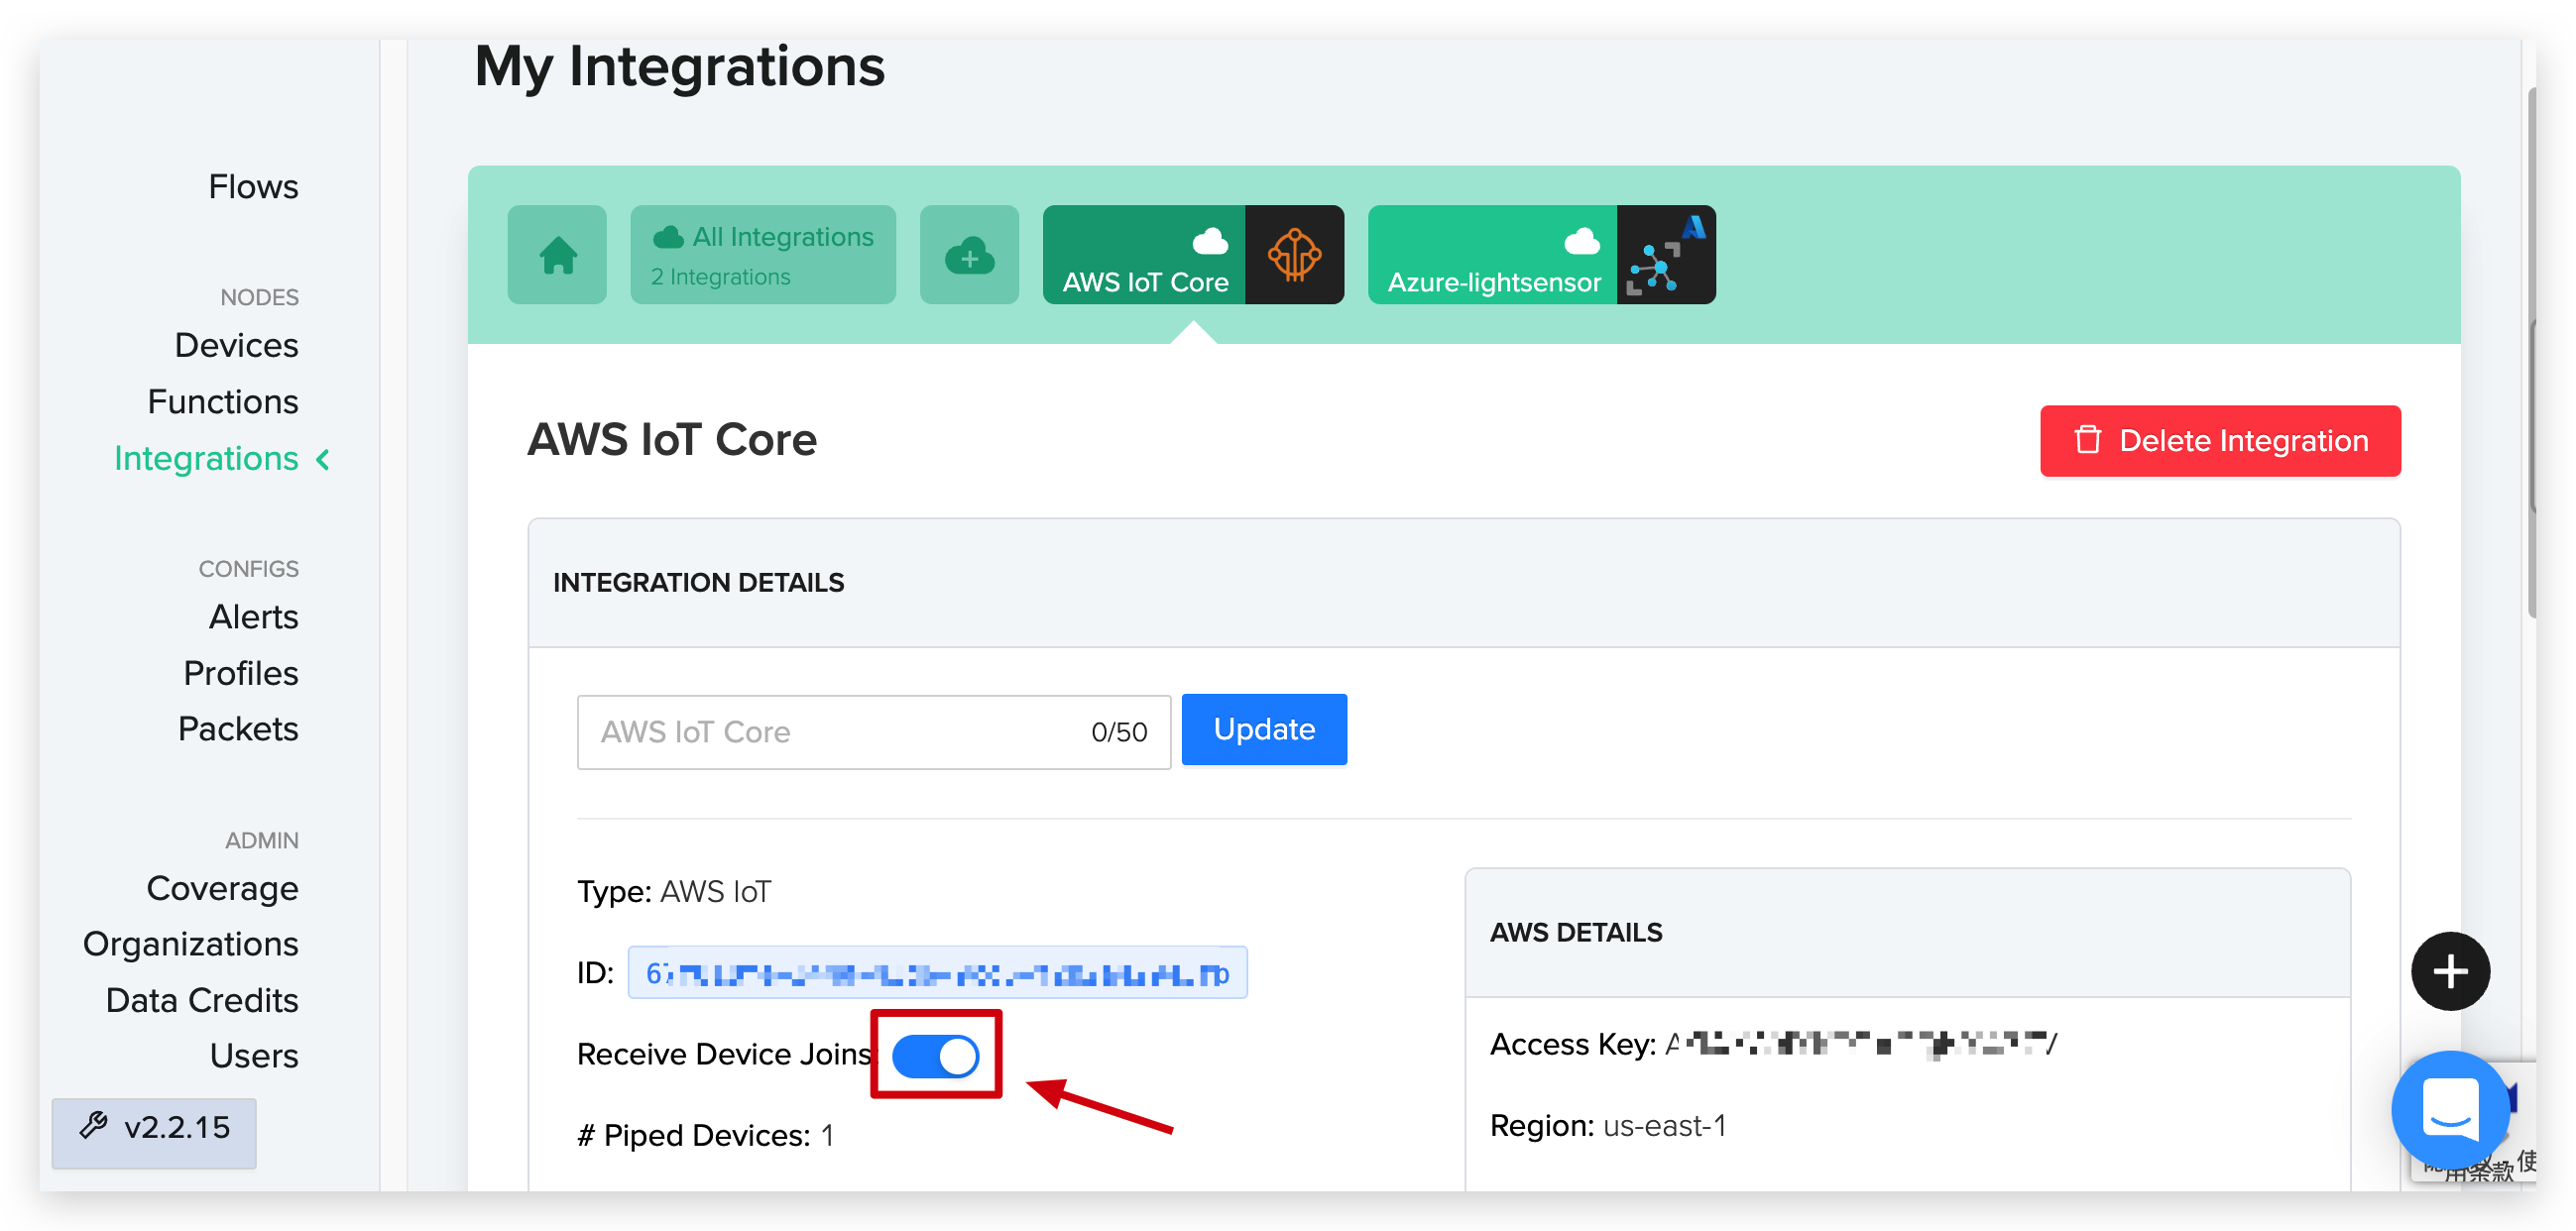
Finally, we give our new Integration a name and click Create Integration. Your new Integration is now ready for use.
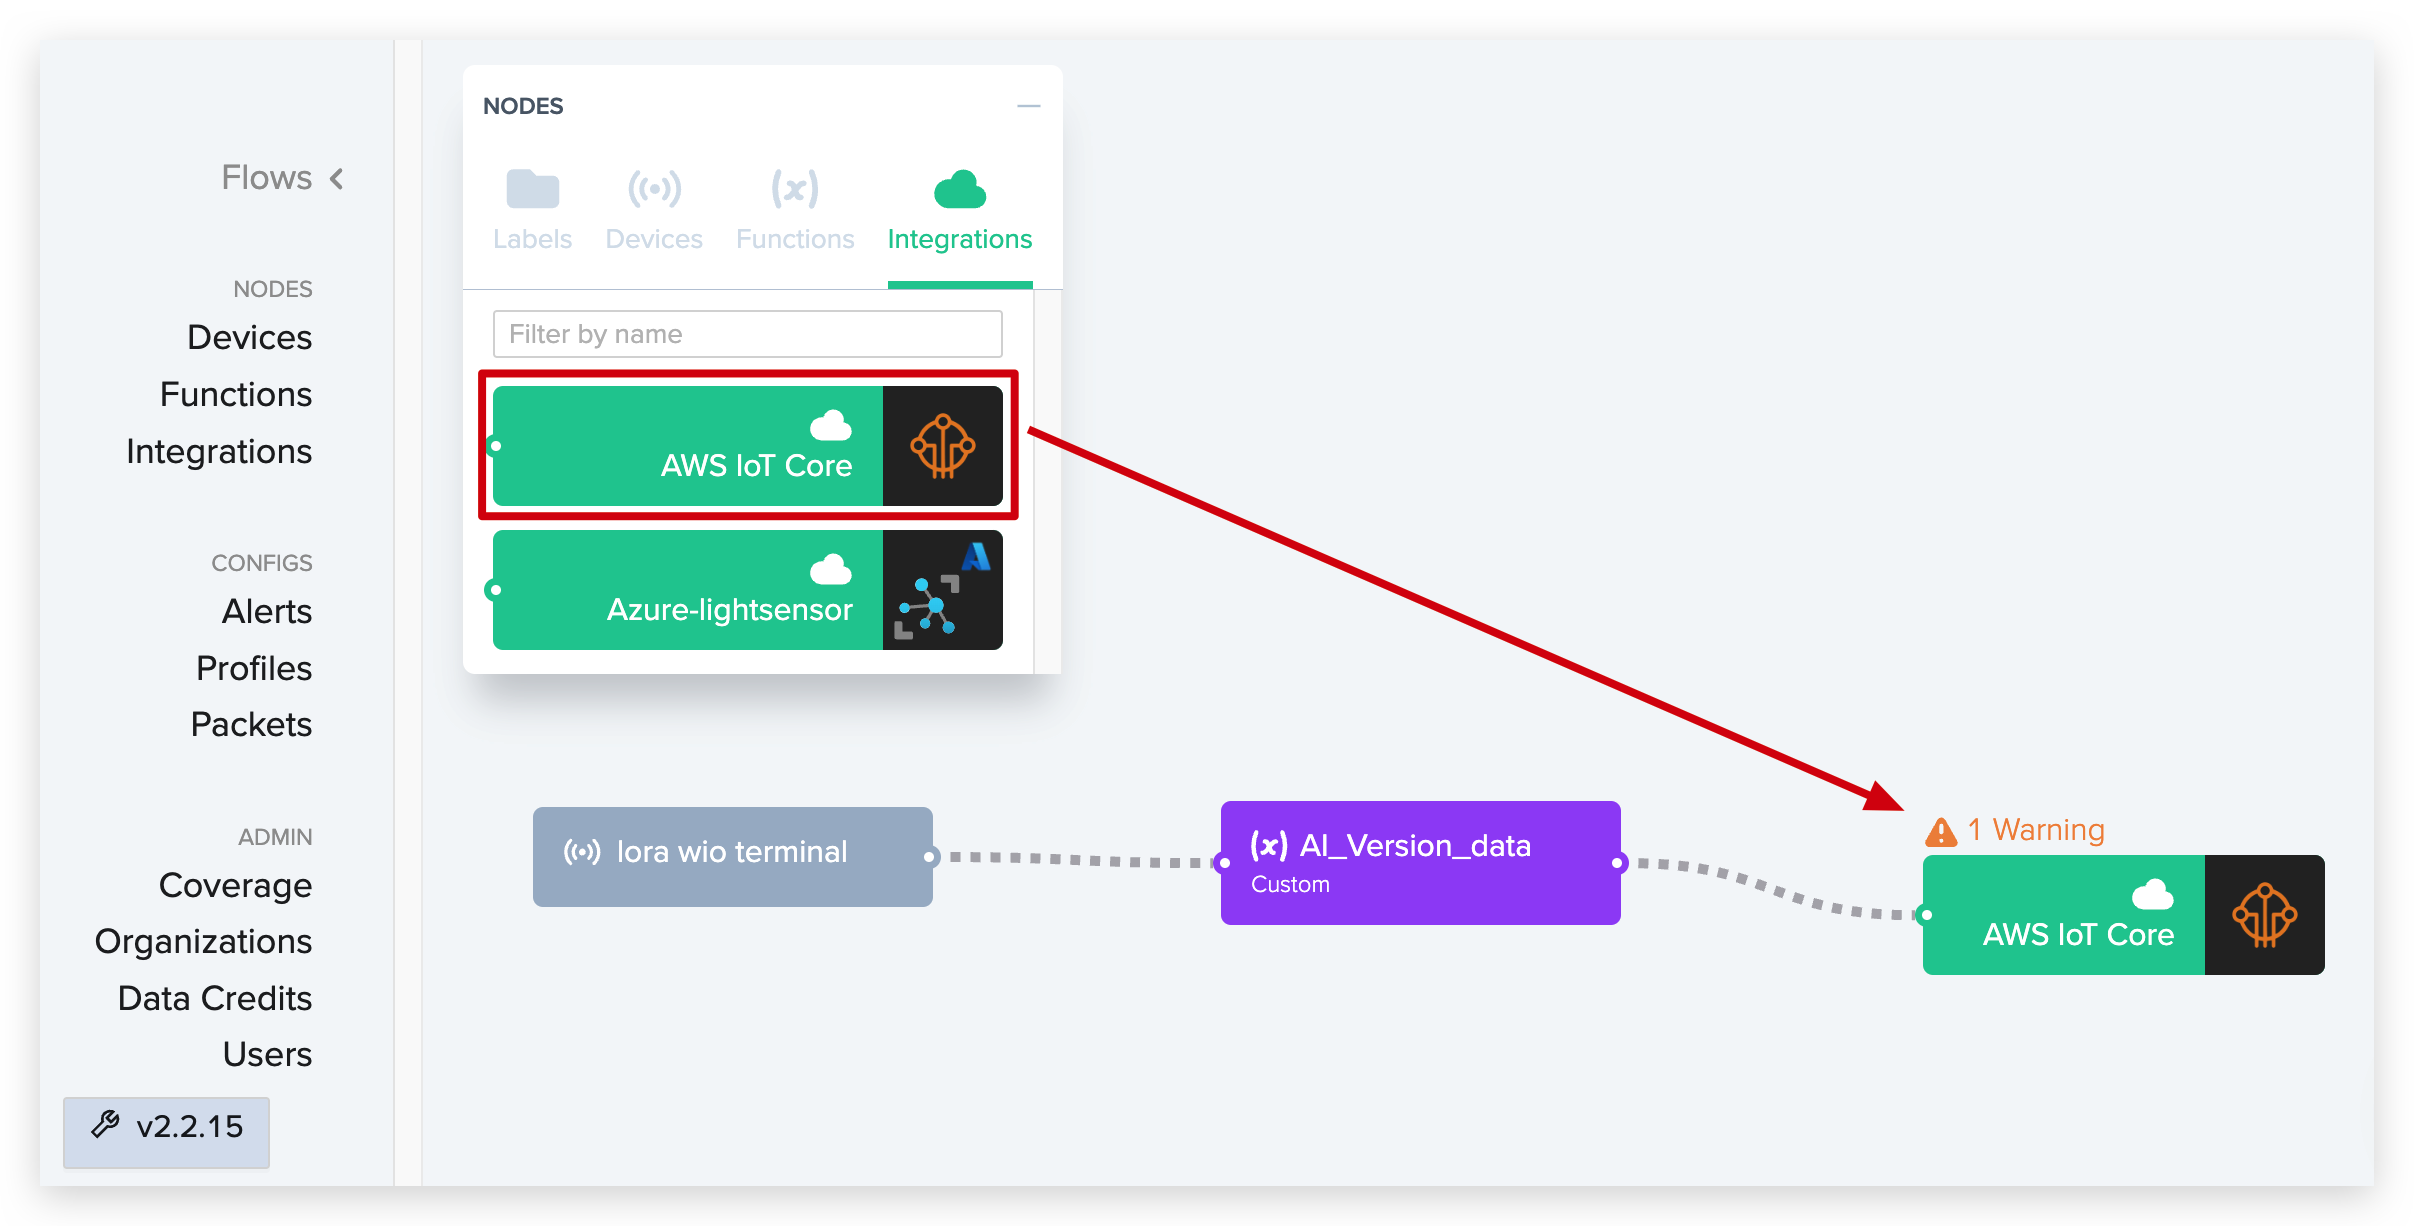
Connecting Integrations to Devices
Now, use the click and drag interface in the Helium Console to connect the device to the function (Decoder) to the AWS IoT Core as shown previously.
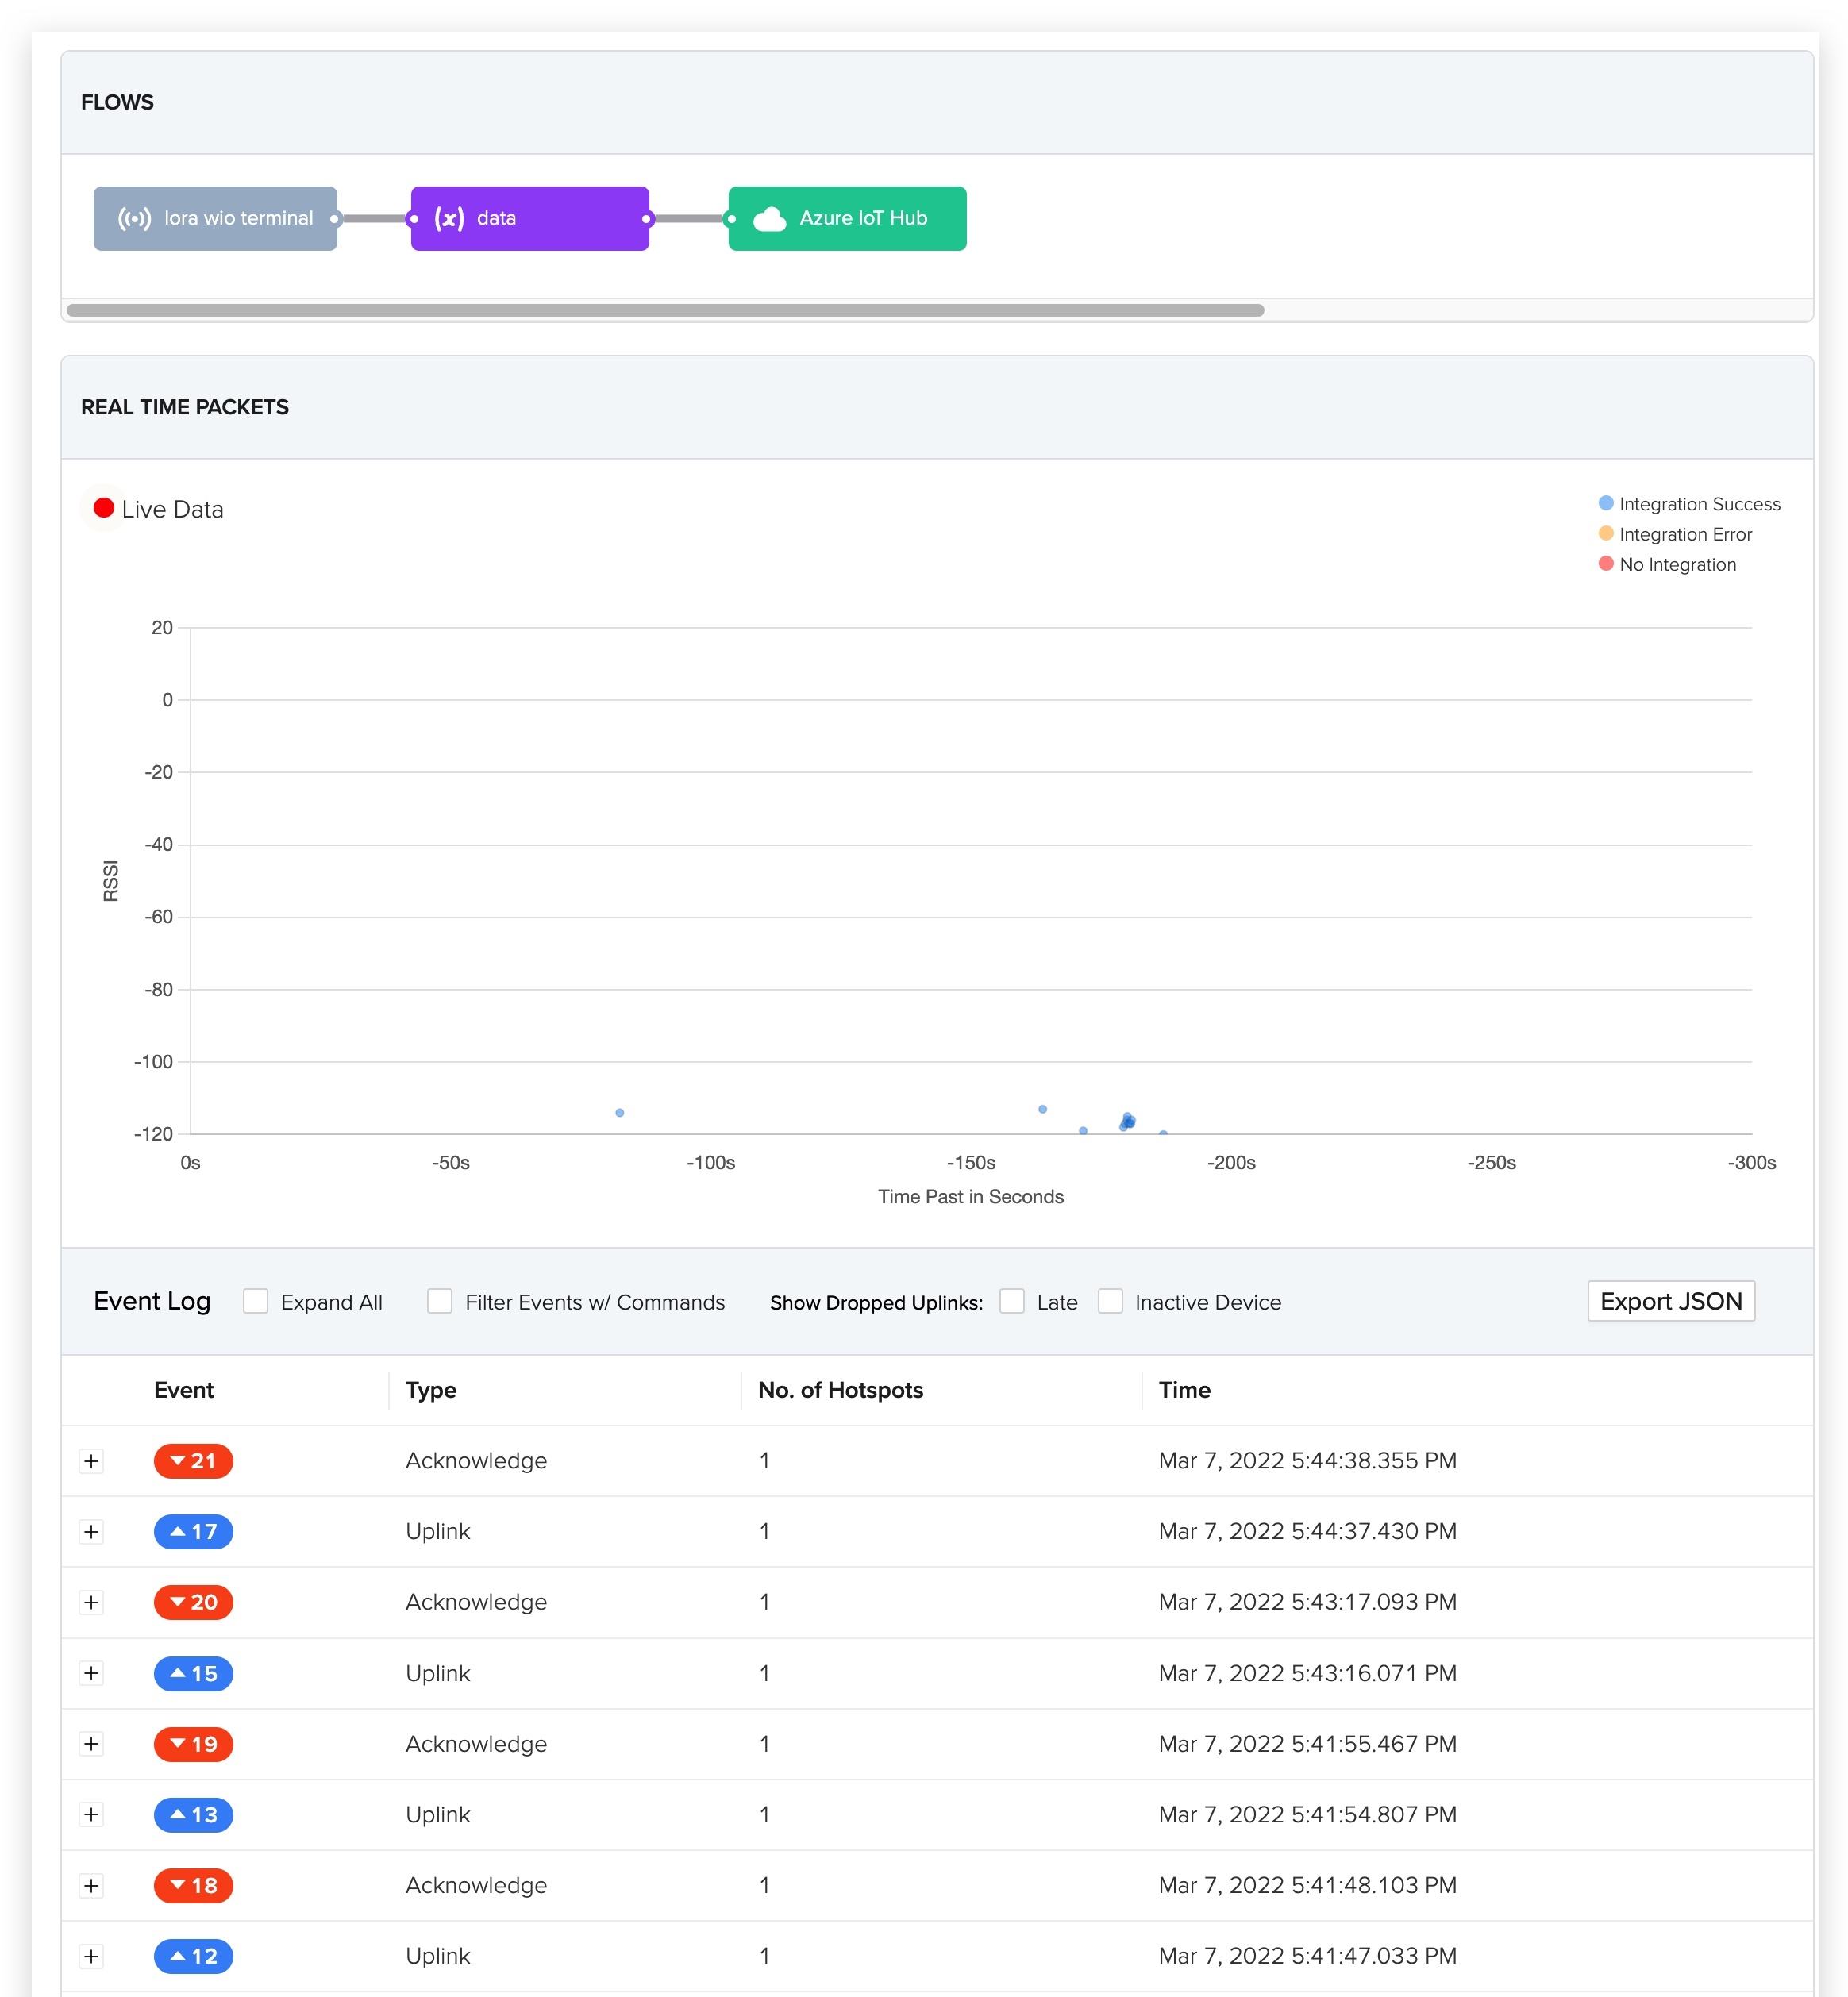
At this point, follow the previous steps to upload the code again, and Wio Terminal will reconnect to Helium and upload the data.
We can also find out about the success of sending data by checking the data returned by the serial monitor.
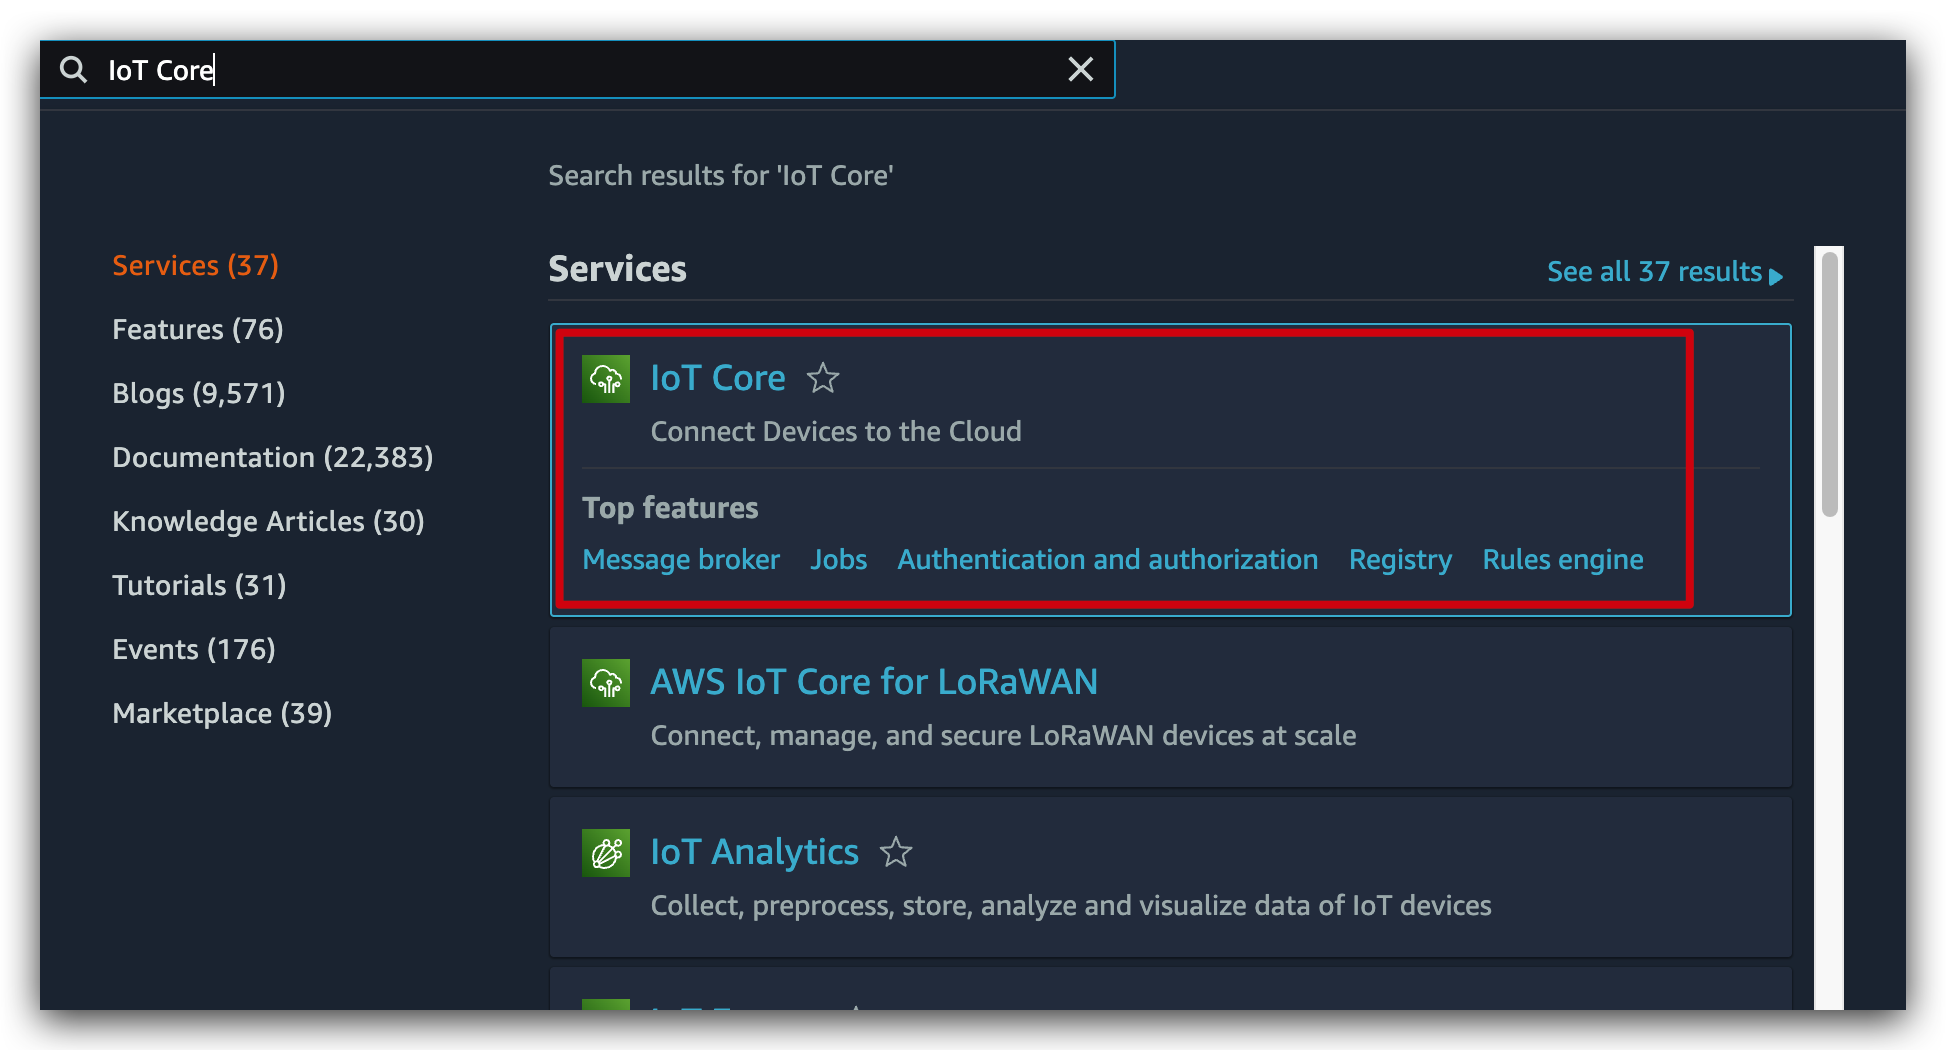
In the AWS IoT Core console, search for IoT Core to access the data management interface.
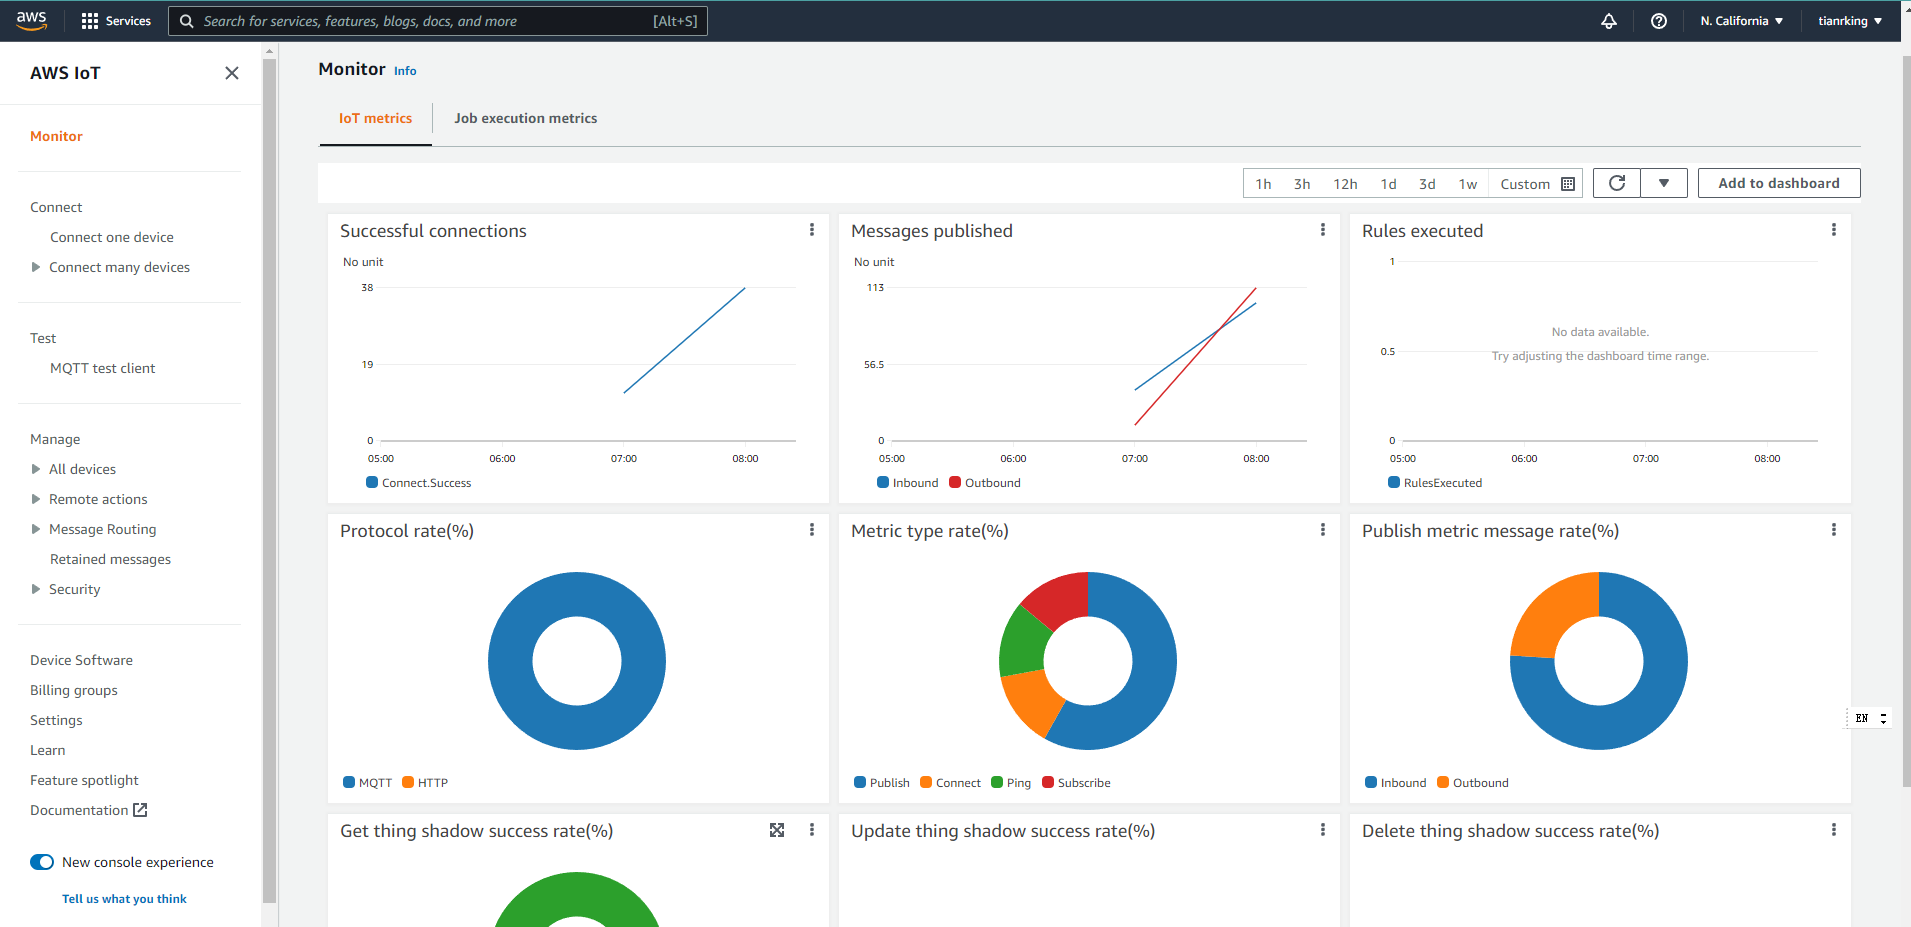
- In the Monitor panel you can see and set up a number of data detection panels to see more visually how the sensor data is being received.
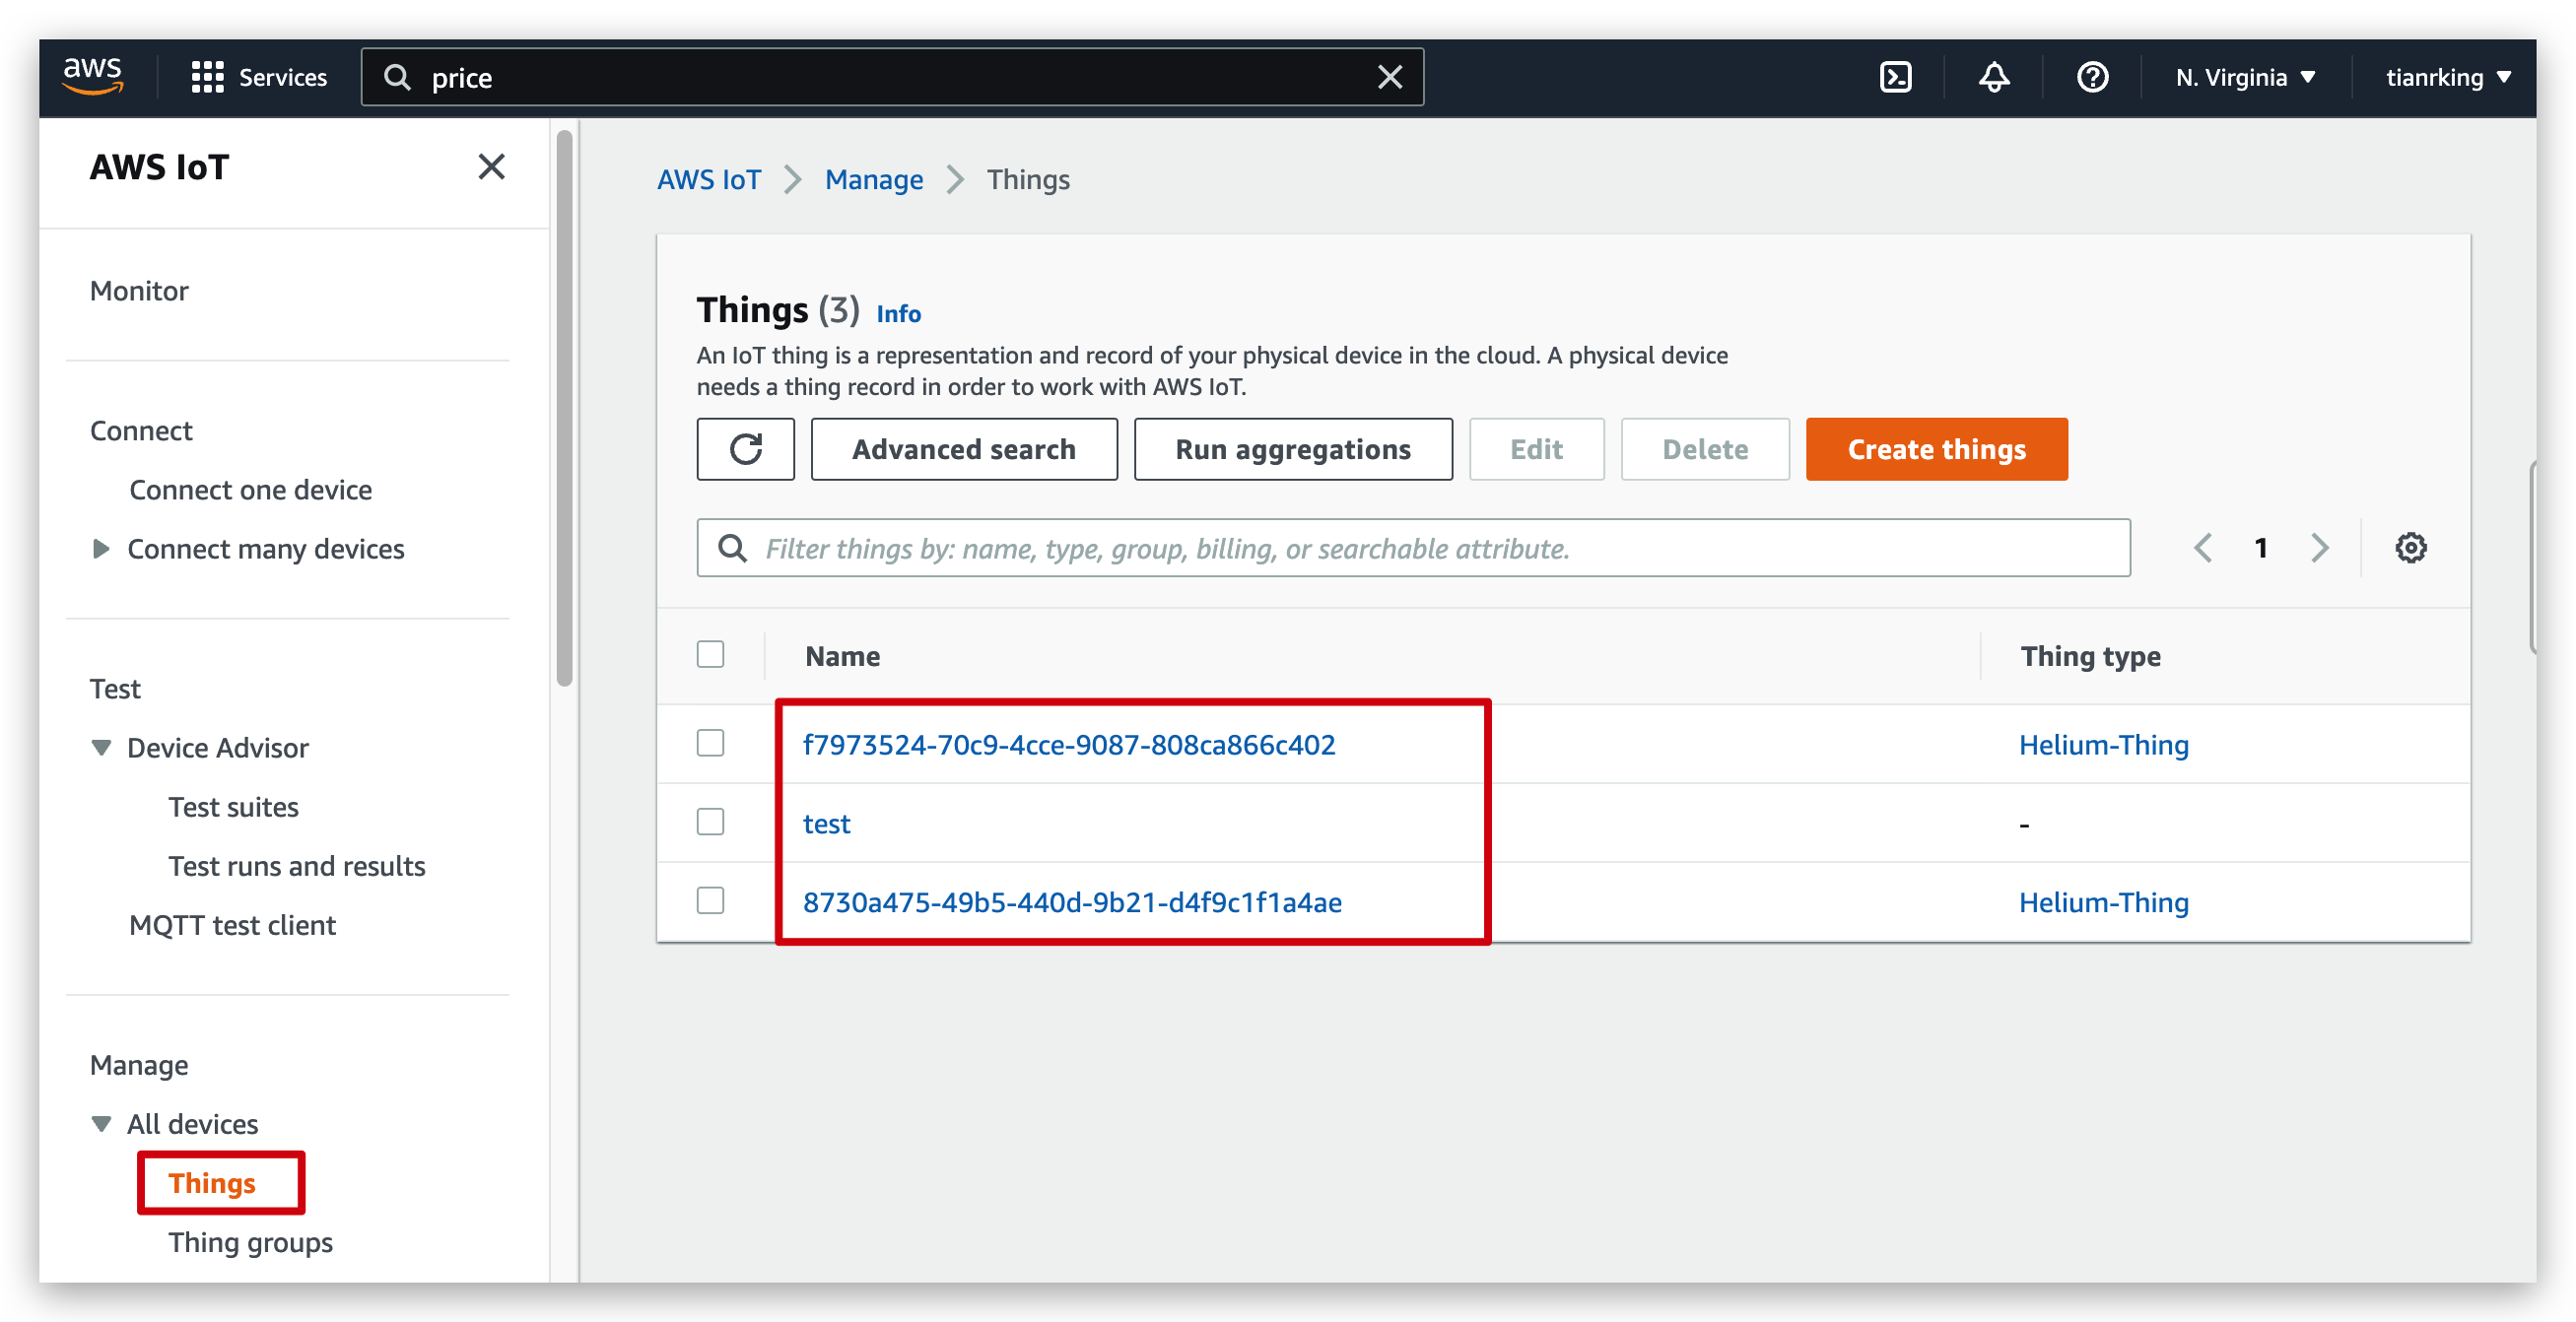
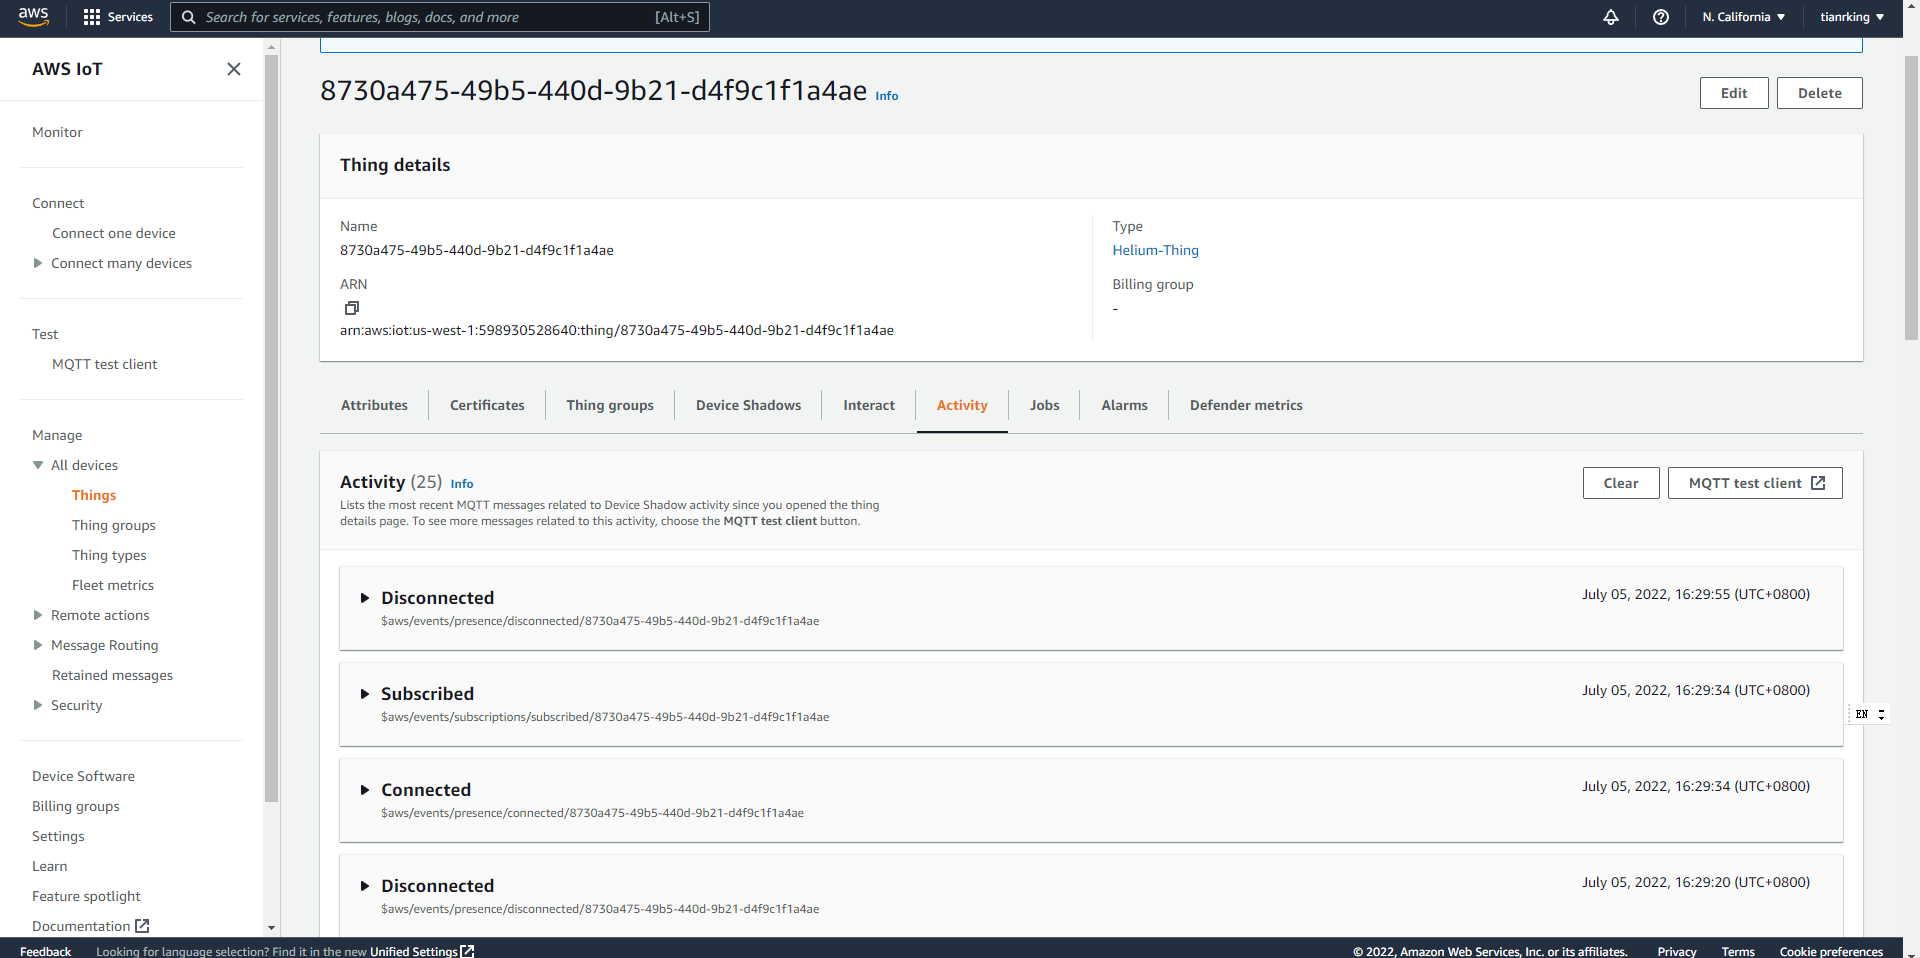
- In AWS IOT core -> All devices -> Things you can see the ID information of the current device and also the activity status of the data in AWS IOT core -> All devices -> Things -> Activity.
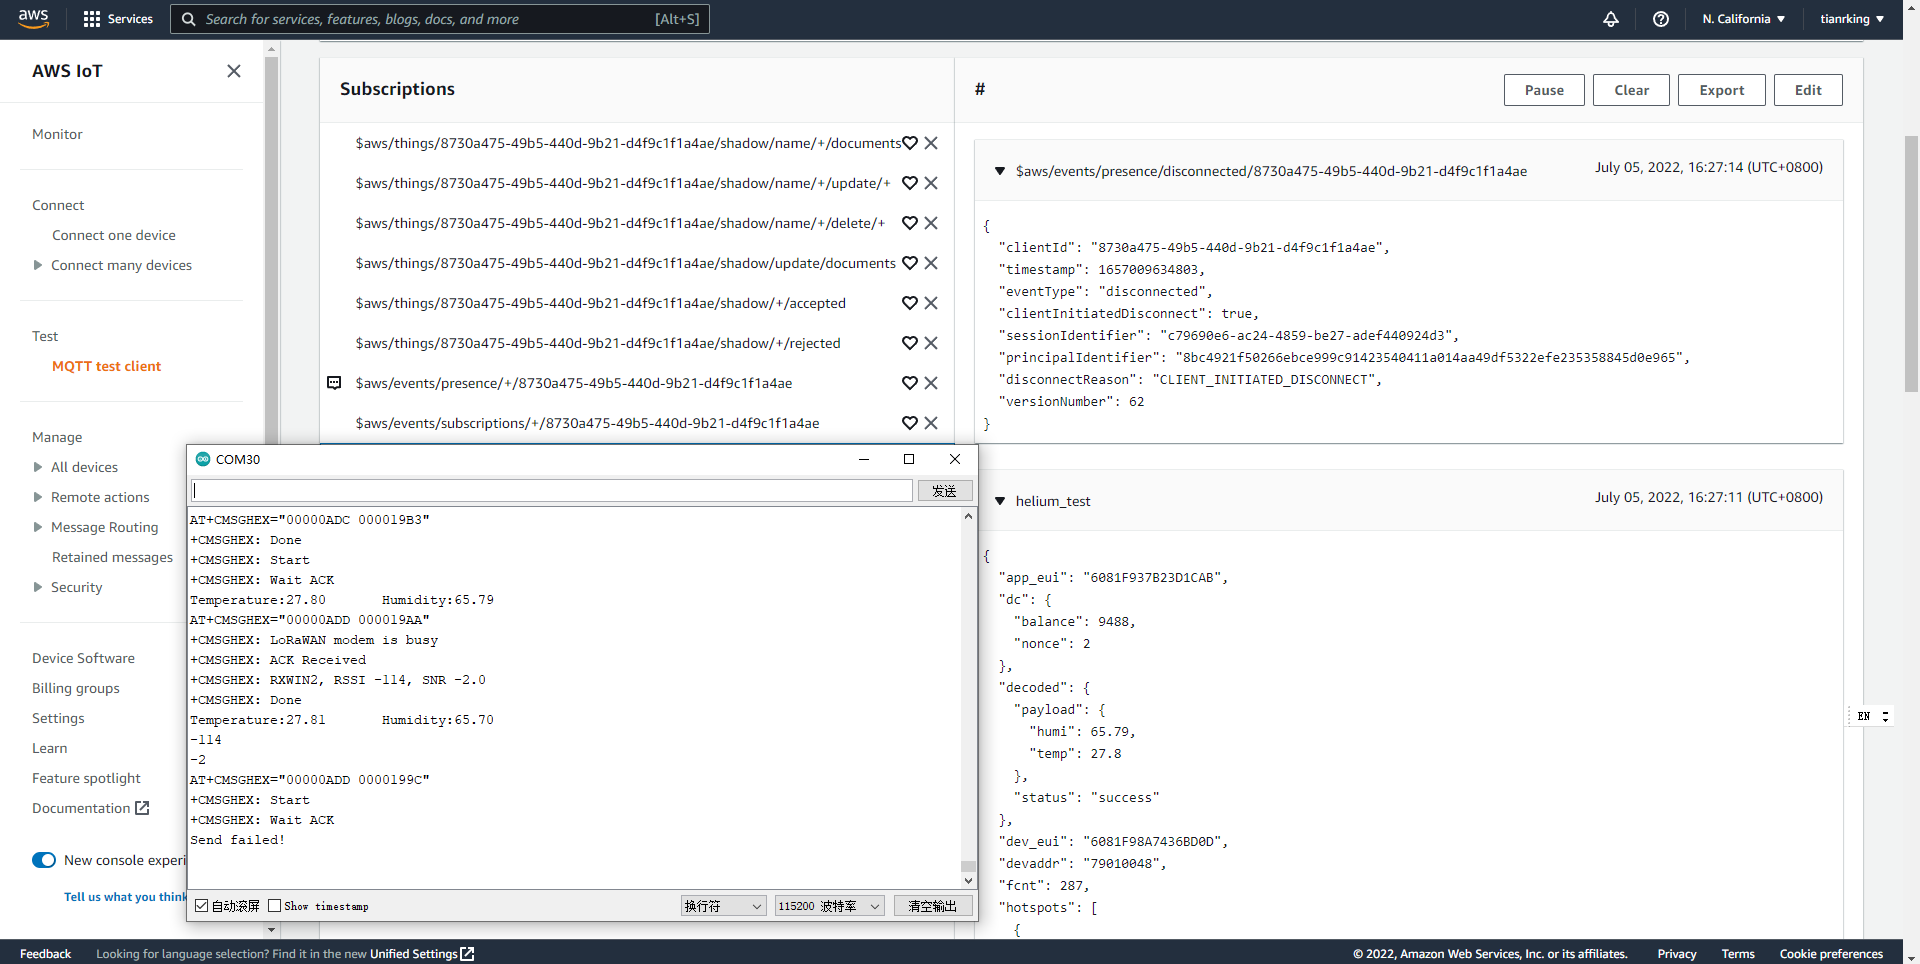
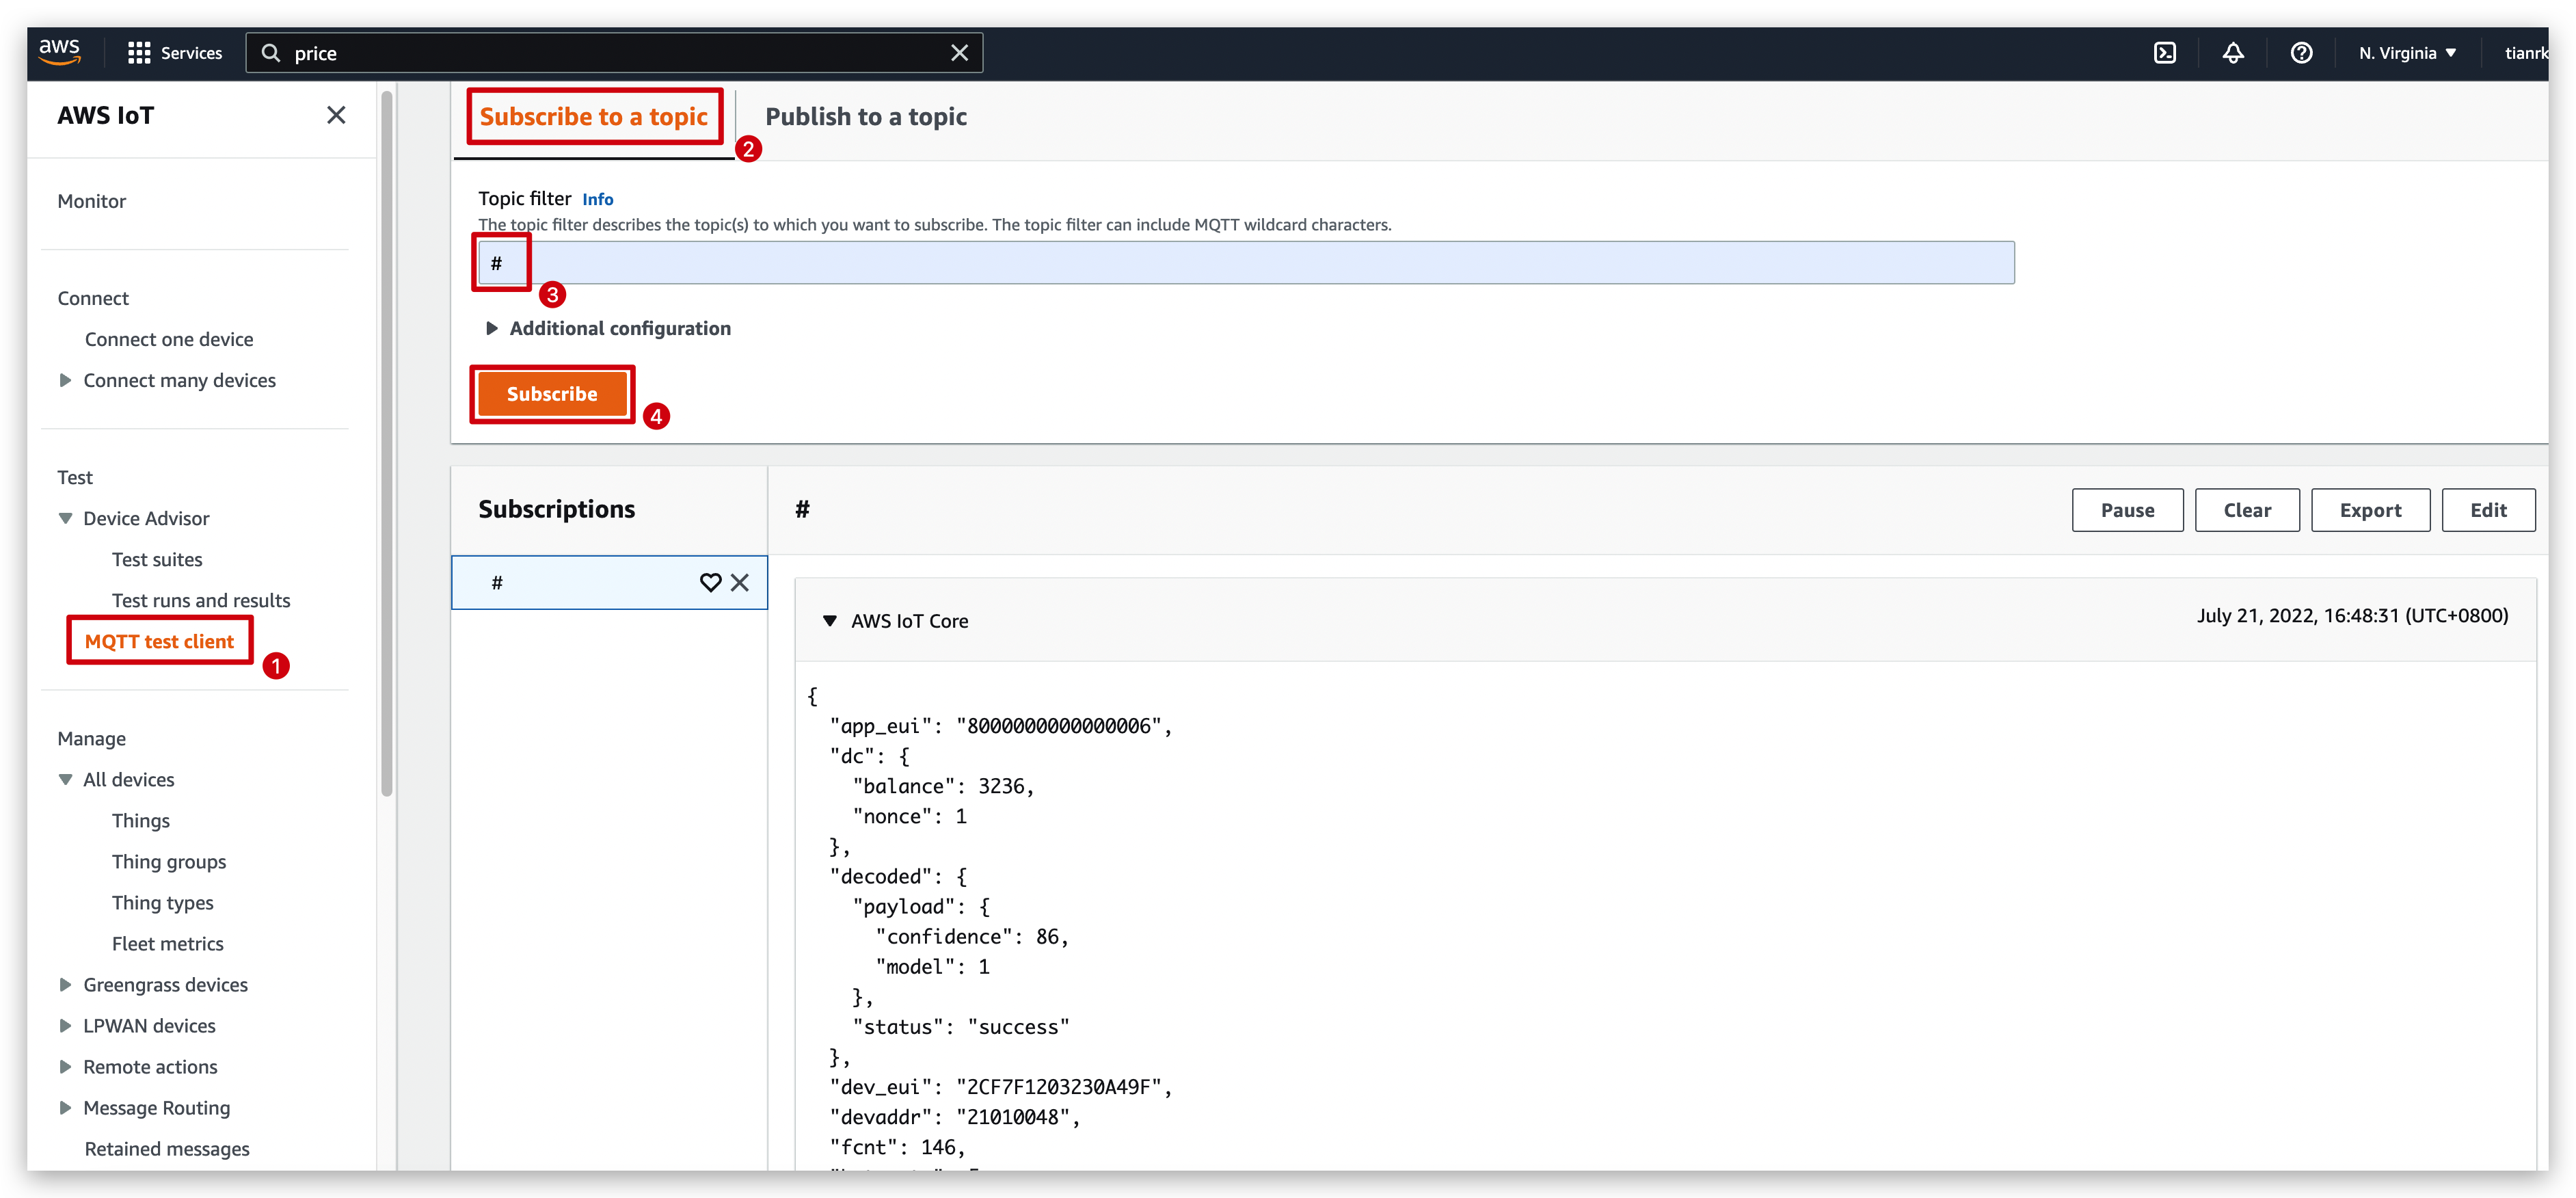
- The uplink messages for the data you can view in AWS IOT core -> MQTT test client.
In the Subscribe to a topic tab, enter the topicName to subscribe to the topic on which your device publishes. For the getting started sample app, subscribe to #, which subscribes to all message topics.
The topic message log page, # opens and # appears in the Subscriptions list. If the device that you configured in Configure your device is running the example program, you should see the messages it sends to AWS IoT in the # message log. The message log entries will appear below the Publish section when messages with the subscribed topic are received by AWS IoT.
Messages published to subscribed topics appear in the message log as they are received, with the most recent message first.
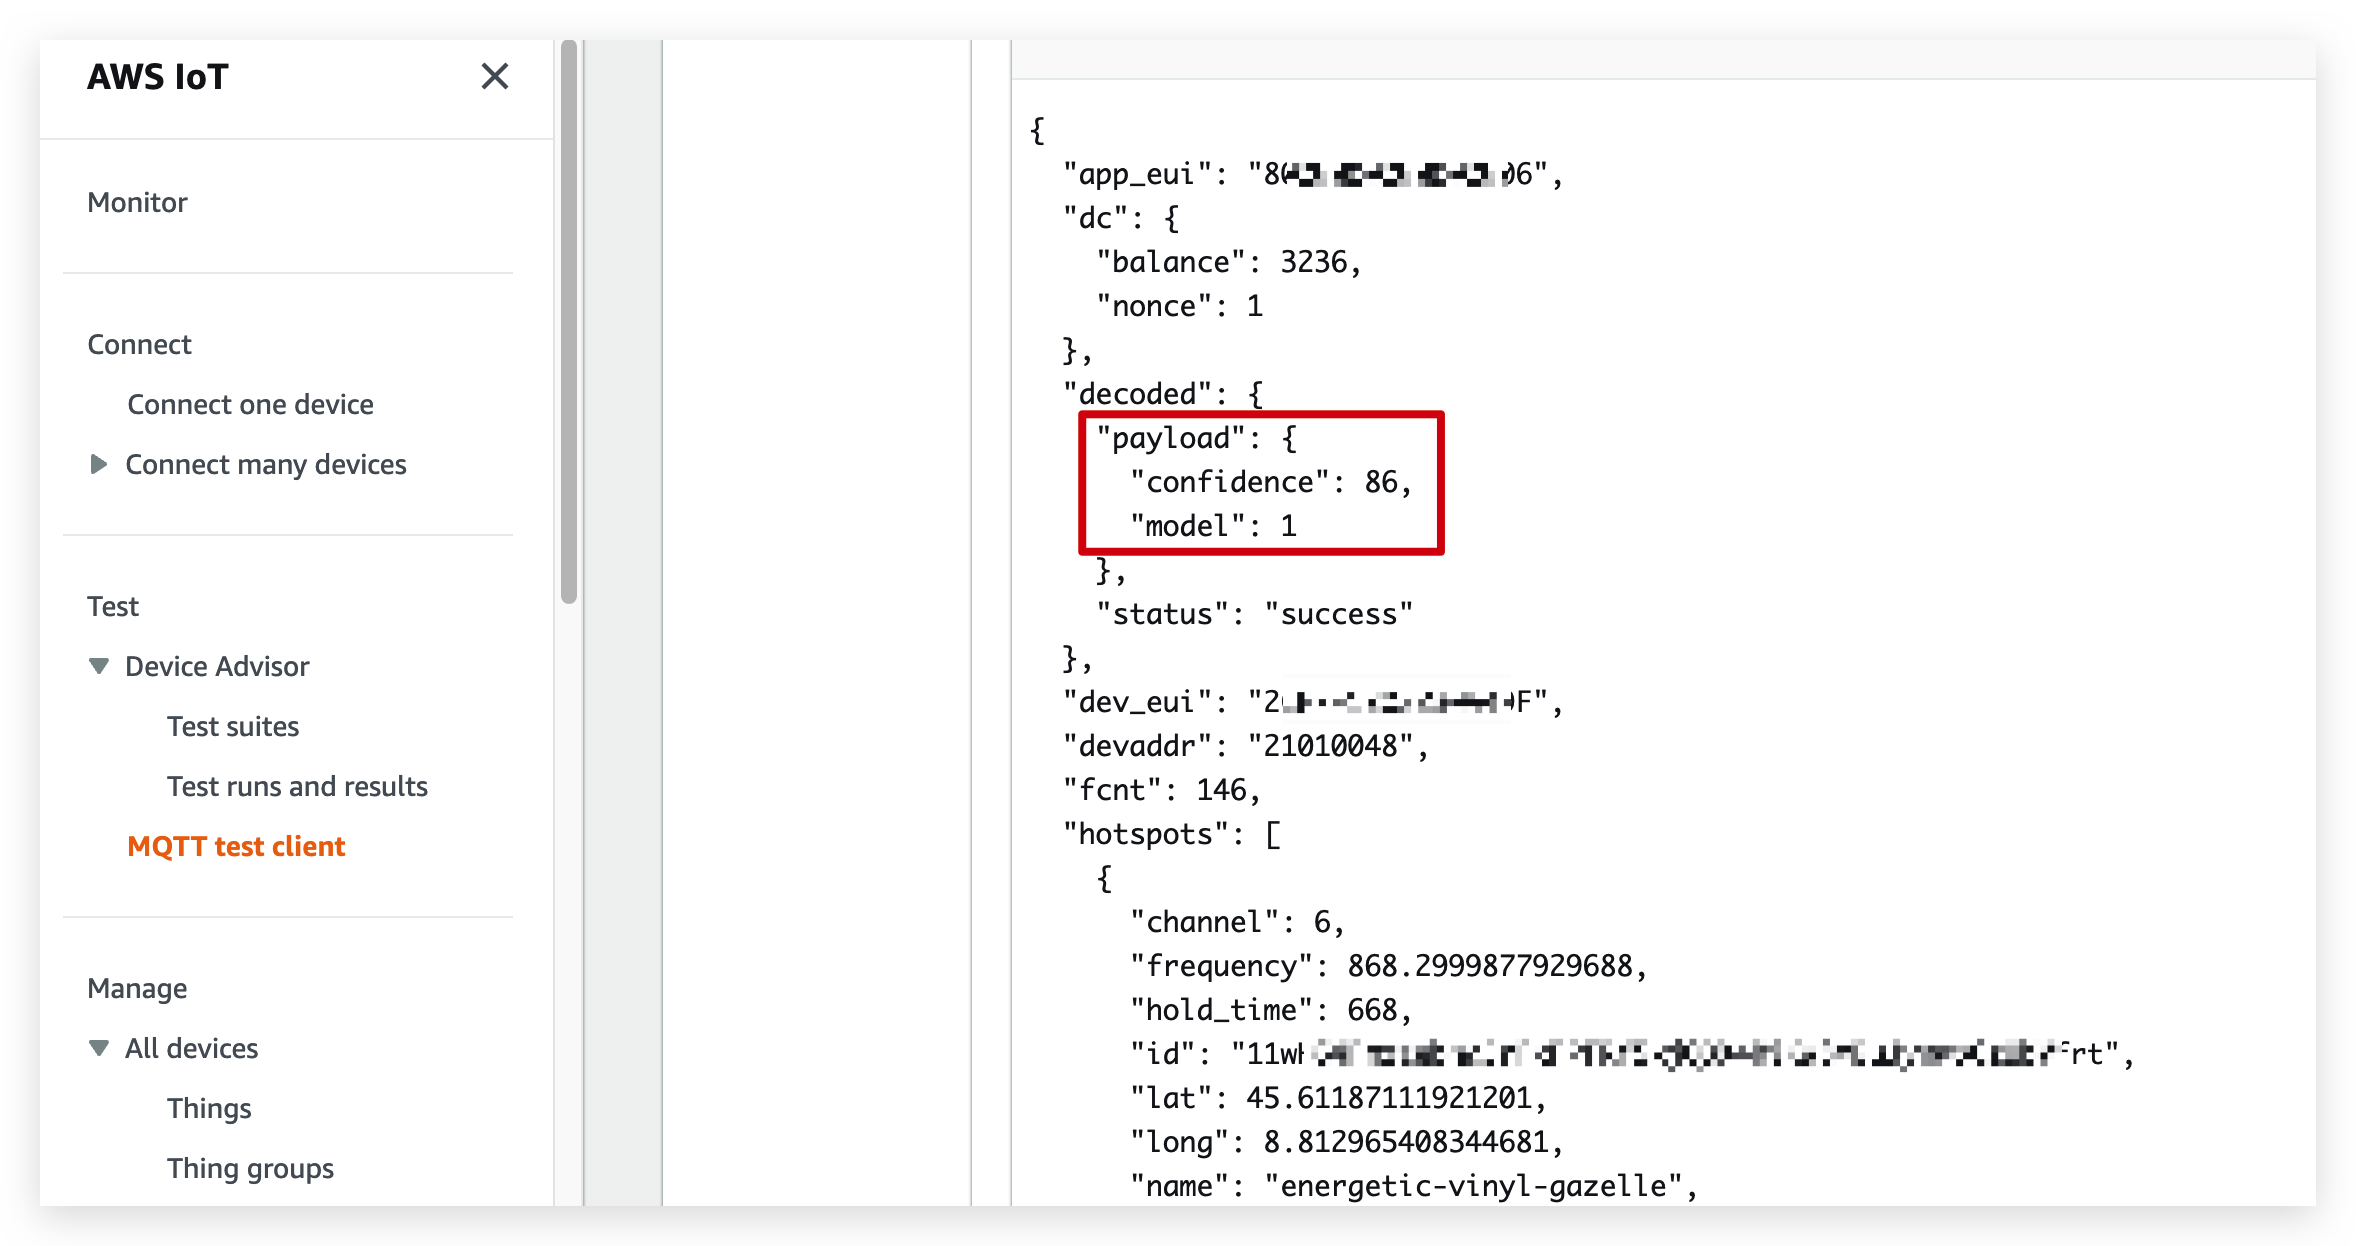
The message received is similar to the one shown below. The data that is useful to us is generally the content following the payload, which shows the values of the sensors.
At this point, we have completed the entirety of Helium's integration into AWS IoT Core. If you want to do more with your data through AWS IoT Core, you can refer to the Documentation Centre of AWS IoT Core to continue learning more in depth.
Tech Support & Product Discussion
Thank you for choosing our products! We are here to provide you with different support to ensure that your experience with our products is as smooth as possible. We offer several communication channels to cater to different preferences and needs.