Coral Mini PCIe Accelerator for ODYSSEY

Coral Mini PCIe Accelerator on ODYSSEY X86J41x5 is an M.2 module that brings the edge tpu coprocessor to existing systems and products.
The edge tpu is a small ASCI designed by google that provides high-performance ml influencing with low power requirements: it's capable of performing 4 trillion operations (tera-operations) per second (tops), using 0.5 watts for each tops (2 tops per watt). For example, it can execute state-of-the-art mobile vision models such as mobileNet v2 at almost 400 fps, in a power-efficient manner. This on-device processing reduces latency, increases data privacy, and removes the need for constant high-bandwidth connectivity.
The M.2 Accelerator is a dual-key M.2 card ( B+M keys), designed to fit any compatible M.2 slot. This form-factor enables easy integration into arm and x86 platforms so you can add local ML acceleration to products such as embedded platforms, mini-PCs, and industrial gateways.

Features
- Performs high-speed ML influencing
- Works with debian linux
- Supports tensorFlow lite
- Supports AutoML Vision Edge
Specification
| Physical specifications | Value |
|---|---|
| Dimensions | B+M key: 22.00 x 80.00 x 2.35 mm |
| Weight | B+M key: 5.8 g |
| Host interface | |
| Hardware interface | M.2 B+M key (M.2-2280-B-M-S3) |
| Serial interface | PCIe Gen2 x1 |
| Operating voltage | |
| DC supply | 3.3V +/- 10 % |
| Environmental reliability | |
| Temperature | -40 ~ 85°C(storage) -20 ~ 70° C (operating) |
| Relative humidity | 0 ~ 100% (non-condensing) |
| Mechanical reliability | |
| Op-shock | 100 G, 11ms (persistent)1000 G, 0.5 ms (stress)1000 G, 1.0 ms (stress) |
| Op-vibe (random) | 0.5 Grms, 5 - 500 Hz (persistent)3 Grms, 5 - 800 Hz (stress) |
| Op-vibe (sinusoidal) | 0.5 Grms, 5 - 500 Hz (persistent)3 Grms, 5 - 800 Hz (stress) |
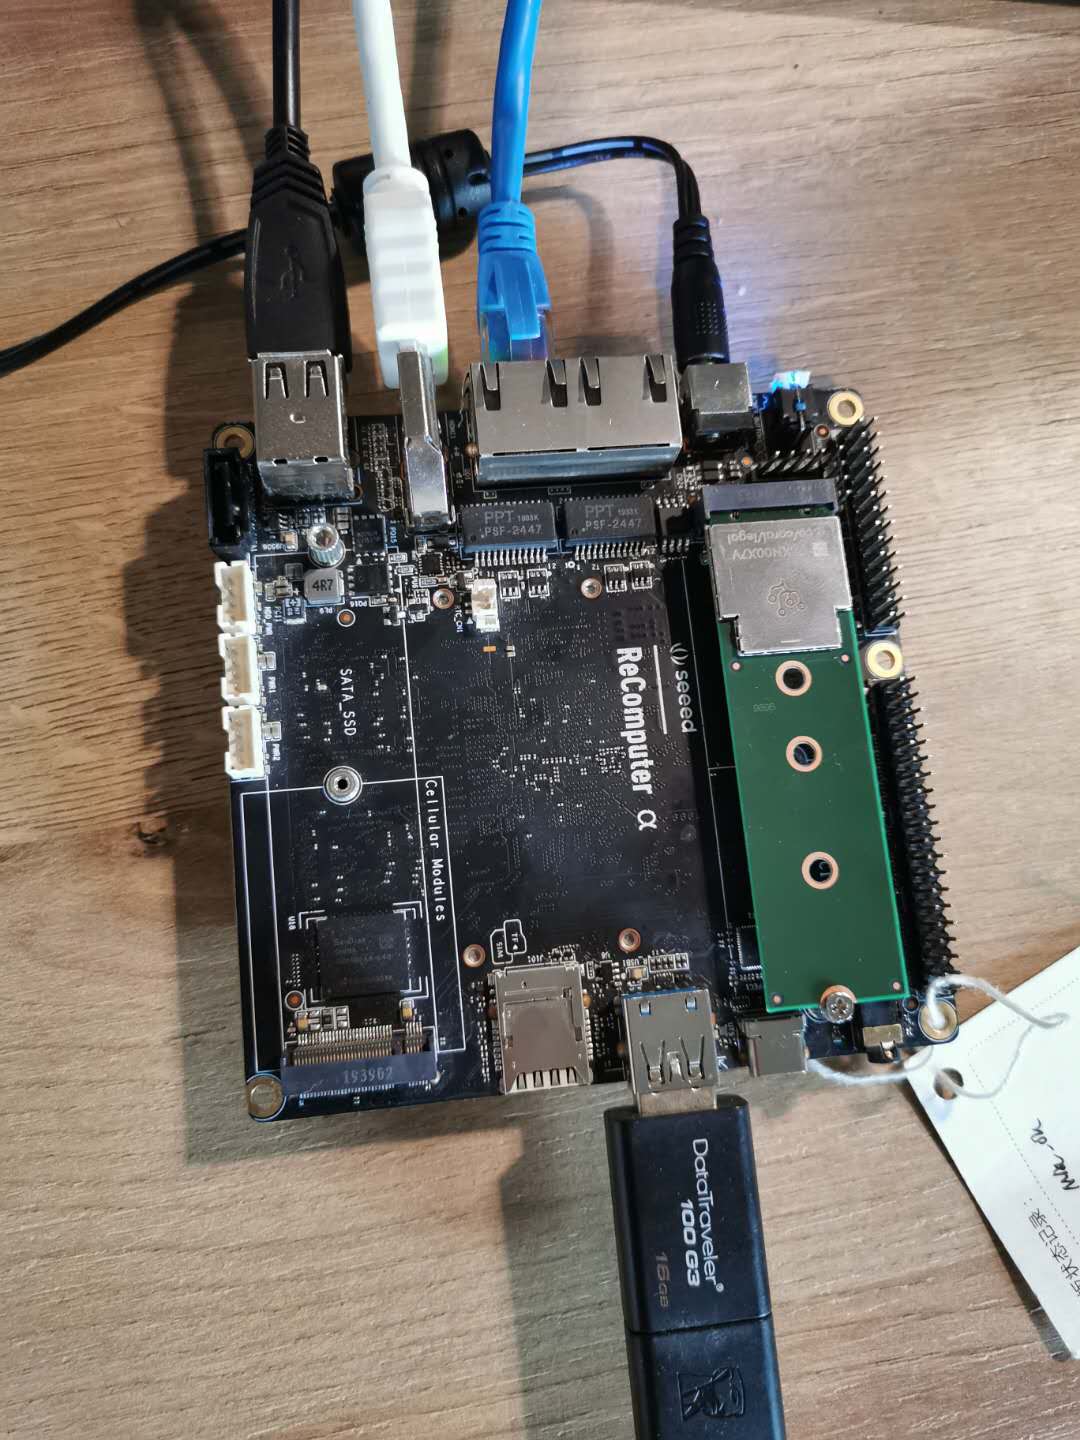
Hardware Overview
Getting Started
play with ODYSSEY - X86J4105
Materials required
| Coral Mini PCIe Accelerator | ODYSSEY X86J41x5 |
|---|---|
|  |
| Get ONE Now | Get ONE Now |
Hardware Connection
The steps of hardware connection is very simple.
- Step 1. Connecting Coral Mini PCIe Accelerator to the ODYSSEY - X86J41x5.
- Step 2. Connecting the power to the ODYSSEY - X86J41x5.
- Step 3. Connecting the power and display to the ODYSSEY - X86J41x5.
- Step 4. Connecting the keyboard and mouse to the ODYSSEY - X86J41x5.
- Step 5. If you have a network cable, please connect it to you ODYSSEY - X86J41x5.
Software
After we finished hardware connection,the next step is to solve software problems. Here I'll tell you a few installation steps: install PCIe driver, edge tpu runtime, and the tensorFlow Lite runtime.
At first, what you need is a linux computer, please follow the step.
-
You can choose x86-64, ARMv7 (32-bit), or ARMv8 (64-bit) system .
Please refer to how to create a bootable USB drive and install Linux OS(Ubuntu Desktop 18.04) onto the ODYSSEY - X86J41x5.
-
An available Coral Mini PCIe Accelerator on ODYSSEY X86J41x5
-
Debian 6.0 Linux distribution or higher, or any derivative thereof (such as Ubuntu 10.0+)
-
Python 3.5 or higher
After you successfully make the U disk boot disk and install the Linux os file , you can go to the next step.
1.Install the PCIe driver
If you already installed a pre-built Apex driver, you should consider Whether the drive will result in the Edge TPU fail, because some of the drivers have bugs lead to these mistakes. So you should check it. So first follow these steps:
1.Check your linux kernel version with this command:
uname -r
If it prints 4.18 or lower, you should be okay and can skip beginning installing our pcie driver.
2.If your kernel version is 4.19 or higher, now check if you have a pre-build apex driver installed:
lsmod | grep apex
If it prints nothing, then you're okay and continue to install our pcie driver.
If it does print an apex module name, stop here and follow the workaround to disable Apex and Gasket.
Install pcie driver as follows:
-
Make sure the host system where you'll connect the module is shut down.
-
Connect the Coral PCIe module to your host system at the B Key M.2 interface(SATA_SSD M.2 interface not support the Coral module).
-
Boot the system and make sure it has an internet connection. Then add our debian package repository to your system and install our pcie driver with these commands:
echo "deb https://packages.cloud.google.com/apt coral-edgetpu-stable main" | sudo tee /etc/apt/sources.list.d/coral-edgetpu.list

curl https://packages.cloud.google.com/apt/doc/apt-key.gpg | sudo apt-key add -

sudo apt update

sudo apt-get install gasket-dkms
- If the user account you'll be using does not have root permissions, you might need to add the following udev rule, and then verify that the "apex" group exists and that your user is added to it:
   sudo sh -c "echo 'SUBSYSTEM==\"apex\", MODE=\"0660\", GROUP=\"apex\"' >> /etc/udev/rules.d/65-apex.rules"

   sudo groupadd apex

   sudo adduser $USER apex
-
Reboot the system.
-
Verify that the accelerator module is detected:
lspci -x | grep 089aYou should see something like this:
03:00.0 System peripheral: Device 1ac1:089aThe 03 number and system peripheral name might be different because those are host-system specific, but as long as you see a device listed with 089a then you're okay to proceed.
-
Verify that the pcie driver is loaded:
ls /dev/apex_0You should simply see the name repeated back:
/dev/apex_0
2. Install the edge tpu runtime
The edge tpu runtime is required to communicate with the edge tpu. You can install it on your host computer from a command line as follows:
sudo apt-get install libedgetpu1-std
Notes
Unlike the USB Accelerator, the mini pcie and M.2 accelerator do not use different runtime packages for "reduced" and "maximum" clock frequencies. Instead, these devices operate at the maximum frequency by default and perform power throttling based on thermal limits.
3. Install the TensorFlow Lite library
There are several ways you can install TensorFlow's apis, but to get started with Python, the easiest option is to install the tflite_runtime package. This package provides the bare minimum code required to run an inference with python (primarily, the Interpreter api), thus saving you a lot of disk space.
To install it, follow the TensorFlow Lite Python quickstart, and then return to this page after you run the pip3 install command.
4. Run a model using the TensorFlow Lite API
Now you're ready to run inference on the edge tpu. Follow these steps to perform image classification with our example code and model:
- Download the example code from GitHub:
   mkdir coral && cd coral

   git clone https://github.com/google-coral/tflite.git
- Download the bird classifier model, labels file, and a bird photo:
cd tflite/python/examples/classification

bash install_requirements.sh
- Run the image classifier with the bird photo (shown in figure 1):
python3 classify_image.py \
--model models/mobilenet_v2_1.0_224_inat_bird_quant_edgetpu.tflite \
--labels models/inat_bird_labels.txt \
--input images/parrot.jpg

You should see results like this:
INFO: Initialized TensorFlow Lite runtime.
----INFERENCE TIME----
Note: The first inference on Edge TPU is slow because it includes loading the model into Edge TPU memory.
11.8ms
3.0ms
2.8ms
2.9ms
2.9ms
-------RESULTS--------
Ara macao (Scarlet Macaw): 0.76562
Congrats! You just performed an inference on the edge tpu using tensorflow lite.
To demonstrate varying inference speeds, the example repeats the same inference five times. It prints the time to perform each inference and the top classification (the label ID/name and the confidence score, from 0 to 1.0). Your inference speeds might differ based on your host system.
The classify_image.py example above uses the tensorflow lite python api. To learn more about how it works, take a look at the classify_image.py source code and read about how to run inference with TensorFlow Lite.
As an alternative to using the tensorflow lite api (used above), you can use the Edge TPU Python API, which provides high-level apis to perform inference with image classification and object detection models with just a few lines of code. For example, try our other version of classify_image.py using the Edge TPU API.
You can also run inference using C++ and TensorFlow Lite.
Resources
Tech Support & Product Discussion
Thank you for choosing our products! We are here to provide you with different support to ensure that your experience with our products is as smooth as possible. We offer several communication channels to cater to different preferences and needs.