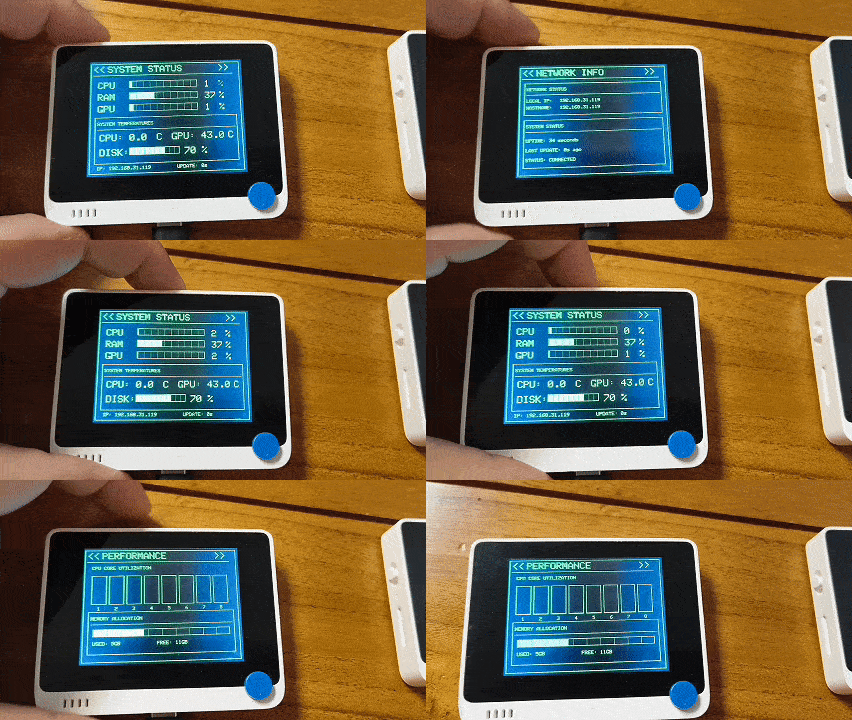
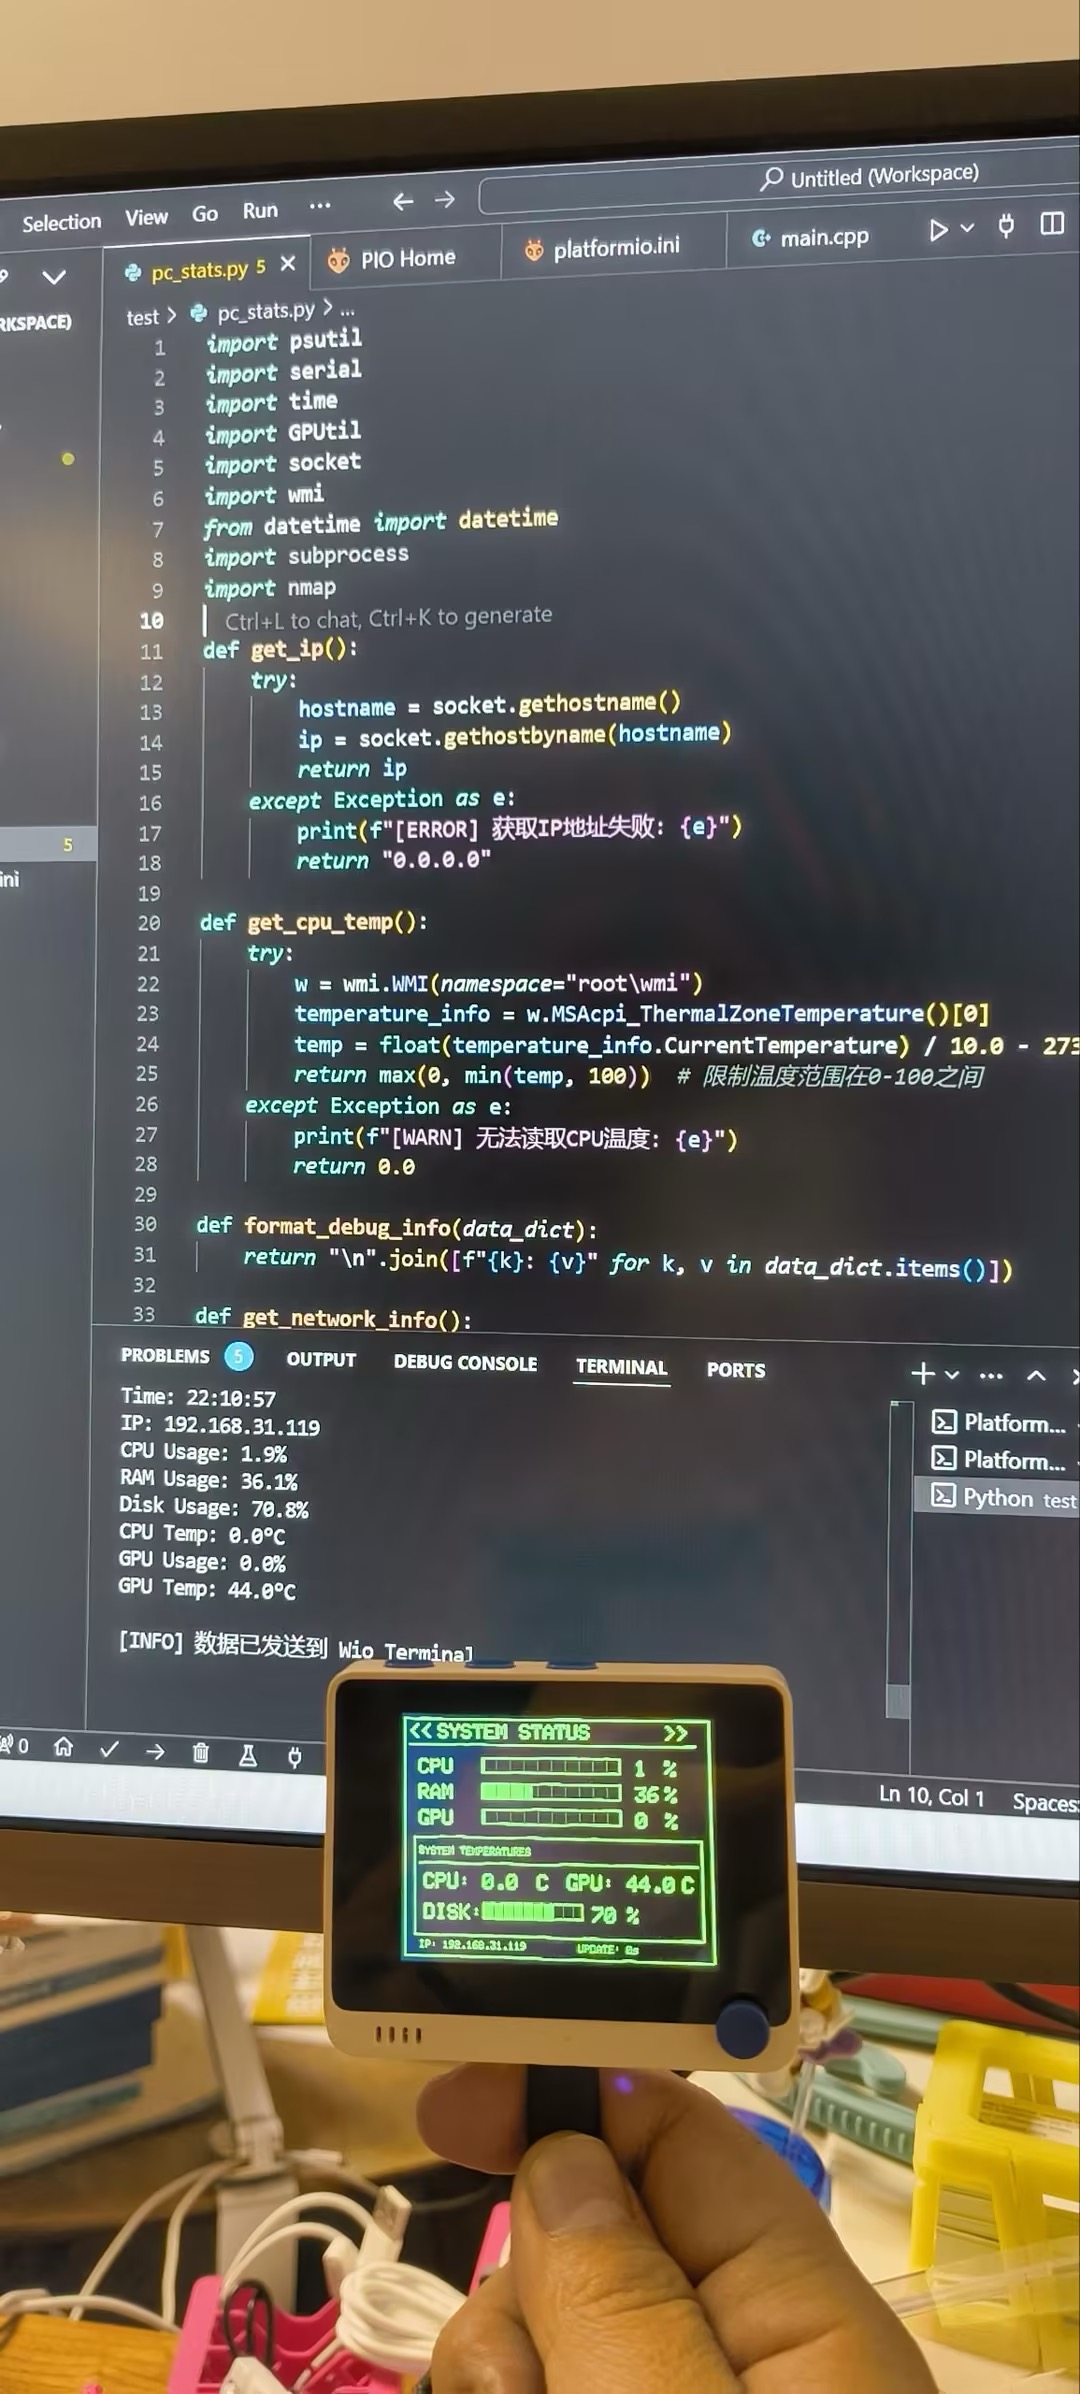
Wio Terminal PC Monitor Tutorial - Cyberpunk Style

Project Overview
Create a cyberpunk-style PC monitoring system using Wio Terminal as a display terminal to monitor various performance indicators of the computer in real time.
Hardware Requirements
- Wio Terminal
- USB-C Data Cable
- A Computer Running Windows
Software Requirements
- VSCode + PlatformIO Plugin
- Python 3.x
- Open Hardware Monitor (to retrieve temperature data)
Detailed Steps
1. Environment Setup
-
Install Python packages:
pip install psutil pyserial GPUtil wmi pywin32 -
Install VSCode plugins:
- Install PlatformIO IDE plugin
- Install and run OpenHardwareMonitor
2. Create the Project
- Create a PlatformIO project:
- Open VSCode
- Click the PlatformIO icon
- Select "New Project"
- Configuration:
- Board: "Seeed Wio Terminal"
- Framework: "Arduino"
3. Code Implementation
(a) Configure platformio.ini
[env:seeed_wio_terminal]
platform = atmelsam
board = seeed_wio_terminal
framework = arduino
lib_deps =
    [email protected]
(b) Create PC Monitoring Script (pc_stats.py)
import psutil
import serial
import time
import GPUtil
import socket
import wmi
from datetime import datetime

def get_cpu_temp():
    try:
        w = wmi.WMI(namespace="root\wmi")
        temperature_info = w.MSAcpi_ThermalZoneTemperature()[0]
        temp = float(temperature_info.CurrentTemperature) / 10.0 - 273.15
        return max(0, min(temp, 100))
    except Exception as e:
        print(f"[WARN] Unable to read CPU temperature: {e}")
        return 0.0

# Configure serial port (modify COM port as needed)
ser = serial.Serial('COM10', 115200)
while True:
    try:
        # Retrieve system data
        cpu_usage = psutil.cpu_percent()
        ram_usage = psutil.virtual_memory().percent
        cpu_temp = get_cpu_temp()
        disk_usage = psutil.disk_usage('/').percent

        # Retrieve GPU information
        try:
            gpus = GPUtil.getGPUs()
            gpu_usage = gpus[0].load * 100
            gpu_temp = gpus[0].temperature
        except:
            gpu_usage = gpu_temp = 0

        # Send data to Wio Terminal
        data = f"{cpu_usage},{ram_usage},{cpu_temp},{gpu_usage},{gpu_temp},{disk_usage},{socket.gethostbyname(socket.gethostname())}\n"
        ser.write(data.encode())
        time.sleep(0.5)

    except KeyboardInterrupt:
        ser.close()
        break
(c) Create Wio Terminal Code (main.cpp)
#include <Arduino.h>
#include "TFT_eSPI.h"

TFT_eSPI tft;
int currentPage = 0;

// Define buttons
const int BTN_1 = WIO_KEY_A;
const int BTN_2 = WIO_KEY_B;
const int BTN_3 = WIO_KEY_C;

// PC State Structure
struct PCStats {
    int cpuUsage = 0;
    int ramUsage = 0;
    float cpuTemp = 0.0;
    int diskUsage = 0;
    int gpuUsage = 0;
    float gpuTemp = 0.0;
    char ipAddress[16] = "0.0.0.0";
    unsigned long lastUpdate = 0;
} pcStats;

// Drawing Functions
void drawBox(int x, int y, int w, int h) {
    tft.drawRect(x, y, w, h, TFT_GREEN);
}

void drawTitle(const char* title) {
    tft.drawString("<<", 10, 10);
    tft.drawString(title, 40, 10);
    tft.drawString(">>", 270, 10);
    drawBox(5, 5, 310, 230);
    tft.drawLine(10, 30, 300, 30, TFT_GREEN);
}

// [Other drawing functions...]

void setup() {
    Serial.begin(115200);
    tft.begin();
    tft.setRotation(3);
    tft.setTextSize(2);

    pinMode(BTN_1, INPUT_PULLUP);
    pinMode(BTN_2, INPUT_PULLUP);
    pinMode(BTN_3, INPUT_PULLUP);

    drawPage(currentPage);
}

void loop() {
    // Receive and parse data
    if (Serial.available()) {
        String data = Serial.readStringUntil('\n');
        // Parse data...
    }

    // Button handling
    if (digitalRead(BTN_1) == LOW) {
        currentPage = 0;
        drawPage(currentPage);
        delay(200);
    }
    // [Other button handling...]

    // Update display
    if (currentPage == 0) {
        drawSystemStatus();
        delay(100);
    }
}
4. Run the Project
-
Upload the code to the Wio Terminal
-
Run OpenHardwareMonitor
-
Run the Python script:
python pc_stats.py -
Use the buttons on Wio Terminal to switch between pages:
- Button A: System Status
- Button B: Performance Monitoring
- Button C: Network Information

Customization Suggestions
- Adjust Display Style: Modify colors (e.g.,
TFT_GREEN), layout, and font size. - Add Animations: Add animated effects for a more cyberpunk feel.
- Add New Features:
- Network speed monitoring
- Disk read/write speed
- System process information
Troubleshooting
-
Serial Connection Issues:
- Check if the COM port is correct
- Confirm baud rate settings (115200)
-
Temperature Reading Issues:
- Ensure OpenHardwareMonitor is running
- Verify administrator permissions
-
Display Issues:
- Check if display coordinates exceed boundaries
- Use the
clearAreafunction to avoid ghosting
Advanced Optimization
- Add data logging functionality
- Implement warning thresholds
- Customize display themes
- Add chart displays
- Enable WiFi connectivity
This project is great for beginners and offers plenty of room for expansion. Start with the basic functionality and gradually add features you want.
Cursor AI Development Tutorial - Based on the Wio Terminal PC Monitor
1. Cursor AI Basics
1.1 Project Initialization
- Open the Cursor editor.
- Tell AI what you want to create:
"I want to create a Wio Terminal project to display PC system information in a cyberpunk style."
- The AI will help you:
- Suggest project structure
- Create necessary files
- Provide initial code
1.2 Collaboration Mode
- Describe clearly and specifically: Focus on one feature at a time.
- Provide feedback promptly: Let the AI know when you encounter issues.
2. Practical Case Study
2.1 Create Basic Display Functionality
Good prompt:
"Help me create a Wio Terminal display program to show CPU usage, memory usage, and temperature information."
- AI will provide:
- Necessary header files
- Basic code structure
- Implementation of display functions
2.2 Solve Specific Problems
Example: Fixing temperature reading issues
Good prompt:
"The CPU temperature reading is 0. How can I fix this?"
- AI’s response:
- Analyze possible causes
- Provide multiple solutions
- Show implementation examples
2.3 Optimize Display Effects
Good prompt:
"How can I optimize the display for a more cyberpunk style?"
- AI will:
- Provide design suggestions
- Implement specific code
3. Debugging Techniques
3.1 Handling Code Errors
-
When encountering compilation errors, copy the error message to AI:
"I encountered this error during compilation: [error message]"
-
AI will:
- Analyze the error cause
- Provide fixes
- Explain the solution
3.2 Handling Logic Issues
Good description:
"The numbers on the screen have ghosting when updated. How can I fix this?"
- AI’s process:
- Understand the root cause
- Suggest clear area functions
- Provide a complete solution
4. Best Practices
4.1 Asking the Right Questions
- Be Specific:
- "I want to implement [specific feature]."
- Provide Context:
- "I’ve implemented [A feature], now I want to add [B feature]."
- Describe Problems Clearly:
- "I encountered [specific issue], and the error message is [error content]."
4.2 Code Optimization
- Request Code Review:
- "Can you review this code and suggest improvements?"
- Performance Optimization:
- "This code runs slowly. How can I optimize it?"
- Code Style Improvement:
- "How can I make this code more readable and maintainable?"
4.3 Feature Expansion
- Gradual Development:
- "I want to add [new feature]. How should I start?"
- Modularization Requests:
- "How can I modularize this feature for future extensions?"
5. Common Pitfalls
5.1 What to Avoid
- Unclear Problems:
- ❌ "The code doesn’t work. What do I do?"
- Incomplete Information:
- ❌ "There’s an error. Help me fix it."
- Overly Broad Scope:
- ❌ "Help me complete the entire project."
5.2 Recommended Practices
- Clear Problem Description:
- ✅ "The CPU usage value is always 0. How can I fix this?"
- Provide Full Information:
- ✅ "I encountered this error: [complete error info]. Using library version: ..."
- Reasonable Task Division:
- ✅ "Let’s first implement the basic display, then add other features step by step."
6. Conclusion
- Gradual Development: Start with basic functionality, then add new features.
- Timely Problem Solving: Handle issues as they arise.
- Effective Communication: Clearly describe your needs and provide context.
- Continuous Optimization: Regularly review and improve your code.
By developing this project, you can see how Cursor AI significantly improves development efficiency. The key is learning how to collaborate effectively with AI. Clear questions and well-defined requirements will help you achieve better results.