DashCamNet and PeopleNet with Jetson Xavier NX Multicamera
Introduction
Nowadays, in the fields of autonomous driving, car recording and violation monitoring we often use artificial intelligence to help us identify vehicle information, vehicle license plates and surrounding obstacles. Thanks to the large number of pre-trained models provided by Nvidia NGC, we can do these complex tasks more easily.
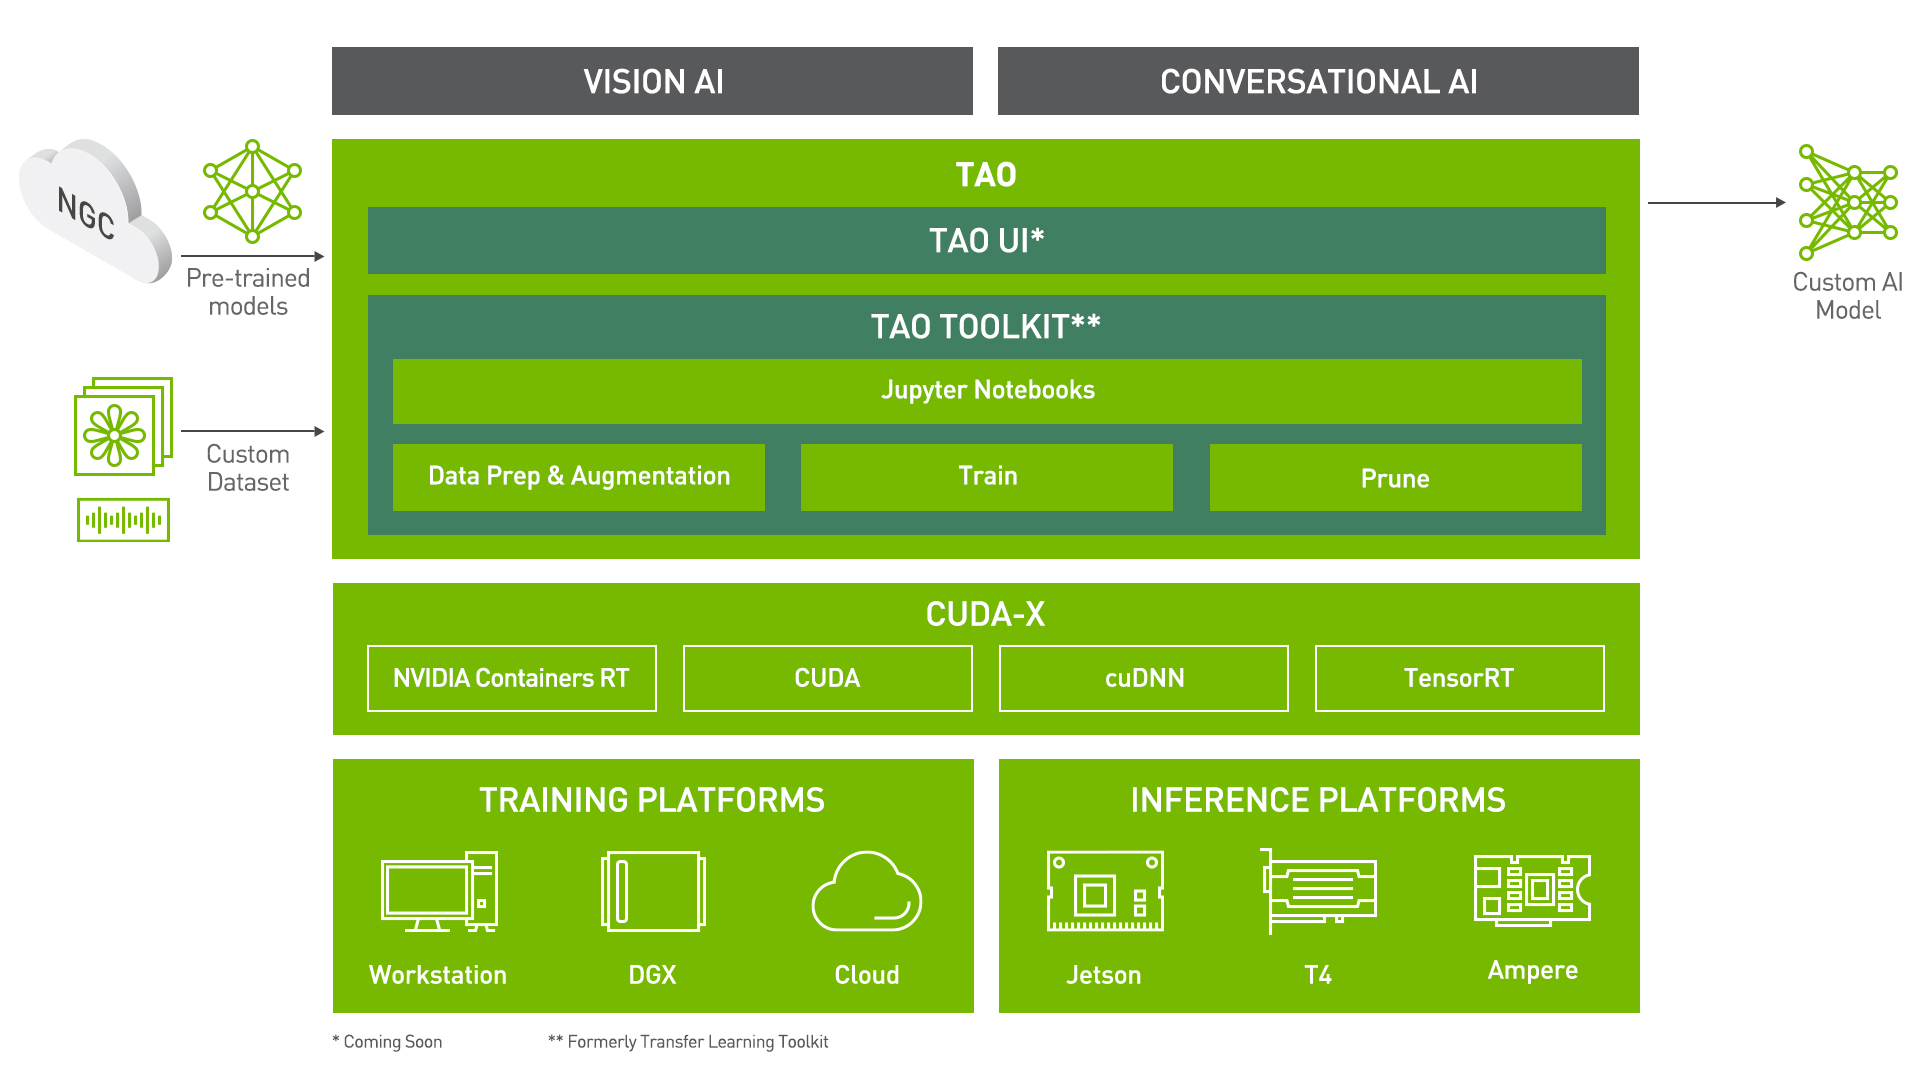
Creating an AI/machine learning model from scratch can cost you a lot of time and money. Transfer learning is a popular technique that can be used to extract learned features from an existing neural network model to a new one. The NVIDIA TAO(Train, Adapt, and Optimize) Toolkit is a CLI and Jupyter notebook based solution of NVIDIA TAO, that abstracts away the AI/deep learning framework complexity, letting you fine-tune on high-quality NVIDIA pre-trained AI models with only a fraction of the data compared to training from scratch.
The TAO Toolkit also supports 100+ permutations of NVIDIA-optimized model architectures and backbones such as EfficientNet, YOLOv3/v4, RetinaNet, FasterRCNN, UNET, and many more.
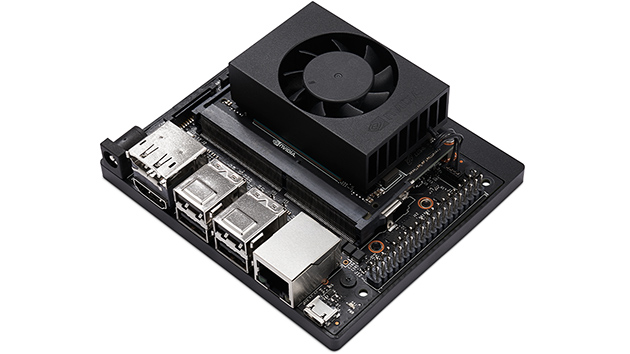
Credit to NVIDIA's repository and Tomasz's project, we are going to detect cars and people with muliticamera deployed in Jetson Xavier NX. Both Jetson SUB Mini PC are good for this demo.
NVIDIA TAO Toolkit was previously named NVIDIA Transfer Learning Toolkit(Tlt).
Materials Requirement
Hardware Setup
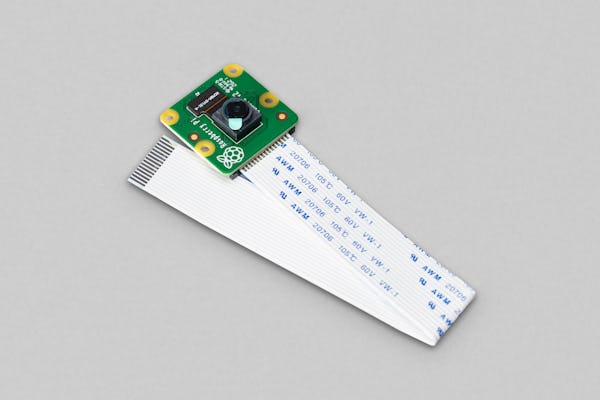
- USB Webcam / Raspberry Pi Camera V2.1 / IMX219-130 8MP cameras / High quality 12.3MP IMX477 cameras
- Display with HDMI, DP or eDP interface
- PC with Linux distribution operating system
Software Setup
- Jetpack 4.5 or 4.6 for Jetson Xavier NX
- Docker
- DeepStream
- TAO Toolkit
- Python3.6 with Pypi(python3-pip) and Virtual Environments
- NVIDIA Container Toolkit
The methods of software installation will be provided in the following steps.
Pre-installation
Before we start the project, we need to install Docker Engine on Ubuntu. There are several ways to install Docker Engine and you can choose either way depending on your needs. If you alreadly set it up, you can skip the step.
- Most users set up Docker’s repositories and install from them for the ease of installation and upgrade tasks, which is the recommended approach.
- Some users download the DEB package and install it manually and manage upgrades completely manually. This is useful in situations such as installing Docker on air-gapped systems with no access to the internet.
- In testing and development environments, some users choose to use automated convenience scripts to install Docker.
Here we are going to use the first one. Before we install the docker, it is required to ensure the version of it is latest. The names of old versions might be docker, docker.io, or docker-engine, you can check it using the following command:
sudo apt-get purge docker docker-engine docker.io containerd runc
When you uninstall the docker, the contents of /var/lib/docker/, including images, containers, volumes, and networks, all of which are preserved. If you want to start with a clean installation, you can refer to the uninstall Docker Engine section at the bottom of this page.
Install Docker using the repository
Before we install Docker Engine on a new host machine, it is required to set up the Docker repository. Afterward, we then can install and update Docker from the repository.
- Step 1. Set up the repository with
aptpackage
Update the apt package index and install packages to allow apt to use a repository over HTTPS with following commands:
 sudo apt-get update
 sudo apt-get install \
    ca-certificates \
    curl \
    gnupg \
    lsb-release
Add Docker’s official GPG key:
curl -fsSL https://download.docker.com/linux/ubuntu/gpg | sudo gpg --dearmor -o /usr/share/keyrings/docker-archive-keyring.gpg
Use the following command to set up the stable repository. To add the nightly or test repository, add the word nightly or test (or both) after the word stable in the commands below. You can Learn about nightly and test channels here.
 echo \
  "deb [arch=$(dpkg --print-architecture) signed-by=/usr/share/keyrings/docker-archive-keyring.gpg] https://download.docker.com/linux/ubuntu \
  $(lsb_release -cs) stable" | sudo tee /etc/apt/sources.list.d/docker.list > /dev/null
- Step 2. Install the Docker Engine
Update the apt package index, and install the latest version of Docker Engine and containerd with following commands:
 sudo apt-get update
 sudo apt-get install docker-ce docker-ce-cli containerd.io
We can verify whether the Docker Engine is installed correctly by running the hello-world image.
sudo docker run hello-world
- Step 3. Manage Docker as a non-root user with following processes.
Create the docker group.
sudo groupadd docker
Add the user into the docker group.
sudo usermod -aG docker $USER
Log out and log back in to reevaluate the group membership.
Verify that you can run docker commands without sudo by running hello-world
docker run hello-world
- Step 4. Set up the NVIDIA Container Toolkit with following processes:
Setup the stable repository and the GPG key:
distribution=$(. /etc/os-release;echo $ID$VERSION_ID) \
   && curl -s -L https://nvidia.github.io/nvidia-docker/gpgkey | sudo apt-key add - \
   && curl -s -L https://nvidia.github.io/nvidia-docker/$distribution/nvidia-docker.list | sudo tee /etc/apt/sources.list.d/nvidia-docker.list
Update the package listing and install the nvidia-docker2 package (and dependencies):
sudo apt-get update
sudo apt-get install -y nvidia-docker2
Restart the Docker daemon to complete the installation after setting the default runtime:
sudo systemctl restart docker
Getting Started
Install NVIDIA GPU Cloud CLI ARM64 Linux
NVIDIA GPU Cloud (NGC) CLI is a Python-based command-line interface for managing Docker containers in the NGC Container Registry. With NGC CLI, you can perform many of the same operations that are available from the NGC website, such as running jobs and viewing Docker repositories within your organization and team space.
- Step 1. Move to the Download CLI page and download the zip file that contains the binary. The NGC CLI binary for ARM64 is supported on Ubuntu 18.04 and later distributions.

- Step 2. Transfer the zip file to a directory where you have permissions and unzip it and finally execute the binary.
You can also download, unzip, and install from the command line by moving to a directory where you have execute permissions and then running the following command:
wget -O ngccli_arm64.zip https://ngc.nvidia.com/downloads/ngccli_arm64.zip && unzip -o ngccli_arm64.zip && chmod u+x ngc
Check the binary's md5 hash to ensure the file wasn't corrupted during download:
md5sum -c ngc.md5
- Step 3. Add your current directory to path:
echo "export PATH=\"\$PATH:$(pwd)\"" >> ~/.bash_profile && source ~/.bash_profile
You must configure NGC CLI for your use in order to run the commands.
- Step 4. Enter the following command, including your API key when prompted:
ngc config set
NGC API key Generation
It is required API key to configure NGC CLI, we can generate it through the NGC website.
- Step 1. Move to the website and click "Sign In/Sign Up".

- Step 2. Register an account as a NVIDIA developer.

- Step 3. Choose an account to proceed.

- Step 4. Click "Setup" on the upper right corner of the page.

- Step 5. Select "Get API Key".

- Step 6. Click "Generate API Key".

- Step 7. The API Key will show at the bottom of the page.

Install the TAO Toolkit
Python3 and python3-pip should be installed at the first:
sudo apt install -y python3 python3-pip
TAO Toolkit is a Python pip package that is hosted on the NVIDIA PyIndex. The package uses the docker restAPI under the hood to interact with the NGC Docker registry to pull and instantiate the underlying docker containers. At the previous steps, we have alreadly set an NGC account and generated an API key associated with the it. If you want to see more about Installation Prerequisites section, you can click it for details on creating an NGC account and obtaining an API key.
Virtual Environment - Virtualenv
A Virtual Environment is an isolated working copy of Python which allows you to work on a specific project without worry of affecting other projects. For example, you can work on a project which requires Django 1.3 while processing a project which requires Django 1.0. You can click here to create isolated Python enviroments.
It is highly recommanded to configure a virtual environment first and then install the TAO Toolkit.
- You can install virtualenv via pip:
pip install virtualenv
- Create a virtual environment:
virtualenv venv
It creates a copy of Python in whichever directory you ran the command in, placing it in a folder named venv.
- Activate the virtual environment:
source venv/bin/activate
- If you are done working in the virtual environment for the moment, you can deactivate it:
deactivate
This puts you back to the system’s default Python interpreter with all its installed libraries.
To delete a virtual environment, just delete its folder.
virtualenvwarpper
After a while, though, you might end up with a lot of virtual environments littered across your system, and its possible you’ll forget their names or where they were placed. Hence, we are using virtualenvwarpper. The virtualenvwrapper provides a set of commands which makes working with virtual environments much more pleasant. It also places all your virtual environments in one place.
You can install (make sure virtualenv is already installed) :
pip install virtualenvwrapper
export WORKON_HOME=~/Envs
source /usr/local/bin/virtualenvwrapper.sh
If you want to see more information about it, please refer to Full virtualenvwrapper install instructions.)
You may follow the instructions in this link to set up a Python virtualenv using a virtualenvwrapper.
Set Python version in the Virtual Environment
-
Step 1. Once you have followed the instructions to install
virtualenvandvirtualenvwrapper, set the Python version in thevirtualenv. This can be done in either of the following ways: -
Defining the environment variable called VIRTUALENVWRAPPER_PYTHON. This variable should point to the path where the python3 binary is installed in your local machine. You can also add it to your
.bashrcor.bash_profilefor setting your Pythonvirtualenvby default.
export VIRTUALENVWRAPPER_PYTHON=/usr/bin/python3
- Setting the path to the python3 binary when creating your
virtualenvusing thevirtualenvwrapperwrapper
mkvirtualenv launcher -p /path/to/your/python3
- Step 2. Once you have logged into the
virtualenv, the command prompt should show the name of your virtual environment
(launcher) py-3.6.9 desktop:
- Step 3. When you are done with you session, you may deactivate your
virtualenvusing thedeactivatecommand:
deactivate
-
Step 4. You may re-instantiate this created
virtualenvenv using theworkoncommand.workon launcher
Install the TAO package
-
step 1. We have alreadly set up the the environmrnt that we need. Now we can install the TAO Launcher Python package called
nvidia-taowith following command.pip3 install nvidia-pyindex
pip3 install nvidia-tao -
step 2. Invoke the entrypoints using the
taocommand.
tao --help
The sample output of the above command is:
usage: tao [-h]
         {list,stop,info,augment,bpnet,classification,detectnet_v2,dssd,emotionnet,faster_rcnn,fpenet,gazenet,gesturenet,
         heartratenet,intent_slot_classification,lprnet,mask_rcnn,punctuation_and_capitalization,question_answering,
         retinanet,speech_to_text,ssd,text_classification,converter,token_classification,unet,yolo_v3,yolo_v4,yolo_v4_tiny}
         ...

Launcher for TAO

optional arguments:
-h, --help            show this help message and exit

tasks:
      {list,stop,info,augment,bpnet,classification,detectnet_v2,dssd,emotionnet,faster_rcnn,fpenet,gazenet,gesturenet,heartratenet
      ,intent_slot_classification,lprnet,mask_rcnn,punctuation_and_capitalization,question_answering,retinanet,speech_to_text,
      ssd,text_classification,converter,token_classification,unet,yolo_v3,yolo_v4,yolo_v4_tiny}
-
step 3. Note that under tasks you can see all the launcher-invokable tasks. The following are the specific tasks that help with handling the launched commands using the TAO Launcher:
- list
- stop
- info
Caution: If the terminal inform "bash: Cannot find tao", please use this command:
export PATH=$PATH:~/.local/bin
tao --help
Install DeepStream5
- Step 1. Edit
/etc/apt/sources.list.d/nvidia-l4t-apt-source.listand replace .6 with .5:
deb https://repo.download.nvidia.com/jetson/common r32.5 main
#deb https://repo.download.nvidia.com/jetson/common r32.6 main
deb https://repo.download.nvidia.com/jetson/t194 r32.5 main
#deb https://repo.download.nvidia.com/jetson/t194 r32.6 main
- Step 2. Type
sudo apt updateand try again to install DeepStream 5.1.
And then install it with the following command:
sudo -H pip3 install pyds-ext
For further information, please check the links down below:
Install Jetson Multicamera Pipelines and Quick Start
Finally, we are going to build a typical multi-camera pipeline, i.e. N×(capture)->preprocess->batch->DNN-> <<your application logic here>> ->encode->file I/O + display, Using gstreamer and deepstream under-the-hood. Give programatic access to configure the pipeline in python via jetmulticam package.
This project utilizes Nvidia HW accleration for minimal CPU usage. For example, you can perform object detection in real-time on 6 camera streams using as little as 16.5% CPU. You can easily build your custom logic in python by accessing image data (via np.array), as well object detection results.
- Step 1. Install the Jetson Multicamera Pipelines with following command:
git clone https://github.com/NVIDIA-AI-IOT/jetson-multicamera-pipelines.git
cd jetson-multicamera-pipelines
bash scripts/install_dependencies.sh
sudo -H pip3 install Cython
sudo -H pip3 install .
- Step 2. Run example with your cameras:
source scripts/env_vars.sh
cd examples
sudo -H python3 example.py
This is the 'example.py', you can apply it to either monocular camera or multi-camera.
import time
from jetmulticam import CameraPipelineDNN
from jetmulticam.models import PeopleNet, DashCamNet

if __name__ == "__main__":

    pipeline = CameraPipelineDNN(
        cameras=[2, 5, 8],
        models=[
            PeopleNet.DLA1,
            DashCamNet.DLA0,
            # PeopleNet.GPU
        ],
        save_video=True,
        save_video_folder="/home/nx/logs/videos",
        display=True,
    )

    while pipeline.running():
        arr = pipeline.images[0] # np.array with shape (1080, 1920, 3), i.e. (1080p RGB image)
        dets = pipeline.detections[0] # Detections from the DNNs
        time.sleep(1/30)
This is the result of multi-camera shown up like:
More
There are more supported models / acceleratorss:
pipeline = CameraPipelineDNN(
    cam_ids = [0, 1, 2]
    models=[
        models.PeopleNet.DLA0,
        models.PeopleNet.DLA1,
        models.PeopleNet.GPU,
        models.DashCamNet.DLA0,
        models.DashCamNet.DLA1,
        models.DashCamNet.GPU
        ]
    # ...
)
Caution: If the terminal inform "EGL Not found", please check EGLDevice.
Tech Support & Product Discussion
Thank you for choosing our products! We are here to provide you with different support to ensure that your experience with our products is as smooth as possible. We offer several communication channels to cater to different preferences and needs.