Work with SenseCraft HMI
SenseCraft HMI is Seeed Studio's no-code interface design platform for ePaper display devices. You can design dashboards, image galleries, calendars, RSS pages, web content pages, and other always-on information screens in a browser, then deploy them to a compatible device over Wi-Fi.
This Wiki is an ePaper Display application guide. It explains the shortest path from a Seeed ePaper device to a working SenseCraft HMI page, and uses one ePaper display board plus one ePaper screen as an example hardware setup.

When to Use This Guide
Use this guide when you want to use SenseCraft HMI with a compatible Seeed ePaper product and quickly complete the following workflow:
- Confirm or flash the SenseCraft HMI firmware.
- Connect the device to Wi-Fi.
- Add the device to your SenseCraft HMI workspace.
- Deploy your first page to the ePaper display.
For the full platform manual, including account settings, editor details, templates, data widgets, and release notes, see the official SenseCraft HMI documentation.
Before You Start
Prepare the following items before using SenseCraft HMI:
- A compatible Seeed ePaper display device.
- A SenseCraft account. You can create one from the SenseCraft HMI login page.
- A 2.4 GHz Wi-Fi network.
- A USB-C data cable if your device needs firmware flashing.
- A computer running a browser that supports serial-port flashing from the SenseCraft HMI web tool.
Different ePaper products use different HMI firmware builds. Always select the firmware that matches your exact device and screen size.
Official SenseCraft HMI Documentation
SenseCraft HMI has a dedicated documentation site. Use this Wiki for the ePaper Display quick-start flow, and use the official documentation for complete platform instructions.
| Topic | Use this when you need to | Link |
|---|---|---|
| Overview | Understand what SenseCraft HMI is and what it can do. | Open Overview |
| Supported Hardware | Check the current device and screen compatibility list. | Open Supported Hardware |
| Getting Started | Follow the official account, firmware, connection, and deployment flow. | Open Getting Started |
| Workspace and Canvas | Learn the editor layout, widgets, data sources, and page-building flow. | Open Workspace Guide |
| AI Generation | Generate images or page layouts with text prompts. | Open AI Generation |
| Release Notes | Check the latest platform and firmware updates. | Open Release Notes |
Example Hardware Setup
The steps below use the XIAO ePaper Display Board (ESP32-S3) - EE04 with the 7.3" Spectra 6 ePaper display as an example. Other compatible Seeed ePaper devices follow the same platform flow, but the firmware build, screen size, and hardware assembly may be different.
| XIAO ePaper Display Board (ESP32-S3) - EE04 | 7.3" Spectra 6 ePaper Display |
|---|---|
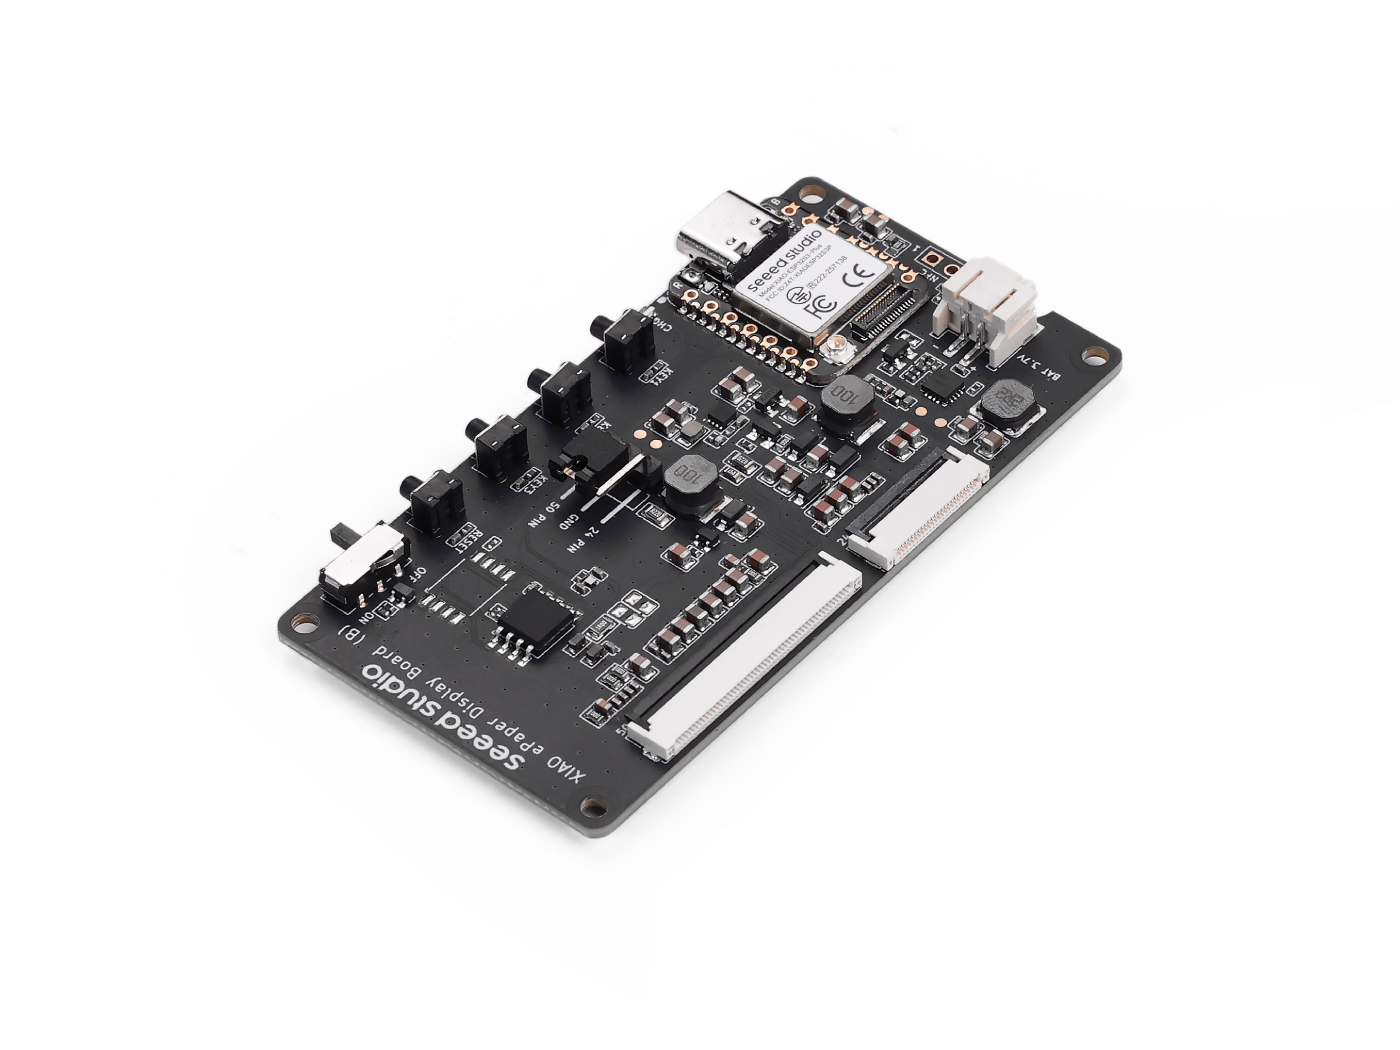 | 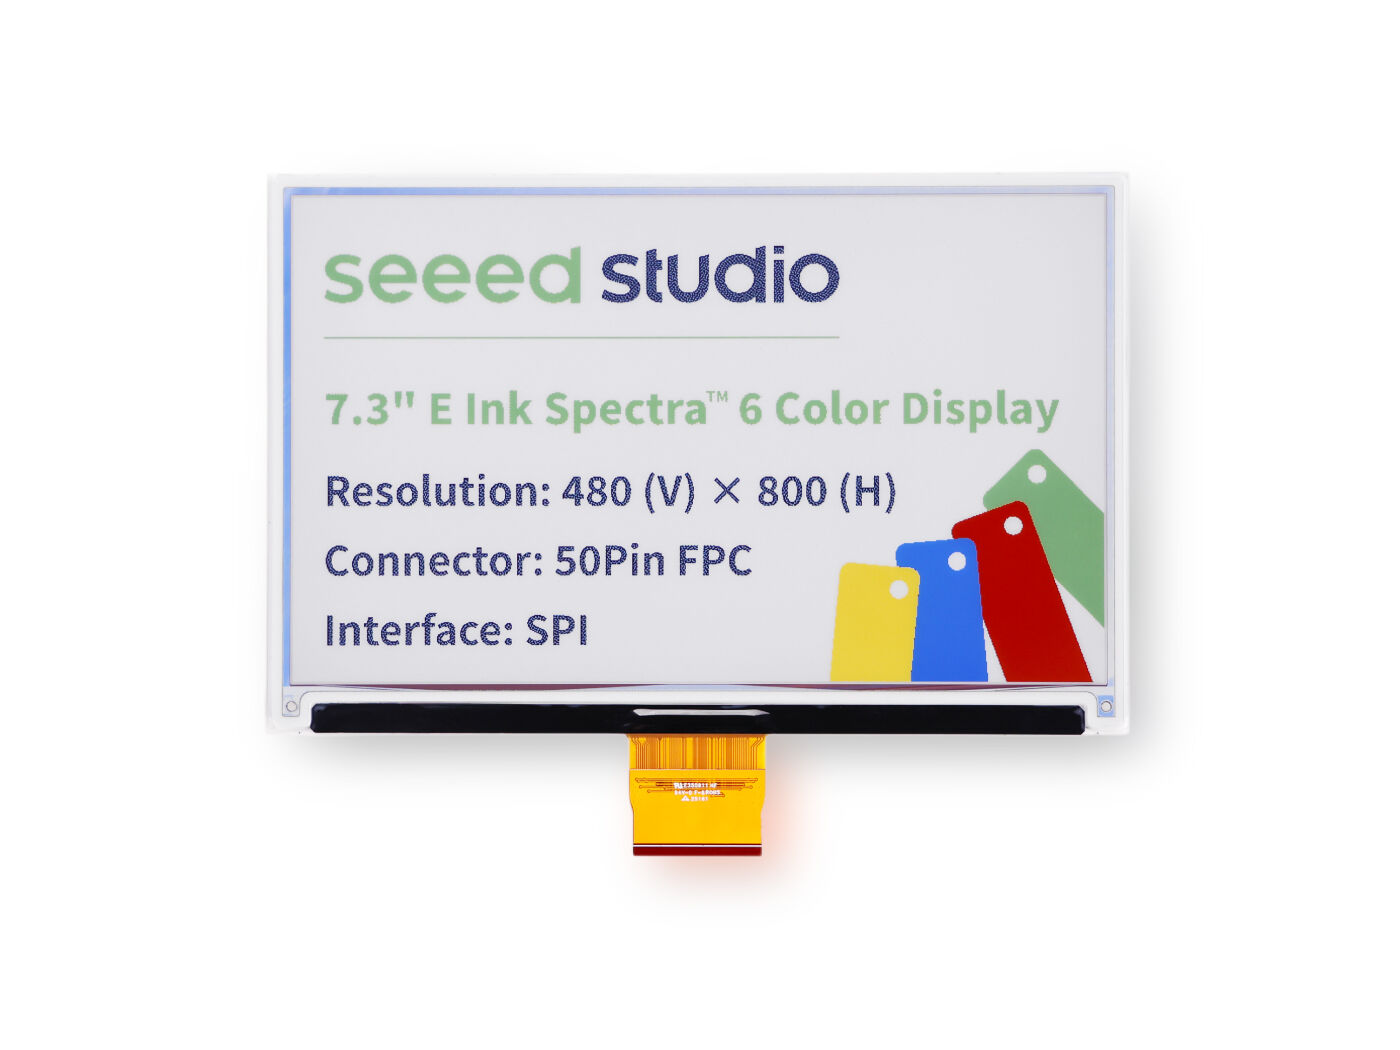 |
This example is not a compatibility list. For the current supported hardware and firmware matrix, always refer to the SenseCraft HMI Supported Hardware page.
Step 1: Confirm or Flash HMI Firmware
The first step is to make sure your ePaper device is running SenseCraft HMI firmware.
- reTerminal E Series
- ePaper Display Board + Screen
The reTerminal E Series is designed to work with SenseCraft HMI out of the box. Power on the device and continue to Step 2: Connect the Device to Wi-Fi.
If you previously flashed another firmware, open the SenseCraft HMI device page, choose your device model, and follow the on-screen firmware instructions.
Use Full Flash only when you want to clear stored Wi-Fi information, pairing data, and existing device content.
For a display board plus separate ePaper screen, flash the HMI firmware that matches your board and panel.
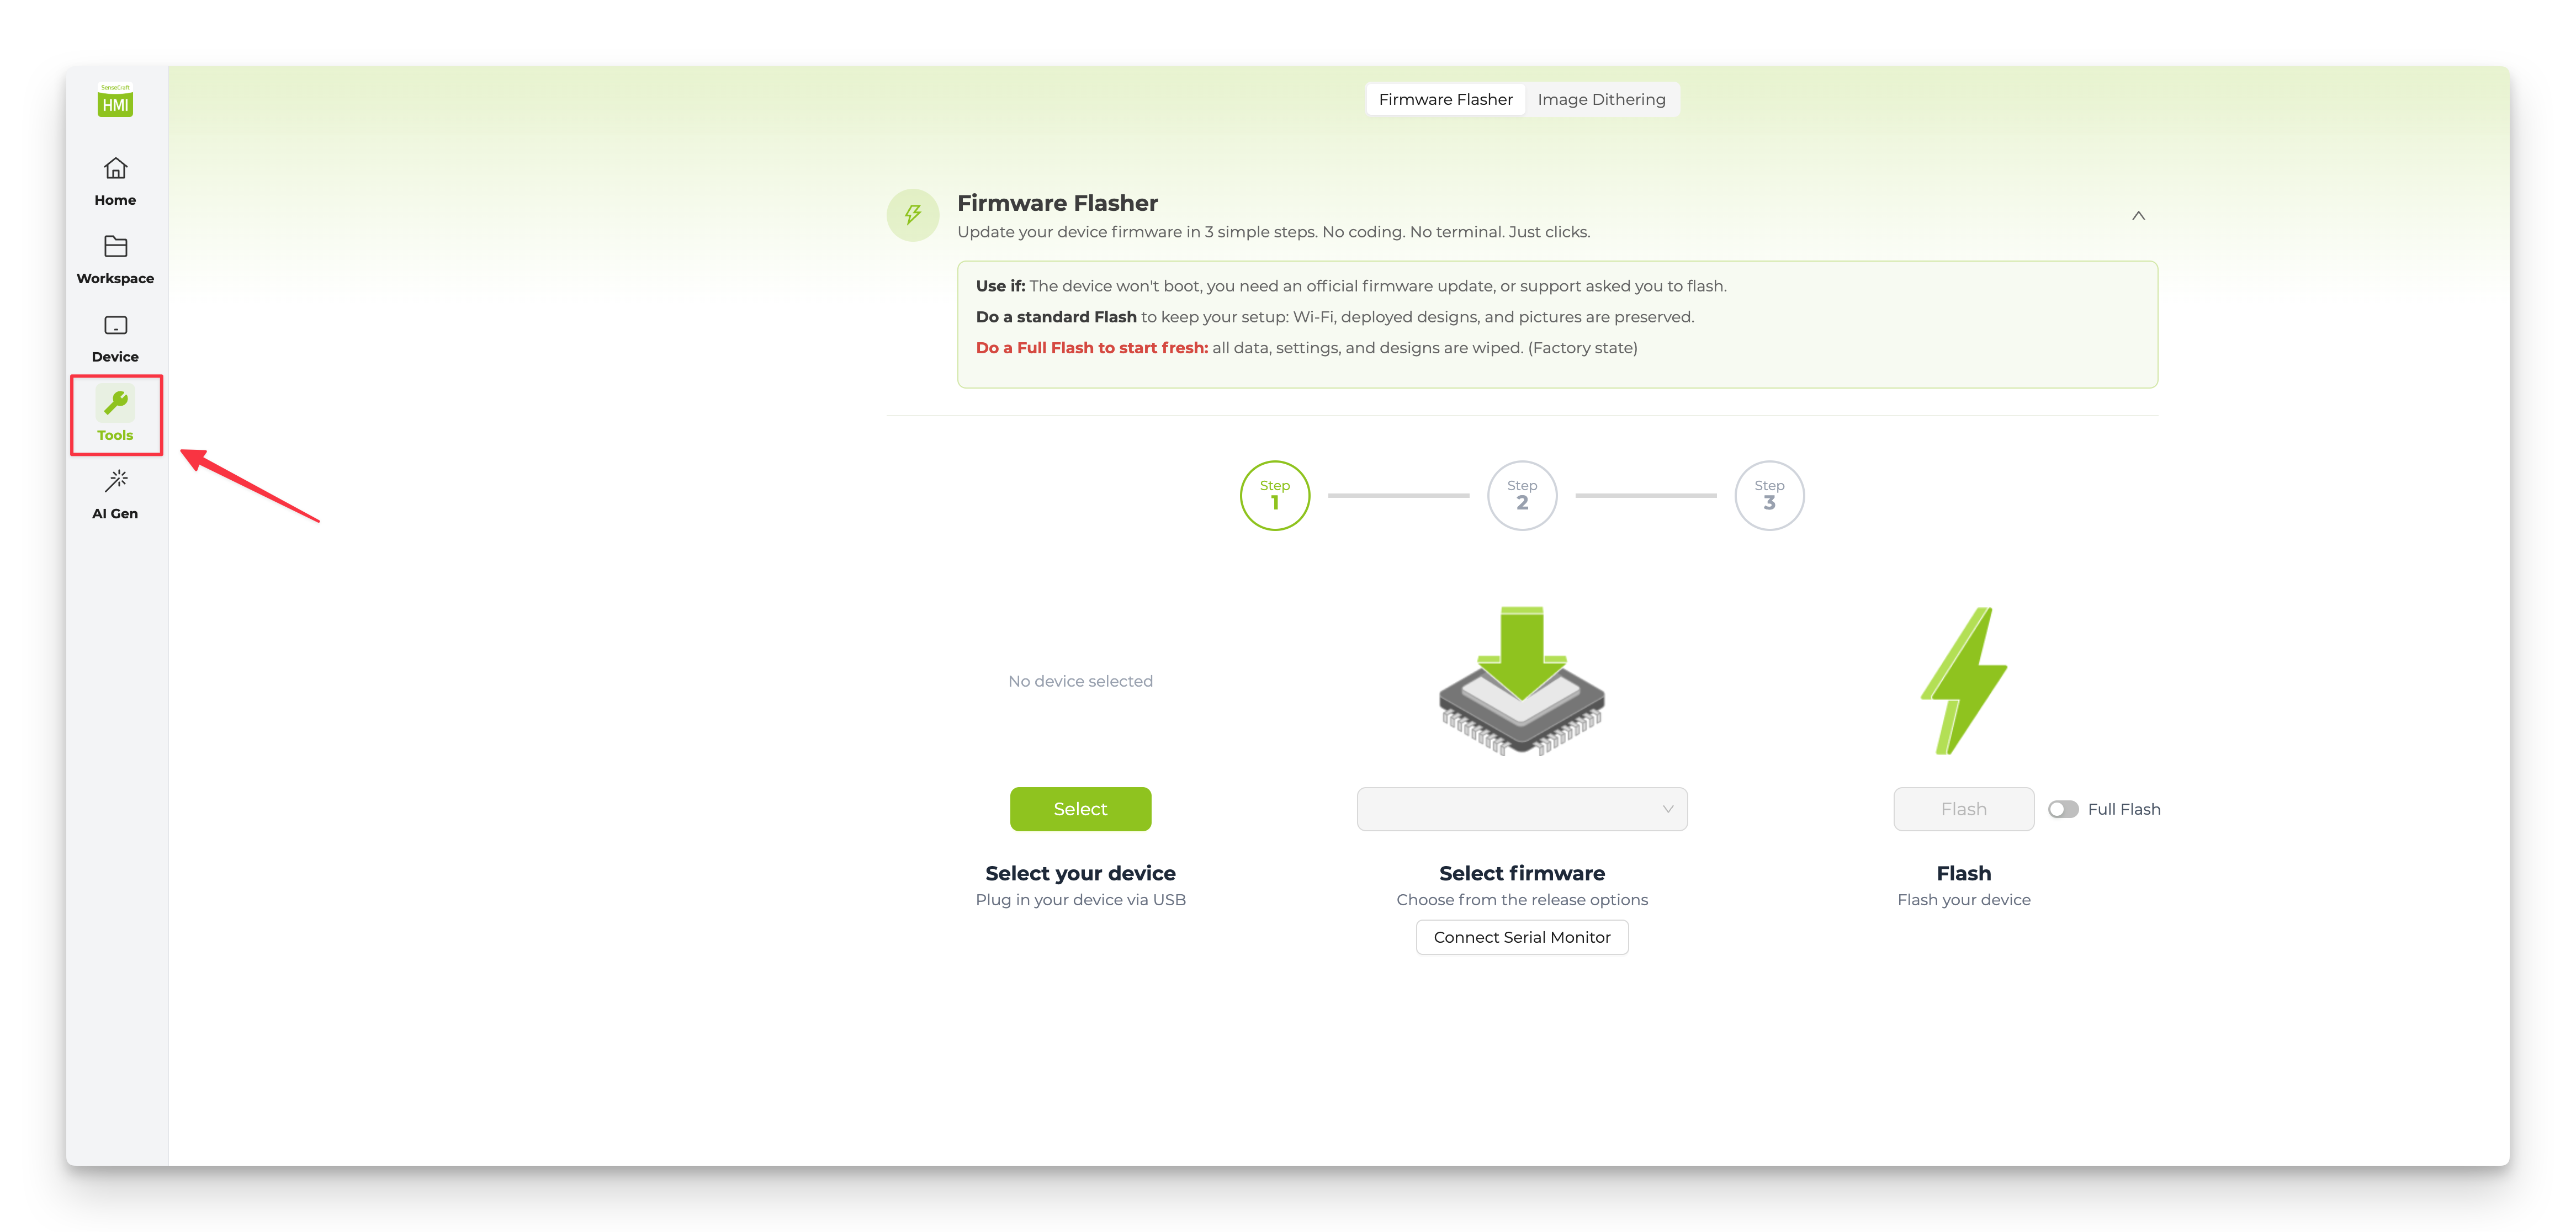
Step 1. Sign in to SenseCraft HMI, then open Tools from the top menu.
Step 2. Select the firmware entry that matches your display. In this example, select the 7.3" Full-Color Display 800 x 480 entry.
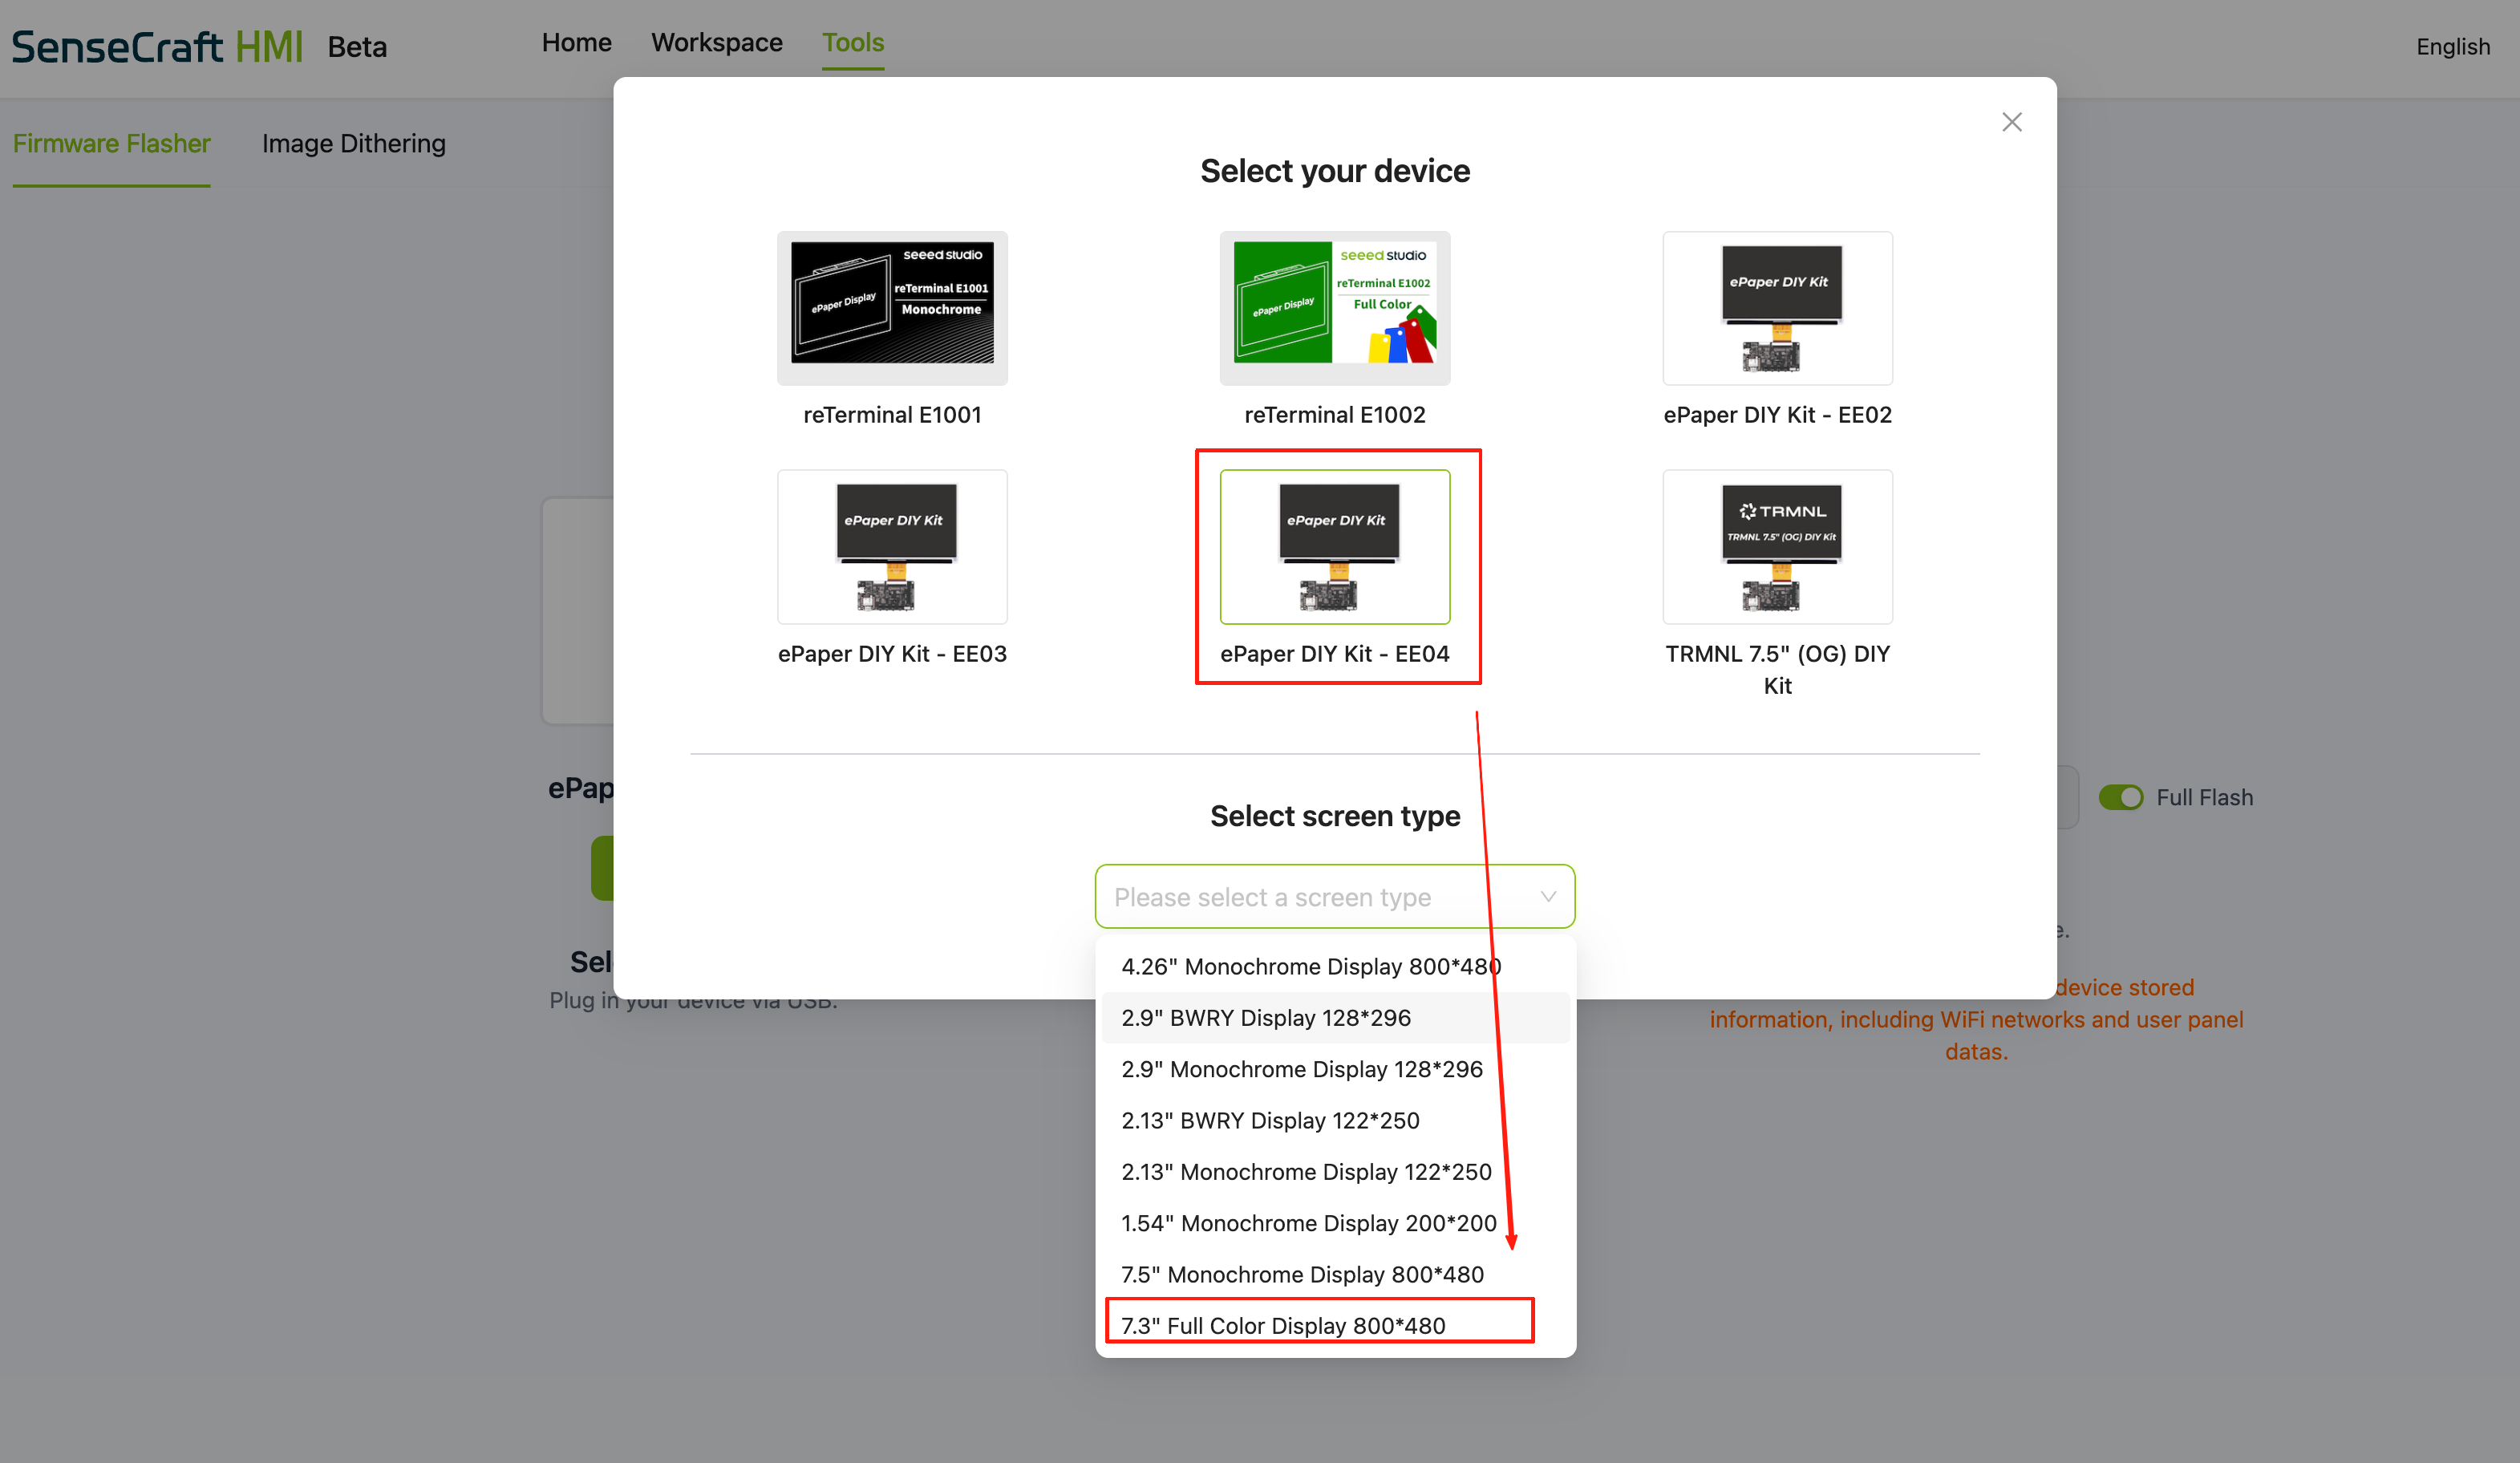
Step 3. Select the latest available firmware version for your hardware.
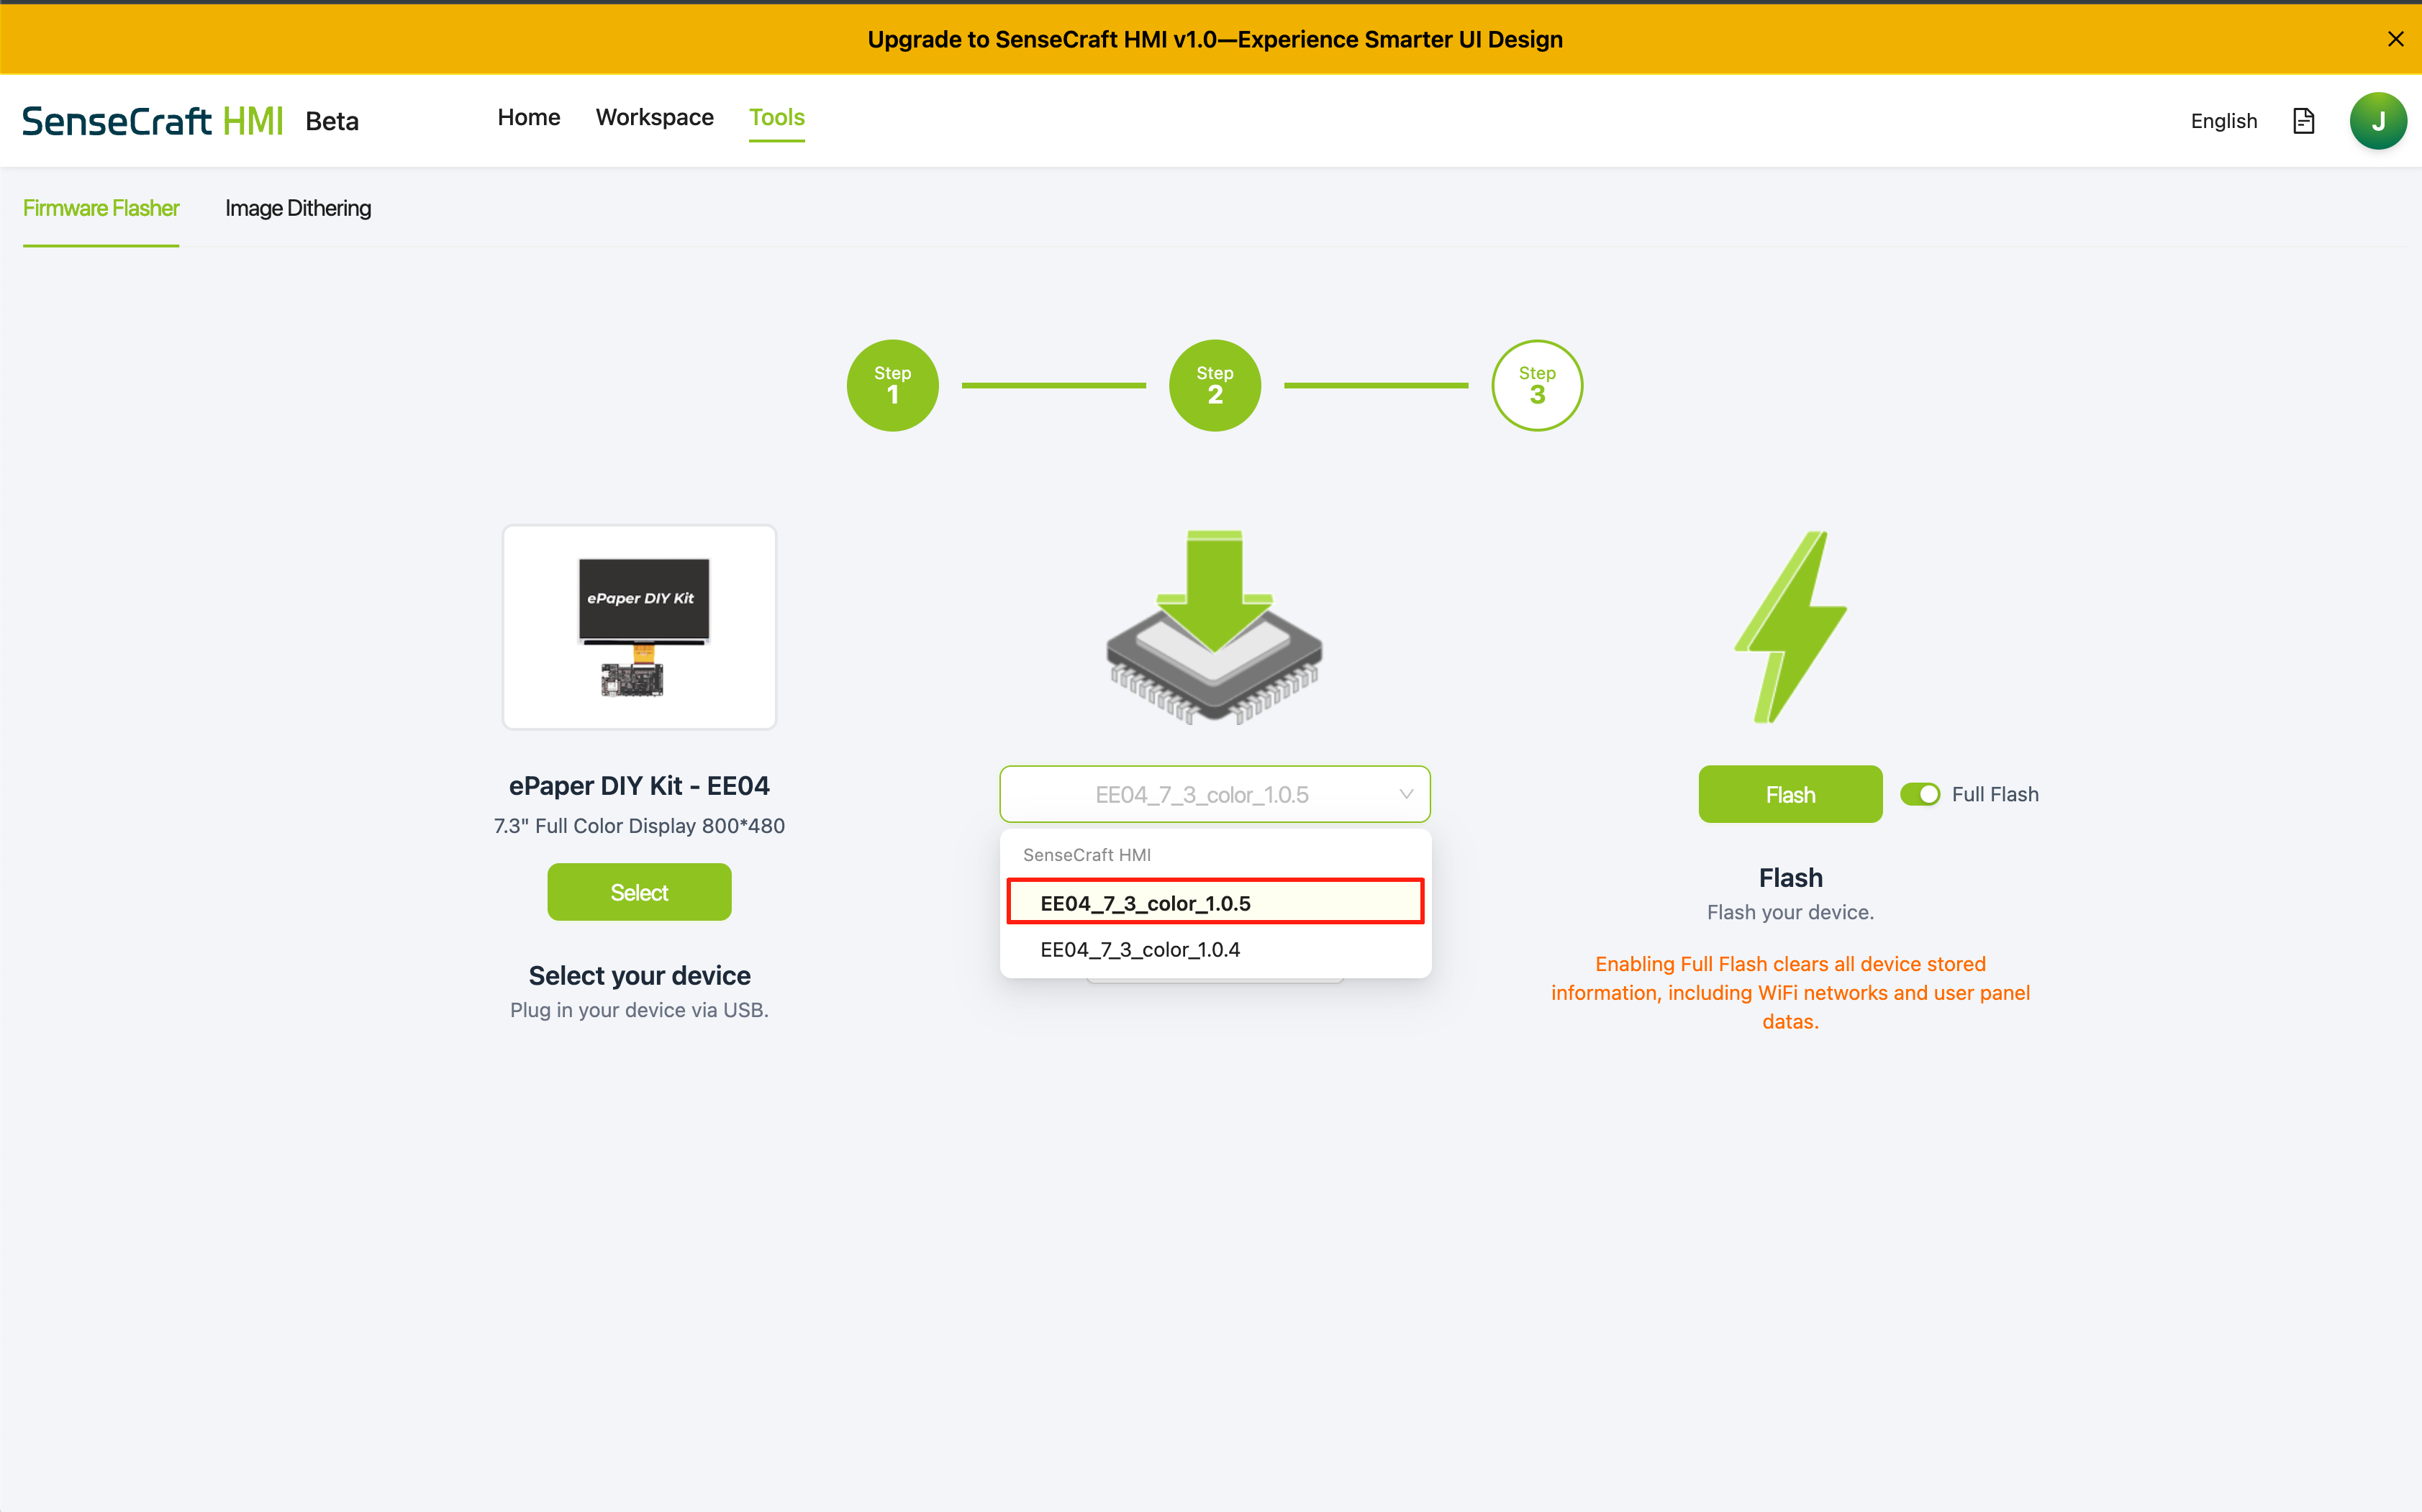
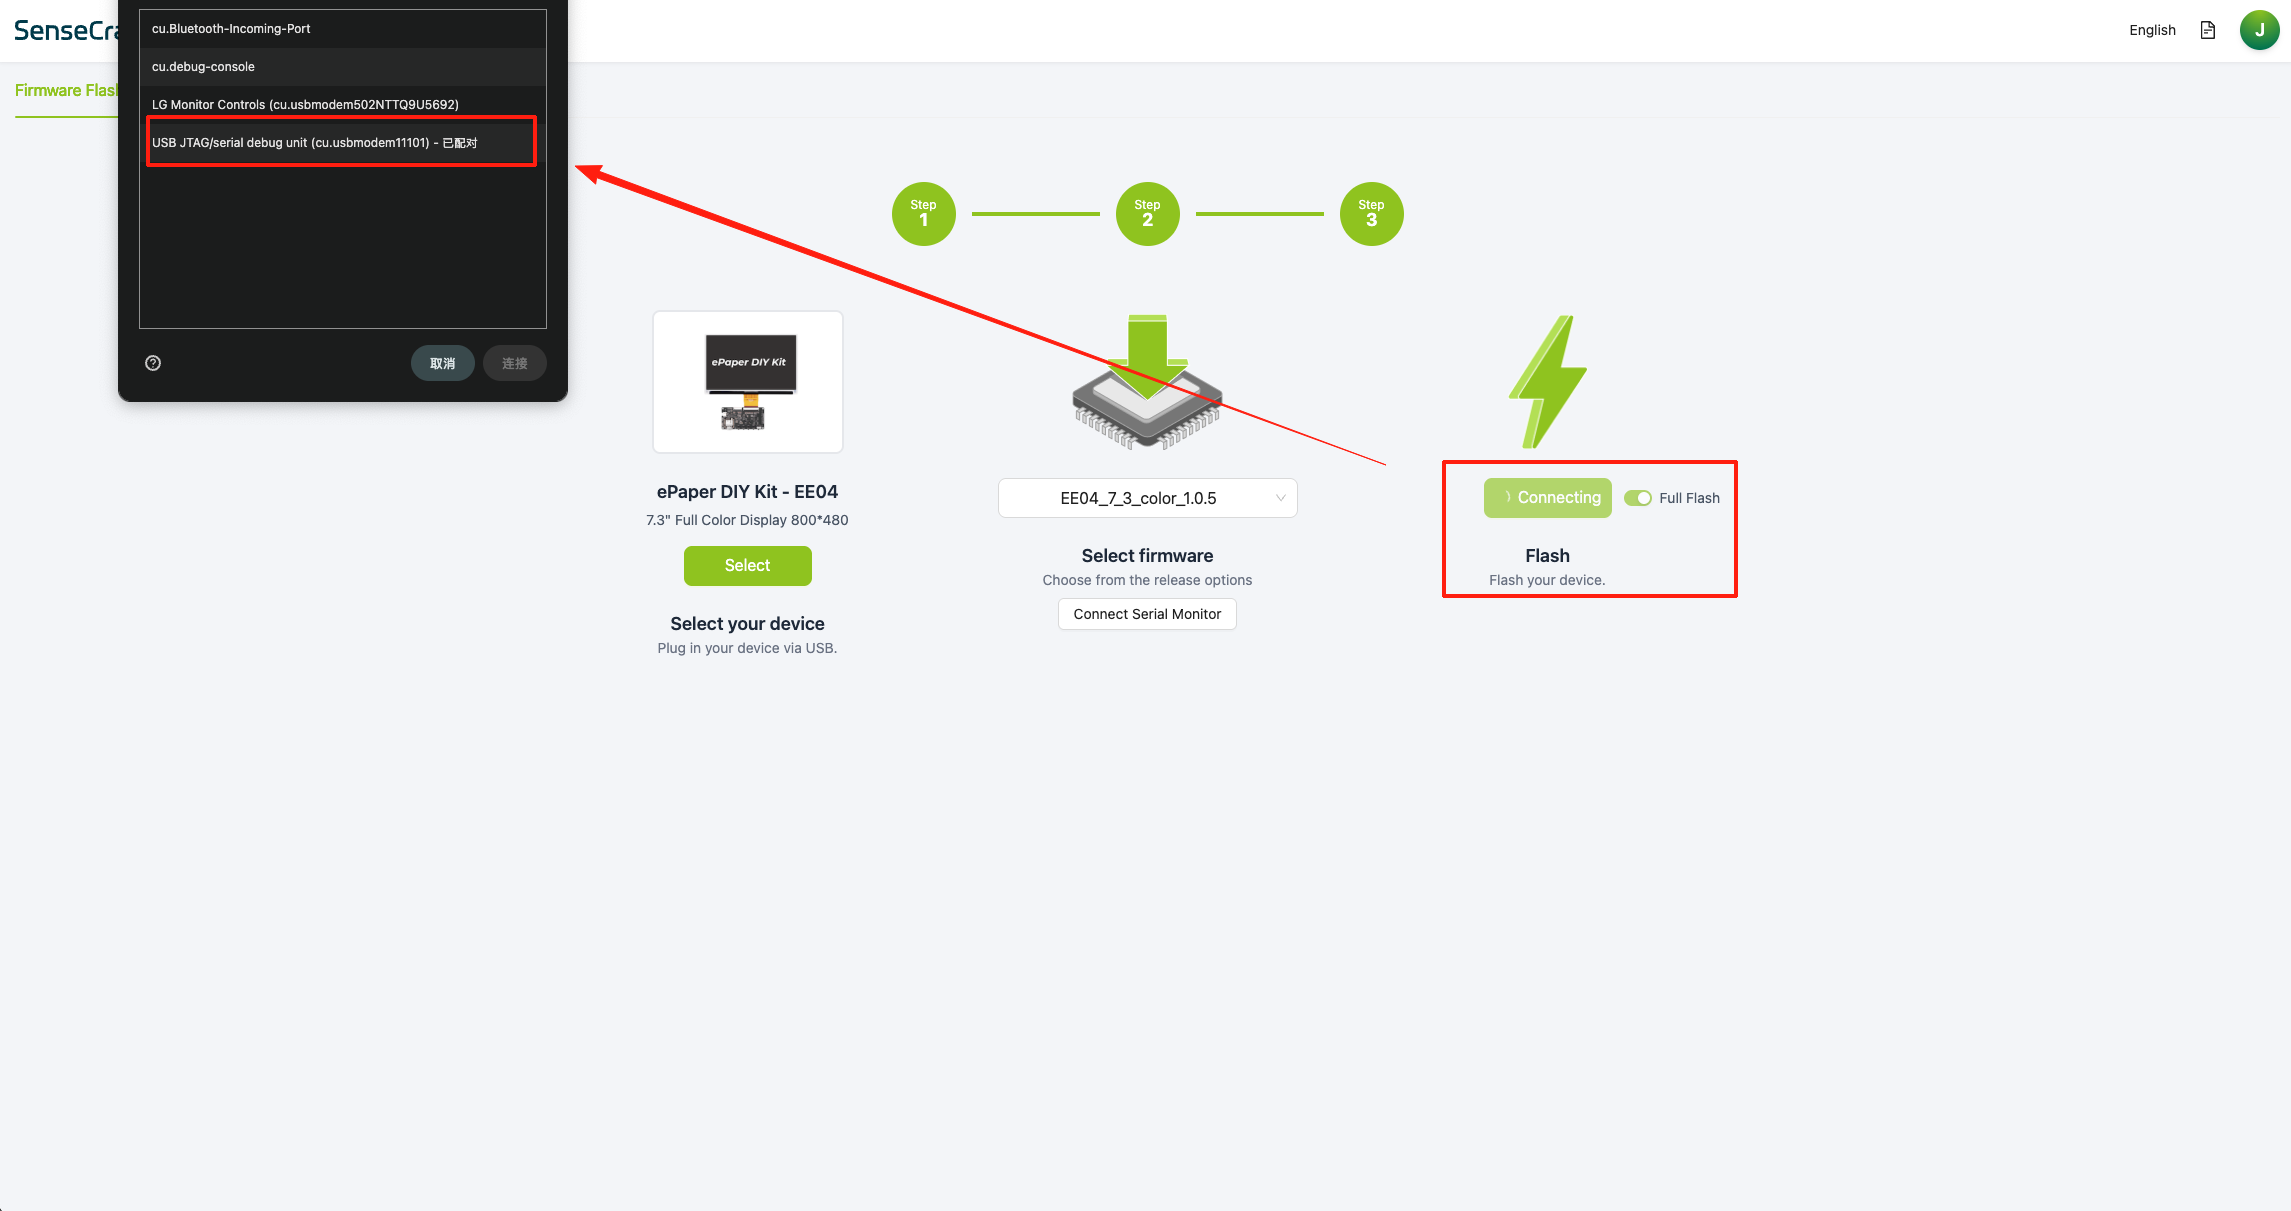
Step 4. Connect the board to your computer with a USB-C data cable, then click Flash.
After clicking Flash, the browser will show a serial-port selection window. Choose the port that belongs to your device.
If no port appears, press the RESET button on the board and try again. Also confirm that your USB-C cable supports data transfer.
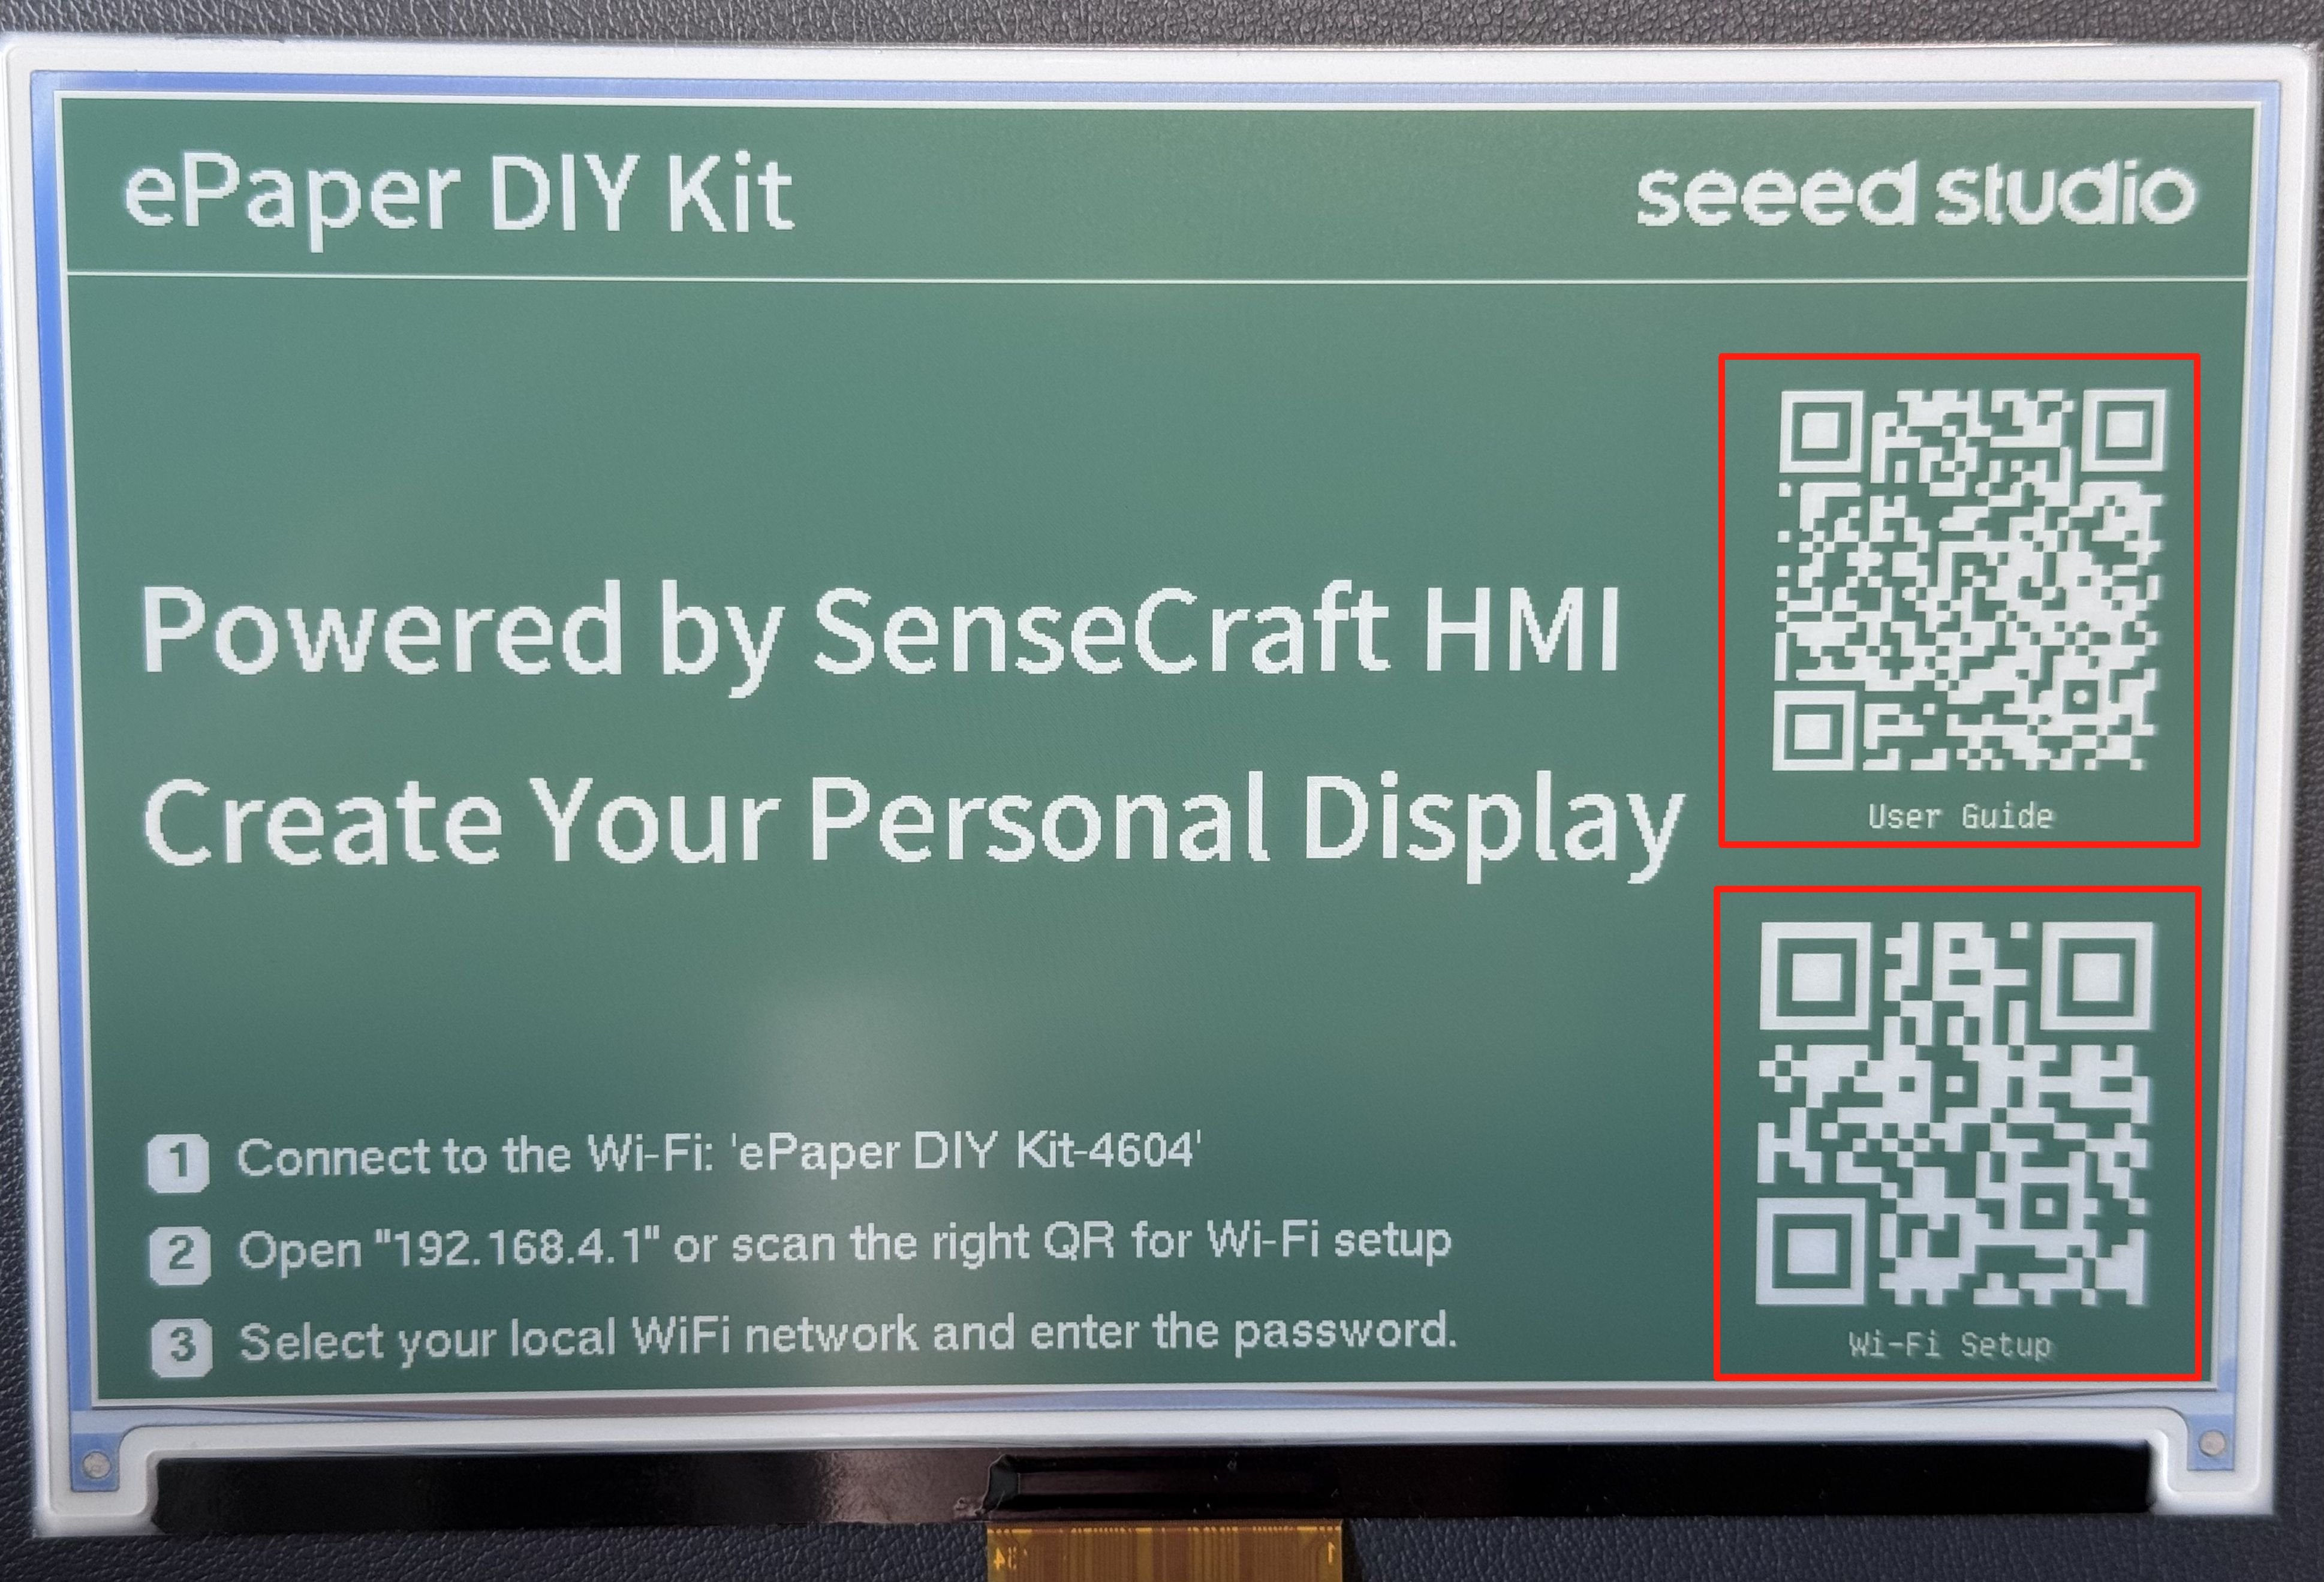
Step 5. Wait for the ePaper display to refresh and show the setup QR code.
Step 2: Connect the Device to Wi-Fi
After the device is running HMI firmware, connect it to your local Wi-Fi network.
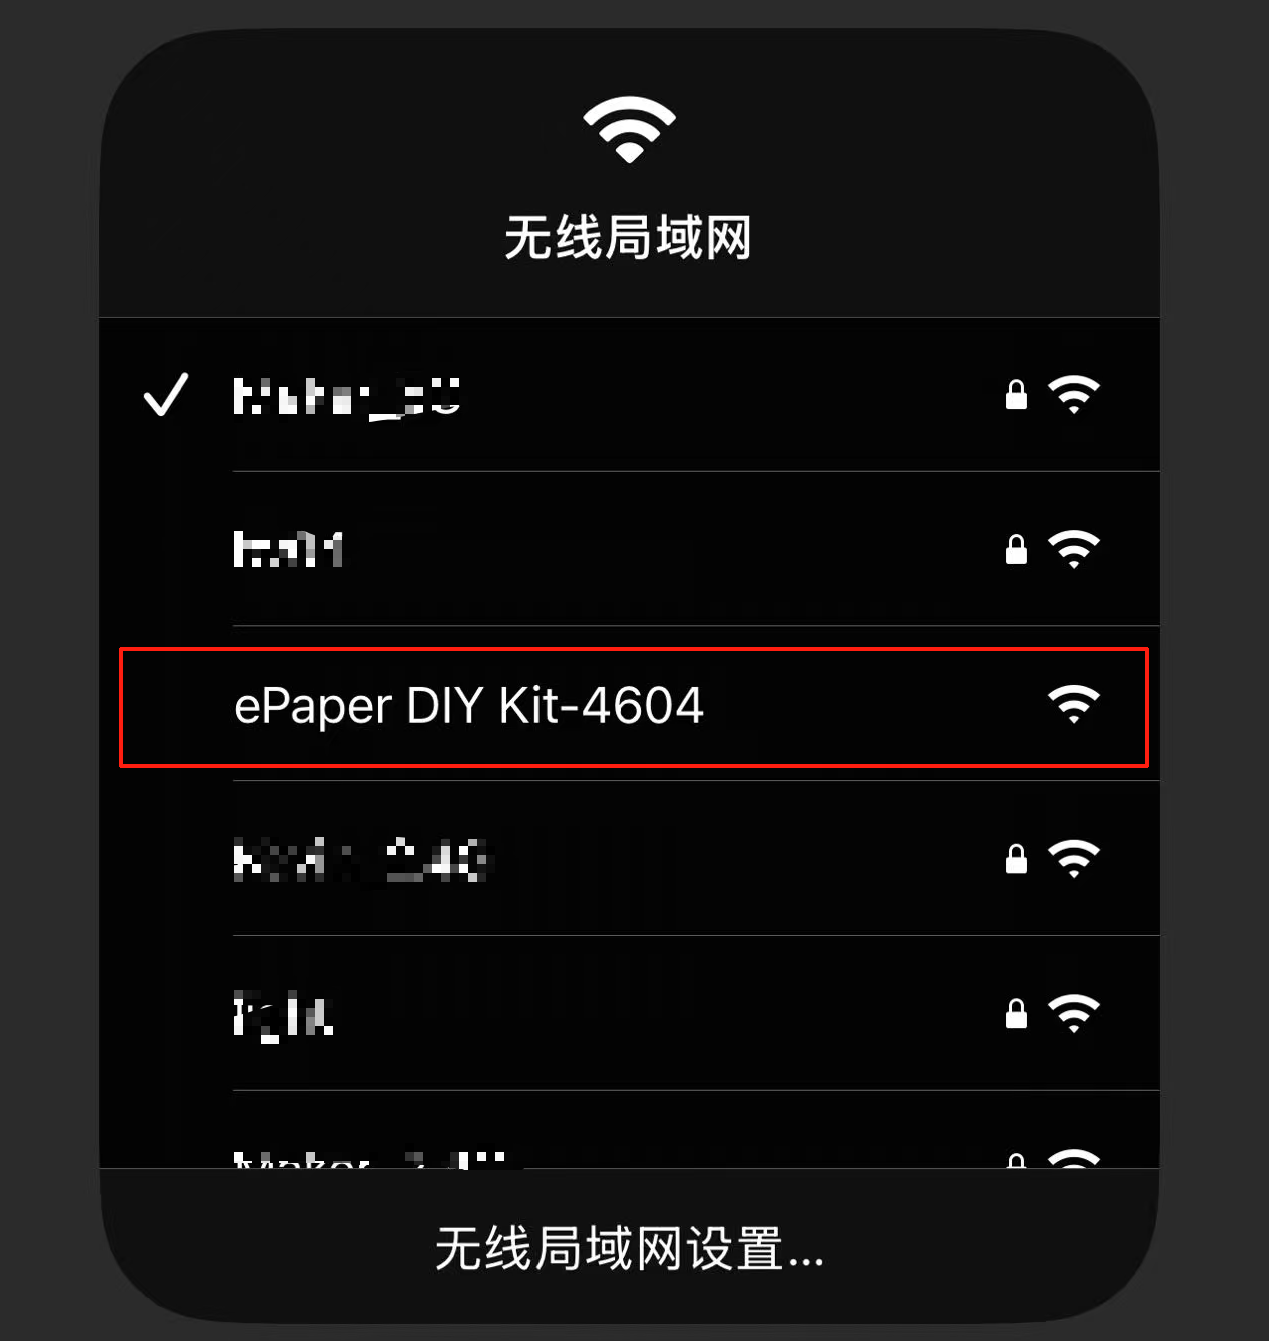
Step 1. Connect your phone or computer to the Wi-Fi access point shown on the ePaper screen. This temporary access point does not require a password.
The access point name depends on the device type. For an ePaper Display Board with a separate screen, the name may appear as ePaper DIY Kit-xxxx. For a reTerminal E Series device, the name may appear as reTerminal E100x-xxxx. In both cases, xxxx usually represents the last four characters of the MAC address.
| ePaper Display Board + Screen | reTerminal E Series |
|---|---|
 | 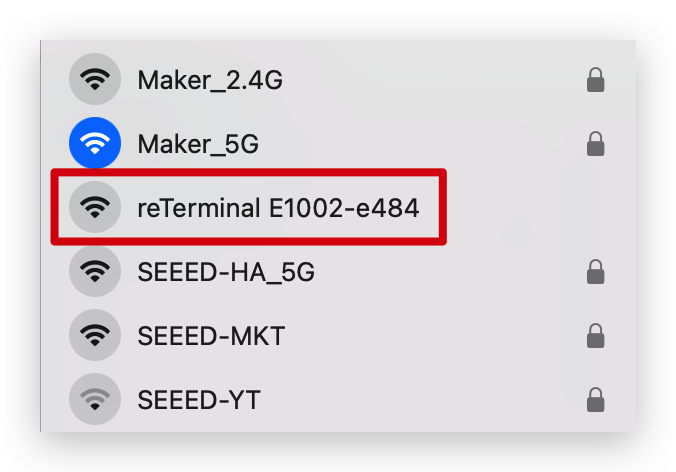 |
AP name example: ePaper DIY Kit-xxxx | AP name example: reTerminal E100x-xxxx |
Step 2. Scan the QR code on the ePaper screen. If the configuration page does not open automatically, open a browser and visit 192.168.4.1.
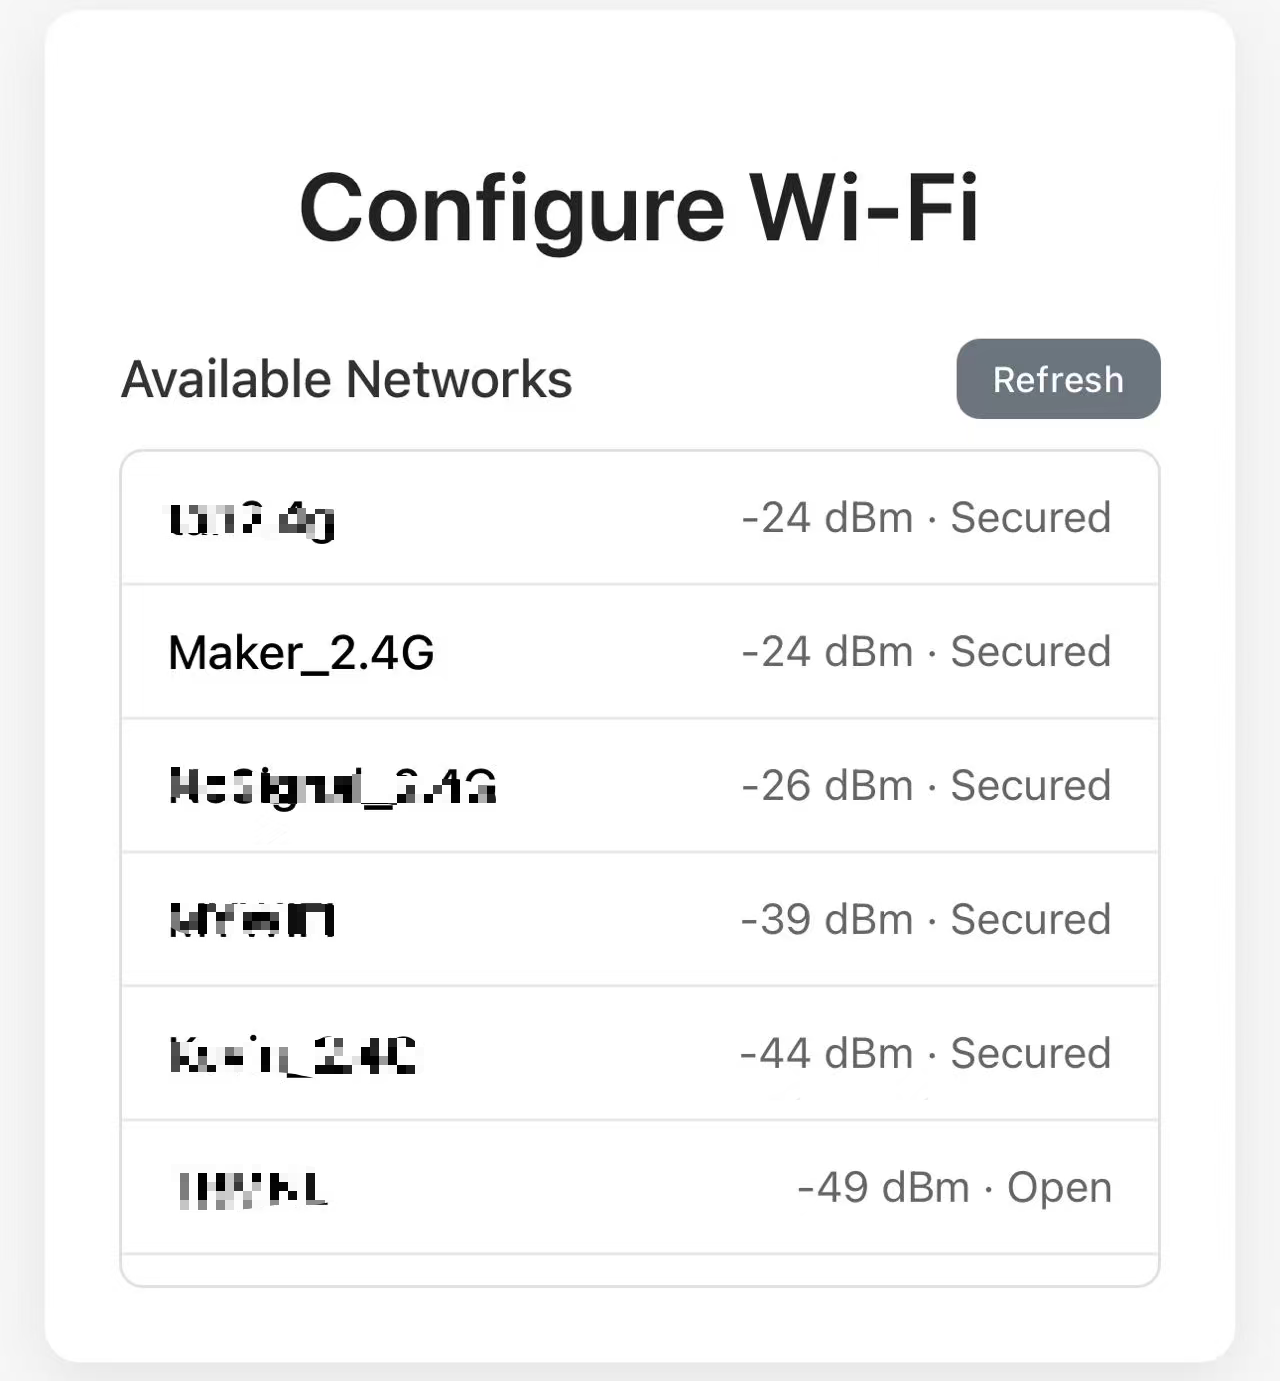
Step 3. Select your local Wi-Fi network, enter the password, and click Connect.
Use a 2.4 GHz Wi-Fi network. Many ESP32-S3-based devices do not connect to 5 GHz Wi-Fi networks.
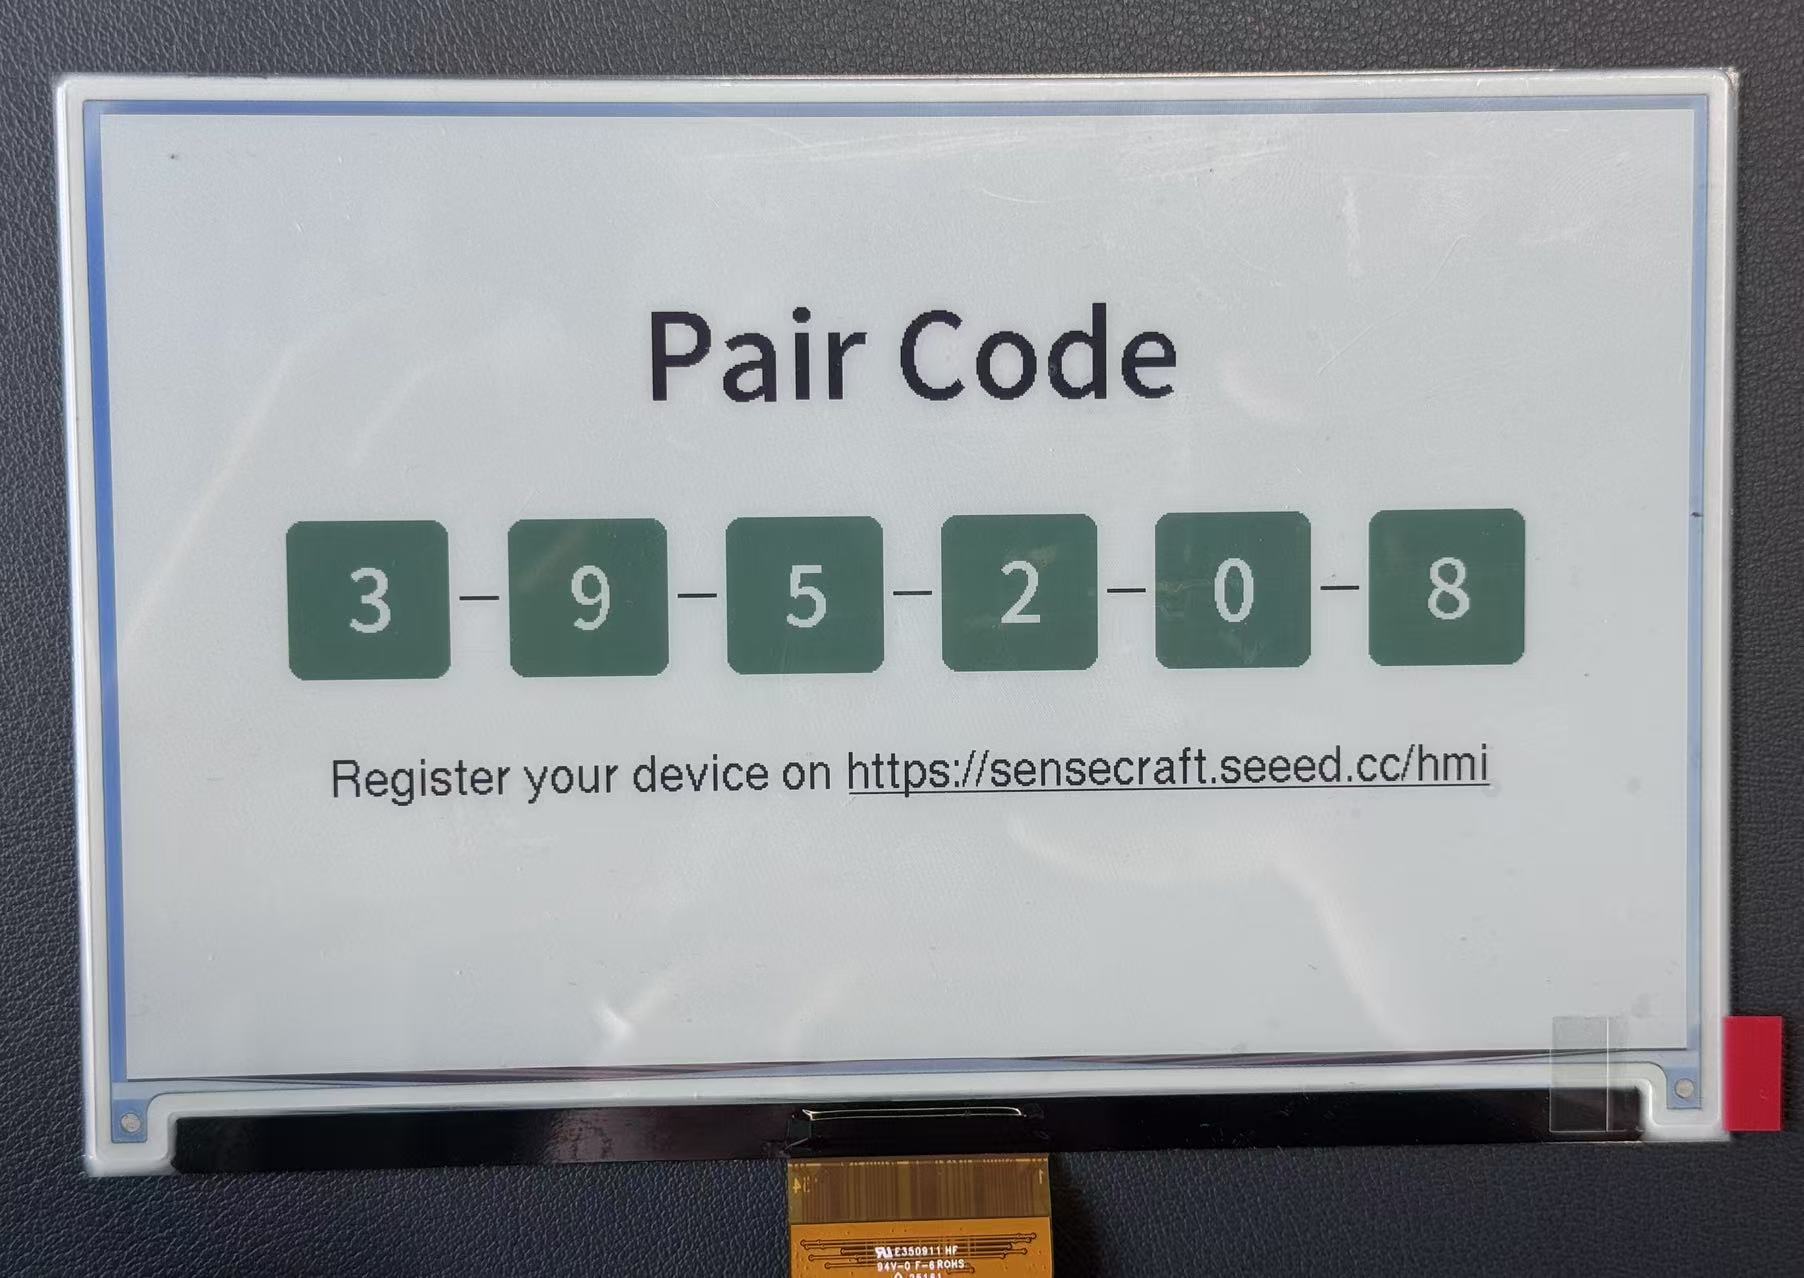
Step 4. Wait until the device joins the network and shows a pair code.
Step 3: Add the Device to SenseCraft HMI
After Wi-Fi setup, add the device to your SenseCraft HMI workspace.
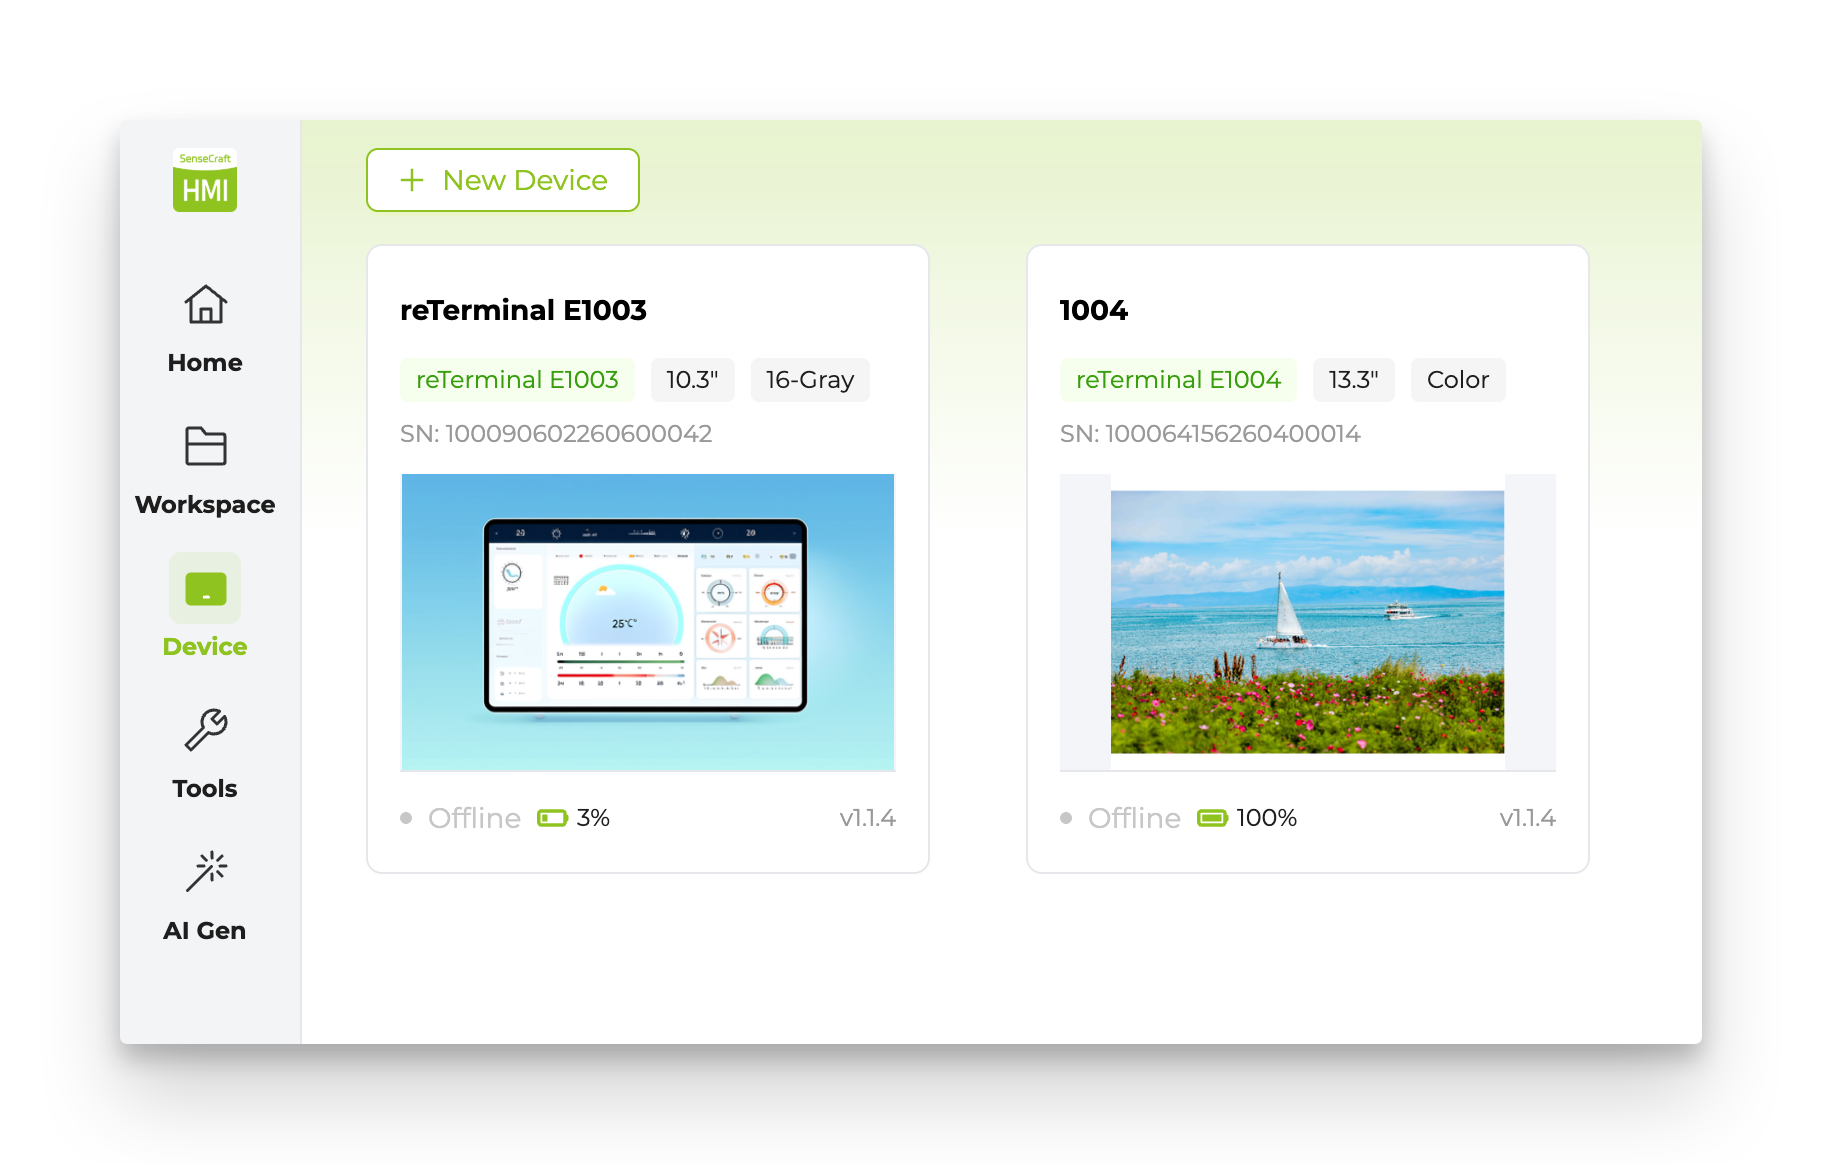
Step 1. Open the Device page and click Add Device.
Step 2. Enter a device name and the pair code shown on the ePaper screen, then click Create.
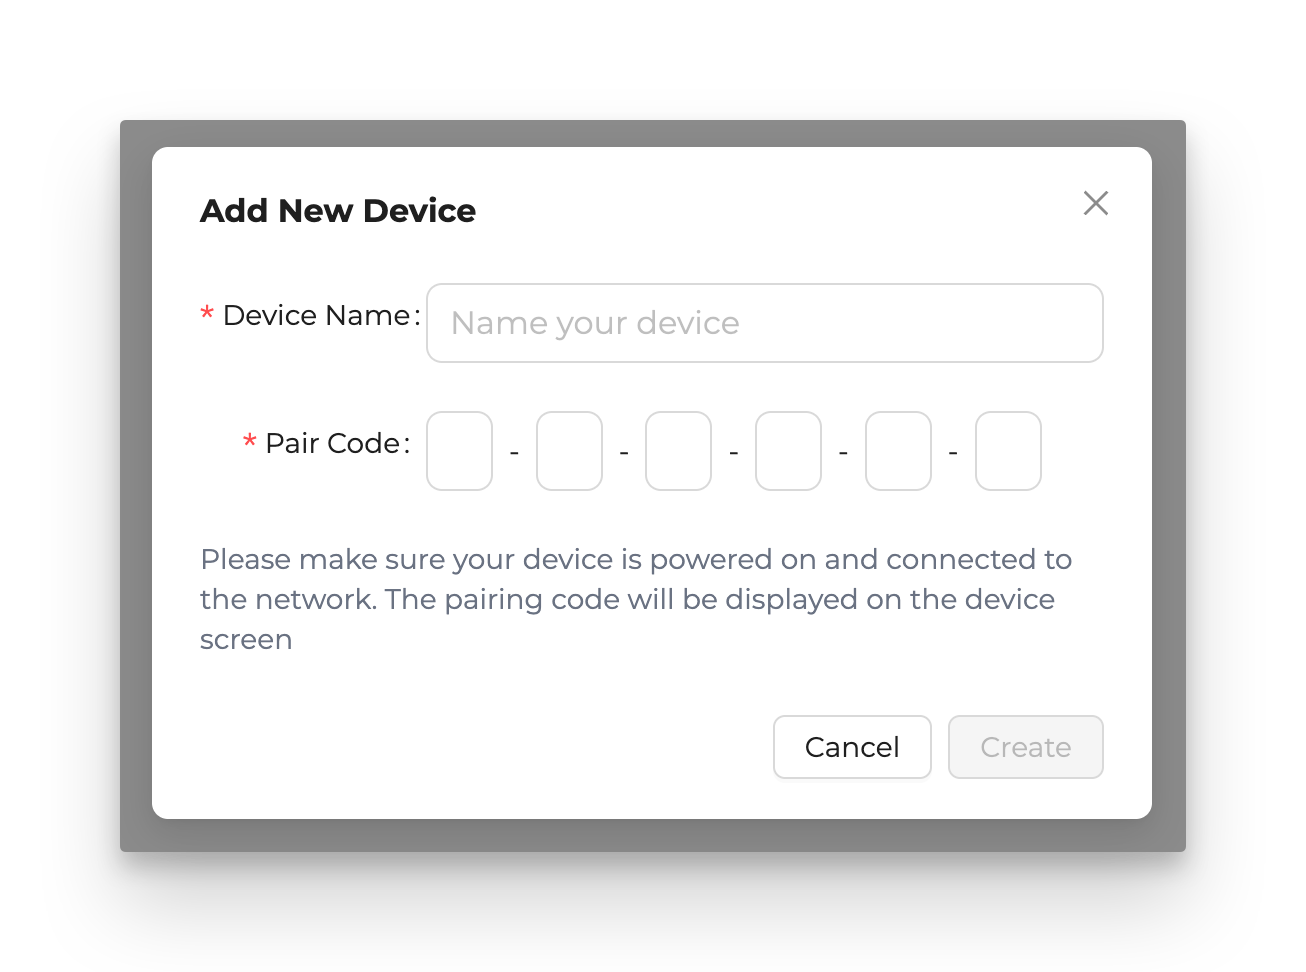
Step 3. Confirm that the device appears in your Panel.
Step 4: Deploy Your First Page
Once the device is paired, you can deploy content from SenseCraft HMI to the ePaper screen.
The fastest way to start is to use an existing template or one of the built-in creation tools. For the detailed editor flow, follow the official Getting Started guide.
| Feature | What it is for | Official guide |
|---|---|---|
| Canvas | Build a page from text, images, widgets, shapes, and data sources. | Open guide |
| AI Generation | Create images or layouts from text prompts. | Open guide |
| Gallery | Display uploaded images or slideshow-style content. | Open docs |
| RSS | Show headlines or article content from an RSS feed. | Open docs |
| Web Content | Render a web page or web-based information panel on the ePaper display. | Open docs |
The example below shows a SenseCraft HMI page deployed to a 7.3" ePaper display.
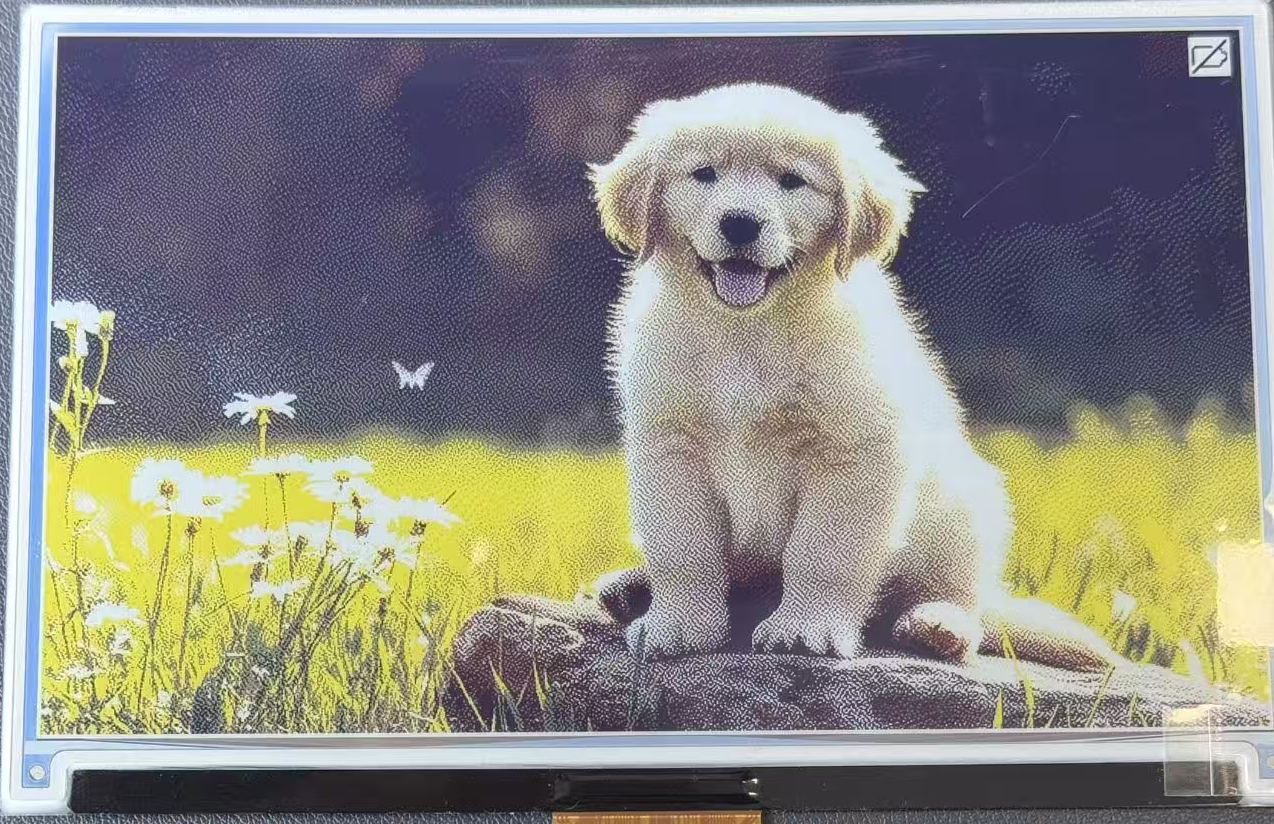
Example result on a 7.3" ePaper display
Troubleshooting
Q1: Why does my computer not detect the device during flashing?
This usually means the browser cannot access the serial port, the cable only supports charging, or the board has not entered the right USB state.
- Use a USB-C cable that supports data transfer.
- Connect the device directly to the computer instead of through a USB hub.
- Press the RESET button and open the port selection window again.
- Try a Chromium-based browser if your current browser does not support web serial flashing.
Q2: Why does the device fail to connect to Wi-Fi?
The most common cause is using an unsupported Wi-Fi band or entering the wrong password.
- Use a 2.4 GHz Wi-Fi network.
- Re-enter the Wi-Fi password carefully.
- Move the device closer to the router during setup.
- If the device was previously configured, use Full Flash only when you want to clear saved network settings and start again.
Q3: Why does the screen not show the expected setup QR code after flashing?
The firmware may not match the connected screen, or the screen may not be connected correctly.
- Recheck the device model, screen size, and firmware entry on the SenseCraft HMI Tools page.
- Power off the board before reconnecting the ePaper flex cable.
- Confirm that the flex cable direction and connector type match your hardware.
- Flash the matching firmware again and wait for the ePaper refresh to finish.
Q4: Why does the deployed page look different from the editor preview?
Different ePaper panels have different resolution, color capability, grayscale behavior, and refresh characteristics.
- Build the page with the same resolution as the target screen.
- Avoid very small text if the screen resolution is low.
- Use high-contrast colors for monochrome or grayscale screens.
- Check the official documentation for editor and deployment details.
Resources
- SenseCraft HMI Platform
- SenseCraft HMI Official Documentation
- SenseCraft HMI Supported Hardware
- SenseCraft HMI Getting Started
- SenseCraft HMI Release Notes
Tech Support & Product Discussion
Thank you for choosing our products! We are here to provide you with different support to ensure that your experience with our products is as smooth as possible. We offer several communication channels to cater to different preferences and needs.