Grove - CO2 & Temperature & Humidity Sensor (SCD41)
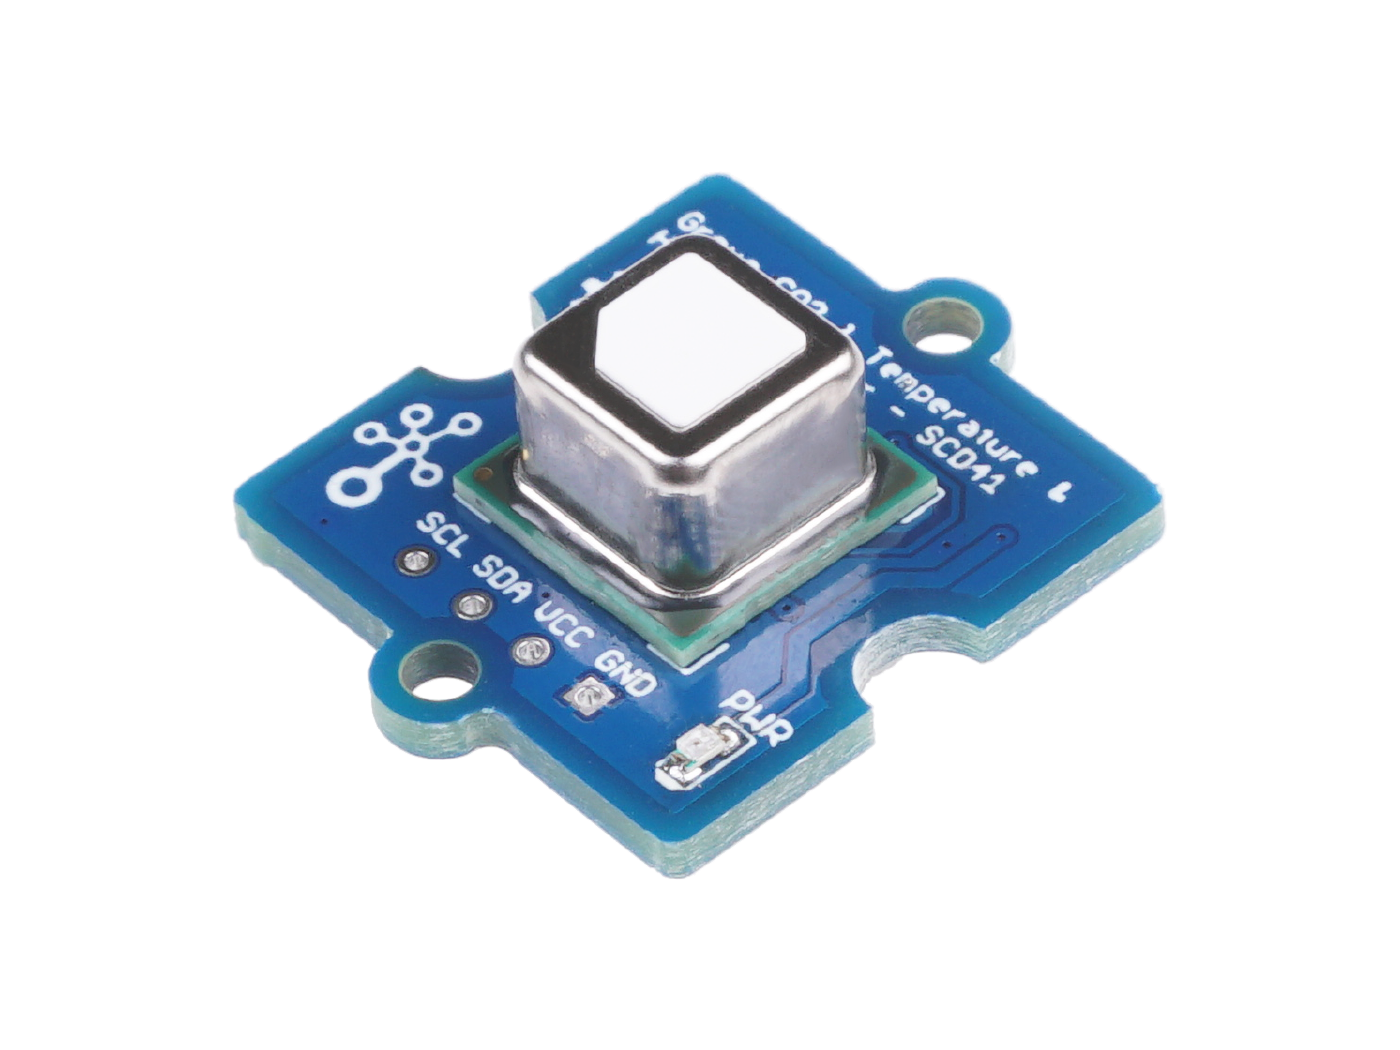
The Grove - CO2 & Temperature & Humidity Sensor - SCD41 is a small but powerful module which made by Sensirion. It is a multiple function sensor which can measure temperature, pressure, humidity and CO2 at the same time. It is based on the SCD41 module and you can use this sensor in your GPS, IoT devices or other device which needs those four parameters.
Features
- 3-in-1 for multiple measurement
- low power consumption
- Wide measurement range
- I2C Interface
- Wide power supply range
Specification
| Item | Value |
|---|---|
| Working voltage | 2.4V~5V |
| Operating range | -10~+60℃; 0-100% r.H.; 0-40,000ppm |
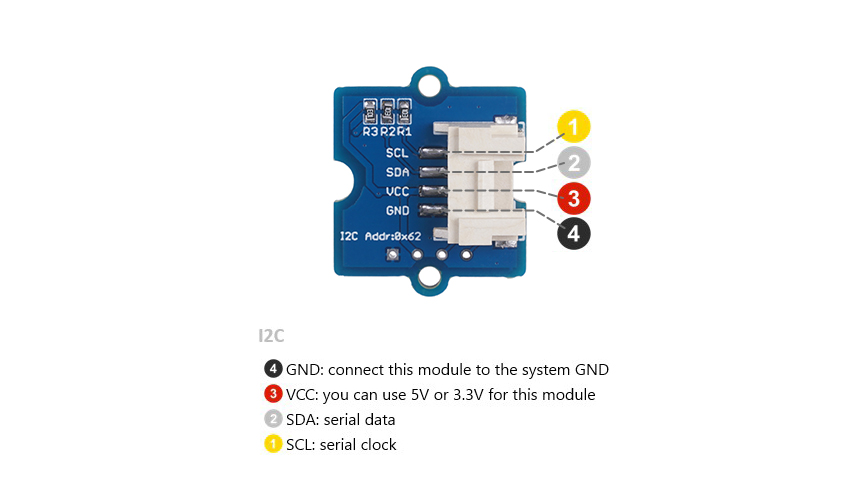
| I2C Address | 0x62 |
Hardware Overview
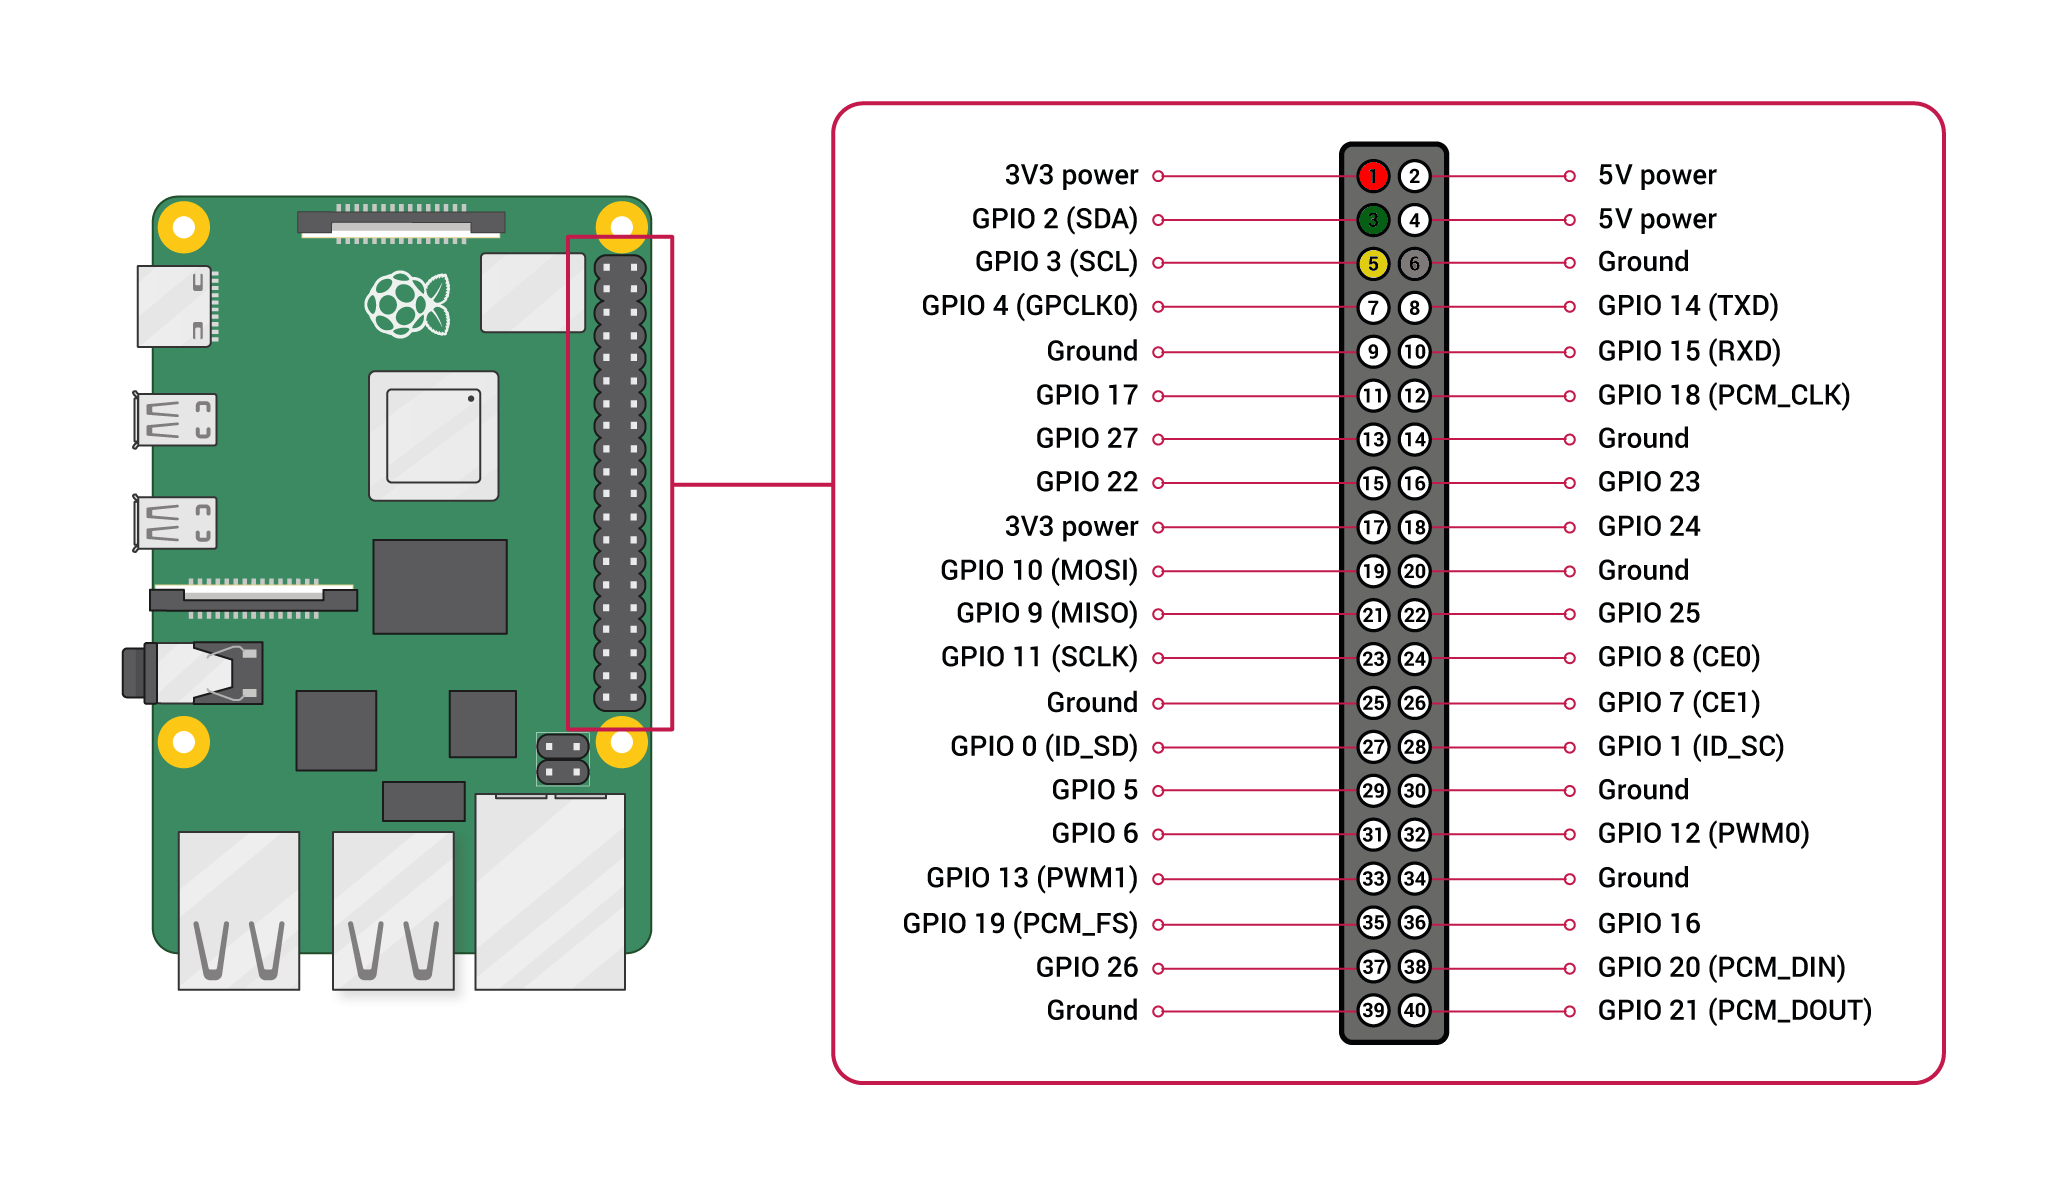
Pin Map
Platforms Supported
| Arduino | Raspberry Pi | |||
|---|---|---|---|---|
The platforms mentioned above as supported is/are an indication of the module's software or theoritical compatibility. We only provide software library or code examples for Arduino platform in most cases. It is not possible to provide software library / demo code for all possible MCU platforms. Hence, users have to write their own software library.
Getting Started
Play With Arduino
Hardware
Materials required
| Seeeduino V4.2 | Base Shield | CO2 & Temperature & Humidity Sensor - SCD41 |
|---|---|---|
 |  |  |
| Get One Now | Get One Now | Get One Now |
1 Please plug the USB cable gently, otherwise you may damage the port. Please use the USB cable with 4 wires inside, the 2 wires cable can't transfer data. If you are not sure about the wire you have, you can click here to buy
2 Each Grove module comes with a Grove cable when you buy. In case you lose the Grove cable, you can click here to buy.
-
Step 1. Connect the Grove-Temperature&Humidity&Pressure&Gas Sensor(BME680) to port I2C of Grove-Base Shield.
-
Step 2. Plug Grove - Base Shield into Seeeduino.
-
Step 3. Connect Seeeduino to PC via a USB cable.
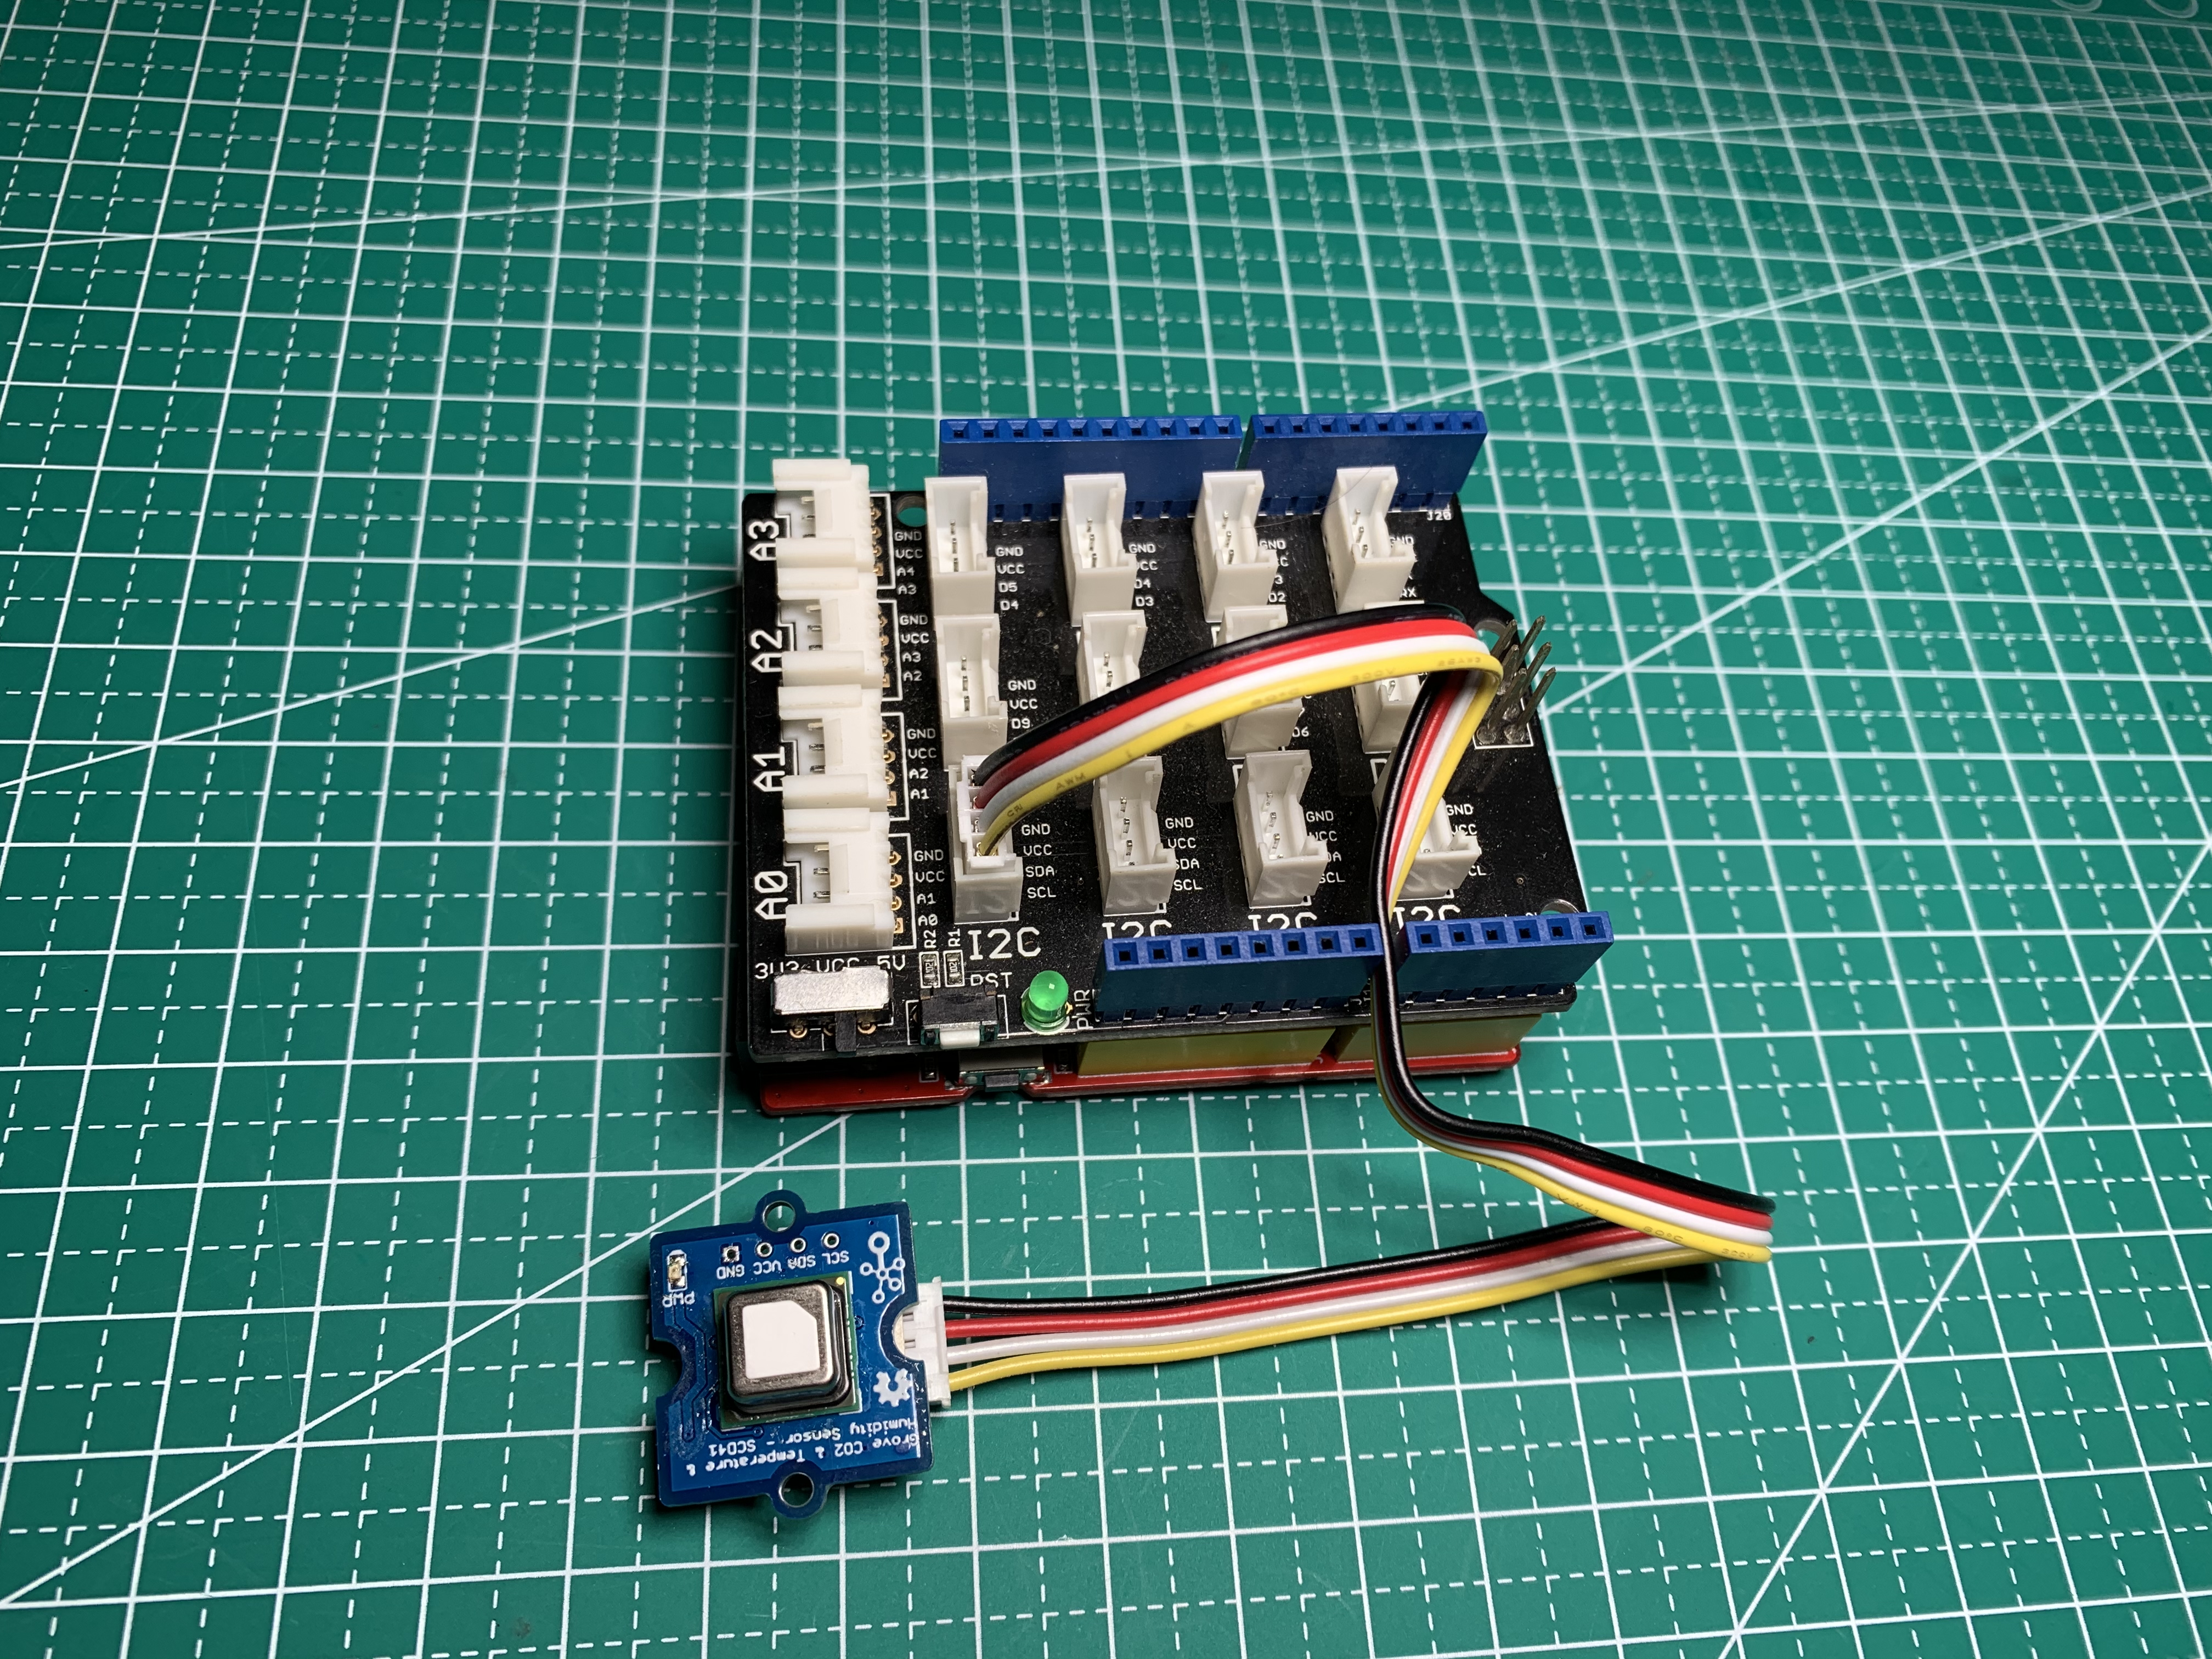
If we don't have Grove Base Shield, We also can directly connect this module to Seeeduino as below.
| Seeeduino | Grove-BME680 |
|---|---|
| 5V | Red |
| GND | Black |
| SDA | White |
| SCL | Yellow |
Software
If this is the first time you work with Arduino, we strongly recommend you to see Getting Started with Arduino before the start.
-
Step 1. Download the arduino-i2c-scd4x library and arduino-core dependency from Github.
-
Step 2. Refer to How to install library to install library for Arduino.
-
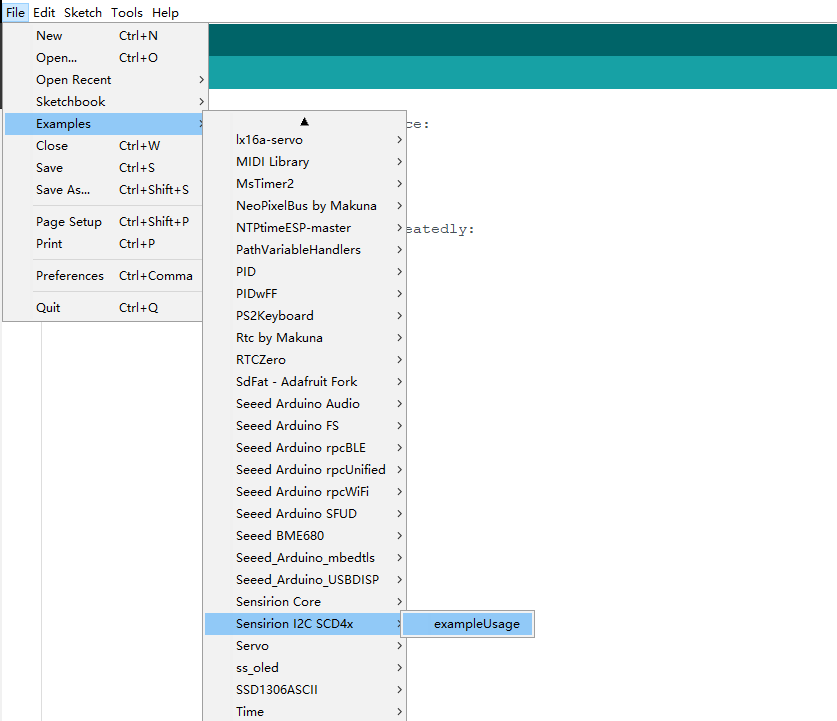
Step 3. Restart the Arduino IDE. Open Sensirion I2c SCD4x example via the path: File --> Examples --> Sensirion I2c SCD4x --> exampleUsage.
-
Step 4. Upload the demo. If you do not know how to upload the code, please check How to upload code.
-
Step 5. Open the Serial Monitor of Arduino IDE by click Tool-> Serial Monitor. Or tap the ++ctrl+shift+m++ key at the same time. if every thing goes well, you will get the result.
The result should be like:
Serial: 0x6A565F073B88
Waiting for first measurement... (5 sec)
Co2:868 Temperature:33.08 Humidity:49.40
Co2:845 Temperature:32.72 Humidity:50.13
Co2:852 Temperature:32.28 Humidity:51.54
- To get the stable and accurate value, you need to let the arduino run the code for about 2 hours. The result is much more reliable then.
Play on RaspberryPi
Materials required
| Raspberry pi | Grove Base Hat for Raspberry Pi | Grove - OLED Display 1.12" V3.0 |
|---|---|---|
 |  | |
| Get One Now | Get ONE Now | Get ONE Now |
Get ready for RaspberryPi
I2C Connection
-
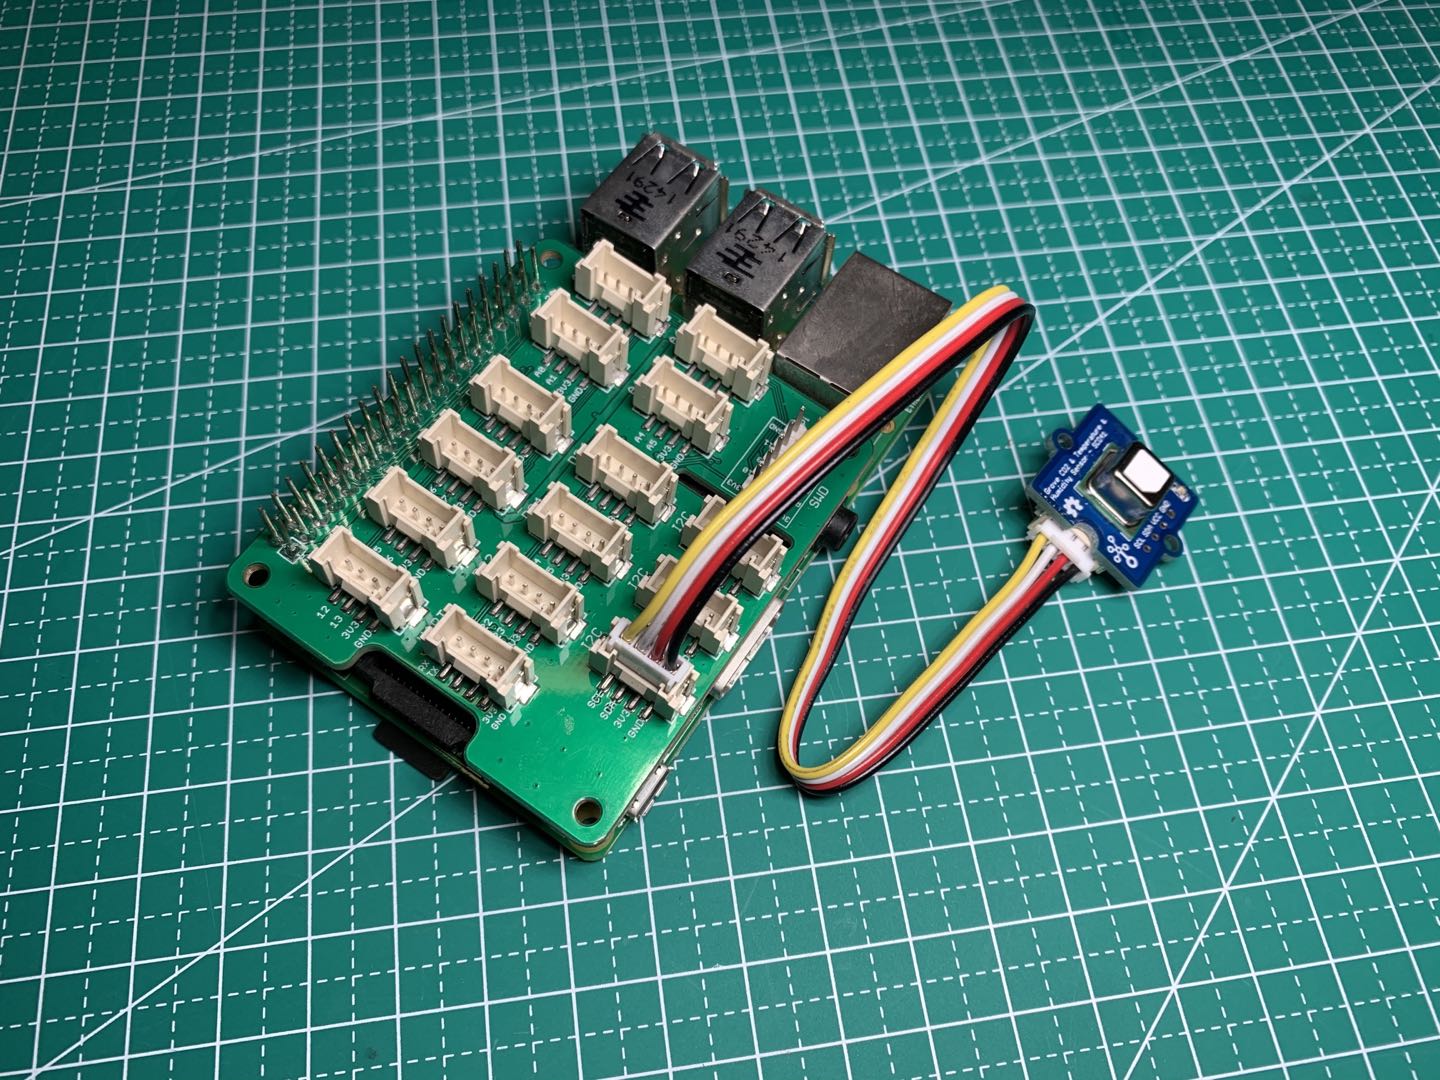
Step 1. Plug Grove - CO2 & Temperature & Humidity Sensor - SCD41 to I2C port of Grove - Base Hat.
-
Step 2. Plug Grove - Base Hat into RaspberryPi.
-
Step 3. Connect RaspberryPi to a PC via Serial or SSH.
Software
- Step 1. Enable I2C on RaspberryPi
sudo apt-get install -y i2c-tools
sudo raspi-config
Follow the pictures to enable I2C and SPI on your RaspberryPi.
_V1.0/img/rpicon.png)
_V1.0/img/rpicon1.png)
_V1.0/img/rpicon2.png)
And then reboot your RaspberryPi
sudo reboot
- Step 2. Install necessary libraries
sudo apt-get install wget gcc make unzip -y
Install WiringPi Library
If you use WiringPi, you need to update WiringPi to version 2.52. This library may not be updated. Other libraries are recommended
cd
sudo apt-get install wiringpi
wget https://project-downloads.drogon.net/wiringpi-latest.deb
sudo dpkg -i wiringpi-latest.deb
gpio -v
Install bcm2835
cd
wget http://www.airspayce.com/mikem/bcm2835/bcm2835-1.60.tar.gz
tar zxvf bcm2835-1.60.tar.gz
cd bcm2835-1.60/
sudo ./configure
sudo make && sudo make check && sudo make install
For further information and the newest libraries please refer to website:bcm2835
-
Step 3. Download the driver from the Sensirion GitHub Page and extract the
.zipon your Raspberry Pi -
Step 4. Compile the driver
1.Open a terminal
2.Navigate to the driver directory. E.g. cd ~/raspberry-pi-i2c-scd4x
3.Run the make command to compile the driver
Output:
rm -f scd4x_i2c_example_usage
cc -Os -Wall -fstrict-aliasing -Wstrict-aliasing=1 -Wsign-conversion -fPIC -I. -o scd4x_i2c_example_usage  scd4x_i2c.h scd4x_i2c.c sensirion_i2c_hal.h sensirion_i2c.h sensirion_i2c.c \
sensirion_i2c_hal.c sensirion_config.h sensirion_common.h sensirion_common.c scd4x_i2c_example_usage.c
- Step 5. Test your connected sensor
Run ./scd4x_i2c_example_usage in the same directory you used to compile the driver.
Output:
serial: 0xbff79f073b51
CO2: 799
Temperature: 20.92
Humidity: 35.95
CO2: 900
Temperature: 20.92
Humidity: 36.47
CO2: 926
Temperature: 20.81
Humidity: 36.85
...
For further infomation, please check Sensirion/raspberry-pi-i2c-scd4x on GitHub.
Schematic Online Viewer
Resources
- [PDF] Sensirion CO2 Sensors SCD4x Datasheet
- [STEP] STEP of Sensirion CO2 Sensors SCD4x
- [ZIP] Grove - CO2 & Temperature & Humidity Sensor - SCD41 Board File
Tech Support & Product Discussion
Thank you for choosing our products! We are here to provide you with different support to ensure that your experience with our products is as smooth as possible. We offer several communication channels to cater to different preferences and needs.