Grove - CO2 & Temperature & Humidity Sensor (SCD30)
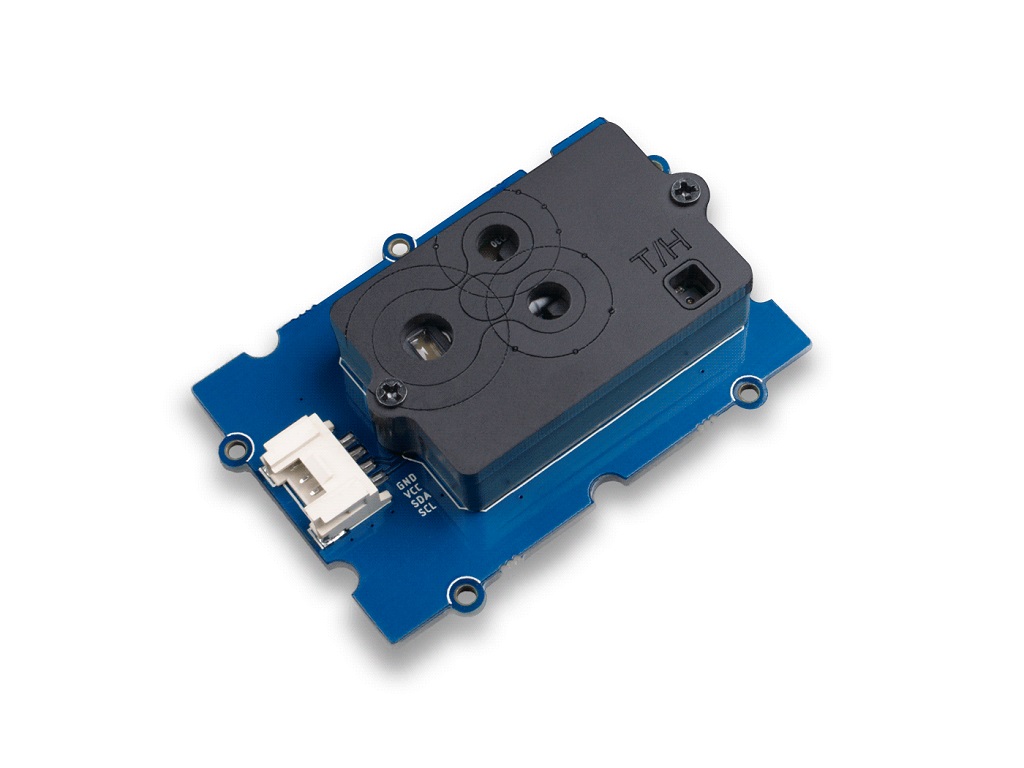
The Grove - CO2 & Temperature & Humidity Sensor (SCD30) is a high precision carbon dioxide sensor, which is based on Sensirion SCD30. The measuring range of this sensor is 0 ppm-40'000 ppm, and the measurement accuracy can reach to ±(30 ppm + 3%) between 400ppm to 10'000ppm.
In addition to the Non-Dispersive Infrared(NDIR) measurement technology for CO2 detection, the SCD30 integrates Sensirion humidity and temperature sensors on the same sensor module.
Upgradable to Industrial Sensors
With the SenseCAP S2110 controller and S2100 data logger, you can easily turn the Grove into a LoRaWAN® sensor. Seeed not only helps you with prototyping but also offers you the possibility to expand your project with the SenseCAP series of robust industrial sensors.
SenseCAP S210x series industrial sensors provide an out-of-box experience for environmental sensing. Please refer to the S2103 Wireless CO2, Temperature, and Humidity Sensor with higher performance and robustness for air quality monitoring. The series includes sensors for soil moisture, air temperature and humidity, light intensity, CO2, EC, and an 8-in-1 weather station. Try the latest SenseCAP S210x for your next successful industrial project.
| SenseCAP Industrial Sensor |
 |
| S2103 Air Temp & Humidity & CO2 |
Version
| Product Version | Changes | Released Date |
|---|---|---|
| Grove - CO2 & Temperature & Humidity Sensor (SCD30) V1.0 | Initial | Dec 2018 |
Application Ideas
- Air Purifier
- Environmental Monitoring
- Plant Environmental Monitoring
Feature
- NDIR CO2 sensor technology
- Integrated temperature and humidity sensor
- Best performance-to-price ratio
- Dual-channel detection for superior stability
- Digital interface I2C
- Low power consumption
- Ultra-long sensor lifetime (15 years)
Specification
| Parameter | Value |
|---|---|
| Supply voltage | 3.3V / 5V |
| Operating temperature | 0 – 50℃ |
| Storage temperature | - 40°C – 70°C |
| Humidity operating conditions | 0 – 95 %RH |
| Sensor lifetime | 15 years |
| Interface | I2C |
| I2C Address | 0x61 |
| Size | L: 61mm W: 42mm H: 19mm |
| Weight | 19.7g |
| Package Size | L: 110mm W: 70mm H: 40mm |
| Gross weight | 27g |
| Parameter | Conditions | Value |
|---|---|---|
| CO2 measurement range | 0 – 40’000 ppm | |
| Accuracy | 400ppm – 10'000ppm | ± (30 ppm + 3%) |
| Repeatability | 400ppm – 10'000ppm | 10ppm |
| Response time | τ63% | 20 s |
| Parameter | Conditions | Value |
|---|---|---|
| Humidity measurement range | 0 %RH – 100 %RH | |
| Accuracy | 0 – 50°C, 0 – 100%RH | ±2 %RH |
| Repeatability | 0.1 %RH | |
| Response time | τ63% | 8 s |
| Parameter | Conditions | Value |
|---|---|---|
| Temperature measurement range | -40°C – 120°C | |
| Accuracy | 0 – 50°C | ±0.5°C |
| Repeatability | 0.1°C | |
| Response time | τ63% | > 2 s |
| Parameter | Conditions | Value |
|---|---|---|
| Average current | Update interval 2 s | 19 mA |
| Max. current | During measurement | 75 mA |
| Energy consumption | 1 measurement | 120 mJ |
Hardware Overview

Platforms Supported
| Arduino | Raspberry Pi | |||
|---|---|---|---|---|
Getting Started
Play With Arduino
Hardware
Materials required
| Seeeduino V4.2 | Base Shield | Grove-CO2 & T&H SCD30 |
|---|---|---|
 |  |  |
| Get ONE Now | Get ONE Now | Get ONE Now |
In addition, you can consider our new Seeeduino Lotus M0+, which is equivalent to the combination of Seeeduino V4.2 and Baseshield.
1 Please plug the USB cable gently, otherwise you may damage the port. Please use the USB cable with 4 wires inside, the 2 wires cable can't transfer data. If you are not sure about the wire you have, you can click here to buy
2 Each Grove module comes with a Grove cable when you buy. In case you lose the Grove cable, you can click here to buy.
Hardware Connection
-
Step 1. Connect the Grove - CO2 & Temperature & Humidity Sensor (SCD30) to the I2C port of the Base Shield.
-
Step 2. Plug Grove - Base Shield into Seeeduino.
-
Step 3. Connect Seeeduino to PC via a USB cable.

Software
If this is the first time you work with Arduino, we strongly recommend you to see Getting Started with Arduino before the start.
-
Step 1. Download the Seeed SCD30 Library Library from Github.
-
Step 2. Refer to How to install library to install library for Arduino.
-
Step 3. Restart the Arduino IDE. Open the example, you can open it in the following three ways: a. Open it directly in the Arduino IDE via the path: File --> Examples -->Grove_scd30_co2_sensor-->SCD30_Example.

b. Open it in your computer by click the SCD30_Example.ino which you can find in the folder XXXX\Arduino\libraries\Seeed_SCD30-master\examples\SCD30_Example, XXXX is the location you installed the Arduino IDE.

c. Or, you can just click the icon
 in upper right corner of the code block to copy the following code into a new sketch in the Arduino IDE.
#include "SCD30.h"

#if defined(ARDUINO_ARCH_AVR)
 #pragma message("Defined architecture for ARDUINO_ARCH_AVR.")
 #define SERIAL Serial
#elif defined(ARDUINO_ARCH_SAM)
 #pragma message("Defined architecture for ARDUINO_ARCH_SAM.")
 #define SERIAL SerialUSB
#elif defined(ARDUINO_ARCH_SAMD)
 #pragma message("Defined architecture for ARDUINO_ARCH_SAMD.")
 #define SERIAL SerialUSB
#elif defined(ARDUINO_ARCH_STM32F4)
 #pragma message("Defined architecture for ARDUINO_ARCH_STM32F4.")
 #define SERIAL SerialUSB
#else
 #pragma message("Not found any architecture.")
 #define SERIAL Serial
#endif


void setup()
{
    Wire.begin();
    SERIAL.begin(115200);
    SERIAL.println("SCD30 Raw Data");
    scd30.initialize();
}

void loop()
{
    float result[3] = {0};

    if(scd30.isAvailable())
    {
        scd30.getCarbonDioxideConcentration(result);
        SERIAL.print("Carbon Dioxide Concentration is: ");
        SERIAL.print(result[0]);
        SERIAL.println(" ppm");
        SERIAL.println(" ");
        SERIAL.print("Temperature = ");
        SERIAL.print(result[1]);
        SERIAL.println(" ℃");
        SERIAL.println(" ");
        SERIAL.print("Humidity = ");
        SERIAL.print(result[2]);
        SERIAL.println(" %");
        SERIAL.println(" ");
        SERIAL.println(" ");
        SERIAL.println(" ");
    }

    delay(2000);
}
The library file may be updated. This code may not be applicable to the updated library file, so we recommend that you use the first two methods.
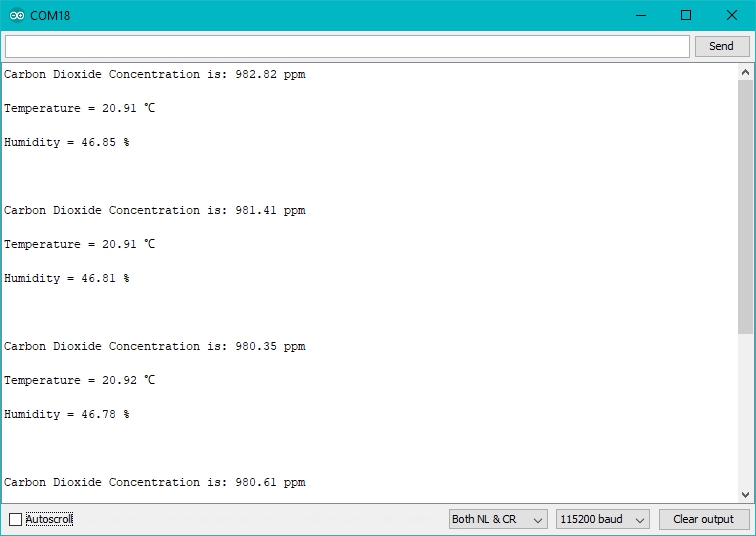
- Step 4. Upload the demo. If you do not know how to upload the code, please check How to upload code.
If everything goes well, the raw data of the Grove - CO2 & Temperature & Humidity Sensor (SCD30) should be able to read from Serial Monitor.
Calibration and Placement
In order to get more accurate results in a practical scenario, you need to pay attention to the following two points:
-
- The correct placement
-
- Calibration
Placement
Please refer to the SCD30 Design-In Guidelines for the correct placement.
Calibration
When activated for the first time a period of minimum 7 days is needed so that the algorithm can find its initial parameter set for ASC. The sensor has to be exposed to fresh air for at least 1 hour every day. Also during that period, the sensor may not be disconnected from the power supply, otherwise the procedure to find calibration parameters is aborted and has to be restarted from the beginning. The successfully calculated parameters are stored in non-volatile memory of the SCD30 having the effect that after a restart the previously found parameters for ASC are still present. For more detail about the calibration, please refer to the Interface Description Sensirion SCD30 Sensor Module
There are two ino sample in the SCD30 library foldor, you can run the SCD30_auto_calibration.ino to start the calibration.
Play With Raspberry Pi
Hardware
- Step 1. Things used in this project:
| Raspberry pi | Grove Base Hat for RasPi | Grove-CO2 & T&H SCD30 |
|---|---|---|
|
|
|
| Get ONE Now | Get ONE Now | Get ONE Now |


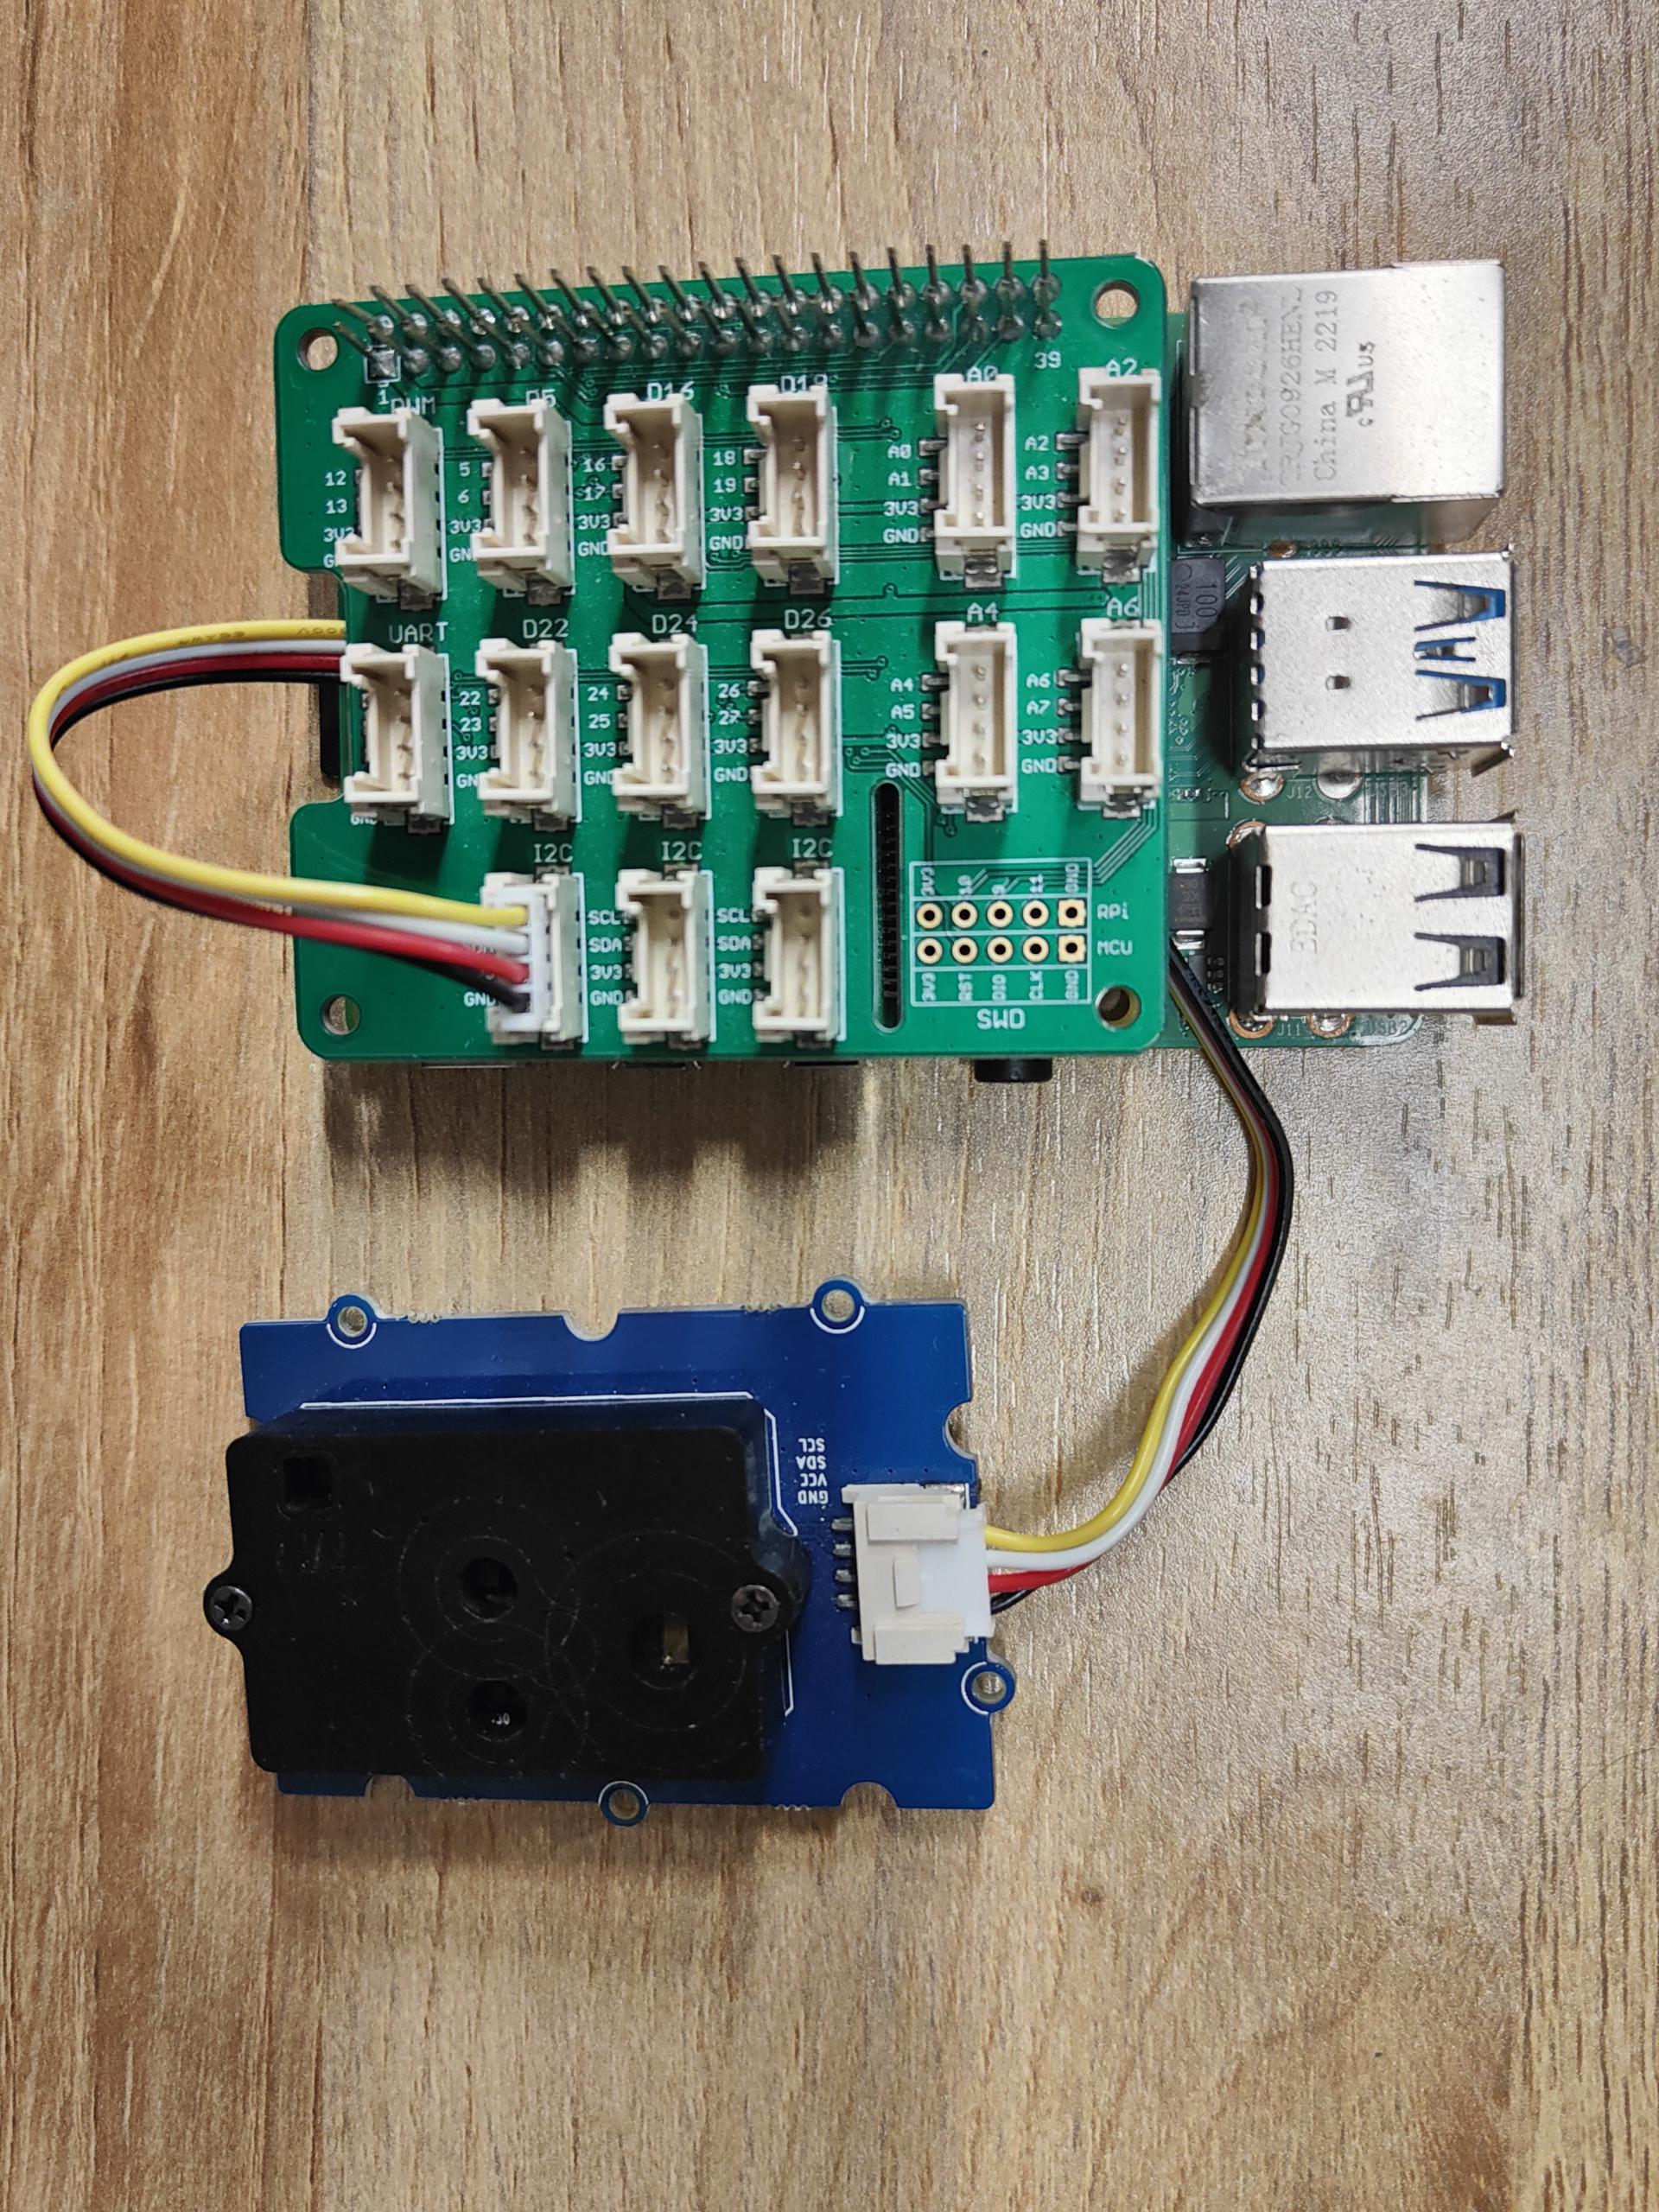
- Step 2. Plug the Grove Base Hat into Raspberry.
- Step 3. Connect the Grove-CO2 to the I2C port of the Base Hat.
- Step 4. Connect the Raspberry Pi to PC through USB cable.
Software
If you are using Raspberry Pi with Raspberrypi OS >= Bullseye, you have to use this command line only with Python3.
- Step 1. Follow Setting Software to configure the development environment.
- Step 2. Enter the relevant virtual environment.
source ~/grove_env/env/bin/activate
cd ~/grove_env/grove.py/grove
-
Step 3. Excute below command to run the code.
-
The following is to check the grove_co2_scd30.py code.
less grove_co2_scd30.py
from typing import NoReturn
from grove.i2c import Bus
import struct
import time


class GroveCo2Scd30(object):
    __COMMAND_TRIGGER_CONTINUOUS_MEASUREMENT = 0x0010
    __COMMAND_STOP_CONTINUOUS_MEASUREMENT = 0x0104
    __COMMAND_SET_MEASUREMENT_INTERVAL = 0x4600
    __COMMAND_GET_DATA_READY_STATUS = 0x0202
    __COMMAND_READ_MEASUREMENT = 0x0300
    __COMMAND_ACTIVATE_ASC = 0x5306
    __COMMAND_SET_FRC = 0x5204
    __COMMAND_SET_TEMPRATURE_OFFSET = 0x5403
    __COMMAND_ALTITUDE_COMPENSATION = 0x5102
    __COMMAND_READ_FIRMWARE_VERSION = 0xd100
    __COMMAND_SOFT_RESET = 0xd304

    def __init__(self, address=0x61, bus=1):
        self.address = address
        self.bus = Bus(bus)

        self.set_measurement_interval(2)
        self.trigger_continuous_measurement()

    @staticmethod
    def _calc_crc(data: list) -> int:
        crc = 0xff

        for d in data:
            crc ^= d

            for _ in range(8):
                if crc & 0x80:
                    crc = ((crc << 1) ^ 0x31) & 0xff
                else:
                    crc = (crc << 1) & 0xff

        return crc

    def _write(self, cmd: int, data: list):
        write_data = list(struct.pack(">H", cmd))
        if data is not None:
            for d in data:
                write_data.extend(struct.pack(">H", d))
                write_data.append(GroveCo2Scd30._calc_crc(struct.pack(">H", d)))

        write_msg = self.bus.msg.write(self.address, write_data)
        self.bus.i2c_rdwr(write_msg)

    def _read(self, address: int, data_number: int) -> list:
        write_data = list(struct.pack(">H", address))

        write_msg = self.bus.msg.write(self.address, write_data)
        self.bus.i2c_rdwr(write_msg)

        read_msg = self.bus.msg.read(self.address, 3 * data_number)
        self.bus.i2c_rdwr(read_msg)

        result = []
        for i in range(data_number):
            d = read_msg.buf[i*3:i*3+2]
            if GroveCo2Scd30._calc_crc(d) != read_msg.buf[i*3+2][0]:
                raise ValueError("CRC mismatch")

            result.append(struct.unpack(">H", d)[0])

        return result

    def trigger_continuous_measurement(self, pressure: int = 0):
        self._write(self.__COMMAND_TRIGGER_CONTINUOUS_MEASUREMENT, [pressure])

    def stop_continuous_measurement(self):
        self._write(self.__COMMAND_STOP_CONTINUOUS_MEASUREMENT, None)

    def set_measurement_interval(self, interval: int):
        self._write(self.__COMMAND_SET_MEASUREMENT_INTERVAL, [interval])

    def get_measurement_interval(self) -> int:
        data = self._read(self.__COMMAND_SET_MEASUREMENT_INTERVAL, 1)

        return data[0]

    def get_data_ready_status(self) -> bool:
        data = self._read(self.__COMMAND_GET_DATA_READY_STATUS, 1)

        return True if data[0] == 1 else False

    def read_measurement(self) -> tuple:
        data = self._read(self.__COMMAND_READ_MEASUREMENT, 6)

        data_bytes = struct.pack(">HHHHHH", data[0], data[1], data[2], data[3], data[4], data[5])
        data_floats = struct.unpack(">fff", data_bytes)
        co2 = data_floats[0]
        temp = data_floats[1]
        humi = data_floats[2]

        return co2, temp, humi

    def set_forced_recalibration(self, co2: float):
        self._write(self.__COMMAND_SET_FRC, [int(co2)])

    def set_automatic_self_calibration(self, activate: bool):
        self._write(self.__COMMAND_ACTIVATE_ASC, [1 if activate else 0])

    def get_automatic_self_calibration(self) -> bool:
        data = self._read(self.__COMMAND_ACTIVATE_ASC, 1)

        return True if data[0] == 1 else False

    def set_temperature_offset(self, offset: float):
        self._write(self.__COMMAND_SET_TEMPRATURE_OFFSET, [int(offset * 100)])

    def get_temperature_offset(self) -> float:
        data = self._read(self.__COMMAND_SET_TEMPRATURE_OFFSET, 1)

        return float(data[0]) / 100

    def set_altitude_compensation(self, altitude: int):
        self._write(self.__COMMAND_ALTITUDE_COMPENSATION, [altitude])

    def get_altitude_compensation(self) -> int:
        data = self._read(self.__COMMAND_ALTITUDE_COMPENSATION, 1)

        return data[0]

    def read(self) -> tuple:
        if not self.get_data_ready_status():
            return None

        return self.read_measurement()


def main() -> NoReturn:
    sensor = GroveCo2Scd30()

    while True:
        if sensor.get_data_ready_status():
            co2, temperature, humidity = sensor.read()
            print(f"CO2 concentration is {co2:.1f} ppm")
            print(f"Temperature in Celsius is {temperature:.2f} C")
            print(f"Relative Humidity is {humidity:.2f} %")

        time.sleep(1)


if __name__ == "__main__":
    main()
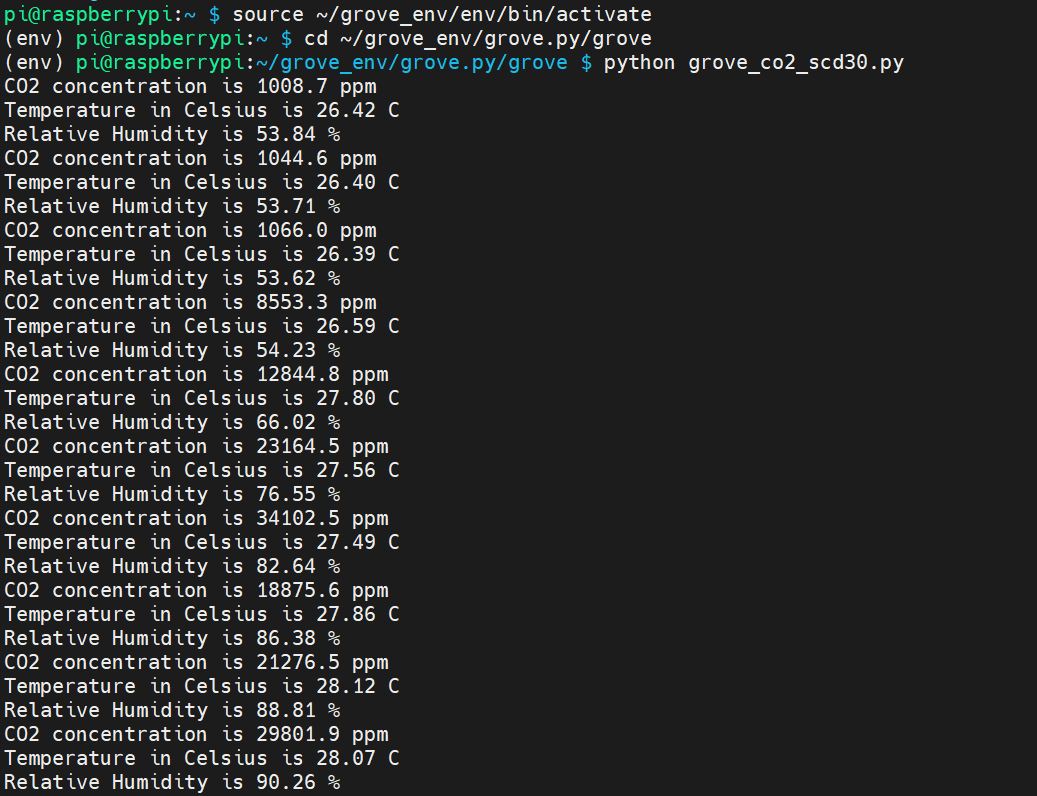
- Run this code
python grove_co2_scd30.py
If everything goes smoothly, you will see the following phenomenon.😄
Play With Wio Terminal (ArduPy)
Hardware
- Step 1. Prepare the below stuffs:
| Wio Terminal | Grove-CO2 & T&H SCD30 |
|---|---|
 | |
| Get One Now | Get One Now |
-
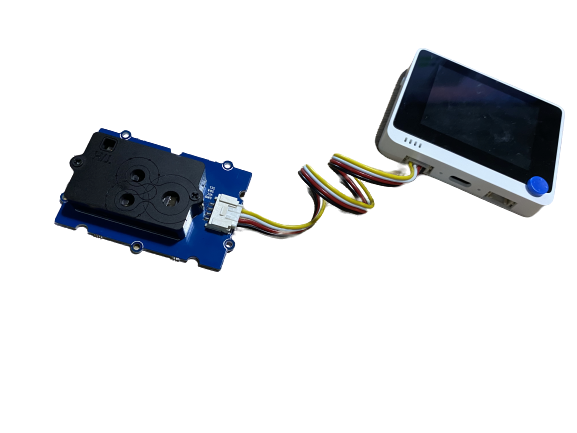
Step 2. Connect Grove-CO2 & T&H SCD30 to the I2C Grove port of Wio Terminal.
-
Step 3. Connect the Wio Terminal to PC through USB Type-C cable.
Software
-
Step 1. Follow ArduPy Getting Started to configure the ArduPy development environment on Wio Terminal.
-
Step 2. Make sure that the ArduPy firmware is flashed into Wio Terminal. For more information, please follow here.
aip install Seeed-Studio/seeed-ardupy-scd30
aip build
aip flash
- Step 3. Copy the following code and save it as
ArduPy-scd30.py:
from arduino import grove_scd30
from machine import LCD
from machine import Sprite
import time

scd30 = grove_scd30()
lcd = LCD()
spr = Sprite(lcd) # Create a buff

def main():
    spr.createSprite(320, 240)
    while True:
        spr.setTextSize(2)
        spr.fillSprite(spr.color.BLACK)
        spr.setTextColor(lcd.color.ORANGE)
        spr.drawString("SCD30 Reading", 90, 10)
        spr.drawFastHLine(40, 35, 240, lcd.color.DARKGREY)
        spr.setTextColor(lcd.color.WHITE)
        spr.drawString("- CO2 Level: ", 20, 50)
        spr.drawString("- Temperature: ", 20, 80)
        spr.drawString("- Humidity: ", 20, 110)

        if(scd30.isAvailable()):
            data = scd30.getCarbonDioxideConcentration()
            spr.drawFloat(data[0], 2,220,50) # CO2
            spr.drawFloat(data[1], 2, 220,80)
            spr.drawFloat(data[2], 2, 220,110)
            spr.pushSprite(0,0)
        time.sleep_ms(500)

        print("\nCarbon Dioxide Concentration:", data[0])
        print("Temperature:", data[1])
        print("Humidity:", data[2])

if __name__ == "__main__":
    main()
- Step 4. Save the
ArduPy-scd30.pyin a location that you know. Run the following command and replace<YourPythonFilePath>with yourArduPy-scd30.pylocation.
aip shell -n -c "runfile <YourPythonFilePath>"
# Example:
# aip shell -n -c "runfile /Users/ansonhe/Desktop/ArduPy-scd30.py"
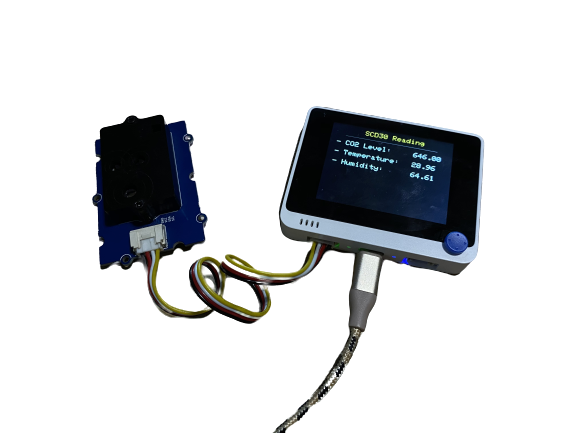
- Step 5. We will see the 3 data values display on terminal as below, and displaying on the Wio Terminal LCD screen.
ansonhe@Ansons-Macbook-Pro ~:aip shell -n -c "runfile /Users/ansonhe/Desktop/ArduPy-scd30.py"
Positional argument (/dev/cu.usbmodem1414301) takes precedence over --open.
Connected to ardupy
Carbon Dioxide Concentration: 2360.639
Temperature: 29.18707
Humidity: 66.88538

Carbon Dioxide Concentration: 2360.639
Temperature: 29.18707
Humidity: 66.88538

Carbon Dioxide Concentration: 2500.573
Temperature: 29.17372
Humidity: 66.61072
Schematic Online Viewer
Resources
- [ZIP] Grove - CO2 & Temperature & Humidity Sensor (SCD30) Schematic file
- [PDF] SCD30 Design-In Guideline
- [PDF] SCD30 Datasheet
- [PDF] SCD30 Interface Description
Tech Support & Product Discussion
Thank you for choosing our products! We are here to provide you with different support to ensure that your experience with our products is as smooth as possible. We offer several communication channels to cater to different preferences and needs.