SenseCAP Console with Node-RED Quick Start
SenseCAP K1100 - The Sensor Prototype Kit represents Seeed Studio concentrating the essence of LoRa® communication on technology and edge intelligence products, for the easiest deploying and mastering of LoRa® and IoT applications.


Upgradable to Industrial Sensors
With the SenseCAP S2110 controller and S2100 data logger, you can easily turn the Grove into a LoRaWAN® sensor. Seeed not only helps you with prototyping but also offers you the possibility to expand your project with the SenseCAP series of robust industrial sensors.
The IP66 housing, Bluetooth configuration, compatibility with the global LoRaWAN® network, built-in 19 Ah battery, and powerful support from APP make the SenseCAP S210x the best choice for industrial applications. The series includes sensors for soil moisture, air temperature and humidity, light intensity, CO2, EC, and an 8-in-1 weather station. Try the latest SenseCAP S210x for your next successful industrial project.


Node-RED is a programming tool for wiring together hardware devices, APIs and online services in new and interesting ways.
It provides a browser-based editor that makes it easy to wire together flows using the wide range of nodes in the palette that can be deployed to its runtime in a single-click.
To make it easier for our users to connect data from the SenseCAP platform to various other Paas platforms for more in-depth data processing. We will do a series of tutorials for SenseCAP & Node-RED.
This tutorial, the first in a series, will walk you through installing and using Node-red and calling the SenseCAP backend API to connect to Node-RED.
Install Node.js®
To install Node-RED locally you will need a supported version of Node.js.
Download the latest 14.x LTS version of Node.js from the official Node.js home page. It will offer you the best version for your system.
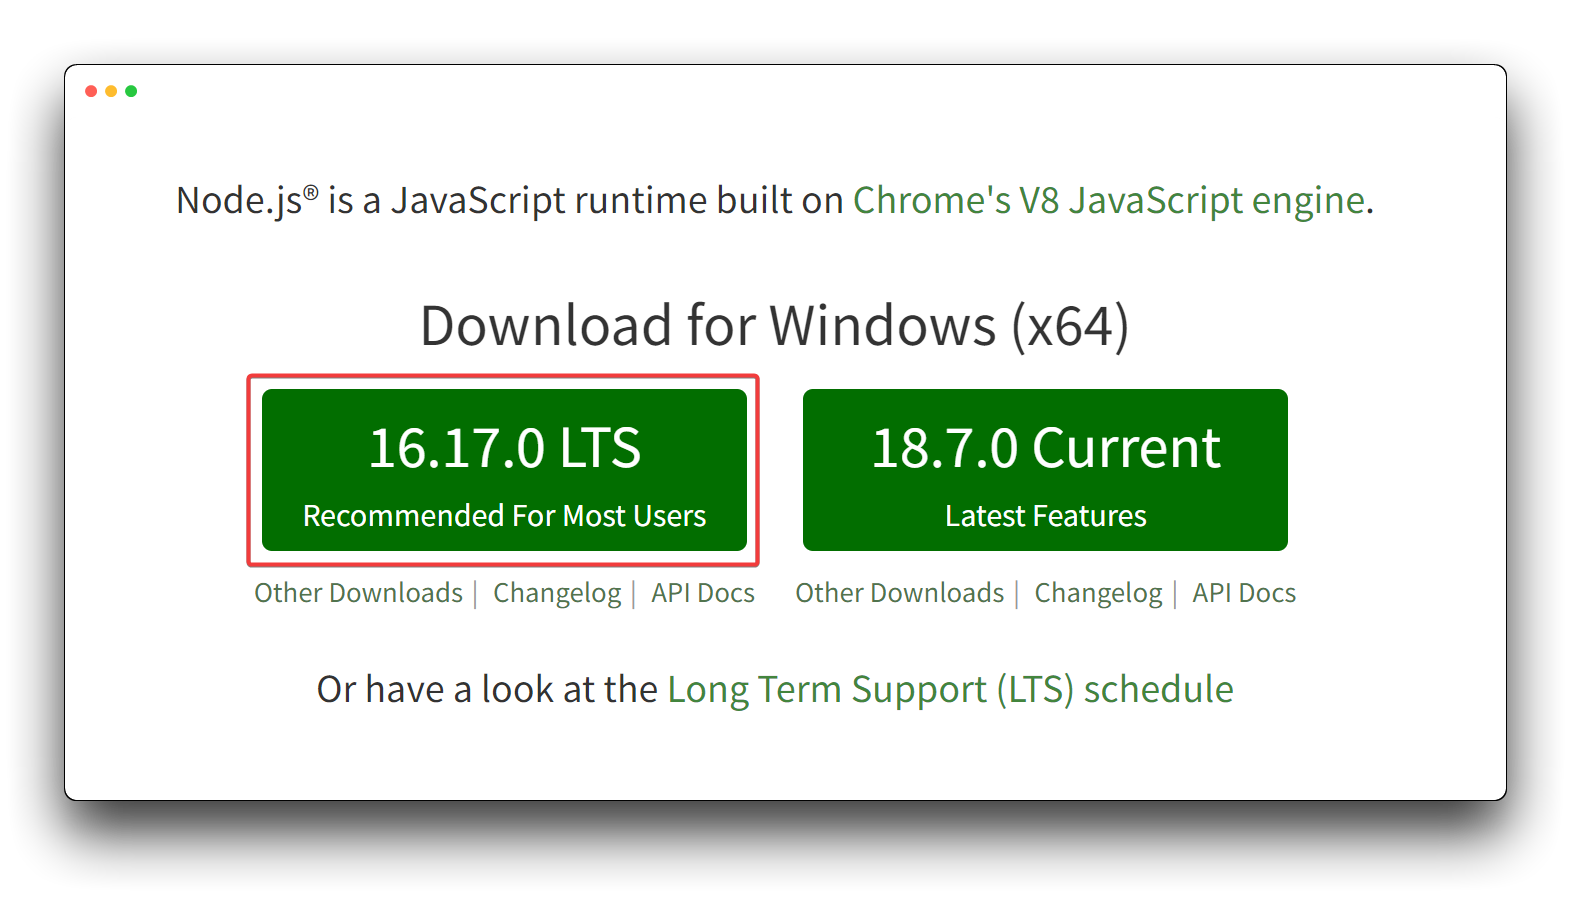
Run the downloaded MSI file. Installing Node.js requires local administrator rights; if you are not a local administrator, you will be prompted for an administrator password on install. Accept the defaults when installing. After installation completes, close any open command prompts and re-open to ensure new environment variables are picked up.
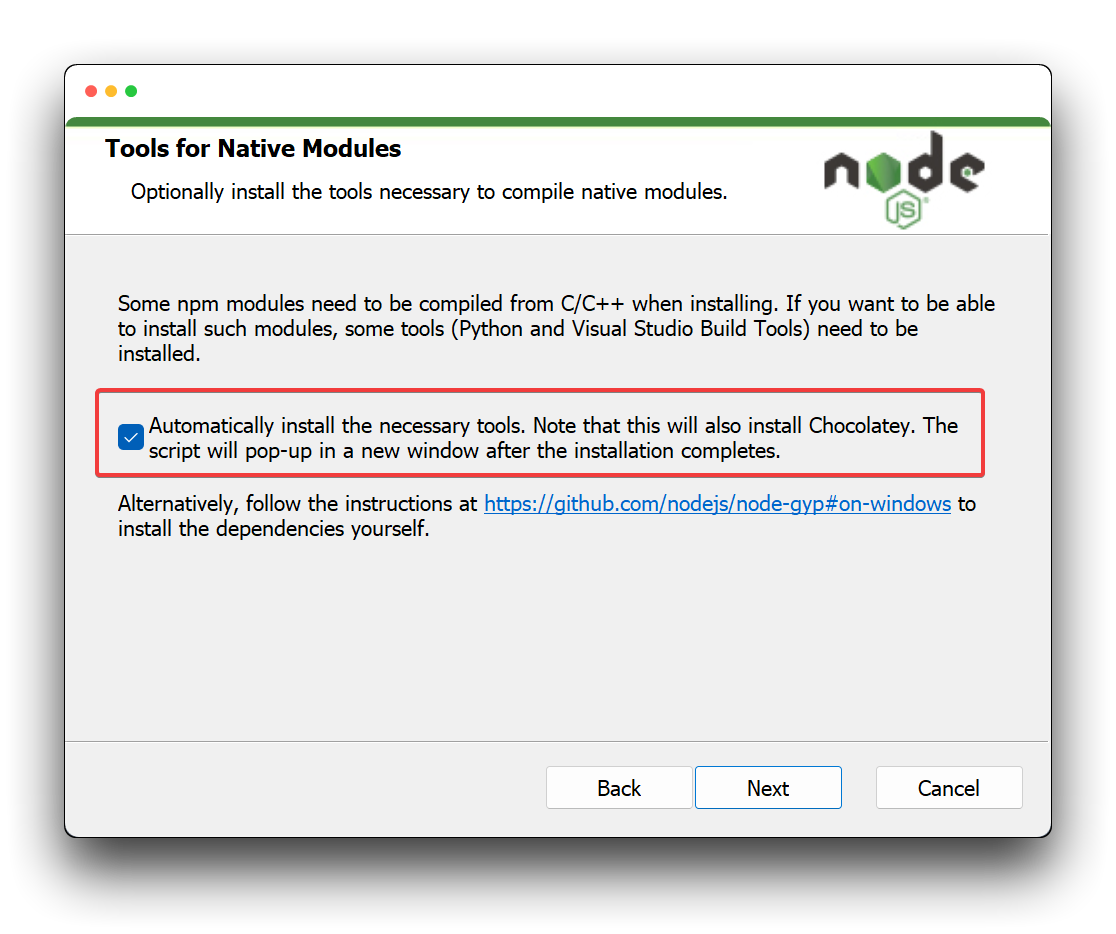
When installing Node.js, if you are using a computer that has not had any programming environment installed, we would recommend that you check the box to install the necessary tools while installing Node.js, which will save you a lot of necessary trouble.
The easiest way to install Node-RED is, using Node's package management tool, npm. However, we do not recommend installing Node-RED with npm 1.x, but rather upgrading it to the latest npm 2.x version.
On Windows (Requires Windows 10 and above), use the Win+R shortcut and type cmd in the pop-up window to bring up the terminal and execute the following command.
If you are using MacOS or Linux, please execute the following command in the terminal and add sudo in front of the command for non-root users.
npm install -g [email protected]
Once installed, open a command prompt and run the following command to ensure Node.js and npm are installed correctly.
node --version && npm --version
You should receive back output that looks similar to:
> v16.17.0
> 2.15.12
Install Node-RED
Installing Node-RED as a global module adds the command node-red to your system path. Execute the following at the command prompt:
npm install -g --unsafe-perm node-red
If Node-RED is installed as a global npm package, then execute the command node-red directly:
node-red
This will output the Node-RED log to the terminal. You must keep the terminal open in order to keep Node-RED running.
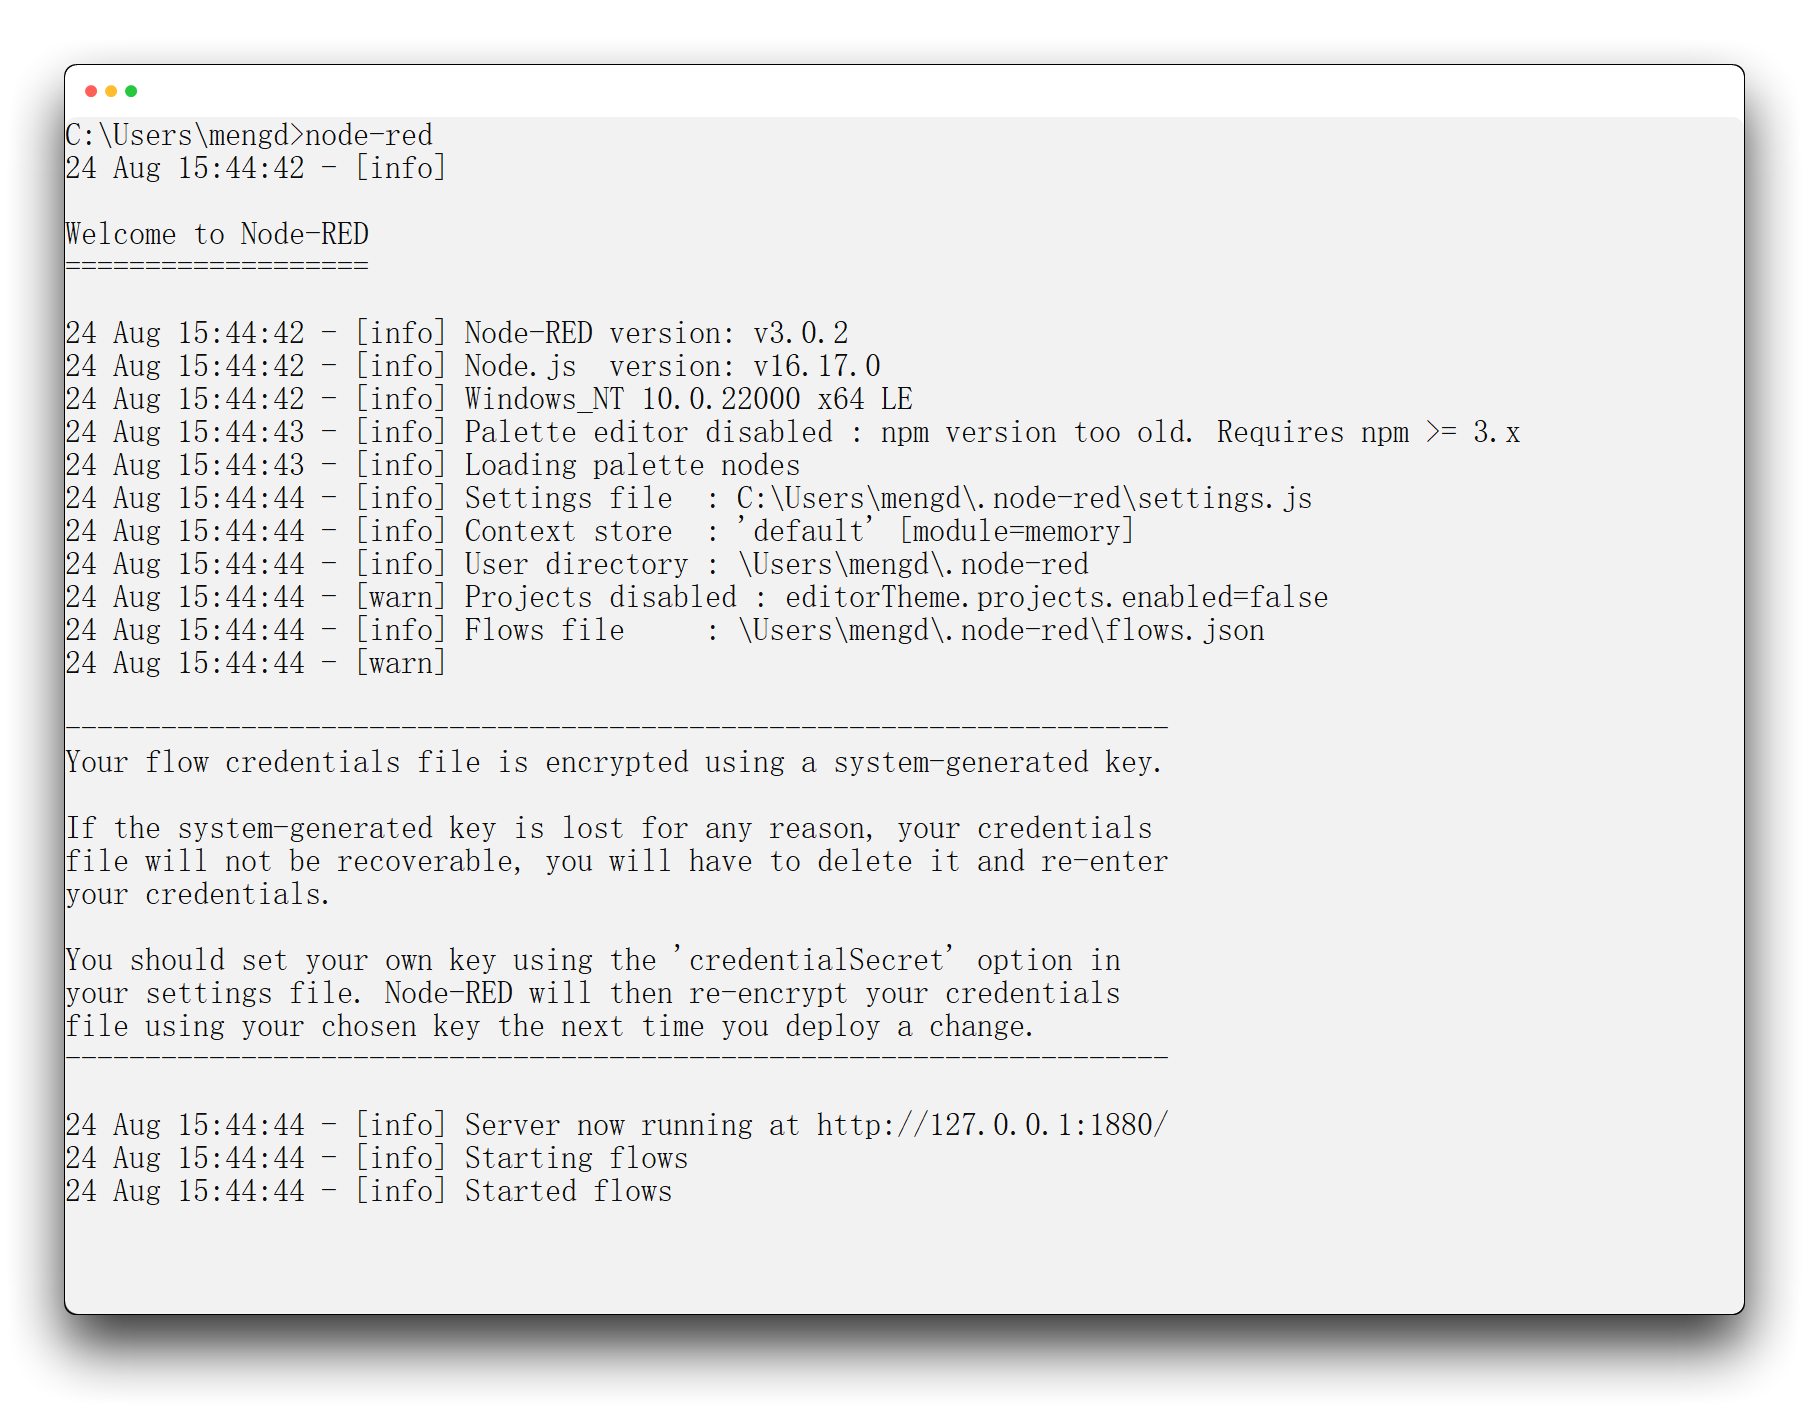
This will allow you to see the Node-RED editor on http://localhost:1880.
Get the SenseCAP API
Before proceeding to this section, make sure you have bound your K1100 device in the SenseCAP console.
Log in to the SenseCAP console. In the drop-down bar to the right of the user name at the top of the dashboard, we can find the Organization Information, please select it.
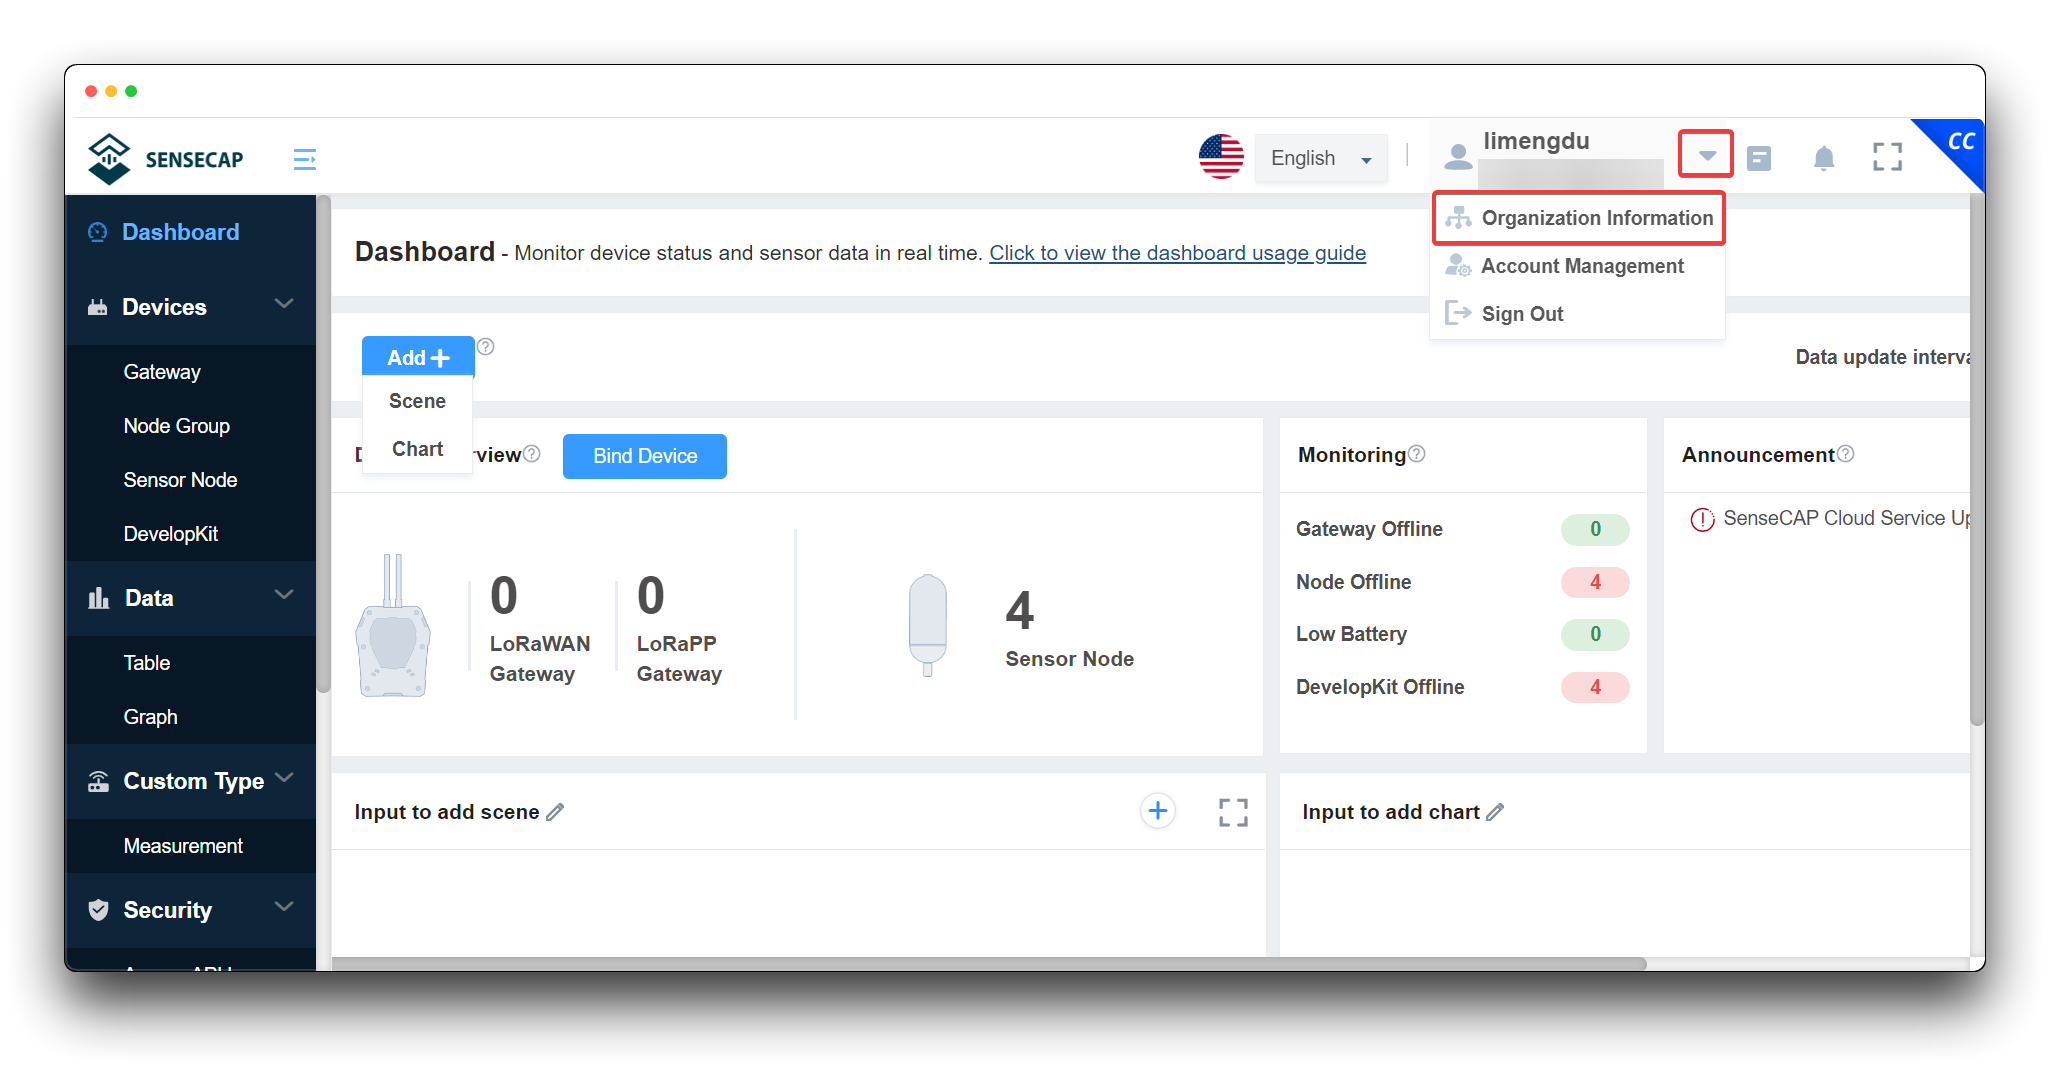
In the Organization Information page, you can see the Organization ID, which you can record first and we will use it in the later steps.

Then, we also need to get the API key for SenseCAP. Please click on Security -> Access API keys on the left side of the dashboard. Then Create an Access Key.
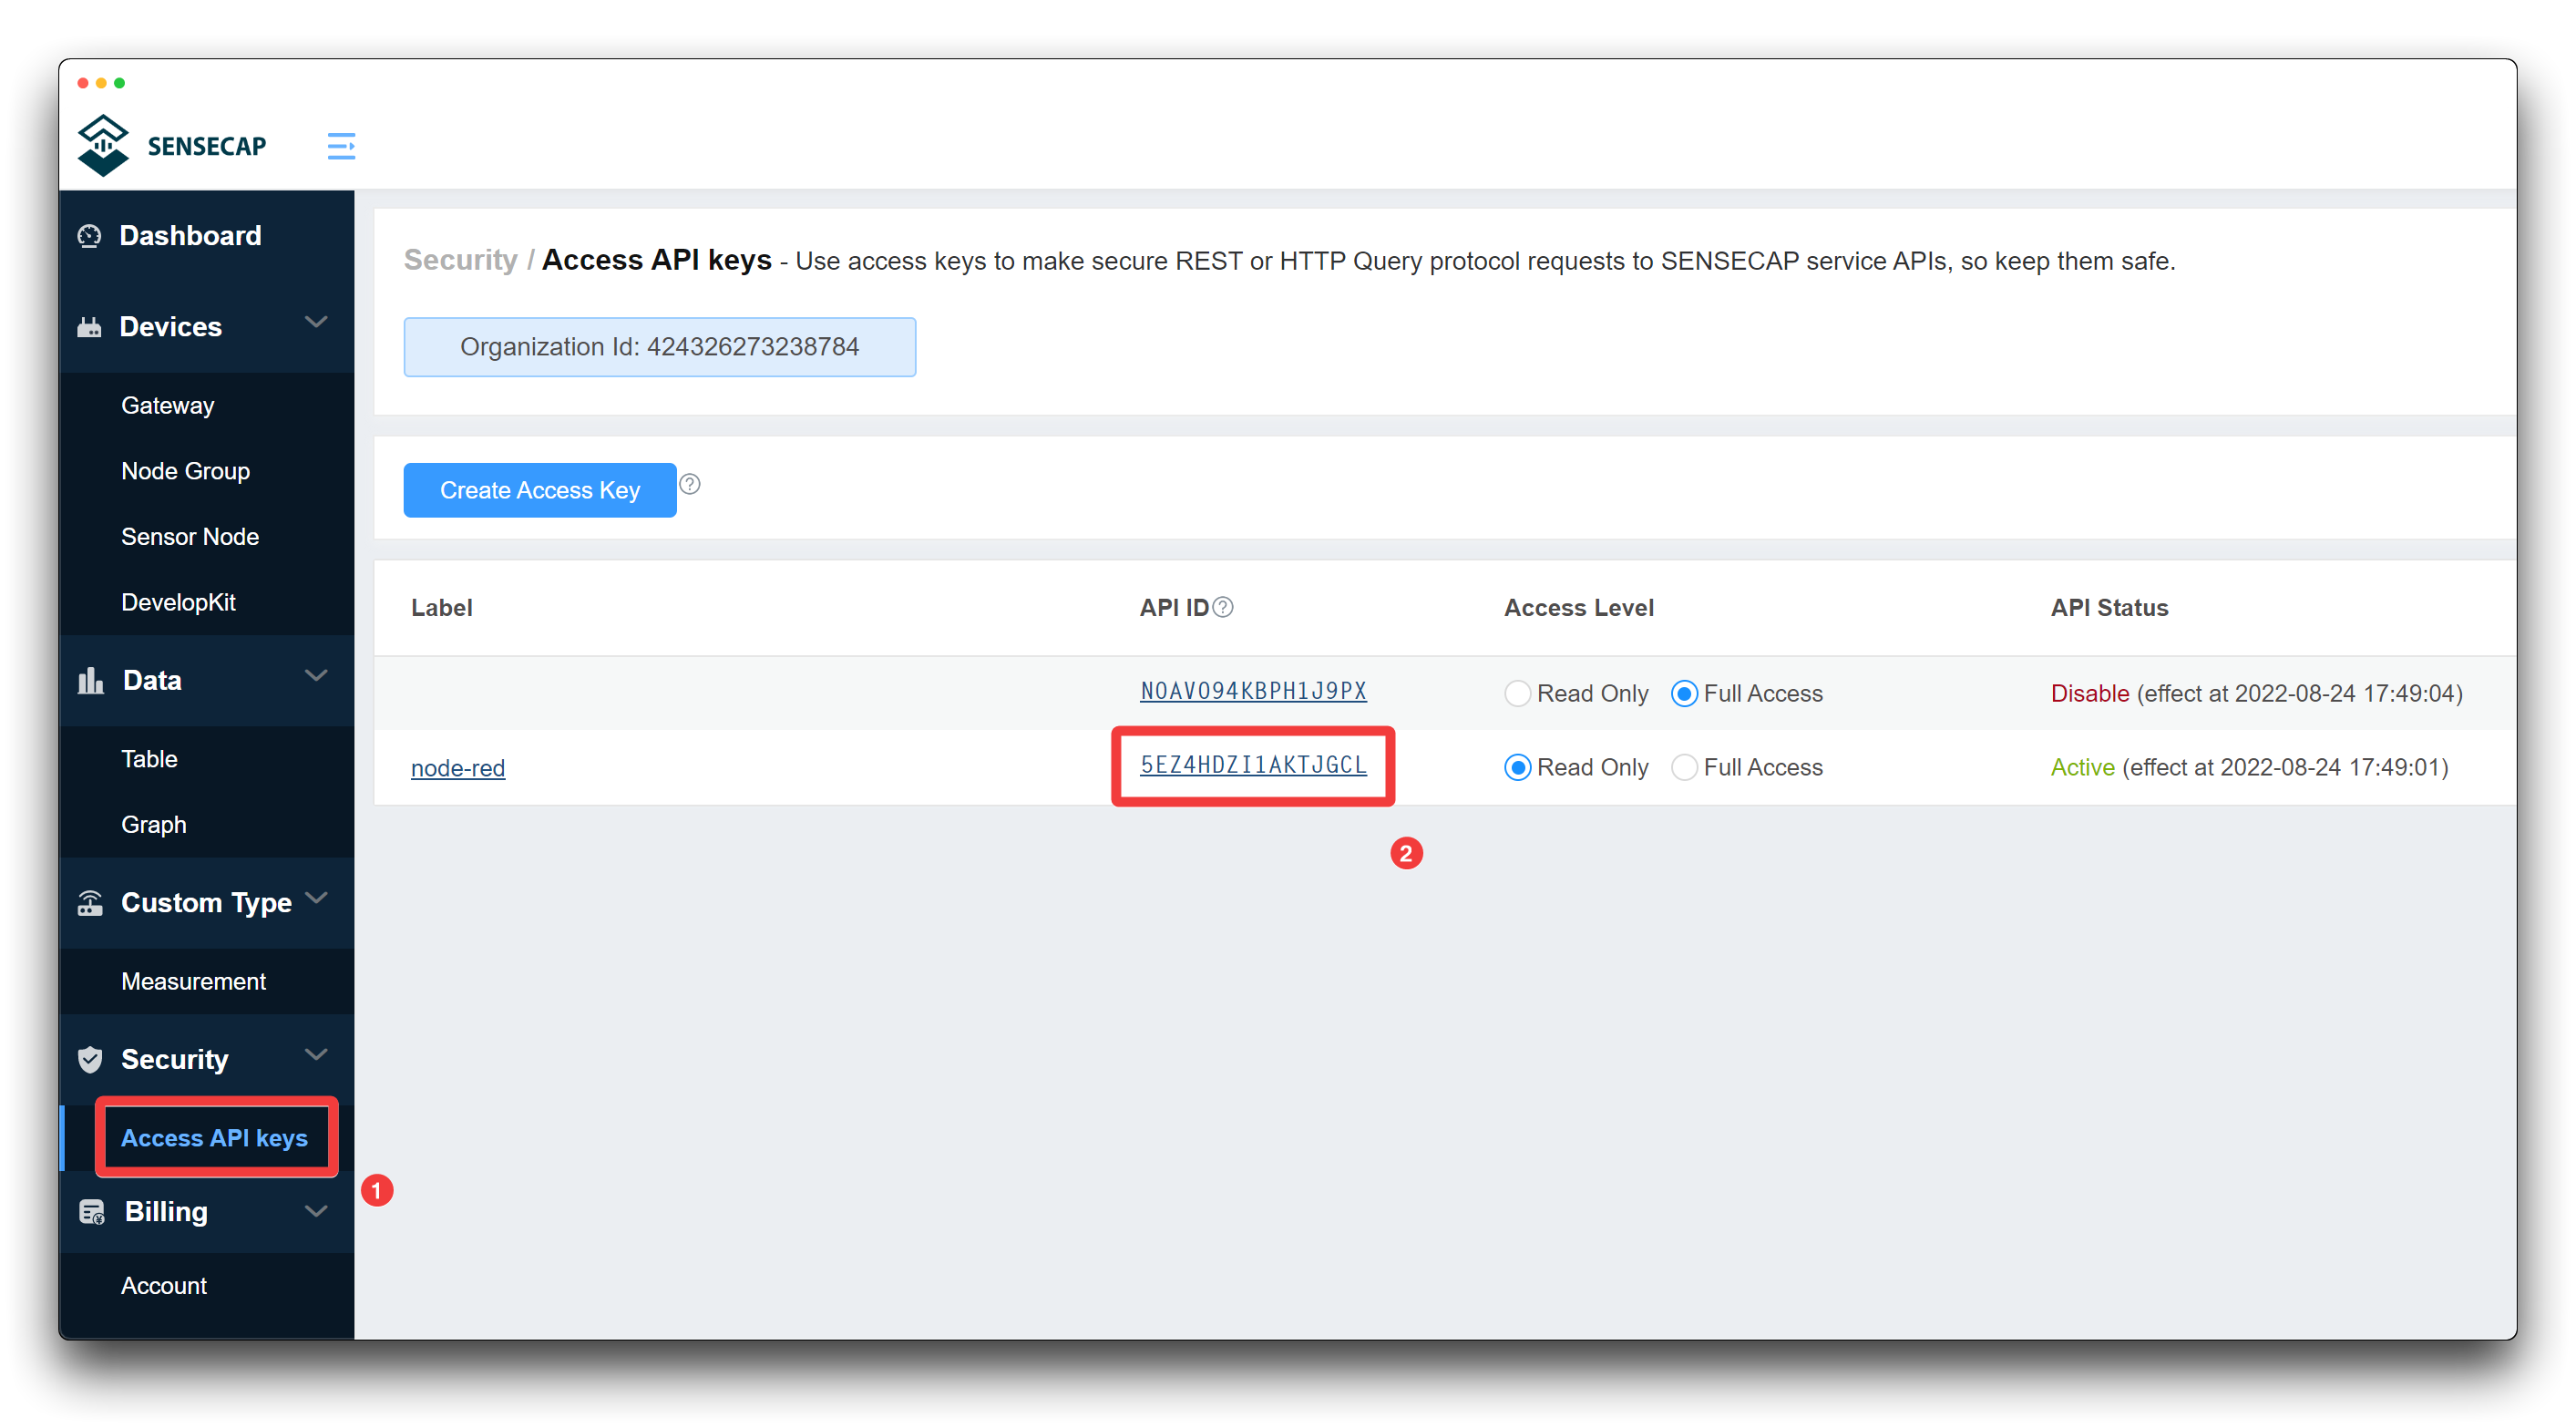
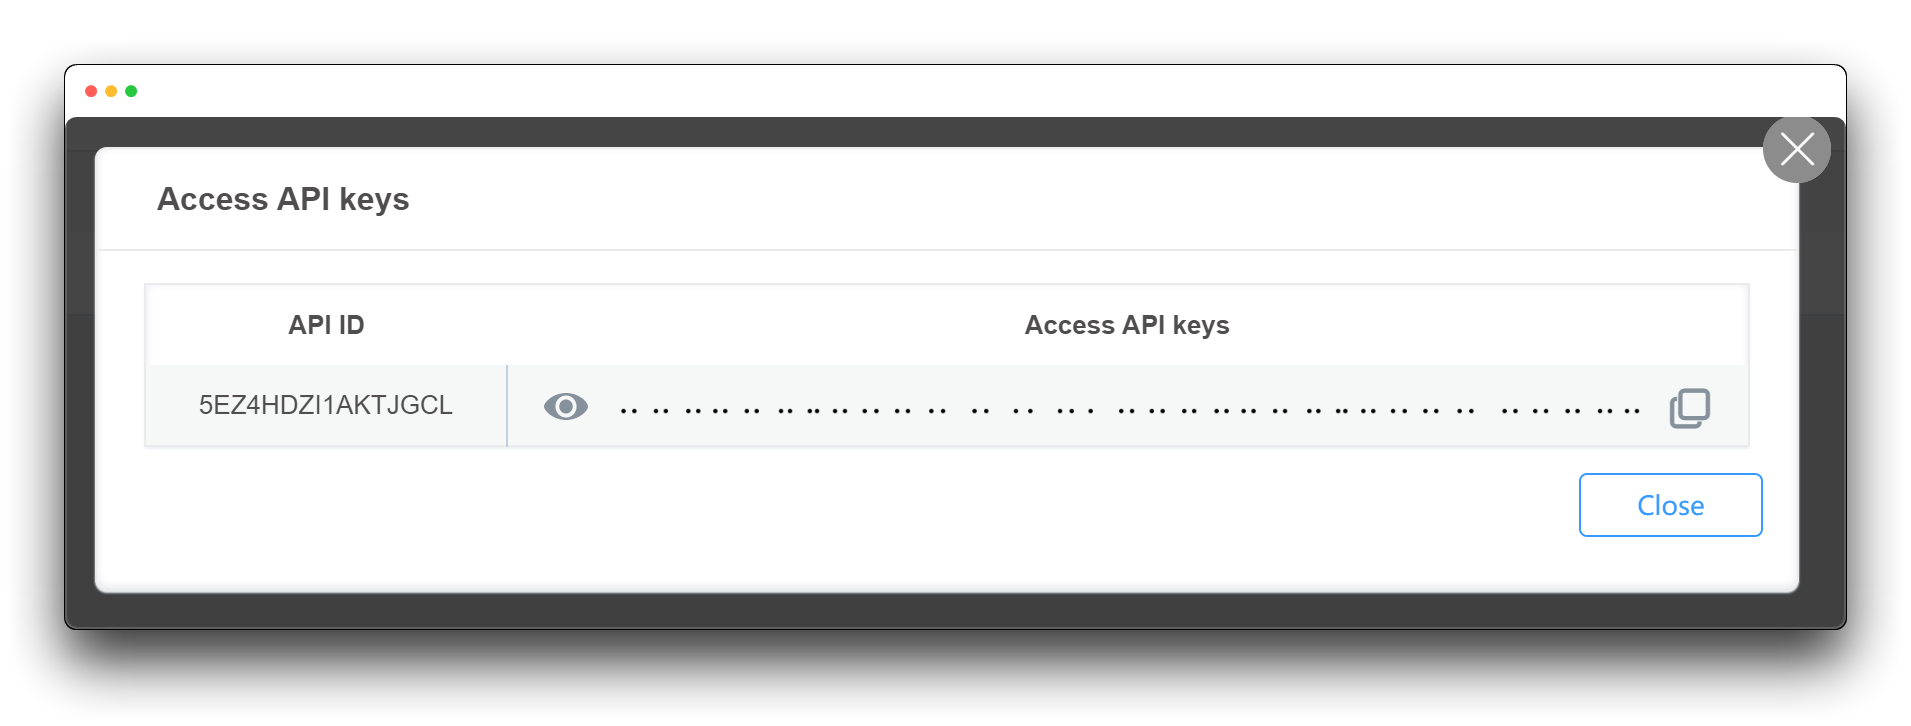
Click on the API ID you created and you will get her Access API keys, please write it down for now, we will use it in the later steps.
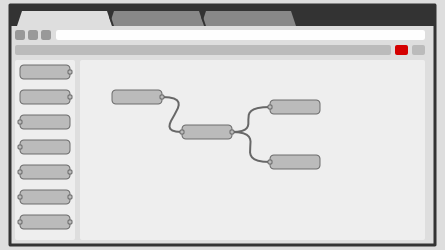
Create a HTTP Node
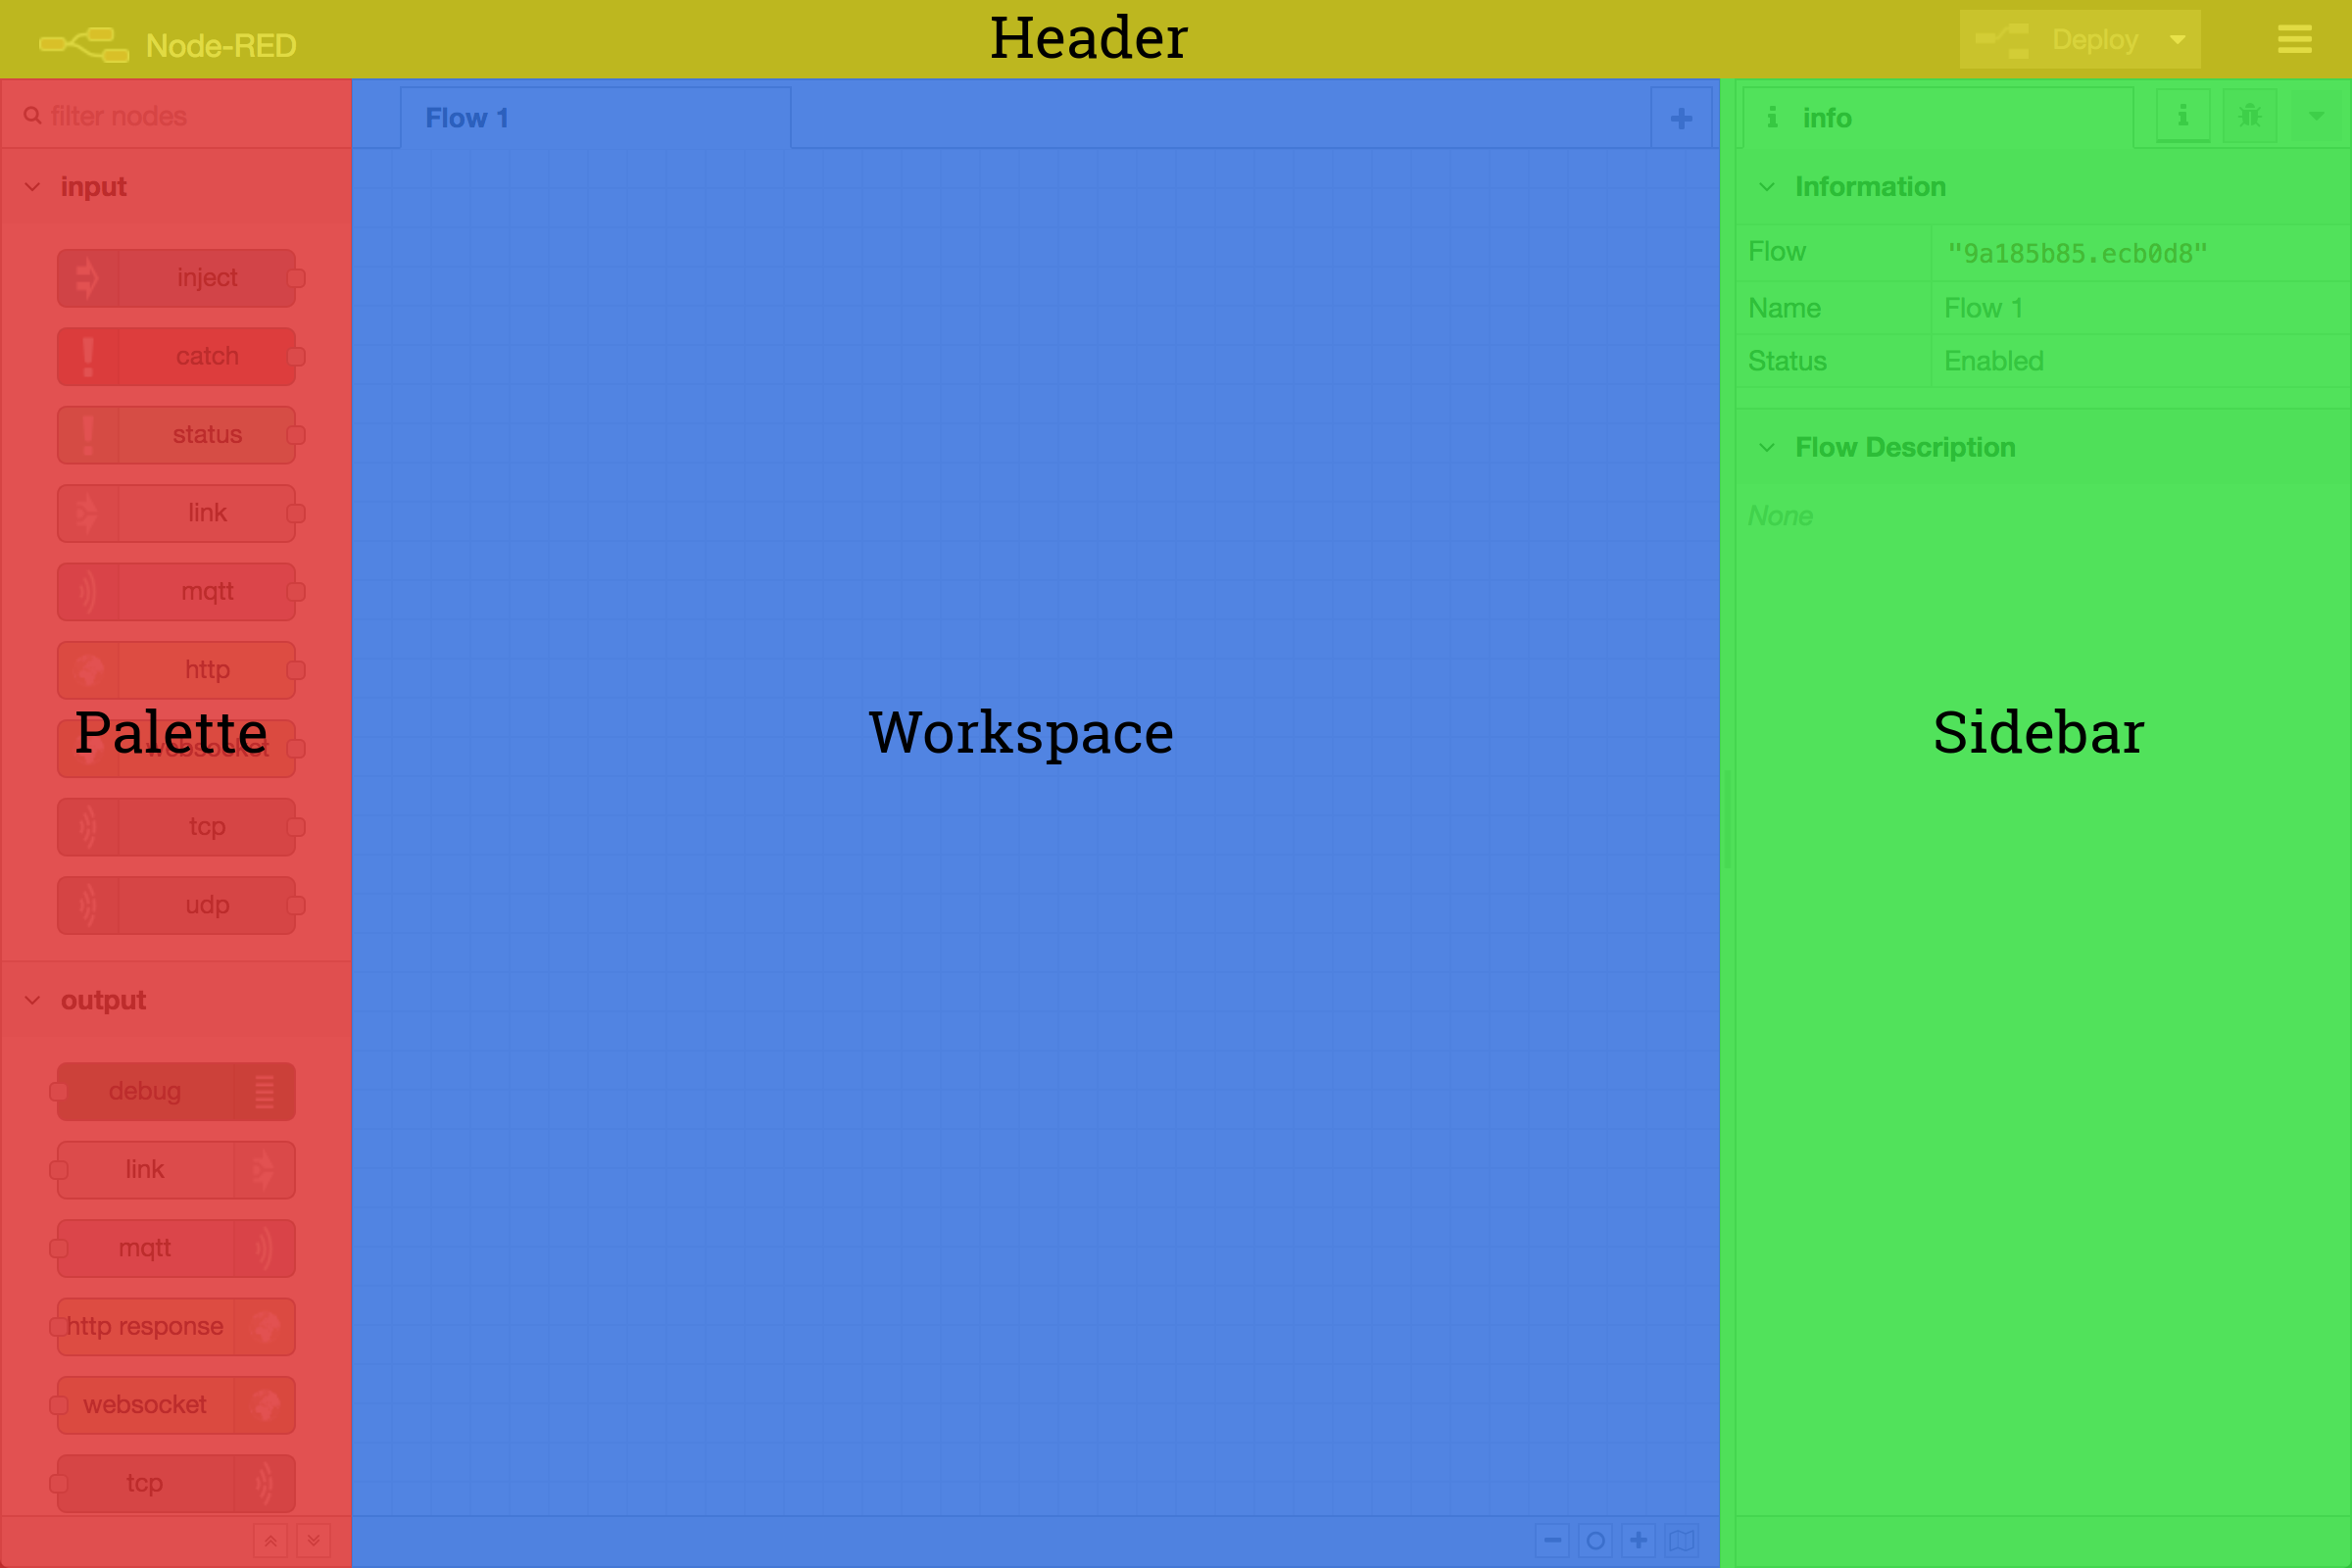
The editor window consists of four components:
- The header at the top, containing the deploy button, main menu, and, if user authentication is enabled, the user menu.
- The palette on the left, containing the nodes available to use.
- The main workspace in the middle, where flows are created.
- The sidebar on the right.
Follow the links above to learn more about each component.
In this example, we will show you how to use MQTT nodes to display the sensor values received by SenseCAP. Before that, let's learn to understand the nodes that we will use more in the future.
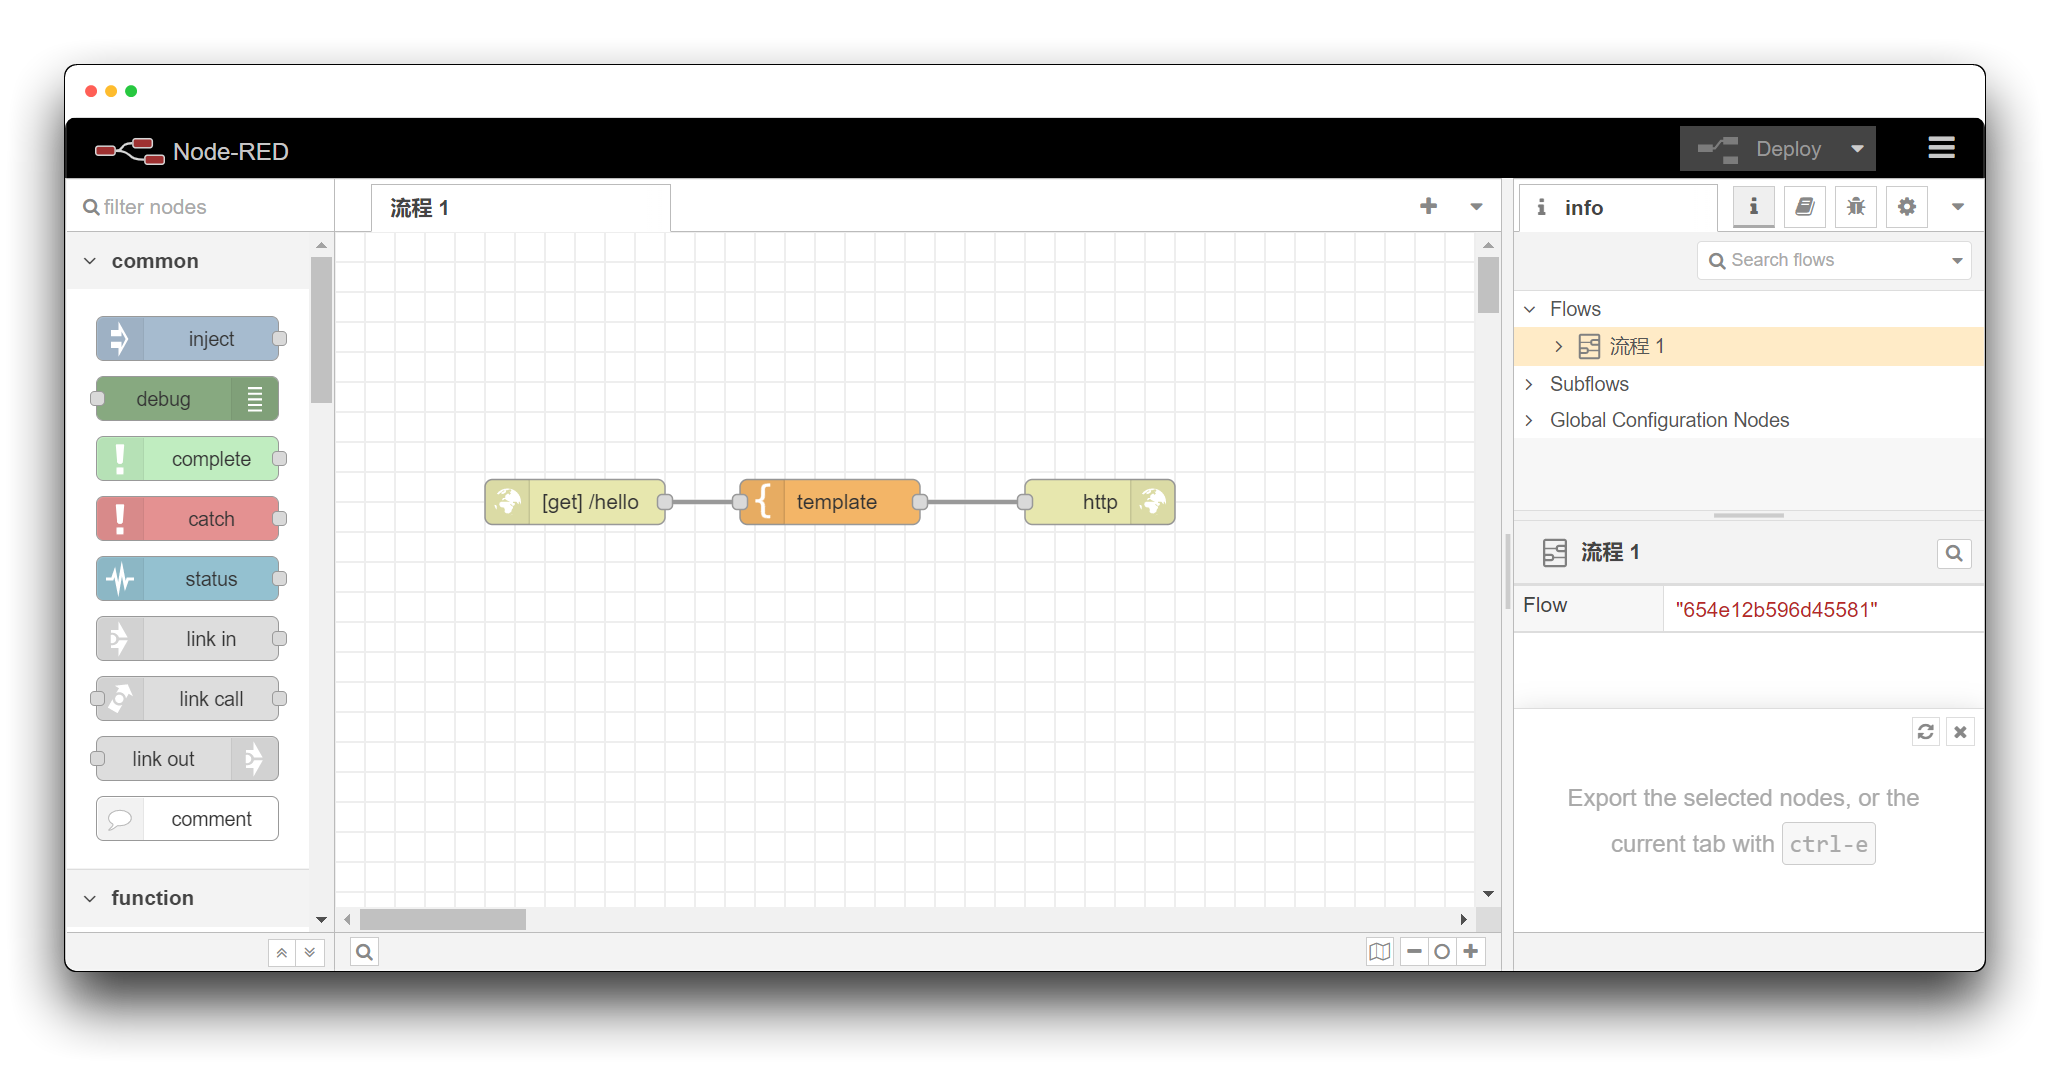
http node
http in node
The http in node can be used to create web services.
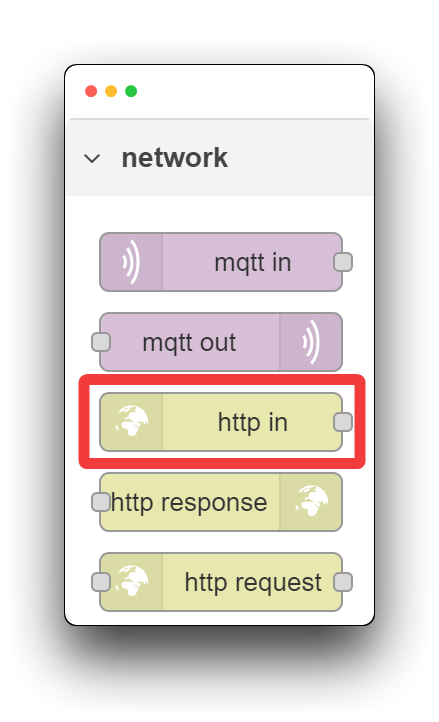
Drag the node to the workspace and double-click the node to access the node's configuration page.
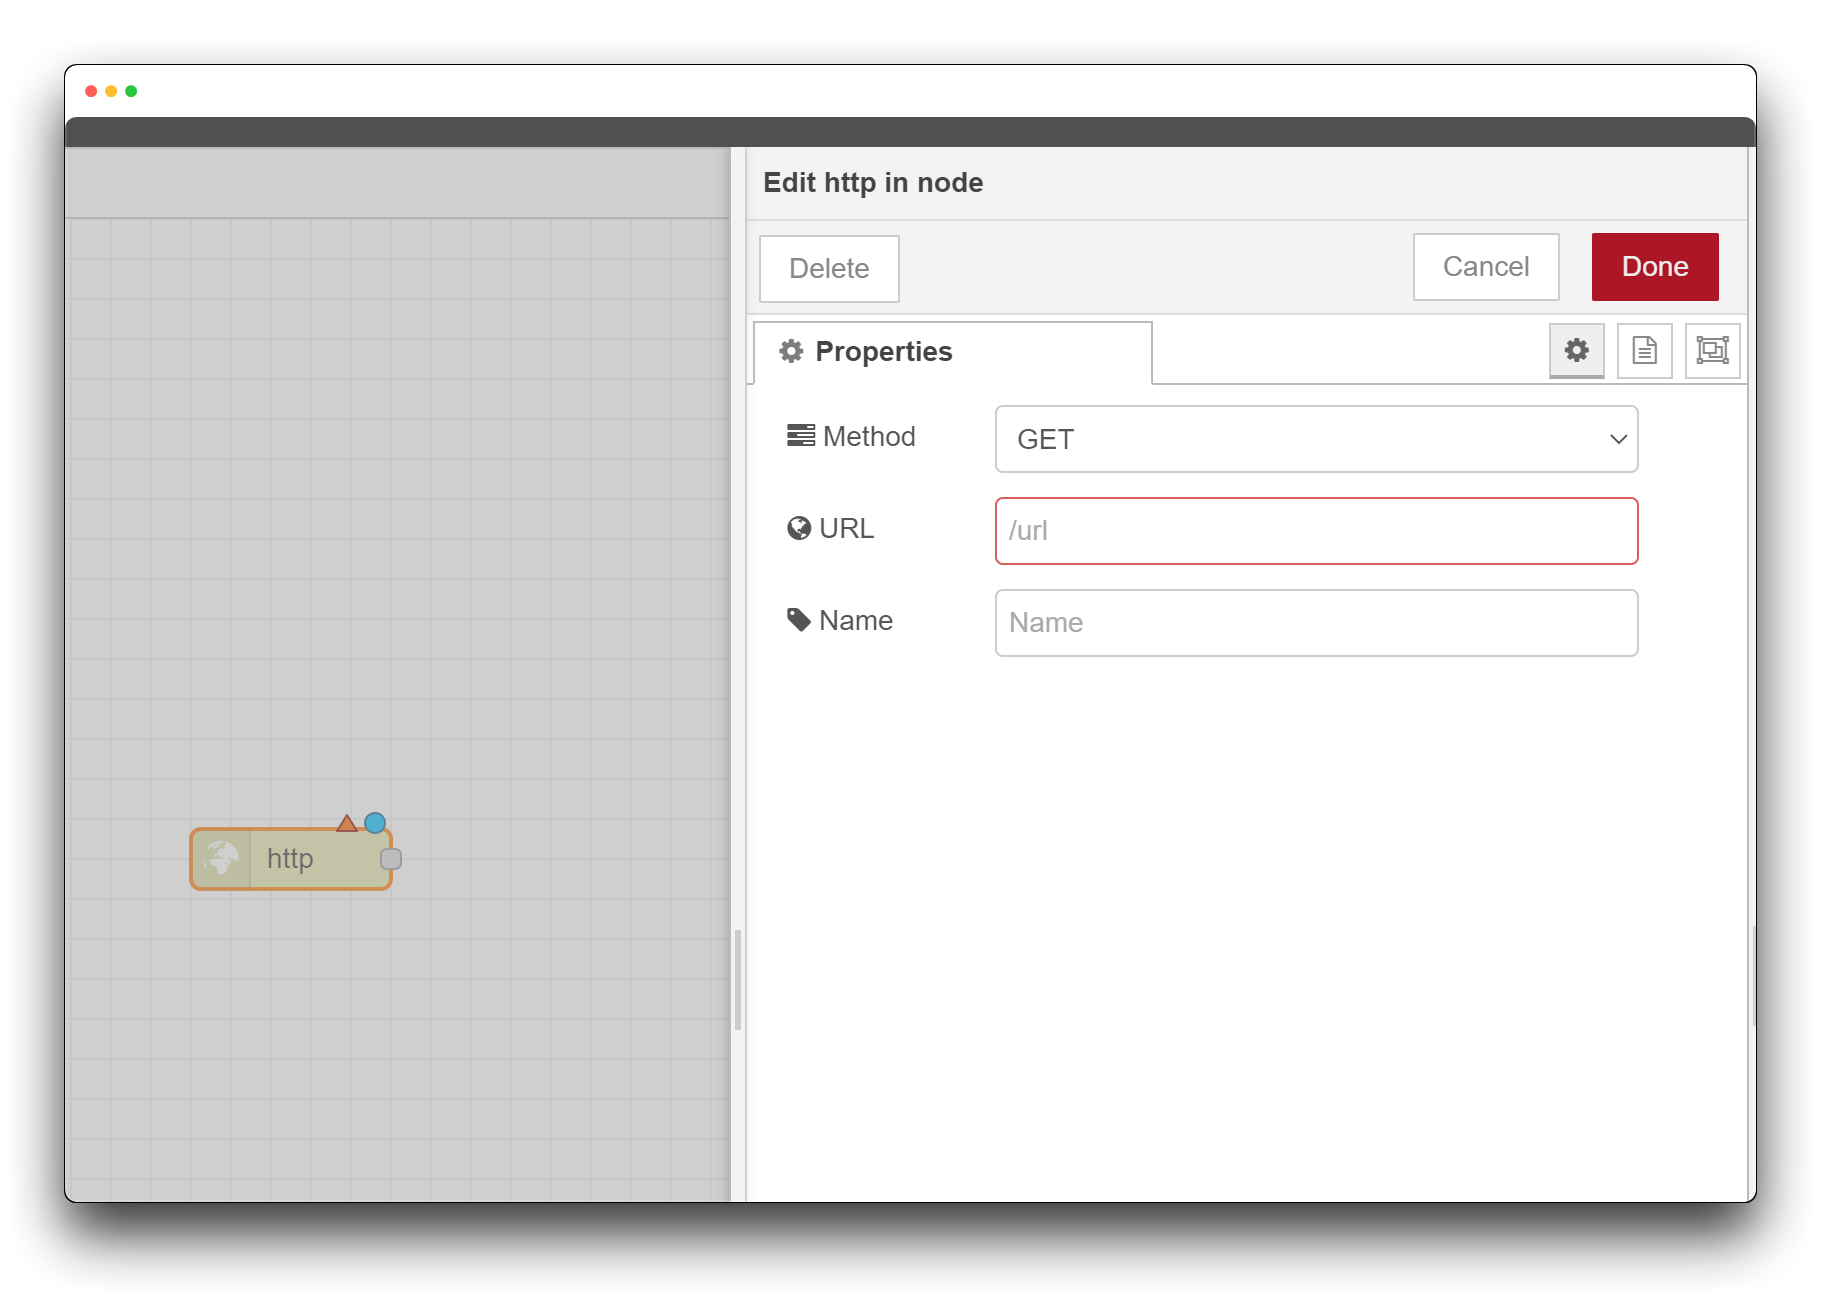
Here, we need to set a URL for the web service you have created so that you can access the web page you have created through the address http://localhost:1880/<URL>.
http response node
The http response node sends the response back to the request received from the HTTP input node.
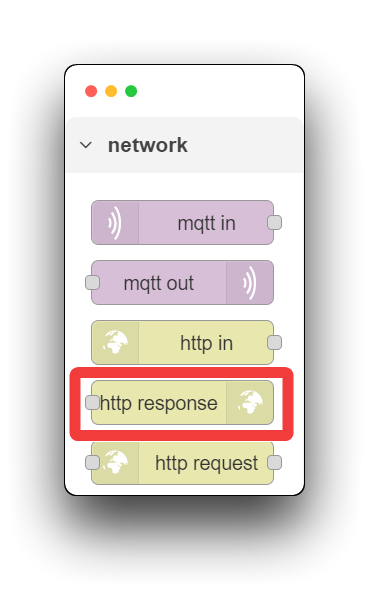
Usually, we don't need to configure it separately, just drag it directly to the workbench for use.
template node
The template node can set properties based on the provided template.
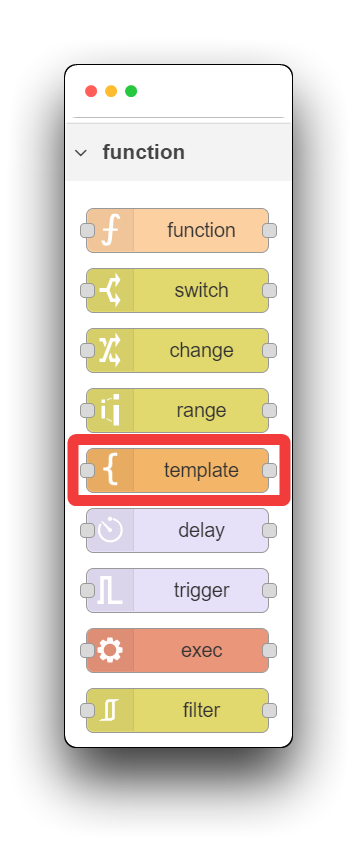
We will use this node and use a simple HTML language to complete the configuration of our web page's display content.
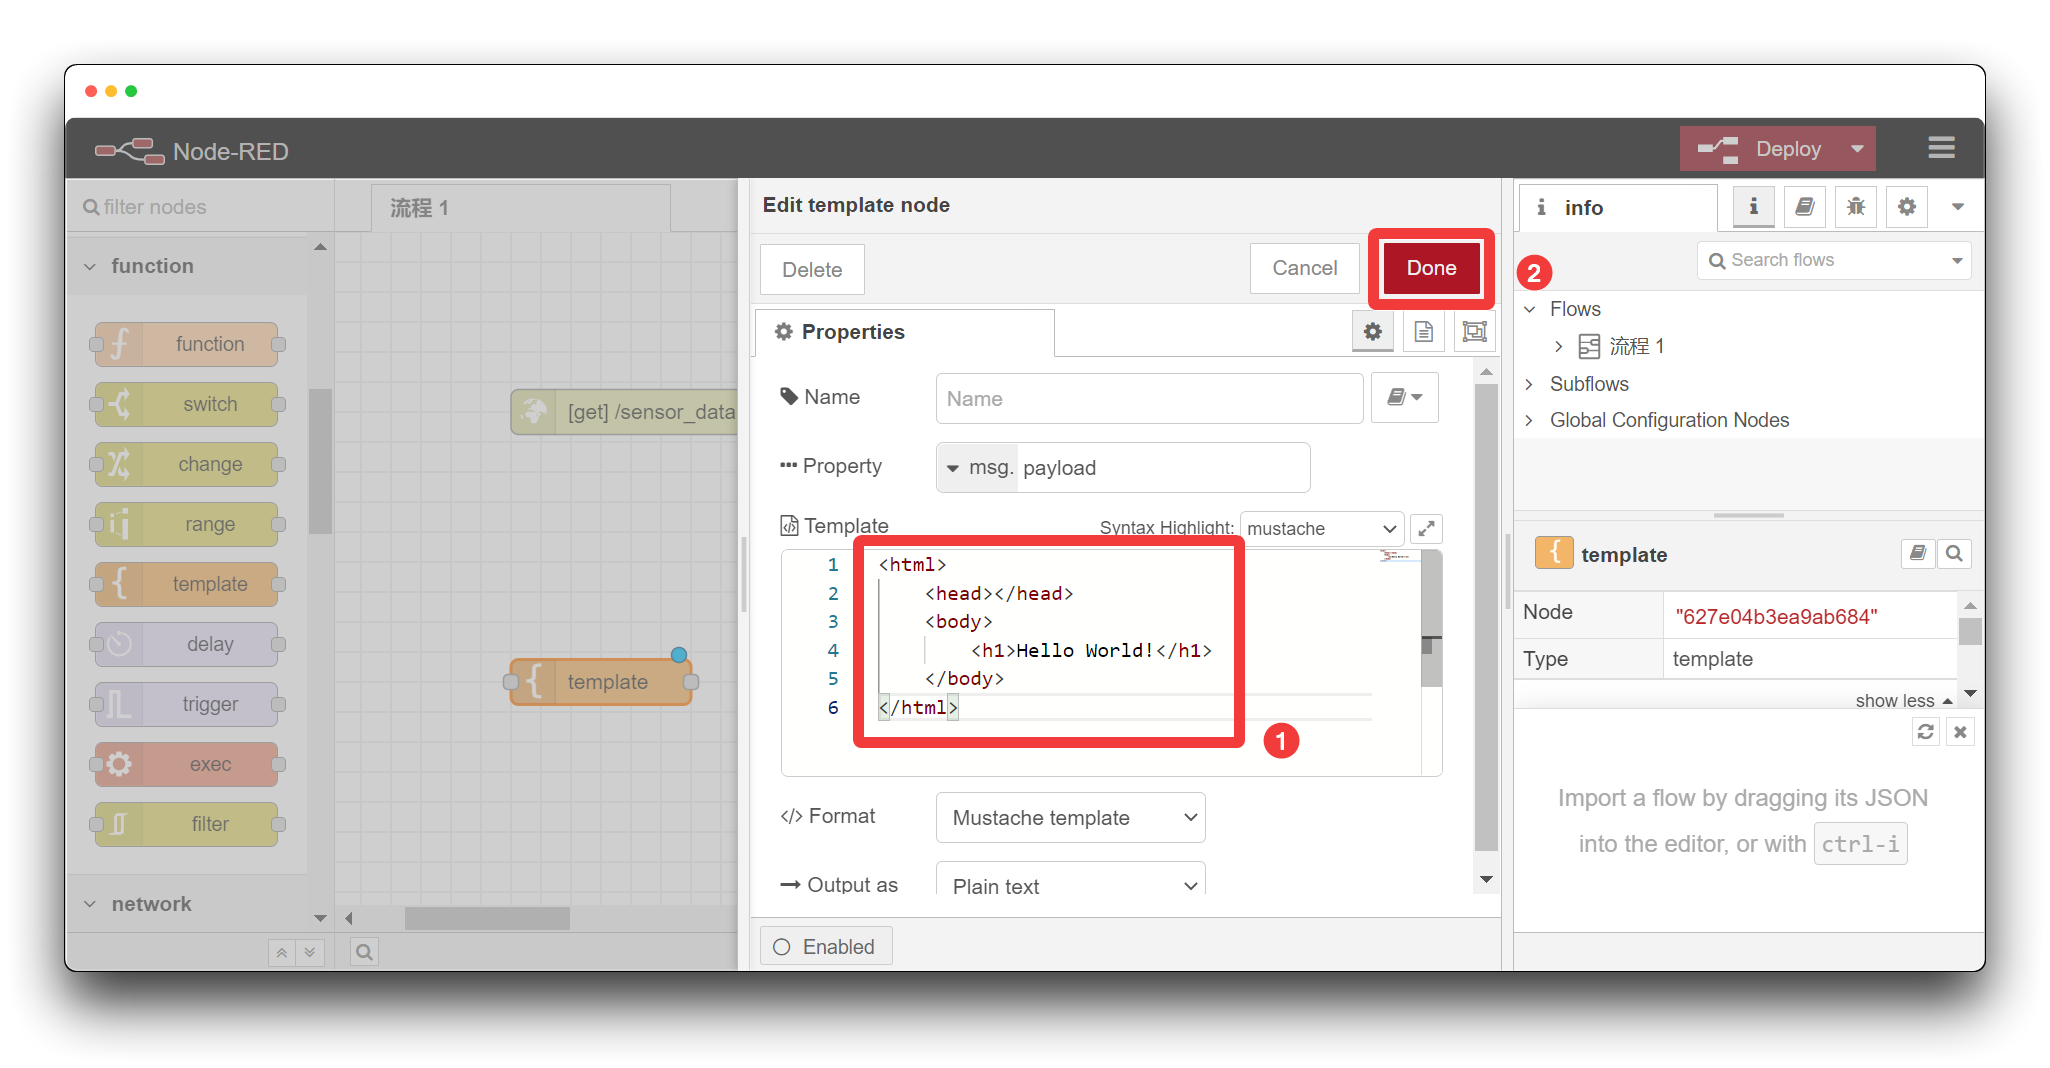
For example, we want to show "Hello World!".
<h1>Hello World!</h1>
Finally, we connect the http in to the template, and connect the template to the http response. Then click the deploy button in the upper right corner, so that a simple web page is created, which is the basic Node-RED operation step.
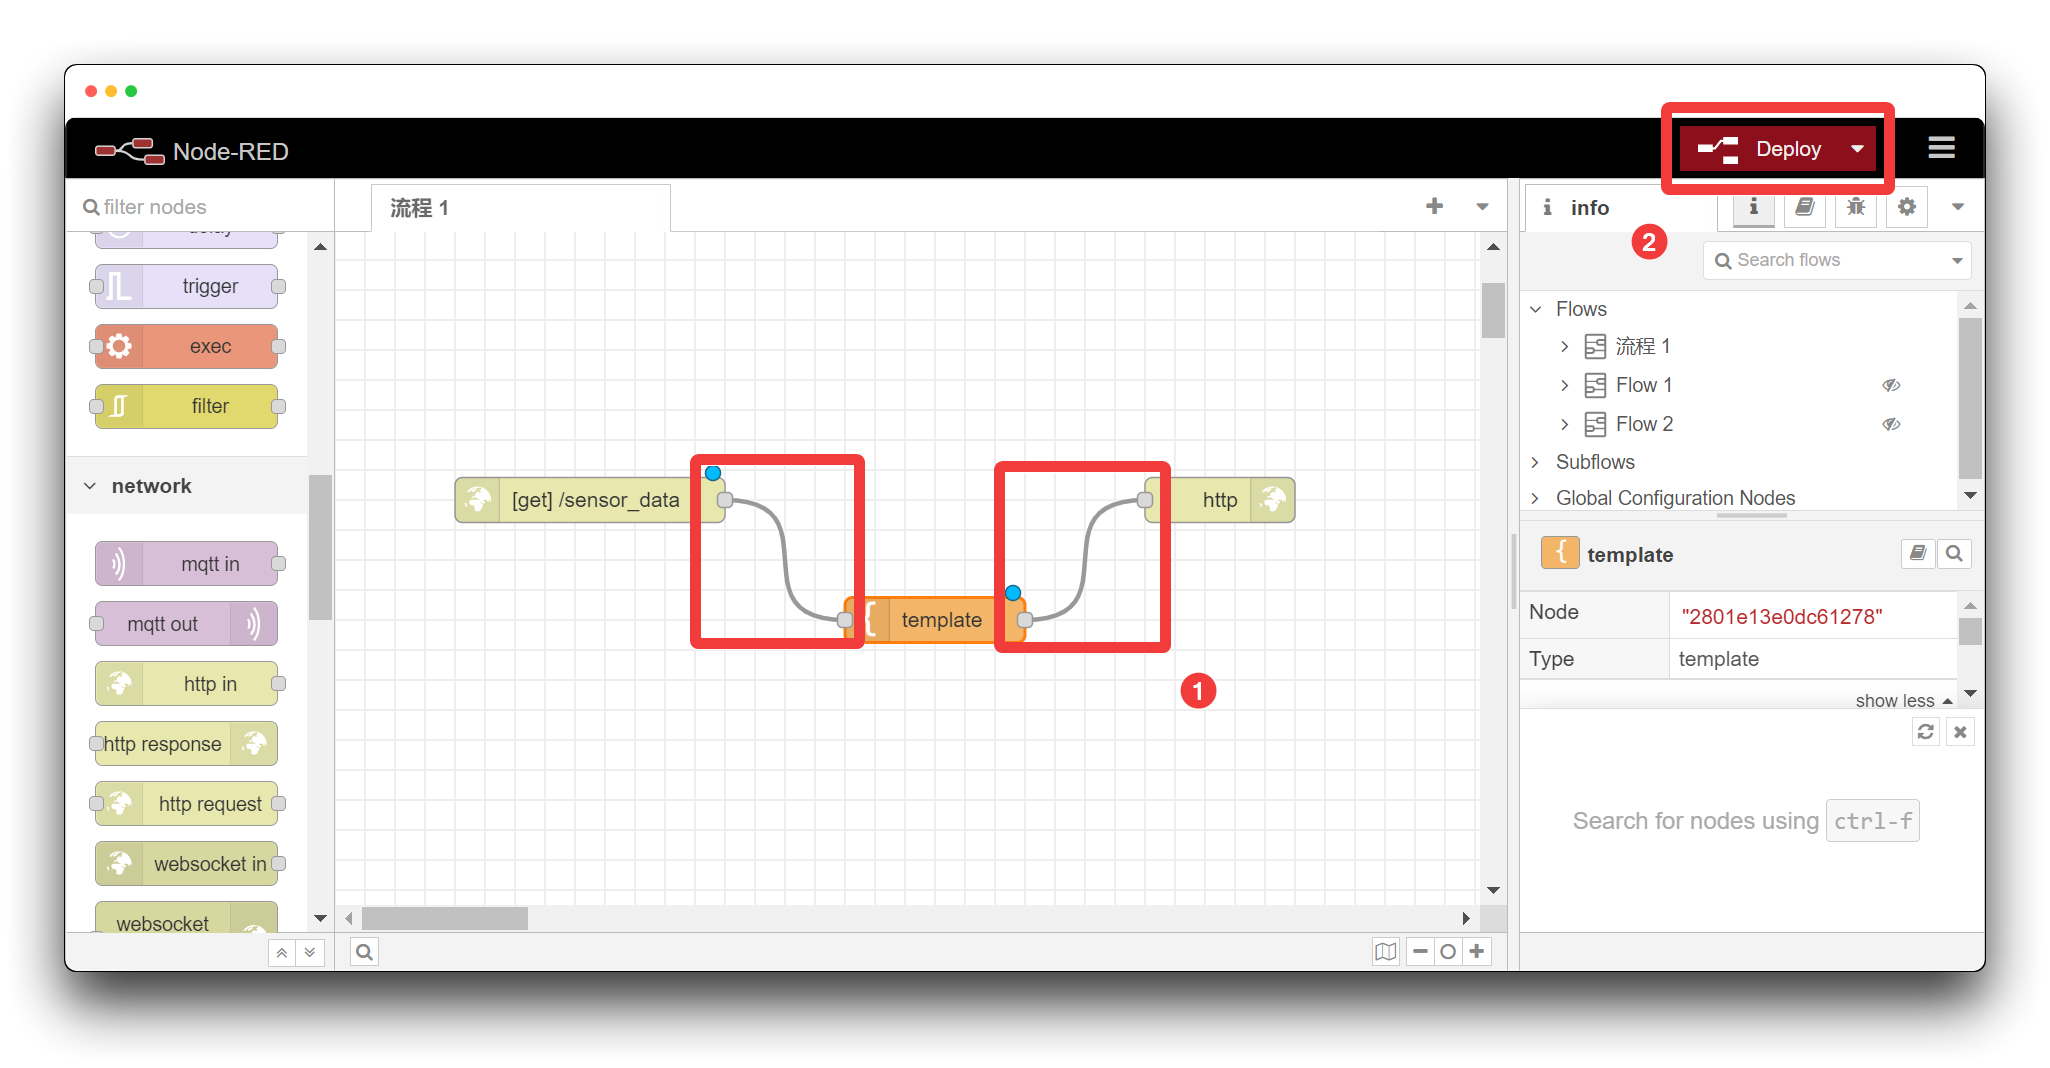
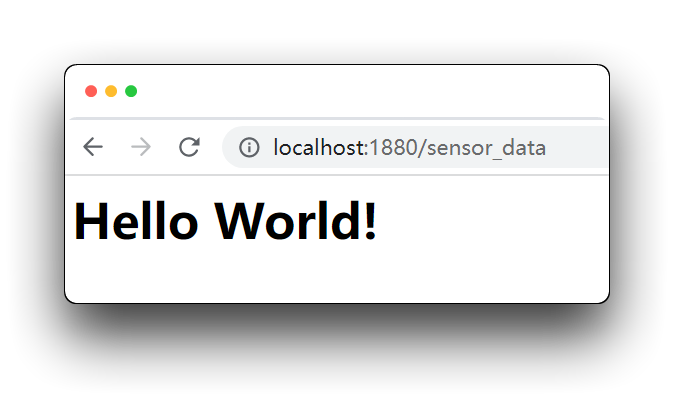
In this example, we created a sensor data URL, so after deployment, we can enter http://localhost:1880/sensor_data in the browser address bar to access the page we just created.
Create a MQTT node
In this section, we will describe how to get the data information of SenseCAP through the MQTT node.
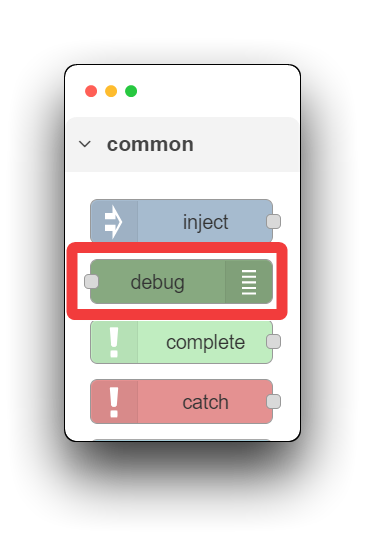
debug node
Displays selected message properties in the debug sidebar tab and optionally the runtime log. By default it displays msg.payload, but can be configured to display any property, the full message or the result of a JSONata expression.
mqtt node
Connects to a MQTT broker and subscribes to messages from the specified topic.
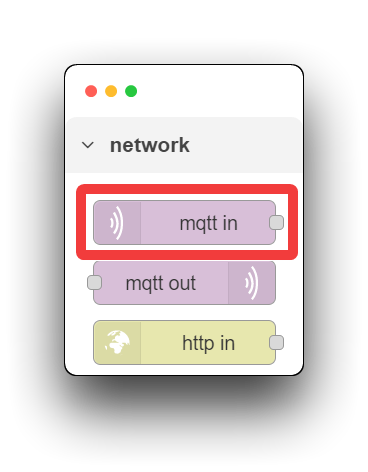
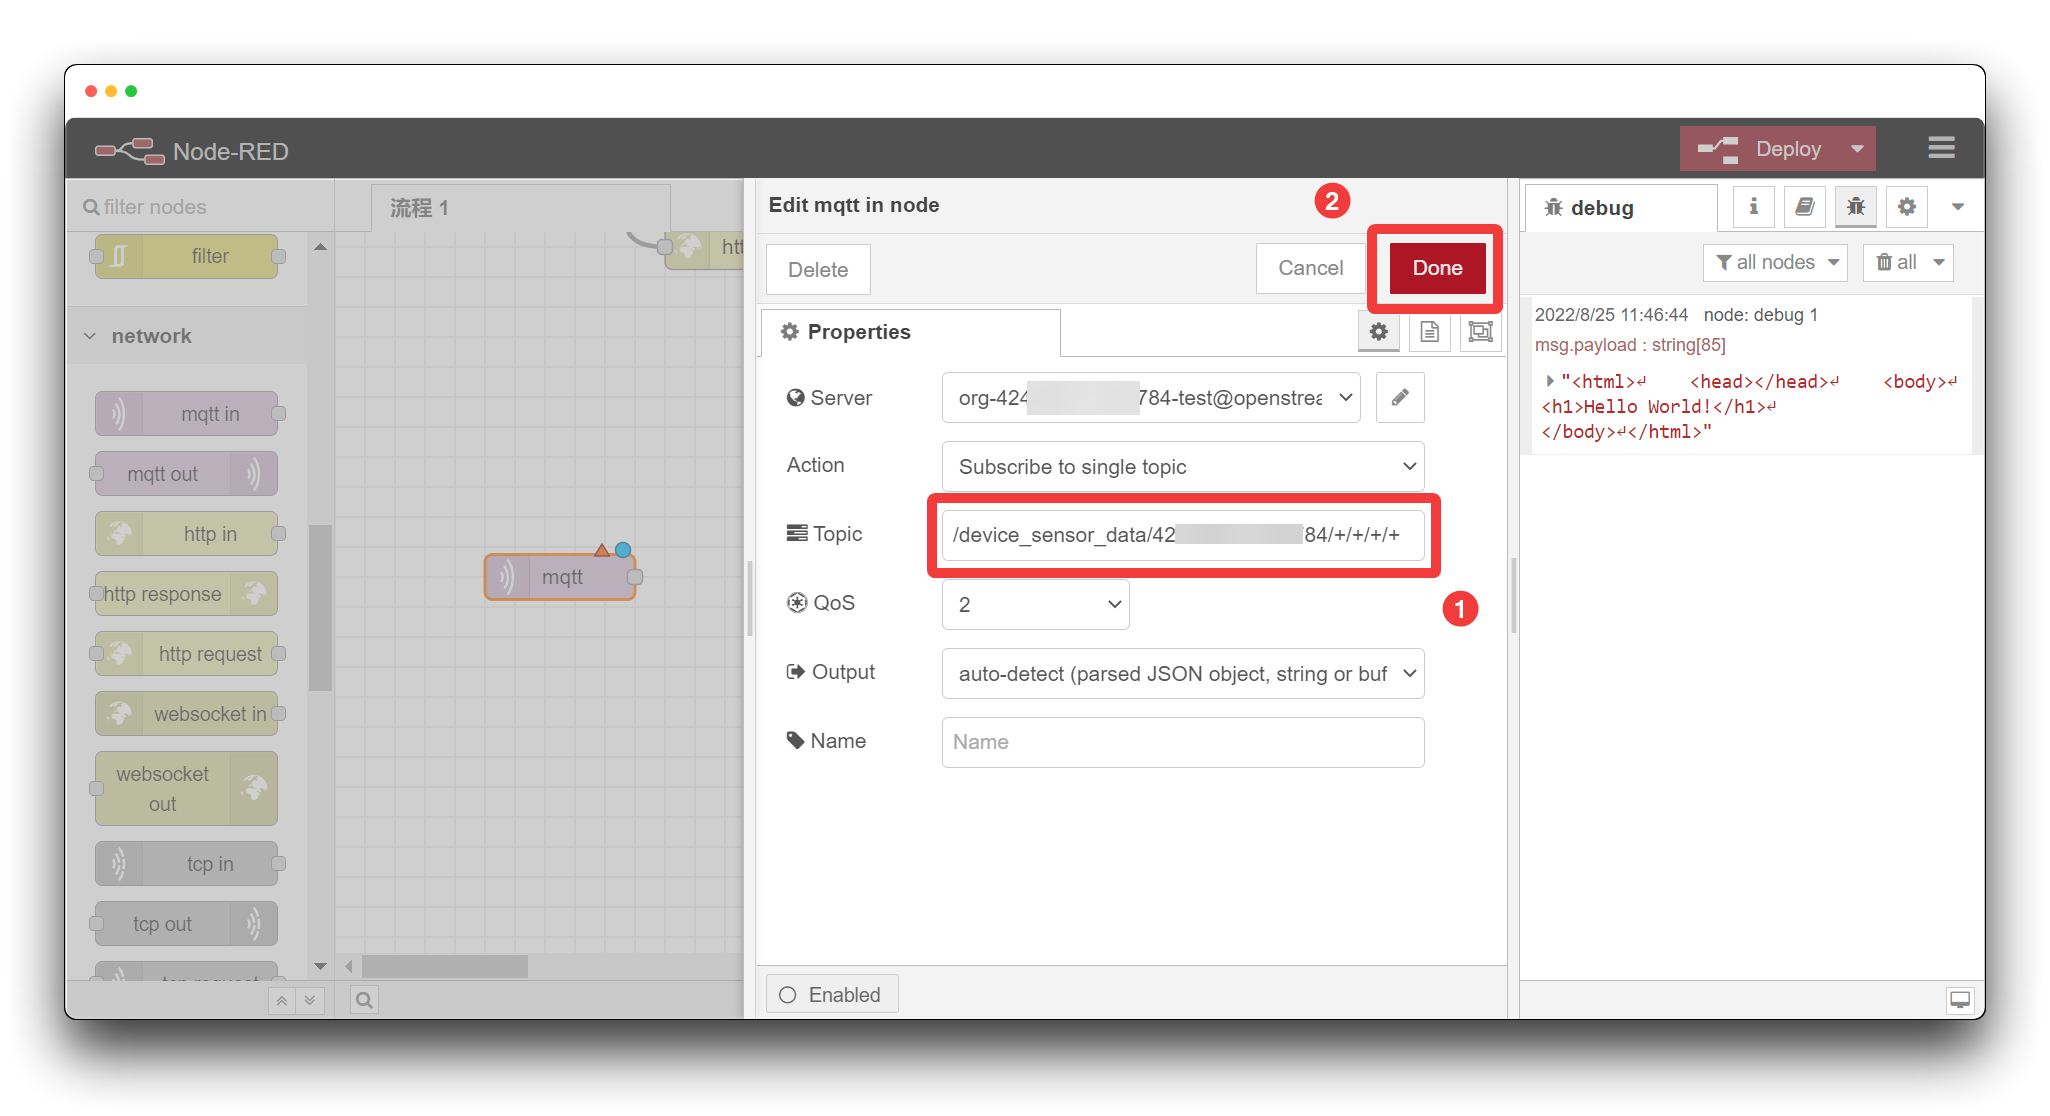
Step 1. Add a new mqtt-broker node.
Drag out an mqtt in node, double-click it to enter the configuration page, then click the edit button after Add new mqtt-broker.

The configuration of mqtt-broker is required to be filled out as follows.
- Server: openstream.api.sensecap.seeed.cc
- Port: 1883
- Protocol: MQTT V3.1.1
- Client ID: The format is
org-<Organization ID>-<Random ID><Orgnization ID>Your organization ID. We have obtained it in the Get the SenseCAP API.<Random ID>uses your own randomly generated numbers or lowercase letters.
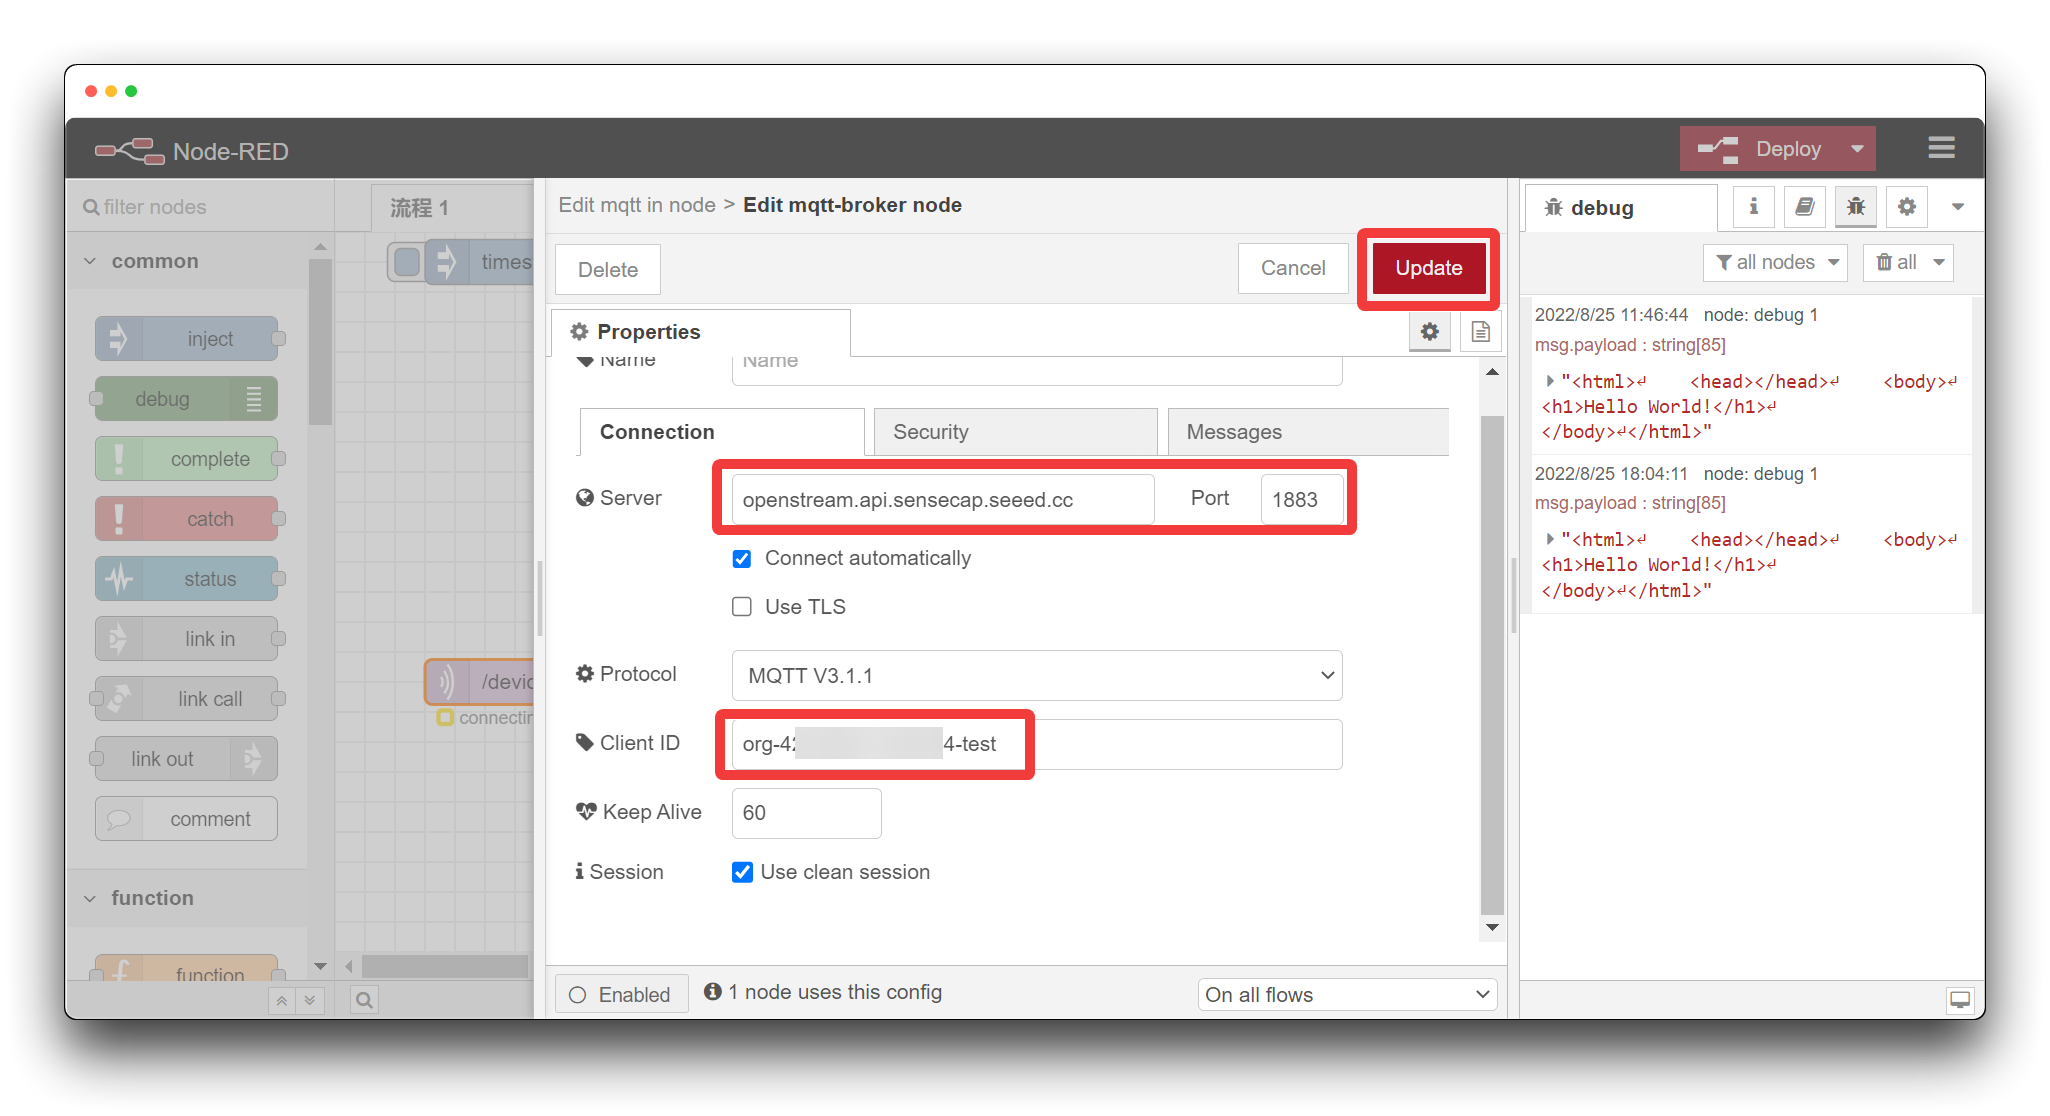
Then we fill in the Security options field with the Username and Password.
- Username: The format is
org-<Organization ID><Orgnization ID>Your organization ID. We have obtained it in the Get the SenseCAP API.
- Password: Fill in the Access API keys that we obtained in the Get the SenseCAP API.
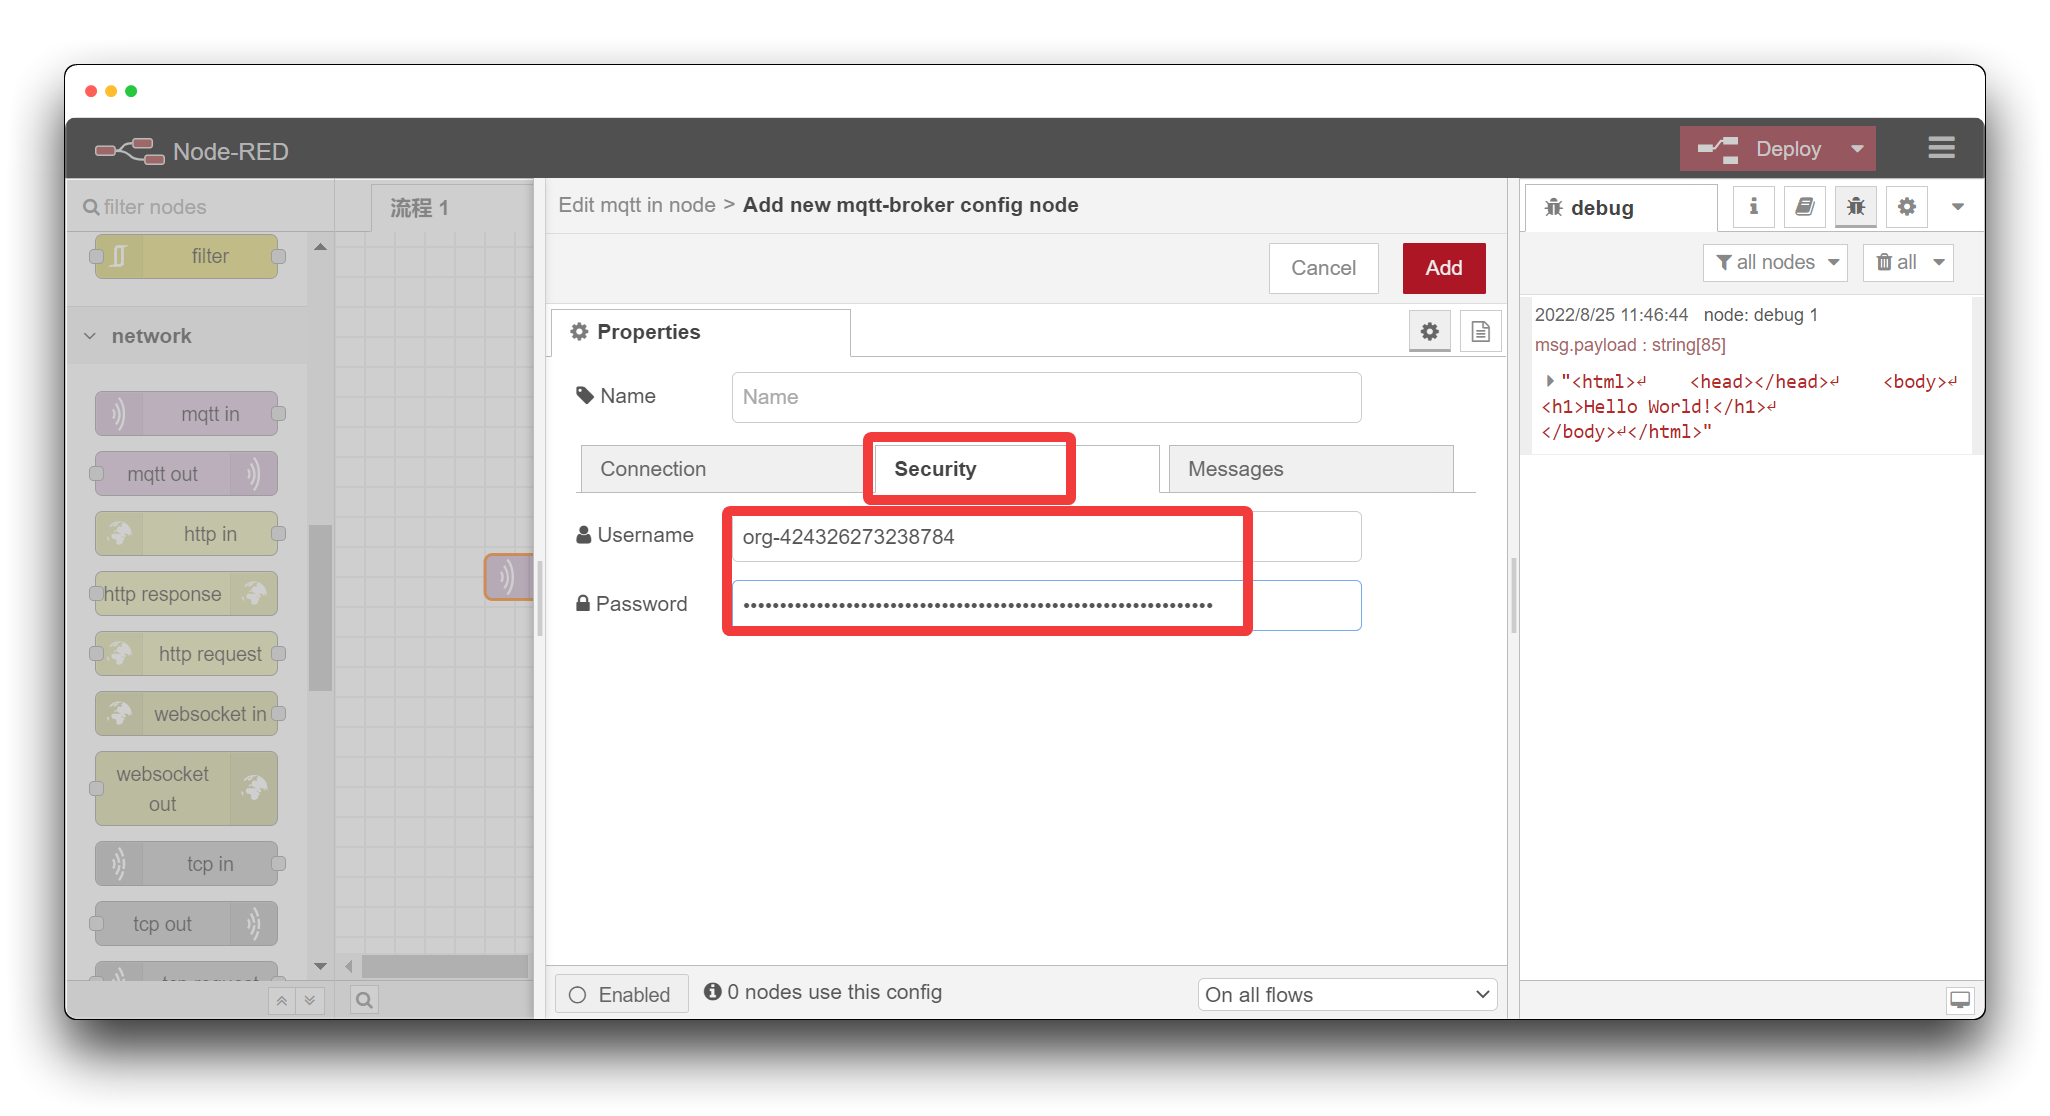
Finally, click the Add button in the upper right corner to return to the configuration page of the mqtt in node.
- Topic: Configuring a topic in a specific format determines the kind of device and data type to be received.
Topic Format: /device_sensor_data/<OrgID>/<DeviceEUI>/<Channel>/<Reserved>/<MeasurementID>
| OrgID | Your organization ID. We have obtained it in the Get the SenseCAP API. |
| DevEUI | Unique identification of sensor devices. This information can be found on the sticker on the back of the Grove - Wio E5, as well as in the SenseCAP console device. |
| Channel | A physical interface on the device to which the sensor is connected. For the K1100 kit, the default value here is 1. |
| Reserved | Reserved Fields. |
| MeasurementID | Measured value ID. This ID can be found in the Measurement IDs section of the SenseCAP documentation |
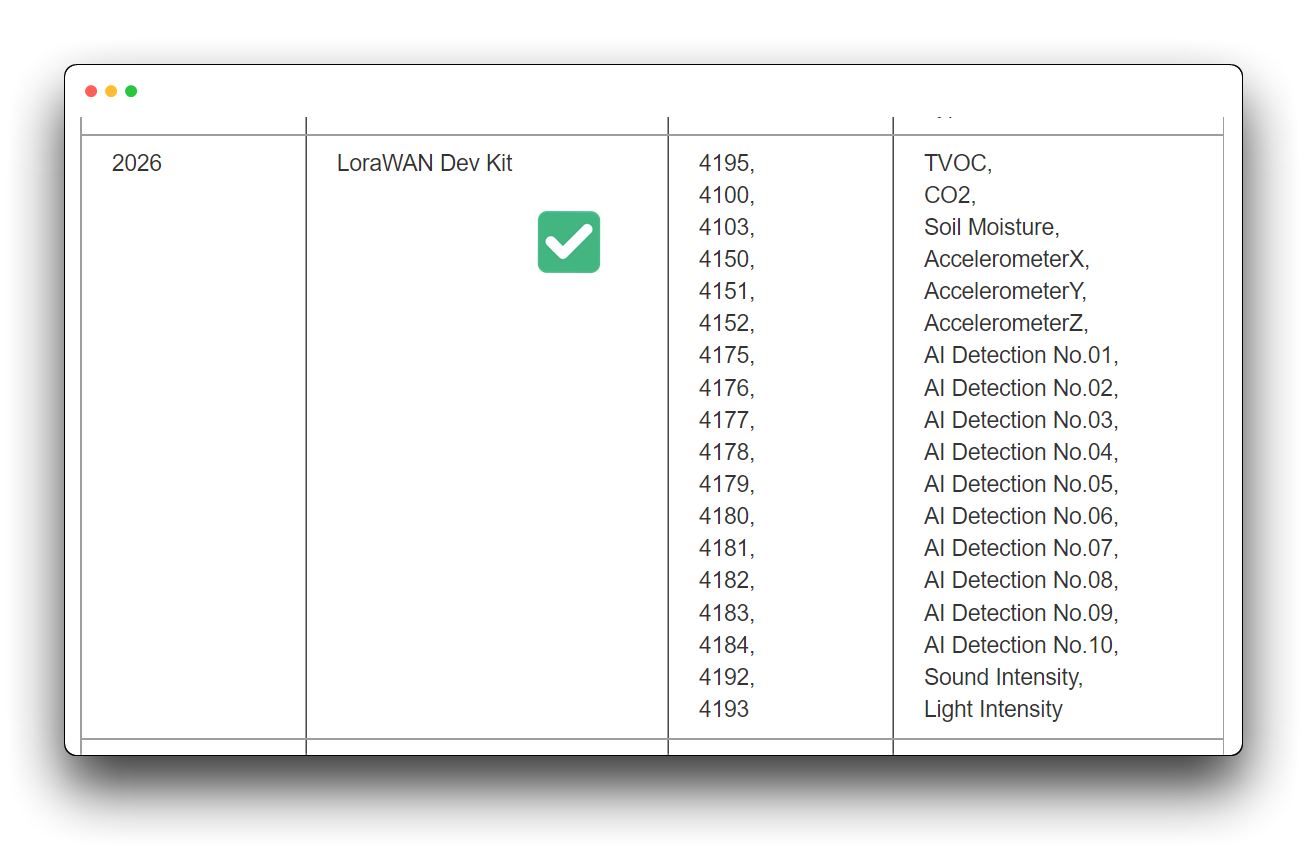
The content of this tutorial only applies to the K1100 kit, so please refer to the content inside the LoraWAN Dev Kit for the Measured value ID and do not call other ID.
For example, if I want to be able to get sensor data for the light values sent by Wio Terminal, then the Topic information I fill in should be:
/device_sensor_data/424324324324324/2CF7F1C043200002/1/+/4193
The <OrgID> field is required, "+" means this field has no filter and can match all. So, "/ + / + / + / +" means listen to all <DeviceEUI>, <Channel>, <Reserved>, <MeasurementID>.
If you want to listen to all messages, then the Topic should be:
/device_sensor_data/424324324324324/+/+/+/+
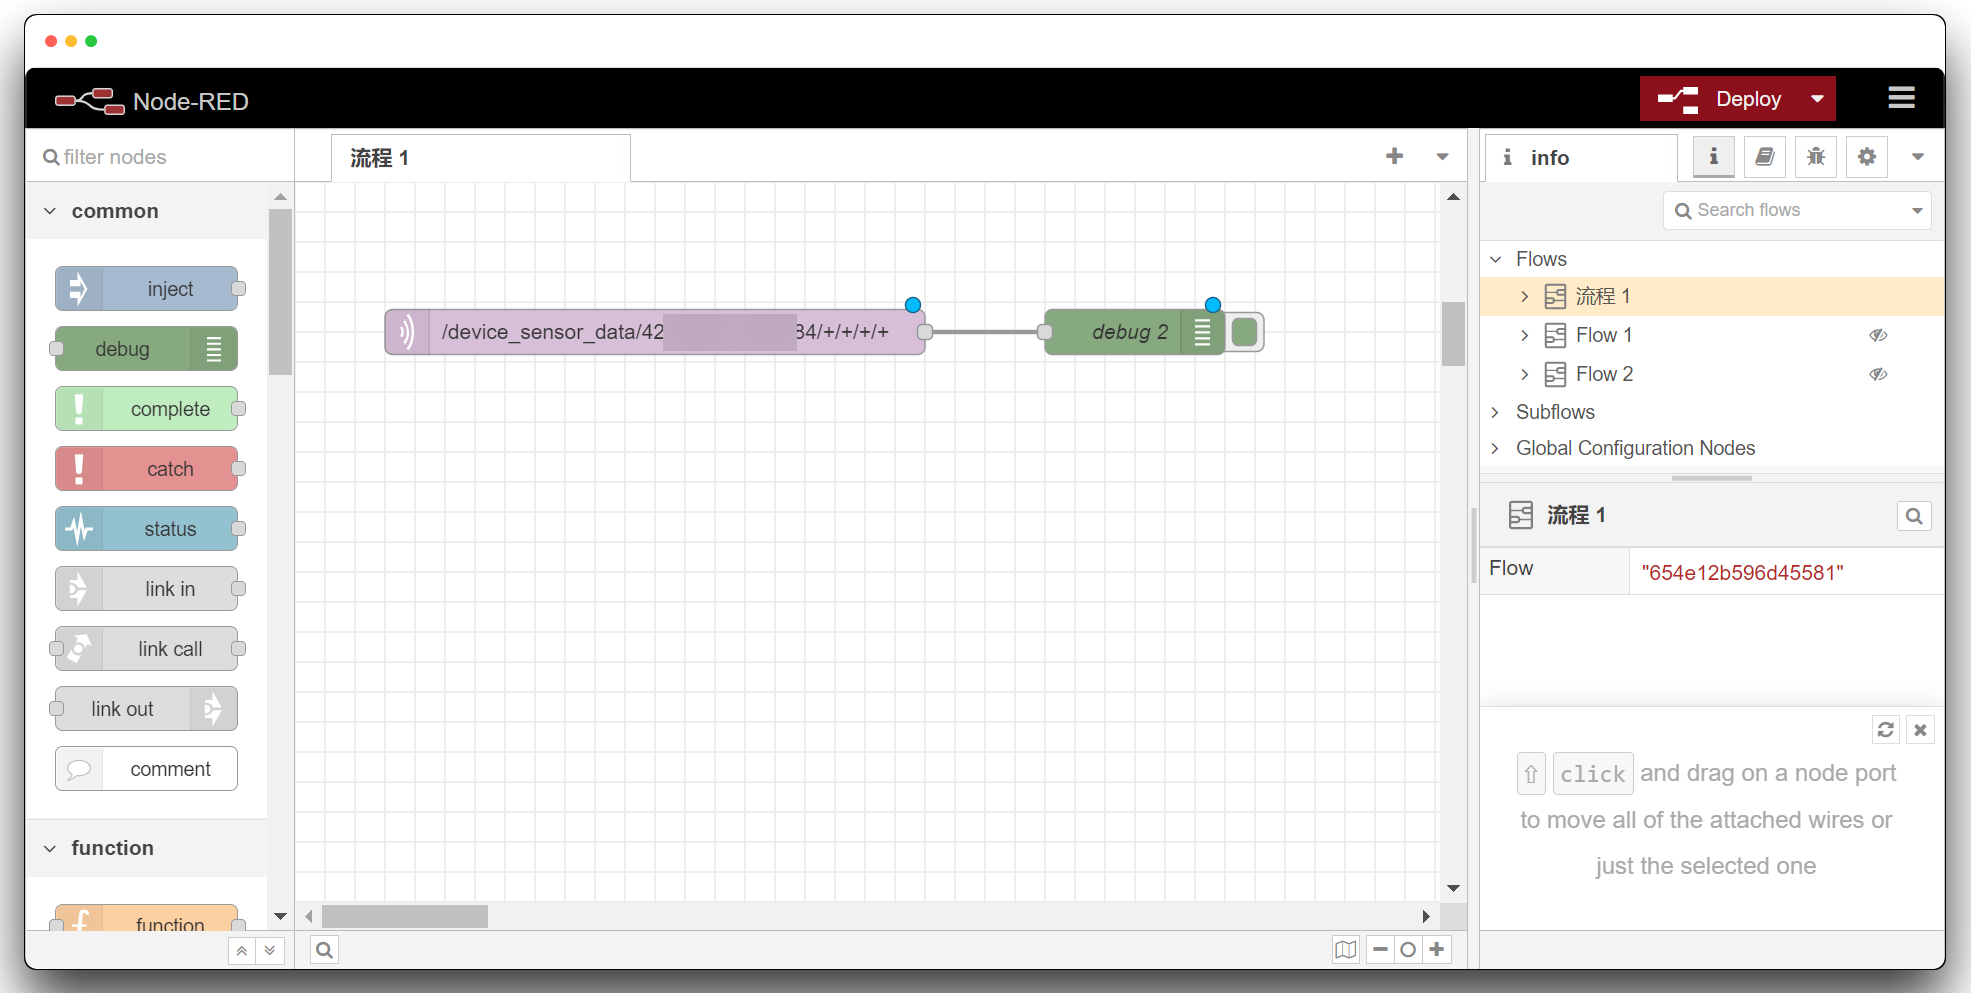
Step 2. Add debug node
Then we might as well add debug nodes to it to make it easier to check if everything is working.
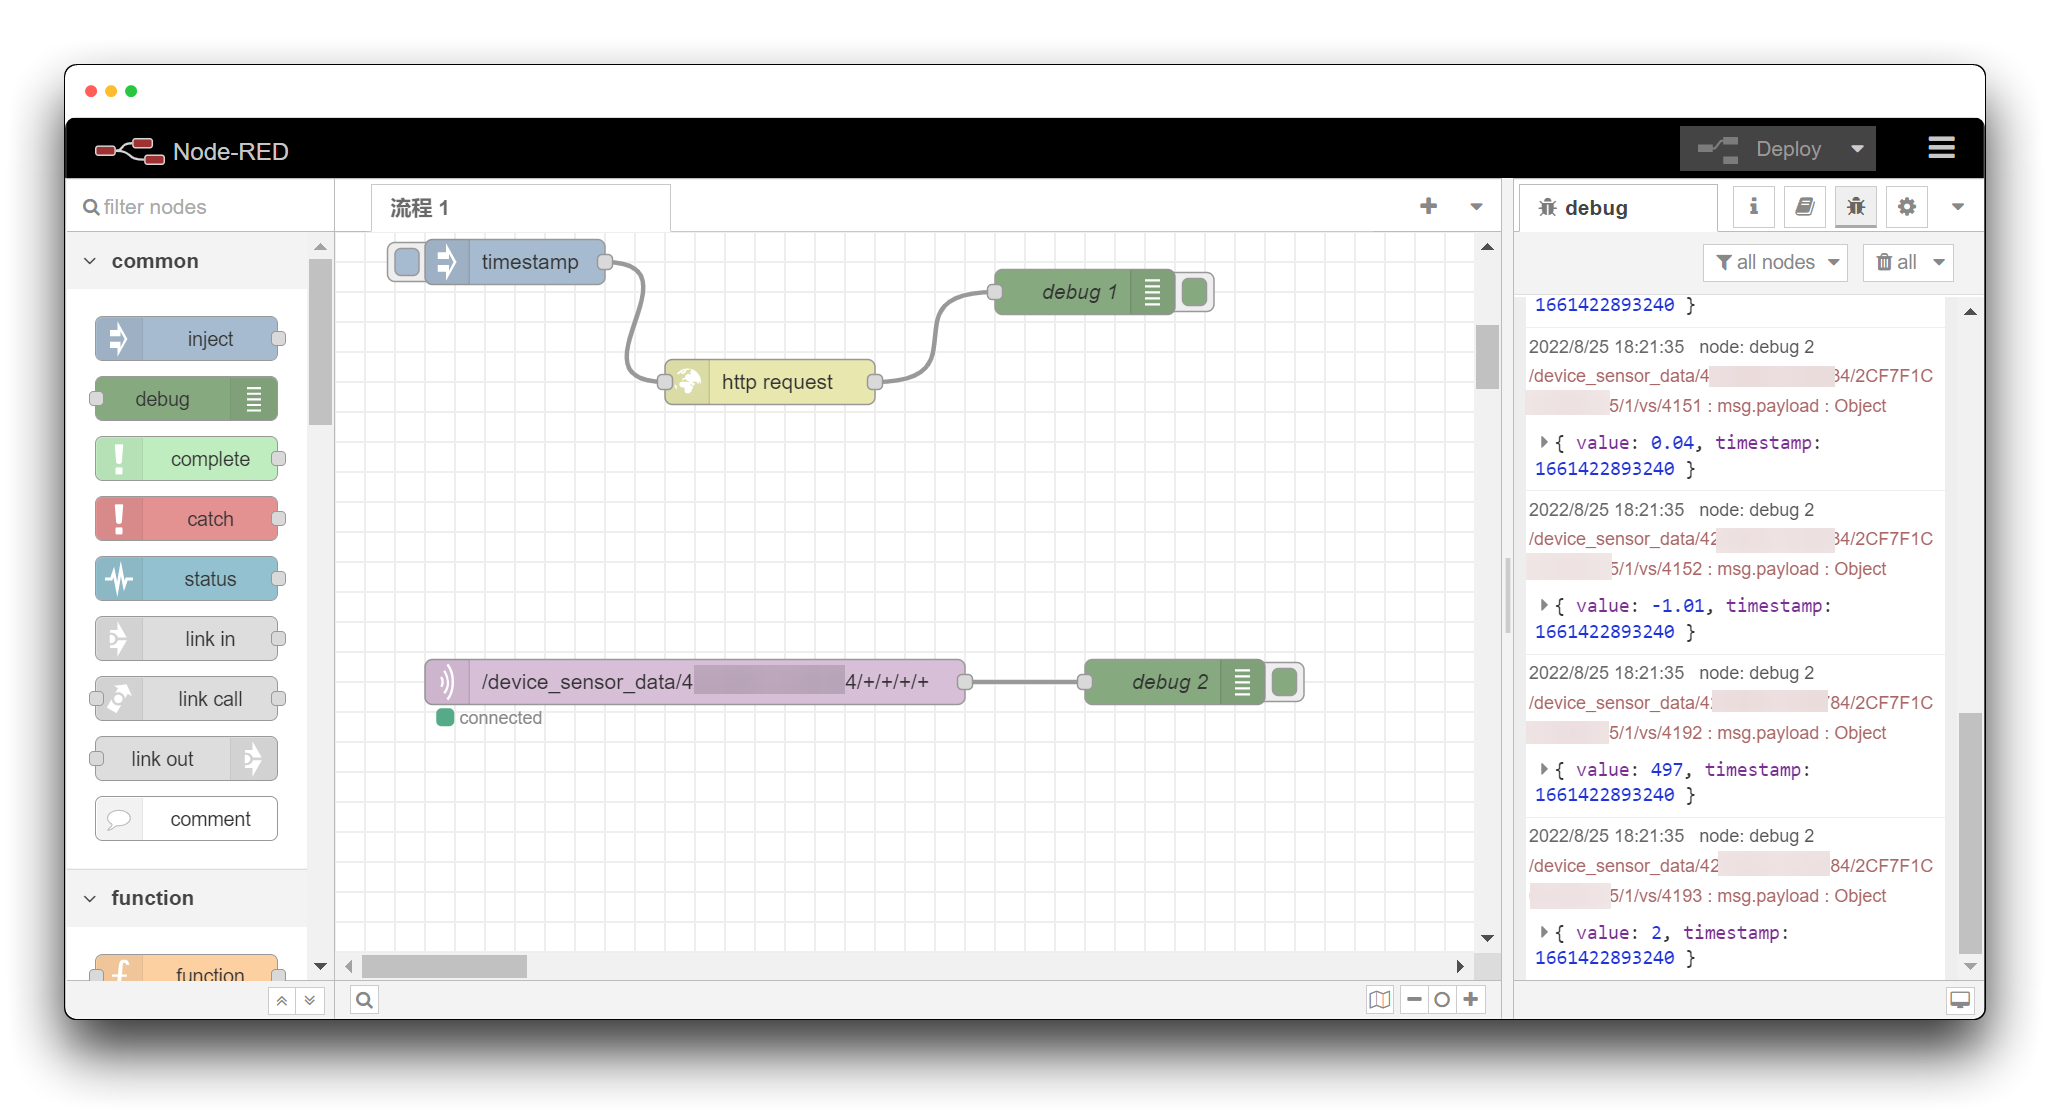
Step 3. Powers up the Wio Terminal and starts sending data to SenseCAP.
We click on the Deploy button and if everything is set up correctly you will be able to see the mqtt in node showing connected. Once the Wio Terminal starts powering up and working and starts sending data to SenseCAP. You will see the data already displayed in the debug window.
Tech Support & Product Discussion
Thank you for choosing our products! We are here to provide you with different support to ensure that your experience with our products is as smooth as possible. We offer several communication channels to cater to different preferences and needs.