Getting Started with Lumeo on NVIDIA® Jetson Devices

Lumeo is a no-code video analytics platform that enables you to rapidly design, deploy, and monitor custom video analytics and other vision-AI enabled applications.
This wiki will walkthrough how you can easily install Lumeo on the NVIDIA Jetson platform and set it up as a gateway so that you will be able to execute pipelines and process video from Streams, IP Cameras on the same network, or attached USB cameras.
Hardware supported
Lumeo is supported by the following platforms:
- NVIDIA Jetson
- x86 server with Nvidia GPU
- GPU instance in AWS, GCP, Azure, etc
However, we will only focus on how to deploy Lumeo on the NVIDIA Jetson platform in this wiki
Prerequisites
-
NVIDIA Jetson device running NVIDIA JetPack with all SDK components installed and connected to the internet
- We have tested this wiki with reComputer J4012 running JetPack 5.1
-
Host PC with Windows, Linux or Mac and connected to the internet
Create a Lumeo Account
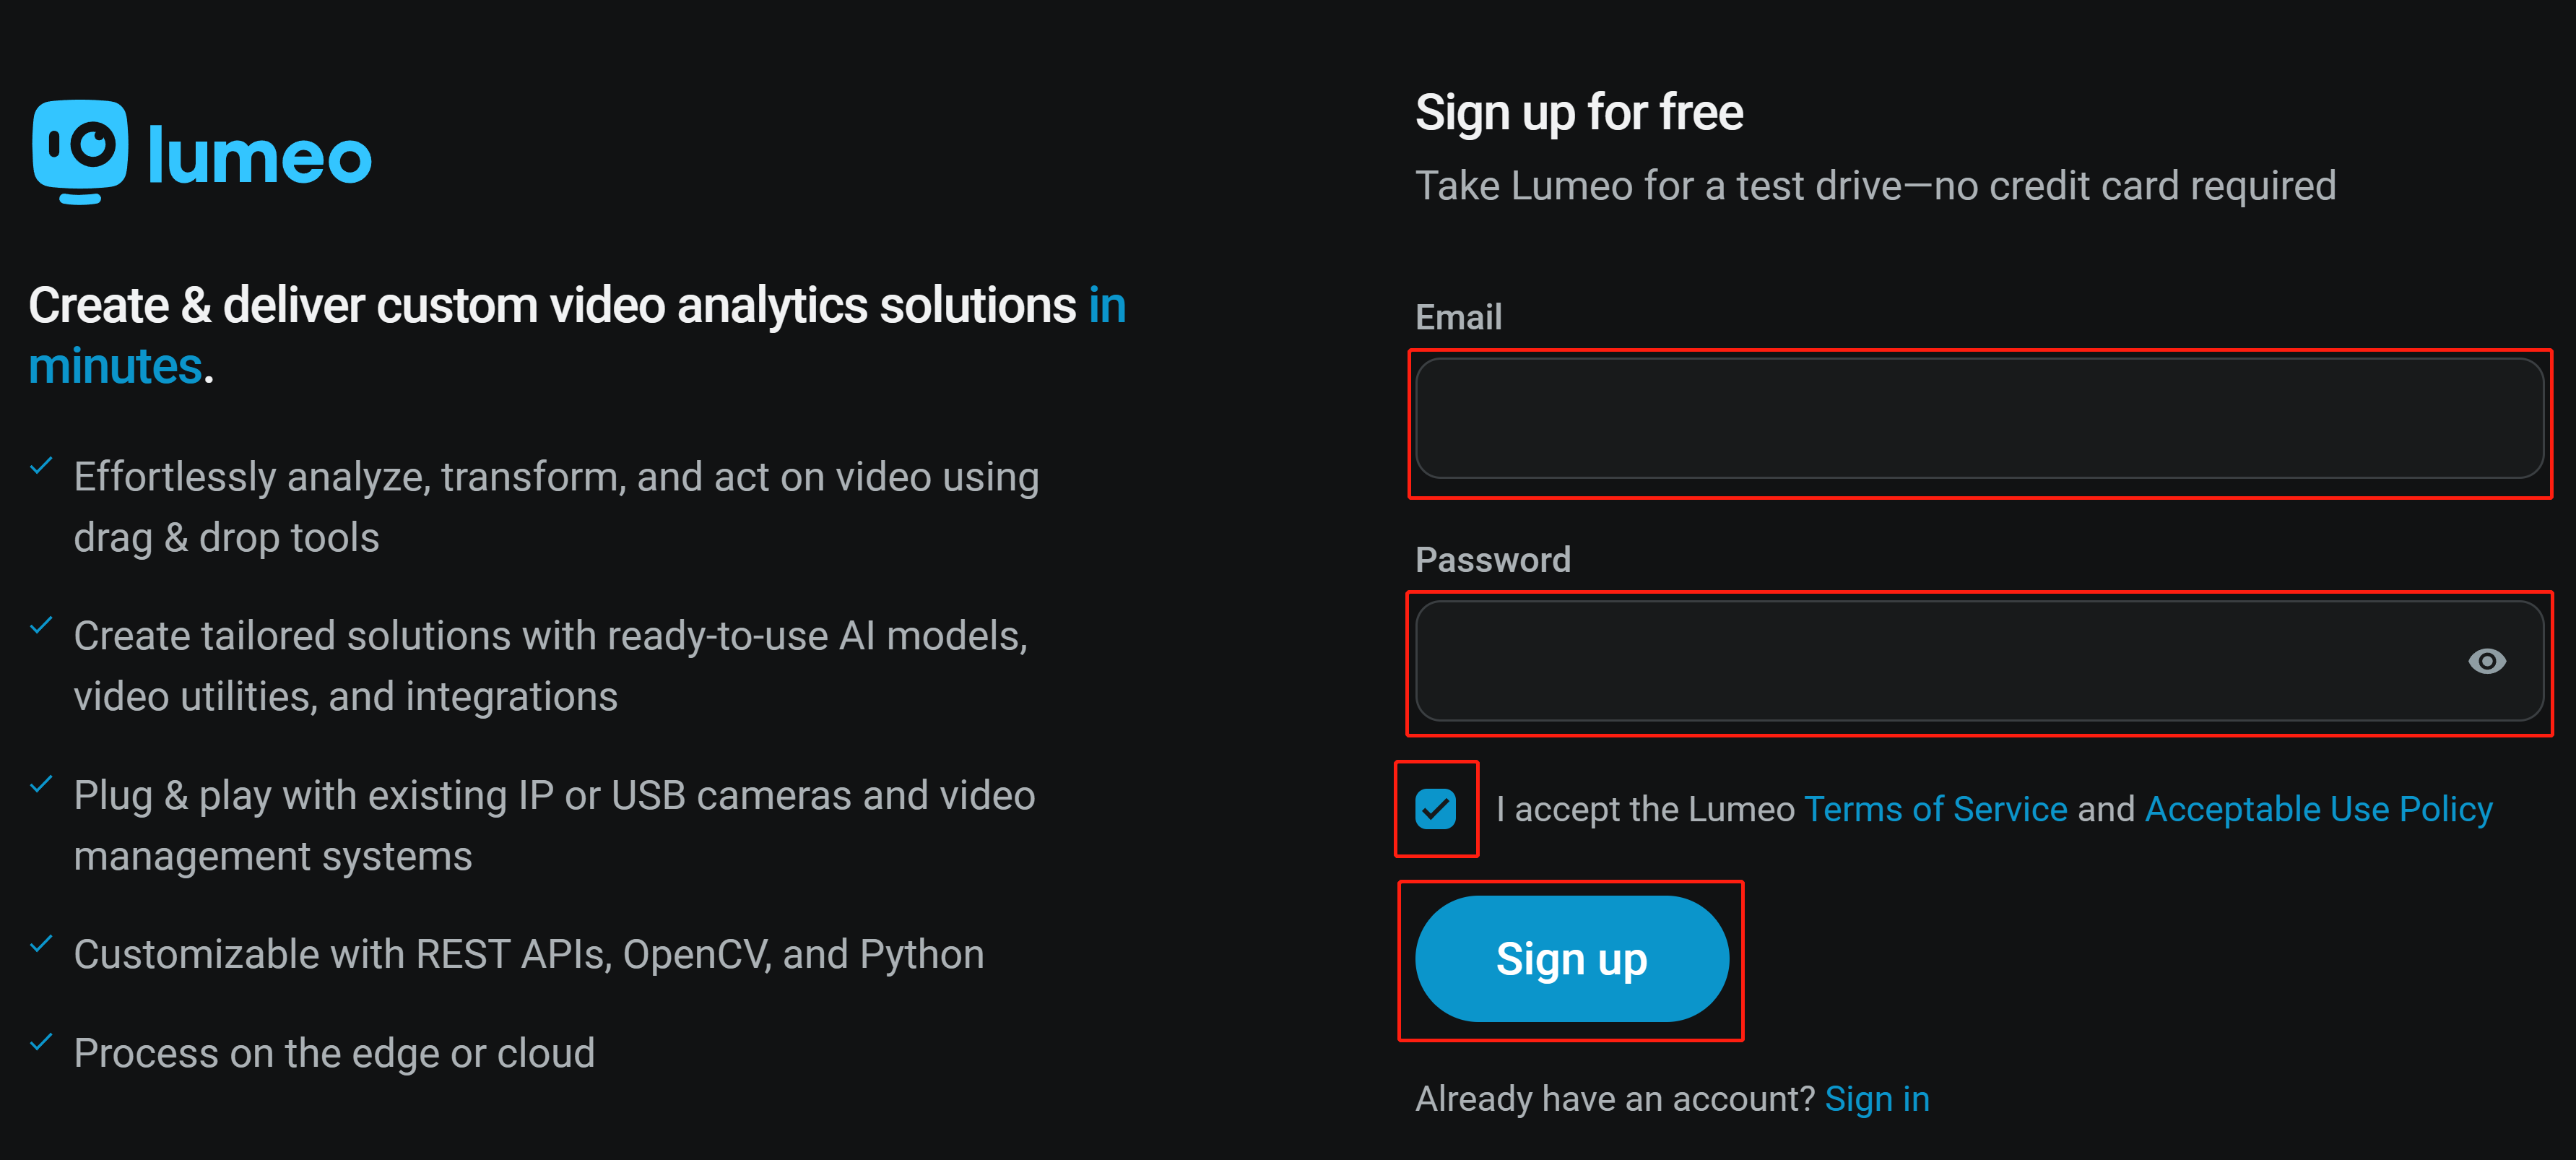
Step 1: Visit this page, enter email, password, click the checkbox to agree to the terms and click Sign up
Step 2: After signing up for a new account, you can sign in to your account with the email and the password created before by visiting this page
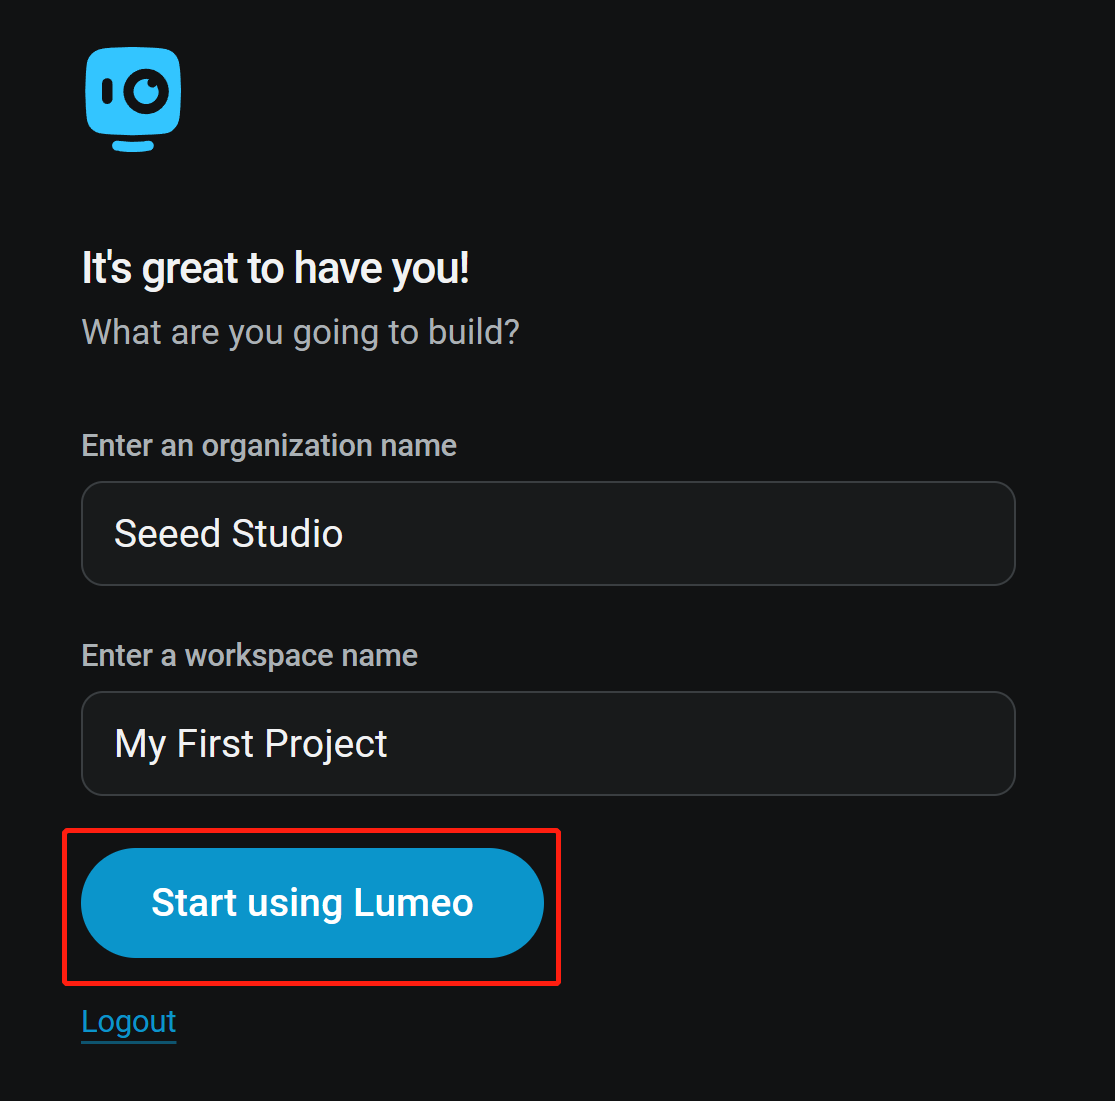
Step 3: Emter an organization name and workspace name and click Start using Lumeo
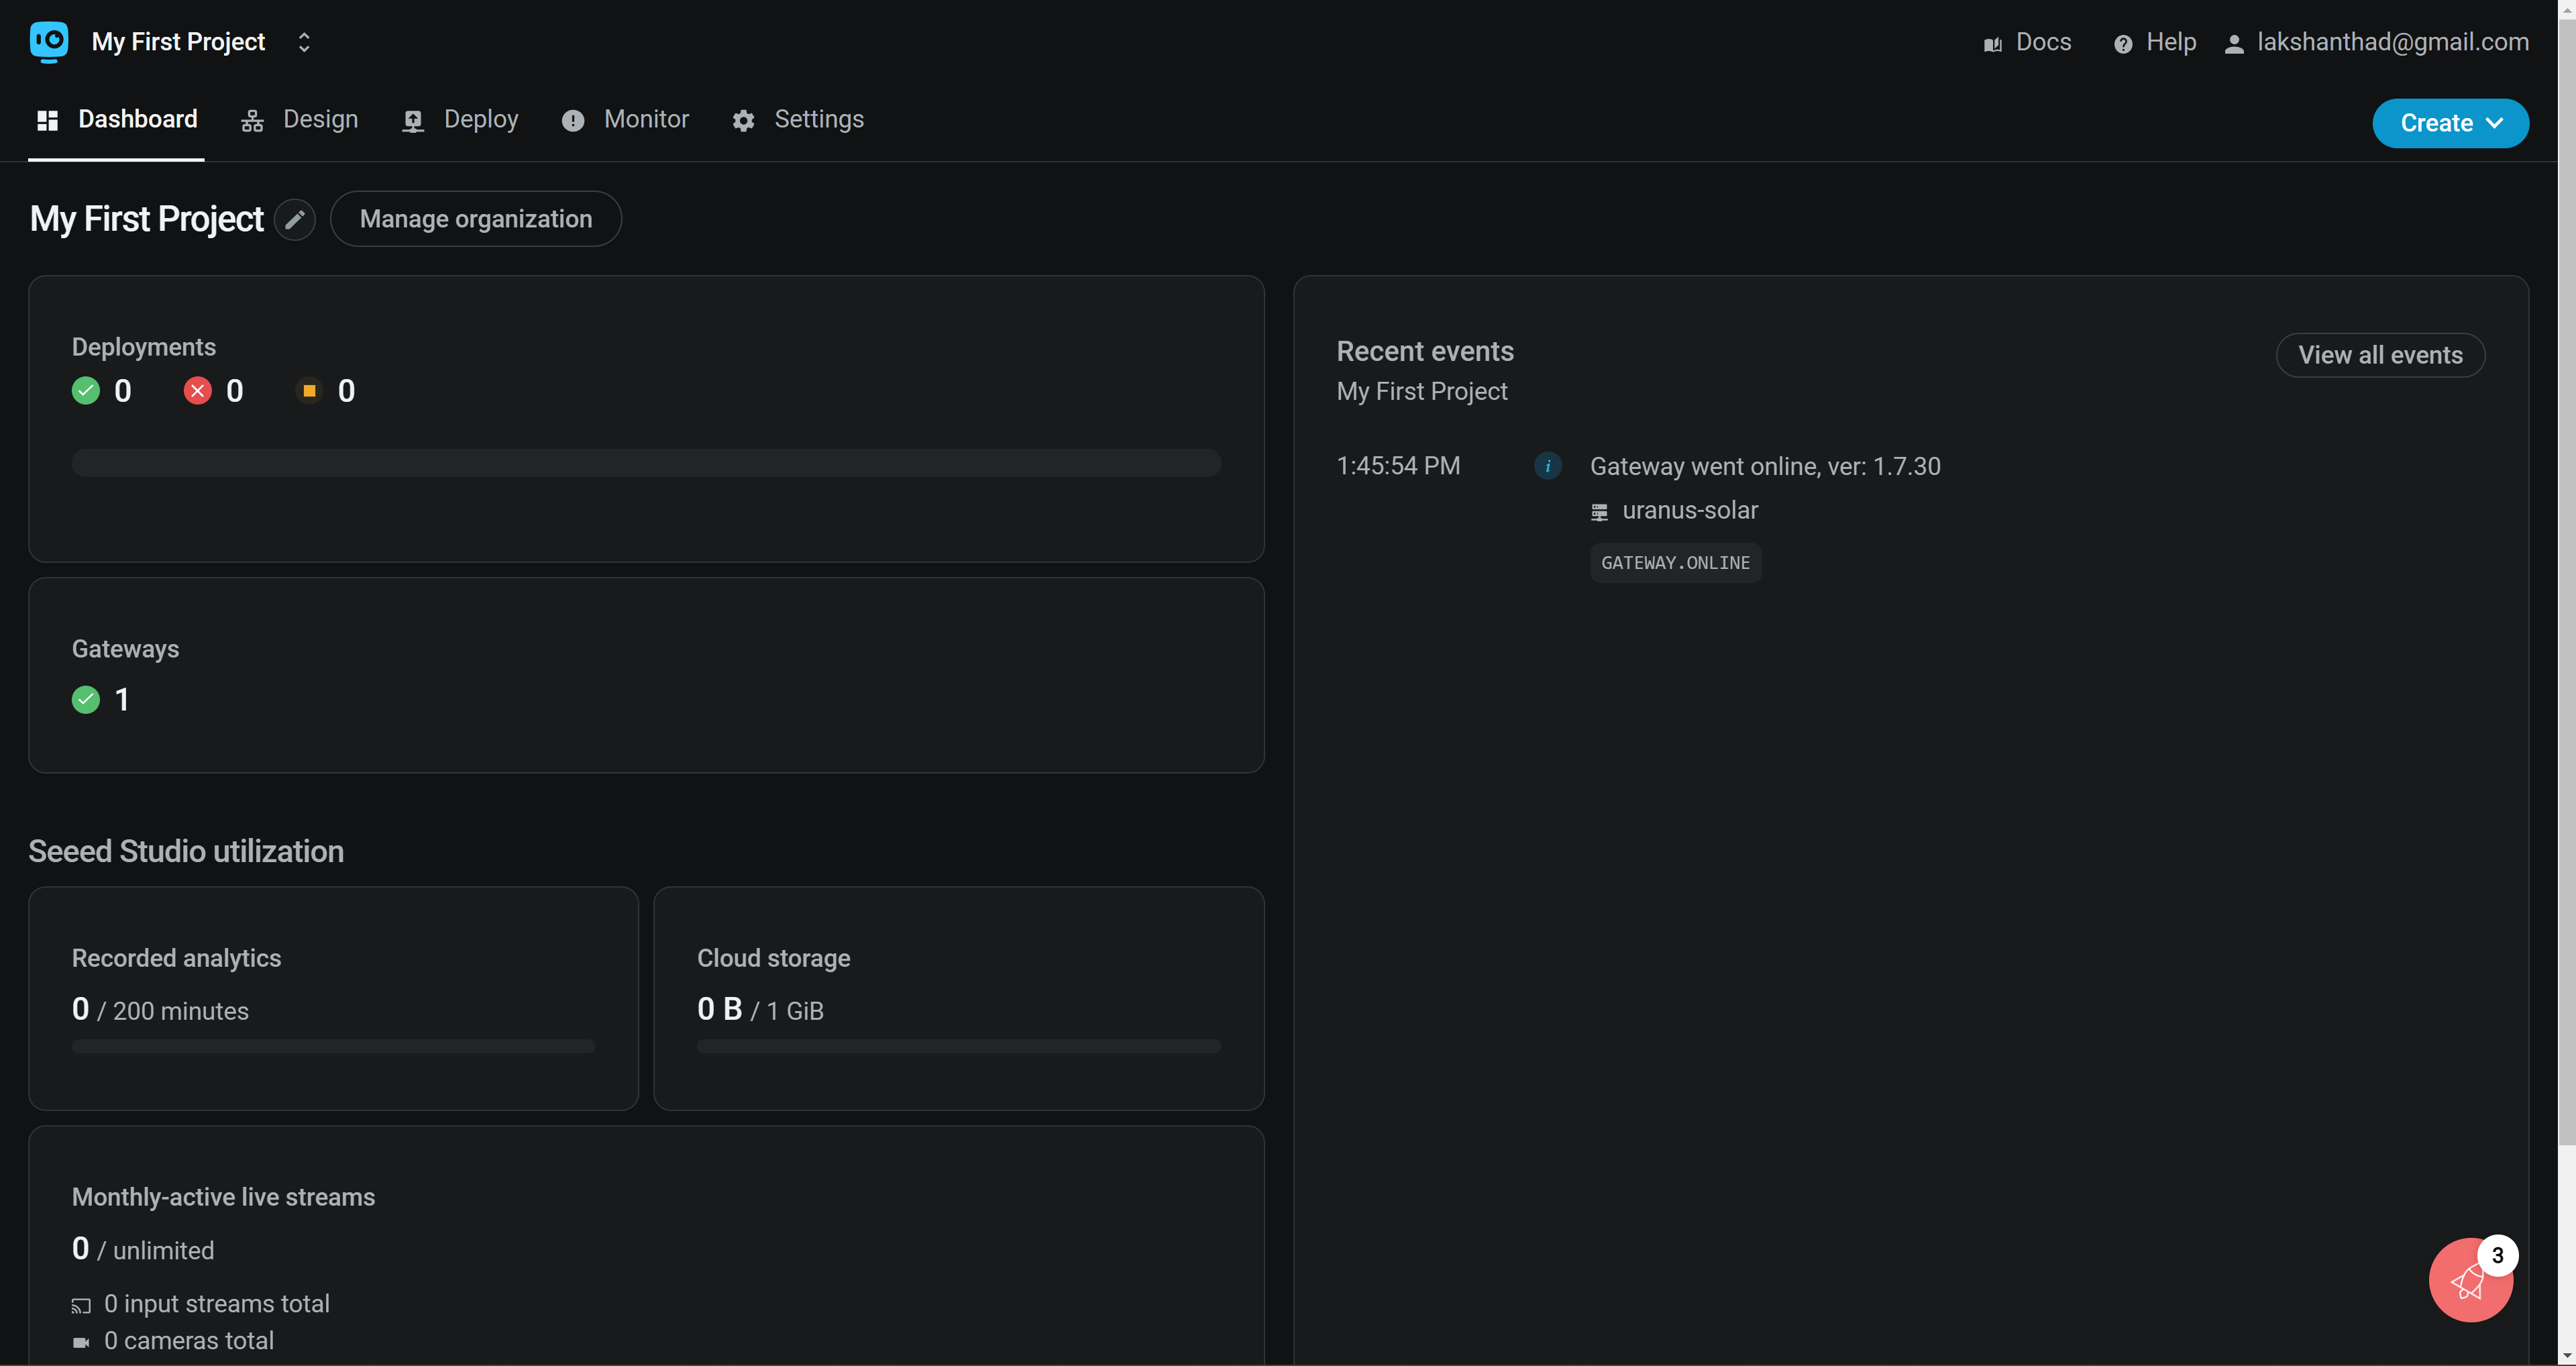
Now you will see the Lumeo console as follows
Install Lumeo Gateway on NVIDIA Jetson
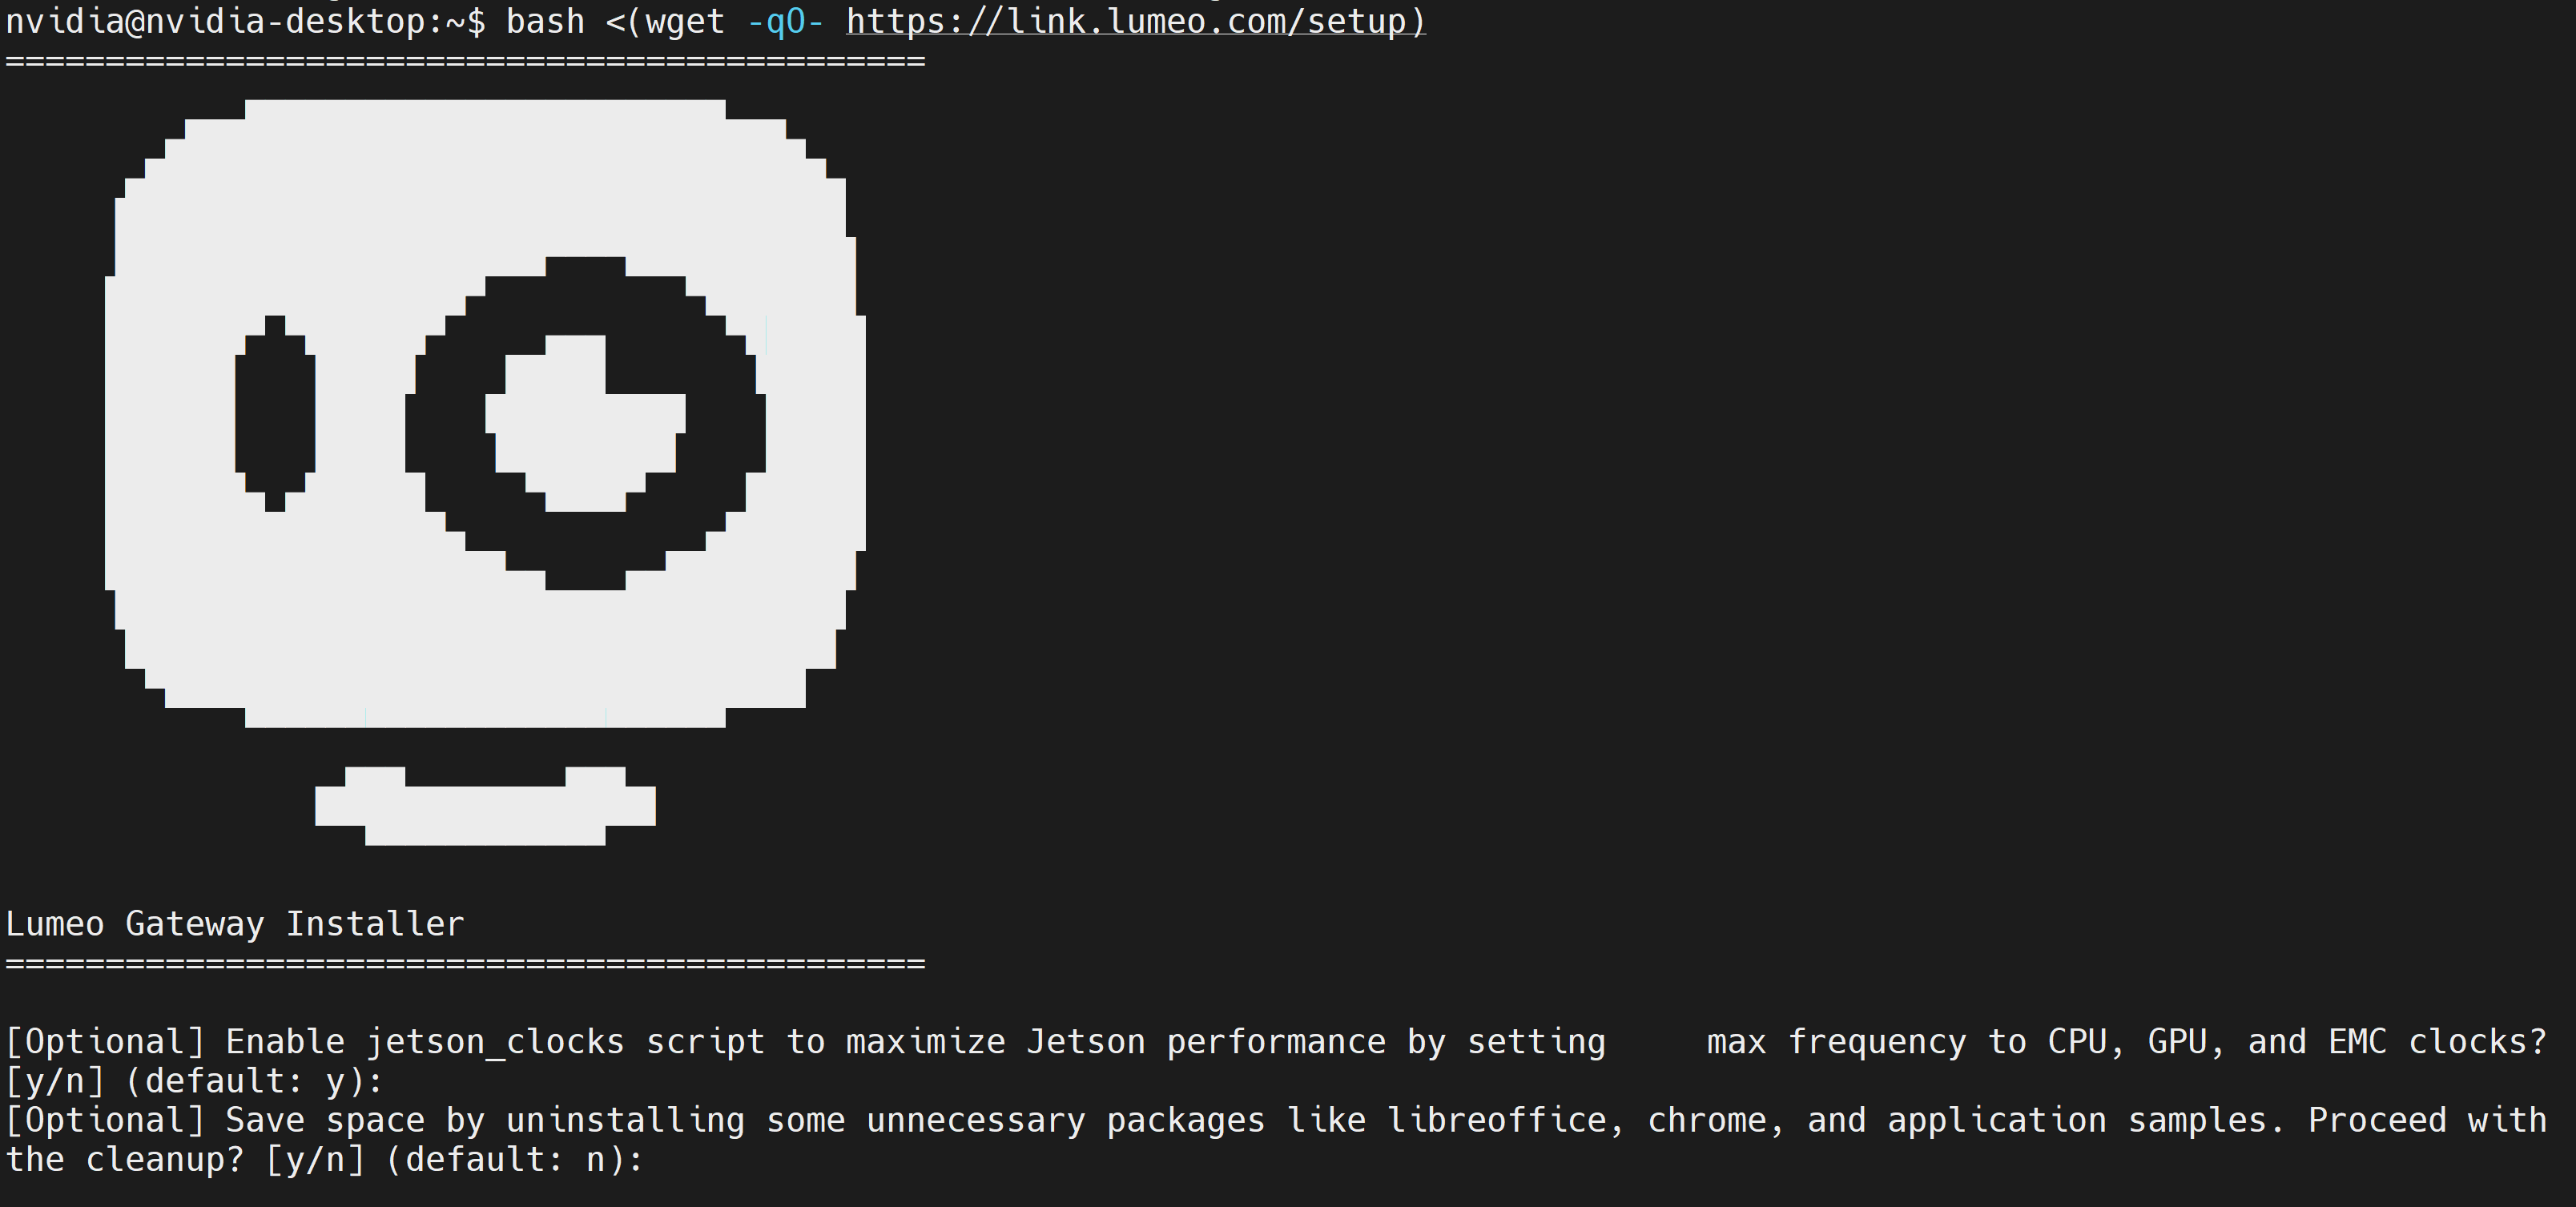
Step 1: Run the installer script inside the Jetson device
bash <(wget -qO- https://link.lumeo.com/setup)
Respond to the prompts in the installer script according to your needs. You can keep everything to default here
If you see the below output, that means the installer has successfully completed
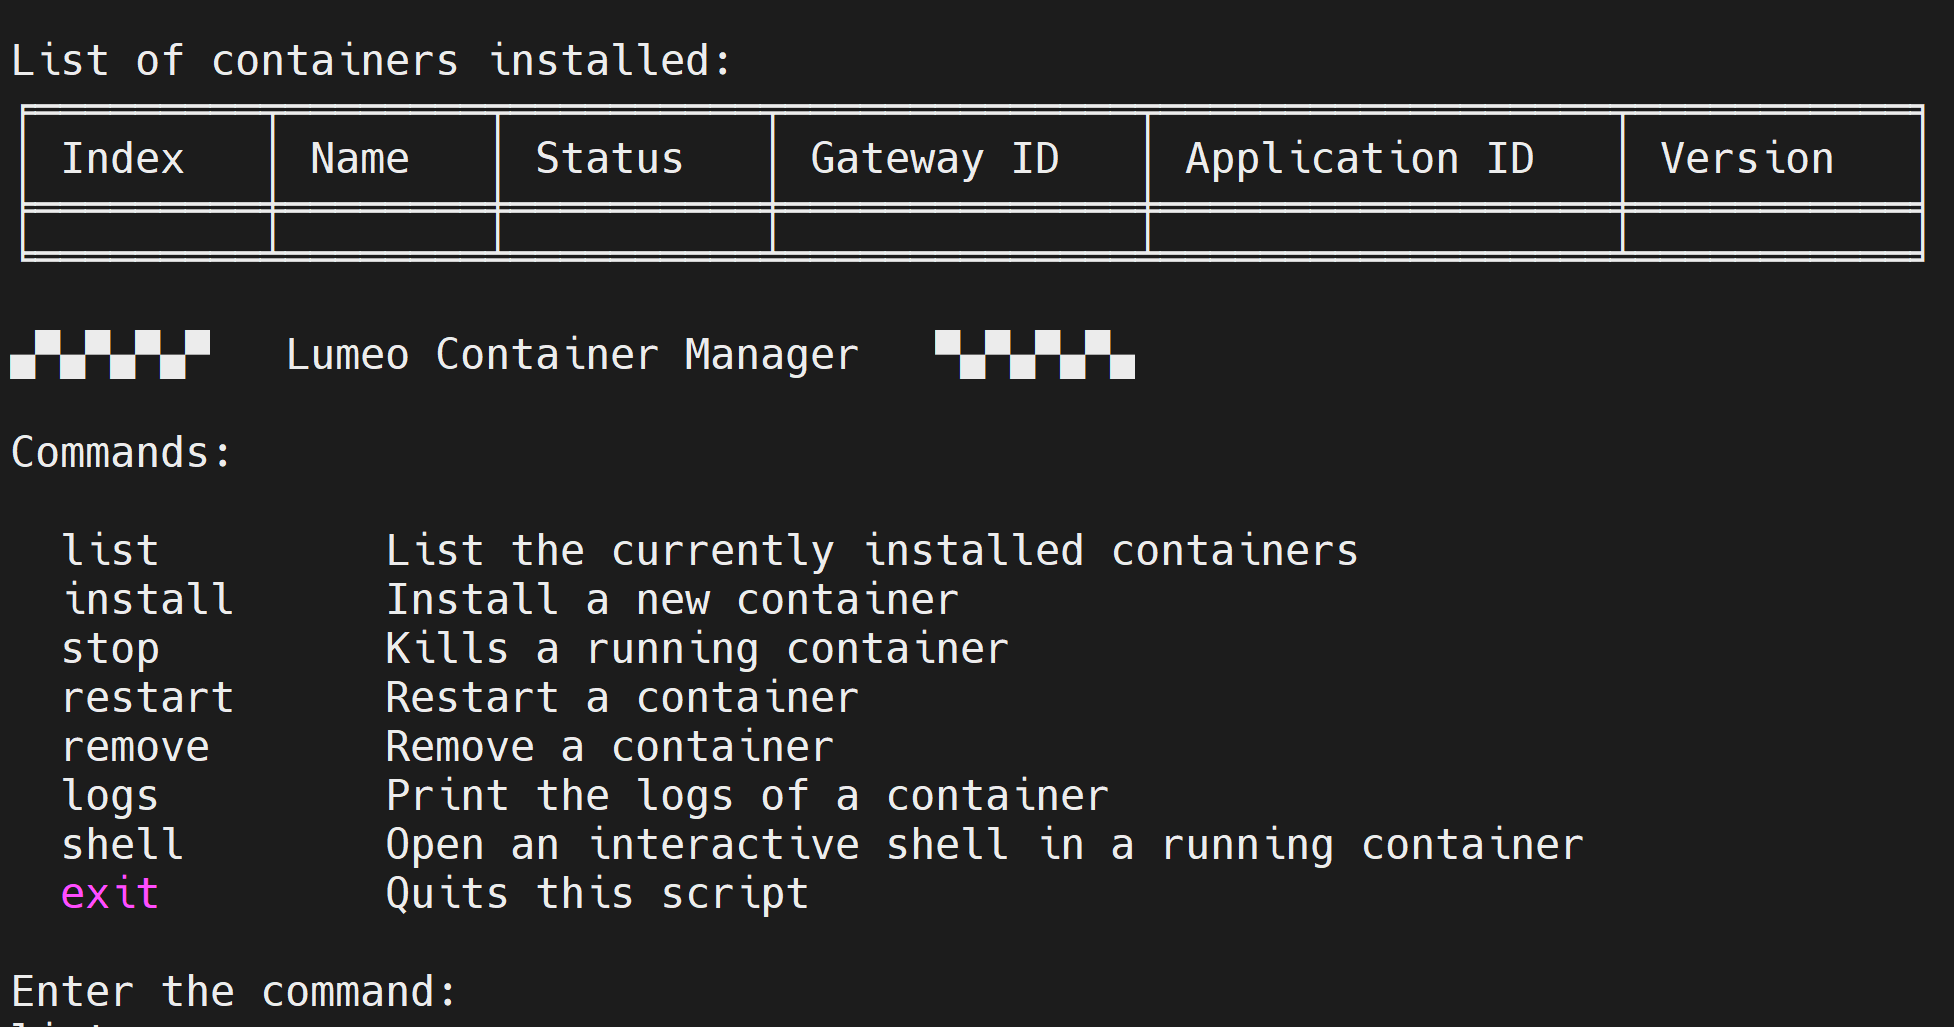
Step 2: Type Install next to the prompt Enter the command: to install a new container which includes the gateway
Enter the command:
install
Note: A free Lumeo account only allows one gateway to be deployed. So you first need to delete the default cloud gateway which comes with Lumeo before deploying your own gateway on the Jetson device. Simply enter the pre-loaded cloud gateway and click Delete to delete that gateway.
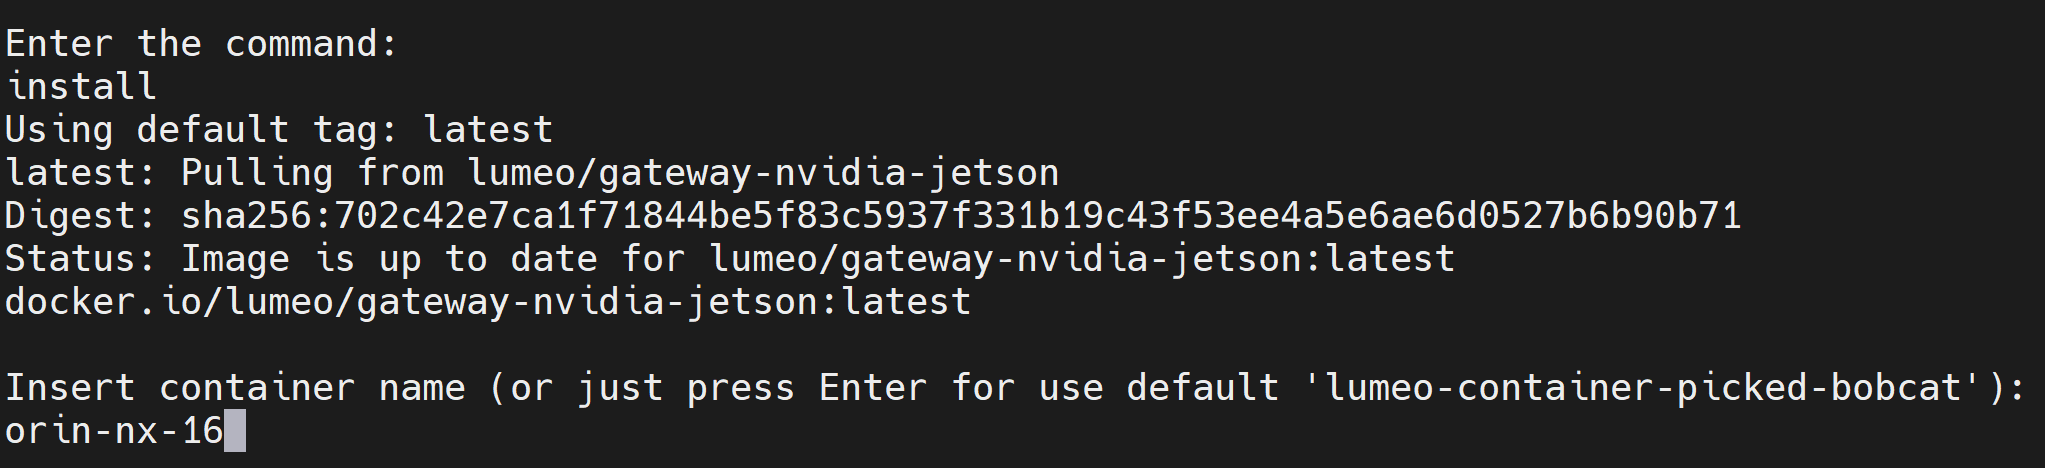
Step 3: Enter a name for the container when prompted and login with your Lumeo account credentials when prompted

Step 4: After the container installation is finished, type list to list the container that you just installed

Step 5: Type exit to quit the running script
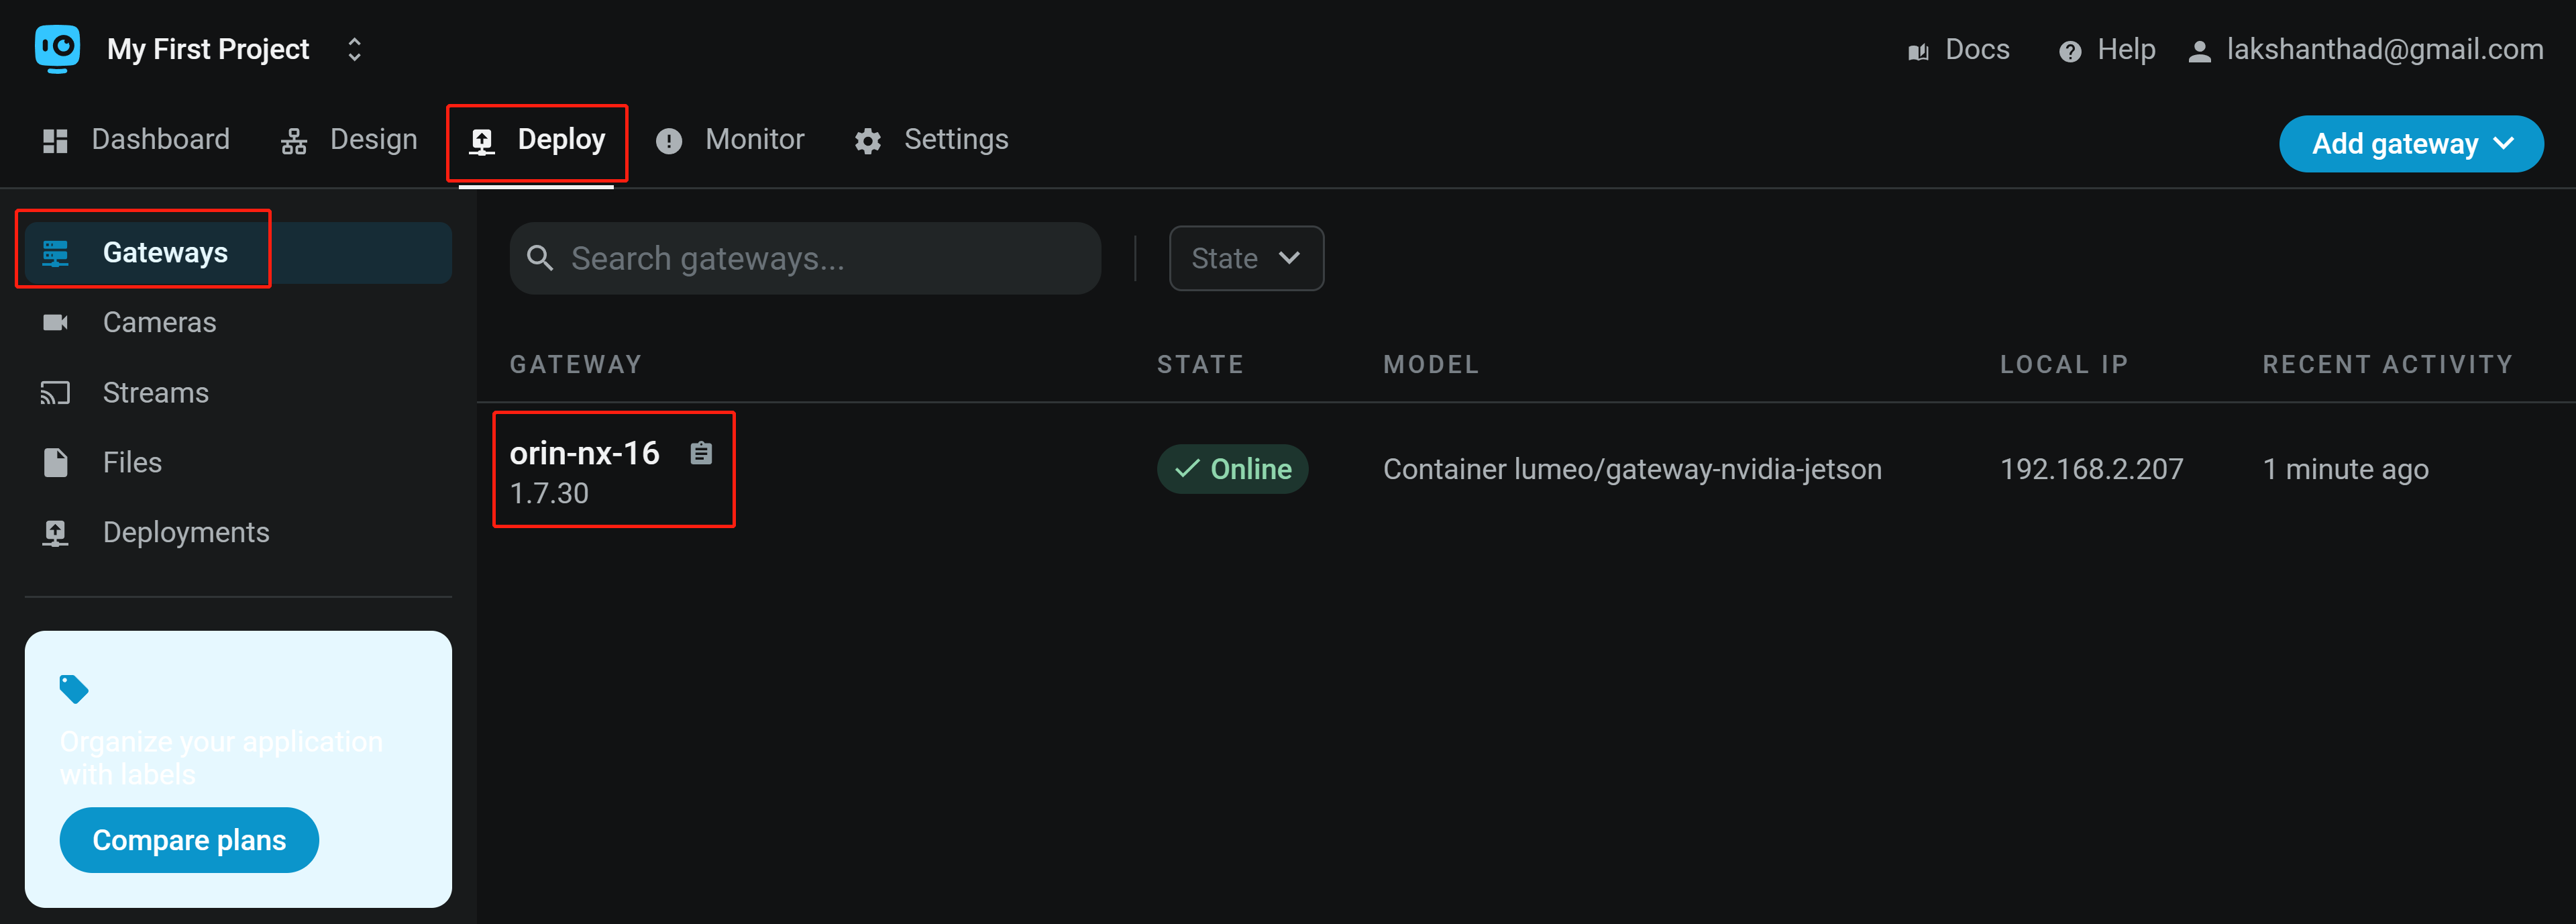
Now you have successfully installed Lumeo Gateway on the NVIDIA Jetson. If you go to Lumeo console and navigate to Gateways, you will see the newly deployed Jetson-powered gateway.
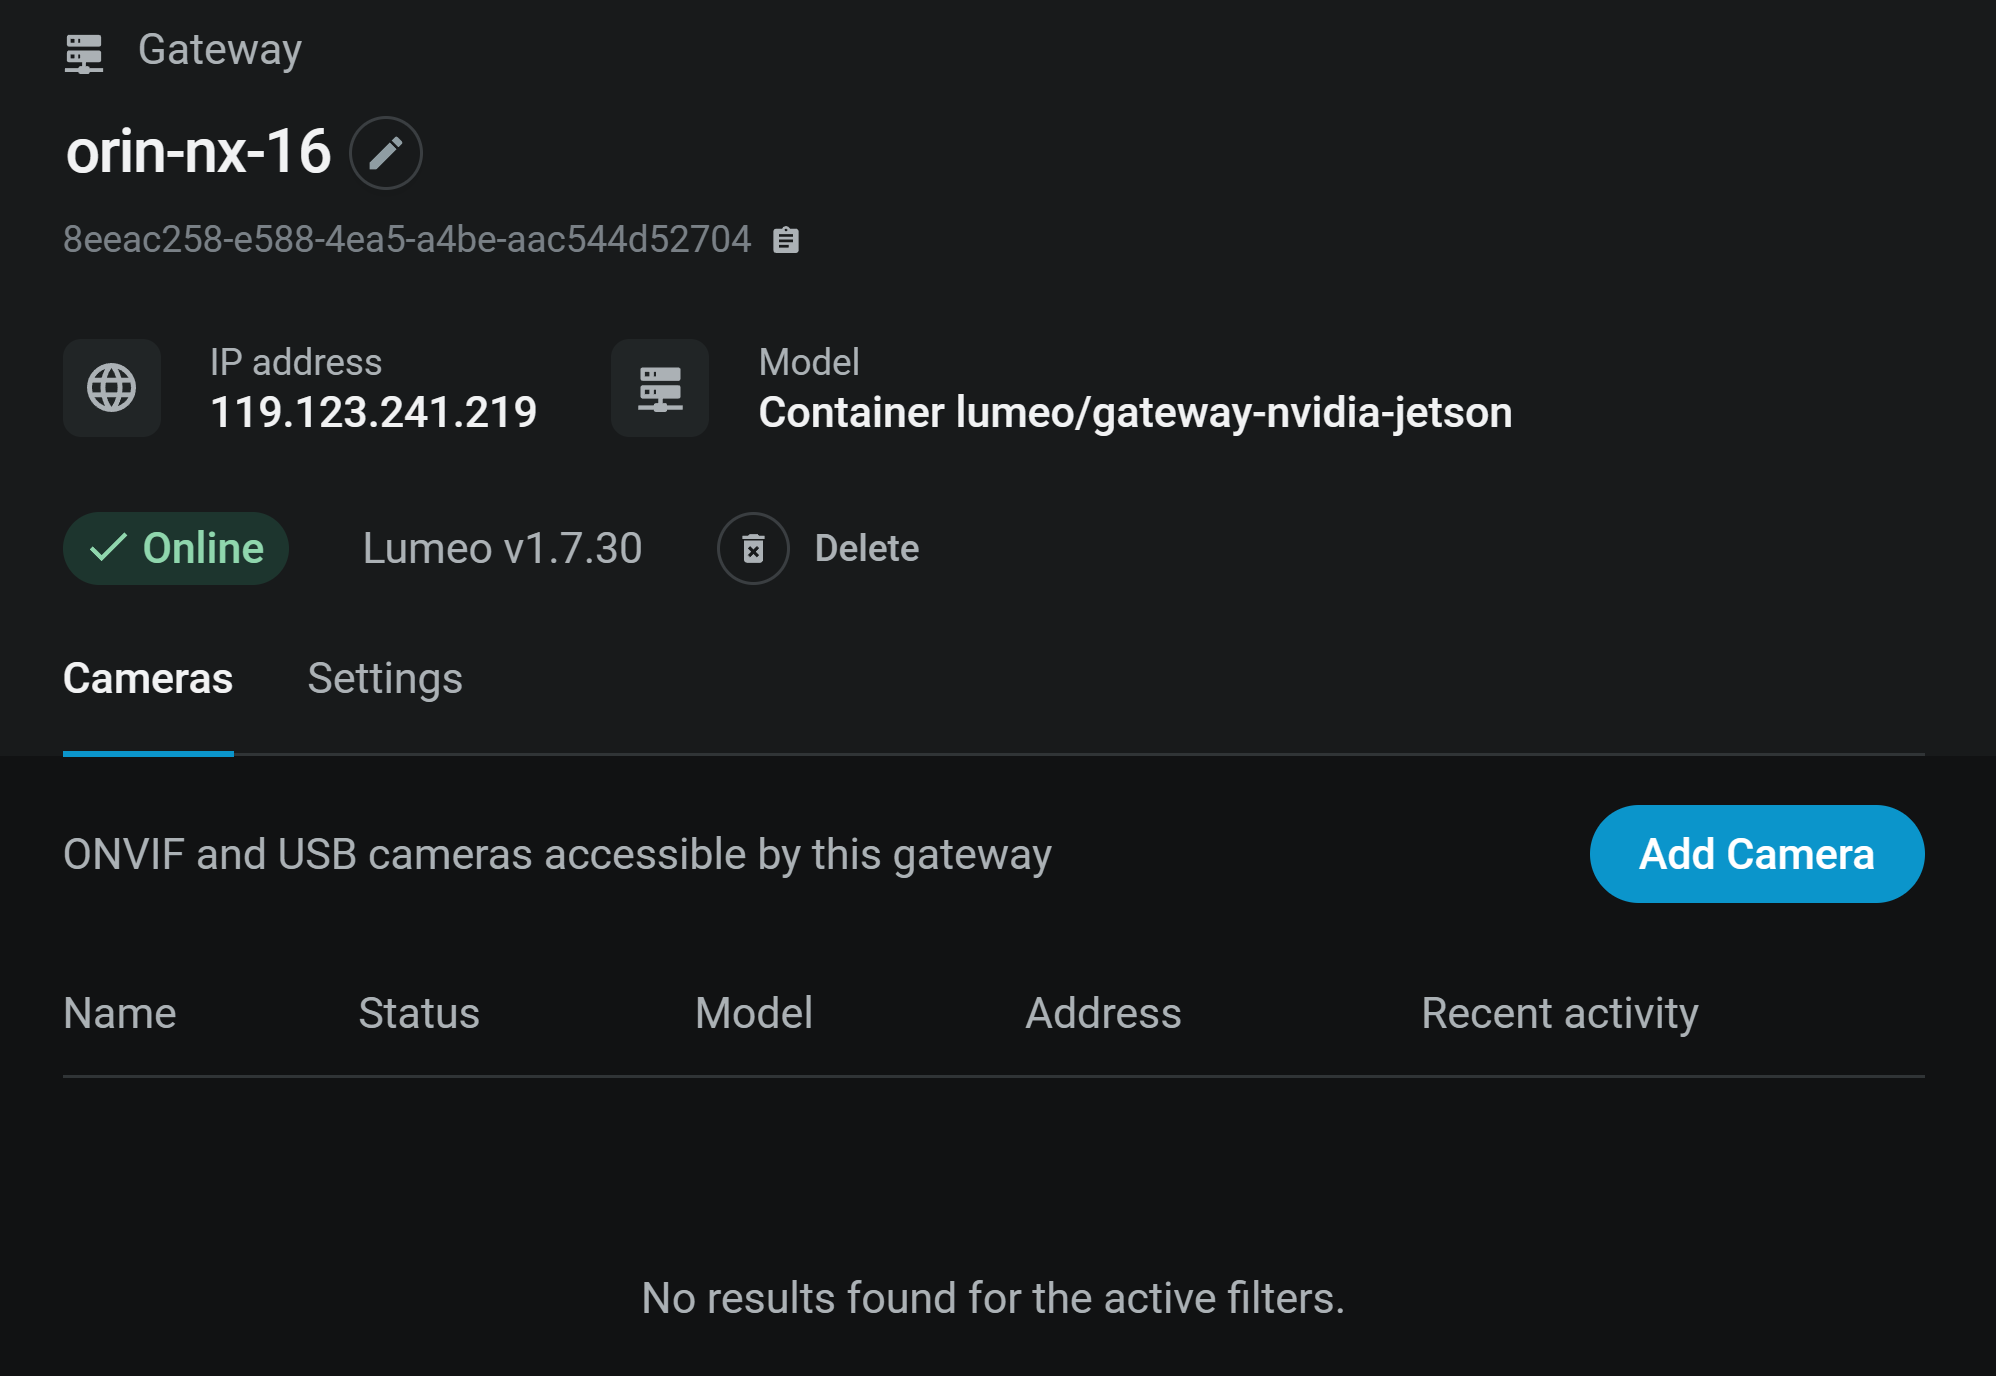
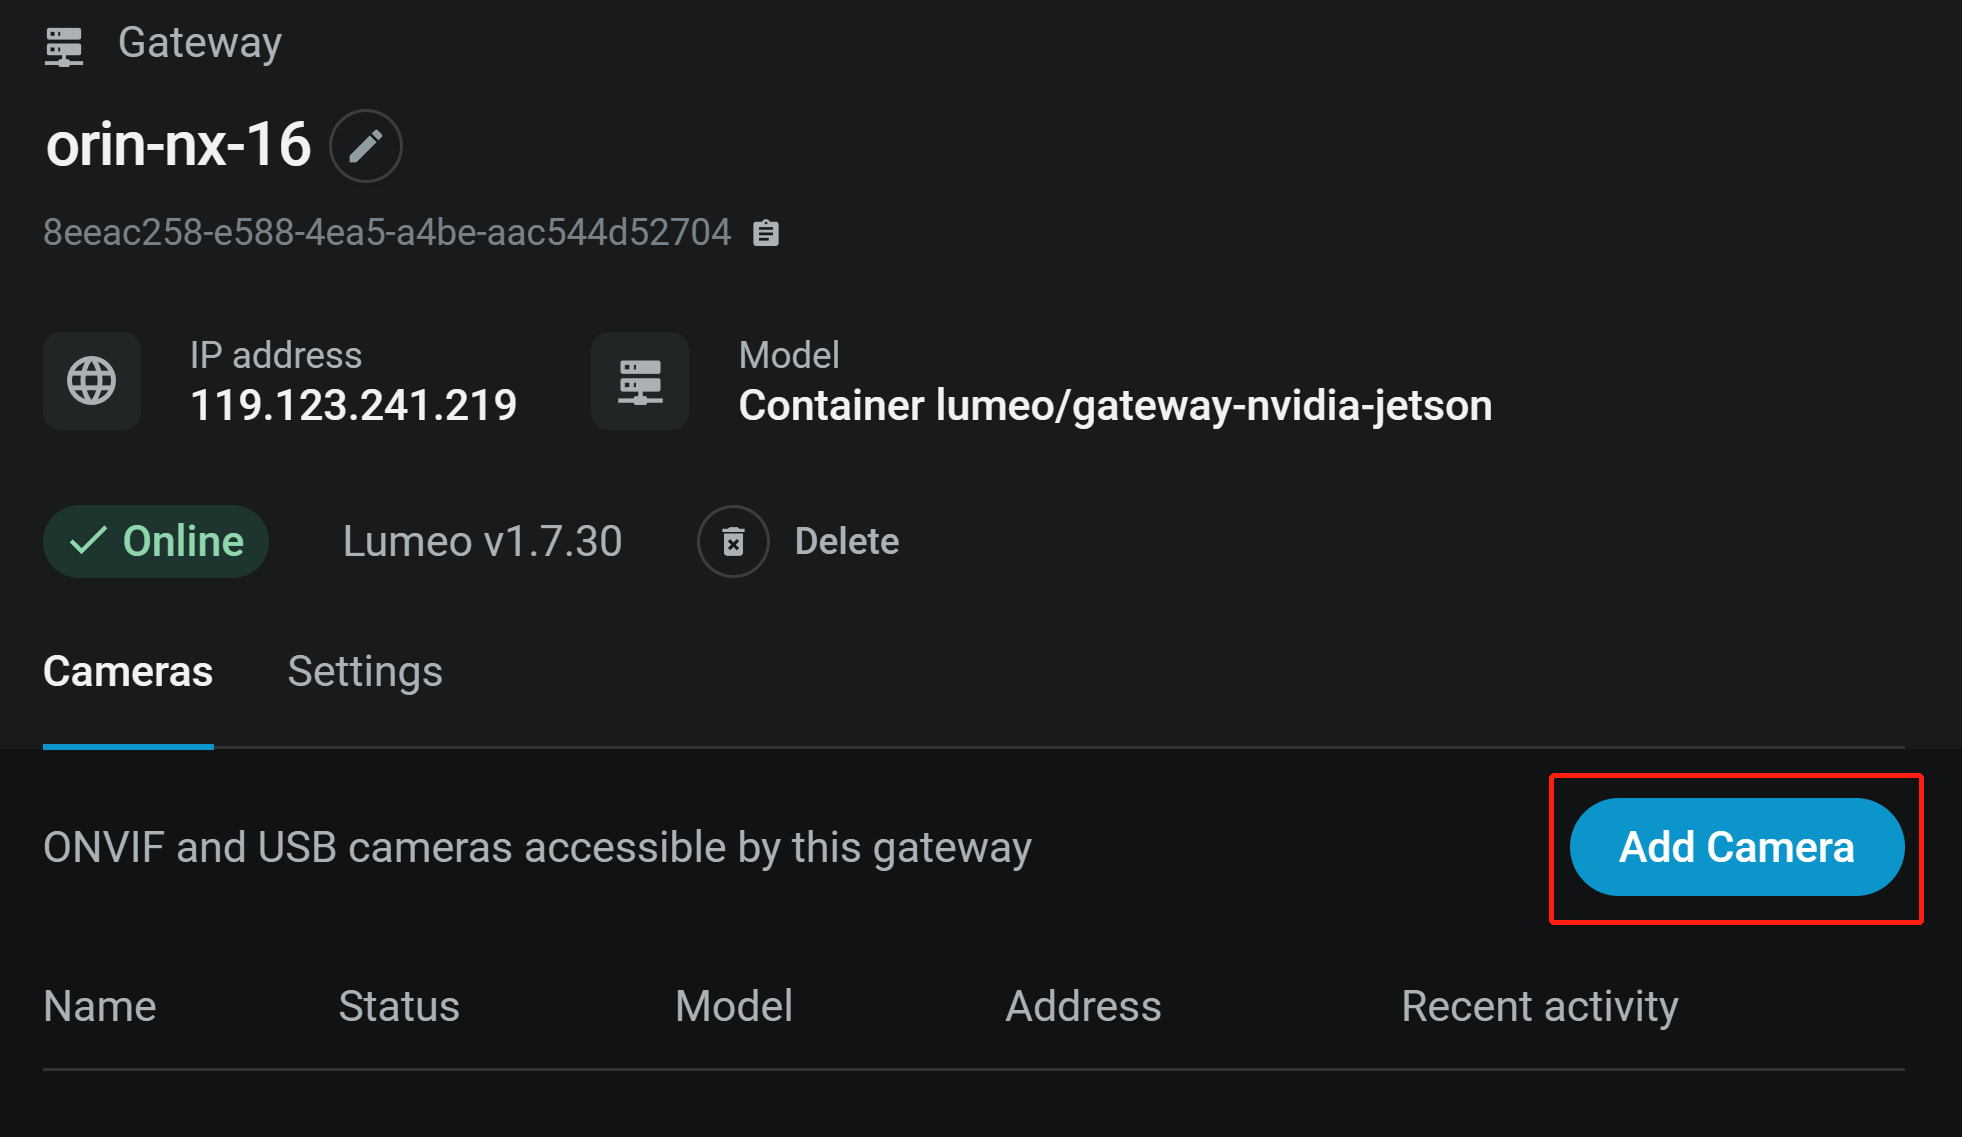
Step 3: Click on the Gateway to view additional information about the gateway
Add cameras to the gateway
Now we will add cameras to gateway that we have already setup on the Jetson device
Step 1: Connect a USB camera to one of the USB ports on the Jetson device or connect an ONVIF camera to the same network as the Jetson device
Step 2: Under the Gateway that we setup before, click Add Camera
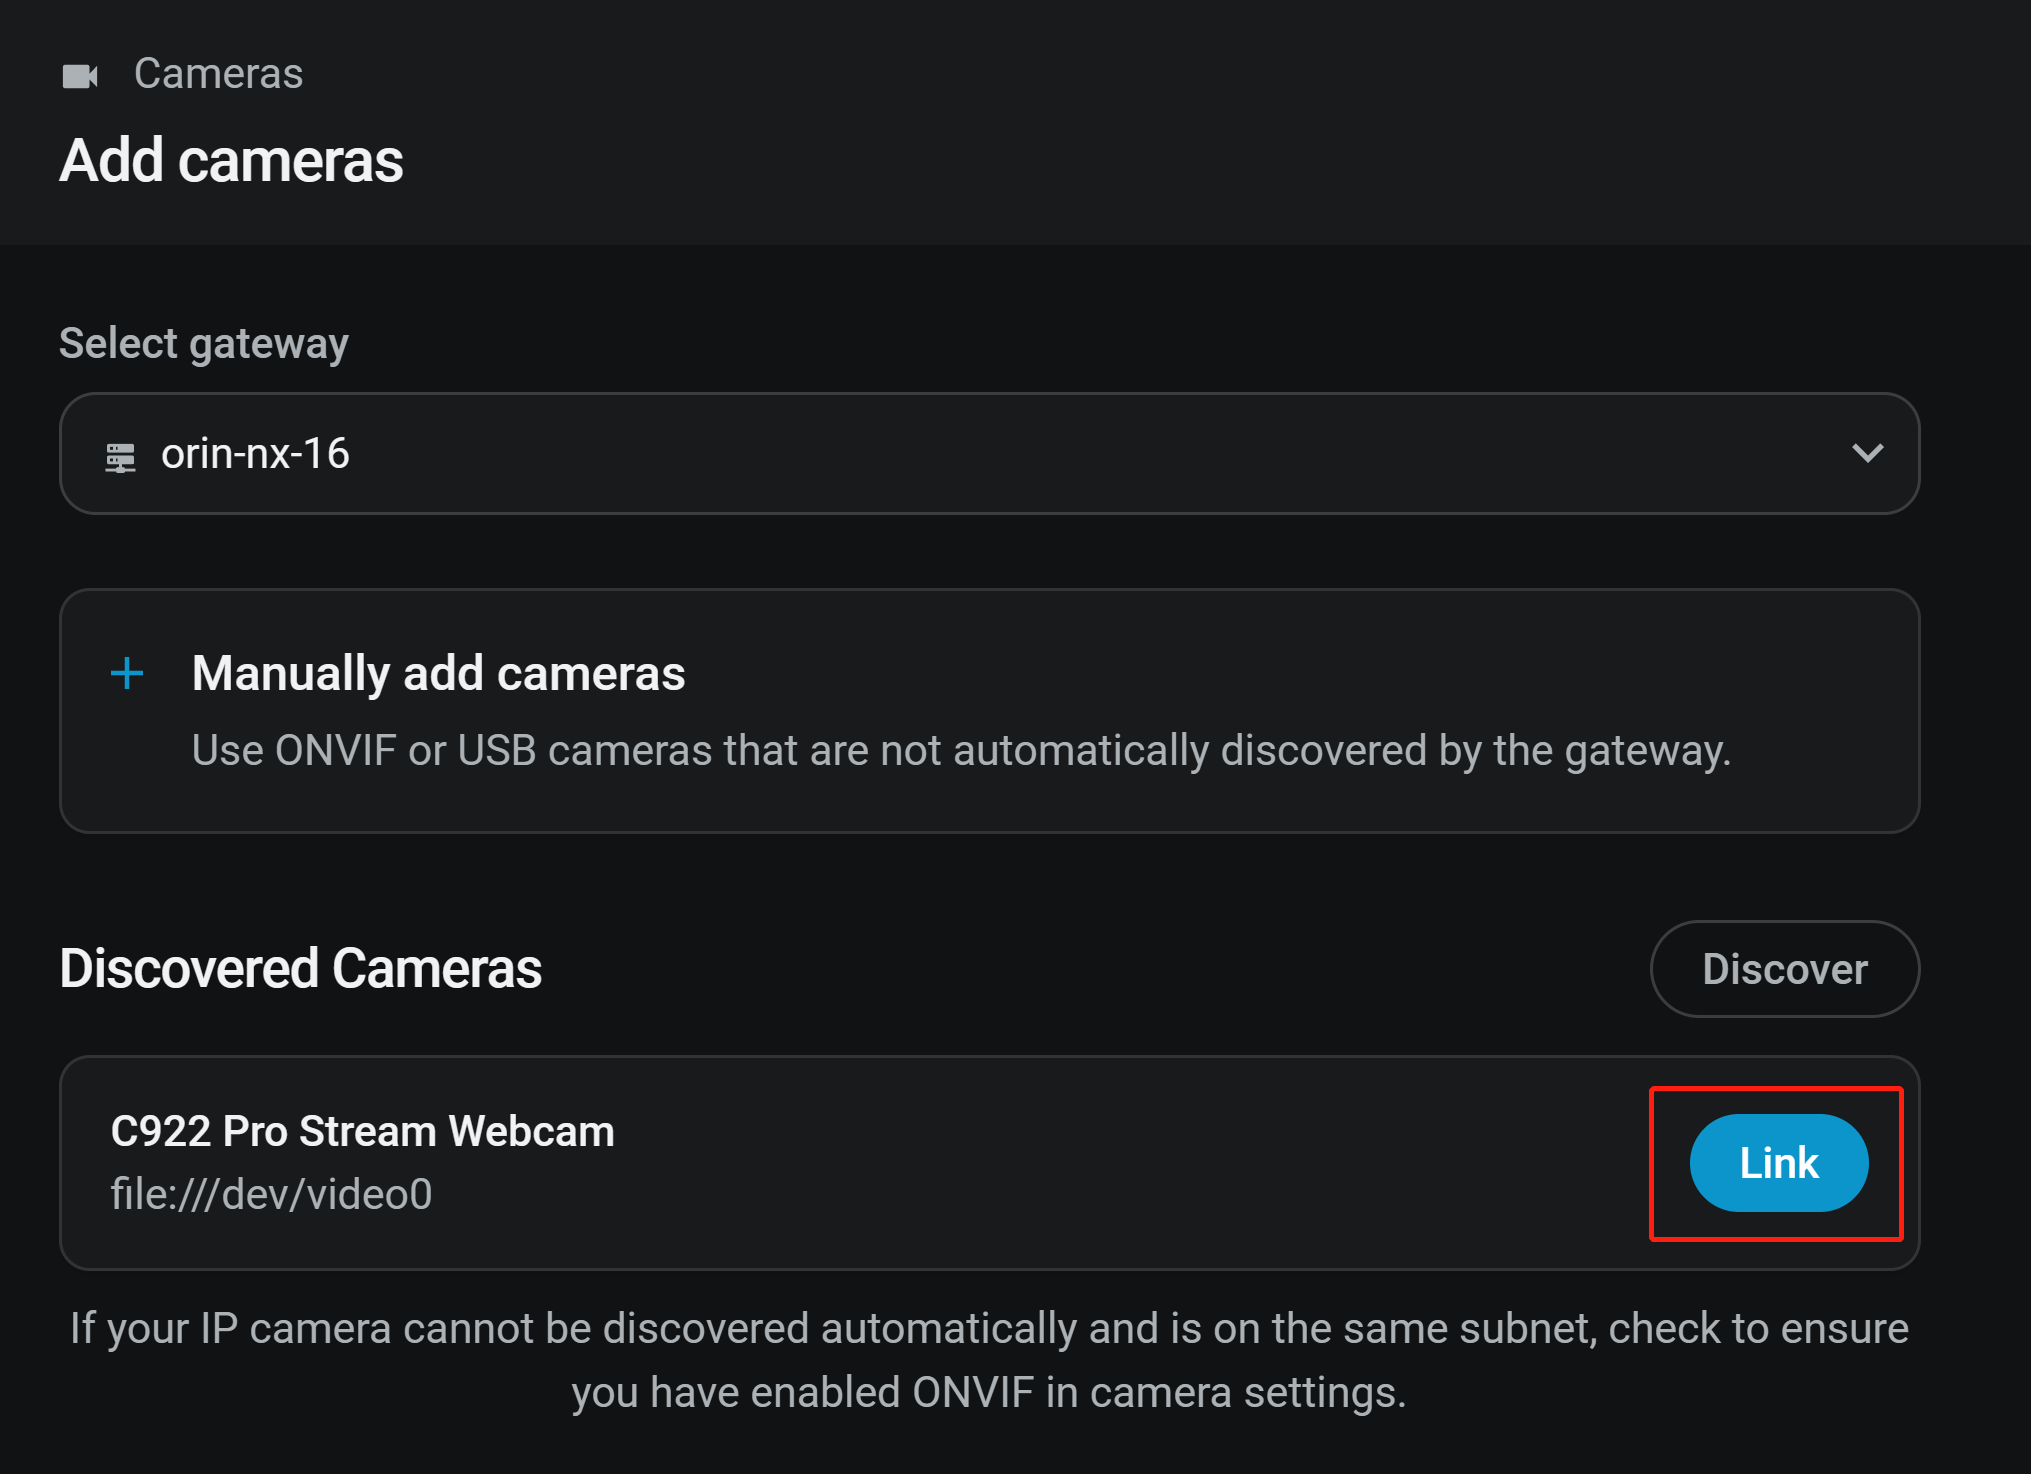
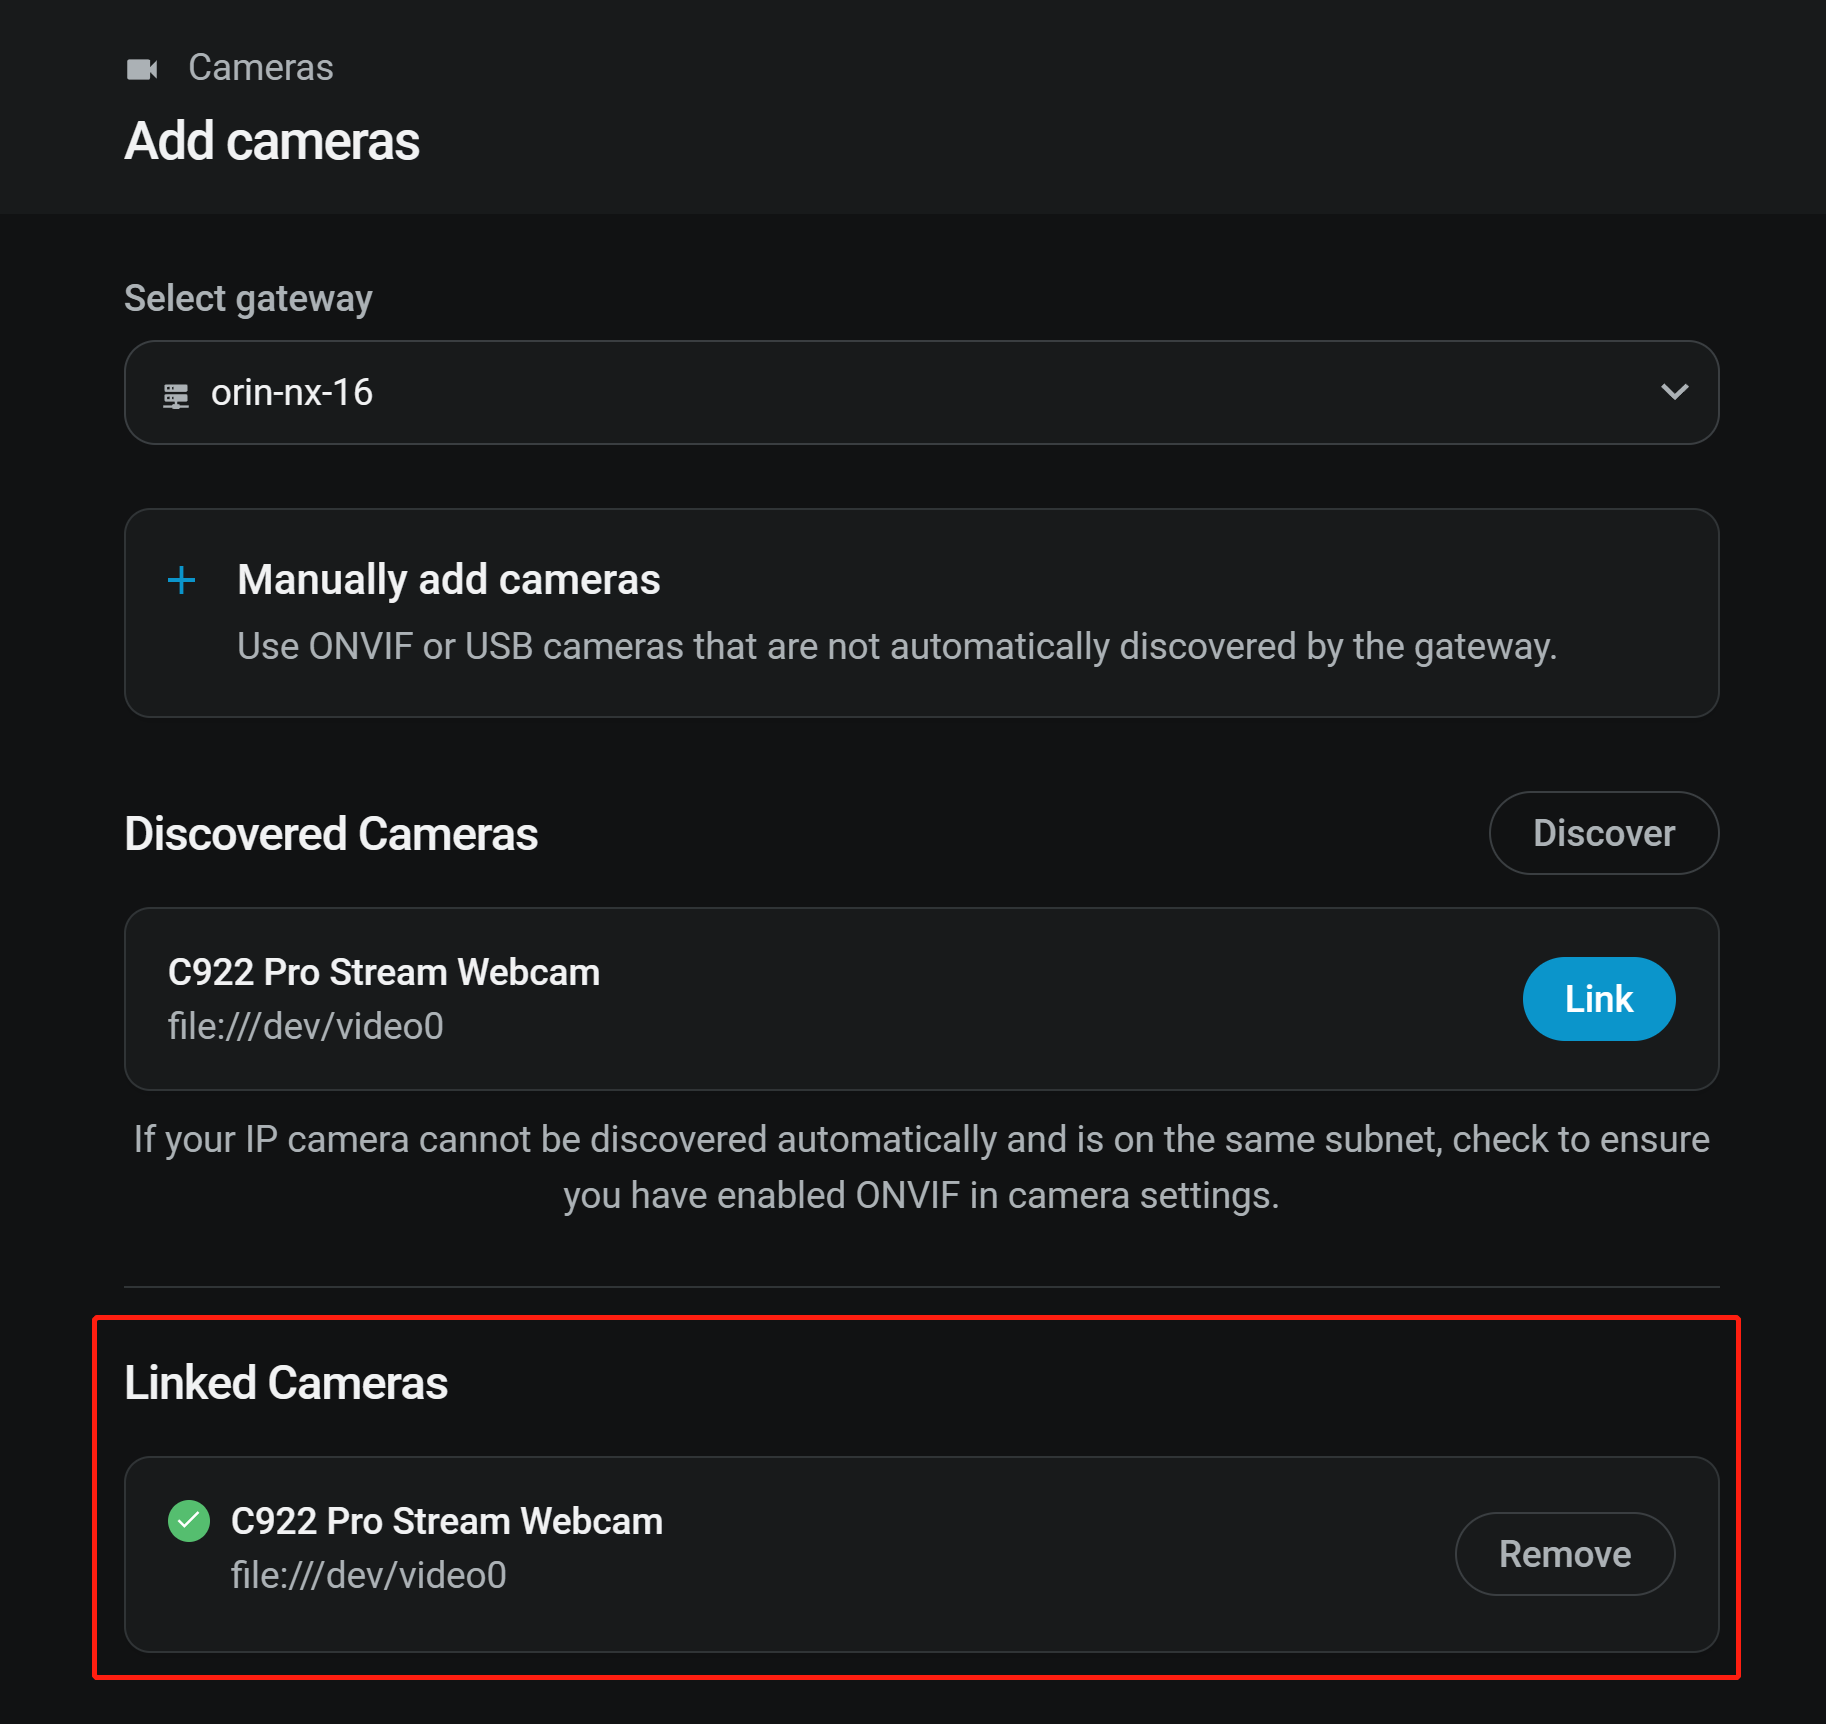
Step 3: It will try to auto discover all the connected USB cameras and the ONVIF cameras on the same network. Click on Link next to a camera to add the camera to the gateway
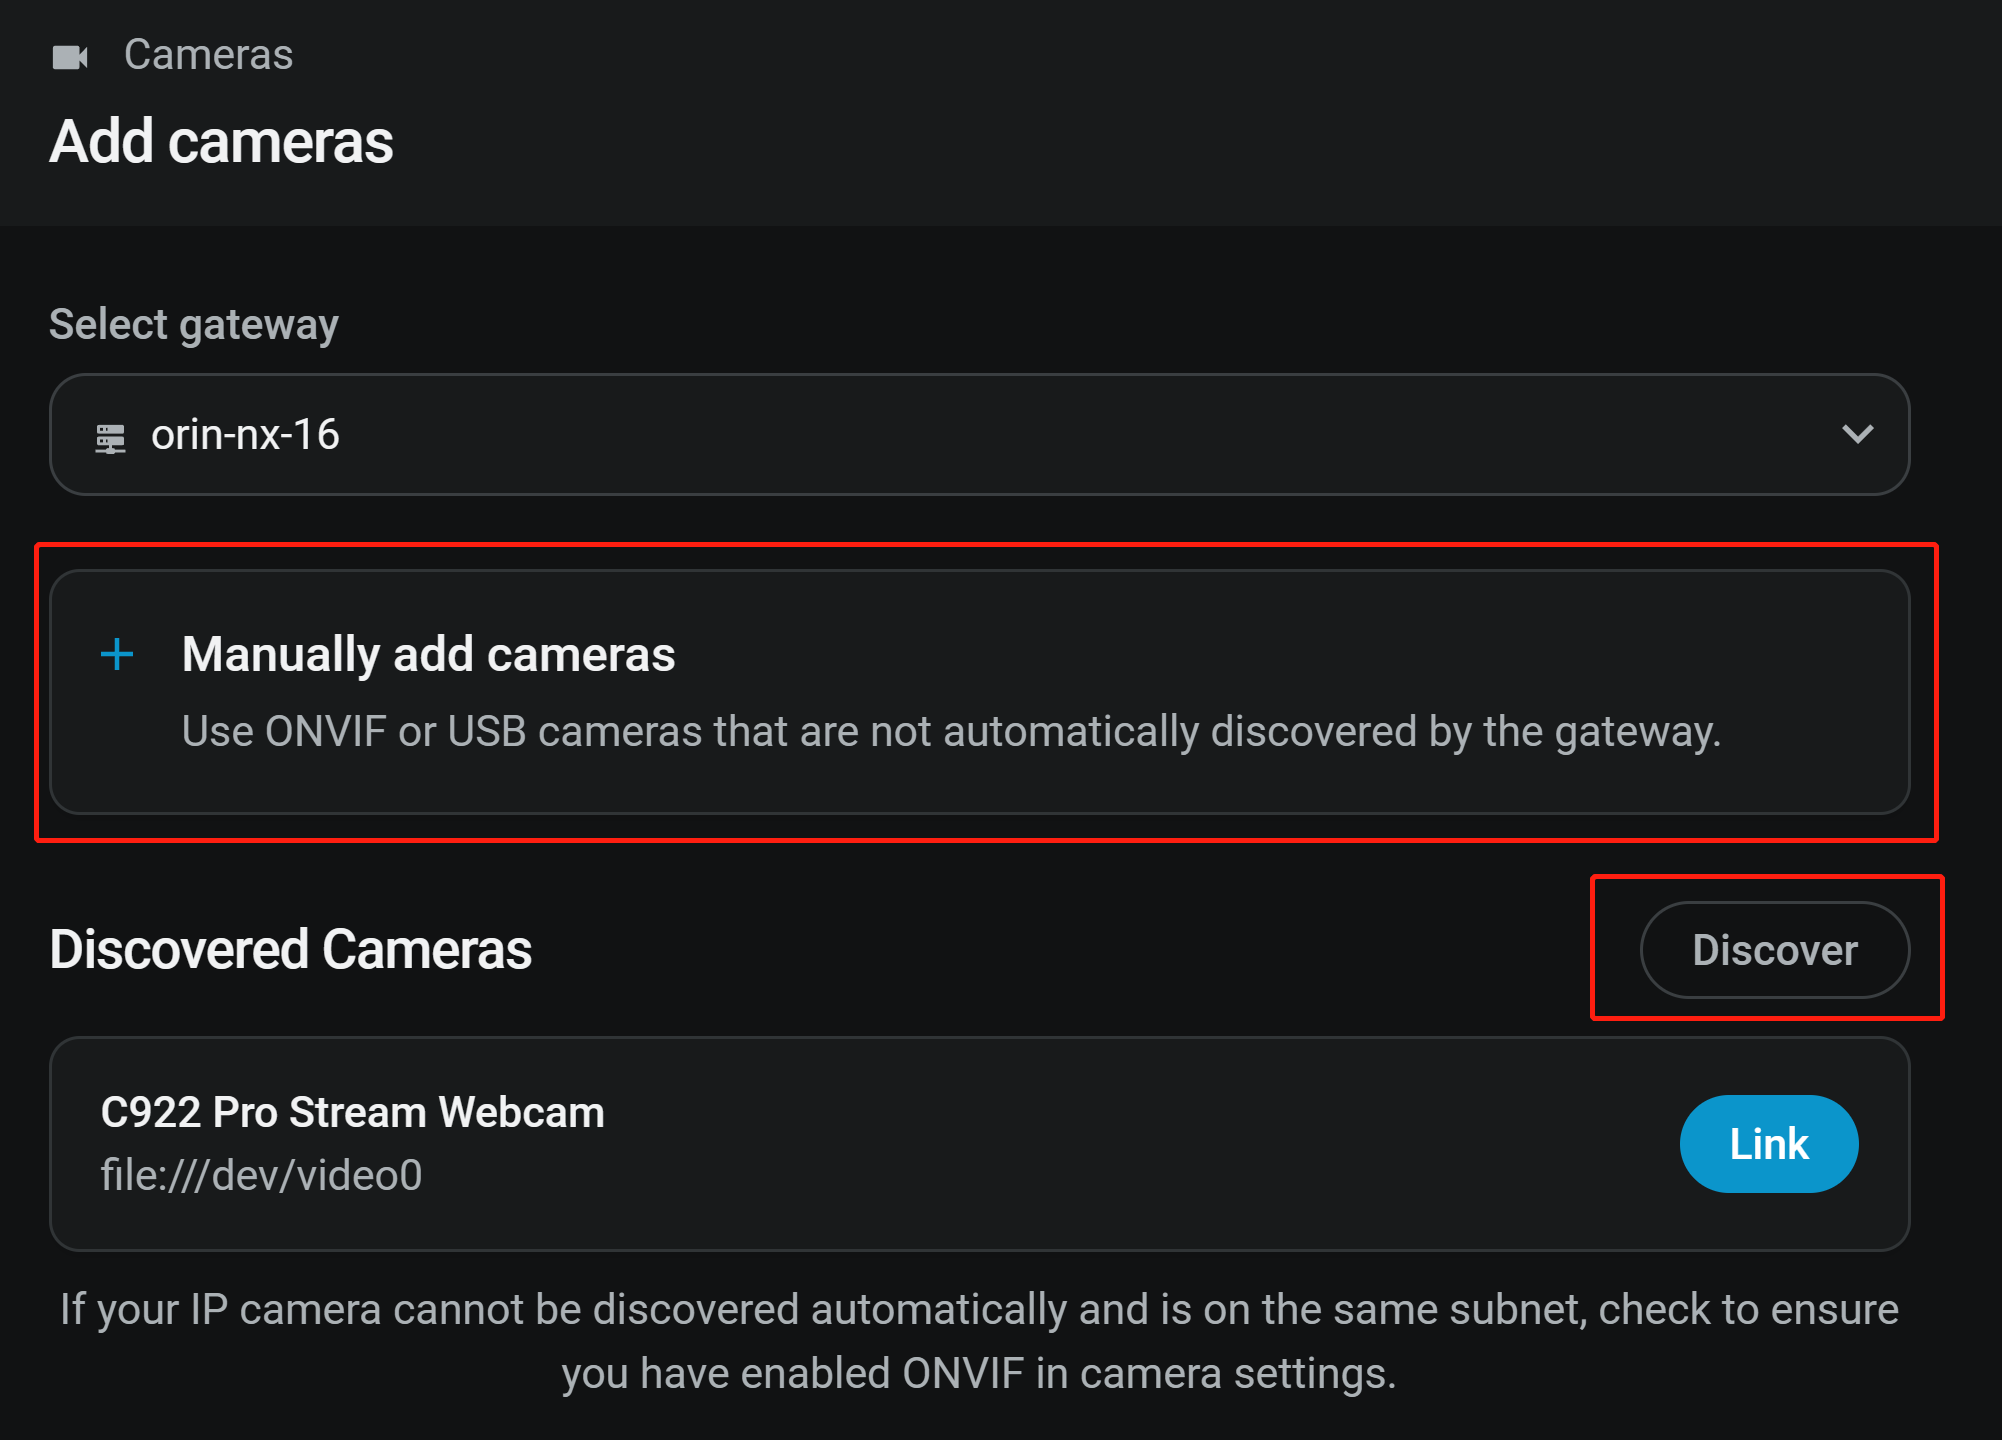
If none of the connected cameras are detected, click Discover to start the auto detect process again. If that also fails, click on + Manually add cameras and confgure all your cameras
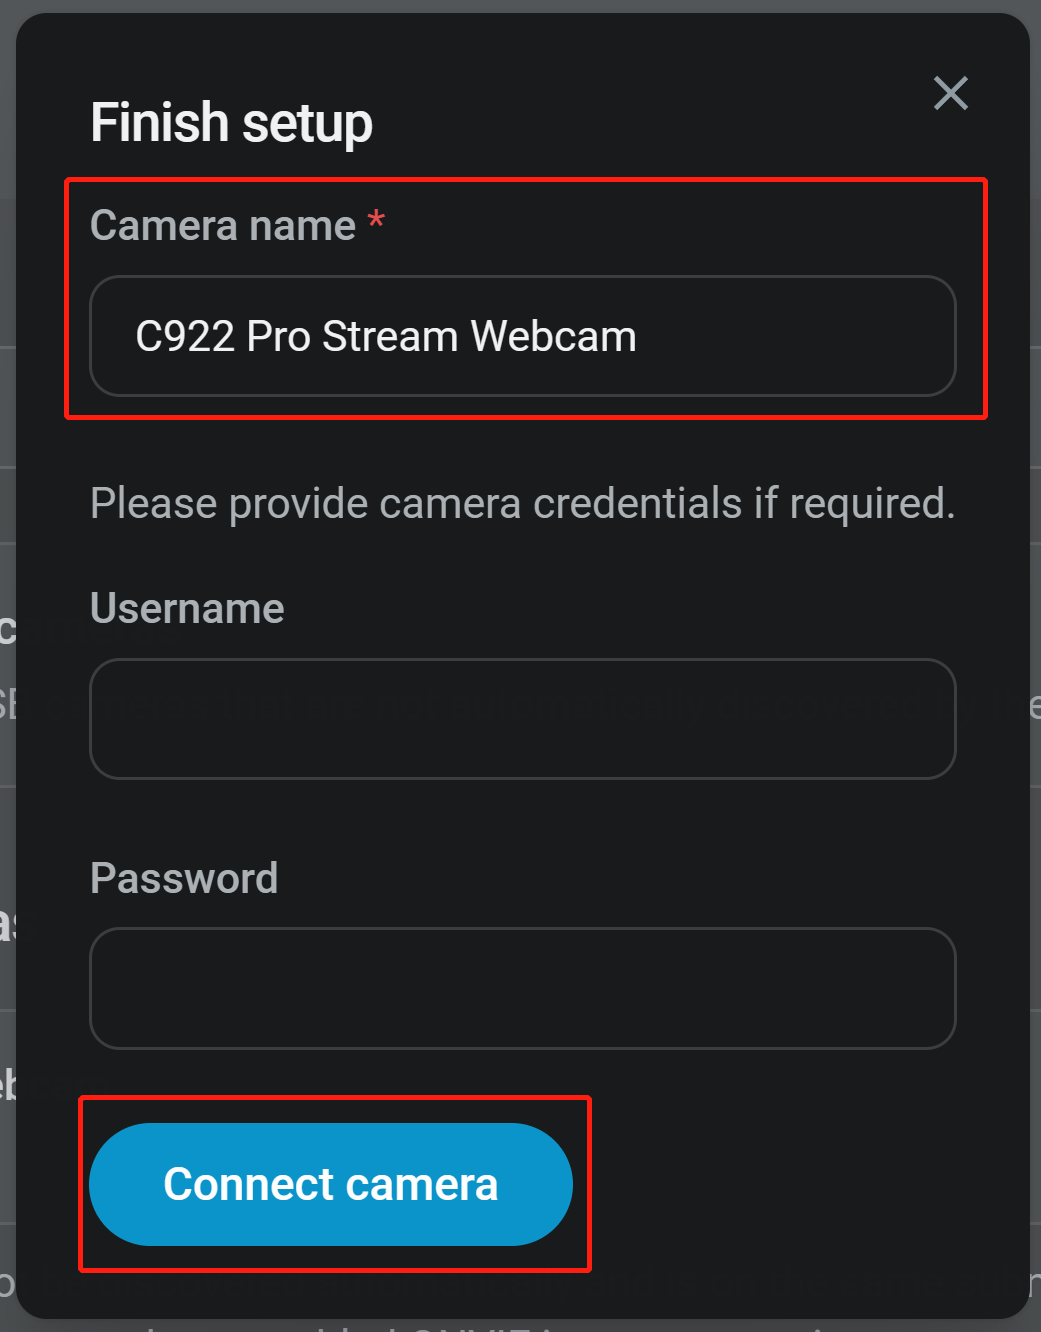
Step 4: Enter a Camera name, provide camera credentials if it is needed by the camera and finally click Connect camera
Now you will see the camera successfully linked
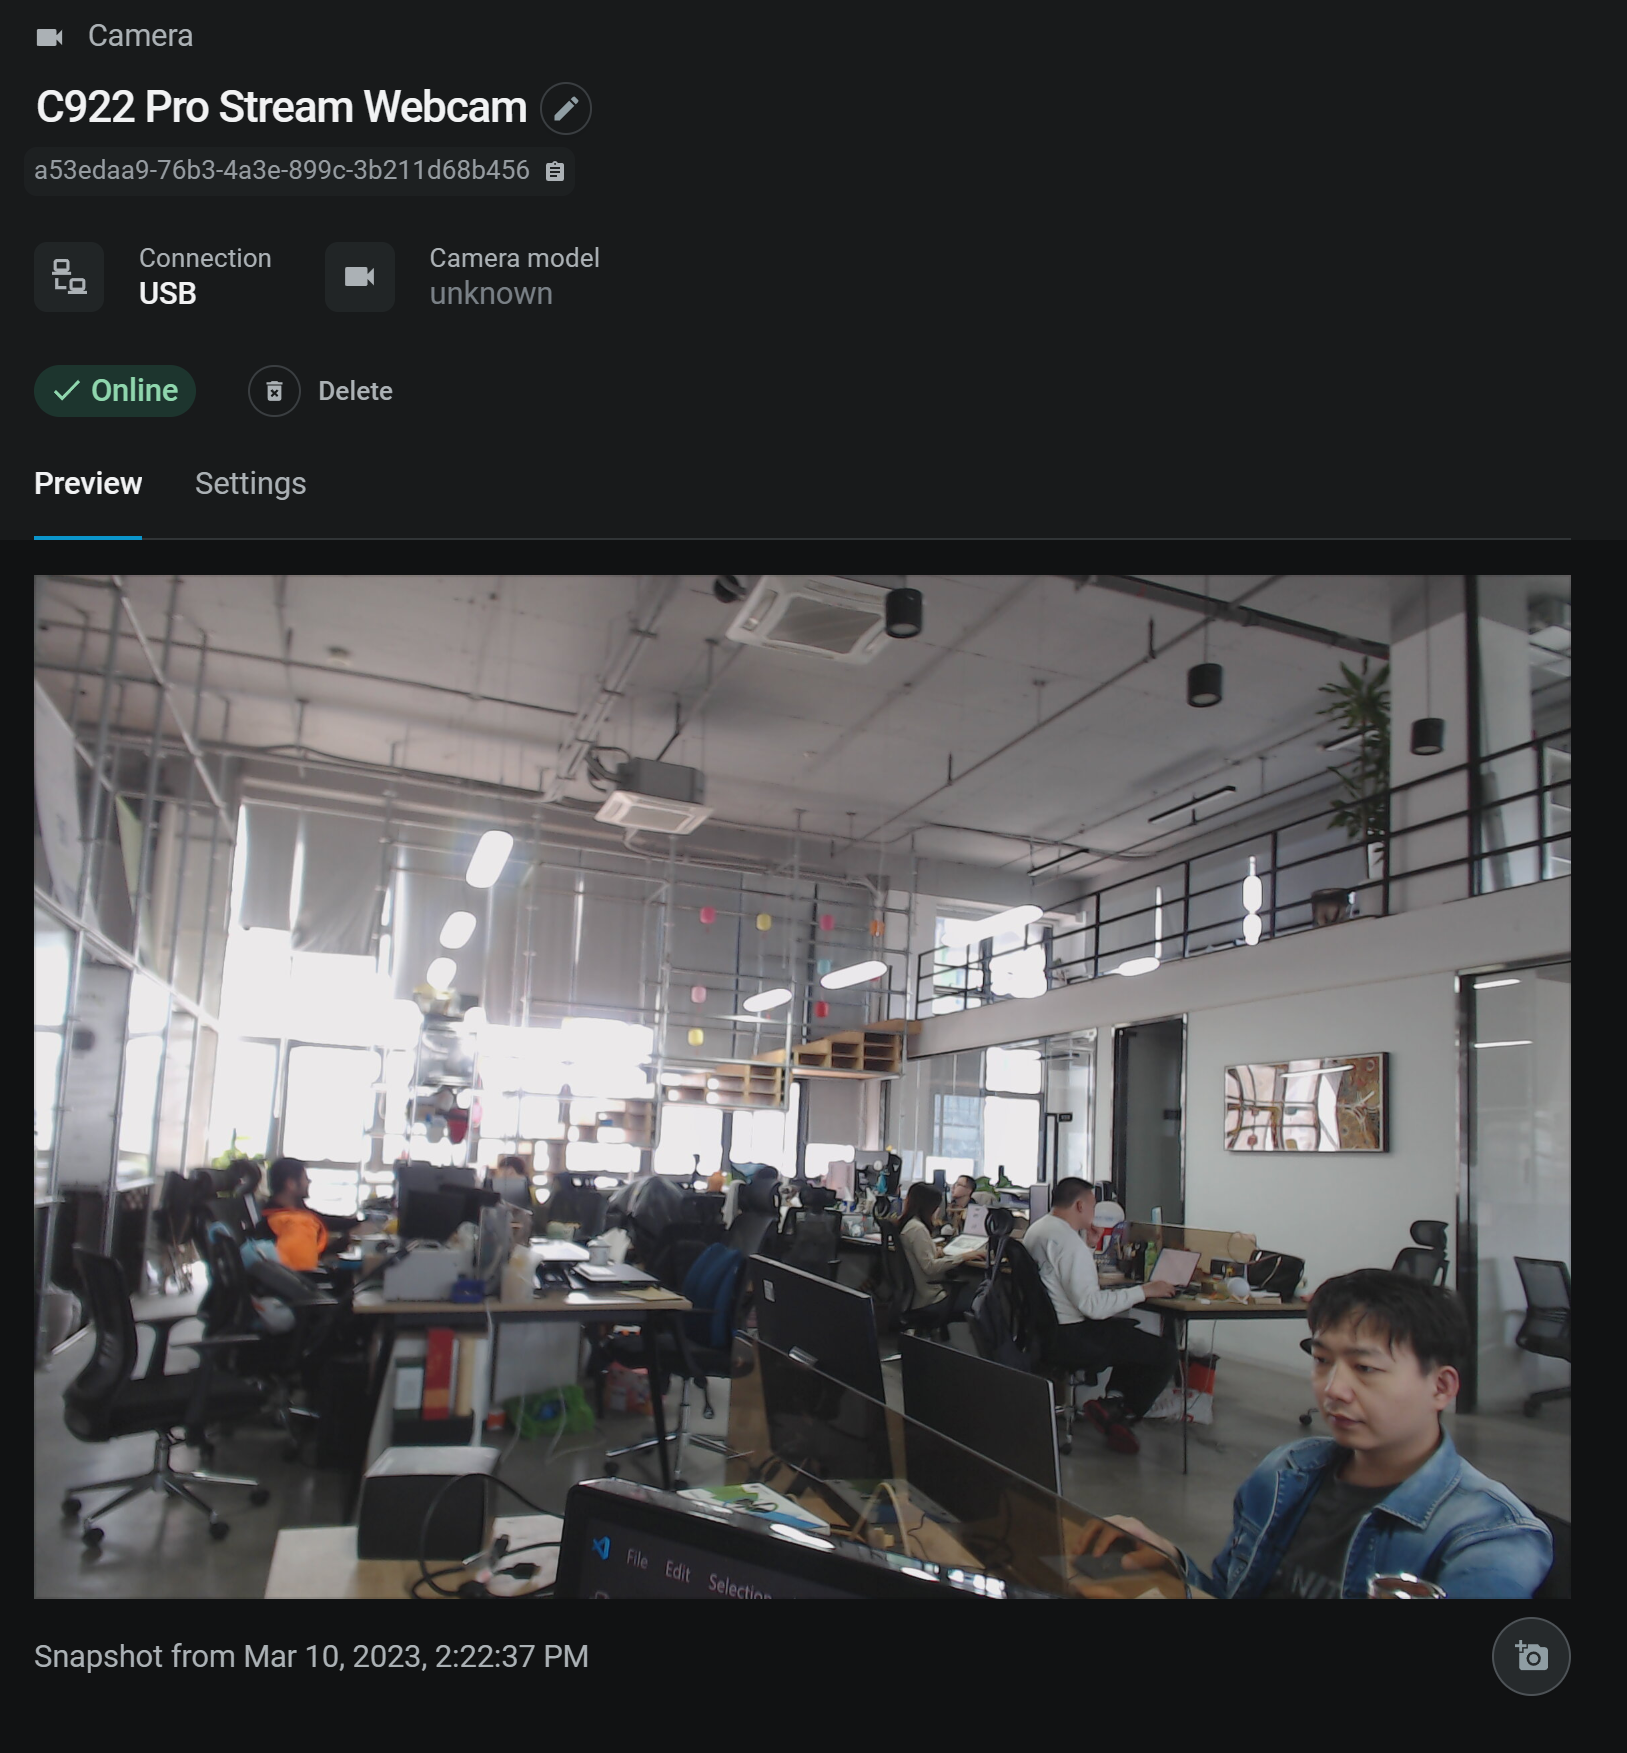
Step 5: Click on the linked camera to output a preview snapshot as follows
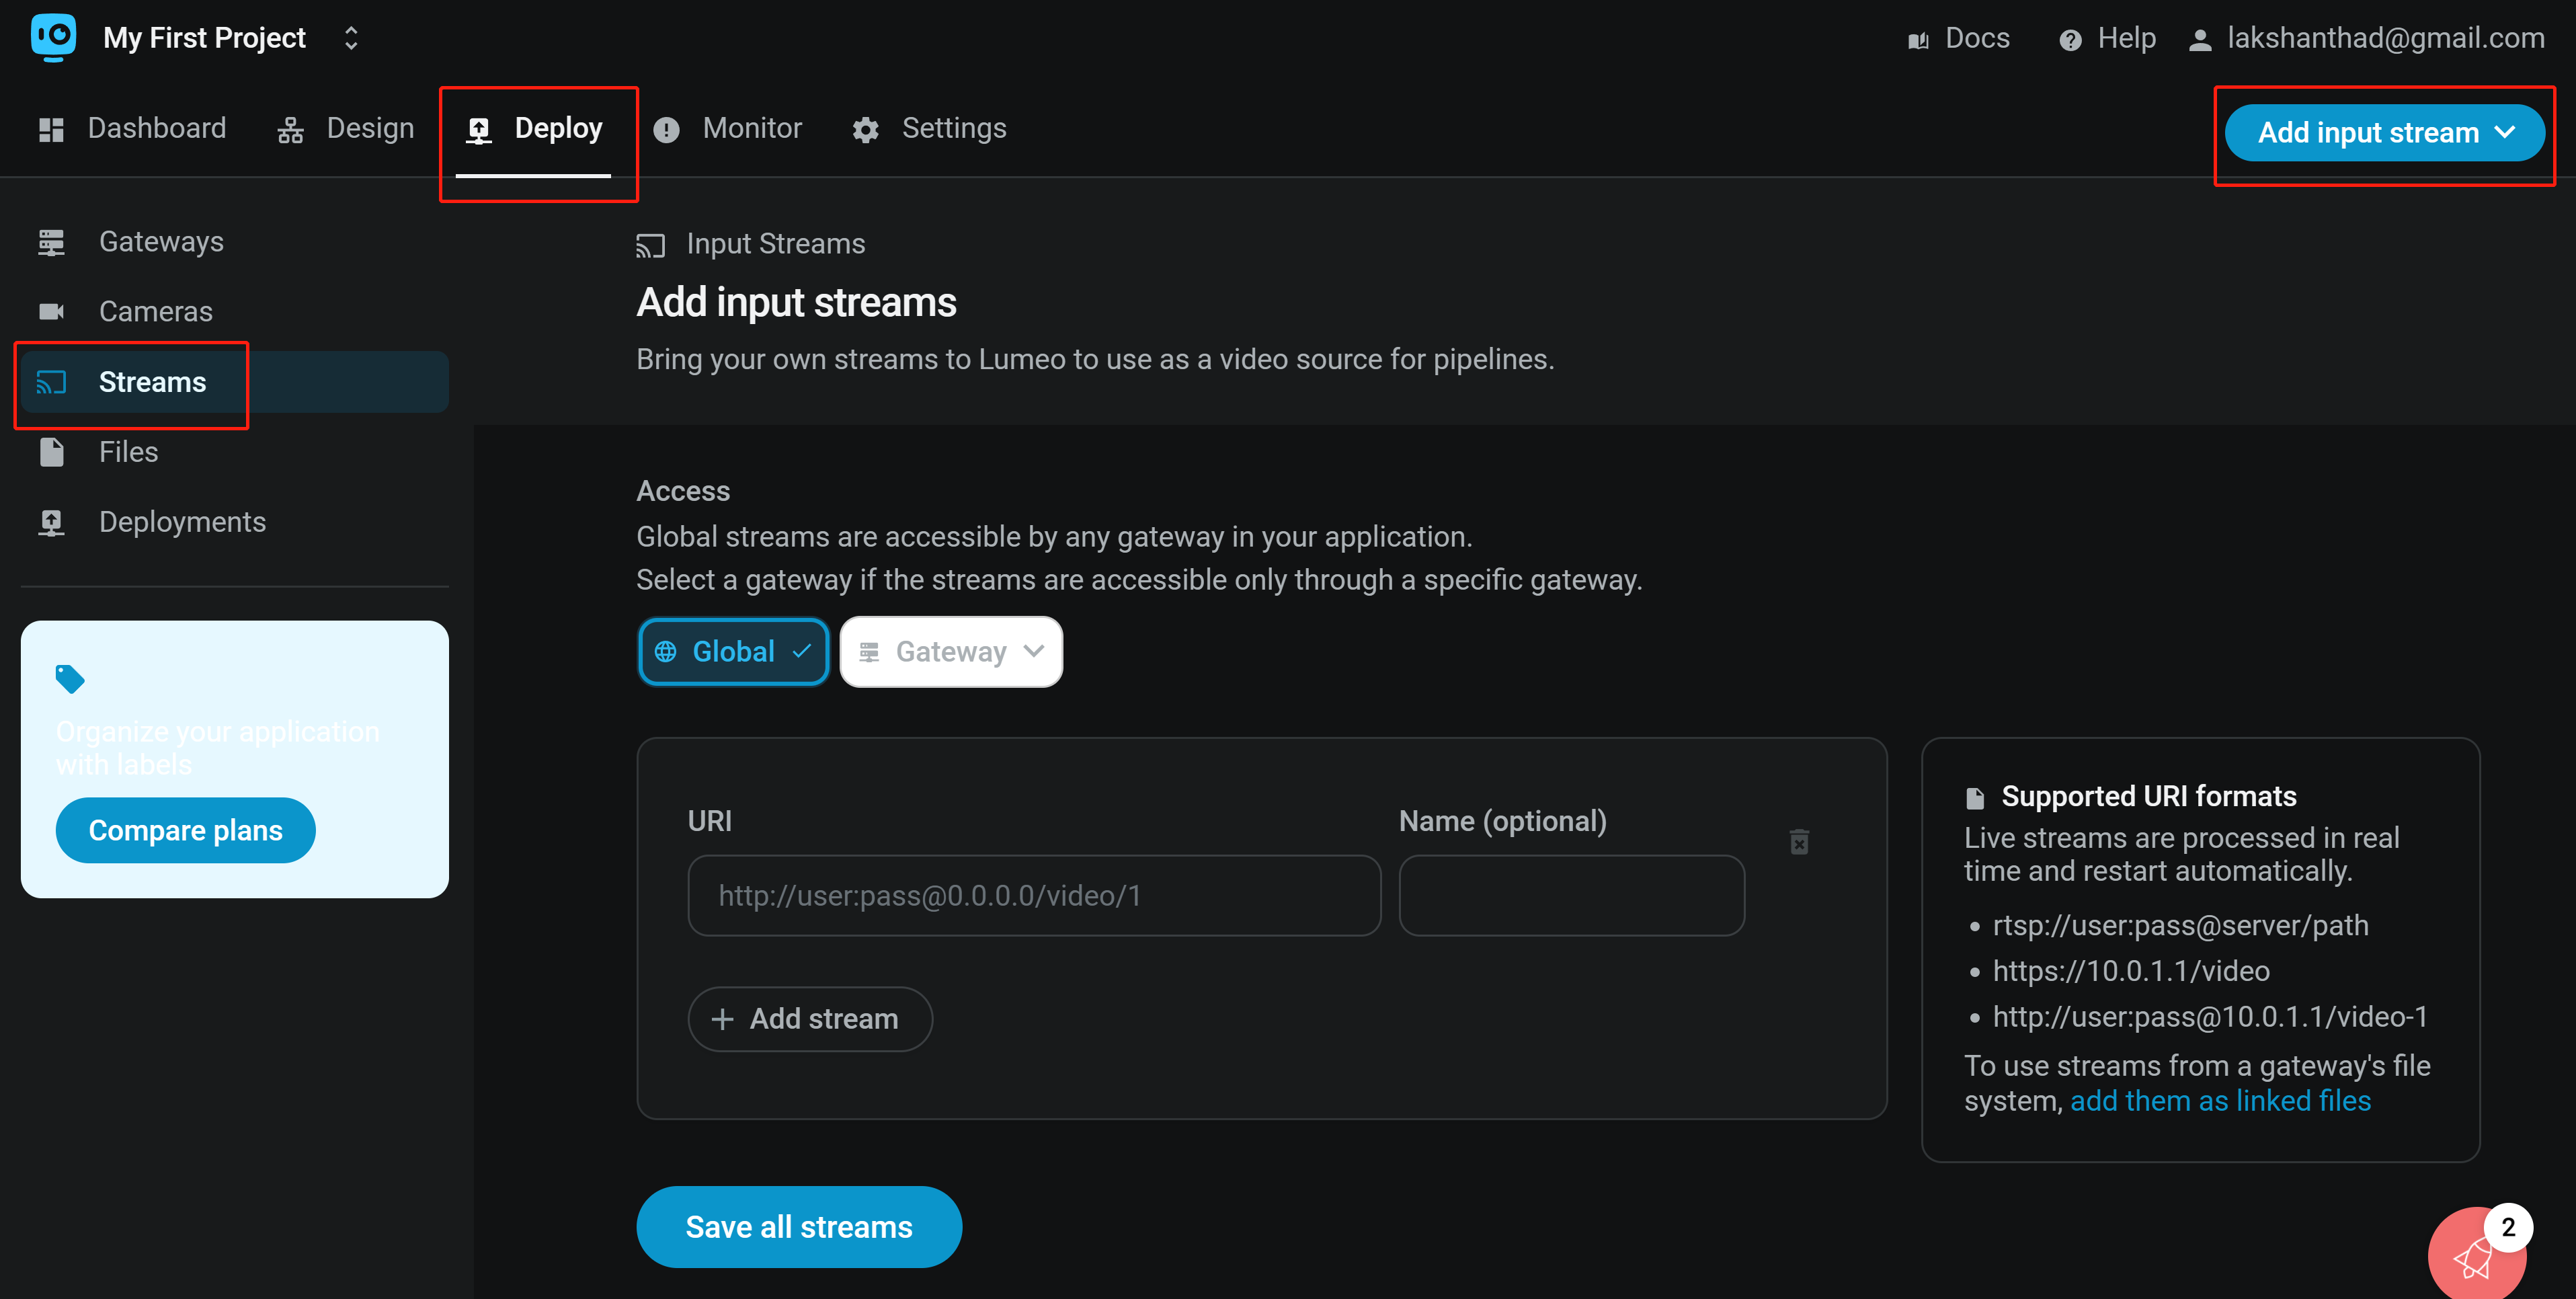
Step 6: If you want to add RTSP or HTTP streams, you can navigate to Deploy > Streams, click Add input stream and configure the stream
Build a people detection pipeline
Lumeo offers many different solutions out-of-the-box with pre-configured pipelines and pre-loaded models. We will try to create a simple people detection application using Lumeo.
Step 1: Select Basics - Detect Objects inside Design > Solutions section
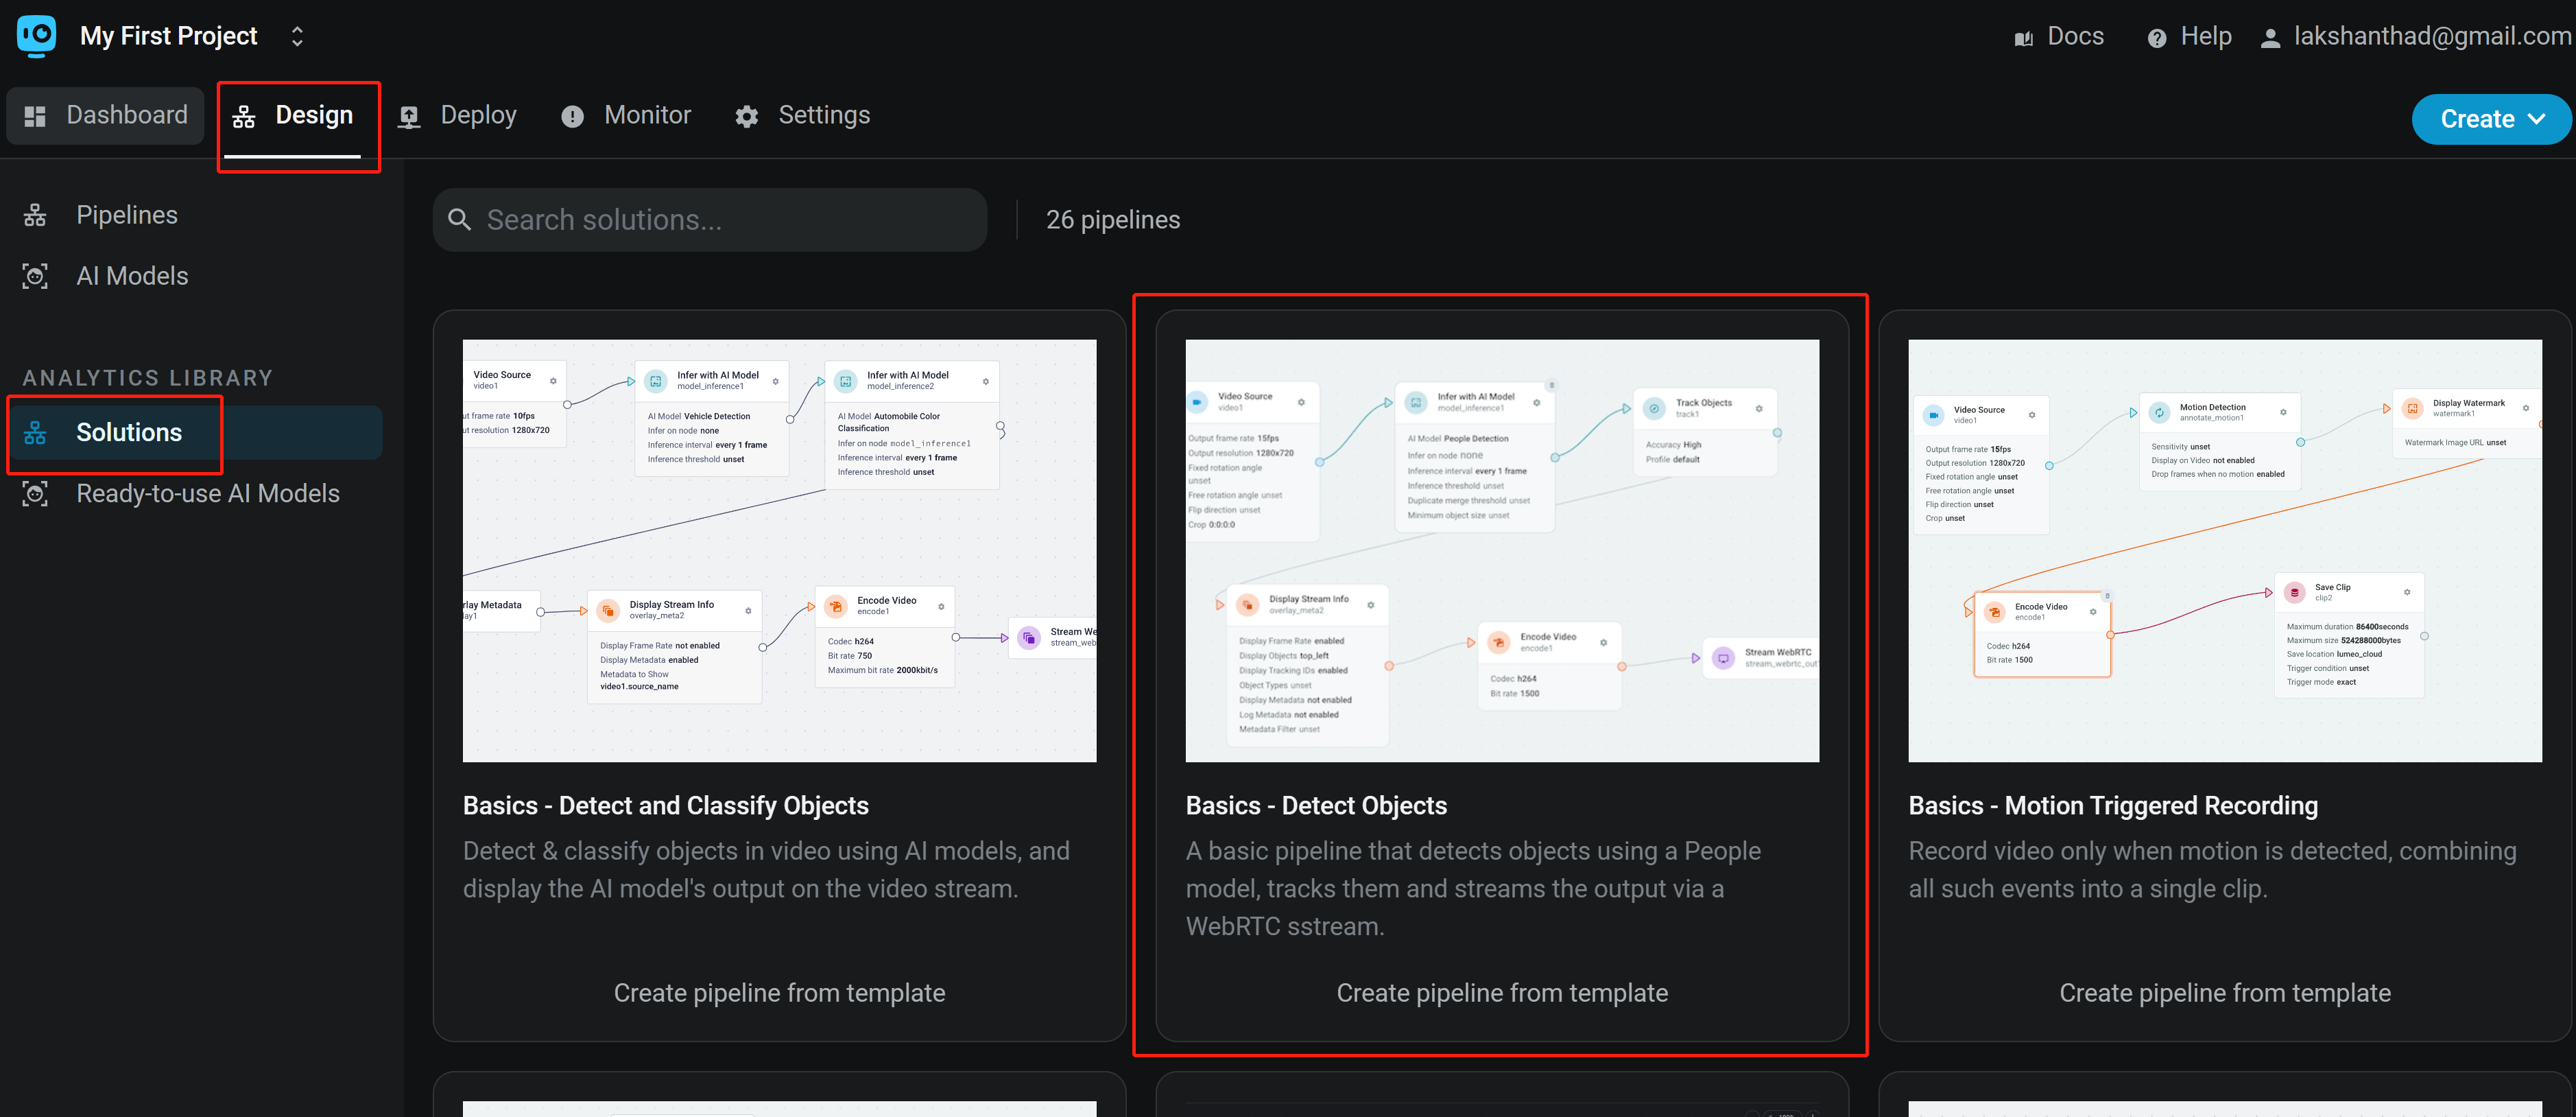
Now you will see the template created for you in a block-based style which allows you to add more customizations and features to the solution. Here you can add, modify or remove blocks according to your preference
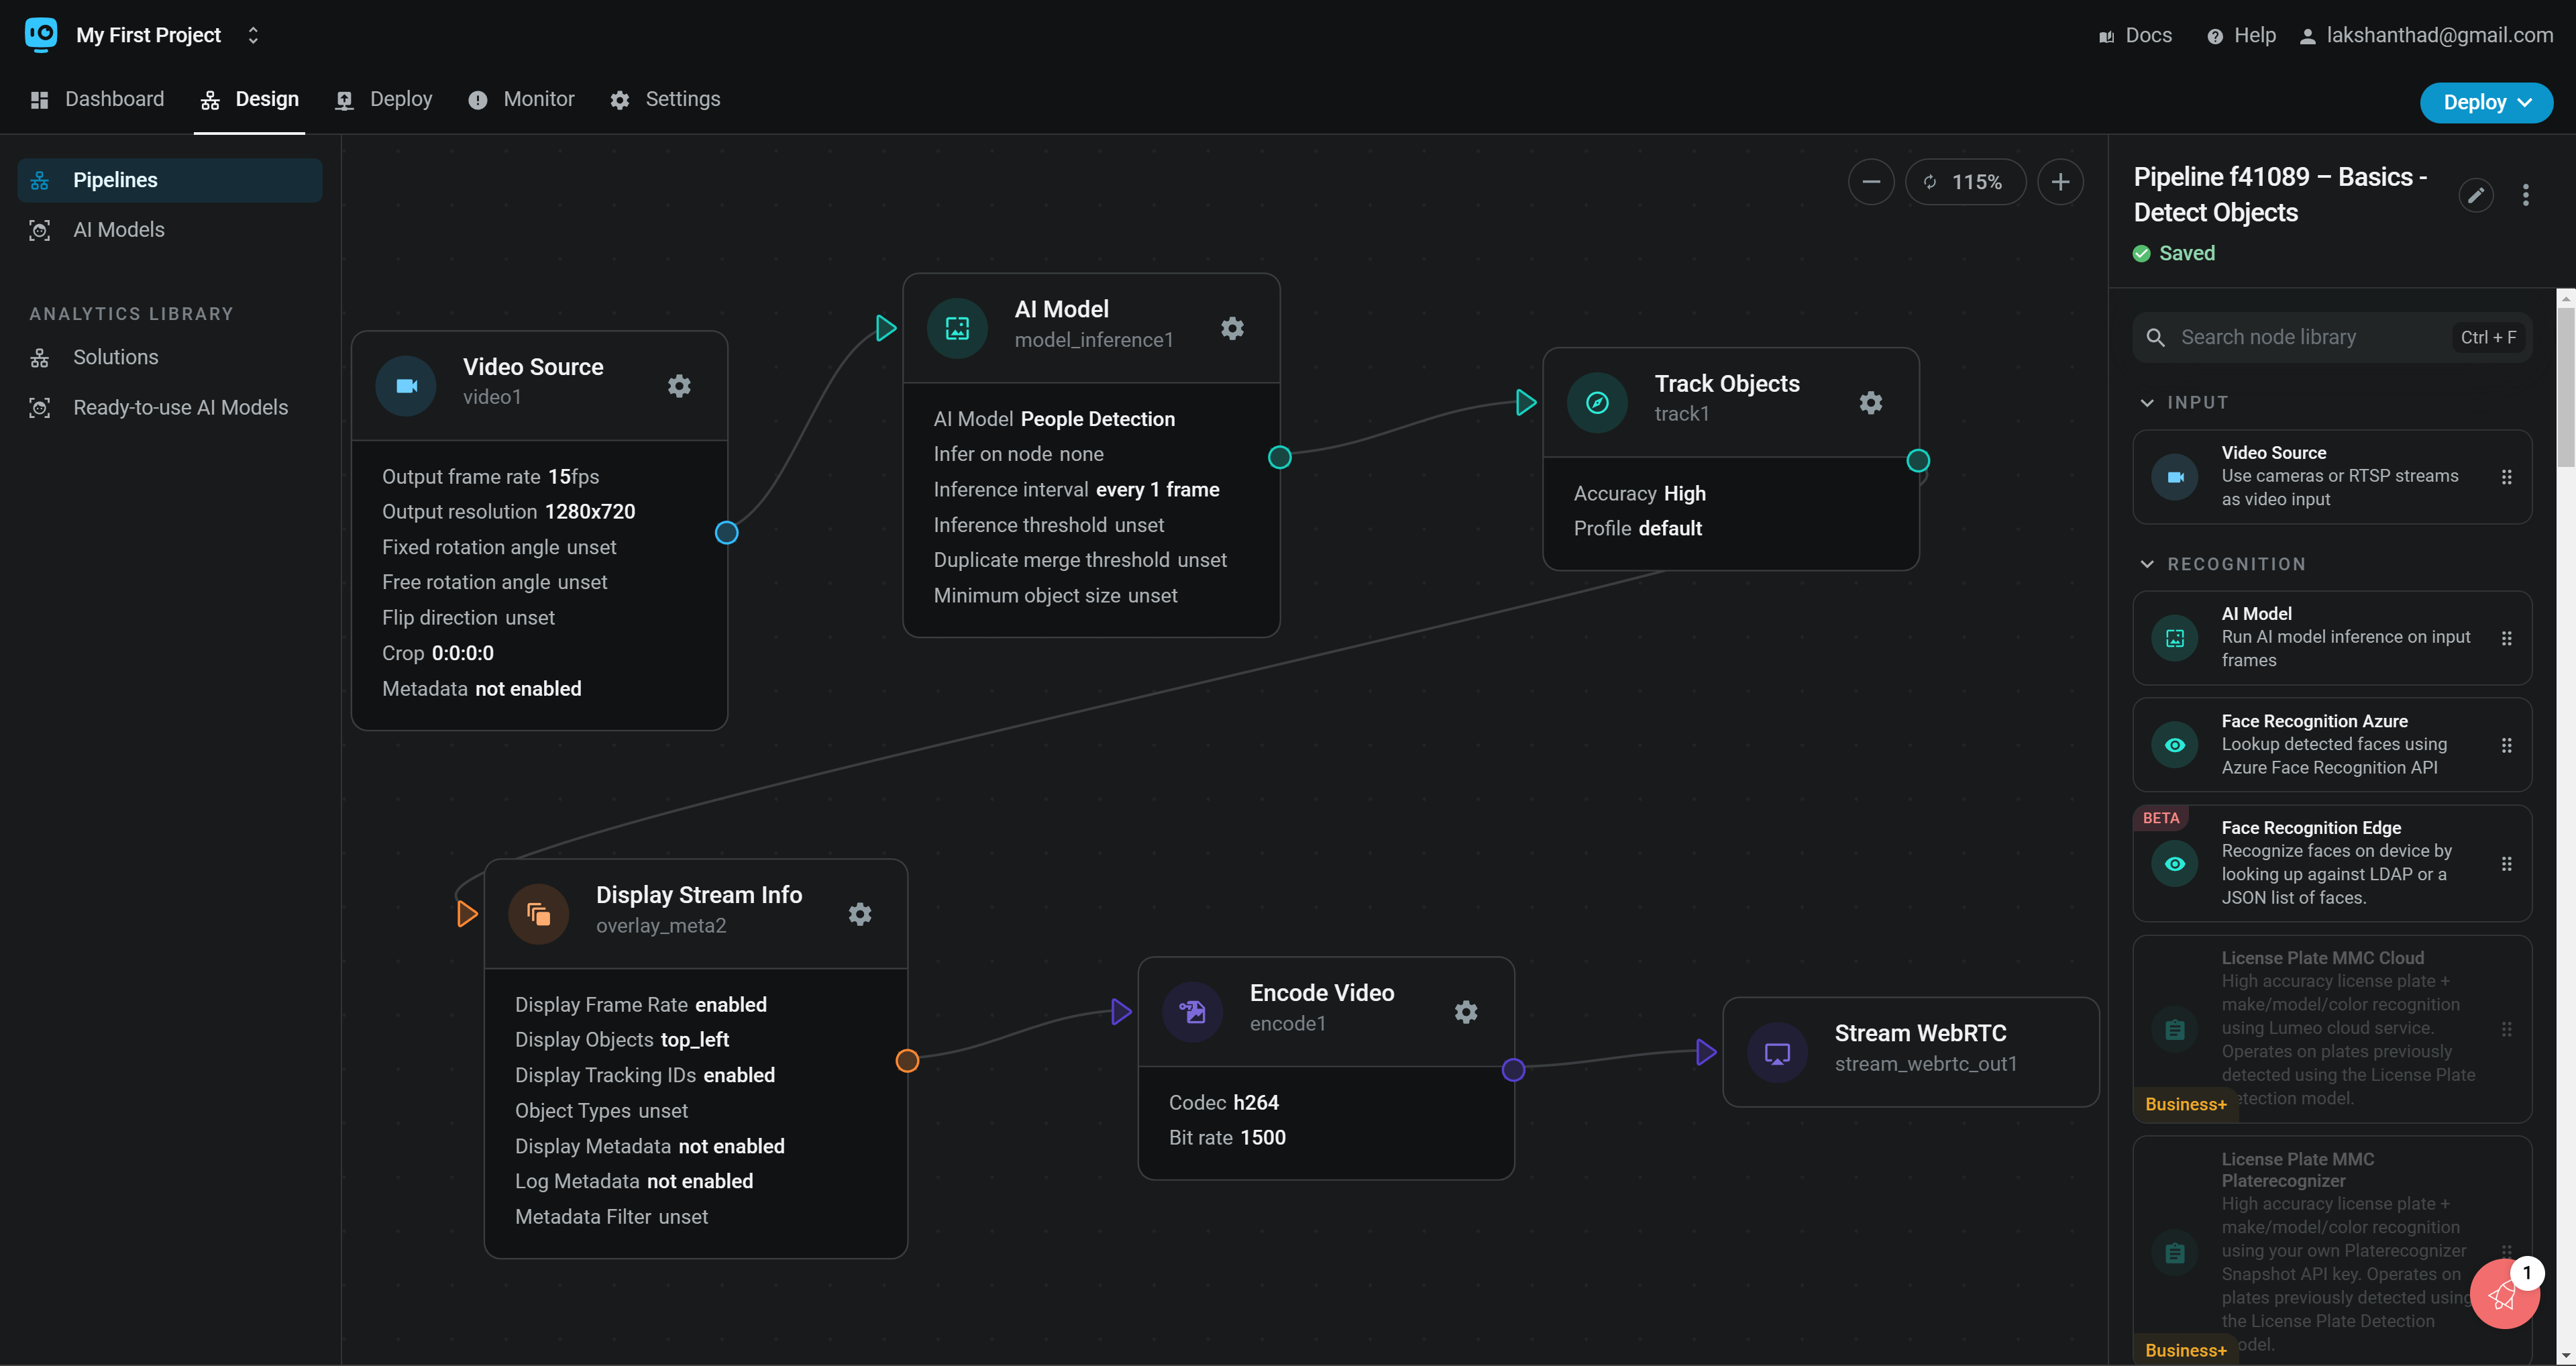
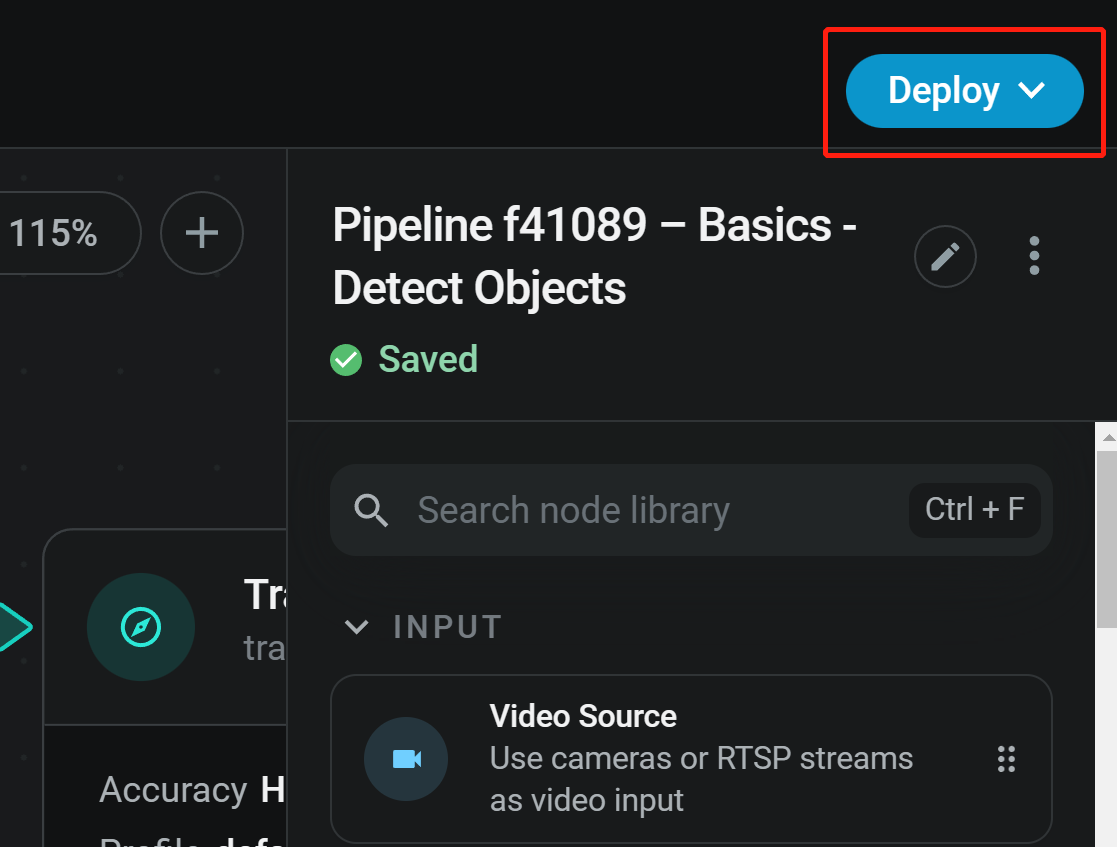
Step 2: This template by default loads a people detection model, tracks the objects, enclode the video and stream via WebRTC. We will keep all the configured blocks to default and click Deploy
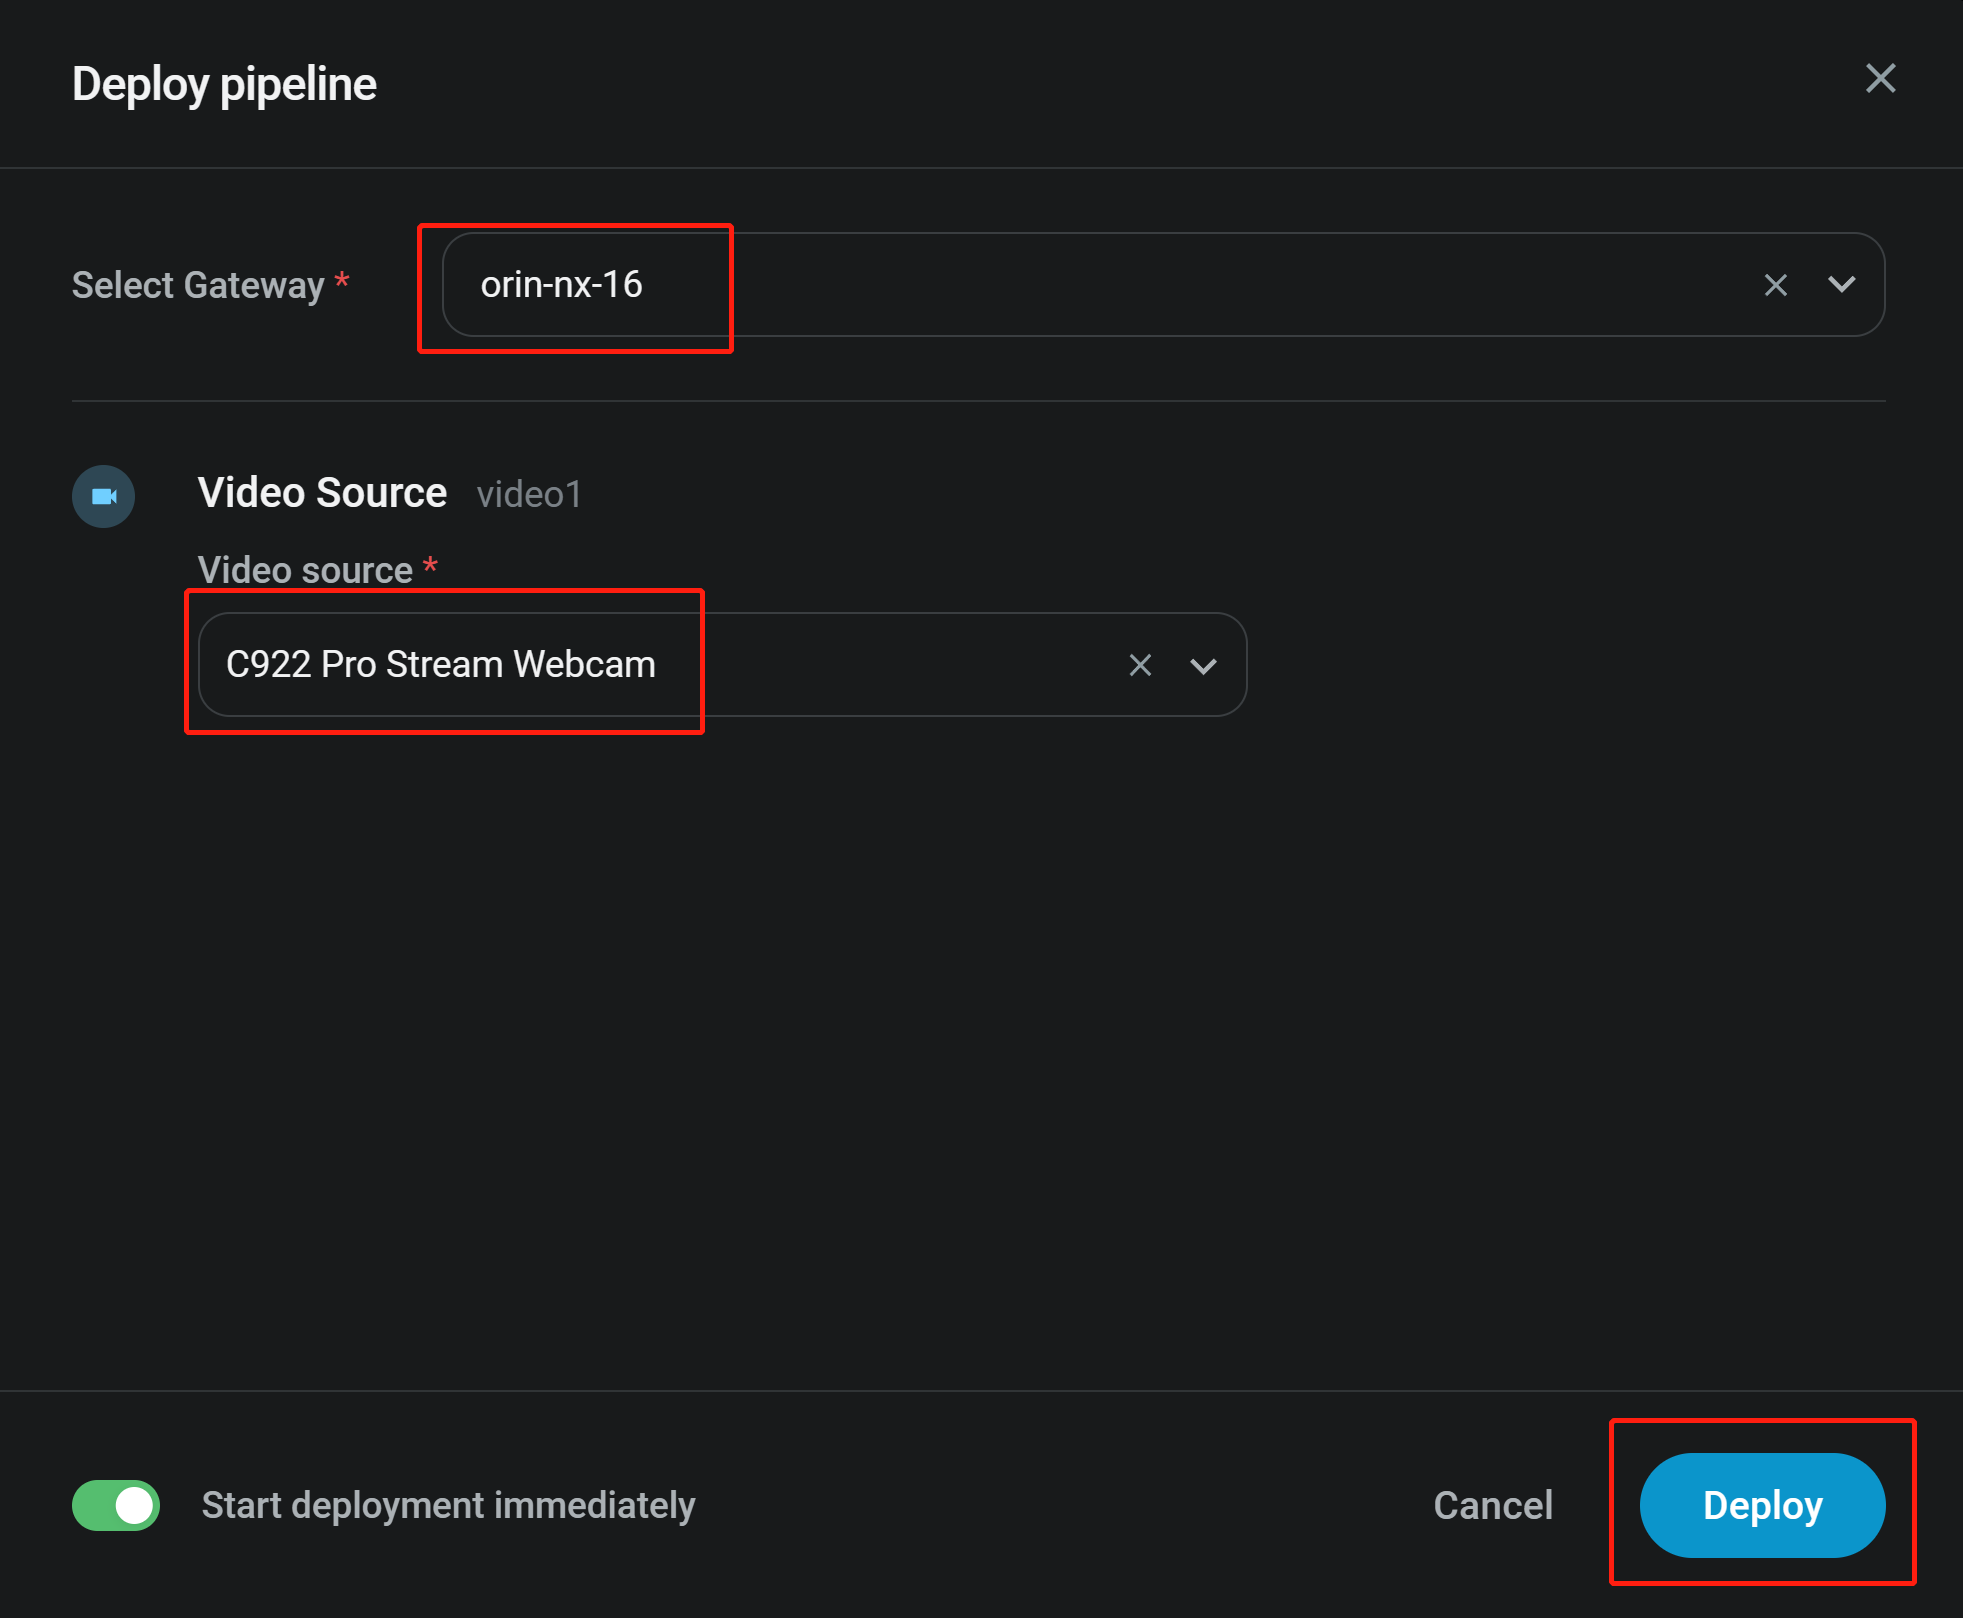
Step 3: Under Select Gateway, choose the gateway that you have deployed on the Jetson, select the camera that you have configured before and click Deploy to start deploying the application to the Jetson device
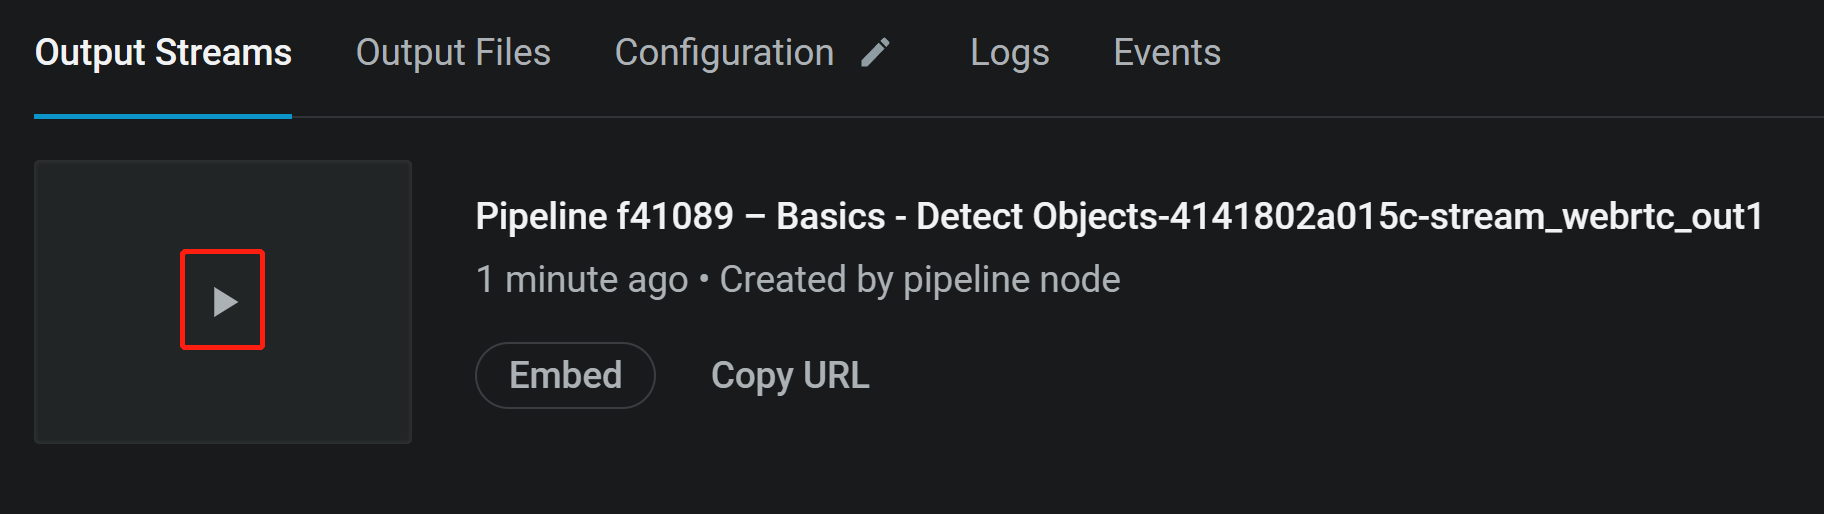
If the deployment is successful, you will see a green icon named running as follows
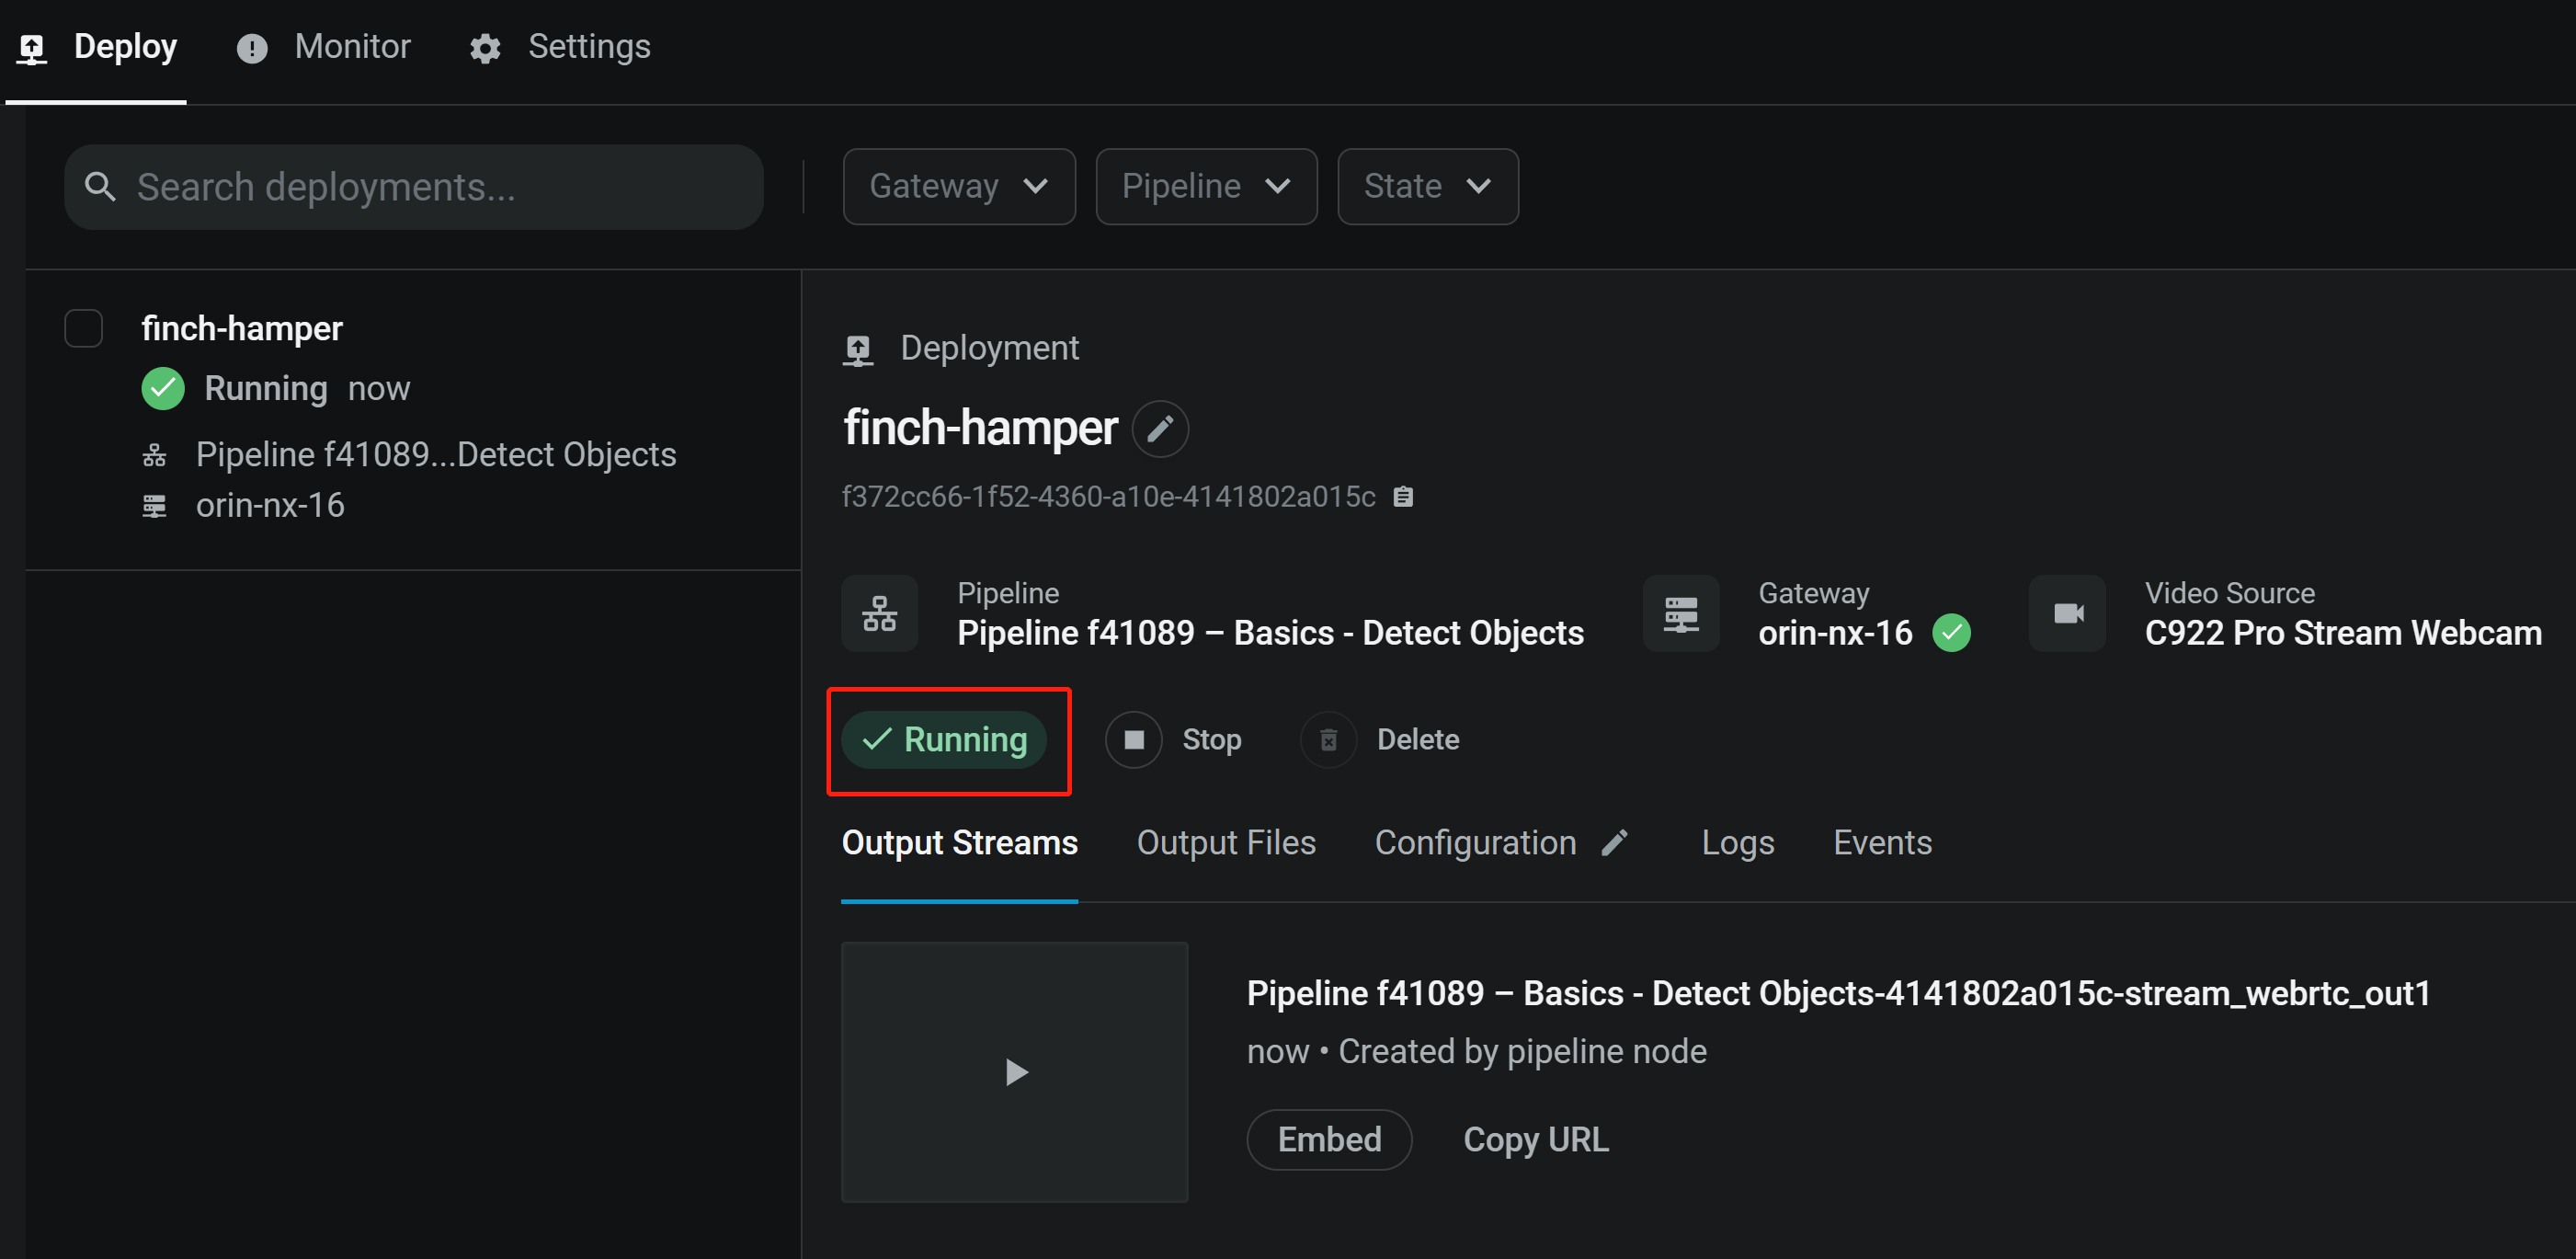
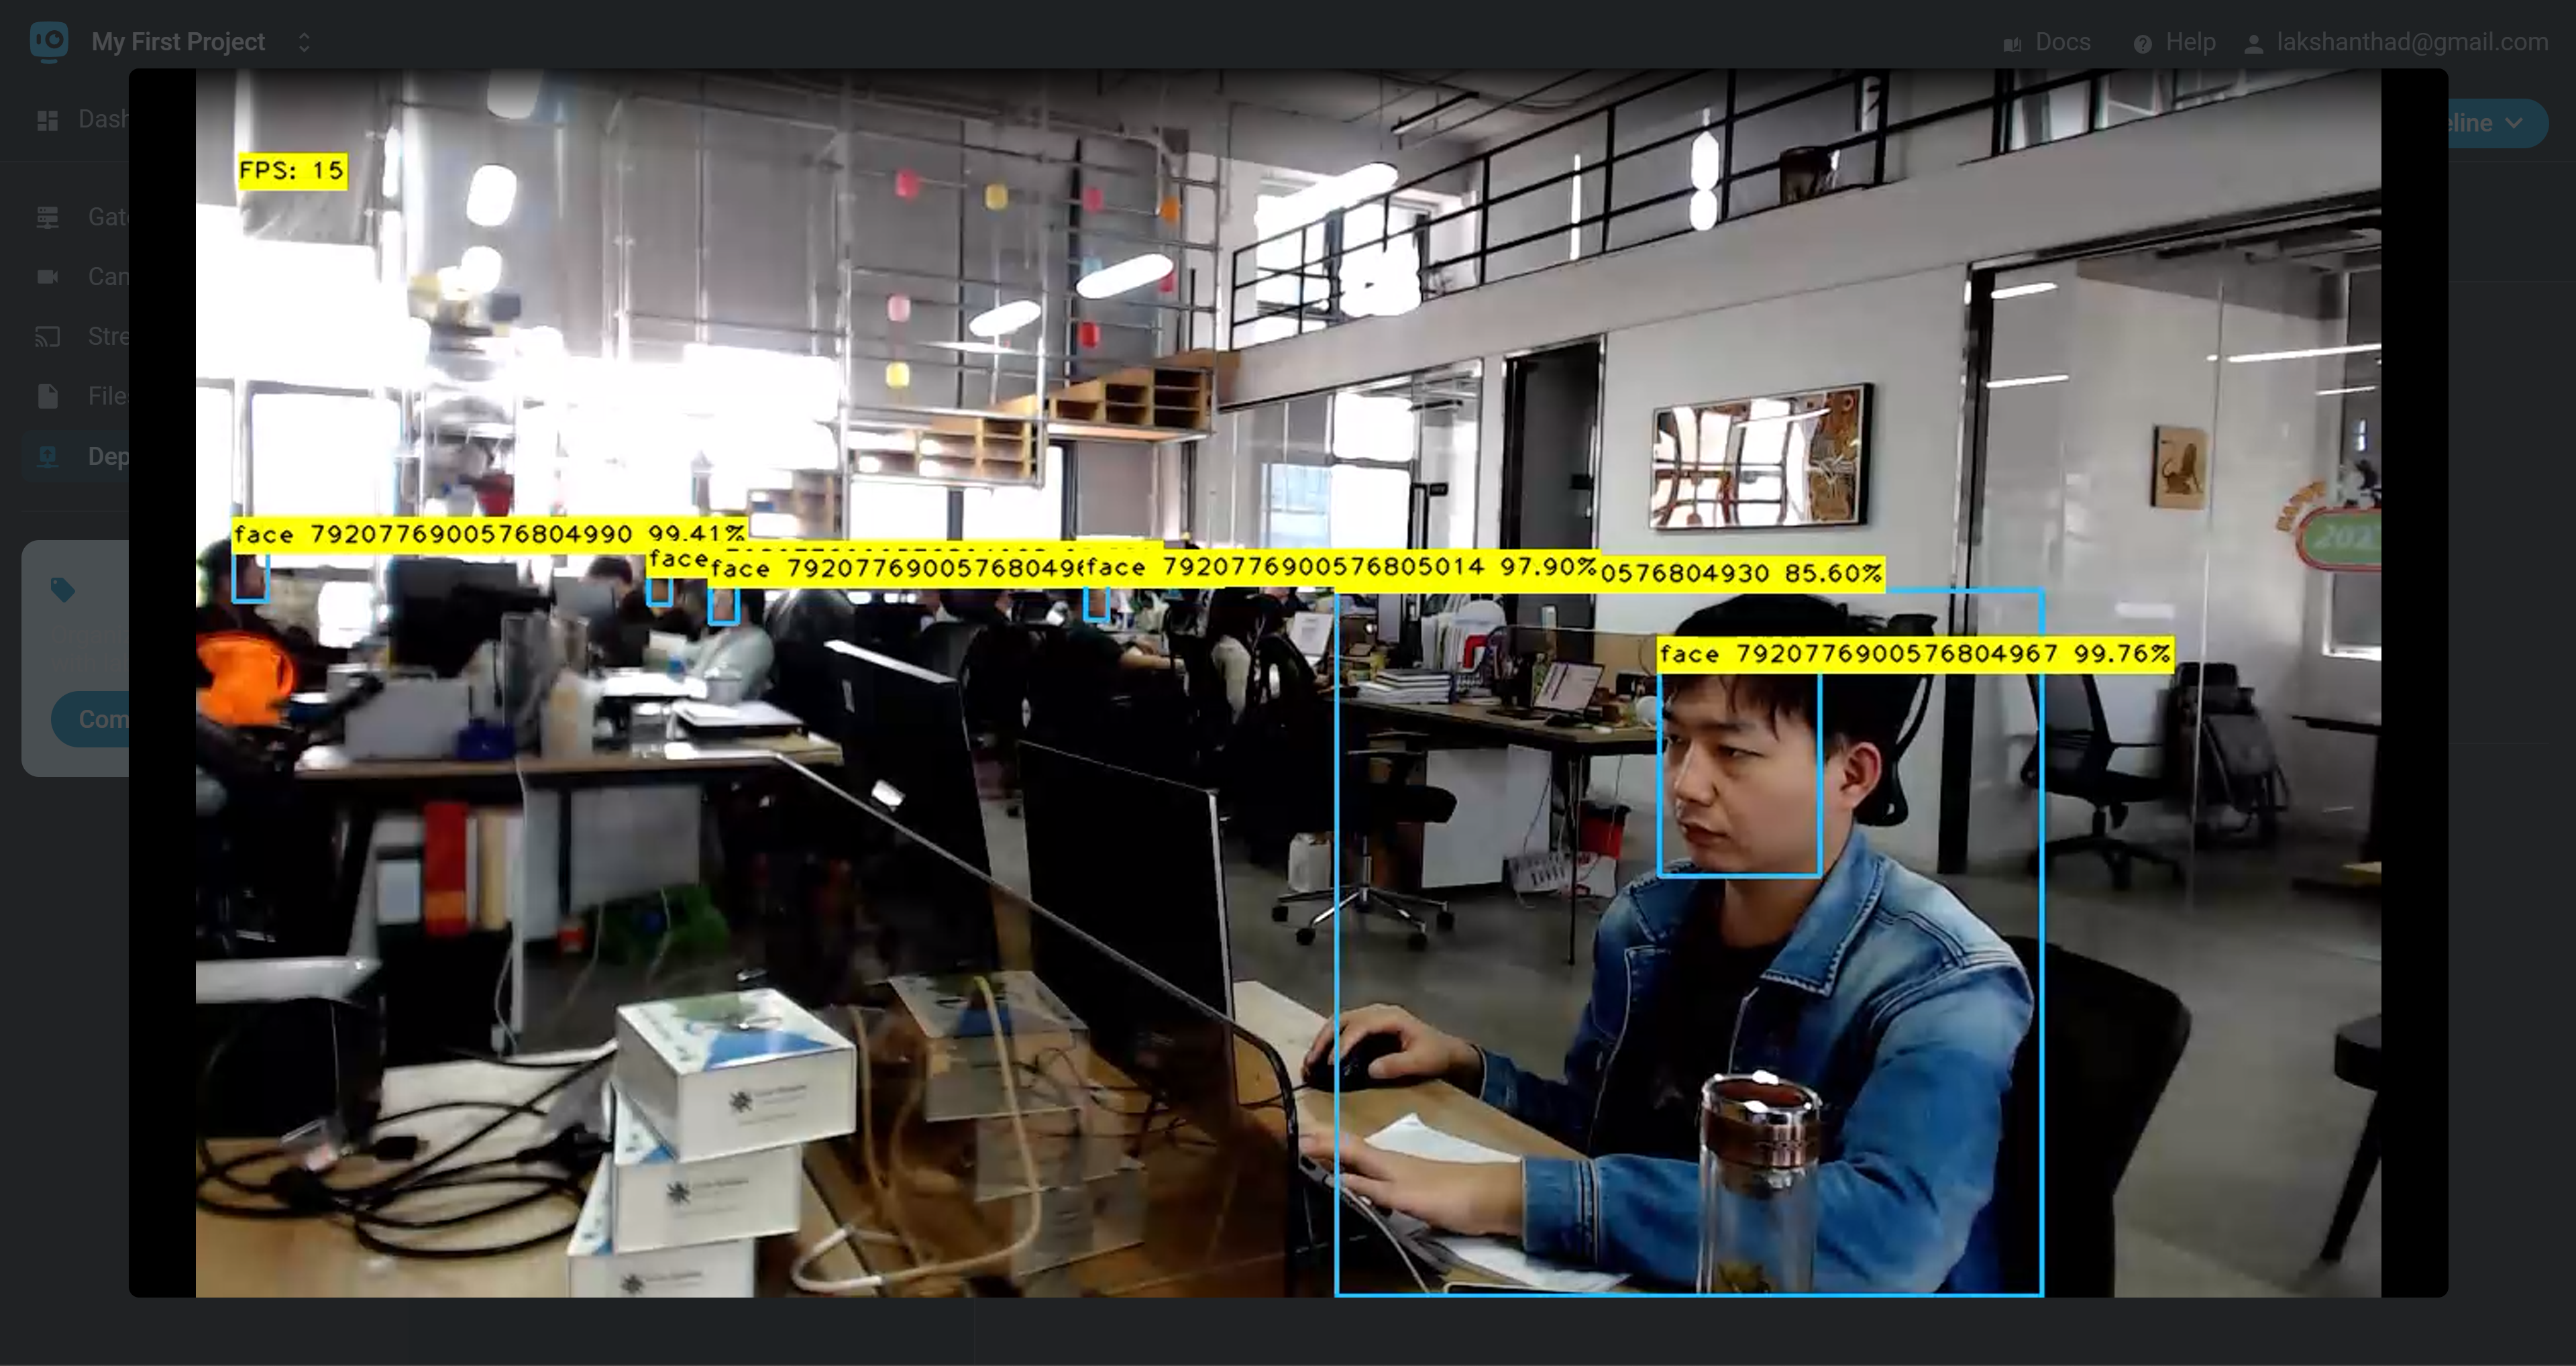
Step 4: Click on the play button to view the output stream via WebRTC
Learn more
Lumeo offers very detailed and comprehensive documentation. So it is highly recommended to check them here.
Tech Support & Product Discussion
Thank you for choosing our products! We are here to provide you with different support to ensure that your experience with our products is as smooth as possible. We offer several communication channels to cater to different preferences and needs.