Installation of Self-Hosted Mender Server on ODYSSEY - X86
We can setup Self-Hosted Mender Server on an ODYSSEY - X86 board and then push OTA updates to other client devices running as Mender clients.
This guide focuses on using the ODYSSEY - X86 board running the OpenWrt System by Seeed. Then we run the Self-Hosted Mender Server as a Docker container on OpenWrt.
Prerequisites
- OpenWrt System by Seeed installed on ODYSSEY - X86 board
- If you want this Self-Hosted Mender Server to be available publically, you need a public IP address with port 443 publicly accessible
- If using public IP as above, you need to bind the public IP to a DNS name for the Mender Server
Installation
Please not that the below guide is based on the official Mender guide for installation with Docker. There are some minor changes from the official guide in this version and therefore, follow this guide step-by-step to successfully setup Self-Hosted Mender Server on ODYSSEY - X86 board.
Basic Preparation
- Step 1. After turning on the ODYSSEY - X86 board with OpenWrt System running, connect one Ethernet port to internet and the other Ethernet port to a PC.

- Step 2. Open the OpenWrt Luci Web UI by accessing 192.168.2.1
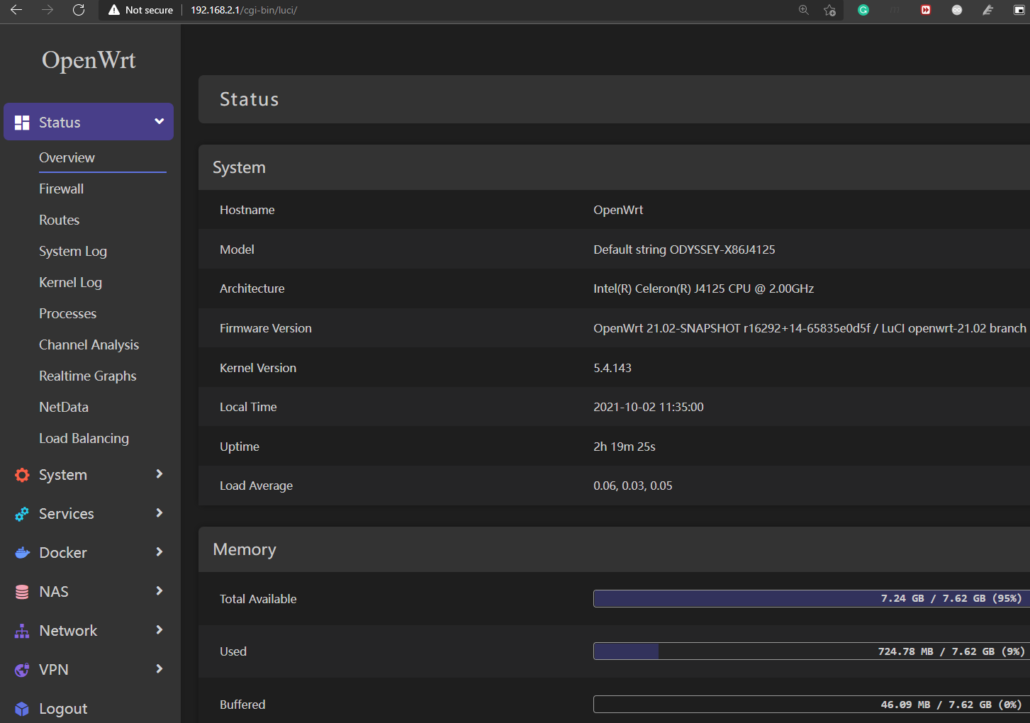
By default Mender Server is set up on port 443 for https and port 80 for http. But OpenWrt uses port 443 to access the Luci web interface via https and port 80 to access the Luci web interface via http. So we need change the port for Luci Web UI first.
Step 3. Navigate to
Services > Terminaland login with your credentialsStep 4. Type the following to access the uhttpd configuration file
vi /etc/config/uhttpd
- Step 5. Change 80 and 443 to different values. Here 80 is changed to 85 and 443 is changed to 446
config uhttpd 'main'
        list listen_http '0.0.0.0:85'
        list listen_http '[::]:85'
        list listen_https '0.0.0.0:446'
        list listen_https '[::]:446'
Note: Press "i" in Vi text editor to enter insert mode
Step 6. Save and exit from the text editor by pressing "ESC" and typing ":wq"
Step 7. On the terminal, type the following to restart uhttpd service
service uhttpd restart
- Step 8. Access Luci web UI again using the newly defined port
example:
192.168.2.1:85
- Step 9. Open terminal again and type the following to update the OpenWrt packages list
opkg update
- Step 10. Install Git
opkg install git-http
- Step 11. Clone the following repository
git clone -b 3.1.0 https://github.com/mendersoftware/integration mender-server
- Step 12. Enter the following directory:
cd mender-server/production
- Step 13. Copy the production template to its own file
cp config/prod.yml.template config/prod.yml
- Step 14. List the files in the directory
ls -l *
-rwxr-xr-x    1 root     root          1489 Nov  8 18:35 run

config:
-rw-r--r--    1 root     root           660 Nov  8 18:35 enterprise.yml.template
-rw-r--r--    1 root     root          5298 Nov  8 18:36 prod.yml
-rw-r--r--    1 root     root          5298 Nov  8 18:35 prod.yml.template
- Step 15. Here we delete enterprise.yml.template file because we are going to run the Open Source edition of Mender Server
rm config/enterprise.yml.template
However, if you are going to run the Enterprise edition of Mender Server, keep the enterprise.yml.template file and please follow here.
- Step 16. While the current working directory is still production, download the necessary Docker images
./run pull
Pulling mender-mongo                  ... done
Pulling mender-deviceconfig           ... done
Pulling mender-useradm                ... done
Pulling mender-workflows-worker       ... done
Pulling mender-create-artifact-worker ... done
Pulling mender-workflows-server       ... done
Pulling mender-device-auth            ... done
Pulling mender-gui                    ... done
Pulling mender-inventory              ... done
Pulling mender-api-gateway            ... done
Pulling minio                         ... done
Pulling mender-deployments            ... done
Pulling mender-nats                   ... done
Pulling mender-deviceconnect          ... done
Pulling mender-mongo (mongo:4.4)...
Note: Please note that Docker Hub enforced limits on pulls originating from anonymous users to 100 per 6 hours (see: Docker pricing). This means that, for reasons completely independent from Mender, the above step may fail and you may have to retry after some time.
Certificates and Keys
- Step 1. Set the public domain name of your server
API_GATEWAY_DOMAIN_NAME="mender.example.com"  # replace with your server's public domain name
STORAGE_PROXY_DOMAIN_NAME="${API_GATEWAY_DOMAIN_NAME}"
Note: If you want this Self-Hoster Mender Server to be only available locally, you can can choose a domain name you already have and attach a random subdomain of your preference. For example: mender.seeedstudio.com. Make sure not to directly use the IP address of the Mender server here because it will not work.
- Step 2. Prepare certificates using the helper script keygen
CERT_CN=$API_GATEWAY_DOMAIN_NAME \
CERT_SAN="DNS:${API_GATEWAY_DOMAIN_NAME},DNS:*.${STORAGE_PROXY_DOMAIN_NAME}" \
../keygen
Generating an EC private key
writing new private key to 'private.key'
-----
................................................................................++++
...........................................................................................++++
writing RSA key
................................................................................................++++
...........................++++
writing RSA key
All Mender Server keys and certificates have been generated in directory /root/mender-server/production/keys-generated.
Please include them in your docker compose and device builds.
For more information, please refer to https://docs.mender.io/
Your local directory tree should now look like this:
├── keys-generated
│   ├── cert
│   │   ├── cert.crt
│   │   └── private.key
│   └── keys
│       ├── deviceauth
│       │   └── private.key
│       └── useradm
│           └── private.key
├── config/enterprise.yml.template
├── config/prod.yml
├── config/prod.yml.template
└── run
The API Gateway and Storage Proxy certificates generated here need to be made available to the Mender client. Consult the section on building for production for a description on how to include the certificates in the client builds.
Persistant Storage
Persistent storage of backend services' data is implemented using named Docker volumes. The template is configured to mount the following volumes:
- mender-artifacts - artifact objects storage
- mender-db - mender services databases data
Create the volumes:
docker volume create --name=mender-artifacts
docker volume create --name=mender-db
The deployment configuration in config/prod.yml now needs to be updated. Let's go through the steps below.
Minio
The keys MINIO_ACCESS_KEY and MINIO_SECRET_KEY control credentials for uploading artifacts into the object store. Since Minio is a S3 API compatible service, these settings correspond to Amazon's AWS Access Key ID and Secret Access Key respectively
- Step 1. We need to generate a secret key with length 16. There are 2 ways to do this
Method 1:
- If you have access to a Linux machine, install pwgen utlity first
sudo apt install pwgen
- After that generate a 16 length random secret key
pwgen 16 1
Method 2:
Type a random 16-length secret key by yourself. It needs to have numbers, upper and lower case characters
- Step 2. Replace the above secret key with this command
MINIO_SECRET_KEY_GENERATED=<secret key-generated>
- Step 3. Insert the access and secret keys into config/prod.yml with the following commands
sed -i.bak "s/MINIO_ACCESS_KEY:.*/MINIO_ACCESS_KEY: mender-deployments/g" config/prod.yml
sed -i.bak "s/MINIO_SECRET_KEY:.*/MINIO_SECRET_KEY: $MINIO_SECRET_KEY_GENERATED/g" config/prod.yml
Deployments Service
The deployments service will upload artifact objects to minio storage via storage-proxy, see the administration overview for more details. For this reason, access credentials DEPLOYMENTS_AWS_AUTH_KEY and DEPLOYMENTS_AWS_AUTH_SECRET need to be updated and DEPLOYMENTS_AWS_URI must point to the domain name of your Storage proxy.
- Step 1. Run the following commands to set DEPLOYMENTS_AWS_AUTH_KEY and DEPLOYMENTS_AWS_AUTH_SECRET to the values of MINIO_ACCESS_KEY and MINIO_SECRET_KEY, respectively
sed -i.bak "s/DEPLOYMENTS_AWS_AUTH_KEY:.*/DEPLOYMENTS_AWS_AUTH_KEY: mender-deployments/g" config/prod.yml
sed -i.bak "s/DEPLOYMENTS_AWS_AUTH_SECRET:.*/DEPLOYMENTS_AWS_AUTH_SECRET: $MINIO_SECRET_KEY_GENERATED/g" config/prod.yml
- Step 2. Run the following command so DEPLOYMENTS_AWS_URI points to your Storage proxy
sed -i.bak "s/https:\/\/set-my-alias-here.com/https:\/\/$STORAGE_PROXY_DOMAIN_NAME/g" config/prod.yml
Storage Proxy
In the default setup there is no separate process acting as a proxy to storage service. For this purpose you can use Mender API Gateway, but with an additional domain name. Change the placeholder value set-my-alias-here to a valid domain name to use Mender API Gateway as a proxy to the storage service, by running the following command
sed -i.bak "s/set-my-alias-here.com/$STORAGE_PROXY_DOMAIN_NAME/g" config/prod.yml
API Gateway
For security purposes, the API Gateway must know precisely the DNS name allocated to it, which you'll configure via the ALLOWED_HOSTS environment variable.
Change the placeholder value my-gateway-dns-name to a valid hostname, by running the following command
sed -i.bak "s/my-gateway-dns-name/$API_GATEWAY_DOMAIN_NAME/g" config/prod.yml
Run the Server
- Step 1. Bring up all services in detached mode with the following command
./run up -d
Creating network "menderproduction_mender" with the default driver
Creating menderproduction_mender-nats_1                   ... done
Creating menderproduction_mender-mongo_1 ... done
Creating menderproduction_minio_1        ... done
Creating menderproduction_mender-gui_1   ... done
Creating menderproduction_mender-workflows-worker_1       ... done
Creating menderproduction_mender-create-artifact-worker_1 ... done
Creating menderproduction_mender-useradm_1                ... done
Creating menderproduction_mender-workflows-server_1       ... done
Creating menderproduction_mender-deviceconfig_1           ... done
Creating menderproduction_mender-inventory_1              ... done
Creating menderproduction_mender-deviceconnect_1          ... done
Creating menderproduction_mender-device-auth_1            ... done
Creating menderproduction_mender-api-gateway_1            ... done
Creating menderproduction_mender-deployments_1            ... done
- Step 2. To verify that the services are running, execute the following command and verify that the state of all services is "Up"
./run ps
                      Name                                    Command                  State                  Ports
-------------------------------------------------------------------------------------------------------------------------------
menderproduction_mender-api-gateway_1              /entrypoint.sh --accesslog ...   Up             0.0.0.0:443->443/tcp, 80/tcp
menderproduction_mender-auditlogs_1                /usr/bin/auditlogs --confi ...   Up             8080/tcp
menderproduction_mender-create-artifact-worker_1   /usr/bin/workflows --confi ...   Up             8080/tcp
menderproduction_mender-deployments_1              /entrypoint.sh --config /e ...   Up             8080/tcp
menderproduction_mender-device-auth_1              /usr/bin/deviceauth --conf ...   Up             8080/tcp
menderproduction_mender-deviceconfig_1             /usr/bin/deviceconfig --co ...   Up             8080/tcp
menderproduction_mender-deviceconnect_1            /usr/bin/deviceconnect --c ...   Up             8080/tcp
menderproduction_mender-gui_1                      /entrypoint.sh nginx             Up (healthy)   80/tcp, 8080/tcp
menderproduction_mender-inventory_1                /usr/bin/inventory-enterpr ...   Up             8080/tcp
menderproduction_mender-mongo_1                    docker-entrypoint.sh mongod      Up             27017/tcp
menderproduction_mender-nats_1                     docker-entrypoint.sh nats- ...   Up             4222/tcp, 6222/tcp, 8222/tcp
menderproduction_mender-tenantadm_1                /usr/bin/tenantadm --confi ...   Up             8080/tcp
menderproduction_mender-useradm_1                  /usr/bin/useradm-enterpris ...   Up             8080/tcp
menderproduction_mender-workflows-server_1         /usr/bin/workflows-enterpr ...   Up             8080/tcp
menderproduction_mender-workflows-worker_1         /entrypoint.sh worker --au ...   Up
menderproduction_minio_1                           /usr/bin/docker-entrypoint ...   Up (healthy)   9000/tcp
- Step 3. Since this is a brand new installation we need to create the initial user via the CLI provided by the User Administration Service. The service's binary is embedded in a Docker container, so to execute it you will issue the exec subcommand of docker-compose
./run exec mender-useradm /usr/bin/useradm create-user [email protected] --password=mypassword
Access the Server
Public Server
Now you can access the public Mender server with the domain name specified in the previous steps. After that you can enter the above credentials for the first user and login to the server.


Local Server
However, if you are running the Mender Server locally, there are some additional steps.
- Step 1. Enter the OpenWrt Luci Web UI
example:
192.168.2.1:85
Step 2. Navigate to
Network > DHCP and DNSStep 3. Under Server Settings click General Settings
Step 4. Inside the space next to Addresses, type the previously created subdomain with the domain name and then enter the IP address of X86 as follows
/mender.seeedstudio.com/192.168.2.1
Step 5. Click SAVE & APPLY
Step 6. Now you can access the local Mender server by typing the subdomain and domain name on the browser
example:
https://mender.seeedstudio.com
Note: Rememeber to add https:// in the beginning
Now you can push OTA updates to the clients which are connected to this self-hosted Mender Server!
Note: If you encounter any issues while starting or running your Mender Server, you can take a look at the section for troubleshooting Mender Server.