SenseCAP M1 Quick Start
Below you will find the required steps to easily set up your hotspot in a few minutes!
- Download the Helium App and create a Helium Wallet
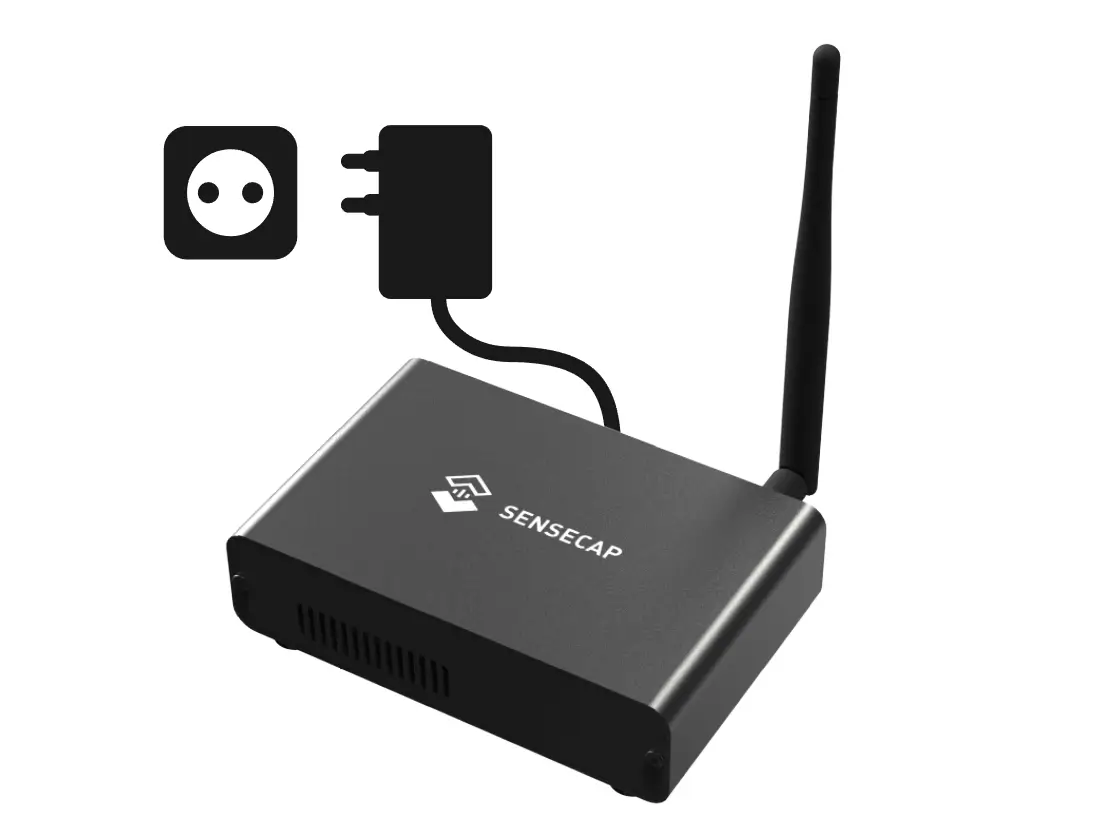
- Attach the antenna and power adapter to the SenseCAP M1 and power it on.
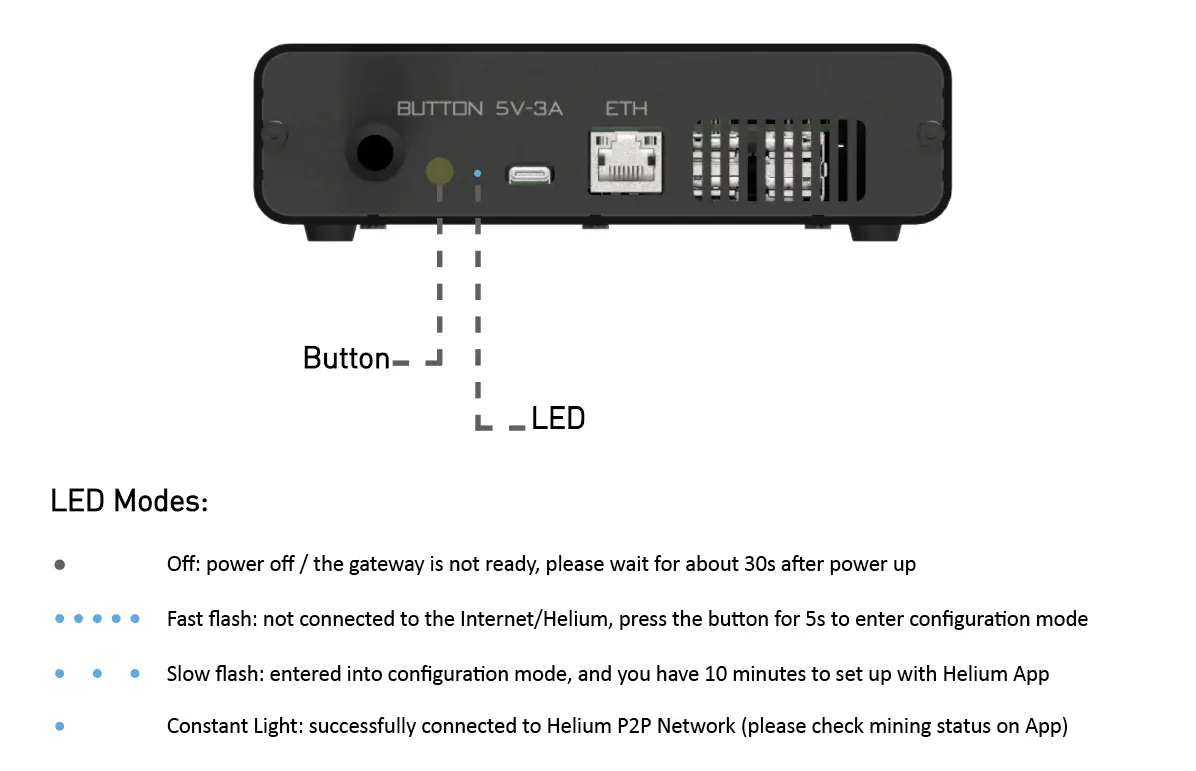
- Press the small button on the back for 6-10 seconds until the Blue LED light begins to flash slowly
- Click "Setup Hotspot" and choose "SenseCAP M1" from the list
- Click "Scan for my Hotspot" from the Bluetooth page and connect to the SenseCAP M1
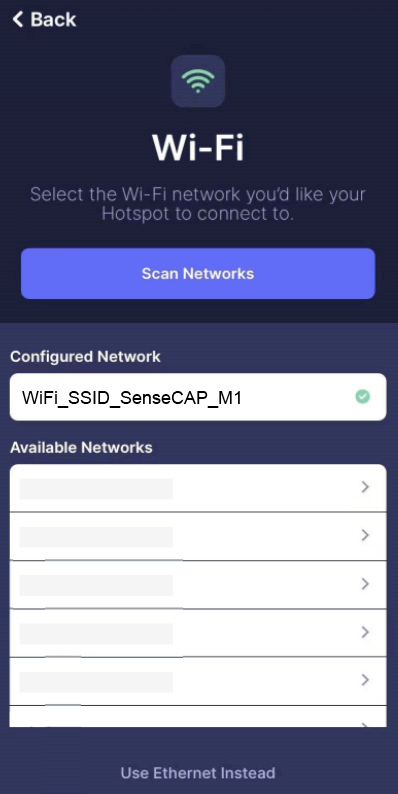
- Select the Wi-Fi and enter the password OR use an Ethernet cable
- Set Hotspot Location and submit location fee
What You Will Need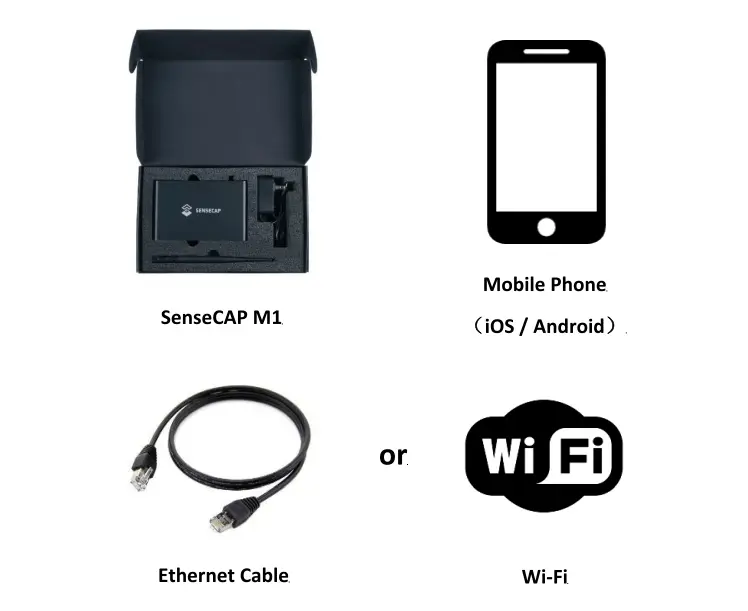
Step 1: Download the SenseCAPApp and create a Helium Wallet.

- Hotspot App for iOS on the iTunes App Store
- Hotspot App for Android on the Google Play Store
Step 2: Attach the antenna and the power adapter onto the SenseCAP M1 and power it up.
NOTE: Please wait half an hour while your hotspot is getting ready for first use and while updating firmware automatically to latest firmware.
ATTENTION: Do not power on the gateway without its antenna connected as this may damage the unit. Make sure you are using the power adapter we provided.
NOTE: The units will come with an adaptor with the US/EU standard plug according to the version you choose, so if there is a different plug standard in the place you are going to place the gateway, you are advised to purchase a plug adaptor to fit the standard. After power-up the gateway, wait 30-60 seconds for the gateway to boot up, you should see the Blue LED on the back of the unit turn on and fast flashing. Now it is ready for you to go to the next step to configure the Bluetooth connection.
Step 3: Press the button on the back for 6-10 seconds until the Blue LED turns to slow flash mode.
Step 4: Click "Set up Hotspot" and choose SenseCAP M1 from the list.
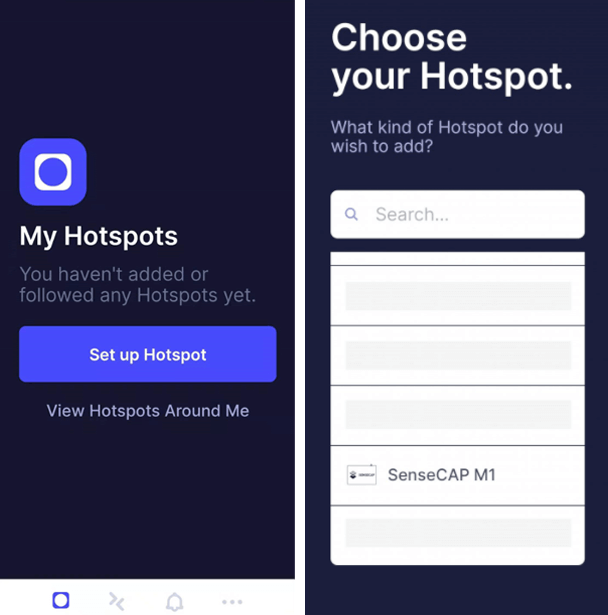
Step 5: Click "Scan for my Hotspot" from the Bluetooth page and then connect to SenseCAP M1.
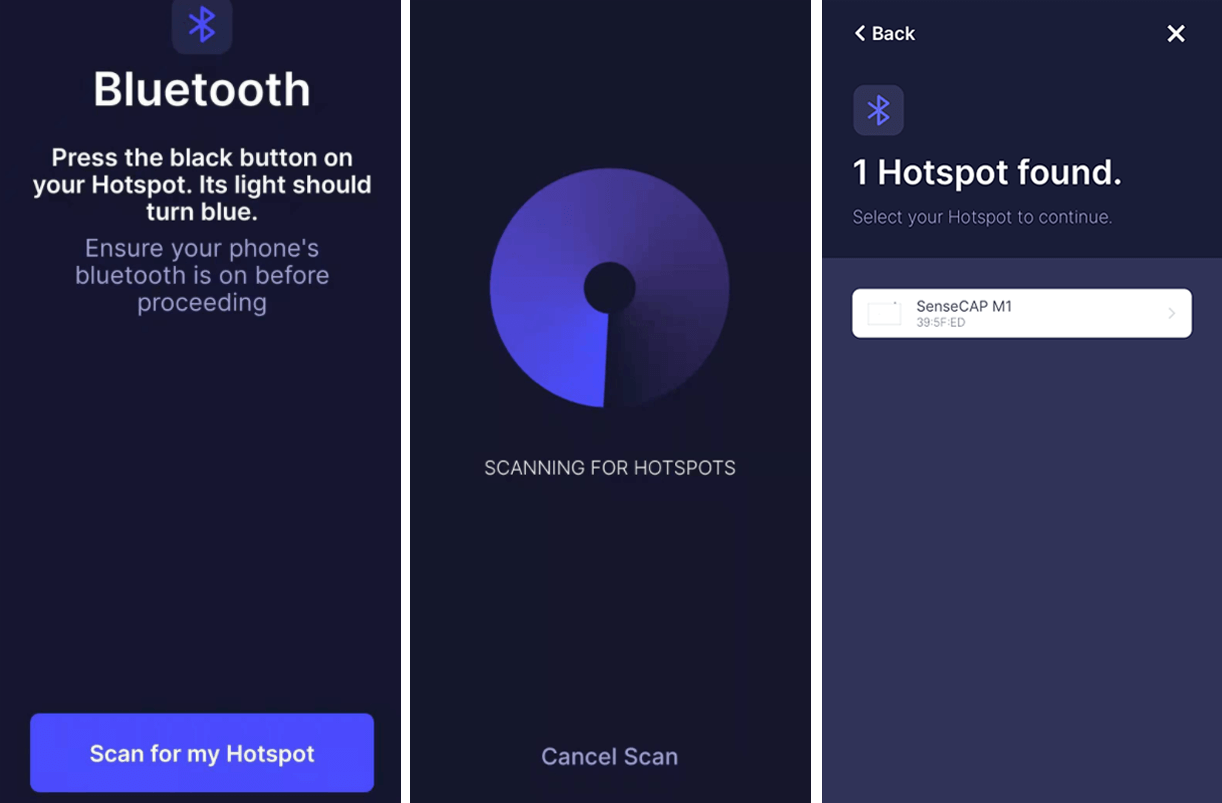
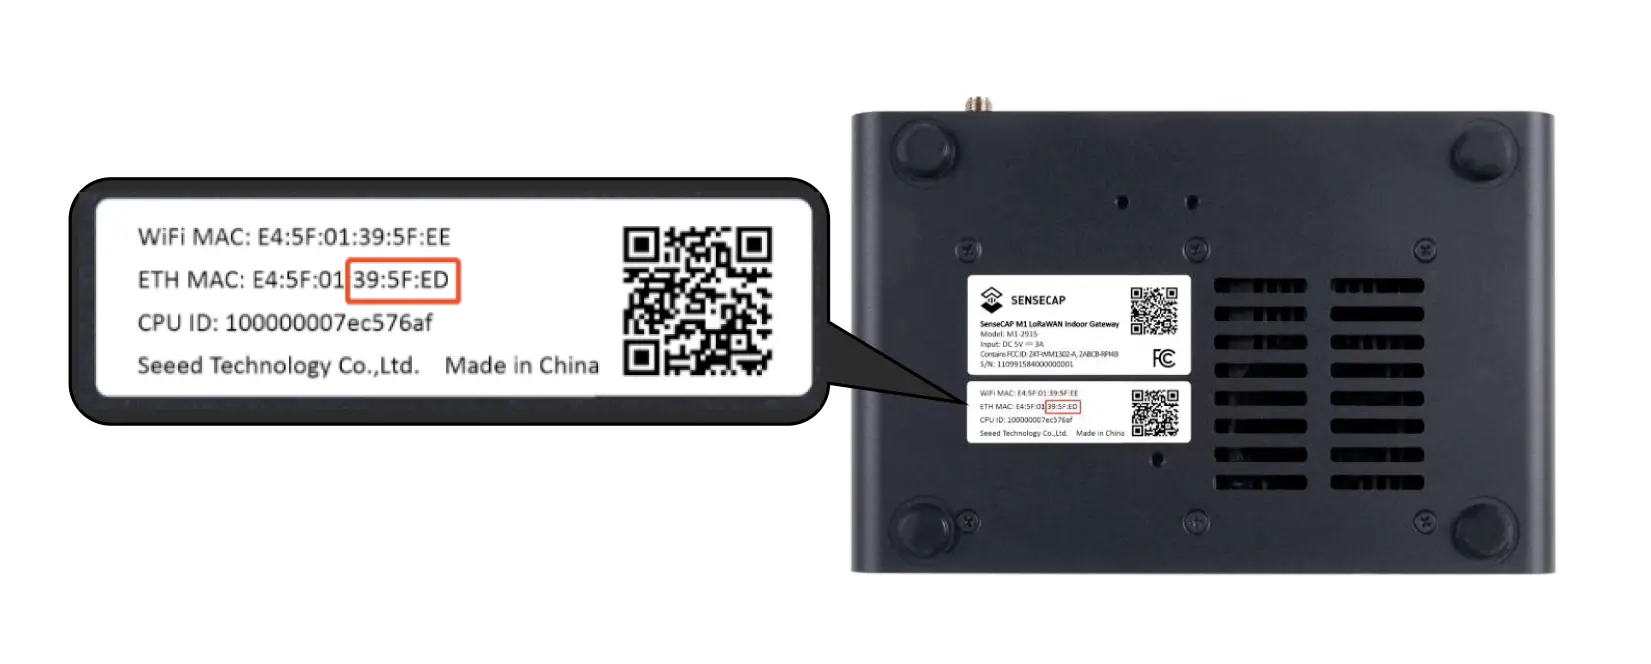
NOTE: The last 6 figures of the device's ETH MAC is displayed under the name of the hotspot, so if more than one gateways are waiting to connect, you could tell hotspot from each other by the ETH MAC, which will be provided on the label stick on the bottom of the device.
Step 6: Select the WiFi and enter the WiFi password to connect to the network.
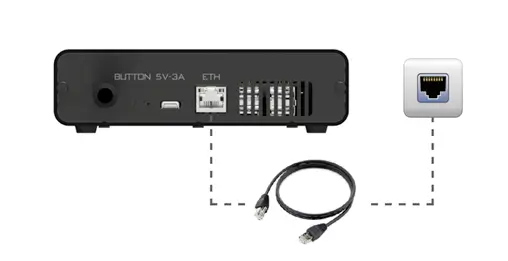
NOTE: To connect with Ethernet, attach the Ethernet cable to the gateway via ETH port, and click "Use Ethernet Instead" on the Wi-Fi connection page to continue.
ATTENTION: If you use an Ethernet cable to connect the Internet, in order to avoid the network connection failure caused by the loose or ejected cable, please try hard when plugging the network cable and make sure you hear a clear "click" sound.
NOTE: For the first boot, after the gateway connected to the internet, it will take about 10-15 minutes for the firmware updates before you could do more configuration and register the gateway to Helium. If there is any problem occurs, please hold on and wait for the updates to complete.
After firmware updates complete, you need to press the button for 6-10 seconds until the Blue LED turns to slow flash mode to enter the Bluetooth configuration mode again.
Step 7: Set Hotspot Location and Pay Location Fee
- After setting up the gateway, you may be asked to set a location for your hotspot.
- The SenseCAP M1 has covered the $40 Helium network activation fee and the first location assert fee of $10 (worth $50 in total) in the purchase price.
- You could set up the location and change to another location if needed, but you will need to pay the $10 location assert fee again every time you move your gateway to a new location.
- Choose the location on the map and confirm the location of your hotspot, and the setup would be completed.
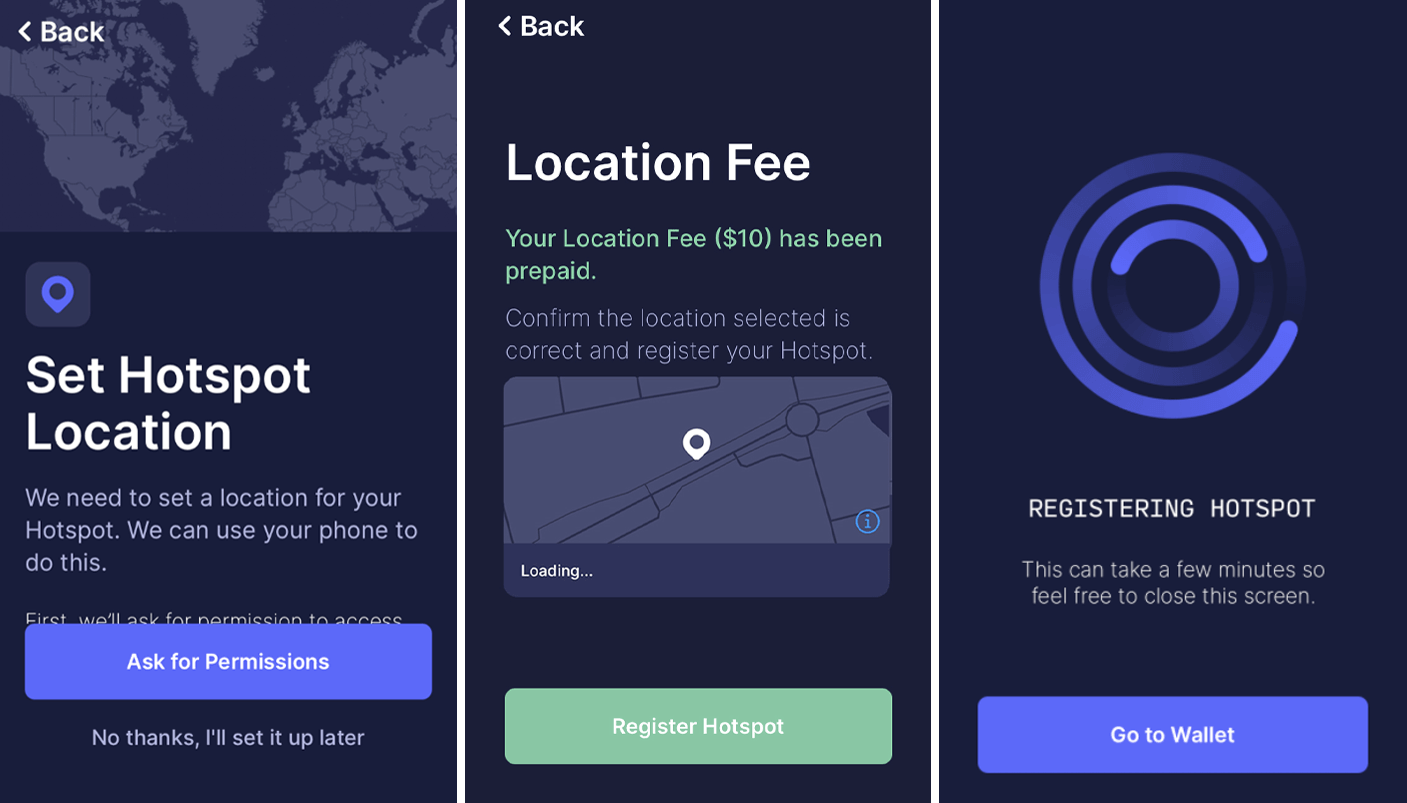
NOTE: You will need to wait for about 15 minutes for the Hotspot to register to the Helium network. You could close this screen by clicking "Go to Wallet", and you could check the updated information of your hotspot in the App after finishing this step.

Welcome To The People's Network!