No code Edge AI Tool
We are pleased to bring you our new experience on the reComputer built with Jetson Nano for quick and easy object recognition.
With just a few simple commands, the environment can be downloaded and deployed, and the process of monitoring, identifying and outputting results from a live screen can't be simpler than three blocks.
Demo Video
Warehouse Security Demo
Farm Guards Demo
Preliminary Preparation
In this example, we'll go over how to download and install what we need under a fresh NVIDIA Jetson system, then open the Edge AI Tool and perform object detection with a live camera. Below is an overview of the steps.
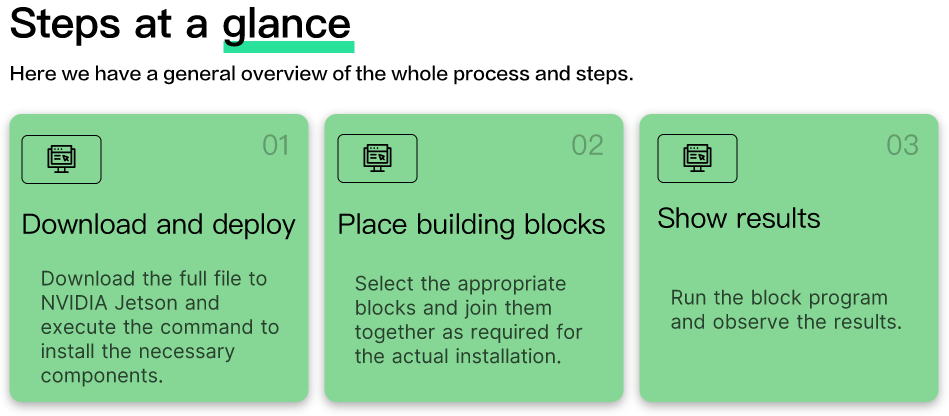
- Download and deploy
- Place blocks
- Show results
Hardware Requirements
Before you start, you will need to have the following hardware ready.
| Hardware Image | Hardware Name |
|---|---|
 | reComputer J1010 with Jetson Nano module or reComputer J1020 with Jetson Nano module |
 | Logitech C270 HD Webcam or other V4L2 USB Camera supported by Jetson |
!!!Attention This example will only run on the reComputer built with Jetson Nano. Note that the reComputer built with Jetson Xavier NX is not supported to work at this time, but it will be supported in the future.
Software Requirements
Before you start, make sure your device is flashed with JetPack 4.6.1. If you want to reflash the Jetson Nano eMMC with JetPack 4.6.1, please refer here.
You can check the installed JetPack version by typing the following on the terminal:
cat /etc/nv_tegra_release
And the output should look like this

Note: R32.7.1 corresponds to JetPack 4.6.1
Getting Started
Once the hardware and software are ready as described above, let's move on to the Edge AI Tool experience. In this example, please connect your display, mouse or keyboard as required, you can also control your NVIDIA Jetson remotely via SSH or VNC.
Step 1. Download and deploy
Open a command line window in NVIDIA Jetson and enter the following command to download the required files to Jetson.
git clone https://github.com/Seeed-Studio/node-red-contrib-ml.git
Once the download is complete, run the following command to start the required docker.
cd node-red-contrib-ml
sudo ./docker-ubuntu.sh
The whole installation and start-up process will take about 7 to 9 minutes.
Step 2. Place blocks
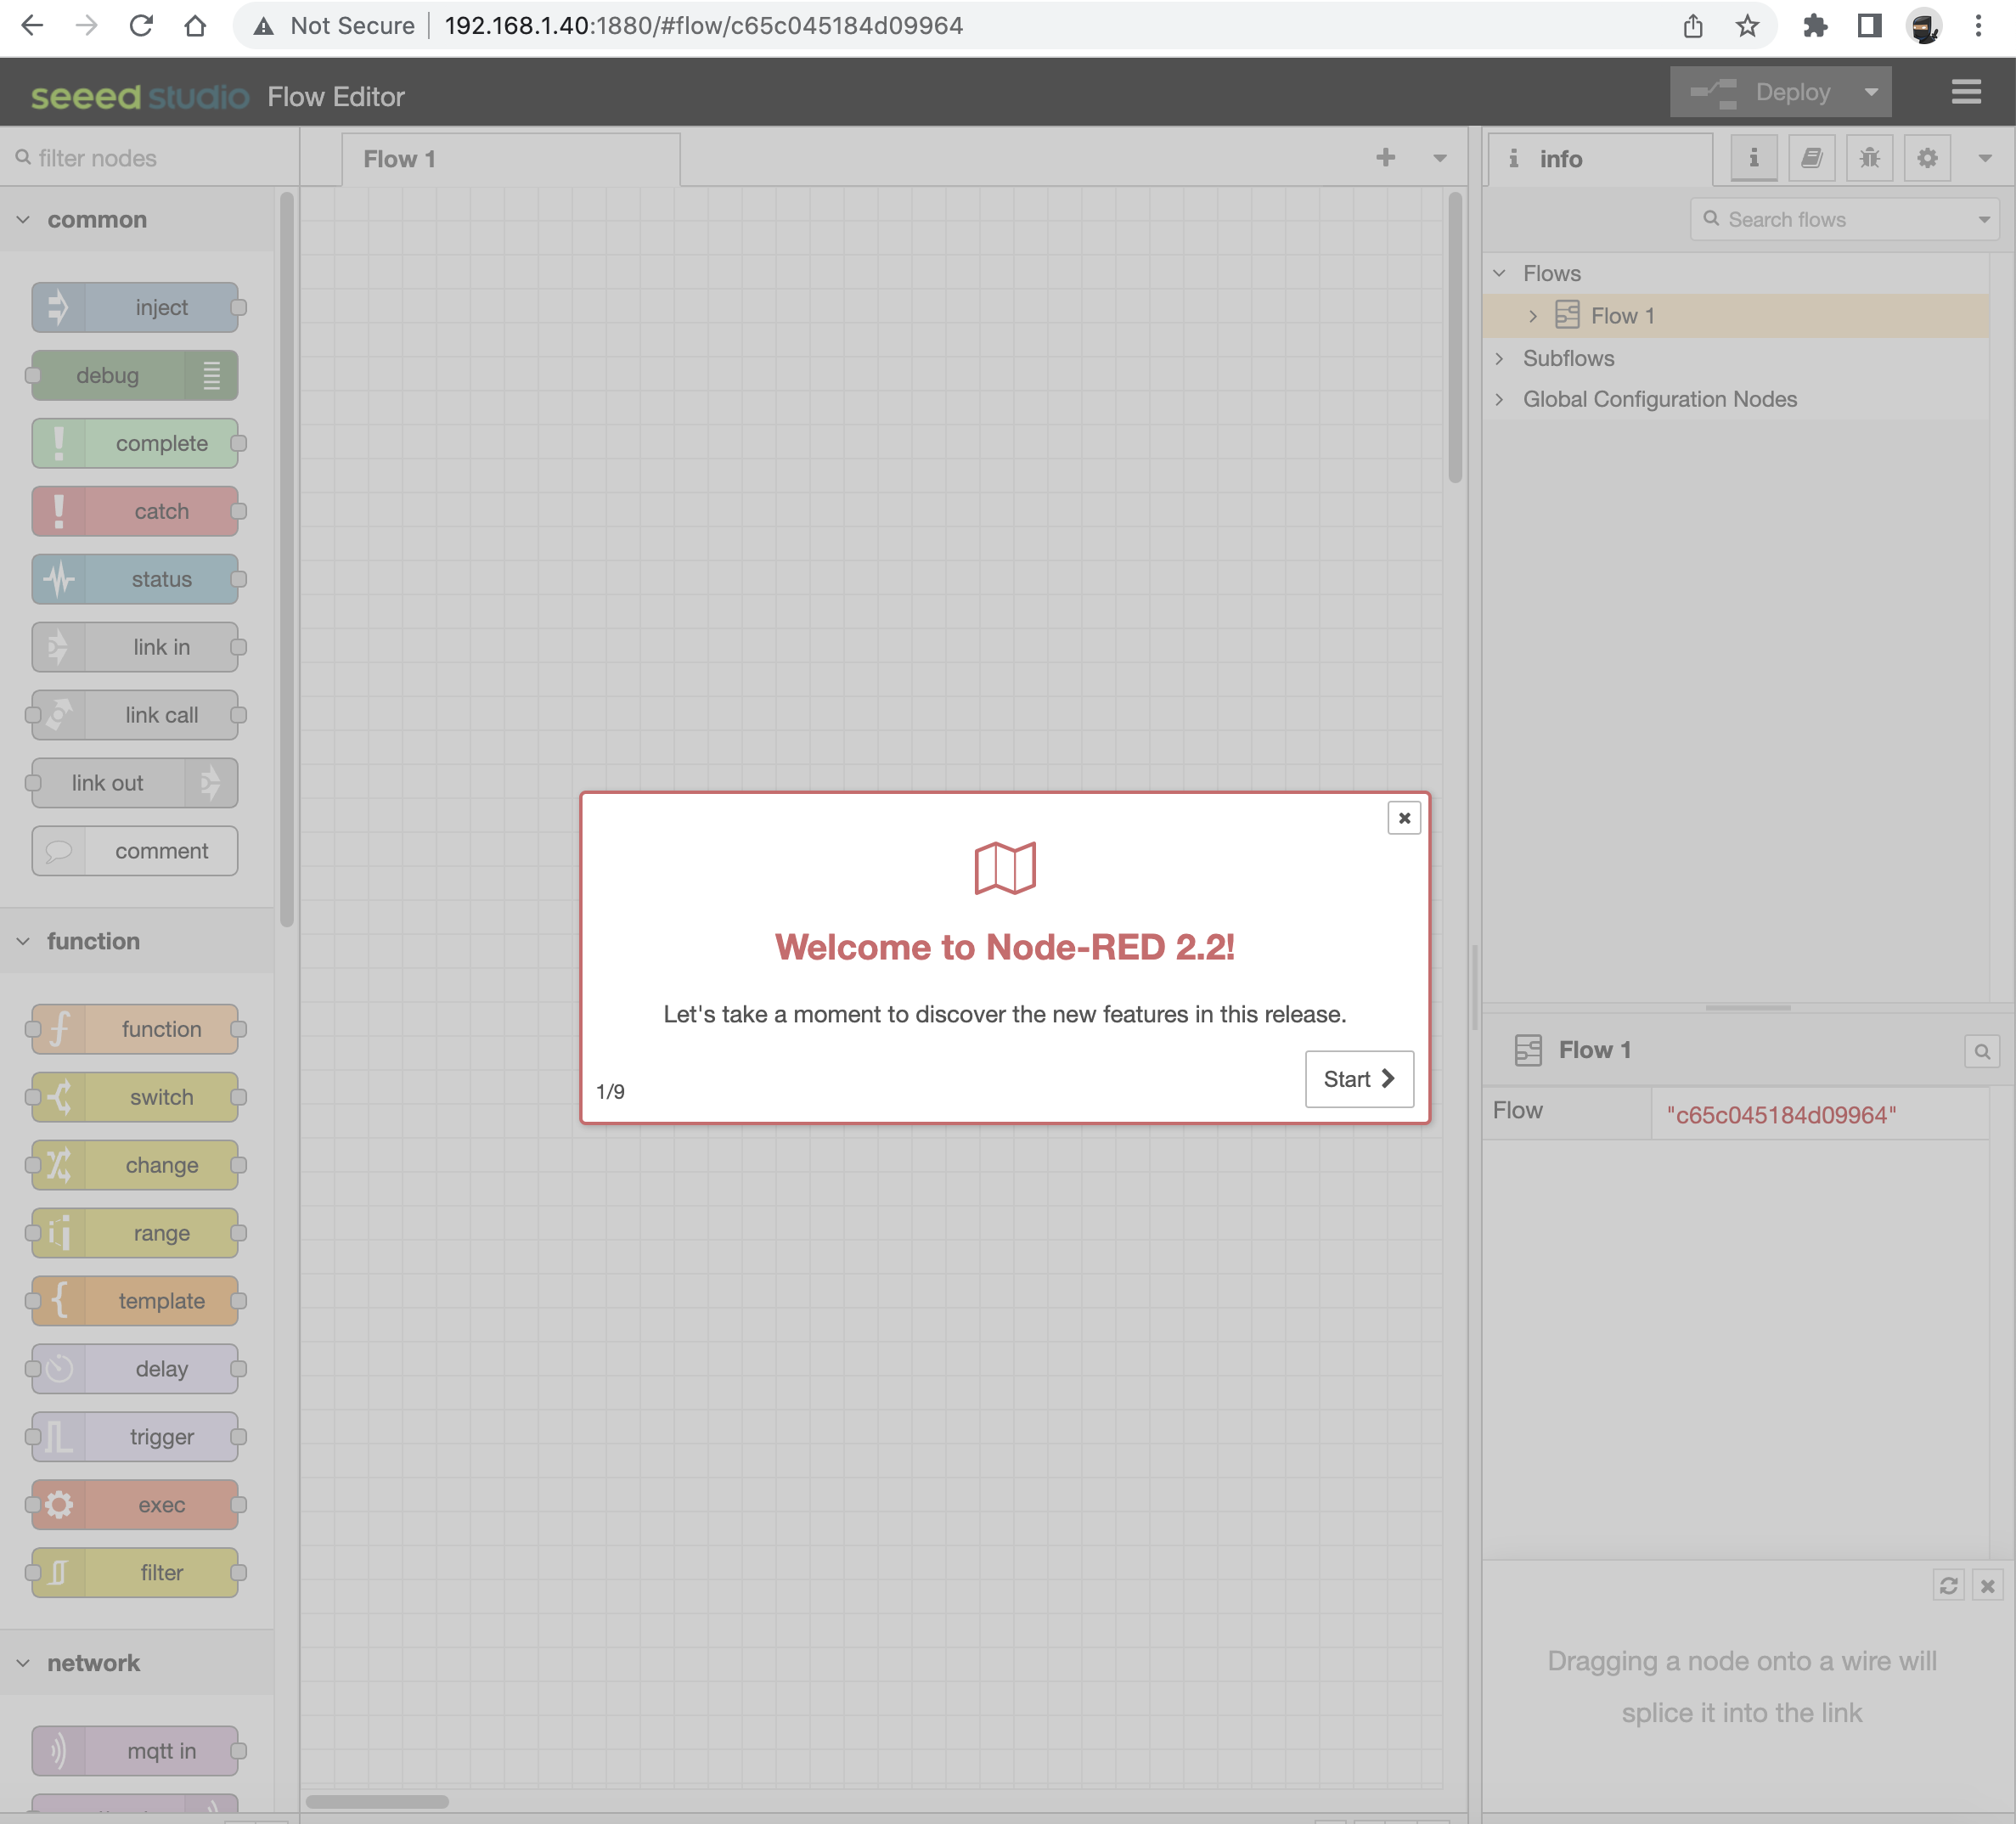
Once the installation is complete, use the Google Chrome browser that comes with your NVIDIA Jetson system to enter the following URL to access the operating interface.
127.0.0.1:1880
You can also enter the IP address plus the port number (1880) in the address bar to access the action page.
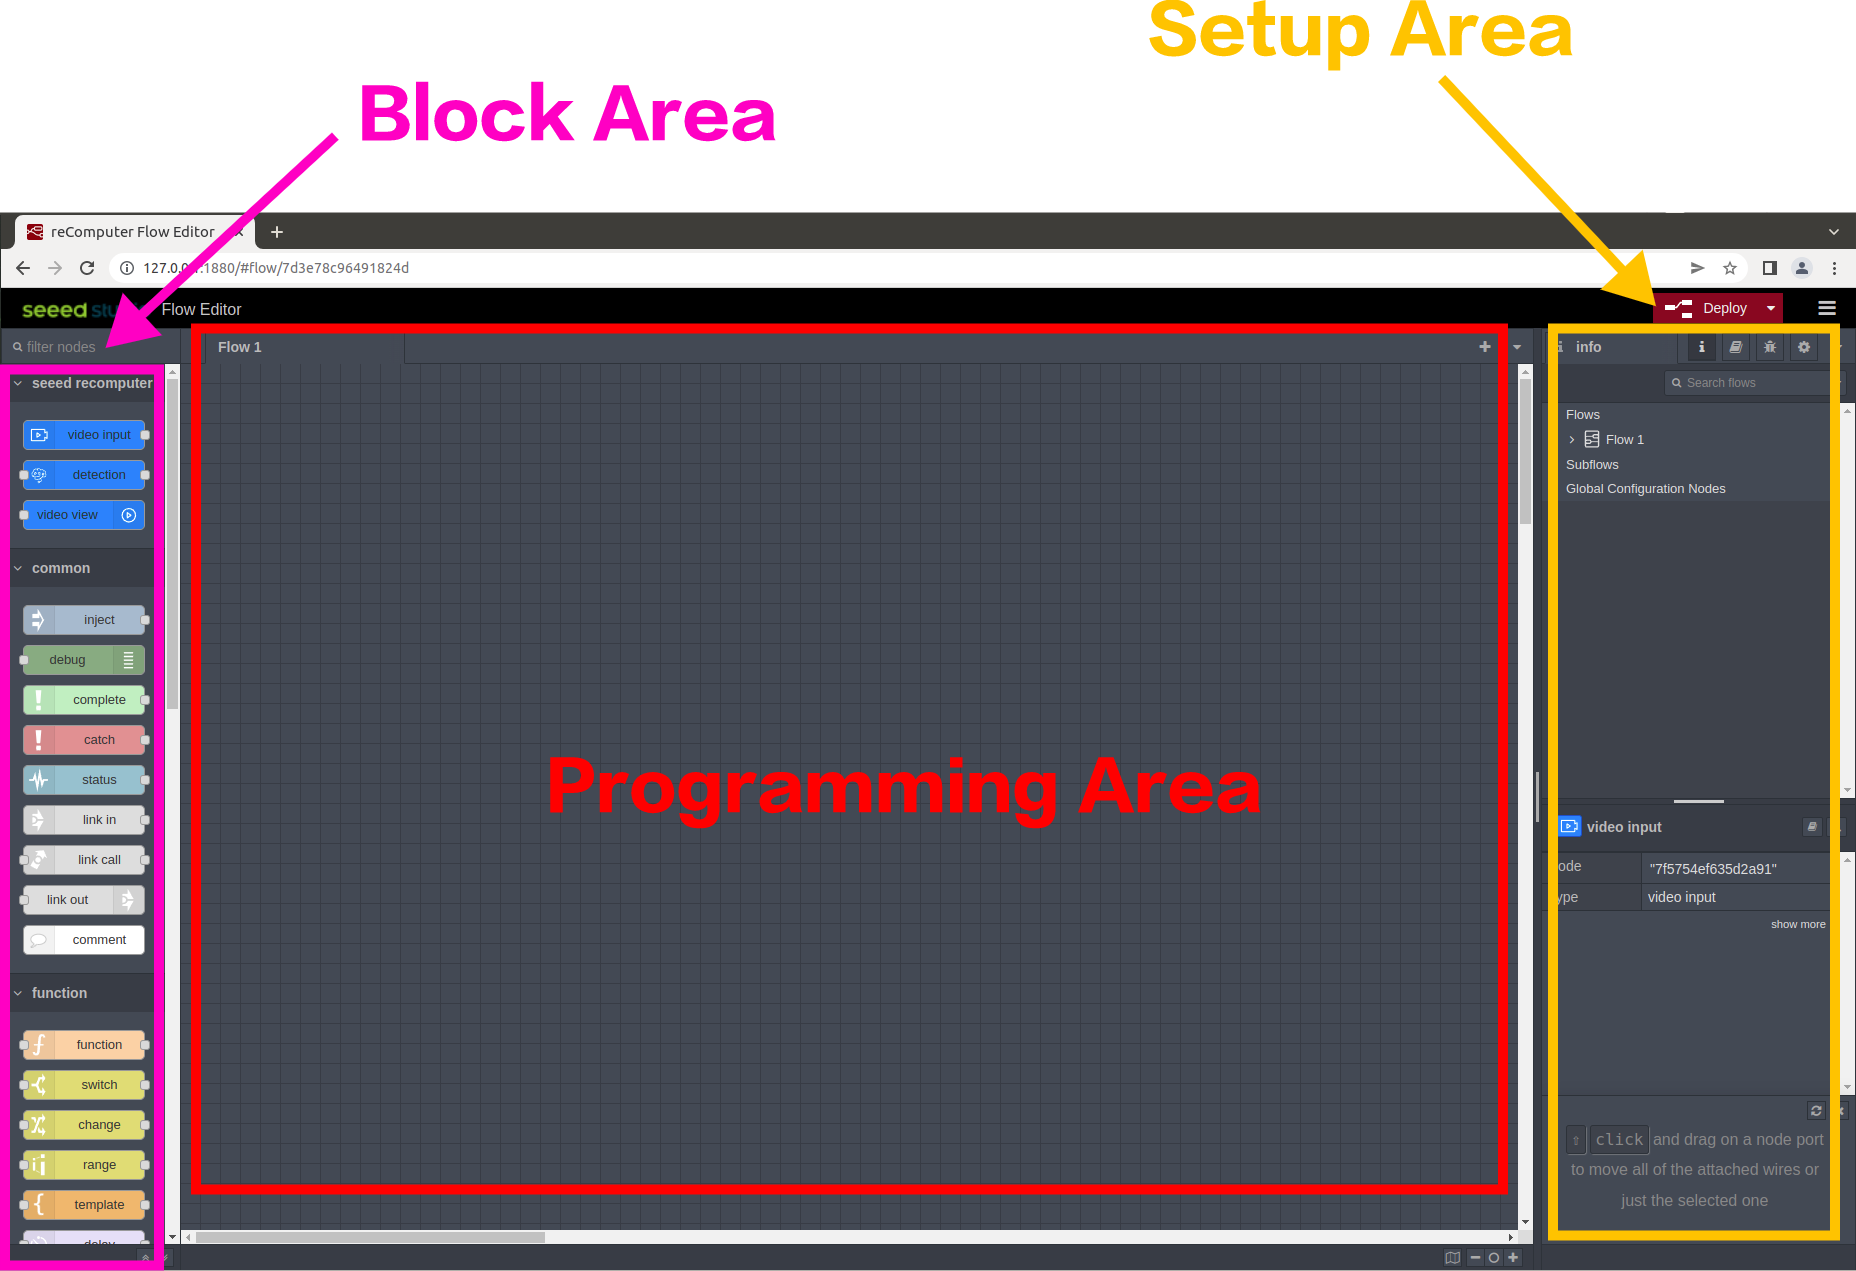
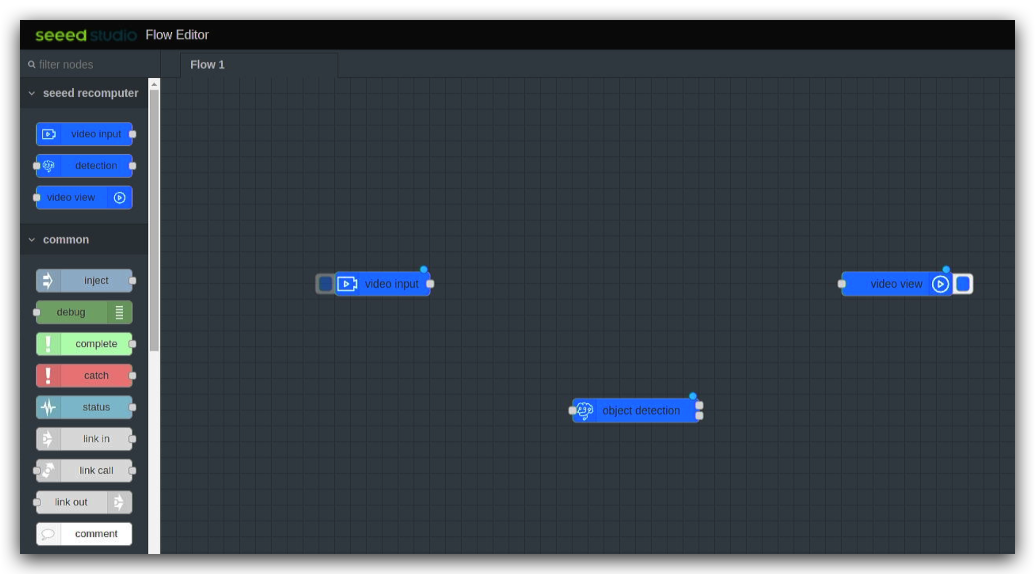
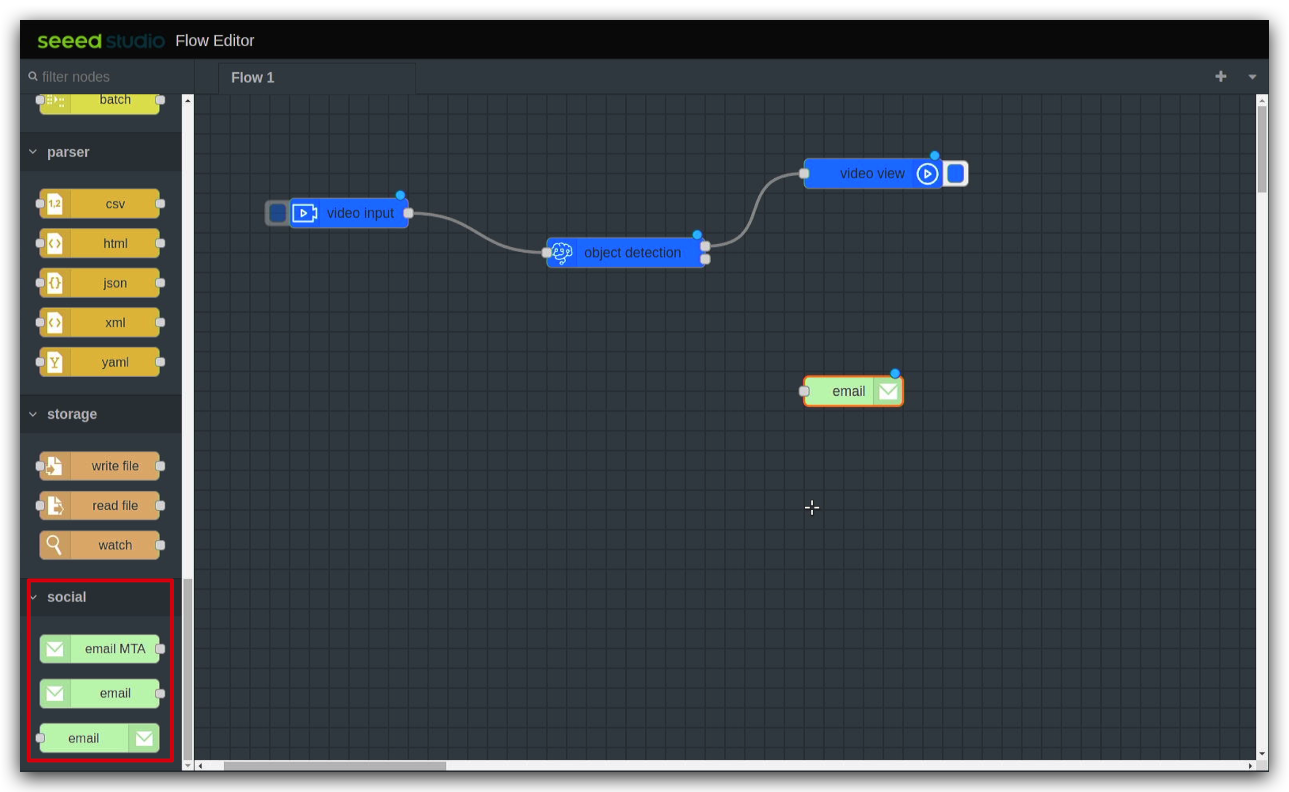
We can see the distribution of Edge AI Tool operations in the diagram below.
-
Block Area: This area is home to a number of blocks that can be manipulated by the user.
-
Programming Area: This area is the user's Programming Area. The user can drag and drop blocks from the Block Area to the Programming Area to complete the program.
-
Setup Area: On the far right is the Setup Area. Here we can see the flow of the Programming Area and can complete some necessary settings or set up operations on blocks etc. in this area.
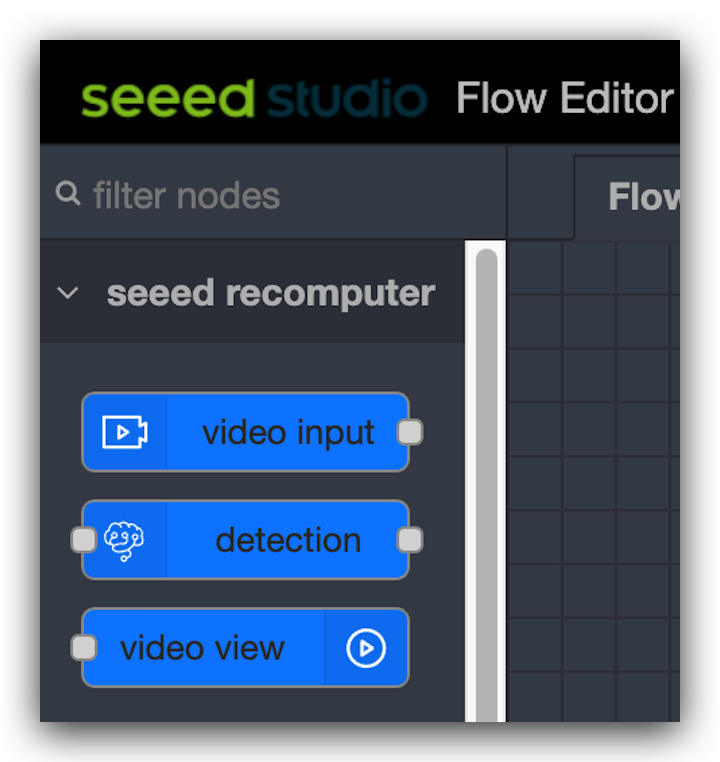
In the Block Area, there is a section called seeed recomputer where we will focus on the use of these three blocks.
-
video input: This lock is used to get the video stream from the camera input. This block can be set up to select a webcam or a local V4L2 USB camera etc.
-
detection: This block is used to select the model to be recognised. The input video stream will be recognised using the model you have selected. For the time being, only the COCO dataset can be used under this version.
-
video view: This block is used to output the processed video stream on the screen.
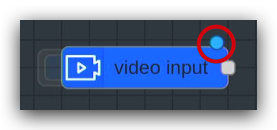
Next we can take a look at the composition of the blocks. Take the building block video input as an example.
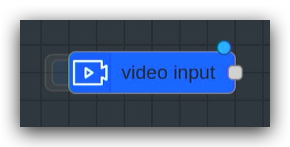
To the left of this block there is a square blue area. When this area is hidden, it means that the video streaming input is turned off.
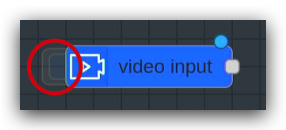
When this area is displayed, it means that the video streaming input is switched on.
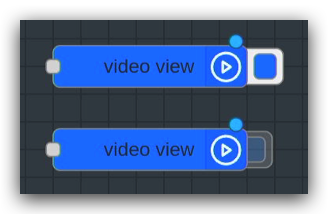
Similarly, the video view block has a square block like this on the right side. Hide turns off the display of the video stream output, the opposite is true.
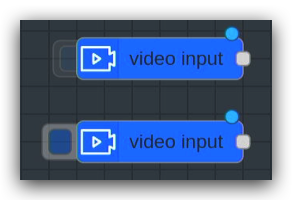
If there is a blue dot in the top right of the block, this is a reminder that the block has been edited, but not deployed. By the way, the whole project runs and needs to be programmed with blocks and deployed before the results are shown.
The grey square to the right of the block is where the blocks are connected. Left mouse click here and drag it to the next block to the left of the connection, then you can connect the two blocks to form a program flow.

It should be noted that the program flow is executed from left to right in this order, and that the left-hand join can only be connected to the right-hand join.
If there is no join to the left of the block, it should be used as the start node of the program flow. If the right-hand side of the block has no connections, then it should be used as the end node of the entire program flow.
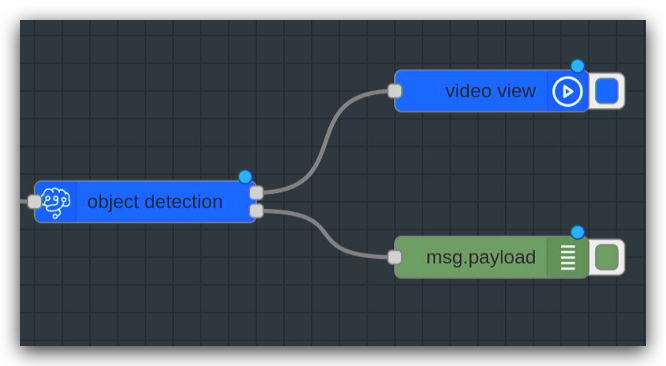
A block with two joints, like object detection, means that several different contents can be output to the block. It is then possible to output both video streams and logs.
The blocks are also very easy and quick to use. You can drag the block you want to use by long pressing the left mouse button and then drag it to the Programming Area of the main screen.
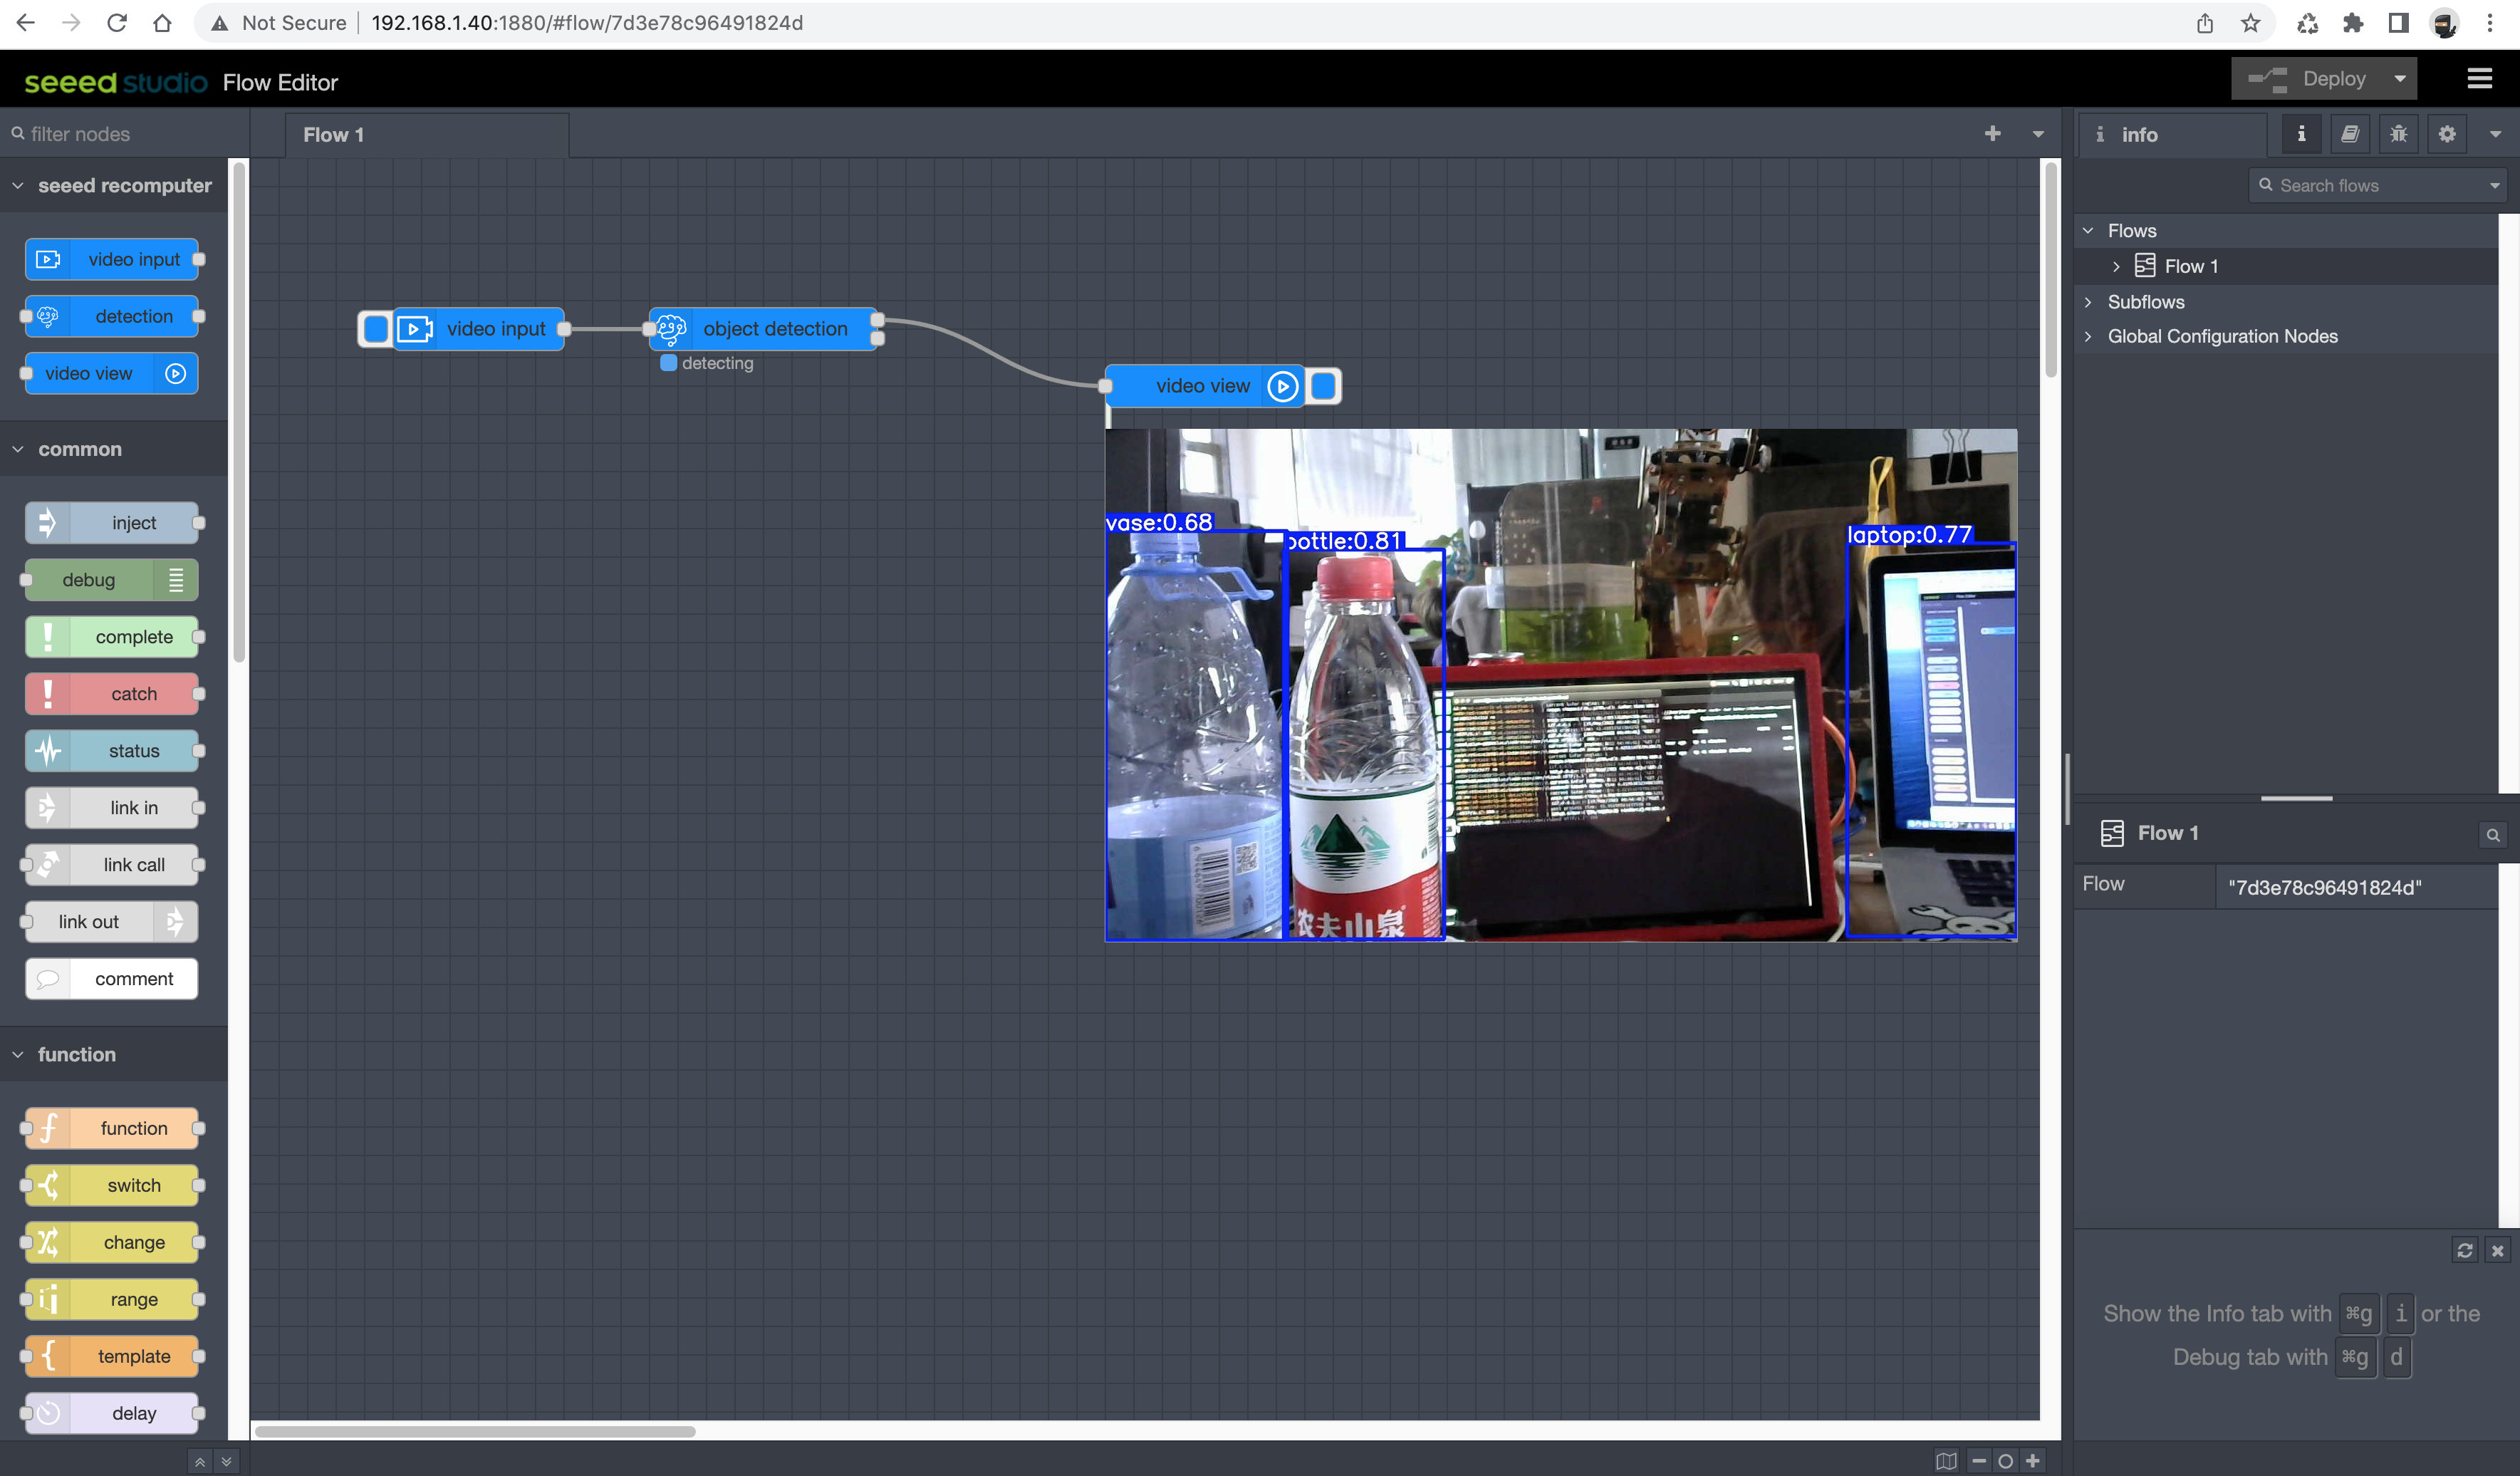
Based on the above description of the blocks, we can design a simple block procedure as follows.
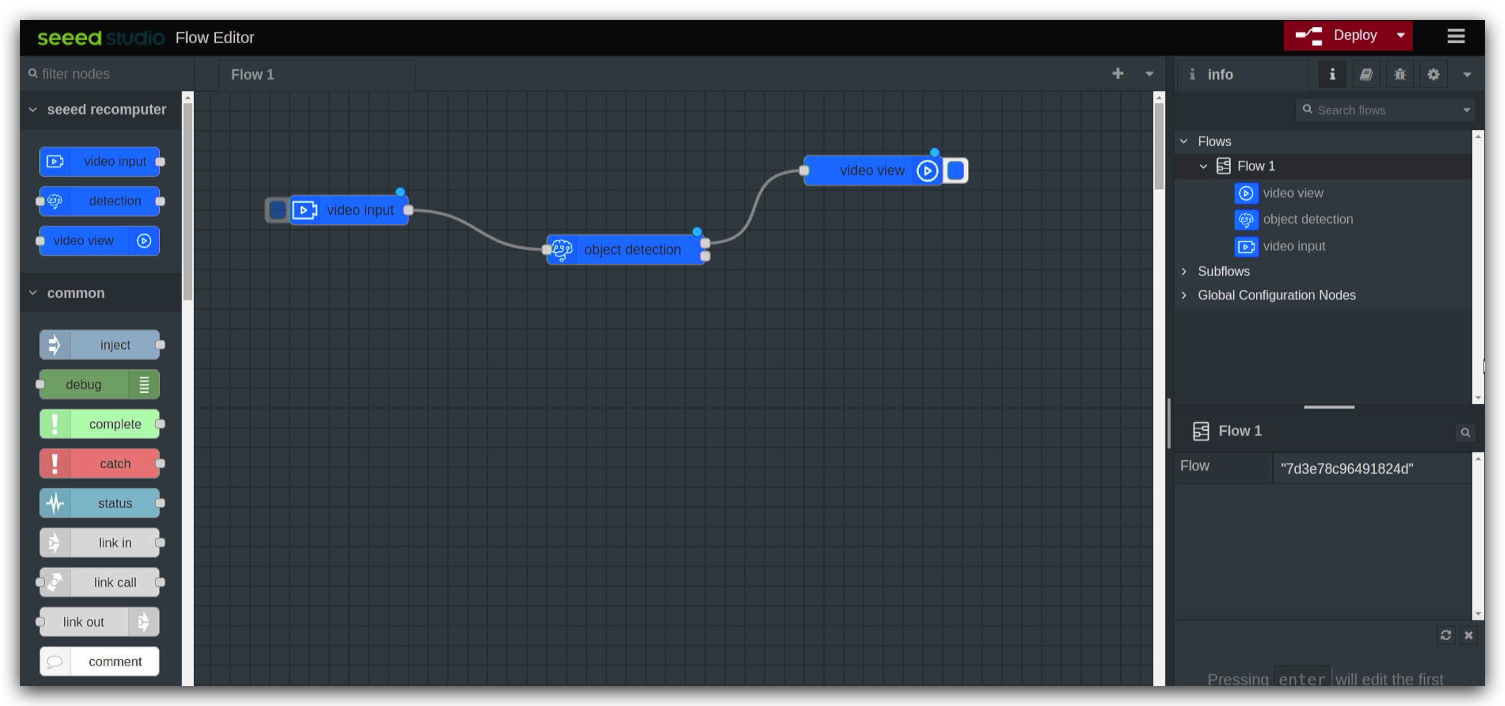
The program shown above is the one that takes the input video stream from the camera and then uses model detection to input the result of recognising the object.
Step 3. Show results
Once the blocks have been placed, we still need to make a simple configuration of the blocks before they can be used. If you want to set up a particular block, you can double click on it and the corresponding settings box will pop up on the right hand side.
Let's start by setting up the video input block.
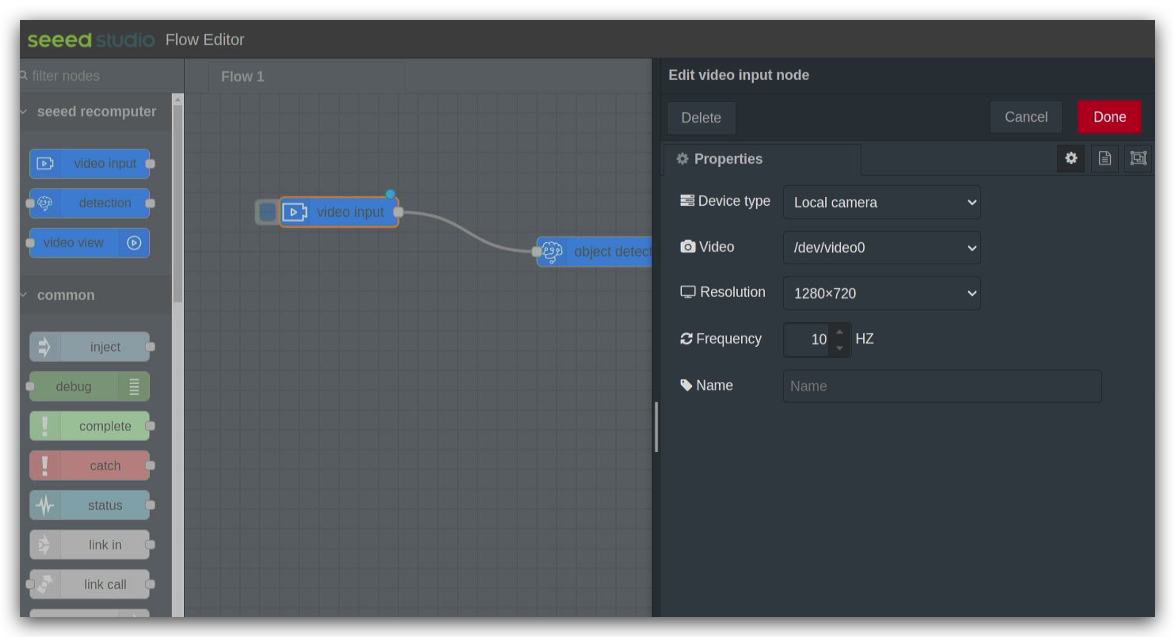
-
Device type: Here you can set the type of camera you have, currently two types of camera are supported, webcam and local camera.
-
Video: Select your camera here. If there is no camera available here, please double check that the camera is supported or that it is connected successfully.
-
URL: If you have selected a webcam, the Video field will become a URL. Here please fill in the input source of the webcam.
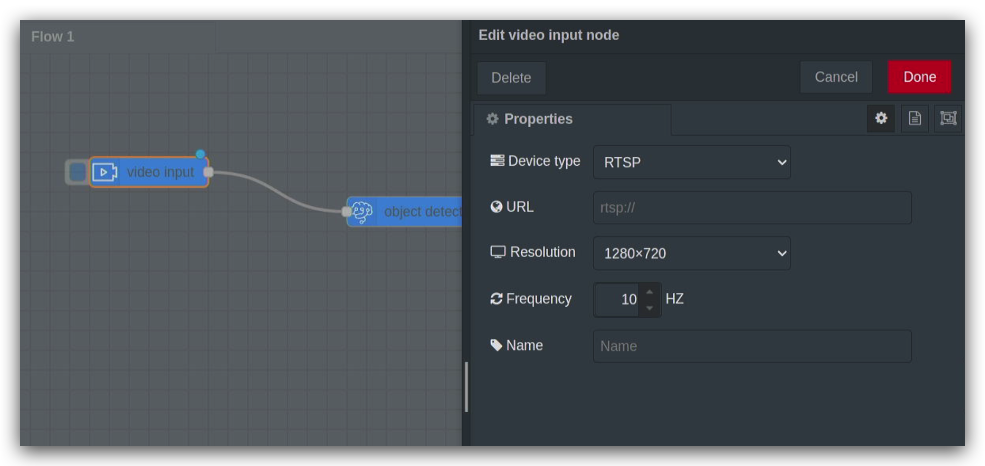
- Resolution: Select your camera resolution here. Selecting the wrong resolution may result in a runtime error.
For object detection block, the settings are as follows.
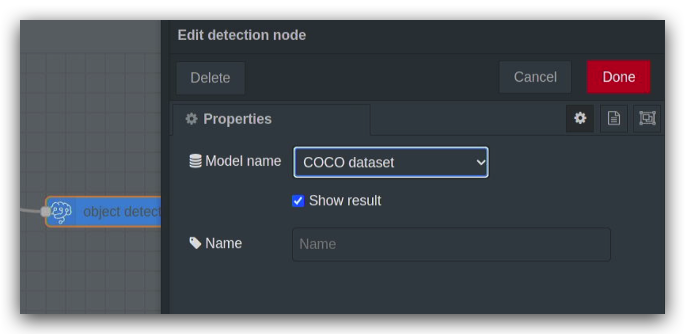
- Model name: Here you select the model name for object recognition, currently only the COCO dataset is supported.
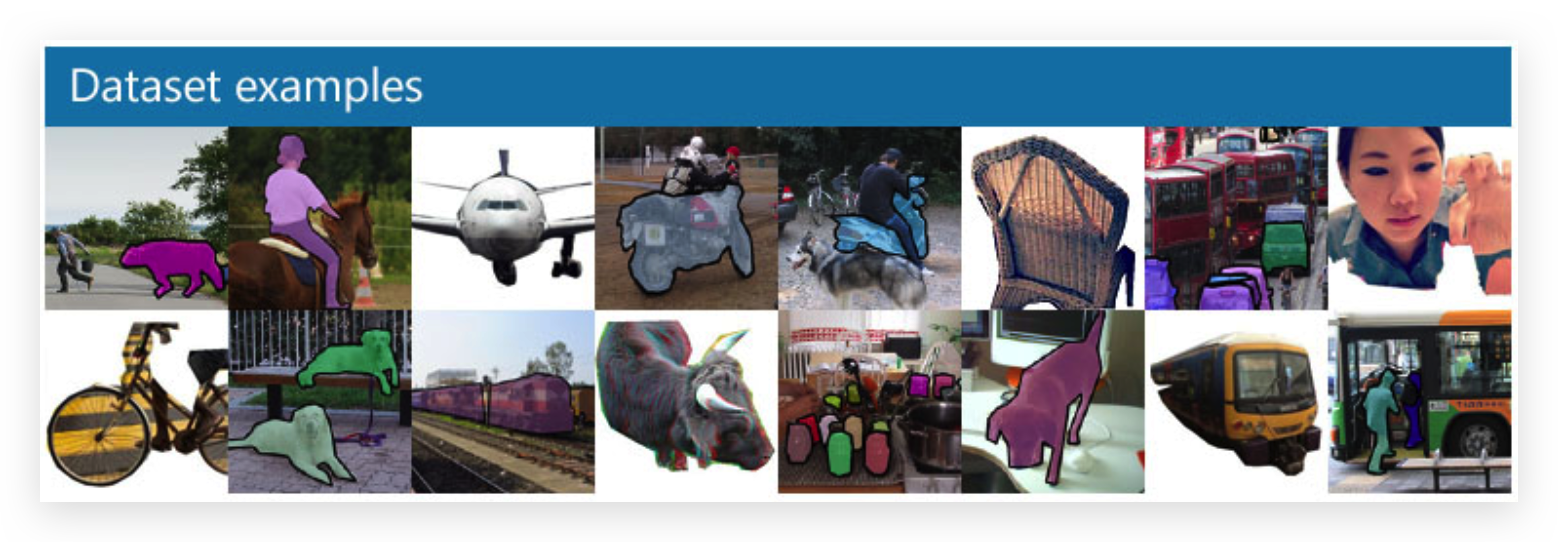
!!!Note COCO is a large-scale object detection, segmentation, and captioning dataset. COCO has several features:
- Object segmentation
- Recognition in context
- Superpixel stuff segmentation
- 330K images (>200K labeled)
- 1.5 million object instances
- 80 object categories
- 91 stuff categories
- 5 captions per image
- 250,000 people with keypoints
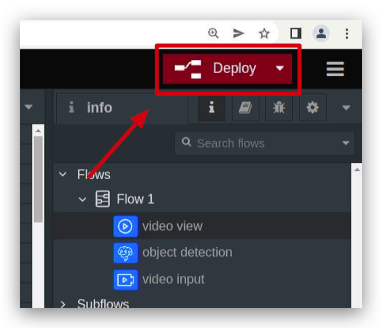
Once you have done so, click on the deploy button in the top right hand corner of the interface and the program stream will start running.
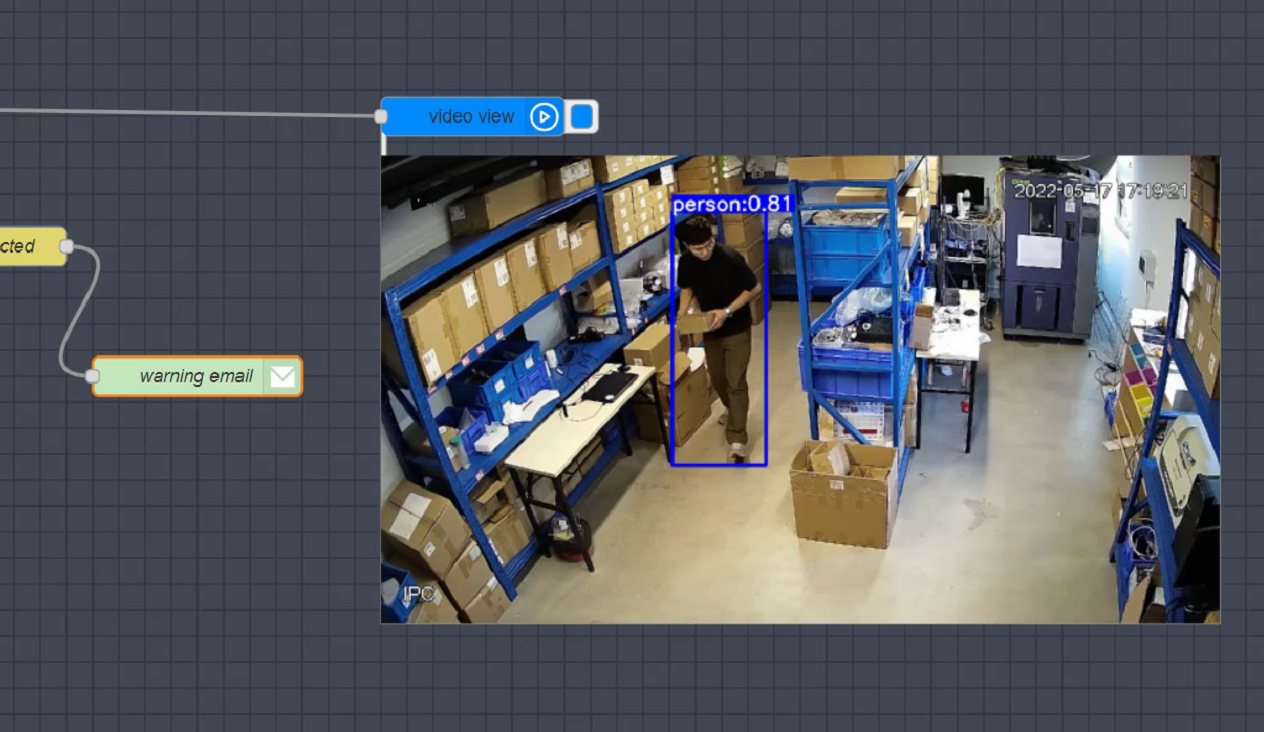
If everything is OK, you can see that the objects identified by the video stream are circled by boxes and given confidence values.
In-depth Operation
We experienced the Edge AI Tool program in its simplest form in the previous chapter. In this section we will take you through more extensions to Edge AI Tool.
Blocks Download
In addition to the blocks in the blocks section, we can download as many blocks as we need to complete more complex projects.
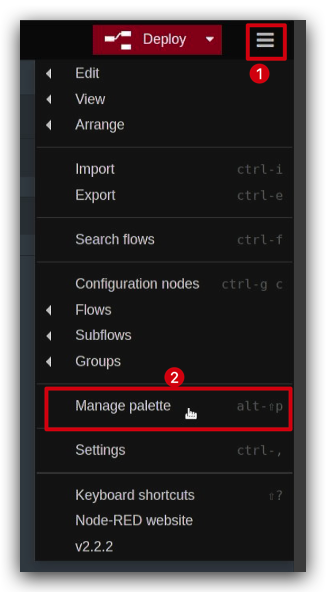
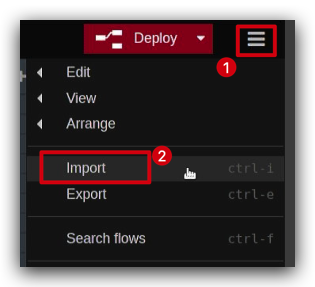
In the Setup Area on the right, there is a button for more options, we select Manage palette.
On the pop-up page, you can see the installed blocks and select Install to download more blocks. Here, we take the example of the mailbox block.
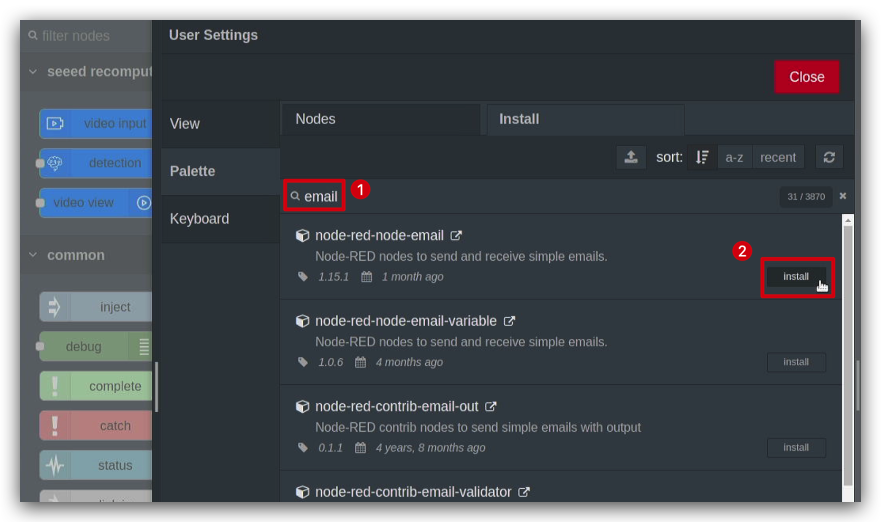
After installation, the newly installed blocks can be seen at the bottom of the blocks section.
Importing others projects
There are times when perhaps you would like to share your interesting projects for others to experience. Or maybe it is someone else's project that you would like to use yourself, then you can refer to the following ways.
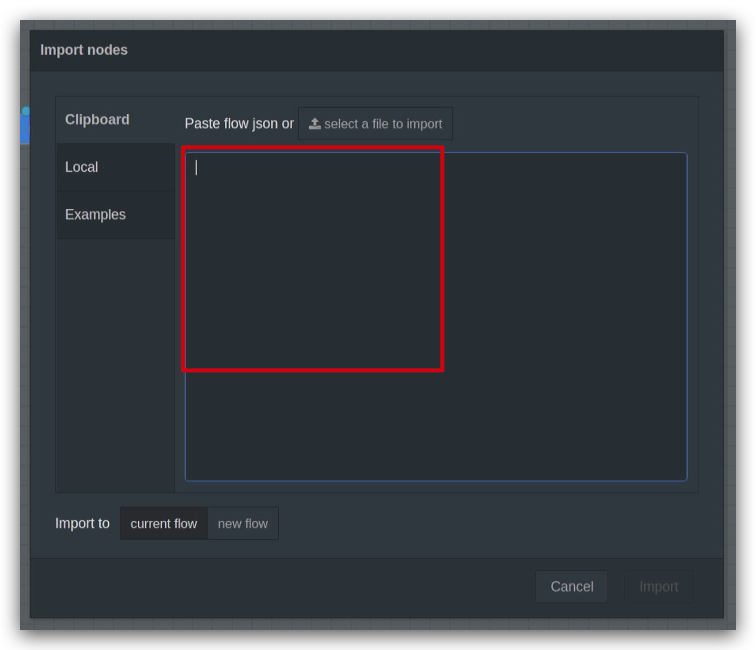
In the Setup Area on the right, there is a button for more options, we select Import.
Next we can paste the code we have shared or obtained in the pop-up window.
In this example, we will share with you a wonderful project that focuses on the ability to detect, in real time, whether someone has entered the environment through a camera and send an email notification if a person is detected.
[
    {
        "id": "7963f97f362cdfc6",
        "type": "tab",
        "label": "warning email",
        "disabled": false,
        "info": "",
        "env": []
    },
    {
        "id": "41a8f267df4eb722",
        "type": "video input",
        "z": "7963f97f362cdfc6",
        "name": "",
        "deviceType": "rtsp",
        "rtsp": "",
        "local": "video0",
        "resolution": "2560",
        "frequency": "60",
        "senderr": true,
        "active": false,
        "x": 160,
        "y": 140,
        "wires": [
            [
                "c5fef75b0ab418c6"
            ]
        ]
    },
    {
        "id": "c5fef75b0ab418c6",
        "type": "detection",
        "z": "7963f97f362cdfc6",
        "name": "",
        "modelName": "coco_dataset",
        "showResult": true,
        "senderr": true,
        "x": 380,
        "y": 200,
        "wires": [
            [
                "40523cc8b61cfcc9"
            ],
            [
                "689c67f6610be9e2"
            ]
        ]
    },
    {
        "id": "40523cc8b61cfcc9",
        "type": "video view",
        "z": "7963f97f362cdfc6",
        "name": "",
        "width": 640,
        "data": "payload",
        "dataType": "msg",
        "thumbnail": false,
        "active": false,
        "pass": false,
        "outputs": 0,
        "x": 650,
        "y": 140,
        "wires": []
    },
    {
        "id": "689c67f6610be9e2",
        "type": "switch",
        "z": "7963f97f362cdfc6",
        "name": "person intrusion detected",
        "property": "payload.labels",
        "propertyType": "msg",
        "rules": [
            {
                "t": "eq",
                "v": "person",
                "vt": "str"
            }
        ],
        "checkall": "true",
        "repair": false,
        "outputs": 1,
        "x": 410,
        "y": 540,
        "wires": [
            [
                "40f6ca0fbb322dd5"
            ]
        ]
    },
    {
        "id": "40f6ca0fbb322dd5",
        "type": "e-mail",
        "z": "7963f97f362cdfc6",
        "server": "",
        "port": "465",
        "secure": true,
        "tls": true,
        "name": "",
        "dname": "warning email",
        "credentials": {
            "userid": "",
            "password": ""
        },
        "x": 720,
        "y": 620,
        "wires": []
    },
    {
        "id": "80a51065a9ee835e",
        "type": "ui_spacer",
        "z": "7963f97f362cdfc6",
        "name": "spacer",
        "group": "529bf2dedebe9911",
        "order": 2,
        "width": 12,
        "height": 1
    },
    {
        "id": "529bf2dedebe9911",
        "type": "ui_group",
        "name": "Default",
        "tab": "ad4ccf9922566f44",
        "order": 1,
        "disp": true,
        "width": 20,
        "collapse": false,
        "className": ""
    },
    {
        "id": "ad4ccf9922566f44",
        "type": "ui_tab",
        "name": "Home",
        "icon": "dashboard",
        "disabled": false,
        "hidden": false
    }
]
Note that the code is not directly usable, you will need to fill in "rtsp": "", with the input source of your webcam. Fill in "server": "", with your email server address and "credentials": { "userid": "", "password": "" }, fill in your username and password.
When everything is ready, the block program works and pushes you an email when it detects activity.
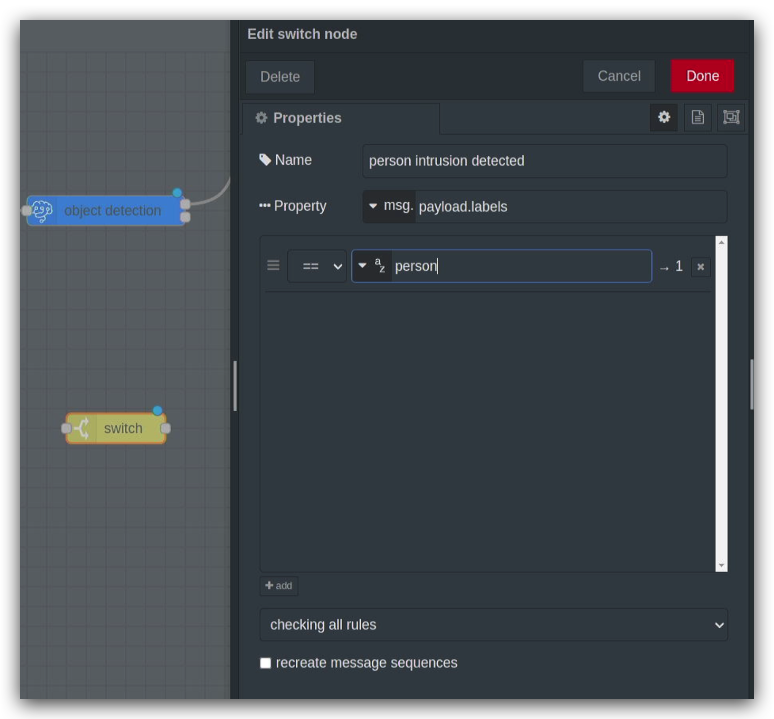
In this project, two new blocks are used, switch and email.
The switch building block is where you feel the program is going based on the judgement information you set. For example, in this program I have named the switch block person intrusion detected and filled in the property payload.labels. payload.labels is the key value of the previous block object detection. When the value of the property is equal to person, the block connected after switch is executed.
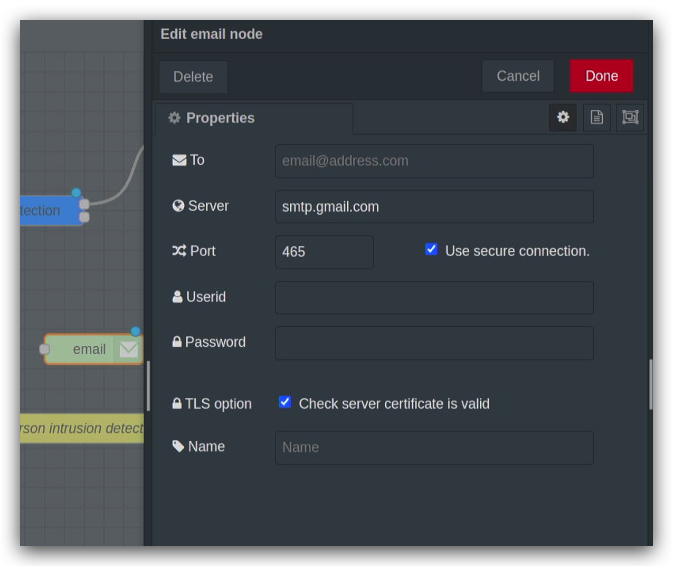
The email block is a little easier to set up, you just need to fill in the email address and server address that you want to receive messages from, depending on the protocol your mailbox supports.
Of course, if you copy the code directly and complete the code changes, you can make no further changes to the blocks. If you are more comfortable using the graphical interface, you can also complete the configuration of these elements in the block settings.
Troubleshooting
What should I do if docker does not start successfully and if there is no seed recomputer in the blocks?
We can shut down docker and restart it with the following command.
cd node-red-contrib-ml/
sudo docker-compose --file docker-compose.yaml down
sudo docker-compose --file docker-compose.yaml up
What should I do if I can't observe the results or if there are errors in the debug?
Please use the following command to see if the docker installation is correct. You should get the three dockers shown in the diagram. if any of them are missing, go back to the first step in Getting Started and reinstall the docker.
sudo docker image ls

If the installation matches the image, then check the running status of the launched docker using the following command.
sudo docker ps

If there is no docker started as in the picture above, try restarting the docker or check if the model and system version of the device match the requirements.
Tech Support & Product Discussion
Thank you for choosing our products! We are here to provide you with different support to ensure that your experience with our products is as smooth as possible. We offer several communication channels to cater to different preferences and needs.