Getting Started with Home Assistant on ODYSSEY-X86
Introduction
This wiki will walkthrough step-by-step on how you can turn your ordinary house into a smart one just by using an ODYSSEY-X86! By the end of this wiki, you will be able to view a beautiful dashboard on your PC, tablet, smartphone, reTerminal and be able to control your home appliances and view other information such as sensor data right at your fingertips. So, let's get started!
What is Home Assistant?
Home Assistant is a free and open-source software for home automation designed to be a central control system for smart home devices, which can be referred to as a smart home hub. It offers you home automation without needing the cloud, which means your home automation system is not dependent on remote servers or an internet connection. This local control means, you can have far better security than cloud connected devices. Also, it offers greater reliability when it comes to keep it running 24x7.
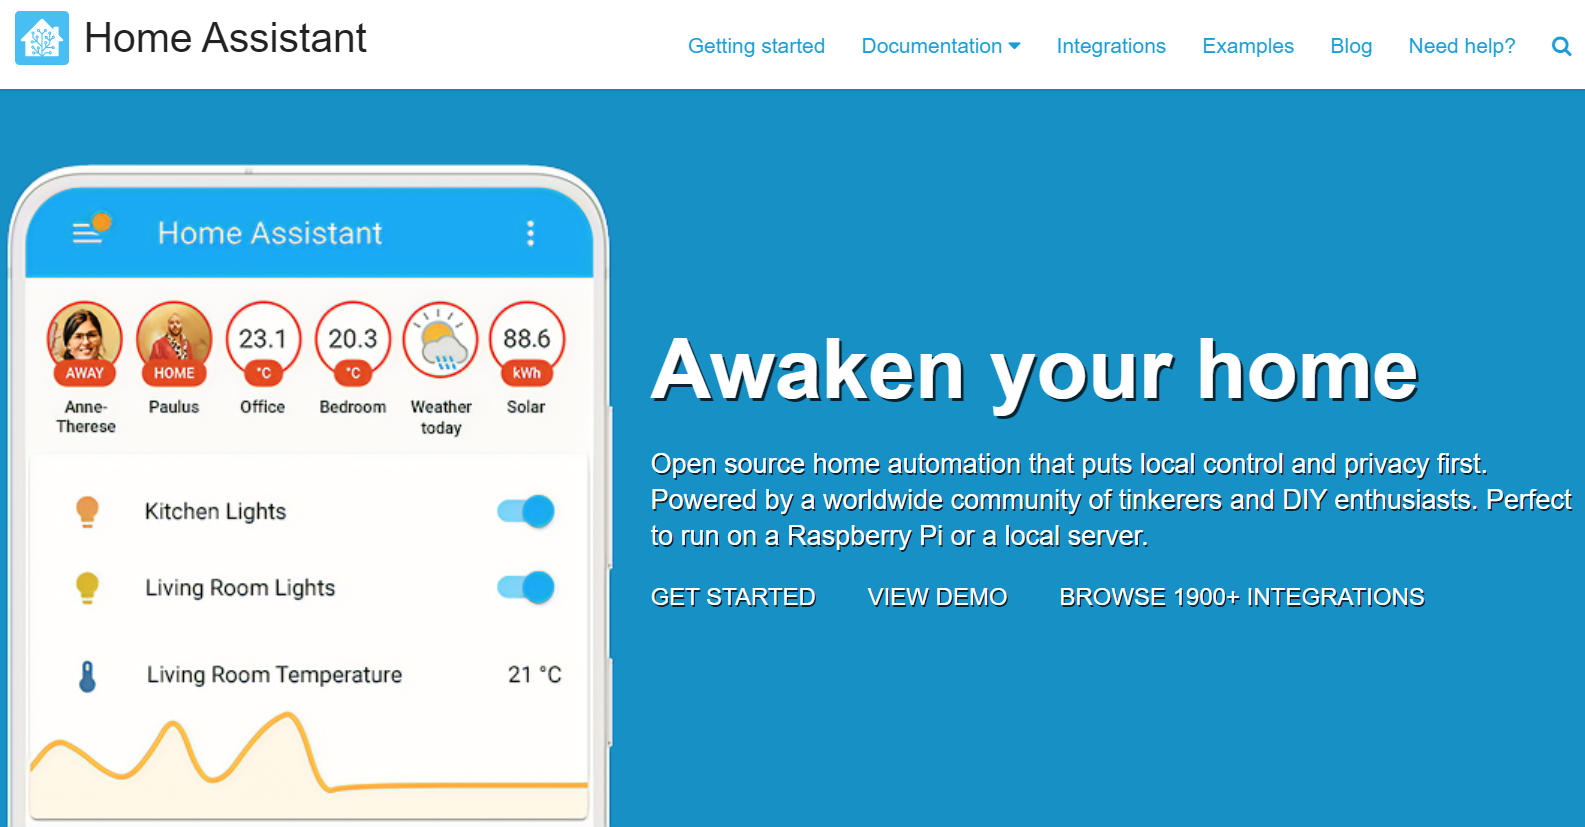
It is flexible to use and very easy to get started even for beginners with the great documentation offered by Home Assistant. Also, there is an active community on Home Assistant Forum with many members who will be there to help you if you come across any issues when building and running Home Assistant.
After setting up Home Assistant, it can be accessed through a web-based user interface by using companion apps for Android and iOS, or by voice commands via a supported virtual assistant such as Google Assistant or Amazon Alexa.
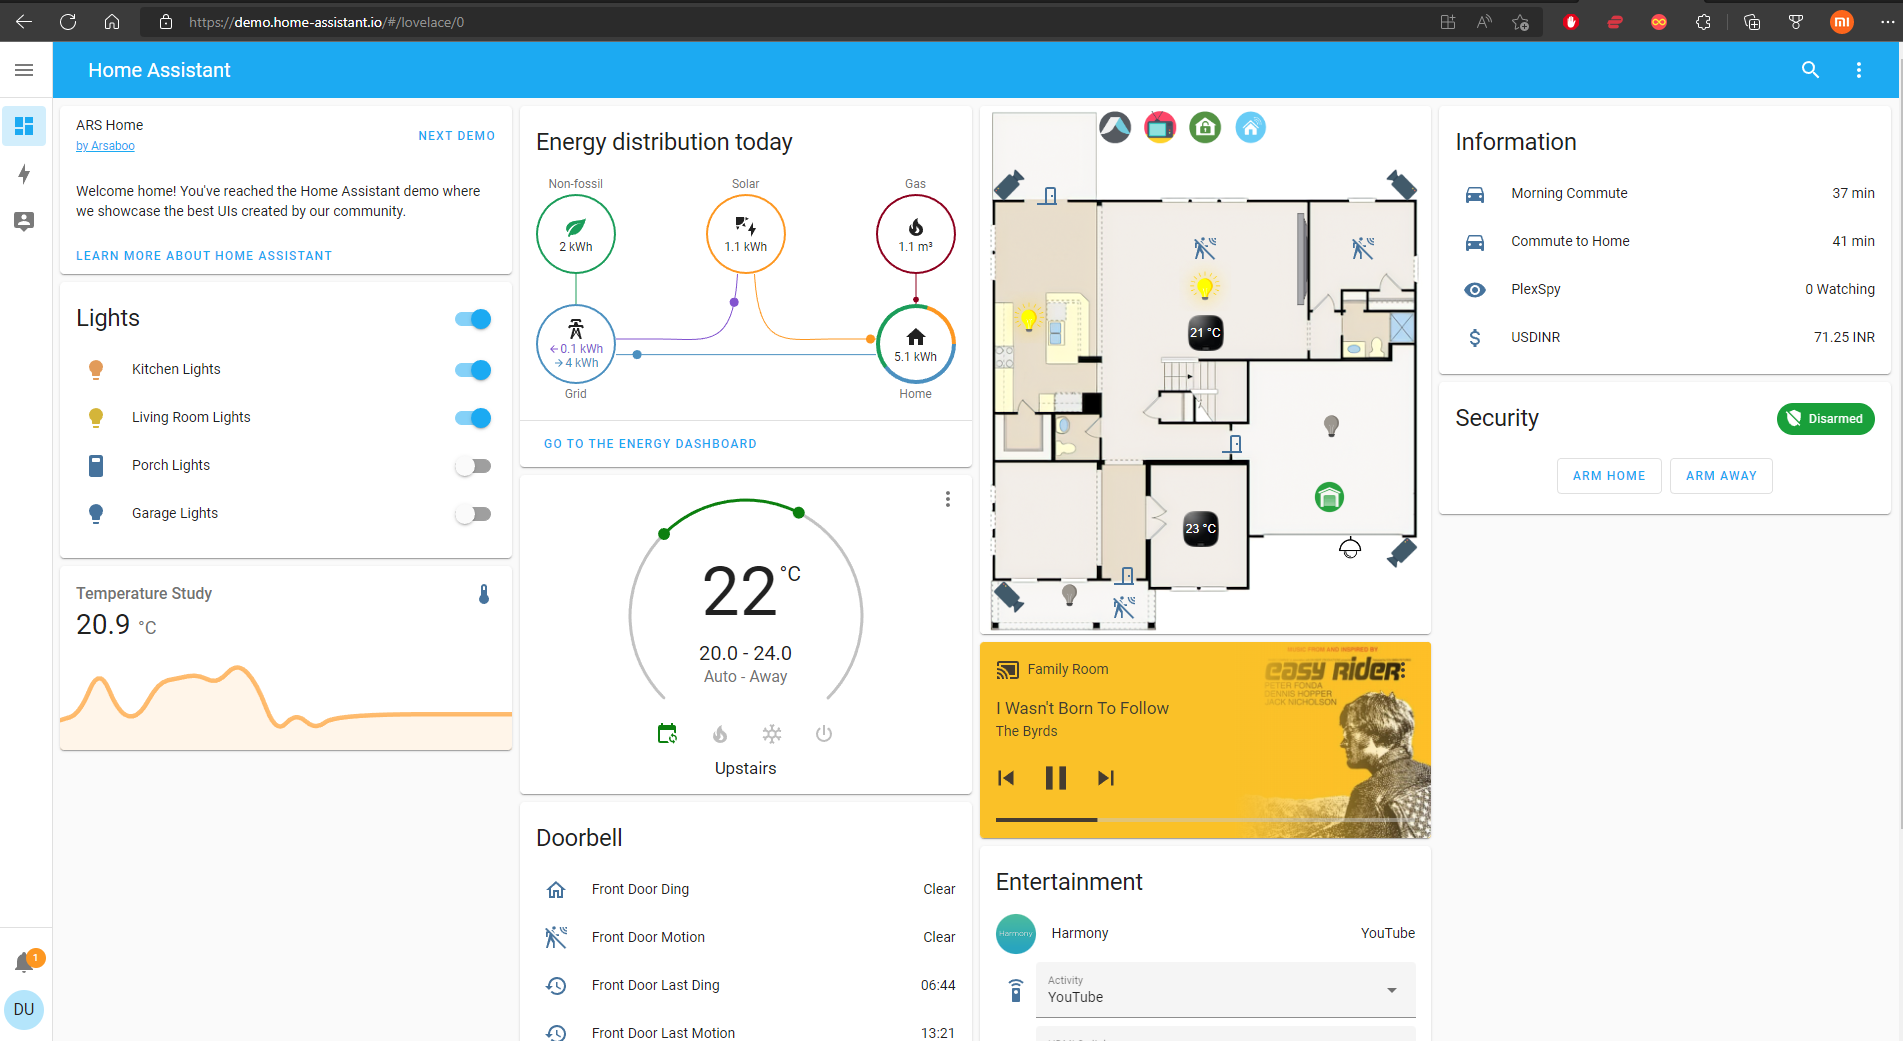
If you want to quickly experience a demo on your web browser, please click here.
Different installation methods
Home Assistant is supported to run on different hardware such as a Raspberry Pi, ODROID, ASUS Tinkerboard, Intel NUC, Windows/ Linux/ Mac PCs. And with this, comes different methods of installation on different hardware. To learn more about all these installation methods please visit this page.
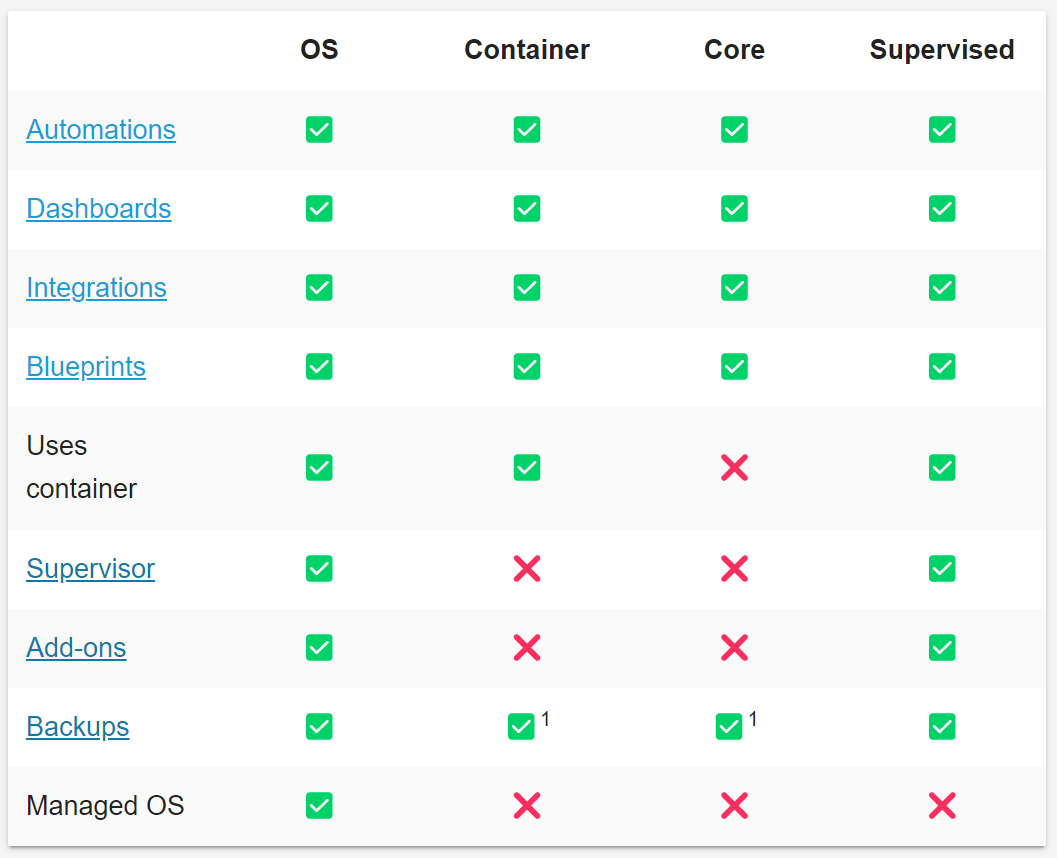
As you can see below, there are 4 main types of installation methods and not all Home Assistant features are supported by all installation methods.
Installation Method for ODYSSEY - X86
According to Home Assistant, the two recommended methods of Home Assistant installation are OS and Container method. Here we will use OS method because it will give access to all the features of Home Assistant.
Why not Home Assistant Container?
If we install Home Assistant Container on ODYSSEY-X86, we will be missing out on several Home Assistant features. So we will skip on that installation. However, if you want to explore this installation method, you can follow this guide.
Let's build it
Now let's go through the process of installing Home Assistant OS on ODYSSEY-X86.
There are different ways to install Home Assistant OS on ODYSSEY-X86. The most simplest way would be to directly flash the Home Assistant OS image to a USB flash drive, connect the USB drive to ODYSSEY-X86 and run Home Assistant from it.
The other way would be to install Home Assistant OS on a different storage device such as an external HDD, SSD, M.2 SSD and the onboard eMMC(for ODYSSEY-X86 eMMC version). This method can guarantee that you have a reliable storage device in comparison with a USB drive.
We will explain how to install Home Assistant OS in both methods!
Run Home Assistant from a USB flash drive
- Step 1. Connect a USB flash drive to your PC
Note: It is recommended to use a flash drive with at least 16GB of storage capacity
-
Step 2. Download and install Balena Etcher according to your operating system
-
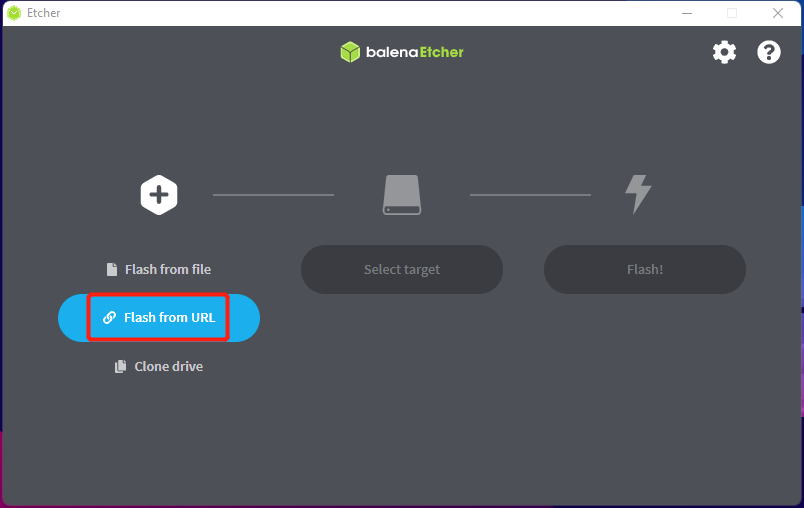
Step 3. Open Balena Etcher and select Flash from URL
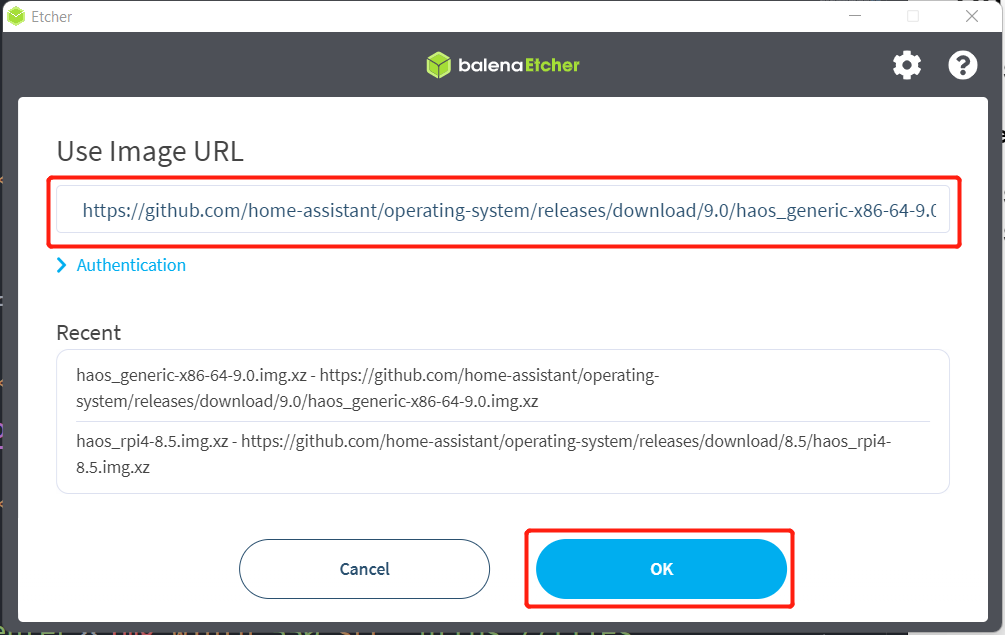
- Step 4. Copy and paste the below URL inside the empty box and click OK
https://github.com/home-assistant/operating-system/releases/download/9.0/haos_generic-x86-64-9.0.img.xz
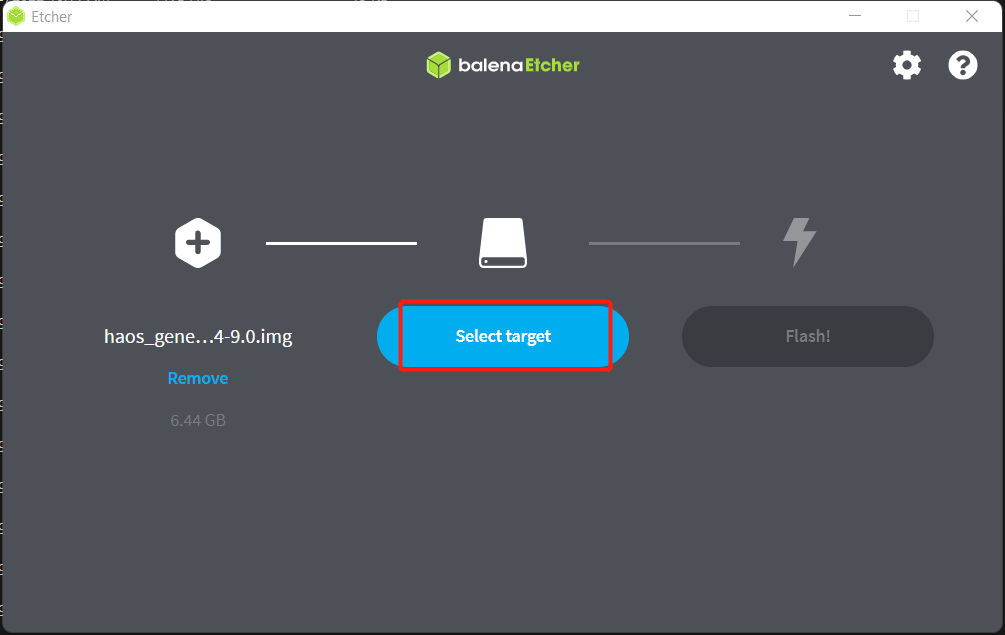
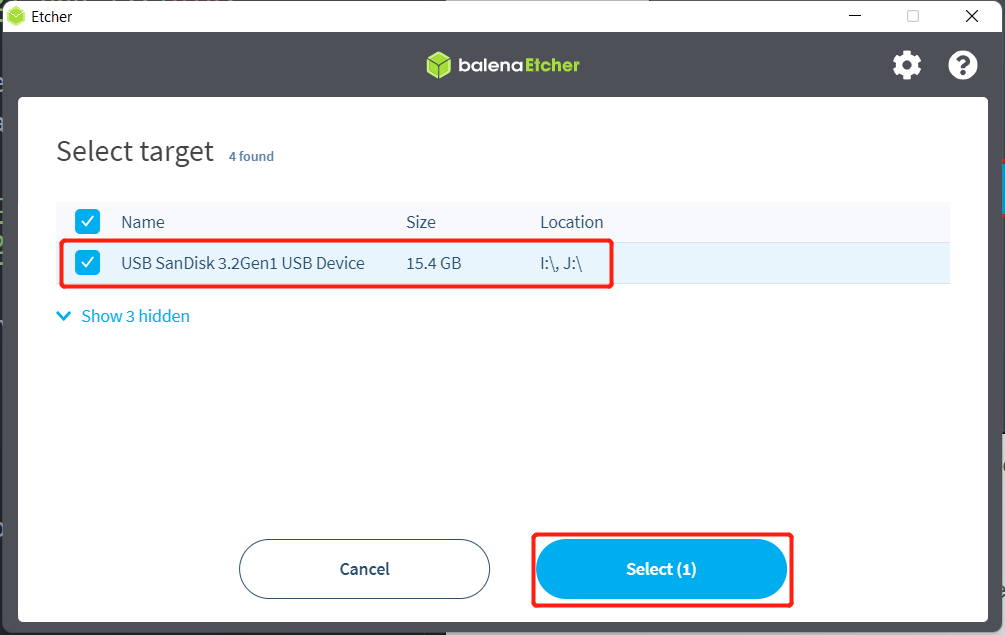
- Step 5. Once the image is downloaded, click Select target and select the connected USB flash drive
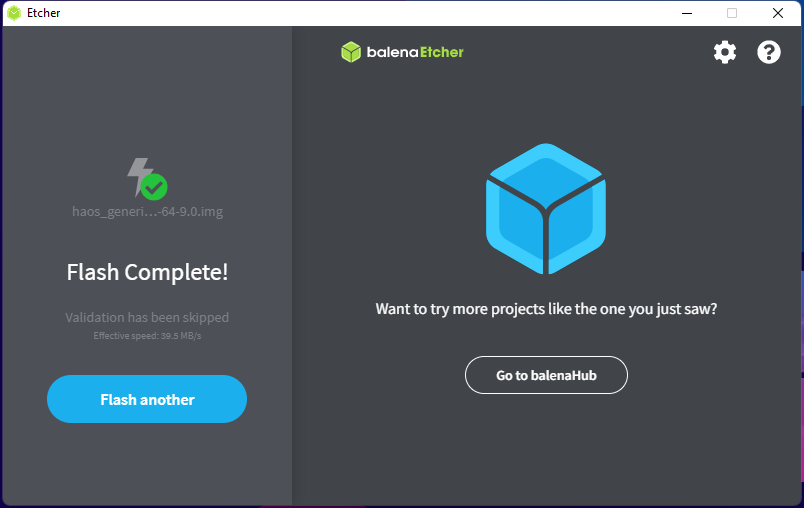
- Step 6. Click Flash to start writing the image to the USB flash drive
If the flashing process is successful, you will see the below output
-
Step 7. Connect this USB flash drive to one of the USB ports on the ODYSSEY-X86 and turn on the board
-
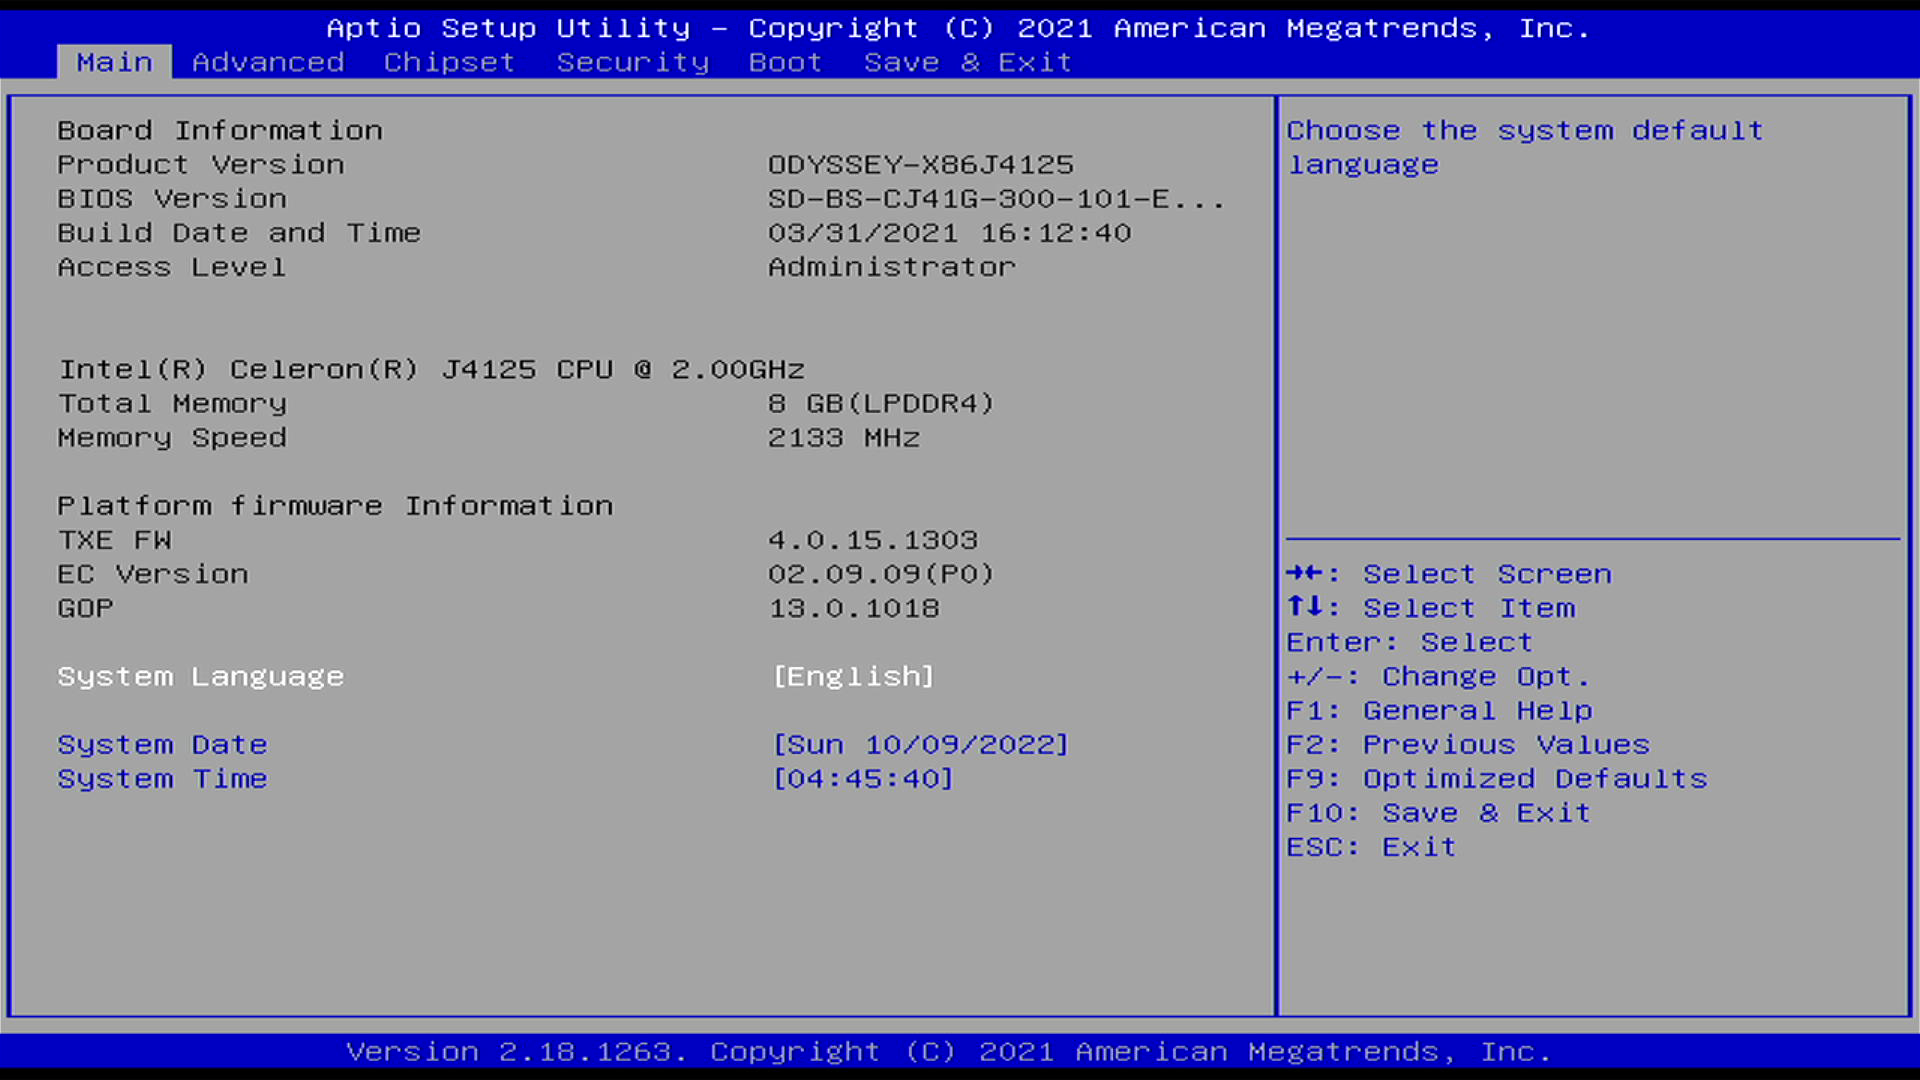
Step 8. Keep pressing DELETE key to enter BIOS
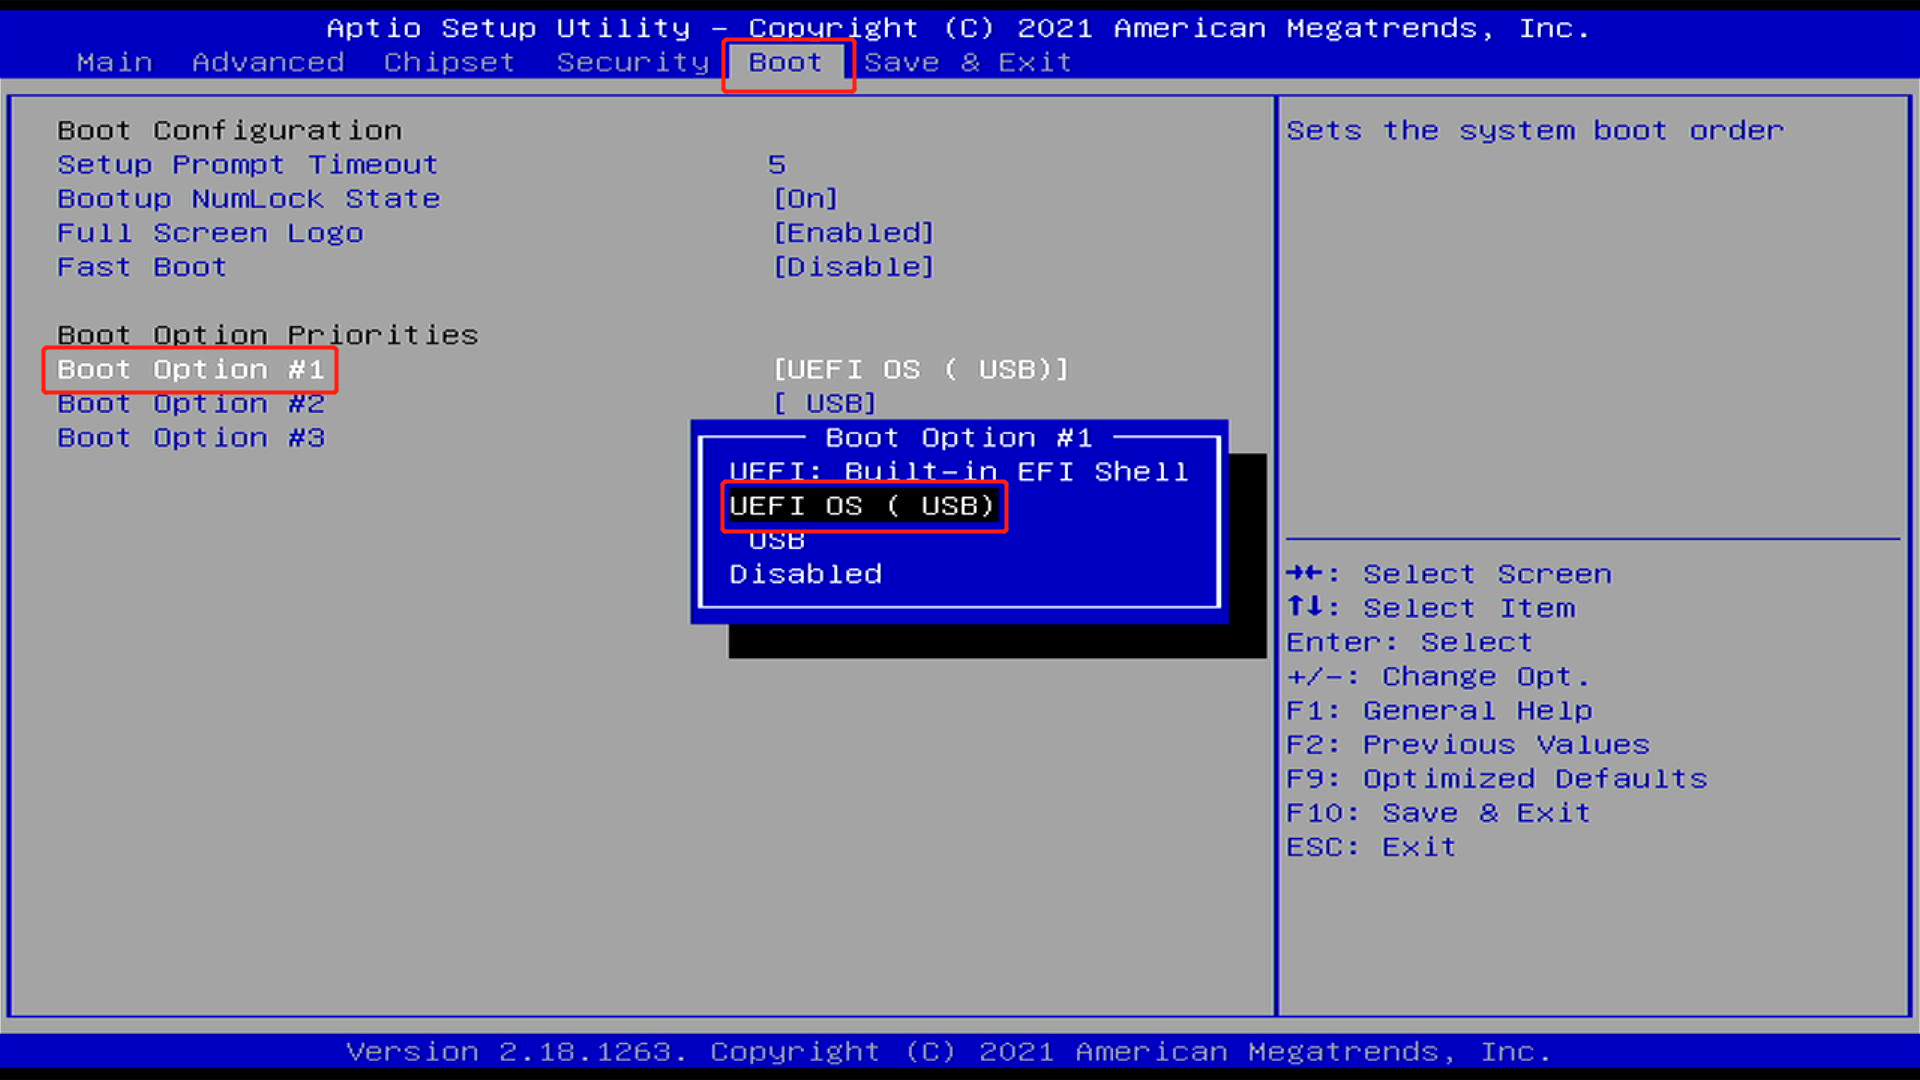
- Step 9. Go to Boot tab, select Boot Option #1 and select UEFI: OS (USB) and click Yes for the pop-up
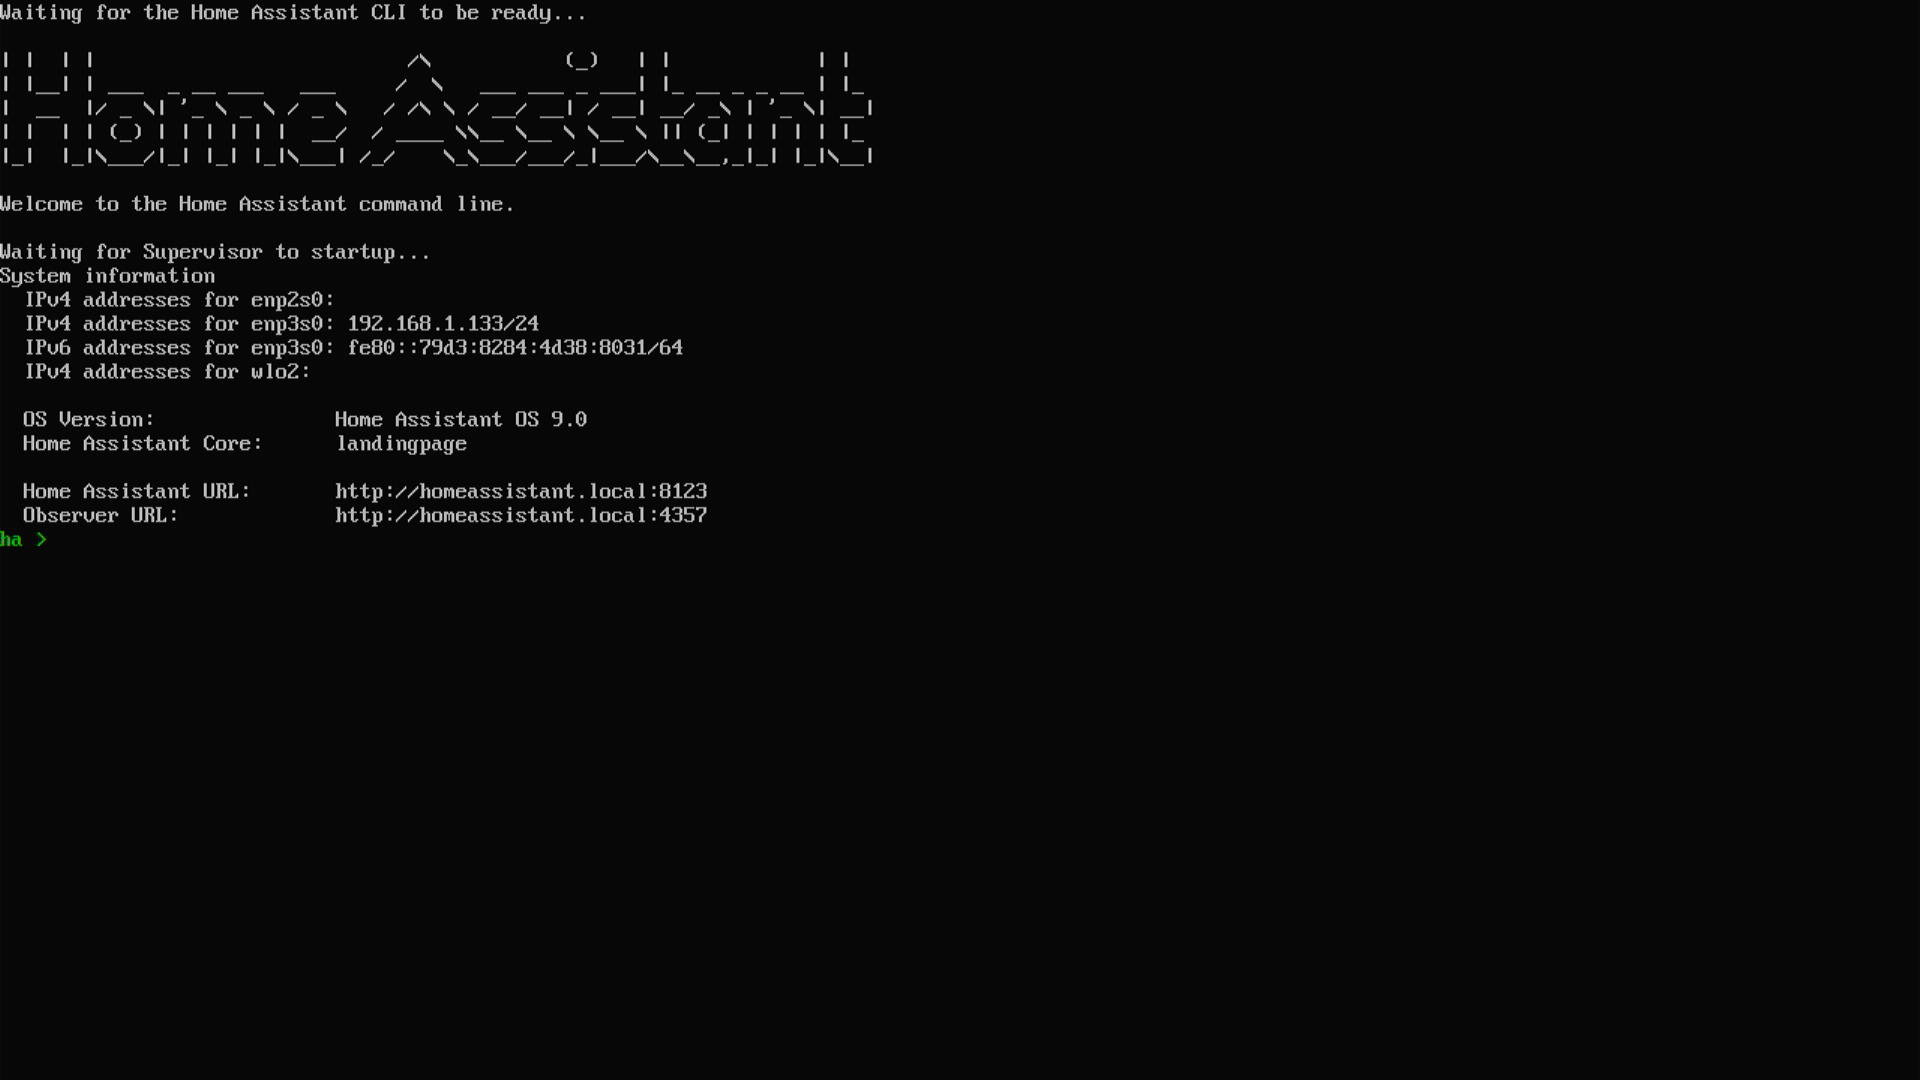
Now ODYSSEY-X86 will reboot and use the connected USB drive as the boot device. After successful booting into Home Assistant OS, you will see the below output
Run Home Assistant from external HDD/ SSD, M.2 SSD, eMMC
In this method, we will first create a bootable USB drive with Ubuntu Desktop and then boot ODYSSEY-X86 from it. After that we will flash Home Assistant OS to a drive (external HDD/ SSD, M.2 SSD, onboard eMMC) while we are inside the Ubuntu system and run Home Assistant from that drive.
-
Step 1. Download the latest Ubuntu Desktop image from here
-
Step 2. Connect a USB flash drive to your PC
Note: It is recommended to use a flash drive with at least 8GB of storage capacity
-
Step 3. Download and install Balena Etcher according to your operating system
-
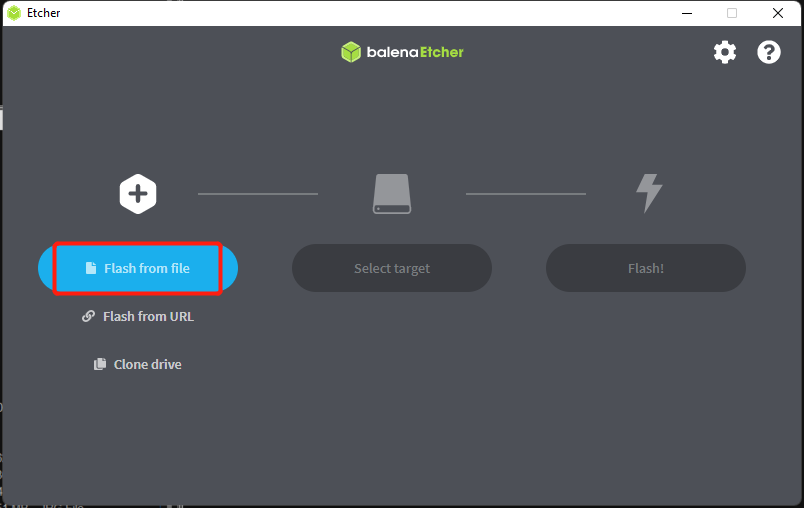
Step 4. Open Balena Etcher, select Flash from file
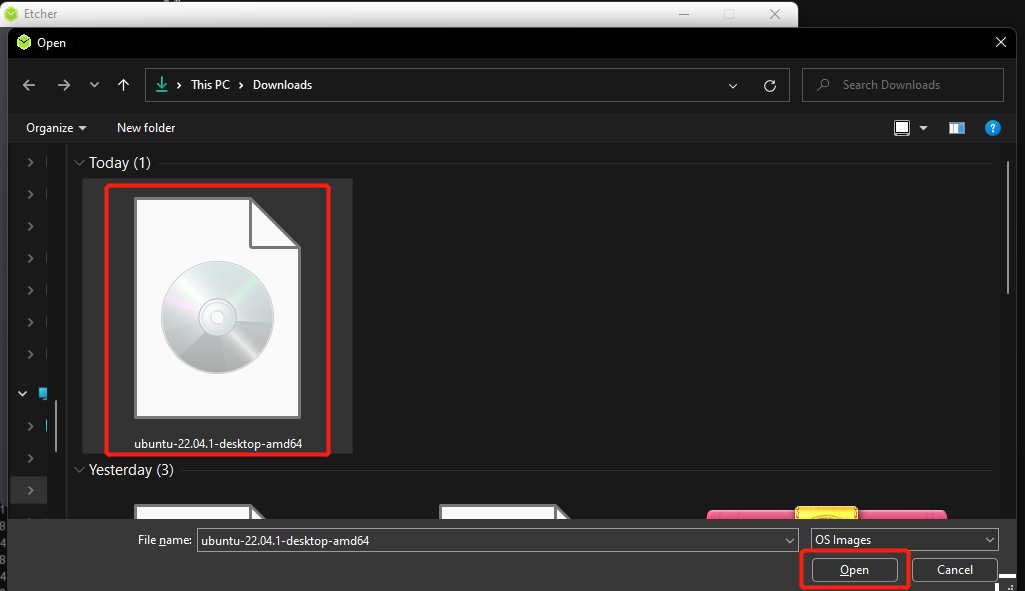
- Step 5. Click on downloaded .iso file and click Open
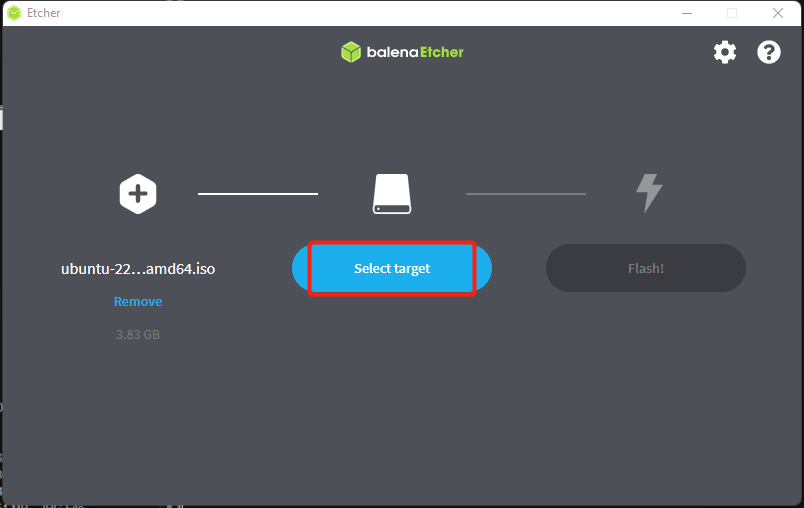
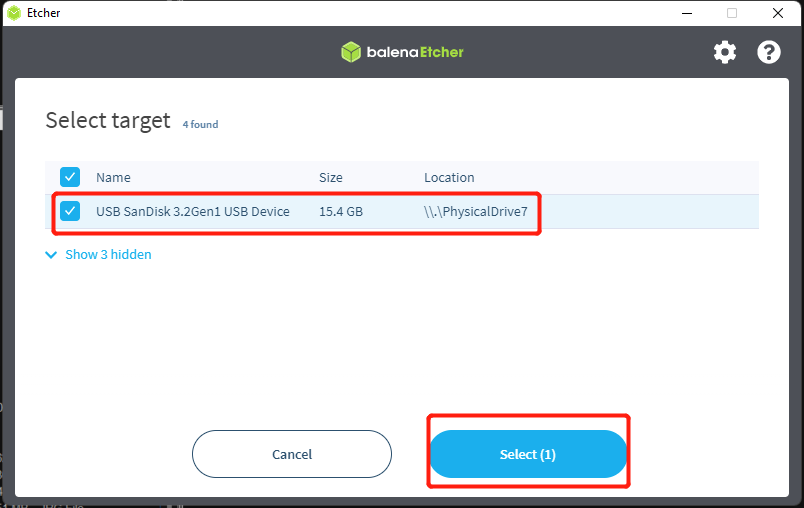
- Step 6. Click Select target, select the connected USB flash drive and click Select
- Step 7. Click Flash to flash Ubuntu server to USB flash drive
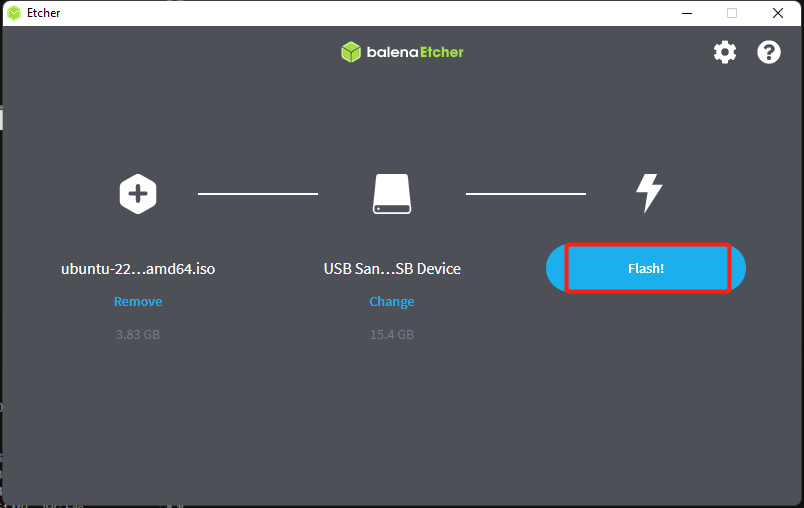
If the flashing process is successful, you will see the below output

- Step 8. Connect this USB flash drive to one of the USB ports on the ODYSSEY-X86, connect a storage drive (external HDD/ SSD, M.2 SSD) and power on the board
Note: Make sure a keyboard, mouse and a display is connected to ODYSSEY-X86
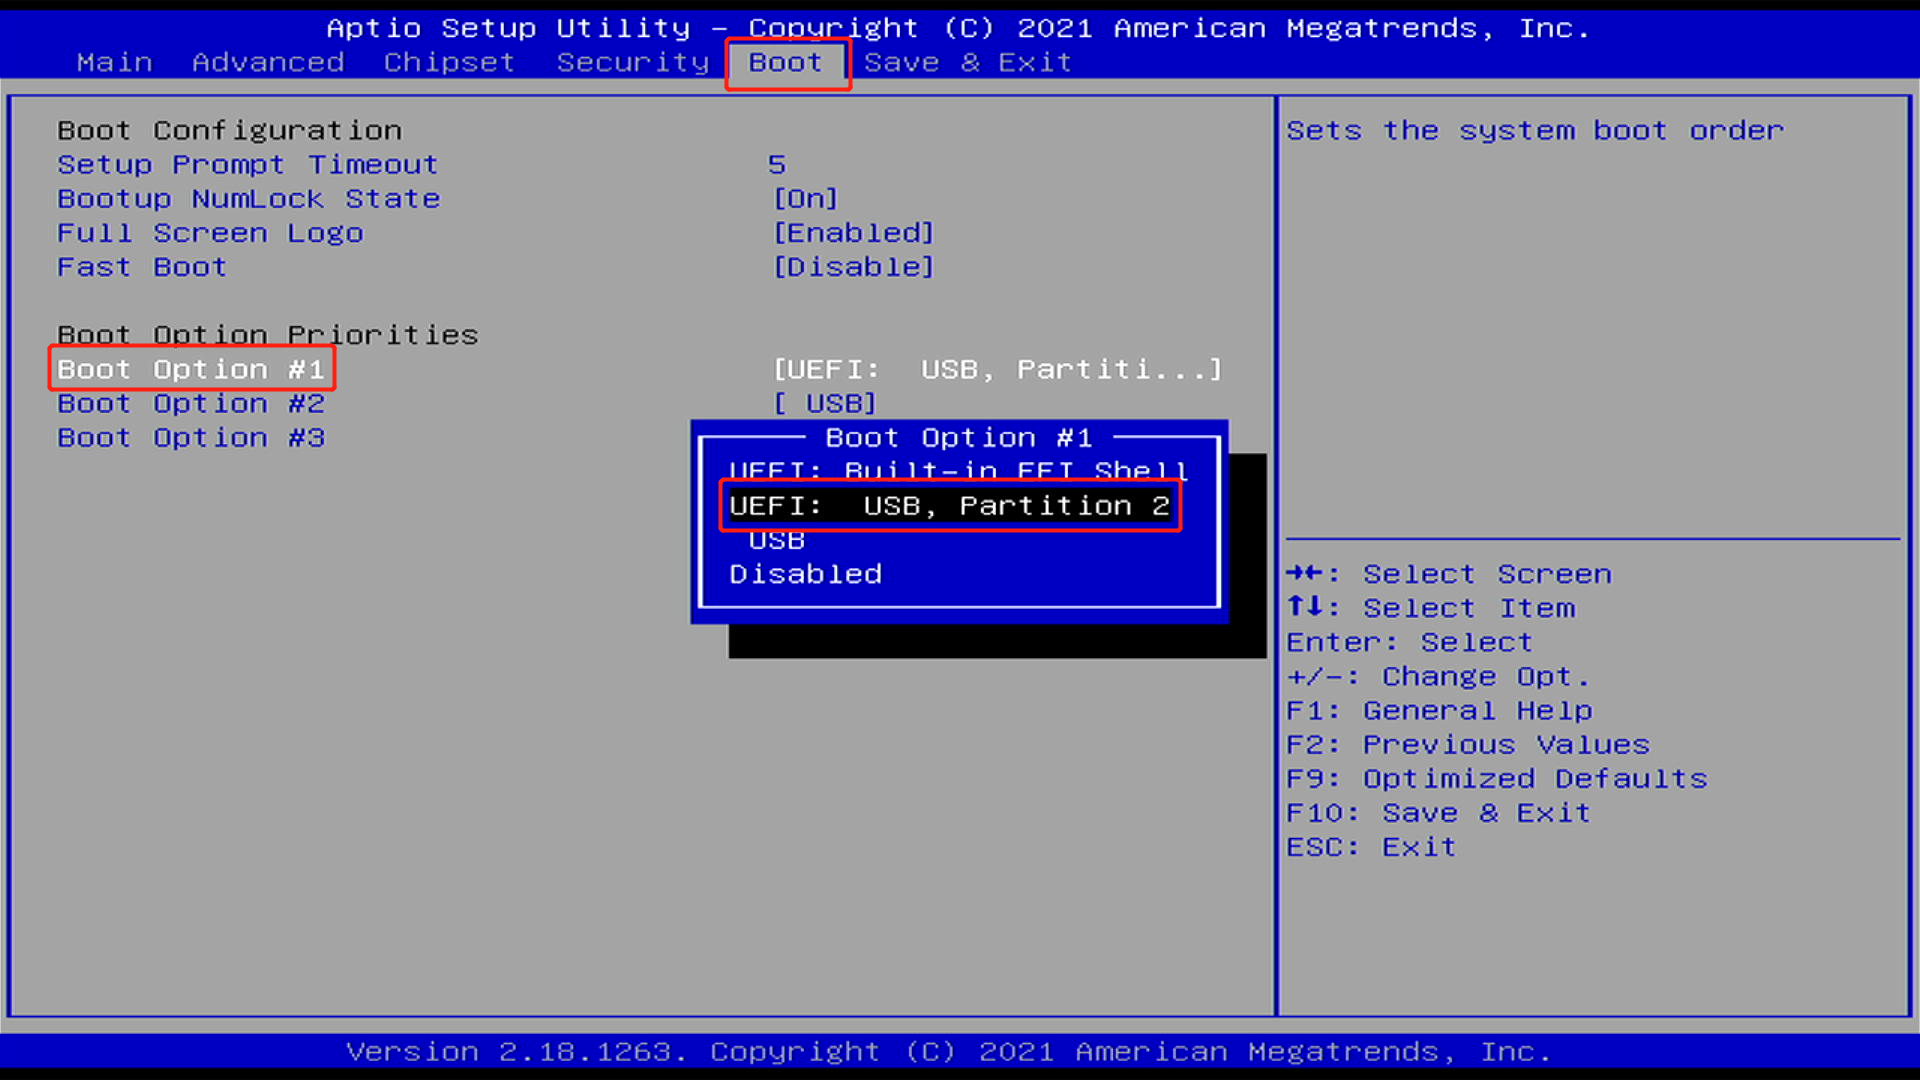
- Step 9. Keep pressing DELETE key to enter BIOS
- Step 10. Go to Boot tab, select Boot Option #1 and select UEFI: USB, Partition 2
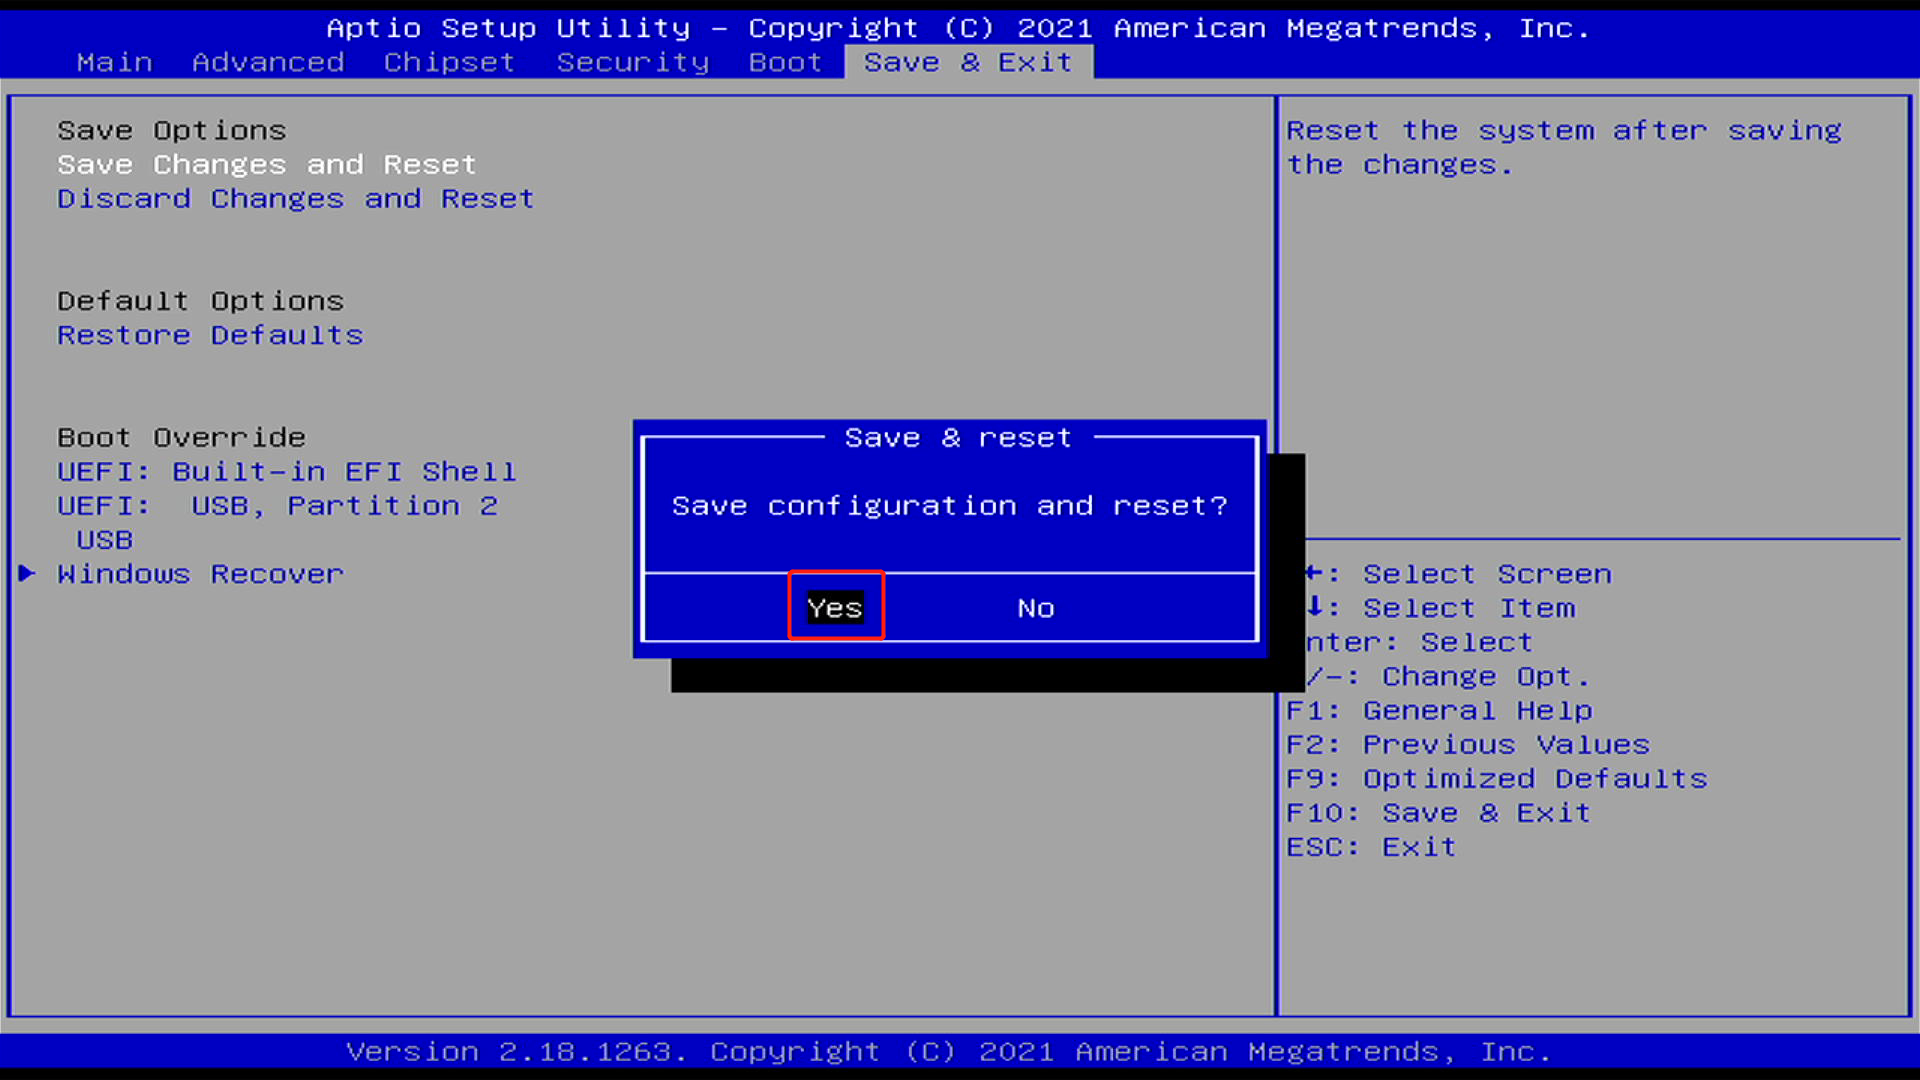
- Step 11. Go to Save & Exit tab, click Save Changes and Reset and click Yes for the pop-up
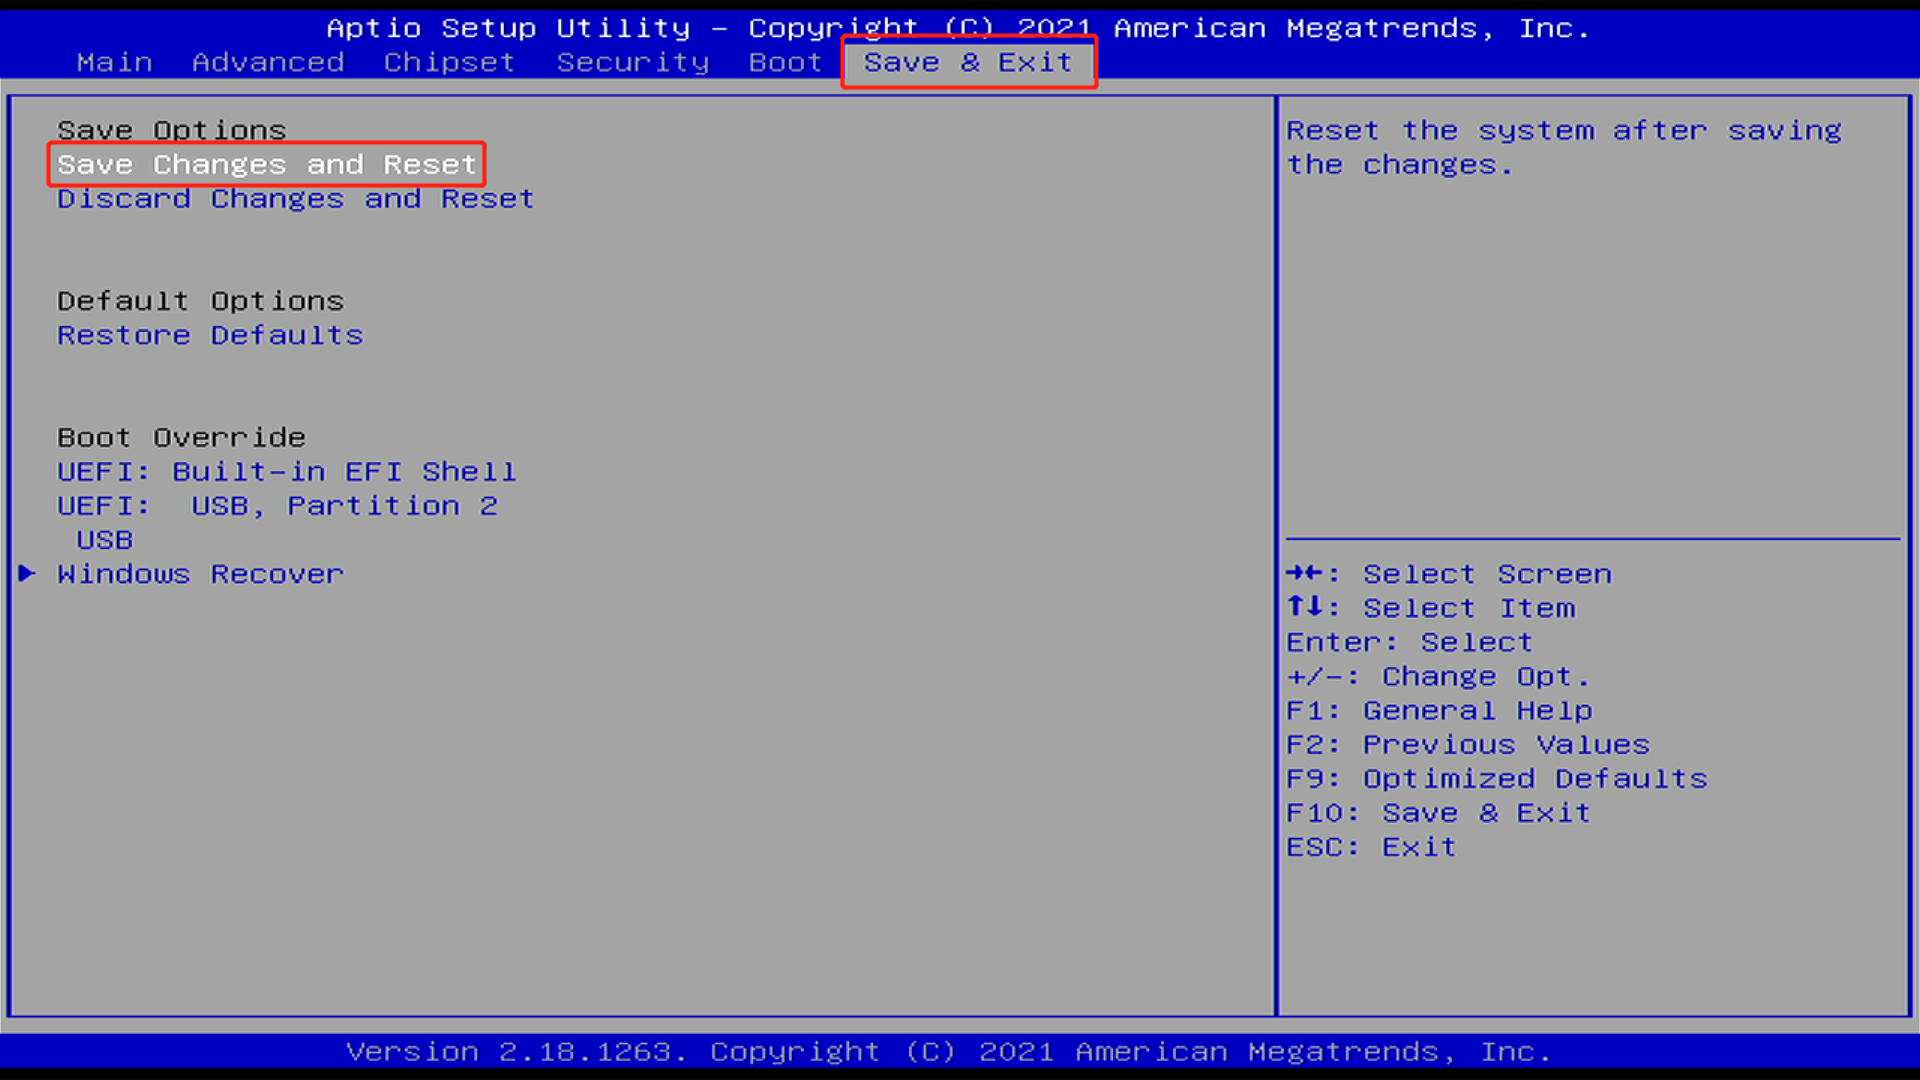
Now ODYSSEY-X86 will reboot and use the connected USB drive as the boot device.
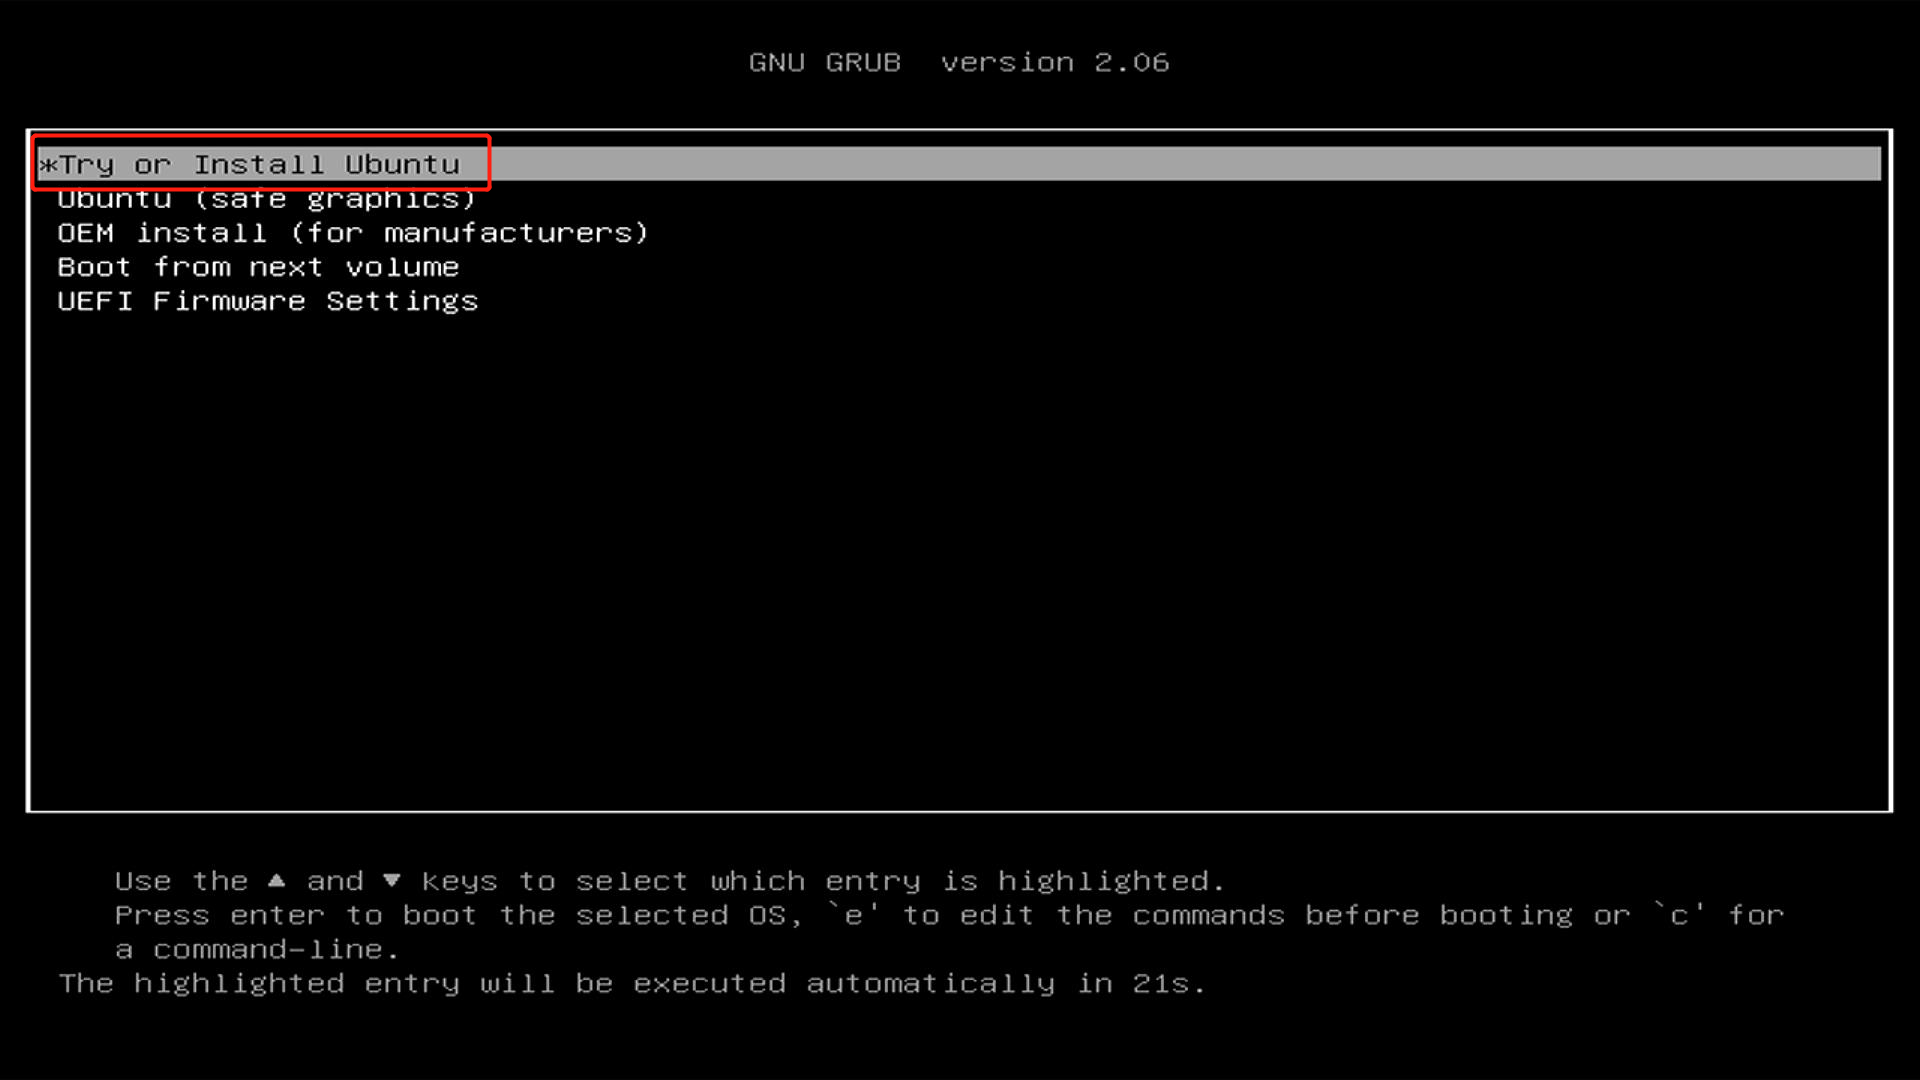
- Step 12. Select Try or Install Ubuntu
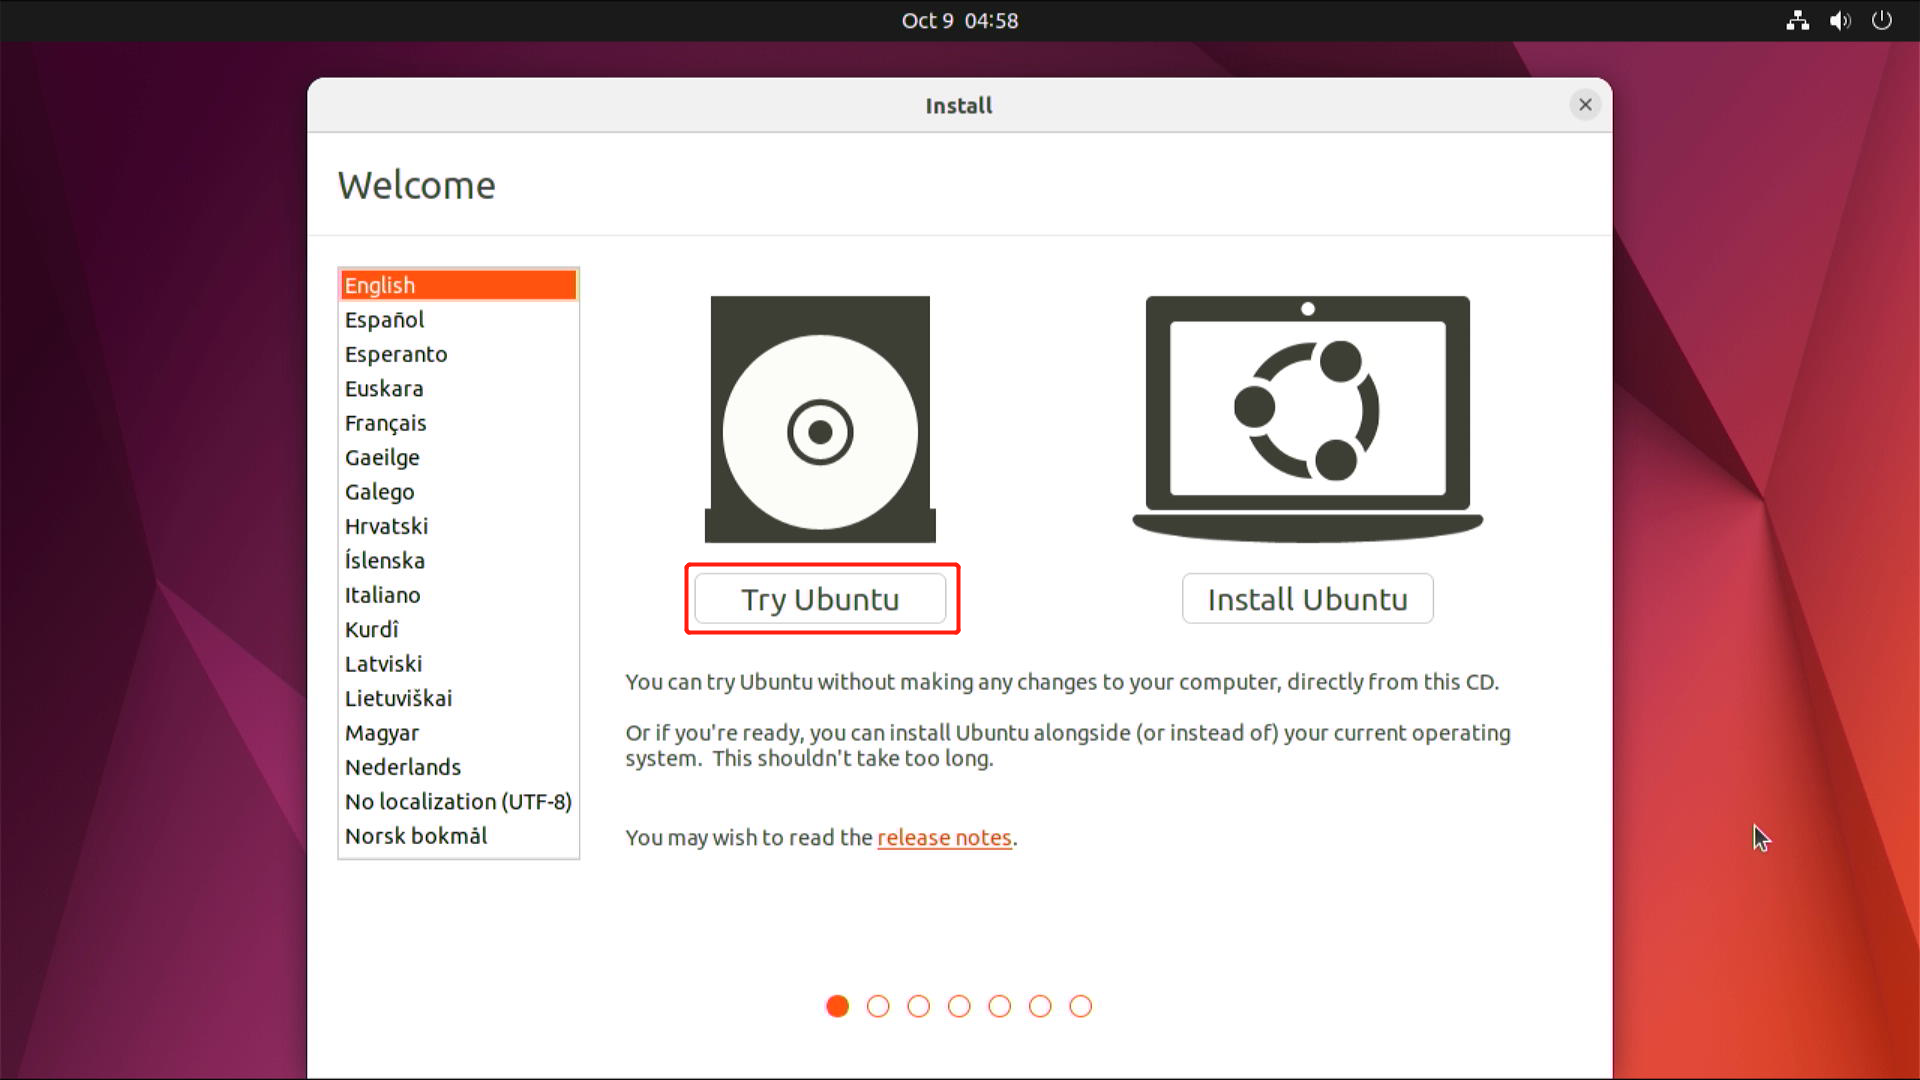
- Step 13. Click Try Ubuntu
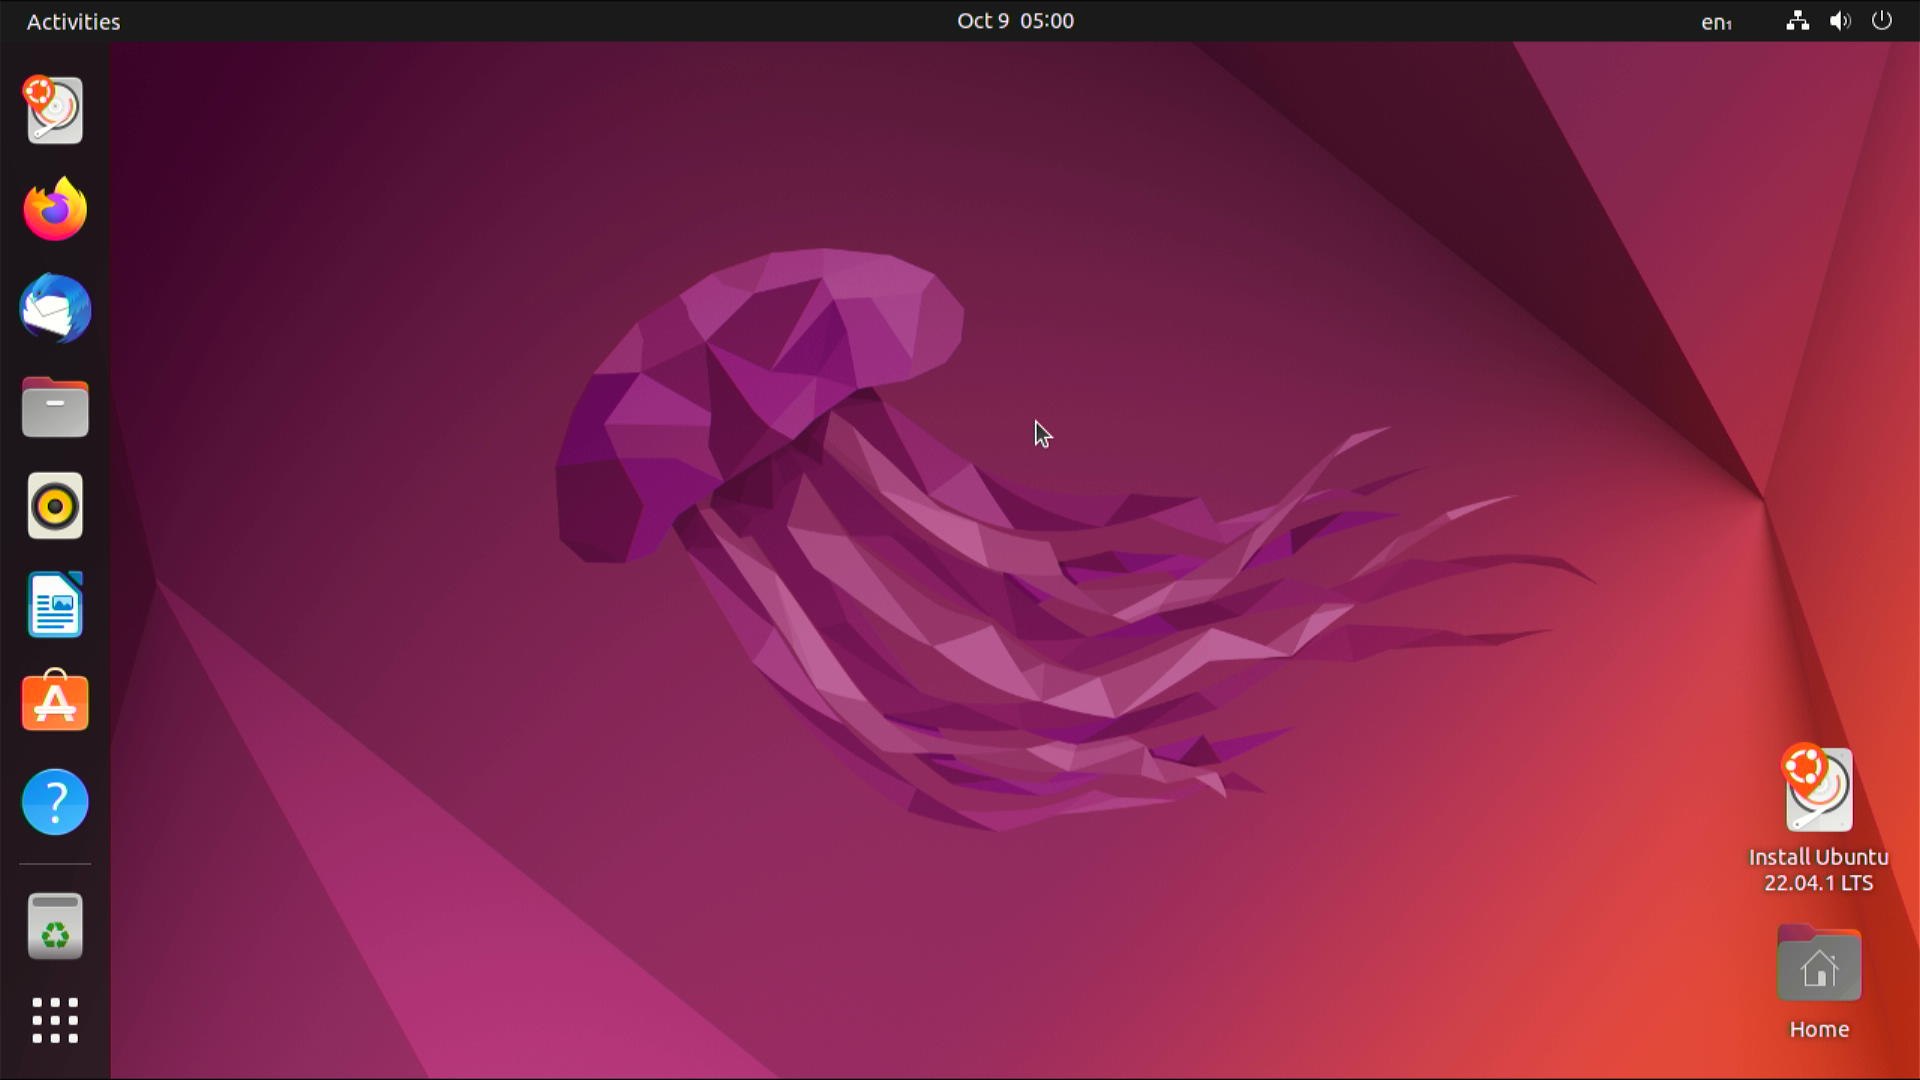
After a few seconds, it will boot into Ubuntu Desktop
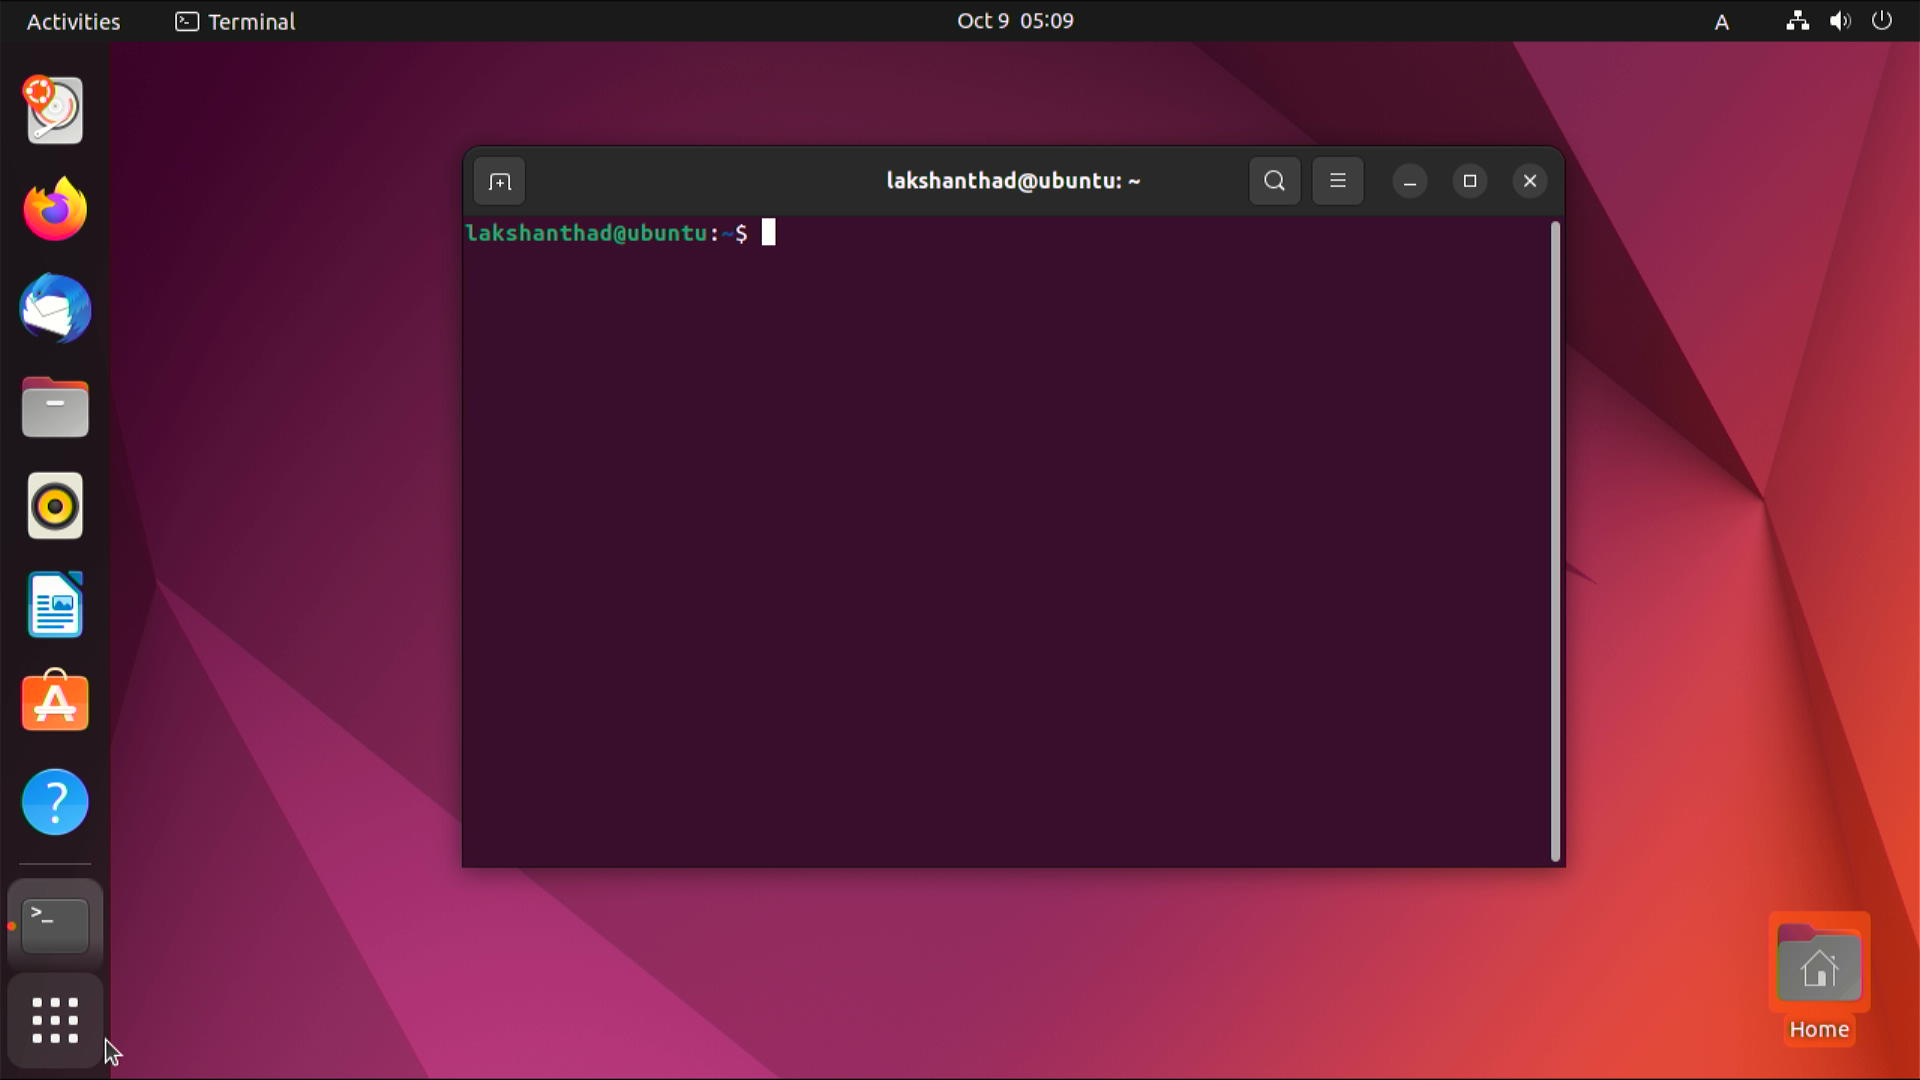
- Step 14. Open a terminal window by pressing Ctrl+Alt+T
- Step 15. Type the following command to download Home Assistant OS image
wget https://github.com/home-assistant/operating-system/releases/download/9.0/haos_generic-x86-64-9.0.img.xz
- Step 16. Extract the file by using the below command
unxz haos_generic-x86-64-9.0.img.xz
This will extract the above .img.xz into .img
- Step 17. Type lsblk to list the connected storage drives. Here we have connected an HDD drive via the SATA port.
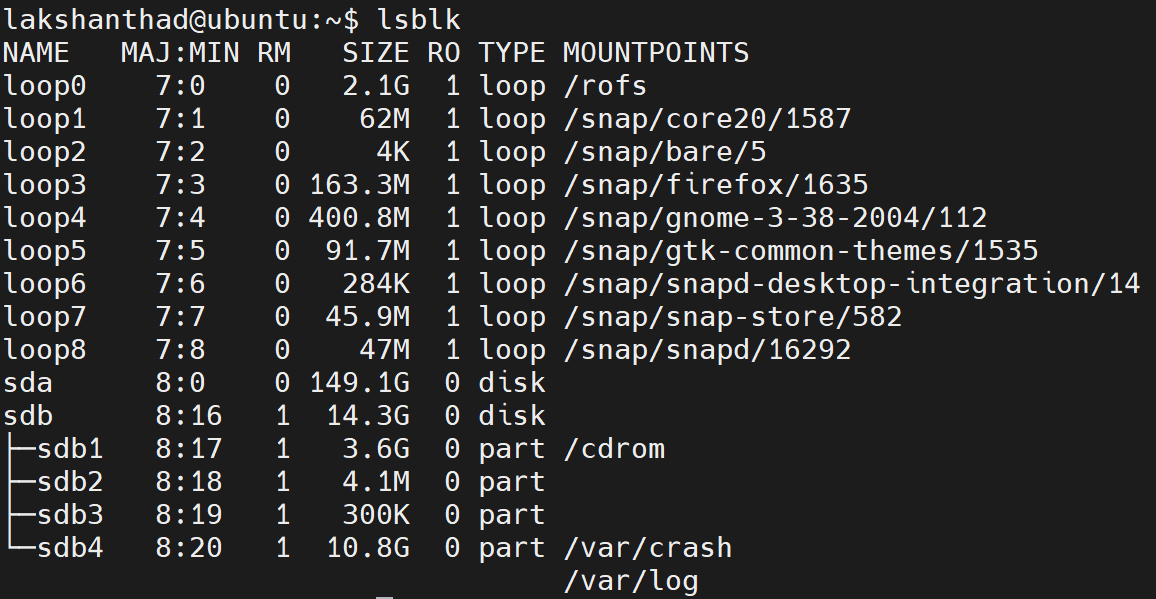
As you can see, the drive which is already running Ubuntu OS (USB flash drive) is sdb with several partitions and mountpoints. We can also identify this drive from the SIZE. This means the drive sda is the connected HDD drive.
- Step 18. Enter the command below to flash the Home Assistant OS image to the connected HDD drive. In this case, drive sda
sudo dd if=haos_generic-x86-64-9.0.img of=/dev/sda status=progress
Wait a few minutes until the process is completed

- Step 19. Type the following to reboot ODYSSEY-X86
sudo reboot
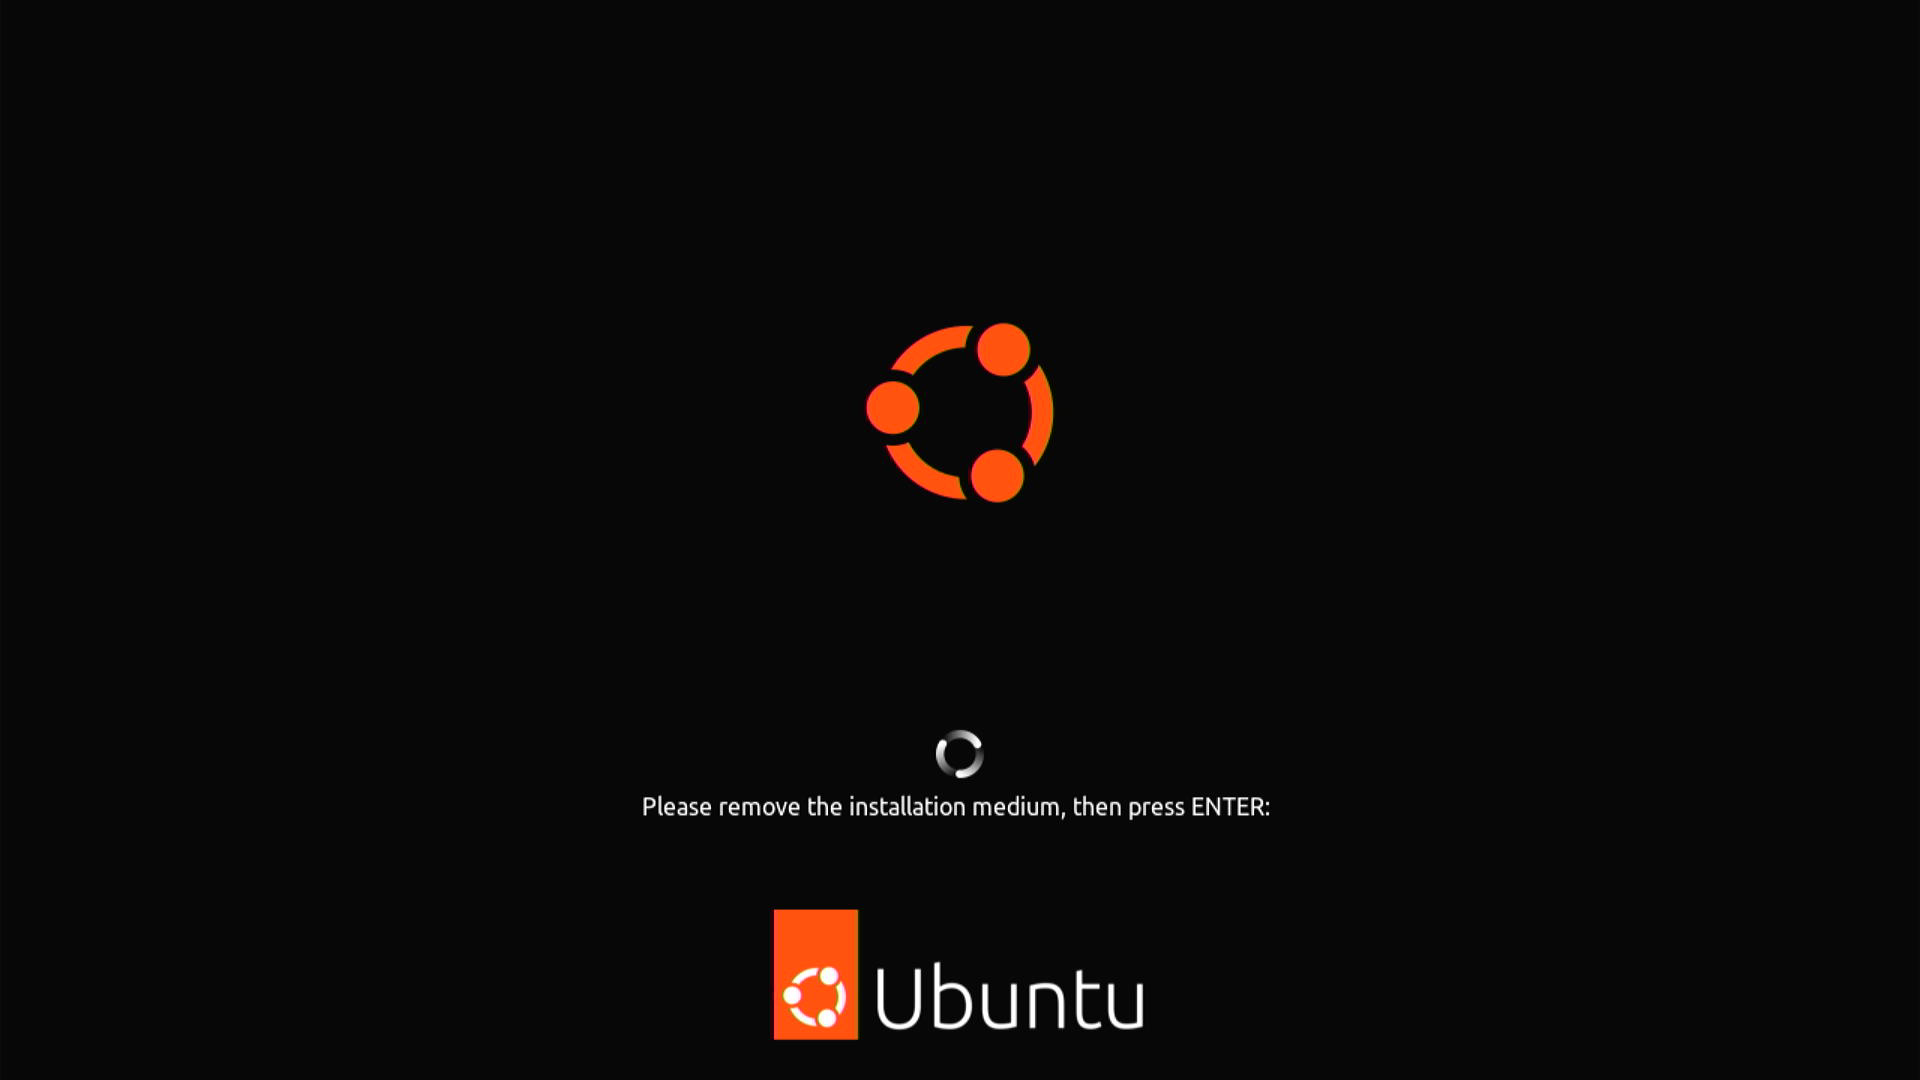
- Step 20. Remove the USB flash drive and press ENTER when you see the below prompt
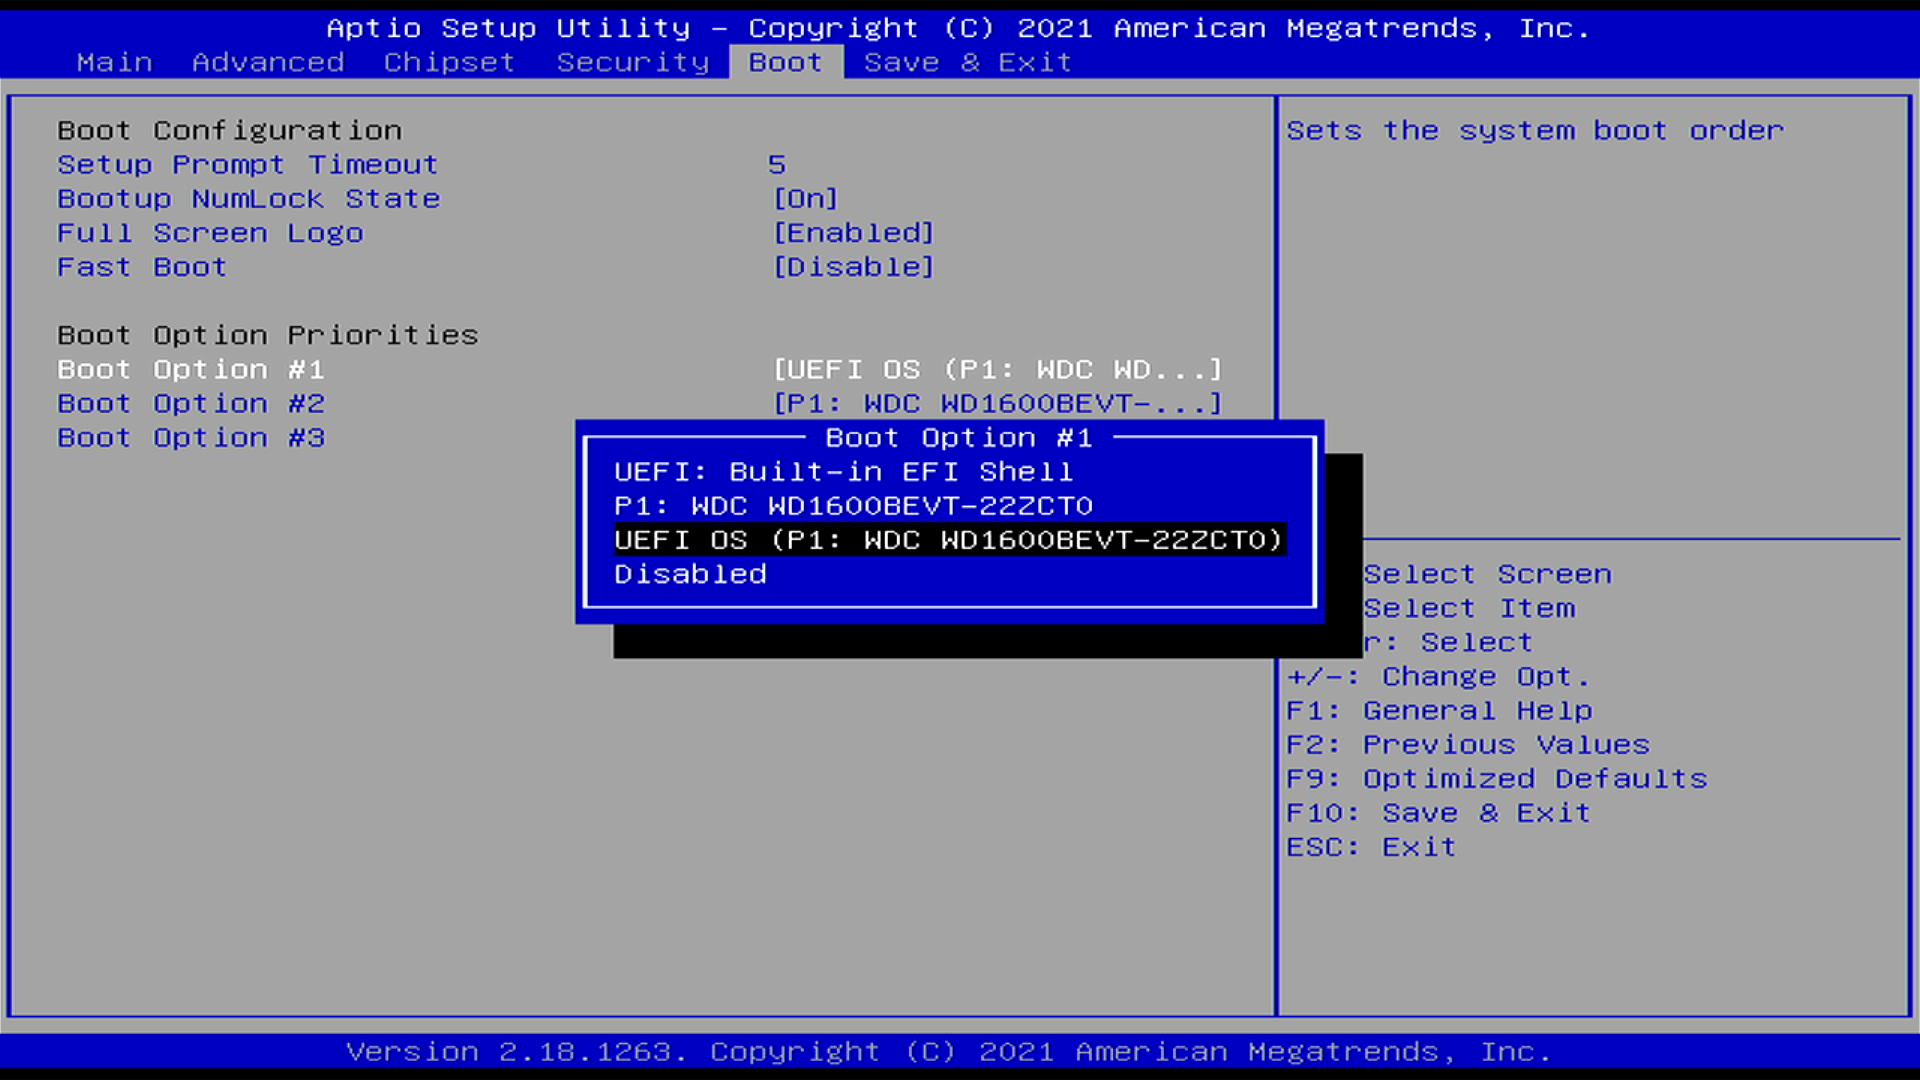
- Step 21. Enter BIOS as explained before and change the boot drive to the connected drive
Now ODYSSEY-X86 will reboot and use the connected drive as the boot device. After successful booting into Home Assistant OS, you will see the below output
View Home Assistant Dashboard UI on web browser
- Step 1. Open a web browser on a PC, tablet, smartphone type the following URL
homeassistant.local:8123
It will take some time to finish the initial start up process
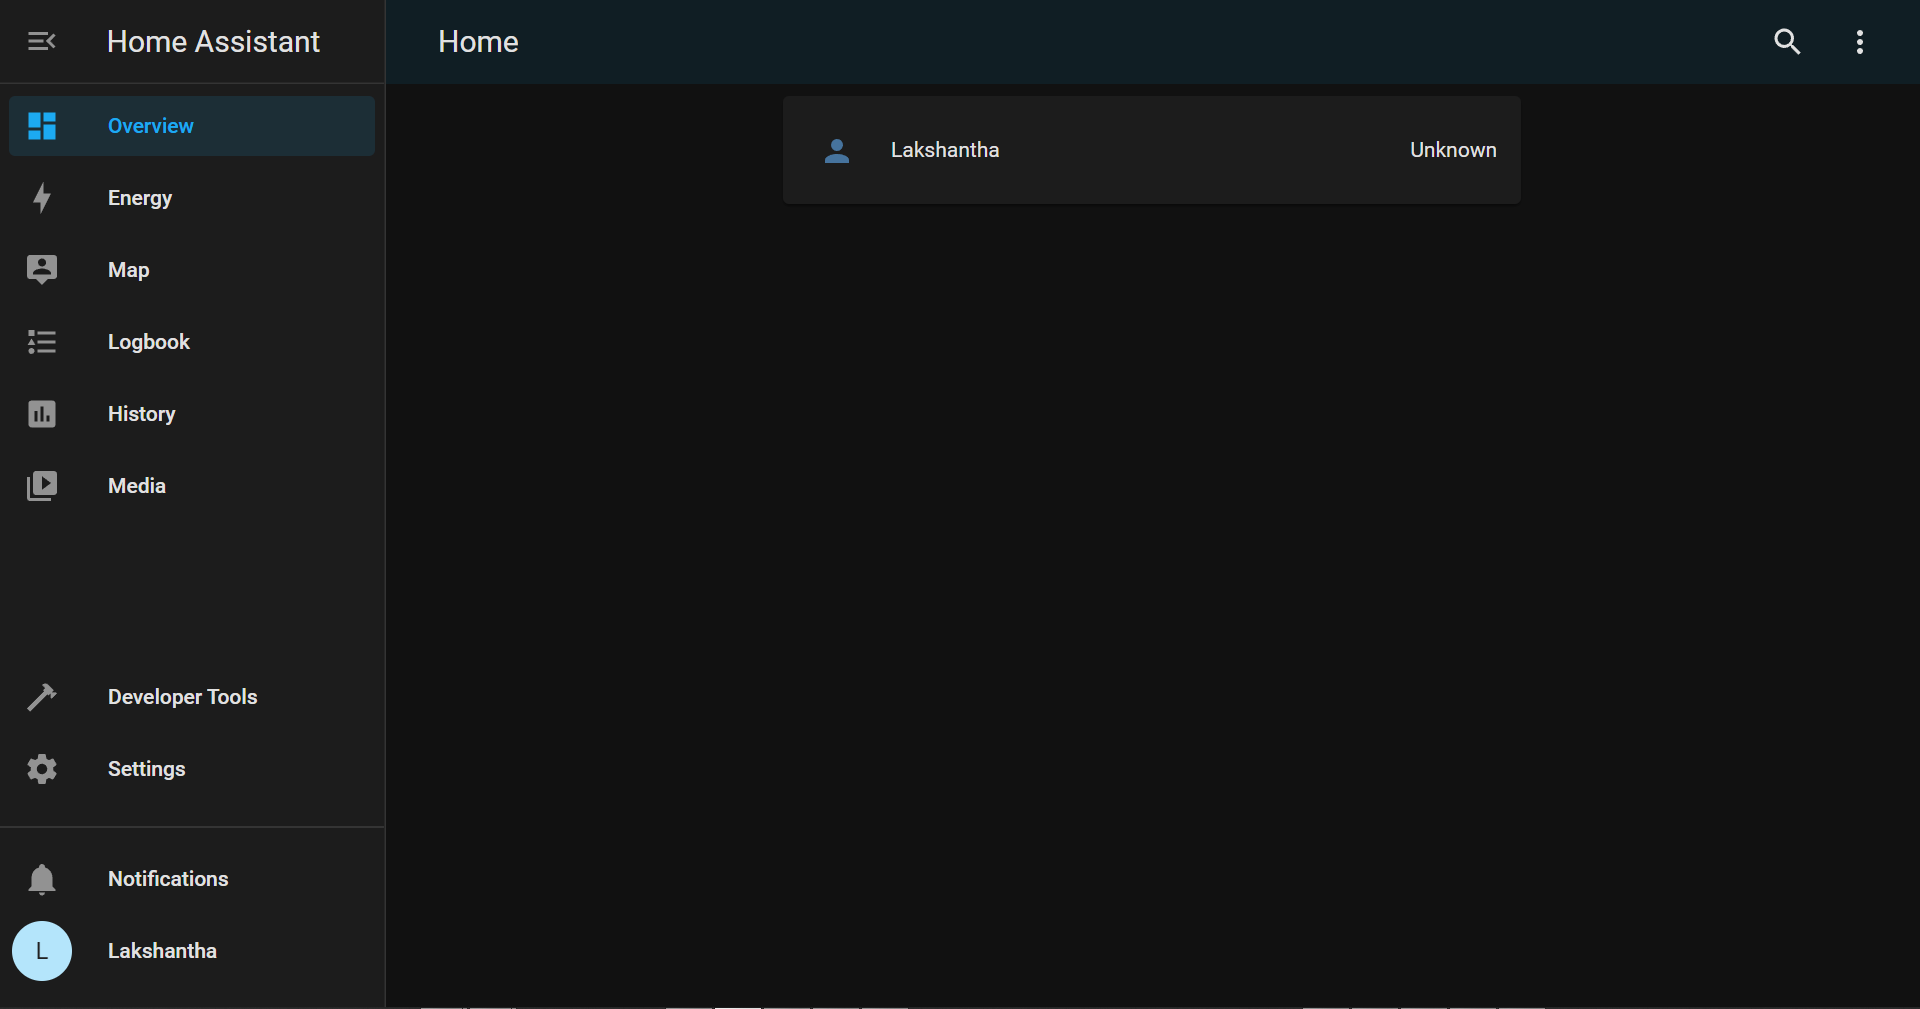
- Step 2. Once finished starting up, create an account and follow through the initial set up instuctions
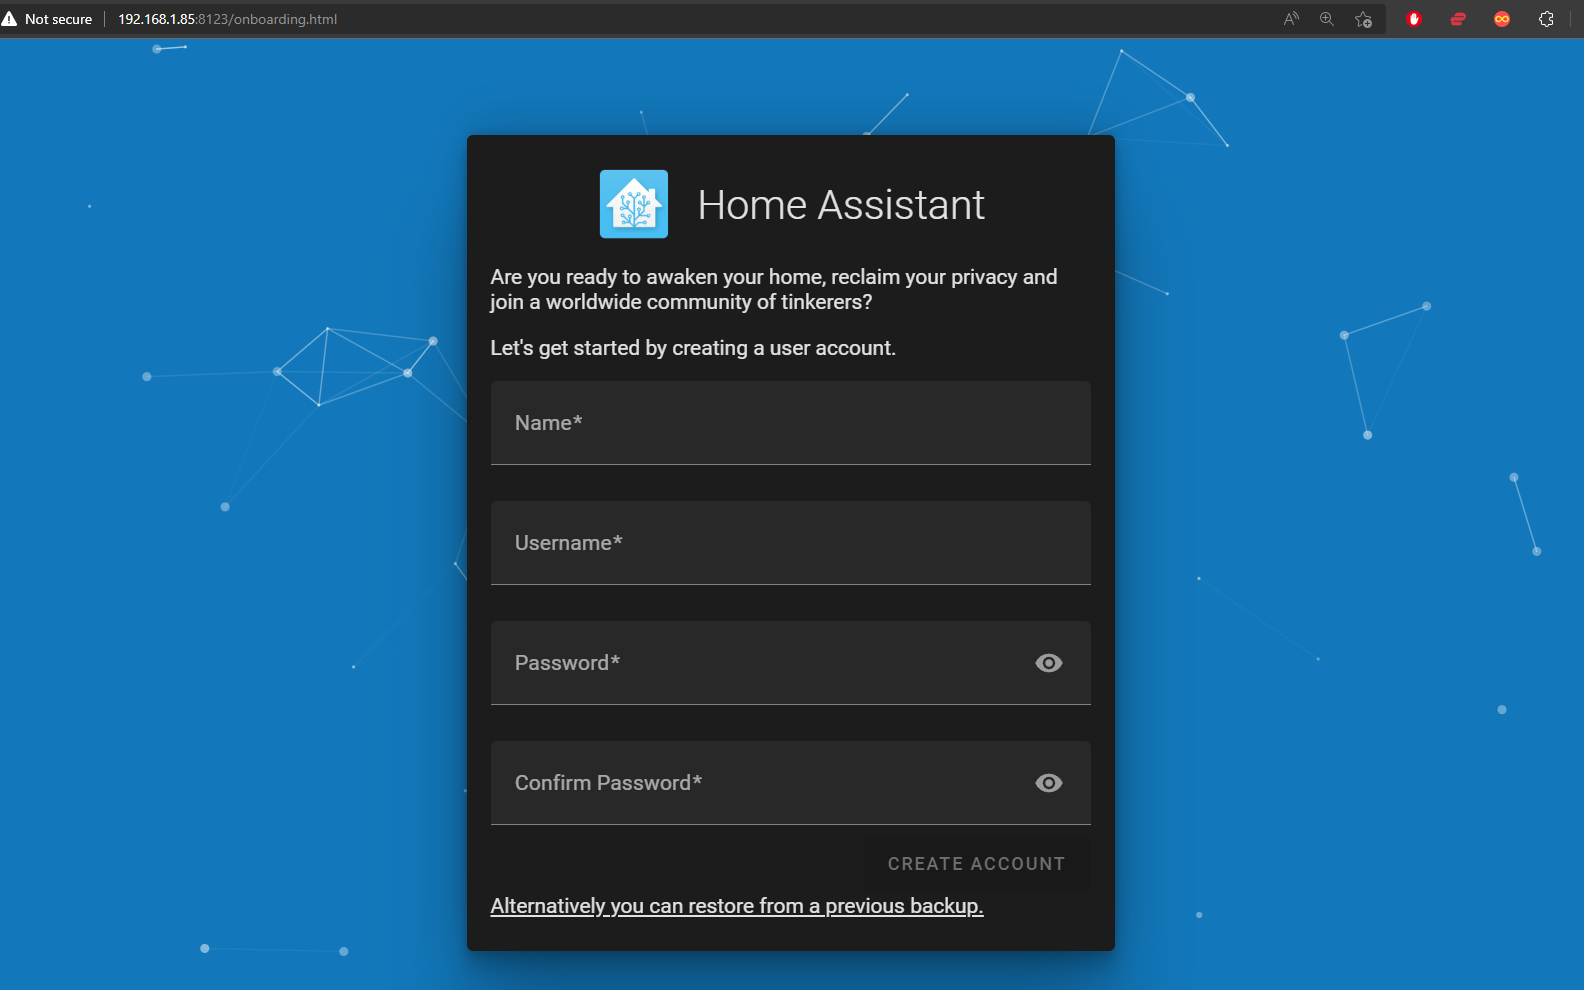
After that you will see your welcome dashboard as follows
View Home Assistant Dashboard UI in Kiosk mode on reTerminal
To be able to view the Home Assistant Dashboard UI on reTerminal LCD, we will use Chromium web browser which already comes with Raspberry Pi OS. We will set up Chromium so that it will autostart on full-screen mode after reTerminal is booted up.
-
Step 1. Turn on reTerminal and make sure Raspberry Pi OS is already installed. If not, you can follow this wiki.
-
Step 2. Navigate to the following directory
cd /etc/xdg/lxsession/LXDE-pi/
- Step 3. Open autostart file with nano text editor
sudo nano autostart
- Step 4. Add the following line to the end of the file
@chromium-browser --kiosk --incognito --disable-pinch --overscroll-history-navigation=0 homeassistant.local:8123
- Step 5. Reboot reTerminal
sudo reboot
Now when reTerminal boots up, Home Assistant dashboard UI will open in full-screen window !
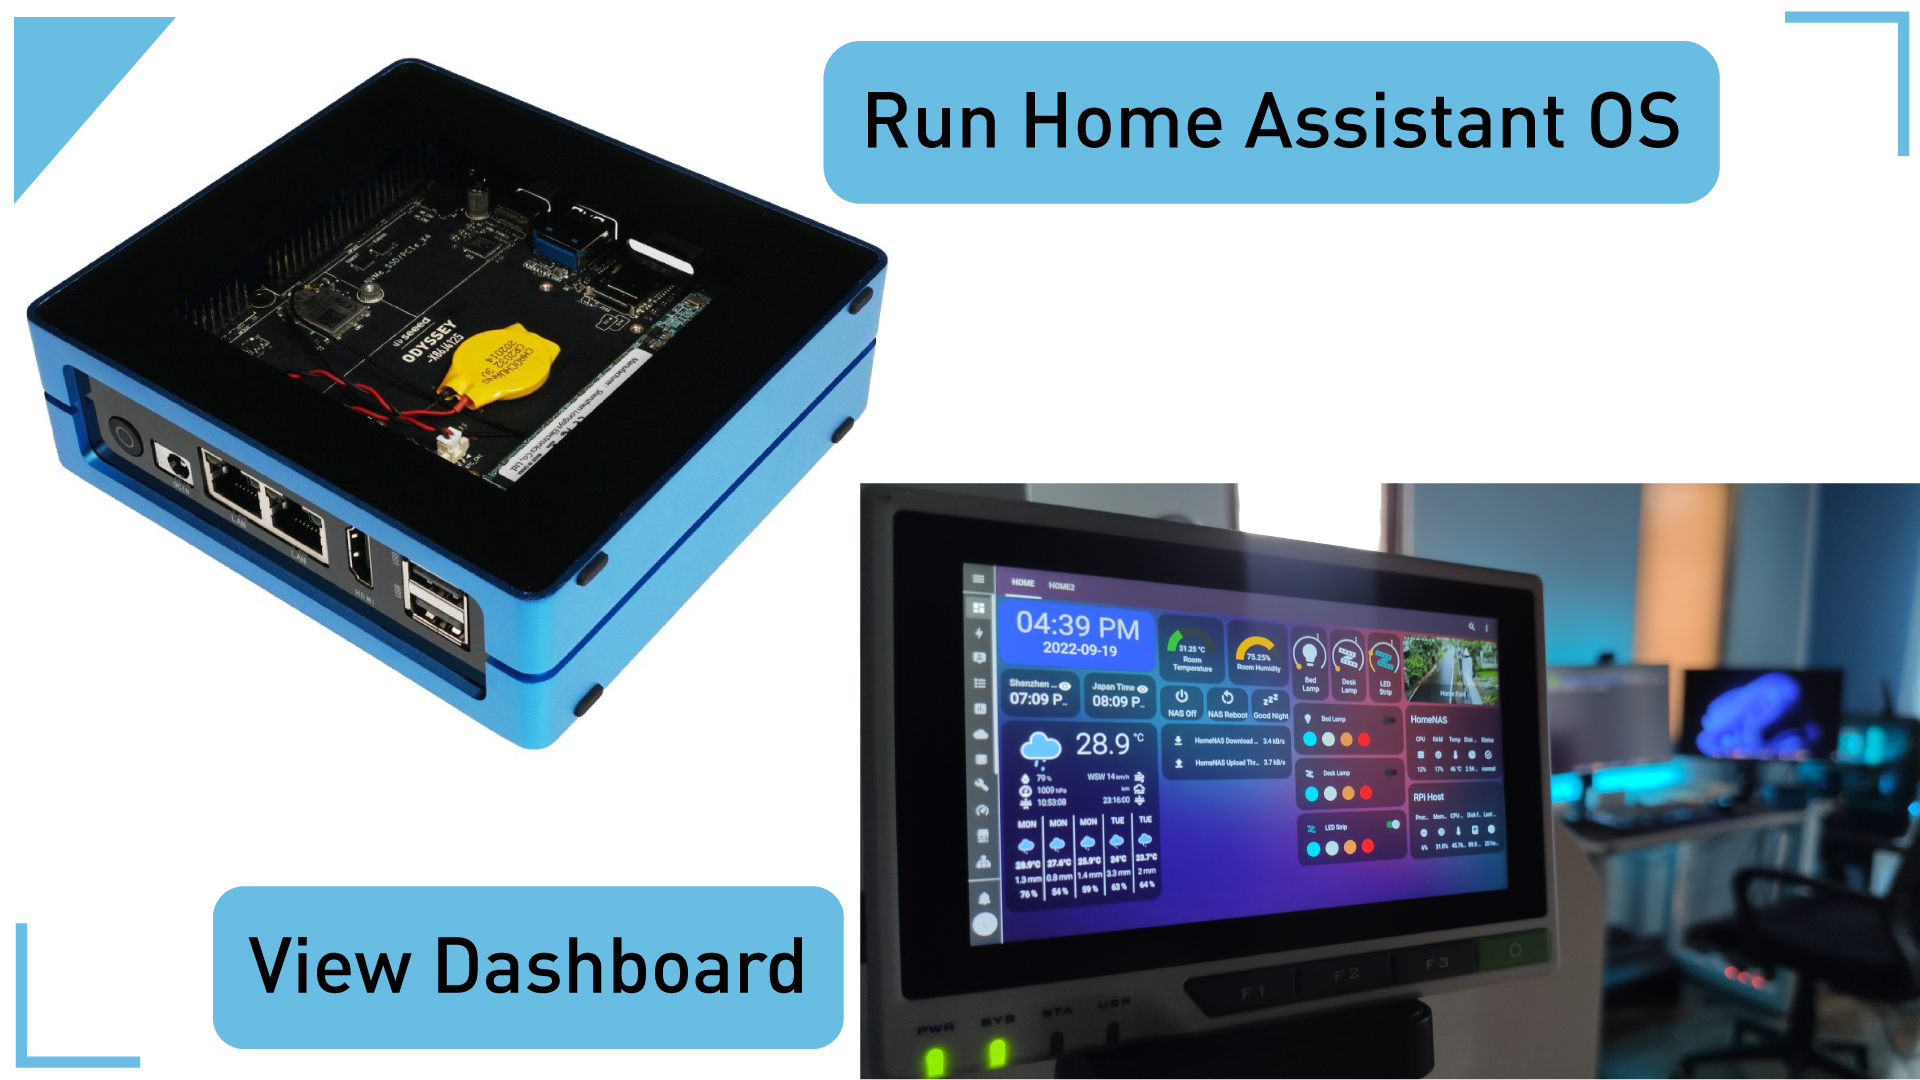
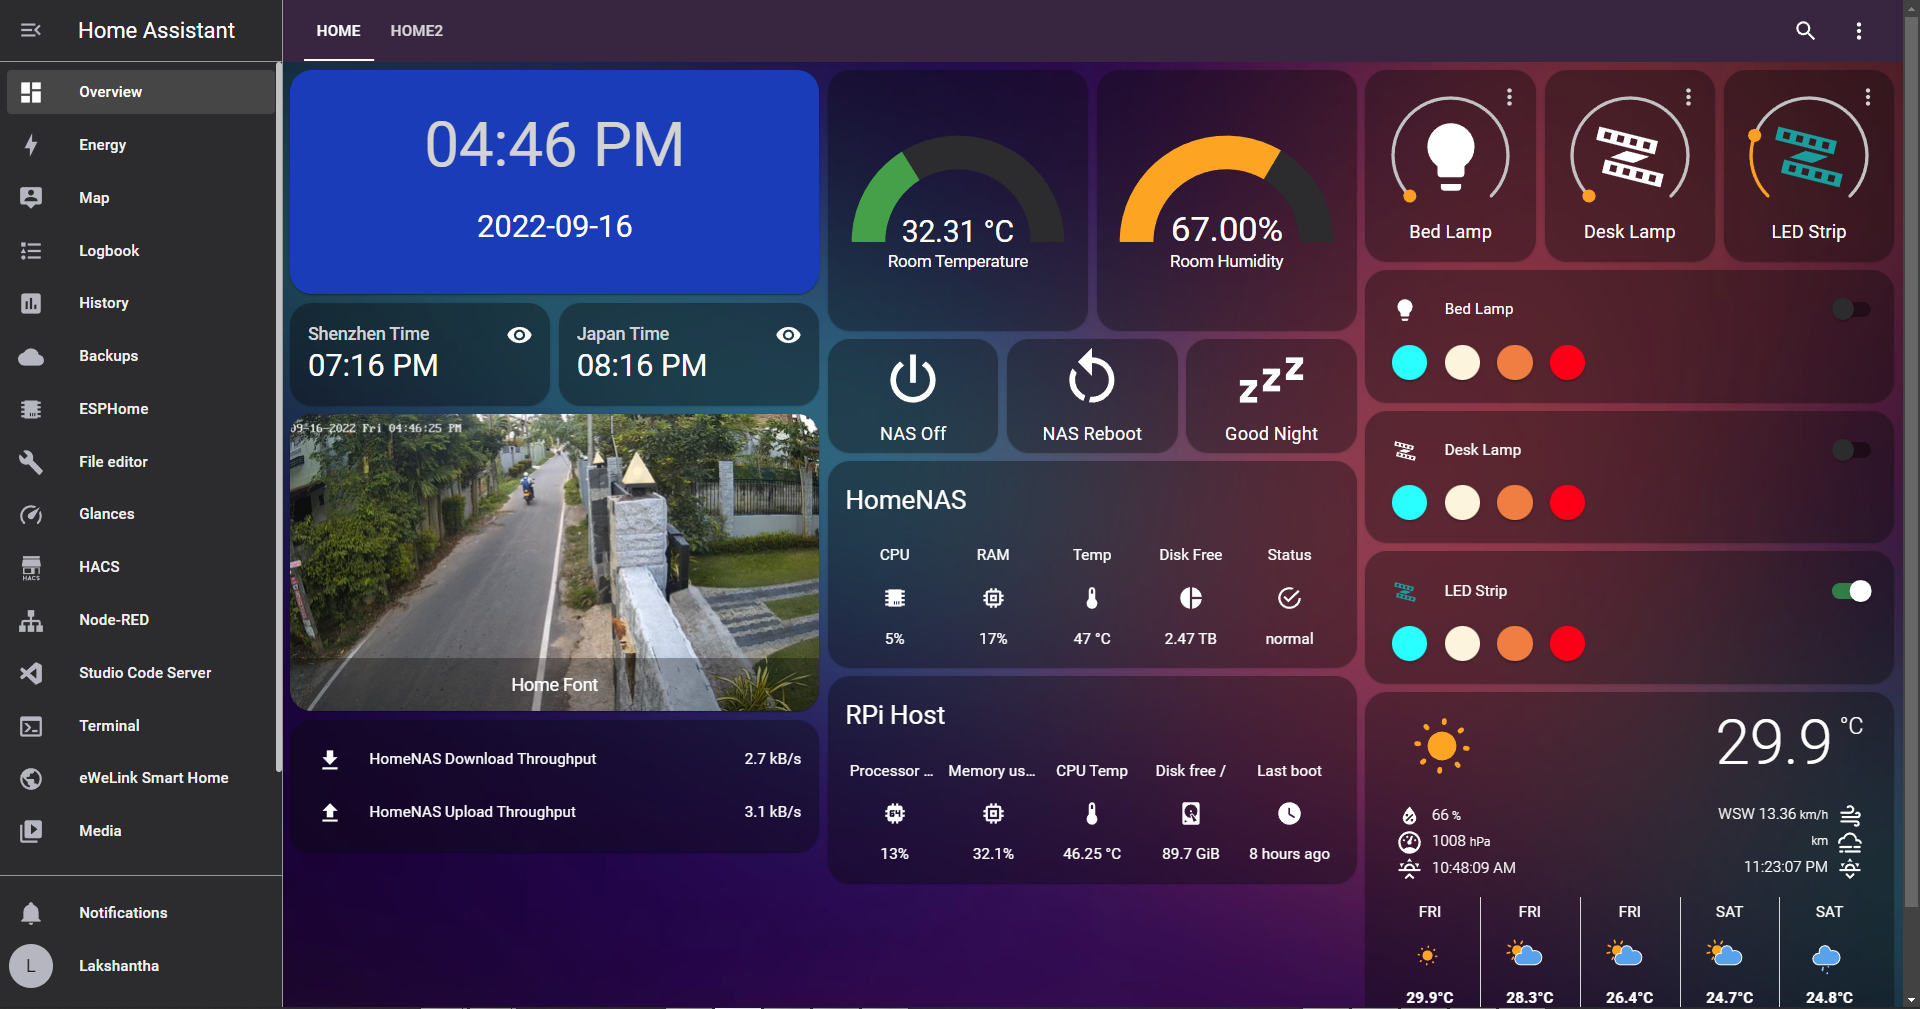
Bonus
After integrating smart lights, temperature, humidity sensors, CCTV and more, a complete Smart Home dashboard on Home Assistant will look like below
Tech Support & Product Discussion
Thank you for choosing our products! We are here to provide you with different support to ensure that your experience with our products is as smooth as possible. We offer several communication channels to cater to different preferences and needs.