OPNsense Installation

This guide explains how to turn your ODYSSEY-X86 into a software router and firewall by installing OPNsense. Let's get started!
What is OPNsense?
OPNsense is an open source firewall and routing software based on FreeBSD operating system which is developed by Deciso. It is a fork of pfSense, which in turn was forked from m0n0wall. It was launched in January 2015. OPNsense has a web-based GUI and supports x86-64 platform. Not only it can act as a firewall, but also it has traffic shaping, load balancing, and virtual private network capabilities. Also other features can be added via plugins.

Prerequisites
-
USB Flash Drive (>1GB)
-
2 Ethernet cables and a router with access to internet
-
External storage media (If you use ODYSSEY-X86 with built-in eMMC, you can use that as well)
- NVMe SSD or
- SATA SSD or
- SATA HDD or
- Micro-SD Card or
- USB Flash Drive (>1GB)
Getting Started
Now let's go through the process of installing OPNsense on ODYSSEY-X86.
Flash OPNsense image to a USB flash drive
-
Step 1. Visit this link to open the download page of OPNsense
-
Step 2. Select amd64 as the Architecture, vga as the image type, choose any Mirror Location and click Download

-
Step 3. Extract the .bz2 file to get an .img file
-
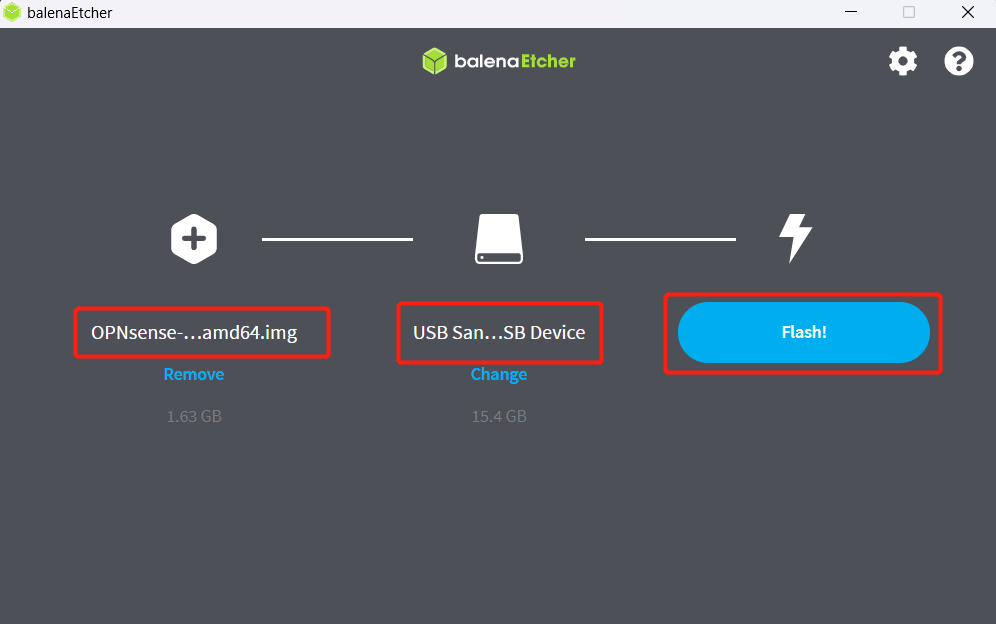
Step 4. Download and install BalenaEtcher according to your OS by visiting this link and open it

- Step 5. Connect a USB flash drive to your PC, click Flash from file, select the downloaded/ extracted file from before, click Select target, choose the connected USB flash drive and click Flash
Boot OPNsense from flash drive and install on external drive
-
Step 1. Connect the USB flash drive that we flashed the OPNsense image before to one the of the USB ports on the ODYSSEY-X86
-
Step 2. Attach an external storage drive to install OPNsense. ODYSSEY-X86 has a number of storage options such as:
- NVMe SSD
- SATA SSD
- SATA HDD
- Micro-SD Card
- USB Flash Drive (>1GB)

- Step 3. Turn on ODYSSEY-X86 and continuosly press DELETE key to enter BIOS

- Step 4. Go to Boot tab, select Boot Option #1 and select UEFI: USB, Partition 1

- Step 5. Go to Save & Exit tab, select Save Changes and Reset and select Yes for the pop up window

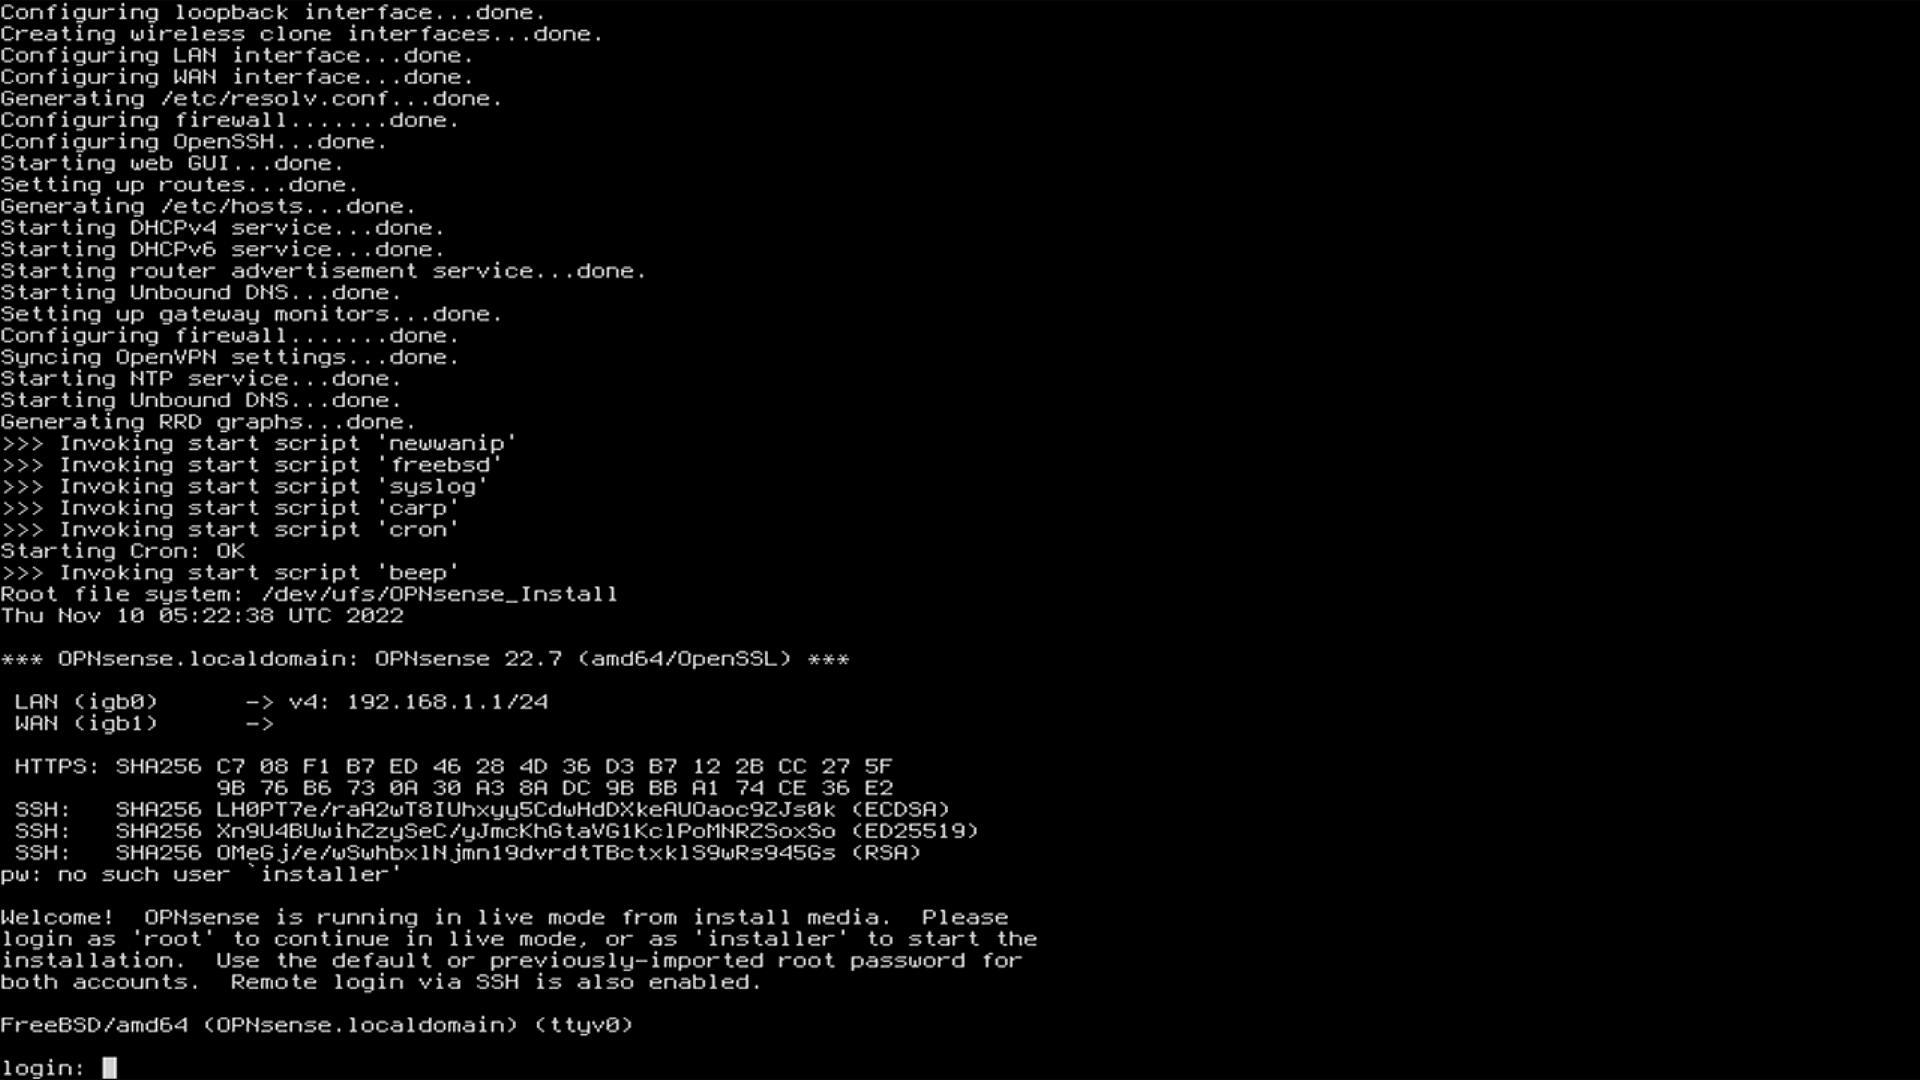
Now ODYSSEY-X86 will boot from the USB flash drive into OPNsense and you will see the following output if it boots successfully
-
Step 6. Type installer at the login: prompt and type opnsense as the password to enter the installation page
-
Step 7. Select Continue with default keymap (default option) and press ENTER

- Step 8. Select Install (UFS) (default option) and press ENTER

- Step 9. Select the connected external drive and press ENTER

Now it will start installing OPNsense on the connected external drive

- Step 10. Once the installation is complete, it will ask you to change the root password. This is recommended. Press ENTER on the window and change the root password


- Step 11. Select Complete Install and press ENTER to reboot

- Step 12. When the system starts booting again, remove the USB Flash Drive, enter BIOS, select the connected external drive as the boot device and boot again

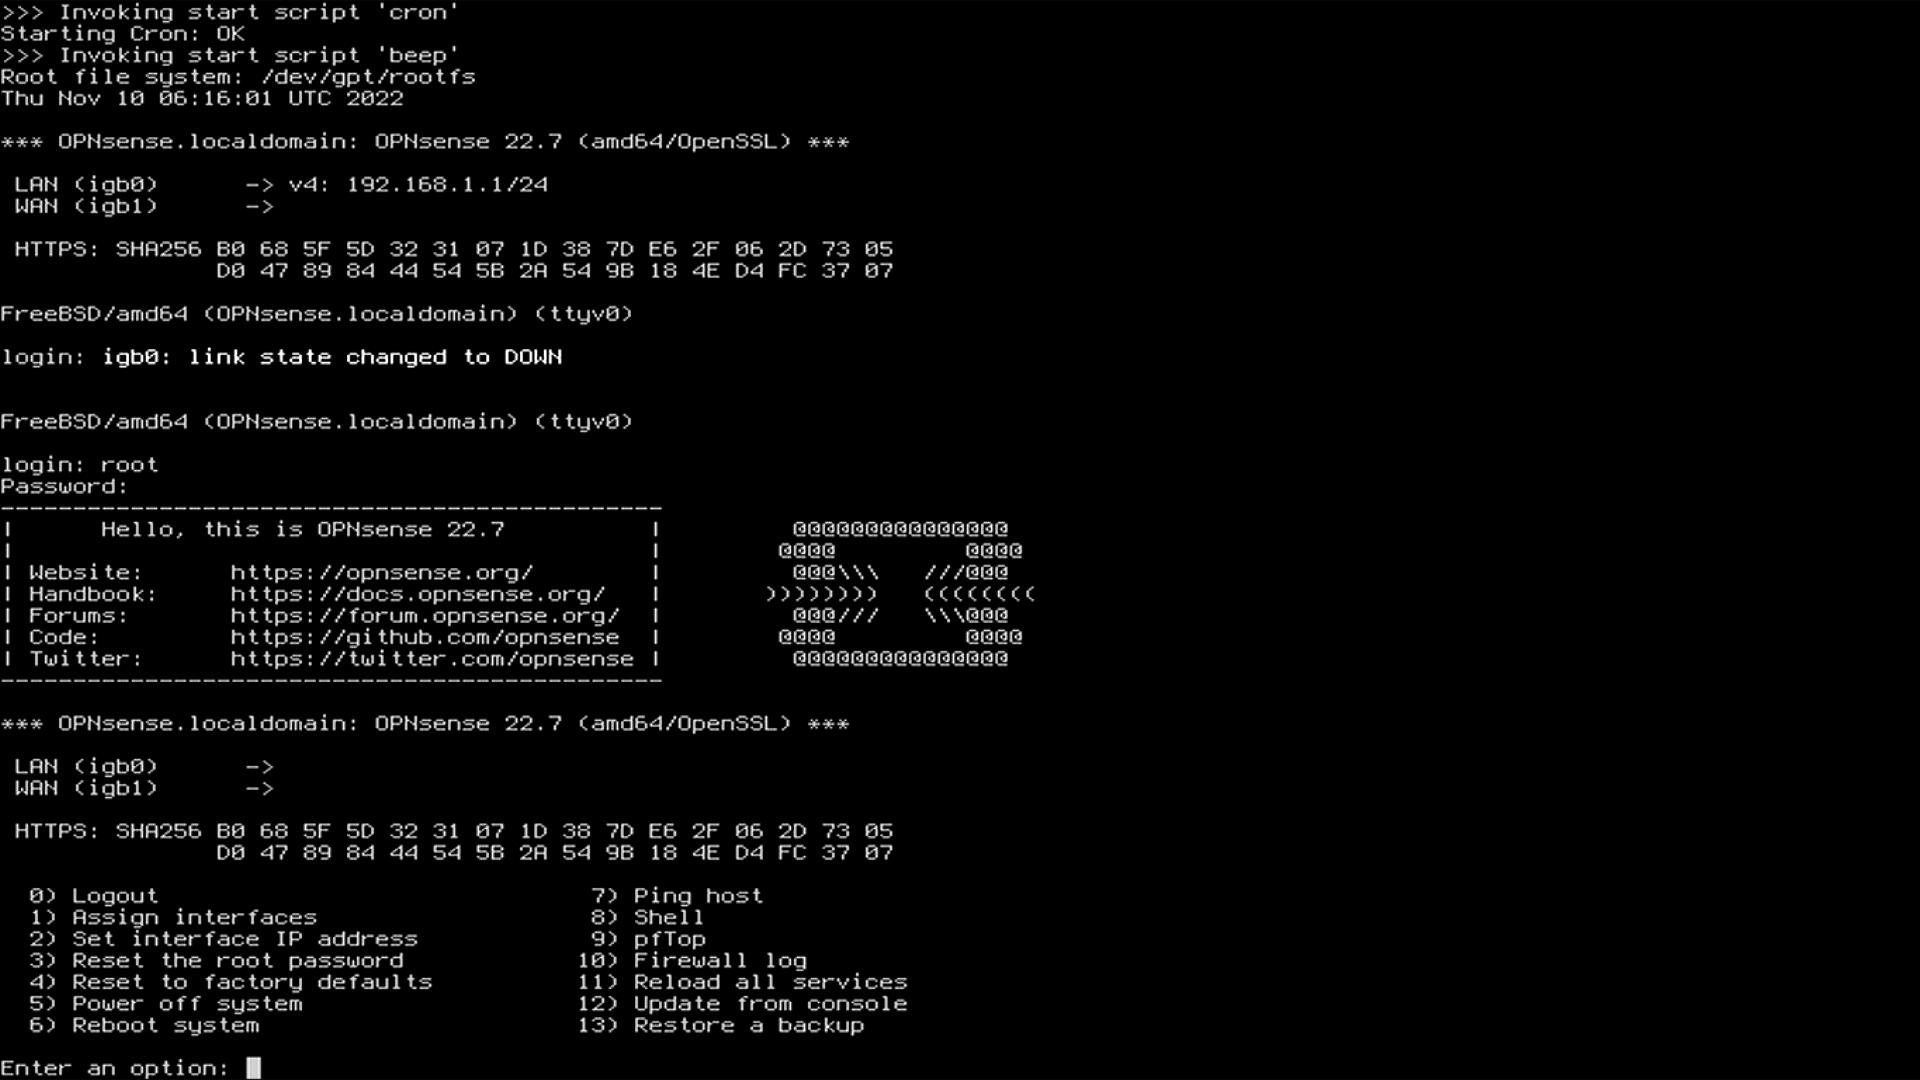
Now ODYSSEY-X86 will boot from the external drive into OPNsense and you will see the following output if it boots successfully
Set up OPNsense
Change LAN interface IP address
By default OPNsense will assign the LAN interface to 192.168.1.1 with DHCP server enabled. If you router IP address is also 192.168.1.1 (most routers have this IP), you might want to change the LAN IP of OPNsense. So we need to do that first.
However, if your router has a different IP address from 192.168.1.1, you can skip this section and move to Hardware Configuration section which is the section after this
- Step 1. Login to the root account by typing root at the login: prompt followed by the password that you specified before
-
Step 2. Set the configuration as follows
- Type 2 to set interface IP address
- Type 1 to select LAN as the interface to configure
- Type N to NOT configure IPv4 address LAN interface via DHCP
- Type 192.168.2.1 as the new LAN IPv4 address (You can enter any IP address of your choice here)
- Type 24 as the new LAN IPv4 subnet bit count
- Press ENTER to configure for LAN, not for WAN
- Press ENTER to skip configuring IPv6 address LAN interface via WAN tracking
- Type y to enable DHCP server on LAN
- Type 192.168.2.1 as the start address of the IPv4 client address range
- Type 192.168.2.254 as the end address of the IPv4 client address range
- Type N to NOT change the web GUI protocol from HTTPS to HTTP
- Type N to NOT generate a new welf-signed web GUI certificate
- Type N to NOT restore web GUI access defaults

After that you will see the following output

Hardware Configuration
Connect the 2 Ethernet ports of the ODYSSEY-X86 to a PC (client) and a router via 2 Ethernet cables as follows
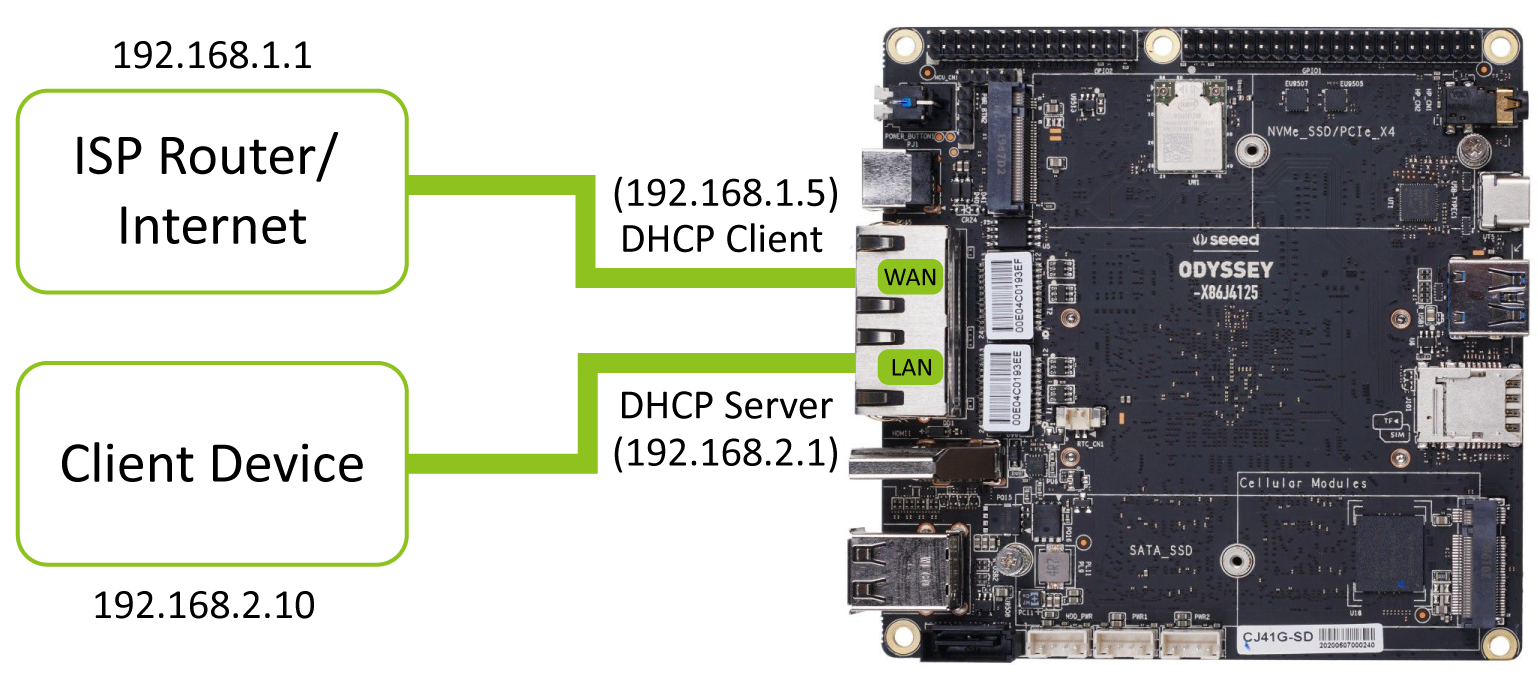
After this, your PC will be able to connect to the internet via the newly setup OPNsense router!
OPNsense GUI
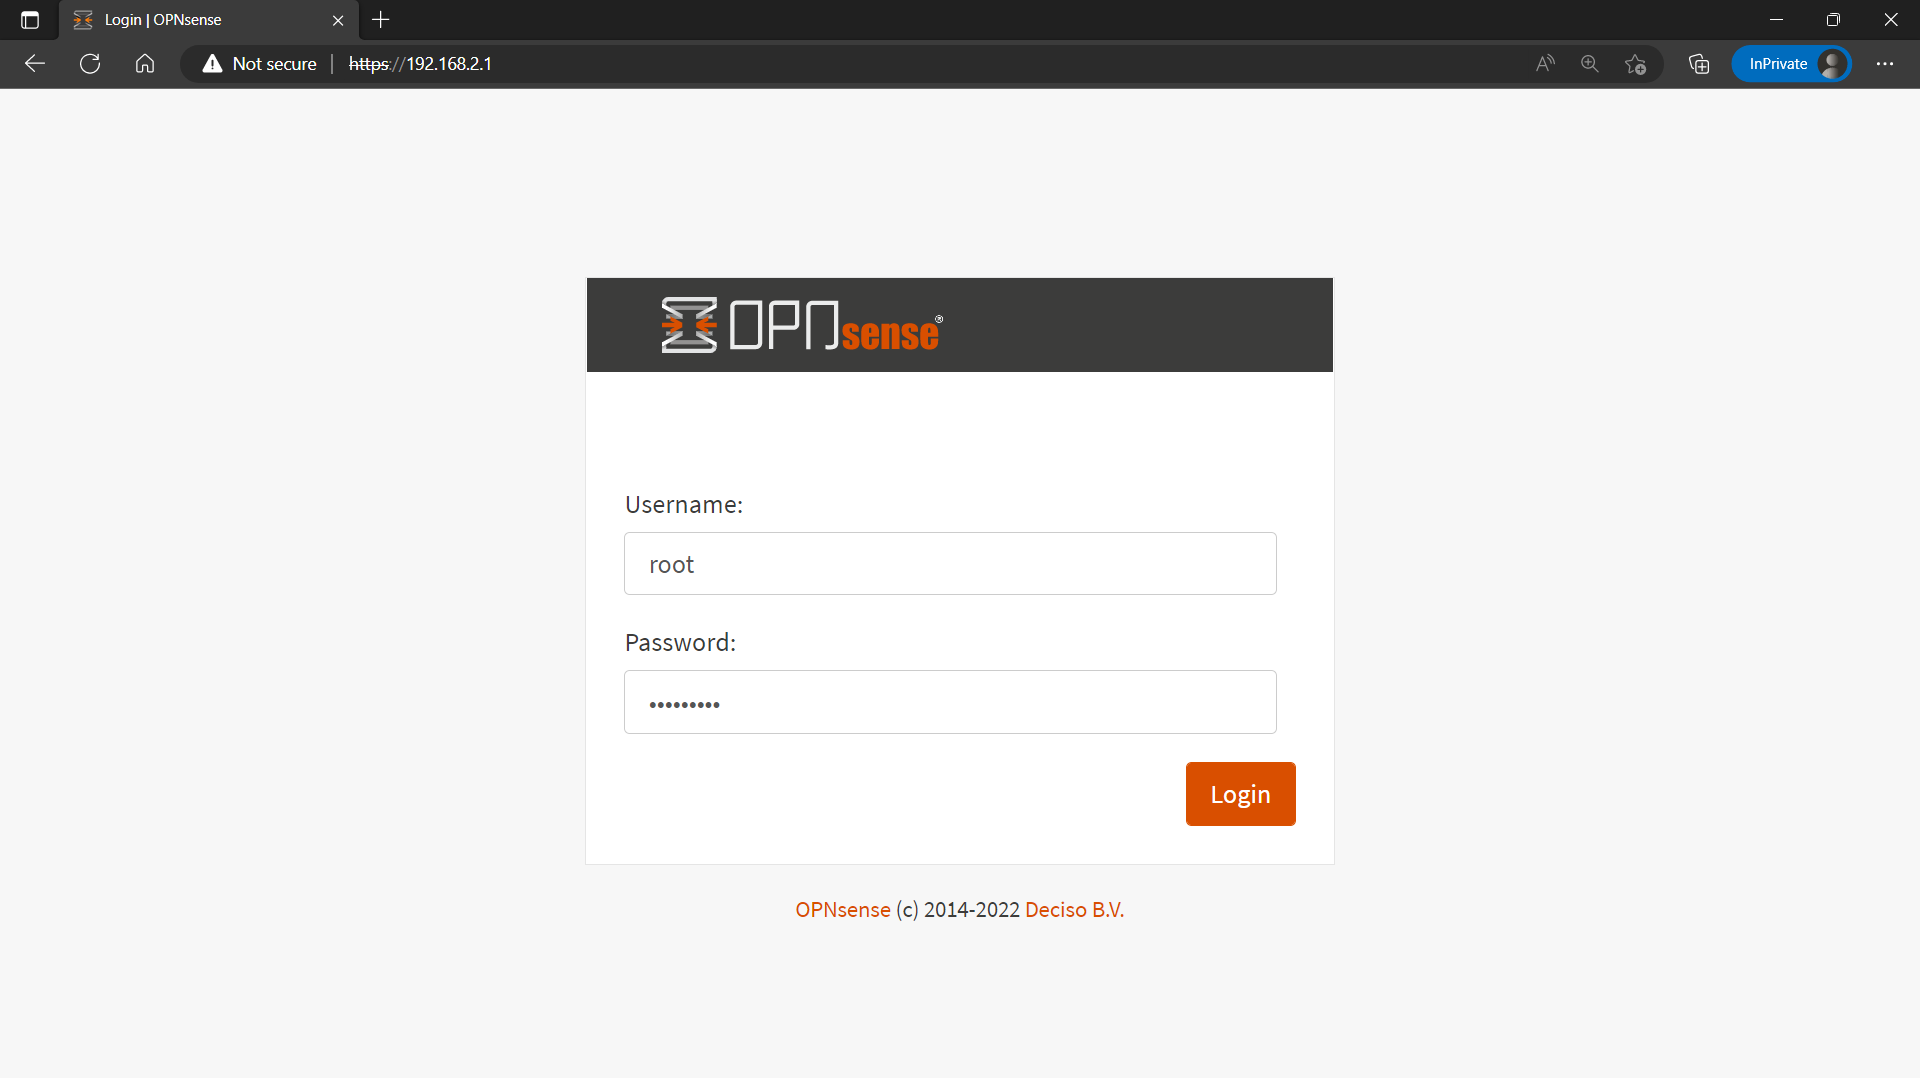
Type 192.168.2.1 on a web browser and login to the web GUI of OPNsense by entering the root account details you specified before
Here you can confgure many settings according to your needs by visiting OPNsense offficial documentation!
Community
Resources
- [Web Page] OPNsense Offficial Documentation
Tech Support & Product Discussion
Thank you for choosing our products! We are here to provide you with different support to ensure that your experience with our products is as smooth as possible. We offer several communication channels to cater to different preferences and needs.