Firmware Upgrade
This tutorial demonstrates how to update the BIOS and EC (Embedded Controller) firmware for the ODYSSEY - X86.
PAY ATTENTION
As the provided firmware on the Wiki is supported to J4105/J4125-V1, updating the BIOS firmware from the Wiki on a J4125-V2 board will cause the board to brick. Please ensure that you have the correct version of ODYSSEY.
Hardware Requirements
-
A Working Computer
-
A USB Drive
-
A Monitor
-
A Keyboard
How to Upgrade the BIOS
BIOS is also like an OS and can be upgraded to fix bugs and enhance performance of the ODYSSEY - X86J41x5. Here is the instruction how to upgrade the BIOS version on ODYSSEY - X86J41x5.
Current Latest BIOS Version and Changelog
Important Notes
1. It wipes the old BIOS settings, and so you would need to re-activate your Windows(if using Windows) again (wipes the activation key, needs Internet to activate again).
2. If you have the non-EMMC version of ODYSSEY-X86, before updating the BIOS, Please make sure to disable eMMC in the BIOS Settings Before and After the updates.
You may check in the BIOS main page for BIOS and EC Firmware's versions.

Latest BIOS Firmware
PAY ATTENTION
As the provided firmware on the Wiki is supported to J4105/J4125-V1, updating the BIOS firmware from the Wiki on a J4125-V2 board will cause the board to brick. Please ensure that you have the correct version of ODYSSEY.
SD-BS-CJ41G-300-101-K 07/26/2022 15:00:00
- Improve overall stability.
Note: If you want the above BIOS with bifurcation feature enabled, please contact [email protected]
With bifurcation feature, you will be able to use the M.2 M-Key for 4 PCIe x1. This enables you to connect four different PCIe x1 devices to the M.2 such as multiple network ports, multiple SSDs and other expansion devices. With the normal BIOS without bifurcation feature, M.2 M-Key can be used for only one PCIe x4.
History BIOS:
SD-BS-CJ41G-300-101-H 08/16/2021 15:00:00
-
SHA256: 9ea30178b4ef8453c6f24f037b4b3352ac6d214c7c22f94985428bcb23a178c2
-
Improve overall stability.
- SHA256: 53711DBF9FB6ABE564BE1C7A870840F8B87CAA42239448869D87C08C1BDF0EC5
- Improve overall stability.
- SHA256: 12f4ce1ab81008525138fcd7d830e18dc13936f3ce4a51e17c314fc55debe480
- Fix bug: loads into other OS other than Windows when set to load others.
- SHA256: 7208d39c4f77a4837a0a1072dce45c7bc8feba28597522ea036778a9c09aa61a
- Added Secure Boot.
- Added Wake on LAN.
- Fix reboot into BIOS settings page under Linux environment (Eg.
systemctl reboot --firmware-setup).- Fix Linux Wake on Lan light issue.
SHA256: eb932b69435d26a5b076c485c90e4289a697681ac092c18e85c86804e3fe4206
- Under BIOS Menu, Setup -> Chipset -> Fan Control, added Always On options.
SHA256: 98bb25d6d32250fb10bf047f5902630b82a8560020fb4336d7723b4dfb3f9df2
- Fix the problem of incomplete display of startup Seeed logo screen.
Latest BIOS support auto-flash feature, where you only need to place the files in the root location of FAT32 format USB and select the USB-drive as boot up option. It will automatic enters flashing.
Step 1 - Download the newest version of BIOS
Download the latest version of BIOS from here.
Step 2 - Prepare bootable USB
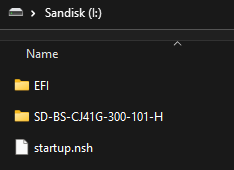
Just like creating a bootable USB for installing OS, format the USB into FAT32 file system. This time, just unzip the downloaded file and copy the contents into the USB.
Step 3 - Upgrading BIOS
Attention
The first boot up from the BIOS upgrade is relatively long, please be patient to wait, and the installed OS will launch eventually. It will take around 3 ~ 5 minutes.
Plug the USB into ODYSSEY - X86J41x5 and boot up and follow steps below:
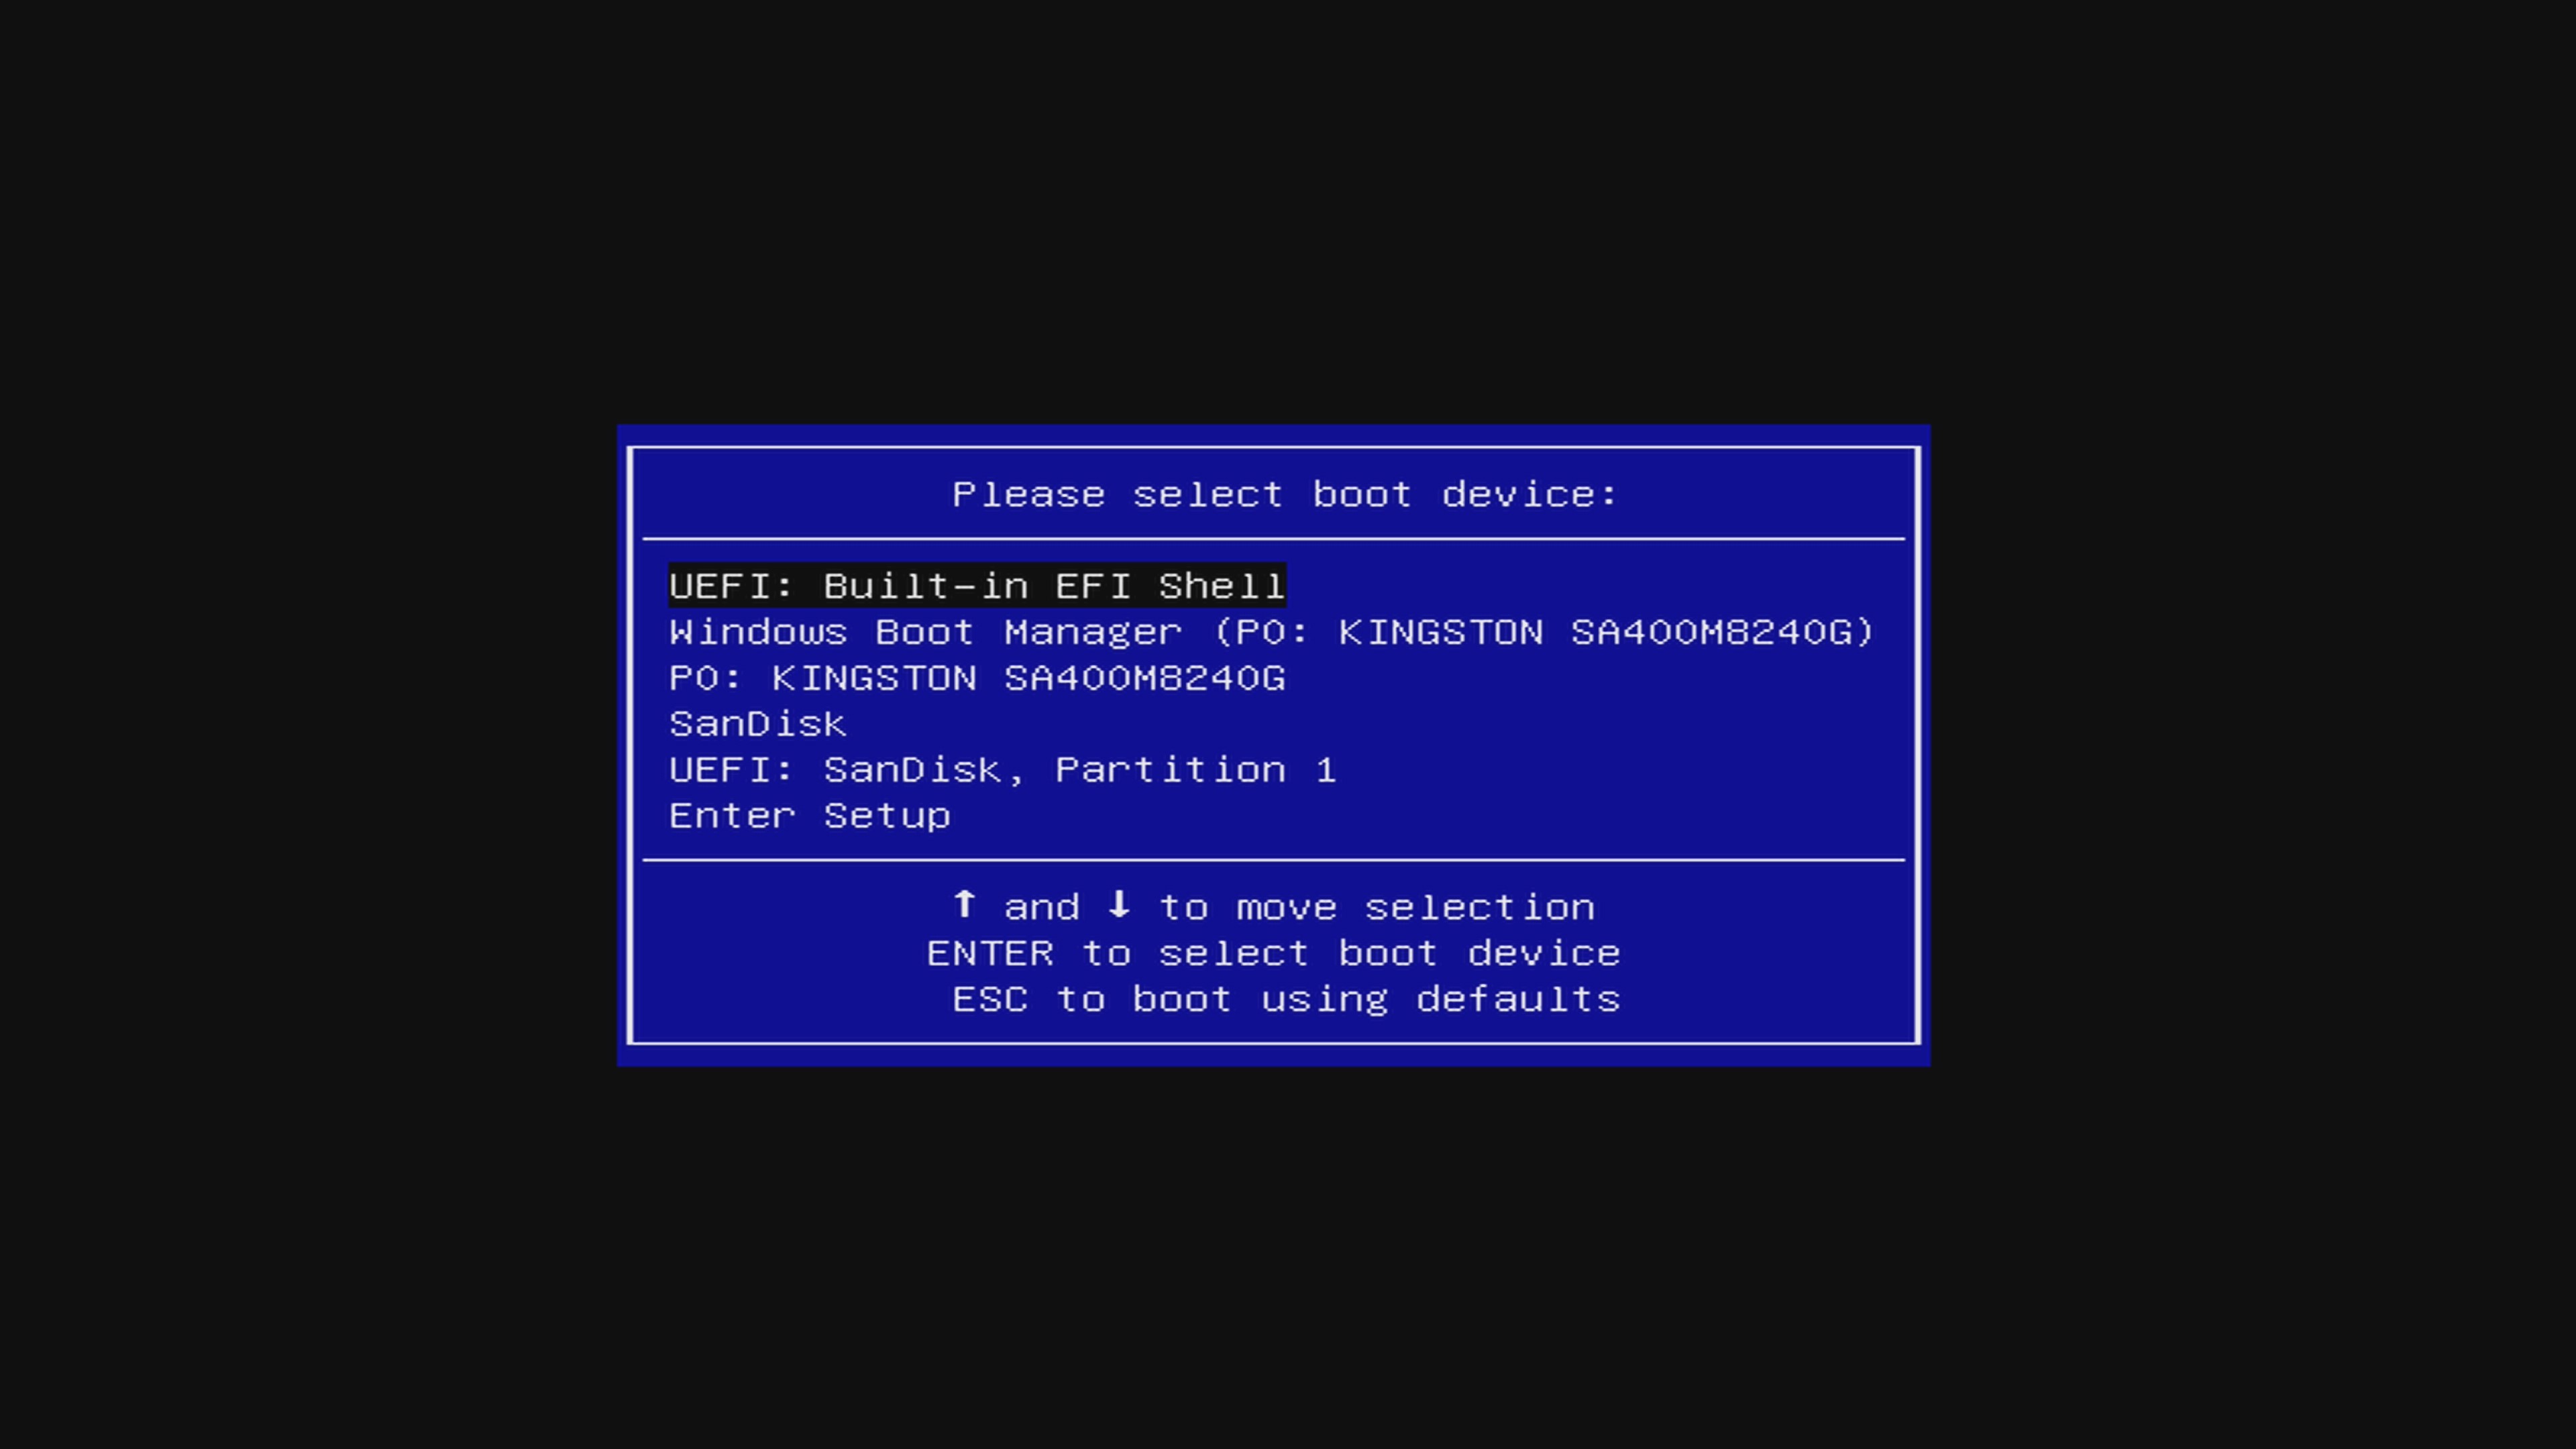
- Keep pressing
F7Key to Enter Boot Manager Screen. Select theUEFI: Built-in EFI Shellas boot device and pressEnter.
- Wait a couple of seconds to enter the EFI shell
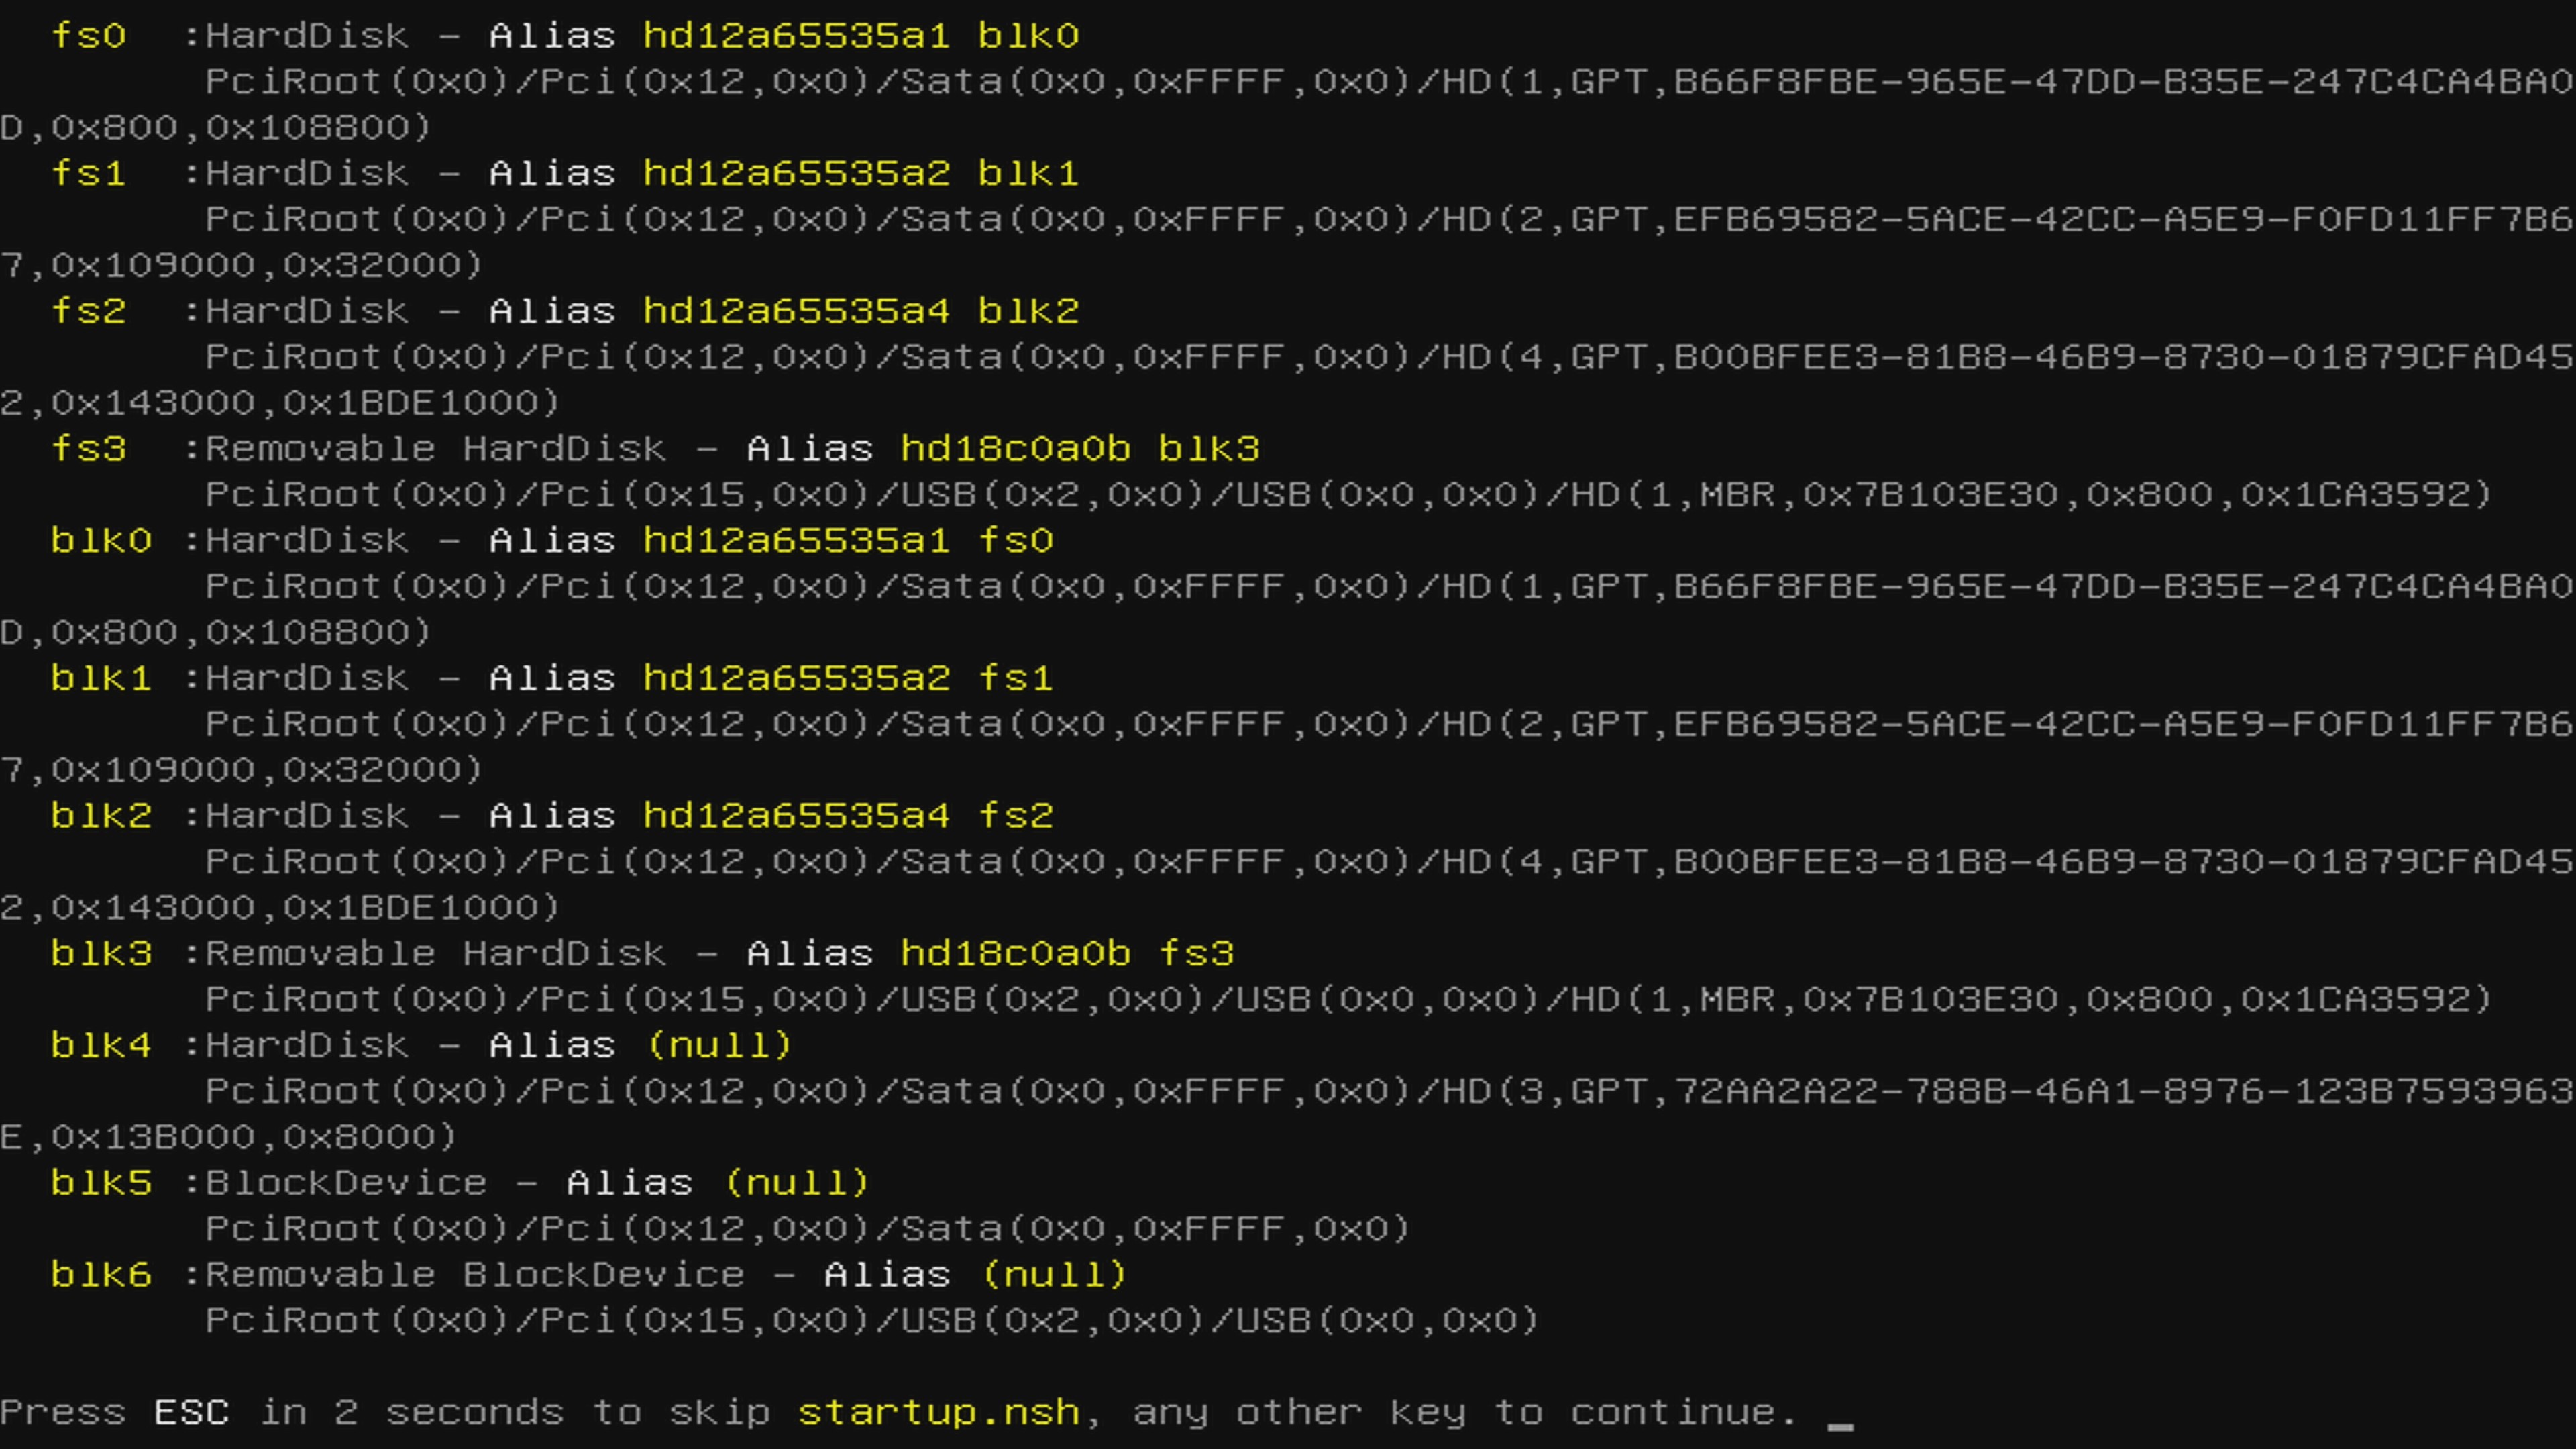
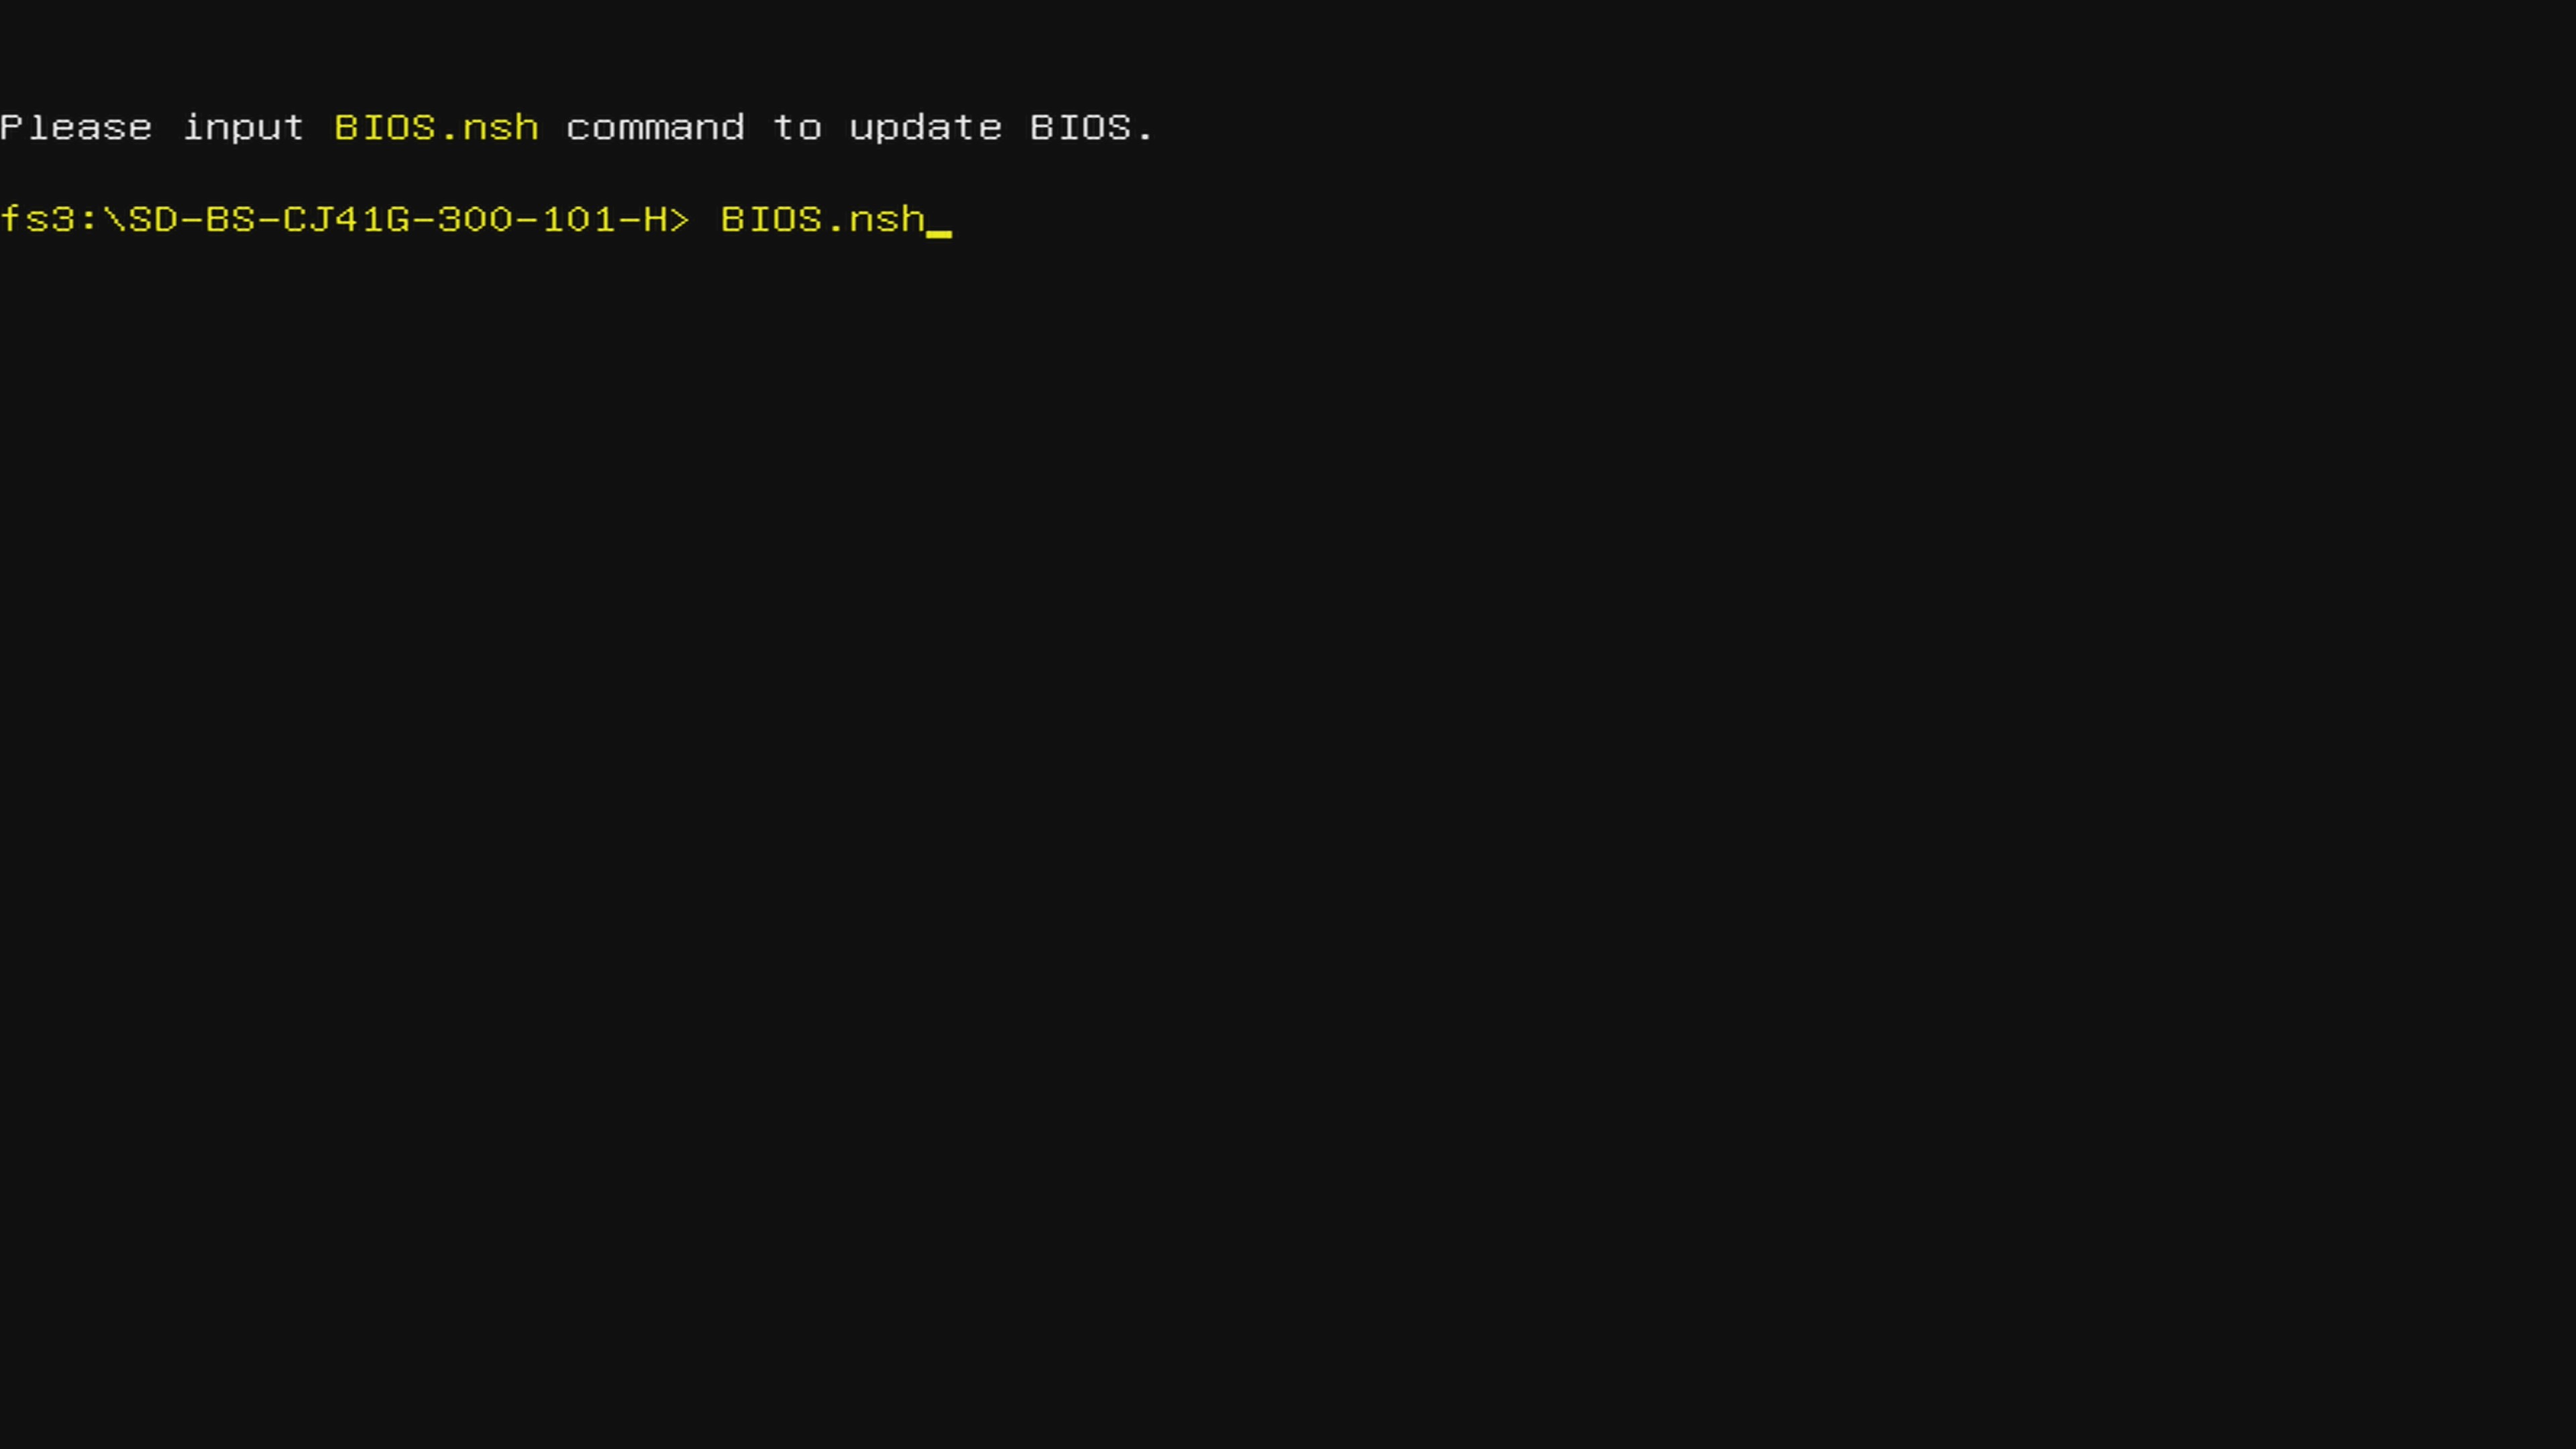
- You will see the following message
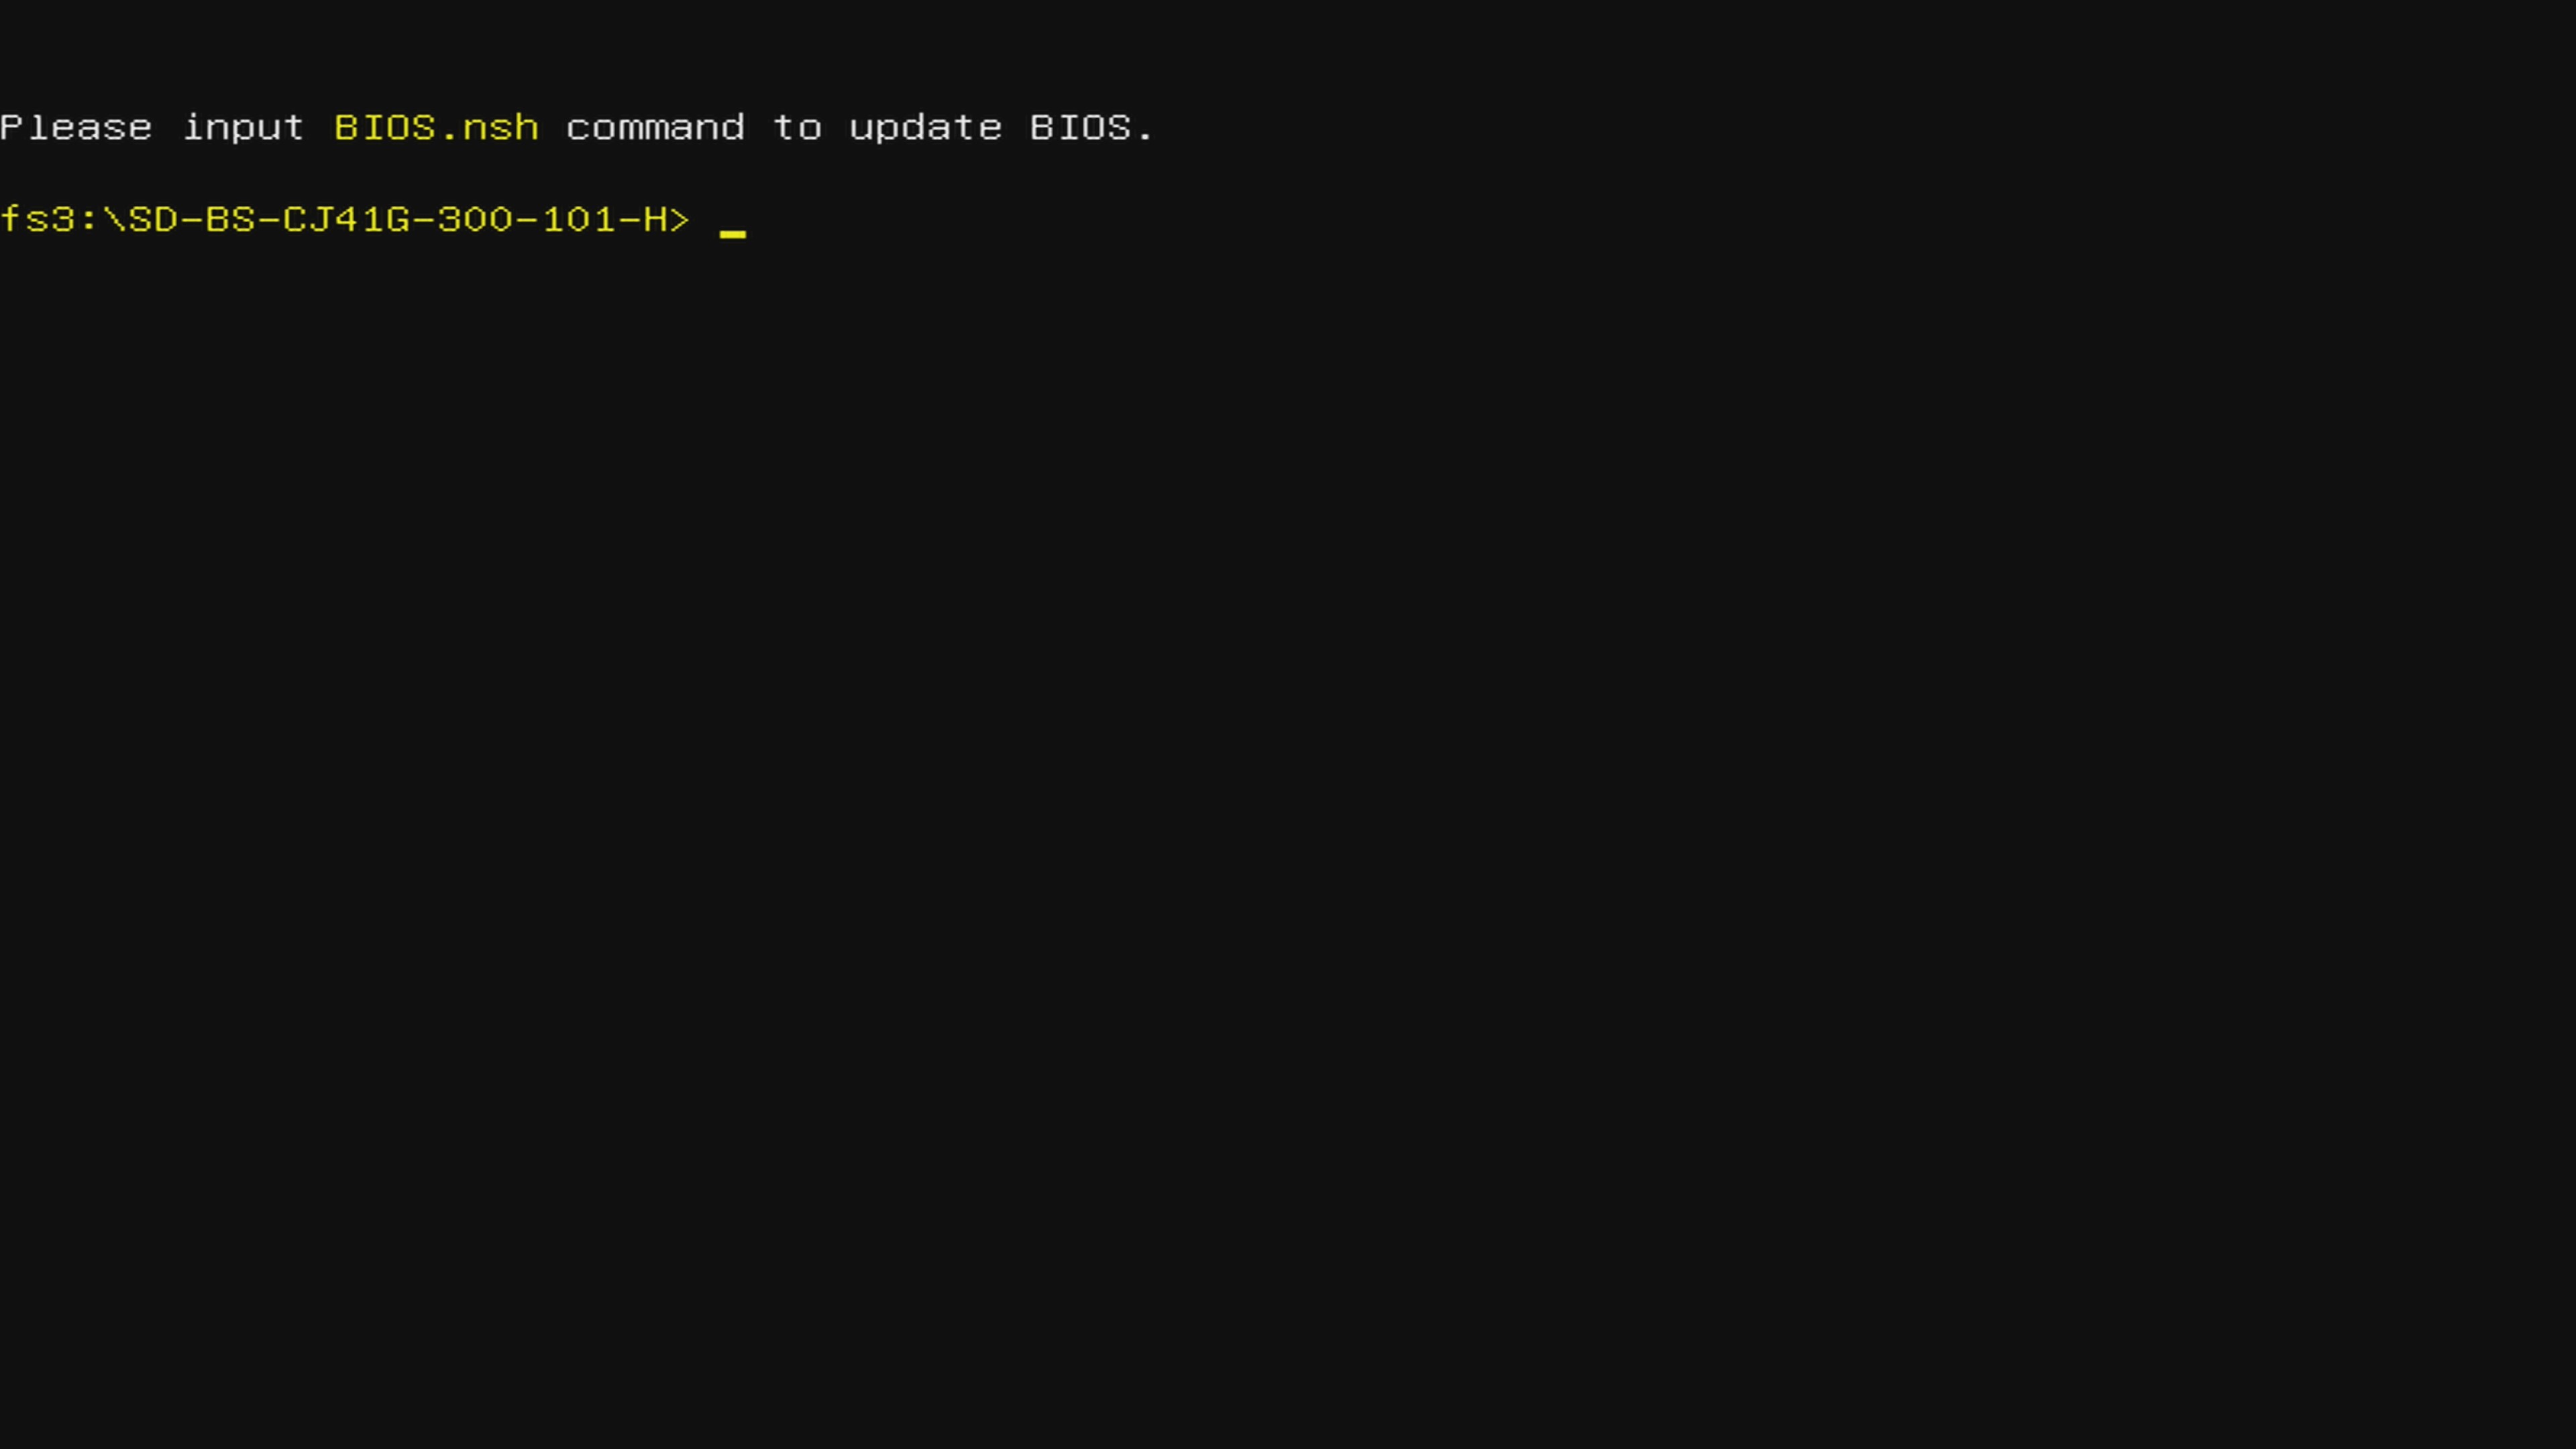
- Type BIOS.nsh and press ENTER to start the update process
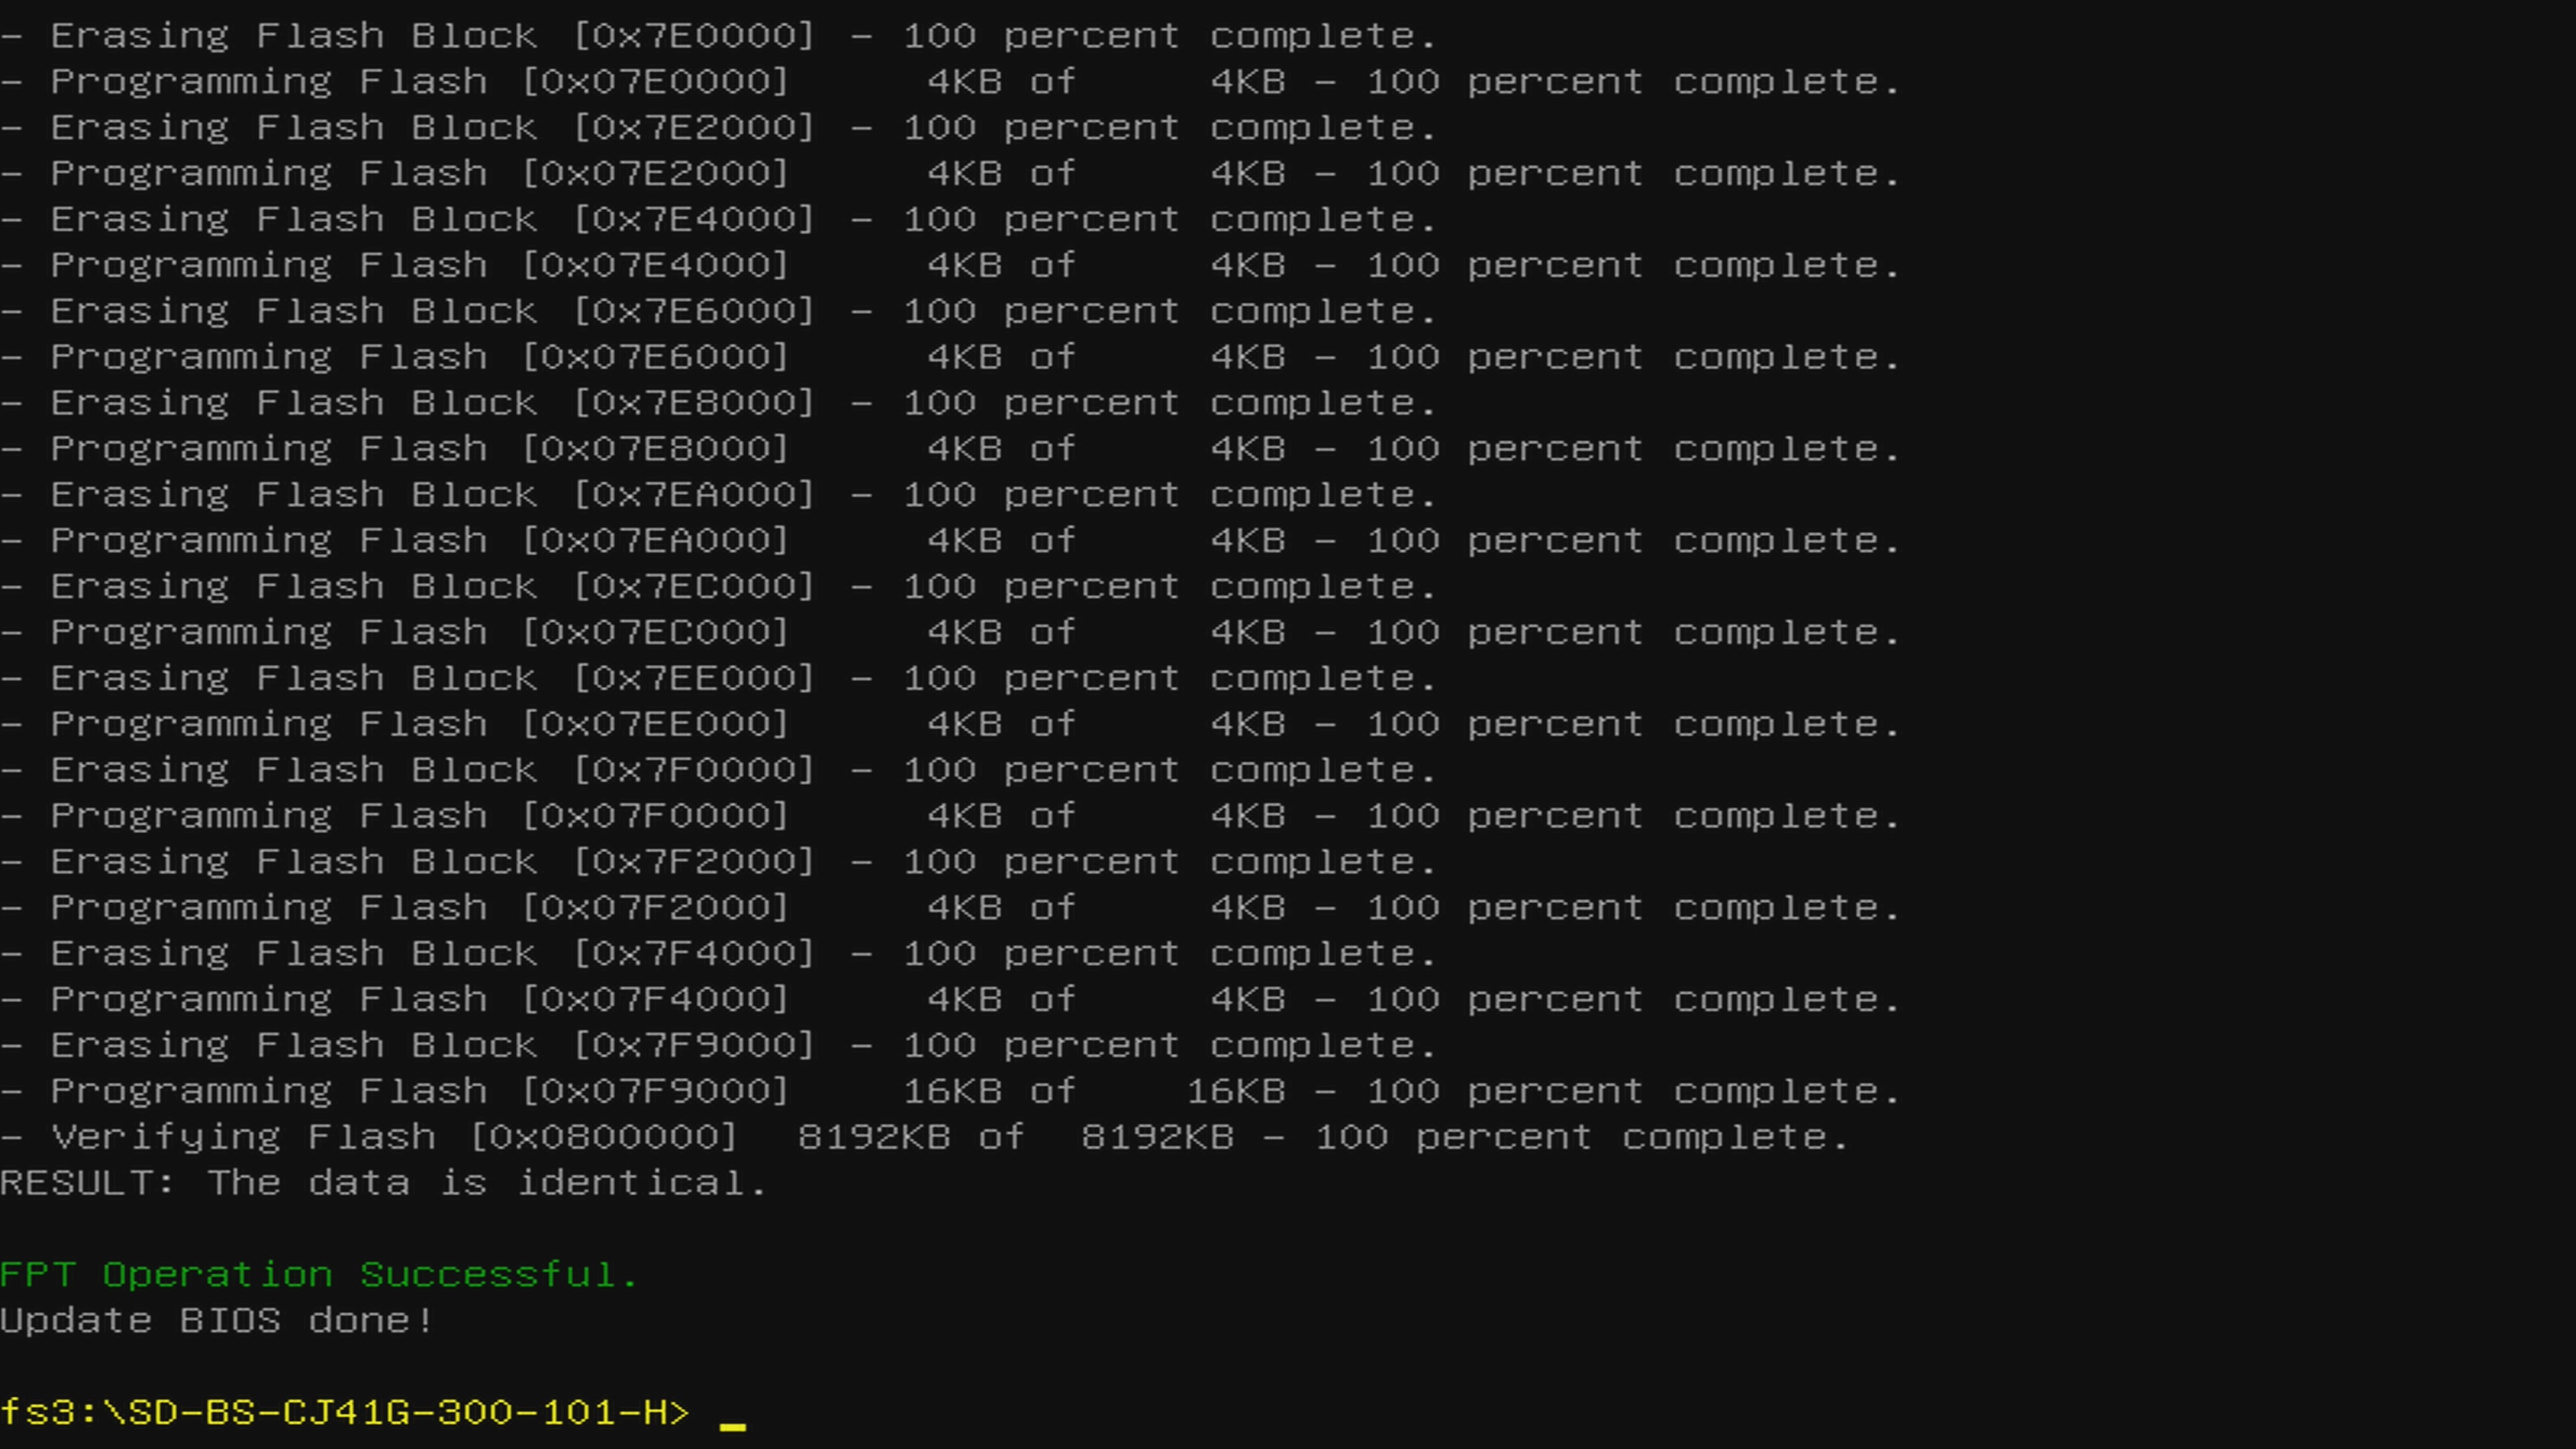
- If the BIOS update was successful, you will see the following output
Step 4 - Reboot
-
When the BIOS is upgraded, press the ON/OFF button, and you should see the blue light goes off.
-
Unplug the DC power jack and RTC battery from the ODYSSEY-X86.
-
Wait a couple of minutes
-
Plug the RTC battery and DC power jack back to the ODYSSEY-X86.
-
Press the ON/OFF button and wait patiently. You should see the blue light goes on.
Step 5 - Wait Patiently
Please wait patiently and DO NOT unplug power (or the hardware) to corrupt the updating process. The process will take 6 ~ 8 minutes, feel free for a coffee break!
Attention
The first boot up from the BIOS upgrade is relatively long, please be patient to wait, and the installed OS will launch eventually. It will take around 6 ~ 8 minutes.
How to update the Embedded Controller
The X86 also has a embedded controller that can be updated. Updating the EC has the same procedure as updating BIOS(auto-update):
-
Download the firmware files.
-
Save them in the root location of a FAT32 formatted USB drive.
-
Start ODYSSEY-X86 and press F7 to enter Boot Select Mode
-
Choose the connected flash drive (if there are 2 options for the flash drive, choose the one that starts with UEFI)
-
Wait and it will automatically start the flashing process.
-
Reboot the device when it's done.
Latest EC Firmware
SD-EC-CJ41G-M-101-R 07/26/2022 17:00:00
- Fixing bug: Increase overall stability.
History EC Firmware:
SD-EC-CJ41G-M-101-Q 10/12/2021 17:00:00
- SHA256: 6009005FF61A64A580F0862343CED1E1E8B4DE8625E326510582063D6E20BCE4
- Fixing bug: Increase overall stability.
SD-EC-CJ41G-M-101-O 08/16/2021 15:00:00
- SHA256: a08605b8b76bda6a50b64e64c4a9b256297d393f7139ffb2525cc93b28556f13
- Fixing bug: Increase overall stability.
- SHA256: DB6E1F77D6EB4B9A79DDAF6E7A55052B7BE6E63B8339C7B948FF111E5C9CA8AD
- Fixing bug: Increase overall stability.
- SHA256: 5e479185398121b1913ada3cff03264ea1522196b53f34c9ace77bd1f3ecc47e
- Fixing bug: Increase stability of the EC firmware.
- SHA256: 4ab099f45439f8f6ec14e25ae50a64f878eed4c998e39000e17f2047df6bbb83
- Fixing bug: Shutting down during BIOS setting page causes the ODYSSEY needs to reset the power in order to turn back on.
- SHA256: 94f664401120183238c5eaa41ea267b240dd5836fa879c568bf3275bca508c52
- Optimize FAN control logic
- SHA256: 4b7ed82357eb608c3ec00f6f5f0358a35e63b327ae33855eb5e7608814f8df6a
- Optimize the problem of incorrect starting and turning temperature of the Fan.
Tech Support & Product Discussion
Thank you for choosing our products! We are here to provide you with different support to ensure that your experience with our products is as smooth as possible. We offer several communication channels to cater to different preferences and needs.