One Wire Temperature Sensor DS18B20
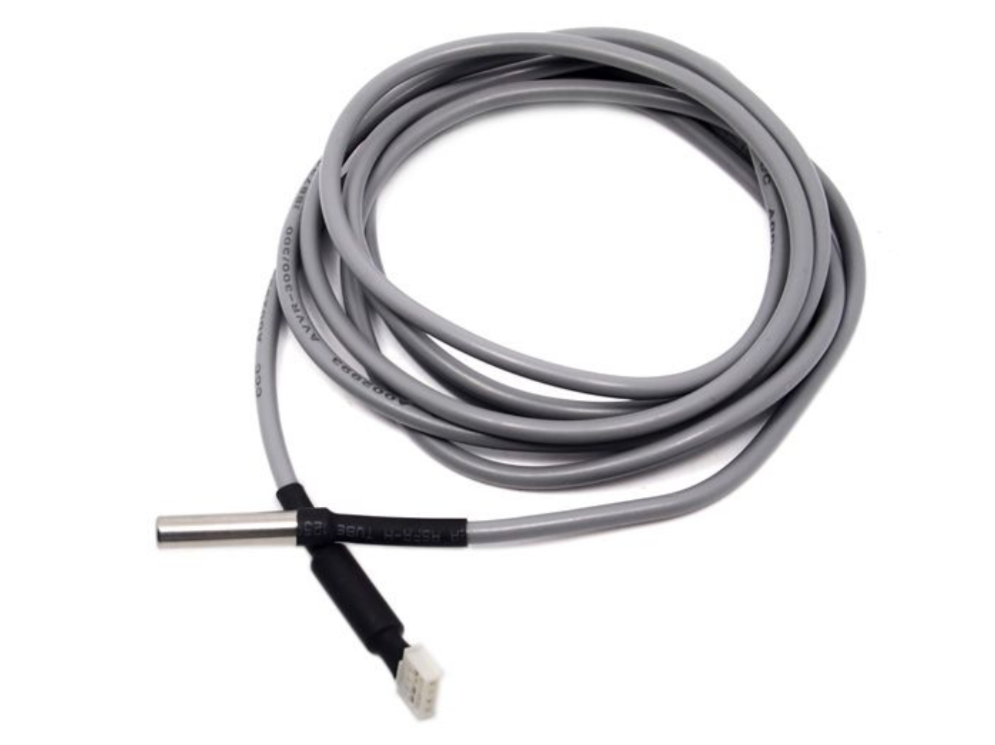

This 2m long One Wire Temperature Sensor has a waterproof probe and long wire shape, suitable for immersive temperature detection. The chip inside this sensor is DS18B20 which is widely adopted.The original one includes three wires inside, you need to add an extra resistance to get it working. For this sensor, we adjusted it into a Grove port and had a resistance pre-assembled inside so that you can use it as a regular Grove sensor. This article is going to illustrate the usage of the sensor on Raspberry Pi and have a fun!
Upgradable to Industrial Sensors
With the SenseCAP S2110 controller and S2100 data logger, you can easily turn the Grove into a LoRaWAN® sensor. Seeed not only helps you with prototyping but also offers you the possibility to expand your project with the SenseCAP series of robust industrial sensors.
SenseCAP S210x series industrial sensors provide an out-of-box experience for environmental sensing. Please refer to the S2101 Wireless Temperature and Humidity Sensor with higher performance and robustness for air quality monitoring. The series includes sensors for soil moisture, air temperature and humidity, light intensity, CO2, EC, and an 8-in-1 weather station. Try the latest SenseCAP S210x for your next successful industrial project.
| SenseCAP Industrial Sensor |
 |
| S2101 Air Temp & Humidity |
Features
- Requires only one wire for data interface
- Waterproof
- Grove compatible
- Accepts 3.0V to 5.5V power supply
- Wide temperature range: -55°C to +125°C
- High accuracy: ±0.5°C( -10°C to +85°C)
The cable part cannot be put under temperature higher than 70°C for a long time.
Specification
| Operating Voltage | 3.0-5.5V |
| Chip | DS18B20 |
| Length | 2m |
| Operating Temperature | -55°C to +125°C |
Platform Supported
| Arduino | Raspberry Pi | |||
|---|---|---|---|---|
Getting Started
After this section, you can make One Wire Temperature Sensor run with only few steps.
Play with Arduino
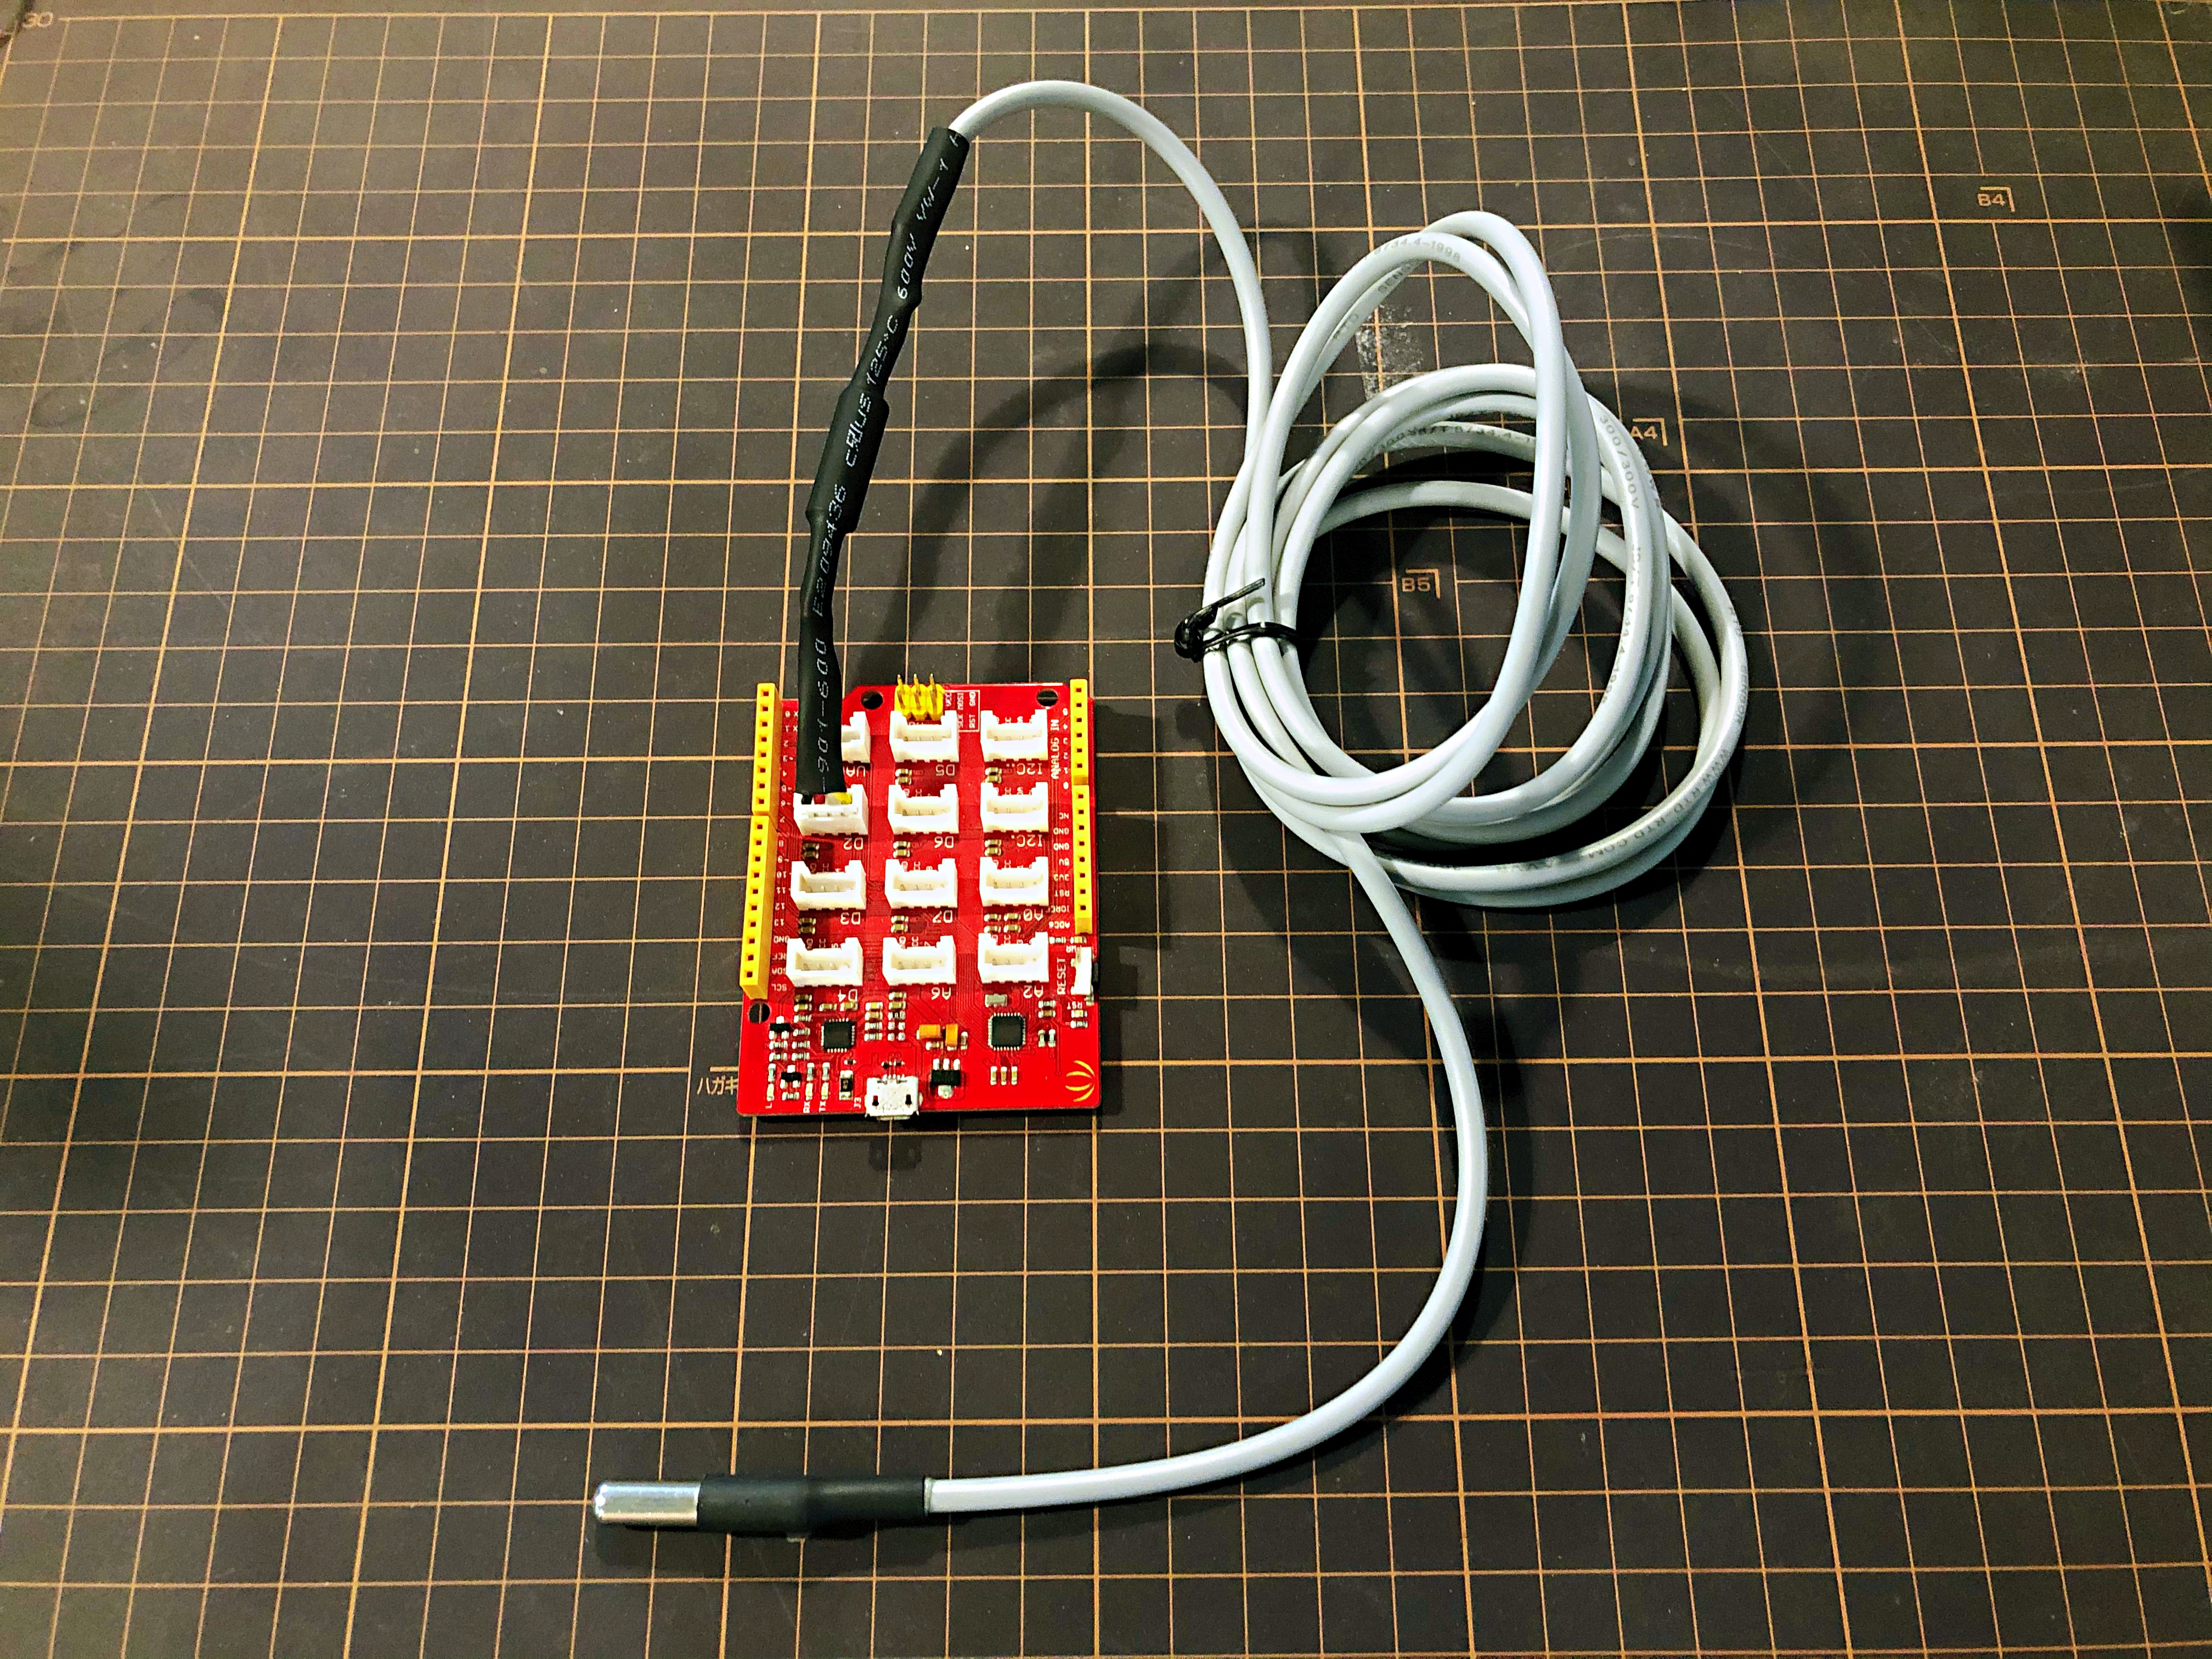
Materials Required
| Seeeduino Lotus V1.1 | One Wire Temperature Sensor |
|---|---|
 |  |
| Get ONE Now | Get ONE Now |
Hardware Connection
Please plug the USB cable,One Wire Temperature Sensor Interface into Seeeduino Lotus V1.1 Interface gently, otherwise you may damage the port.
-
Step 1. Plug One Wire Temperature Sensor into D2 interface of Seeeduino Lotus V1.1 with a Grove Cable.
-
Step 2. Connect Seeeduino Lotus V1.1 to PC via a USB cable.
-
Step 3. Download the code, please refer to the software part.
-
Step 4. Run the code and the outcome will display on the screen of Serial Monitor in your Arduino IDE .
Software
If this is the first time you work with Arduino, we strongly recommend you to see Getting Started with Arduino before the start.
-
Step 1. Download the Library for Onewire and Library for Arduino Temperature Control
-
Step 2. Copy the whole OneWire and Arduino-Temperature-Control-Library files and paste them into your Arduino IDE library file.
-
Step 3. Upload the demo code from Software Code below. If you do not know how to upload the code, please check How to upload code.
Software Code
// Include the libraries we need
#include <OneWire.h>
#include <DallasTemperature.h>

// Data wire is plugged into port 2 on the Arduino
#define ONE_WIRE_BUS 2


// Setup a oneWire instance to communicate with any OneWire devices (not just Maxim/Dallas temperature ICs)
OneWire oneWire(ONE_WIRE_BUS);

// Pass our oneWire reference to Dallas Temperature.
DallasTemperature sensors(&oneWire);

/*
 * The setup function. We only start the sensors here
 */
void setup(void)
{
  // start serial port
  Serial.begin(115200);
  Serial.println("Dallas Temperature IC Control Library Demo");

  // Start up the library
  sensors.begin();
}

/*
 * Main function, get and show the temperature
 */
void loop(void)
{
  // call sensors.requestTemperatures() to issue a global temperature
  // request to all devices on the bus
  Serial.print("Requesting temperatures...");
  sensors.requestTemperatures(); // Send the command to get temperatures
  Serial.println("DONE");
  // After we got the temperatures, we can print them here.
  // We use the function ByIndex, and as an example get the temperature from the first sensor only.
  float tempC = sensors.getTempCByIndex(0);

  // Check if reading was successful
  if(tempC != DEVICE_DISCONNECTED_C)
  {
    Serial.print("Temperature for the device 1 (index 0) is: ");
    Serial.println(tempC);
  }
  else
  {
    Serial.println("Error: Could not read temperature data");
  }
}
If everything goes well, you can go to Serial Monitor to see an outcome as following:

Play with Raspberry Pi
Materials required
| Raspberry Pi 4 Model B | Grove - Base Hat for Raspberry Pi | One Wire Temperature Sensor |
|---|---|---|
 |  | |
| Get One Now | Get One Now | Get One Now |
Connecting hardware
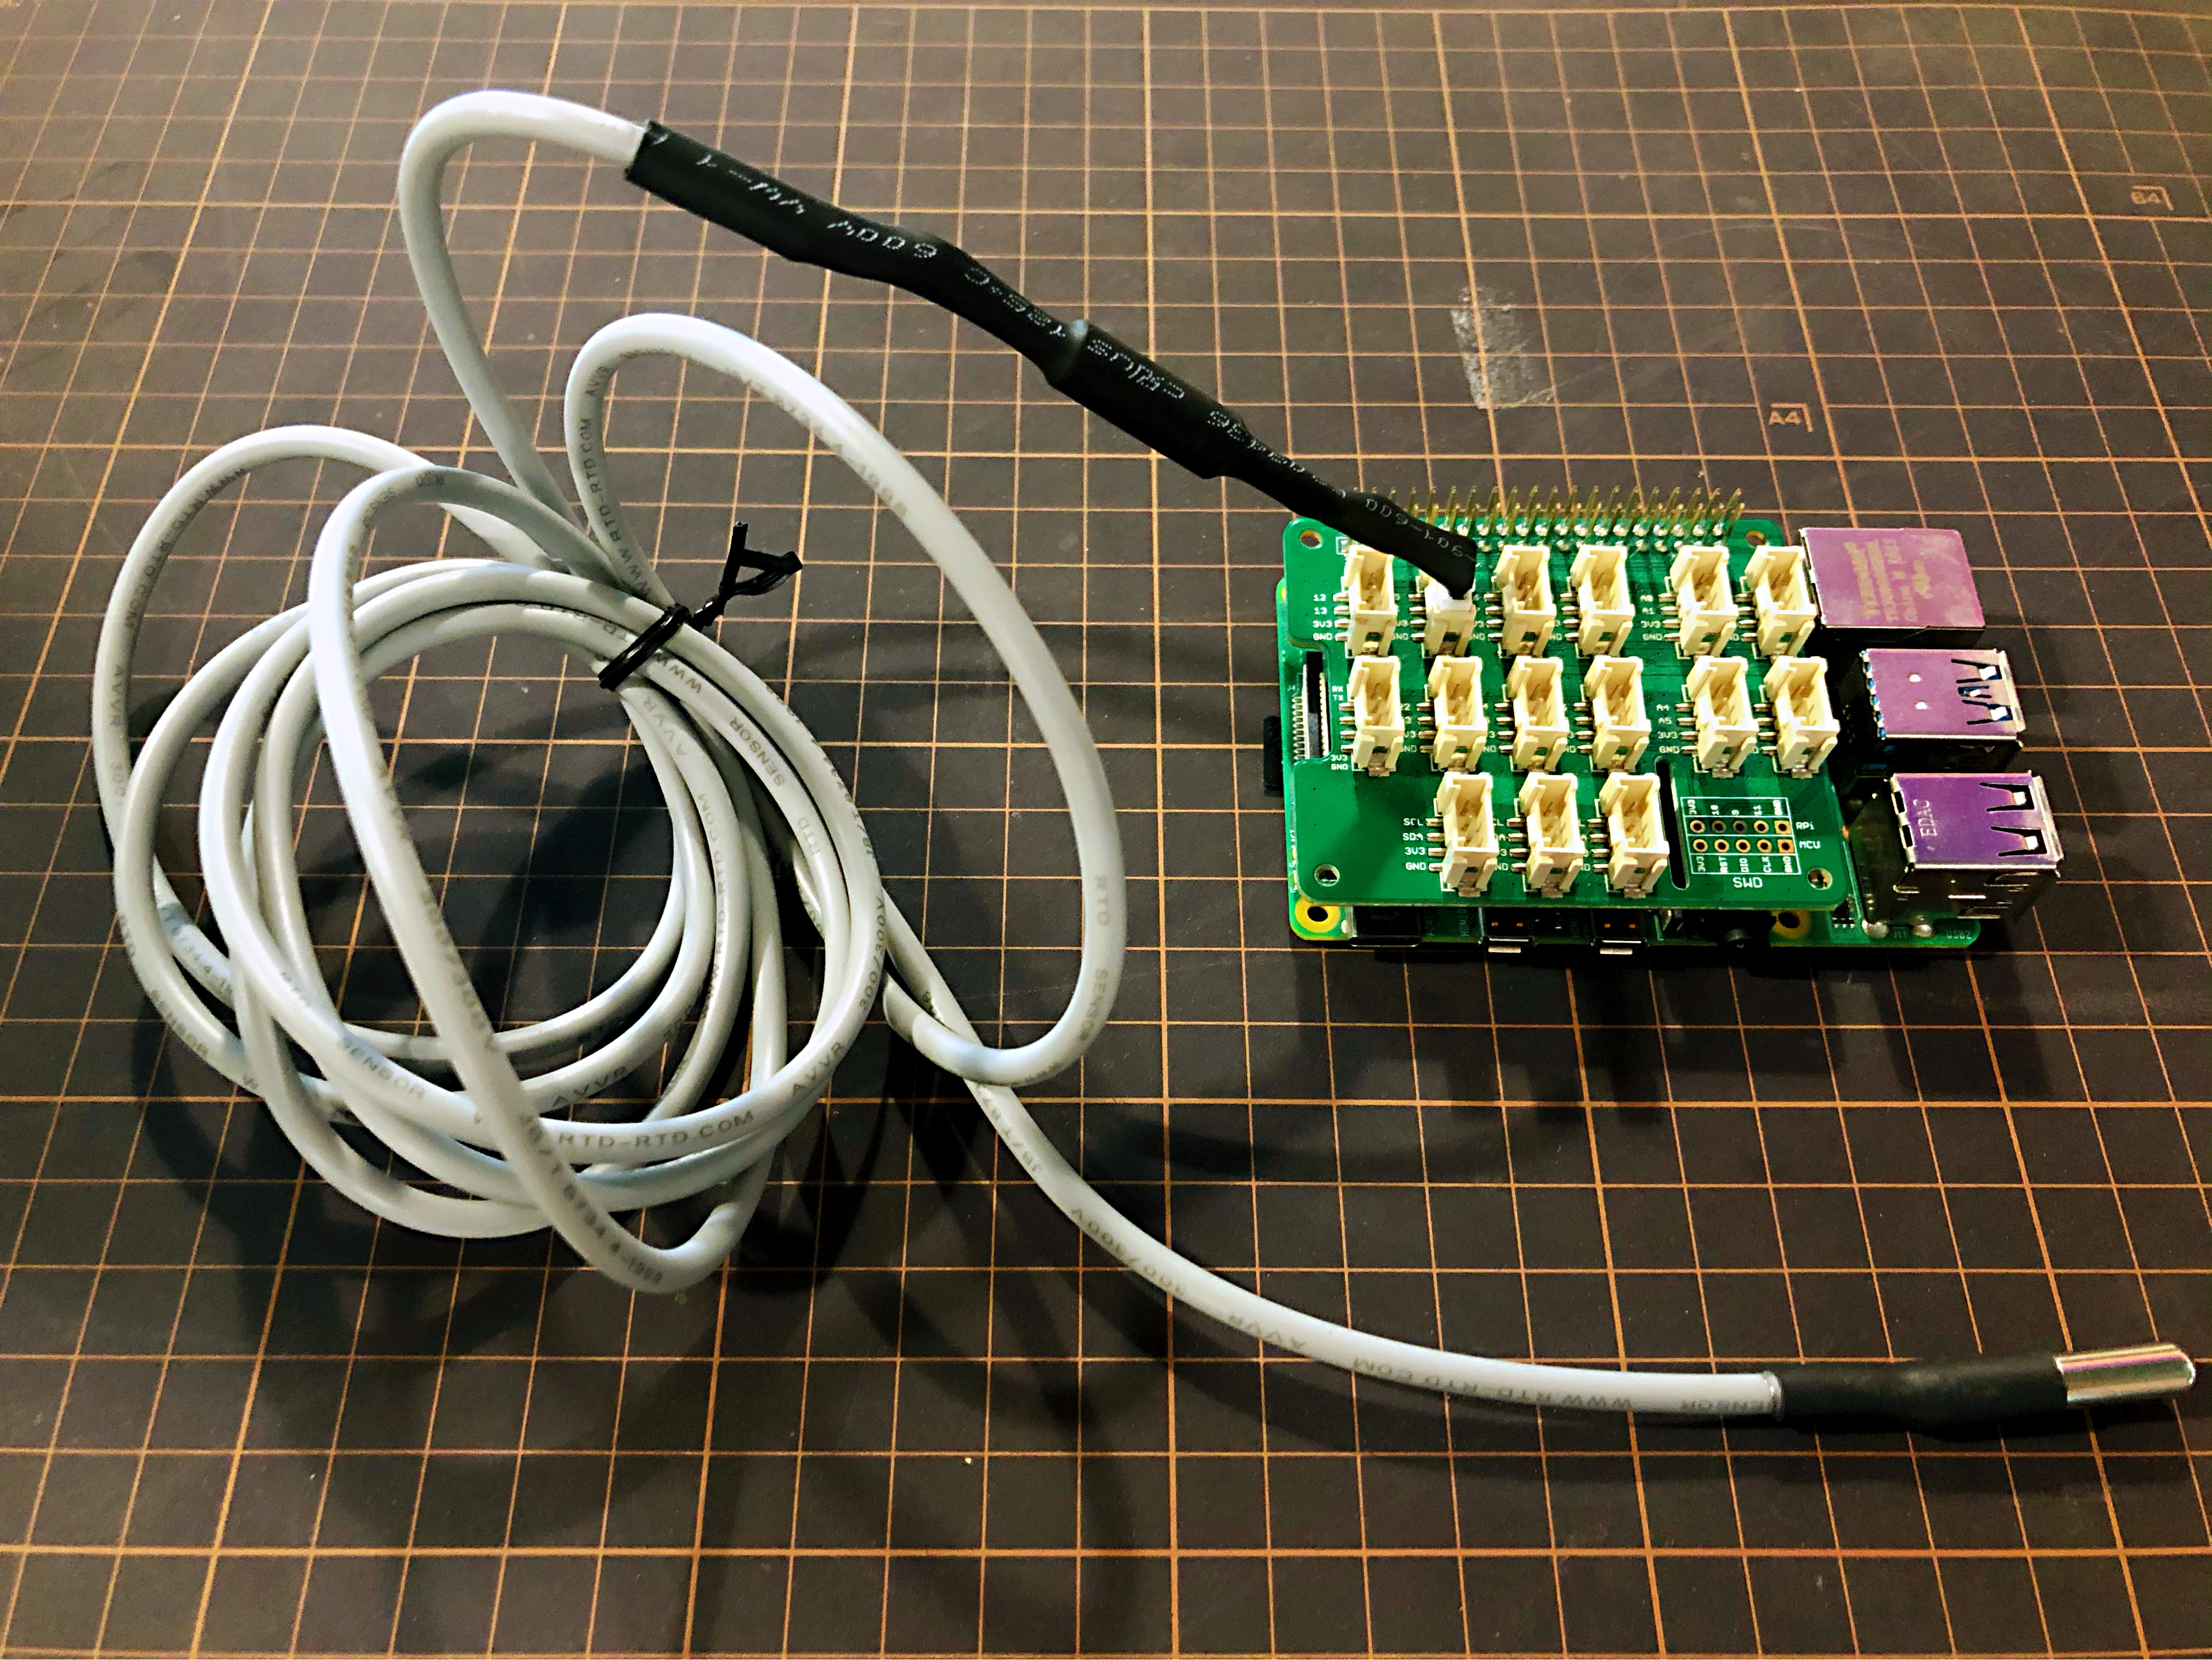
Step 1. Connect One Wire Temperature Sensor to port D5 of Grove - Base Hat for Raspberry Pi, Plugged into Raspberry Pi 4 Model B. And then connect the Raspberry Pi 4 Model B with a PC.
Step 2. After accessing the system of Raspberry Pi, git clone Seeed_Python_DS18B20 and install grove.py by inserting the following command:
pip3 install Seeed-grove.py
Or on supported GNU/Linux systems like the Raspberry Pi, you can install the driver locally from PyPI:
pip3 install seeed-python-Ds18b20
Step 3. To install system-wide (this may be required in some cases):
sudo pip3 install seeed-python-Ds18b20
And you can insert the following command to upgrade the driver locally from PyPI:
pip3 install --upgrade seeed-python-Ds18b20
Software
import seeed_ds18b20
import time

def main():
    DS18B20 = seeed_ds18b20.grove_ds18b20()
    print("Please use Ctrl C to quit")
    while True:
        temp_c,temp_f = DS18B20.read_temp
        print('temp_c %.2f C   temp_f %.2f F' % (temp_c,temp_f),end=" ")
        print('\r', end='')
        time.sleep(0.5)

if __name__ == "__main__":
    main()
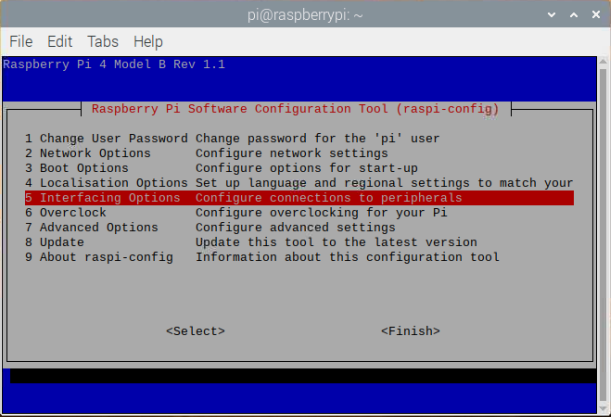
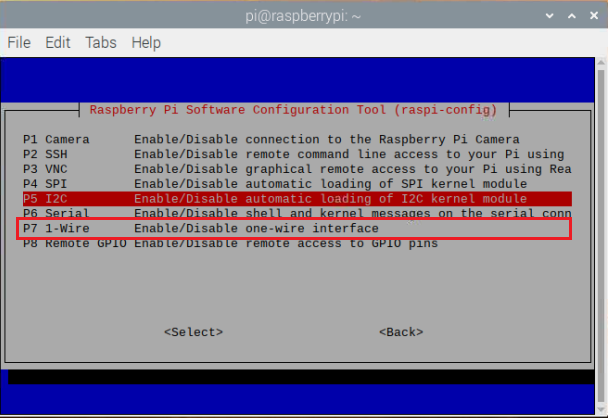
When running the demo code on Raspberry Pi, you MIGHT be reminded to enable the 1-Wire interface. Then you should use the command sudo raspi-config and reboot to enable the 1-Wire device:
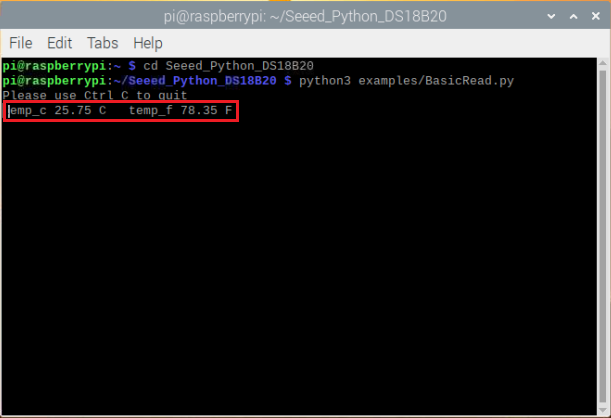
Step 4. Run the demo by the following command:
cd Seeed_Python_DS18B20
python3 examples/BasicRead.py
The outcome will display as following if everything goes well:
Resource
[PDF] DS18B20-Datasheet.
Tech Support & Product Discussion
Thank you for choosing our products! We are here to provide you with different support to ensure that your experience with our products is as smooth as possible. We offer several communication channels to cater to different preferences and needs.