Getting started with Nvidia Jetson
This wiki is wrote for ReSpeaker 2-Mics Pi HAT v1, to distinguish the v1 and v2 device, please refer to How to Distinguish ReSpeaker 2-Mics Pi HAT Hardware Revisions.
Driver installation and configuration
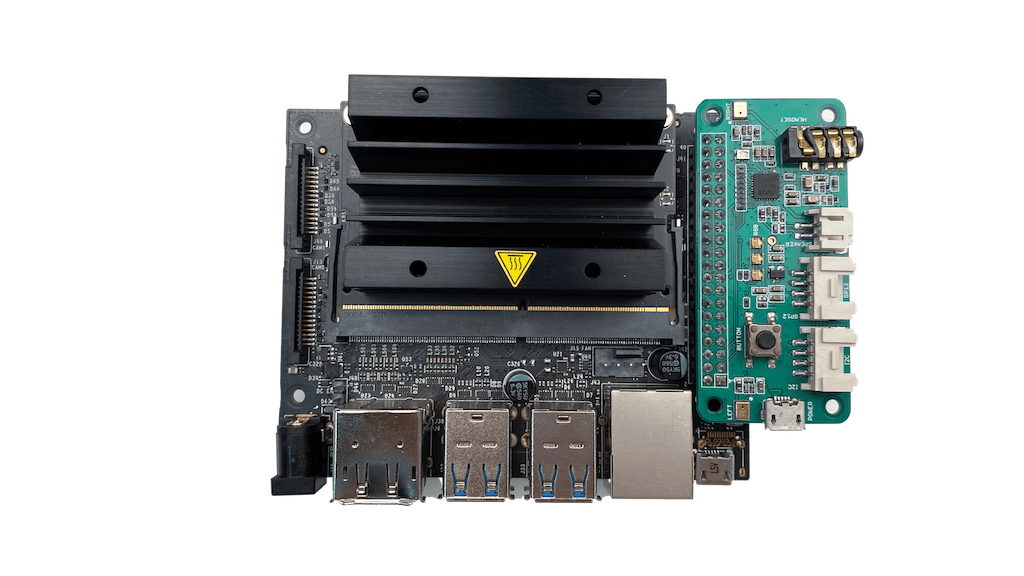
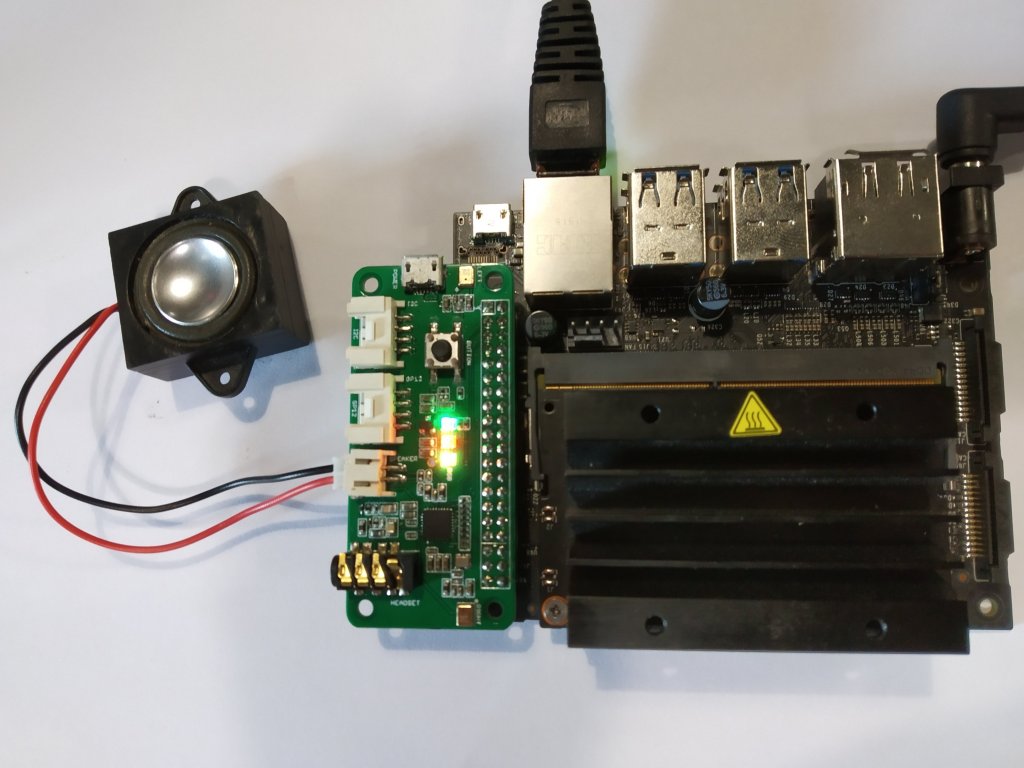
1. Connect ReSpeaker 2-Mics Pi HAT to Jetson Nano
Mount ReSpeaker 2-Mics Pi HAT on your Jetson Nano, make sure that the pins are properly aligned when stacking the ReSpeaker 2-Mics Pi HAT.
Jetson Nano Connection

2. Setup the driver on Jetson Nano
Make sure that you are running the latest Jetson Nano OS image on your device. (updated at 2021.07.03)
This is tested for JetPack 4.5.1. For other version, you will need to check kernel headers version number with ls /usr/src/linux-headers-*
STEP 1. Clone the repo
cd ~
git clone https://github.com/Seeed-Studio/seeed-linux-dtoverlays
cd ~/seeed-linux-dtoverlays
STEP 2. Build dtbo & driver
export CUSTOM_MOD_FILTER_OUT="lis3lv02d mcp25xxfd gt9xx seeed-voicecard"
KBUILD=/usr/src/linux-headers-4.9.201-tegra-ubuntu18.04_aarch64/kernel-4.9 make all_jetsonnano
STEP 3. Install the Driver
sudo -E KBUILD=/usr/src/linux-headers-4.9.201-tegra-ubuntu18.04_aarch64/kernel-4.9 make install_jetsonnano
STEP 4. Install dtbo
sudo /opt/nvidia/jetson-io/config-by-hardware.py -n "Seeed Voice Card 2MIC"
STEP 5. Reboot
sudo reboot
STEP 6. Restore Alsa widgets settings
Must wait a moment the time sound card busy after login.
cd ~/seeed-linux-dtoverlays
alsactl -f extras/wm8960_asound.state-jetson-nano restore 1
STEP 7. Check that the sound card name matches the source code seeed-voicecard by command aplay -l and arecord -l.
jetson@jetson:~$ aplay -l
**** List of PLAYBACK Hardware Devices ****
card 0: tegrahda [tegra-hda], device 3: HDMI 0 [HDMI 0]
  Subdevices: 1/1
  Subdevice #0: subdevice #0
card 1: tegrasndt210ref [tegra-snd-t210ref-mobile-rt565x], device 0: ADMAIF1 CIF ADMAIF1-0 []
  Subdevices: 0/1
  Subdevice #0: subdevice #0
card 1: tegrasndt210ref [tegra-snd-t210ref-mobile-rt565x], device 1: ADMAIF2 CIF ADMAIF2-1 []
  Subdevices: 1/1
  Subdevice #0: subdevice #0
card 1: tegrasndt210ref [tegra-snd-t210ref-mobile-rt565x], device 2: ADMAIF3 CIF ADMAIF3-2 []
  Subdevices: 1/1
  Subdevice #0: subdevice #0
card 1: tegrasndt210ref [tegra-snd-t210ref-mobile-rt565x], device 3: ADMAIF4 CIF ADMAIF4-3 []
  Subdevices: 1/1
  Subdevice #0: subdevice #0
card 1: tegrasndt210ref [tegra-snd-t210ref-mobile-rt565x], device 4: ADMAIF5 CIF ADMAIF5-4 []
  Subdevices: 1/1
  Subdevice #0: subdevice #0
card 1: tegrasndt210ref [tegra-snd-t210ref-mobile-rt565x], device 5: ADMAIF6 CIF ADMAIF6-5 []
  Subdevices: 1/1
  Subdevice #0: subdevice #0
card 1: tegrasndt210ref [tegra-snd-t210ref-mobile-rt565x], device 6: ADMAIF7 CIF ADMAIF7-6 []
  Subdevices: 1/1
  Subdevice #0: subdevice #0
card 1: tegrasndt210ref [tegra-snd-t210ref-mobile-rt565x], device 7: ADMAIF8 CIF ADMAIF8-7 []
  Subdevices: 1/1
  Subdevice #0: subdevice #0
card 1: tegrasndt210ref [tegra-snd-t210ref-mobile-rt565x], device 8: ADMAIF9 CIF ADMAIF9-8 []
  Subdevices: 1/1
  Subdevice #0: subdevice #0
card 1: tegrasndt210ref [tegra-snd-t210ref-mobile-rt565x], device 9: ADMAIF10 CIF ADMAIF10-9 []
  Subdevices: 1/1
  Subdevice #0: subdevice #0


jetson@jetson:~$ arecord -l
**** List of CAPTURE Hardware Devices ****
card 1: tegrasndt210ref [tegra-snd-t210ref-mobile-rt565x], device 0: ADMAIF1 CIF ADMAIF1-0 []
  Subdevices: 1/1
  Subdevice #0: subdevice #0
card 1: tegrasndt210ref [tegra-snd-t210ref-mobile-rt565x], device 1: ADMAIF2 CIF ADMAIF2-1 []
  Subdevices: 1/1
  Subdevice #0: subdevice #0
card 1: tegrasndt210ref [tegra-snd-t210ref-mobile-rt565x], device 2: ADMAIF3 CIF ADMAIF3-2 []
  Subdevices: 1/1
  Subdevice #0: subdevice #0
card 1: tegrasndt210ref [tegra-snd-t210ref-mobile-rt565x], device 3: ADMAIF4 CIF ADMAIF4-3 []
  Subdevices: 1/1
  Subdevice #0: subdevice #0
card 1: tegrasndt210ref [tegra-snd-t210ref-mobile-rt565x], device 4: ADMAIF5 CIF ADMAIF5-4 []
  Subdevices: 1/1
  Subdevice #0: subdevice #0
card 1: tegrasndt210ref [tegra-snd-t210ref-mobile-rt565x], device 5: ADMAIF6 CIF ADMAIF6-5 []
  Subdevices: 1/1
  Subdevice #0: subdevice #0
card 1: tegrasndt210ref [tegra-snd-t210ref-mobile-rt565x], device 6: ADMAIF7 CIF ADMAIF7-6 []
  Subdevices: 1/1
  Subdevice #0: subdevice #0
card 1: tegrasndt210ref [tegra-snd-t210ref-mobile-rt565x], device 7: ADMAIF8 CIF ADMAIF8-7 []
  Subdevices: 1/1
  Subdevice #0: subdevice #0
card 1: tegrasndt210ref [tegra-snd-t210ref-mobile-rt565x], device 8: ADMAIF9 CIF ADMAIF9-8 []
  Subdevices: 1/1
  Subdevice #0: subdevice #0
card 1: tegrasndt210ref [tegra-snd-t210ref-mobile-rt565x], device 9: ADMAIF10 CIF ADMAIF10-9 []
  Subdevices: 1/1
  Subdevice #0: subdevice #0
- Step 3. Test, you will hear what you say to the microphones (don't forget to plug in an earphone or a speaker):
arecord -f cd -Dhw:1 test.wav
aplay -Dhw:1 test.wav
or (to play the sound from microphone immediately to speakers/headphones):
arecord -D hw:1,0 -f S32_LE -r 48000 -c 2 | aplay -D hw:1,0 -f S32_LE -r 48000 -c 2
Note: -Dhw:1 is the recording(or playback device number), depending on your system this number may differ.
Usage overview
To run the following examples, clone https://github.com/respeaker/mic_hat.git repository to your Jetson Nano
git clone https://github.com/respeaker/mic_hat.git
All the Python scripts, mentioned in the examples below can be found inside this repository. To install the necessary dependencies, from mic_hat repository folder, run
sudo apt-get install portaudio19-dev libatlas-base-dev
pip3 install Jetson.GPIO spidev pyaudio
APA102 LEDs
Each on-board APA102 LED has an additional driver chip. The driver chip takes care of receiving the desired color via its input lines, and then holding this color until a new command is received.
python3 interfaces/pixels.py

Record sound with Python
We use PyAudio python library to record sound with Python.
First, run the following script to get the device index number of 2 Mic pi hat:
python3 recording_examples/get_device_index.py
You will see the device ID as below.
Input Device id 1 - tegra-snd-t210ref-mobile-rt565x: - (hw:1,1)
To record the sound, open recording_examples/record.py file with nano or other text editor and change RESPEAKER_INDEX = 1 to index number of ReSpeaker on your system. Then run python script record.py to make a recording:
python3 recording_examples/record.py
If you want to extract channel 0 data from 2 channels, have a look at the content of record_one_channel.py. For other channel X, please change [0::2] to [X::2].
python3 recording_examples/record_one_channel.py
To play the recorded samples you can either use aplay system utility, for example
aplay -f cd -Dhw:1 output.wav #for Stereo sound