SEEED IOT BUTTON FOR AWS
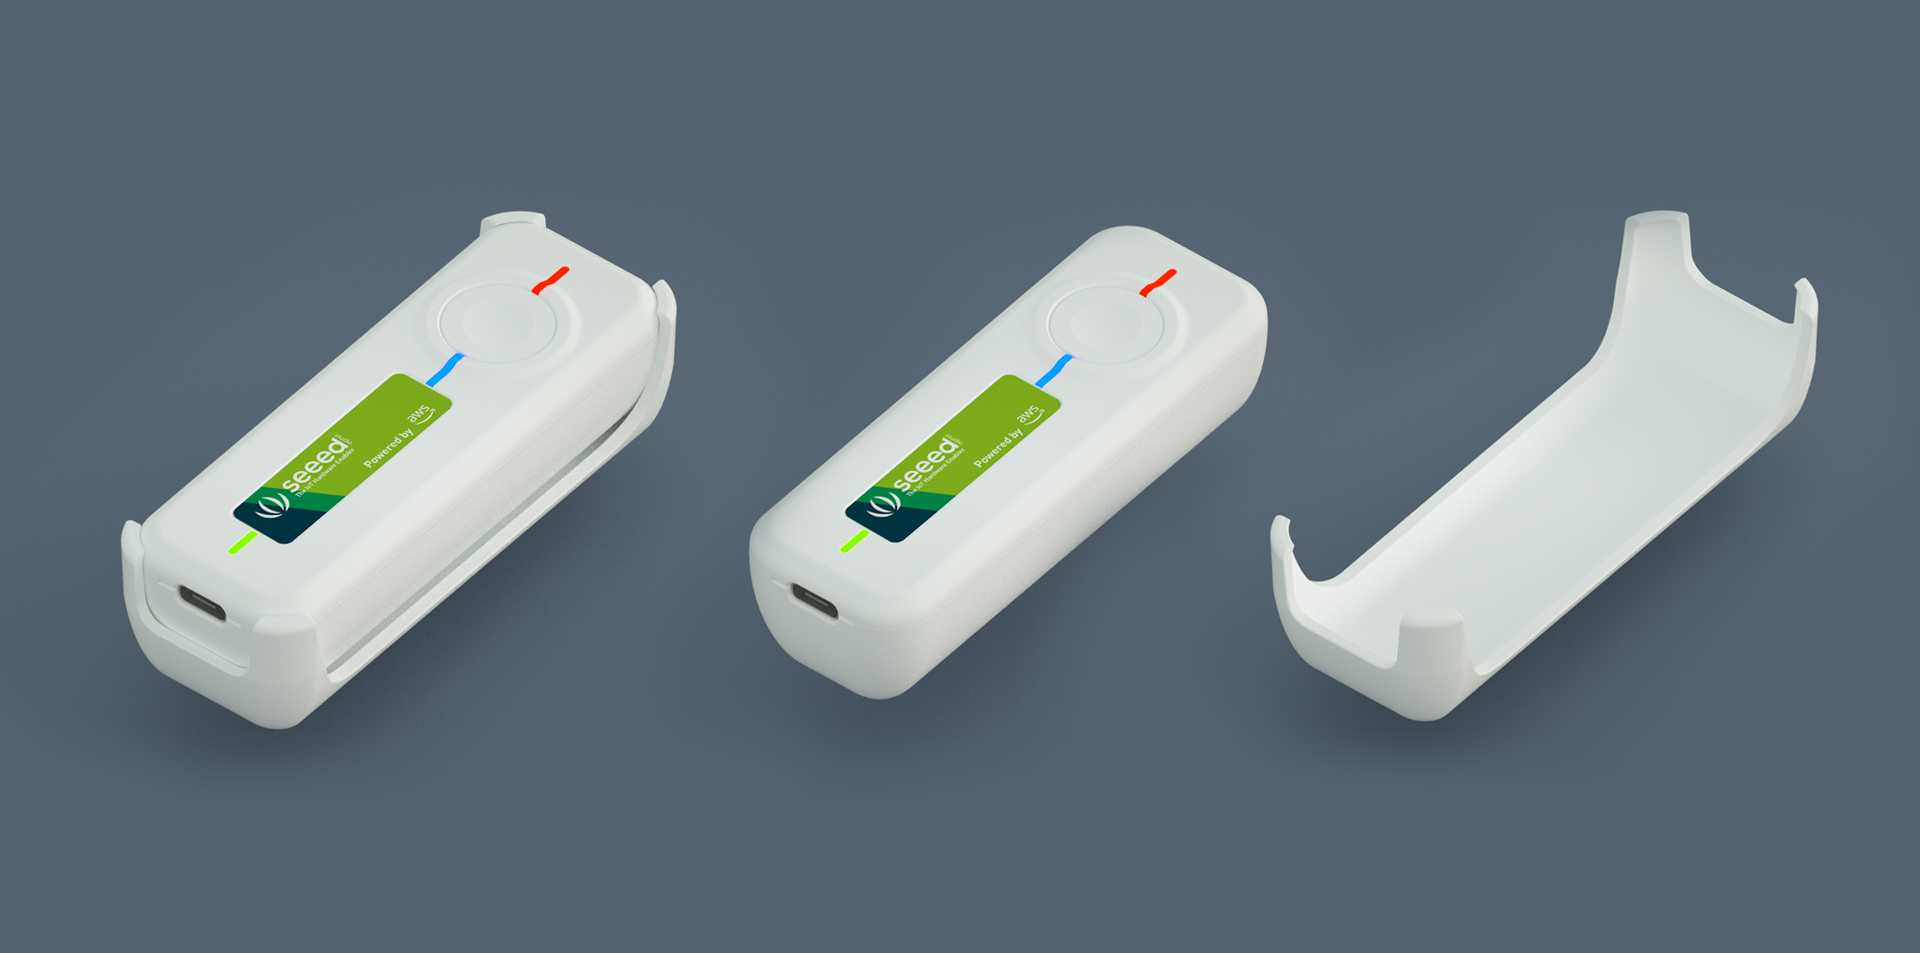
The Seeed IoT Button For AWS is a Wi-Fi based, programmable button that is easy to configure and simple to use. You can use the Seeed IoT Button For AWS to capture quick customer feedback without burdening customers with time-consuming questionnaires. It is designed for enterprises and developers to easily integrate with existing business workflows and systems using the AWS IoT 1-Click service. And this IoT Button is fully compatible with official AWS IoT 1-Click iOS app and Android app. The battery for this device is NCR18650B chargeable Li-ion battery. Please kindly know that no battery in the package, while the battery is available in regular convenience store and customer need to prepare themselves. And what we propose is Panasonic NCR18650B 3.6V 3400mAh.There is a bracket for this IoT Button. Customer can stick it on the wall or other surface and easy to put the IoT Button in and get out from the bracket. The Seeed IoT Button for AWS supports three types of clicks: single, double, and long press, and 3 LEDs for different indications.

Feature
- Single/Double/Long Press Click Events
- Onboard Power/Event/Wi-Fi Configuration Status LED
- Equipped with Realtek RTL8720DN, dual-band 2.4Ghz / 5Ghz Wi-Fi
- Removable and Chargeable NCR18650B Battery
- Battery polarity reversed protection and indication
- USB Type-C Charging
- Stickable Bracket
Specification
| Parameter | Value |
|---|---|
| Size | 92*32*25mm |
| MCU | Realteak, RTL8720DNL 20MHz Cortex M0; 200MHz Cortex M4F |
| Flash | 4MB |
| Button | 100,000 Cycles |
| LED | RGB |
| Wi-Fi | 802.11 a/b/g/n 2.4GHz & 5GHz |
| Bluetooth | BLE 5.0 |
| Battery | 3.6V Li-ion 18650 Rechargeable battery |
| Charging Interface | USB Type-C |
| Charging Current | 500mA |
| Charging time | 4-6 Hours(According to battery capacity) |
| Battery Protection | Over charge,Over current,Over discharge, Reverse polarity protection |
| Firmware Update | Support OTA |
Hardware Overview

LED Status Indications
Getting Started
Powering Up
The first step of getting started is to power on the IoT button. There are two ways to power on the buttons:
Method 1 - USB Type-C
Simply plug in the USB Type-C cable to the USB port to power on the device. You should see the power indication LED is flash Green once.
After Green light flashed once, you should also see the LED blink a green light at a very low brightness. You can see it under darker surrounding.
Method 2 - Using Battery
You can also use battery to power on the IoT button. Open the enclosure (please refer to the gif below) and put the battery in. Once the battery is installed, you will also need to plug the IoT button to a computer or a power adapter via USB Type-C once to initialize the battery circuit. You should see the power indication LED is Green. You may now remove the USB connection and LED will go off and everything is set.
When the Power Status LED is red, it indicates that the battery is reversed!
How To Take Out The Enclosure
The following gif demonstrates how to take out the enclosure using the Triangle Plastic Pry Opening Tool provided in the package.
Setting up Wi-Fi on the Button
1.Download the latest AWS IoT 1-Click App from Apple App Store or Google Play Store
2.Launch the AWS IoT 1-Click App and sign up with an Amazon AWS account
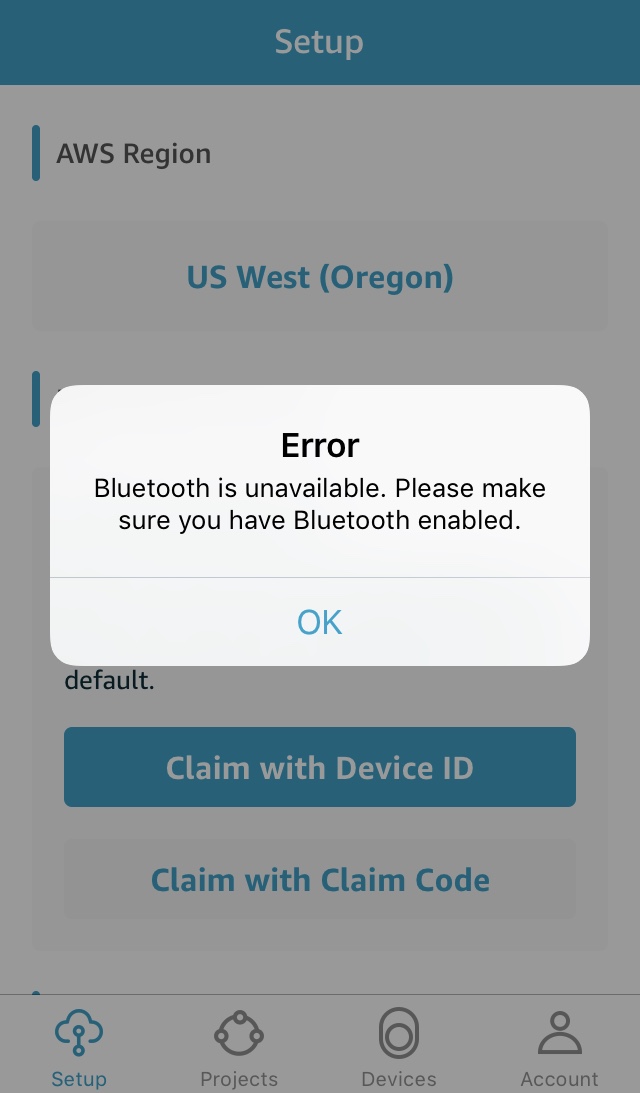
Please make sure that the Bluetooth is turned on, or error will appeared as shown.
3.Press Claim with Device ID in the App. Press Scan in the app and Scan the DSN from the bottom of Seeed IoT Button for AWS.
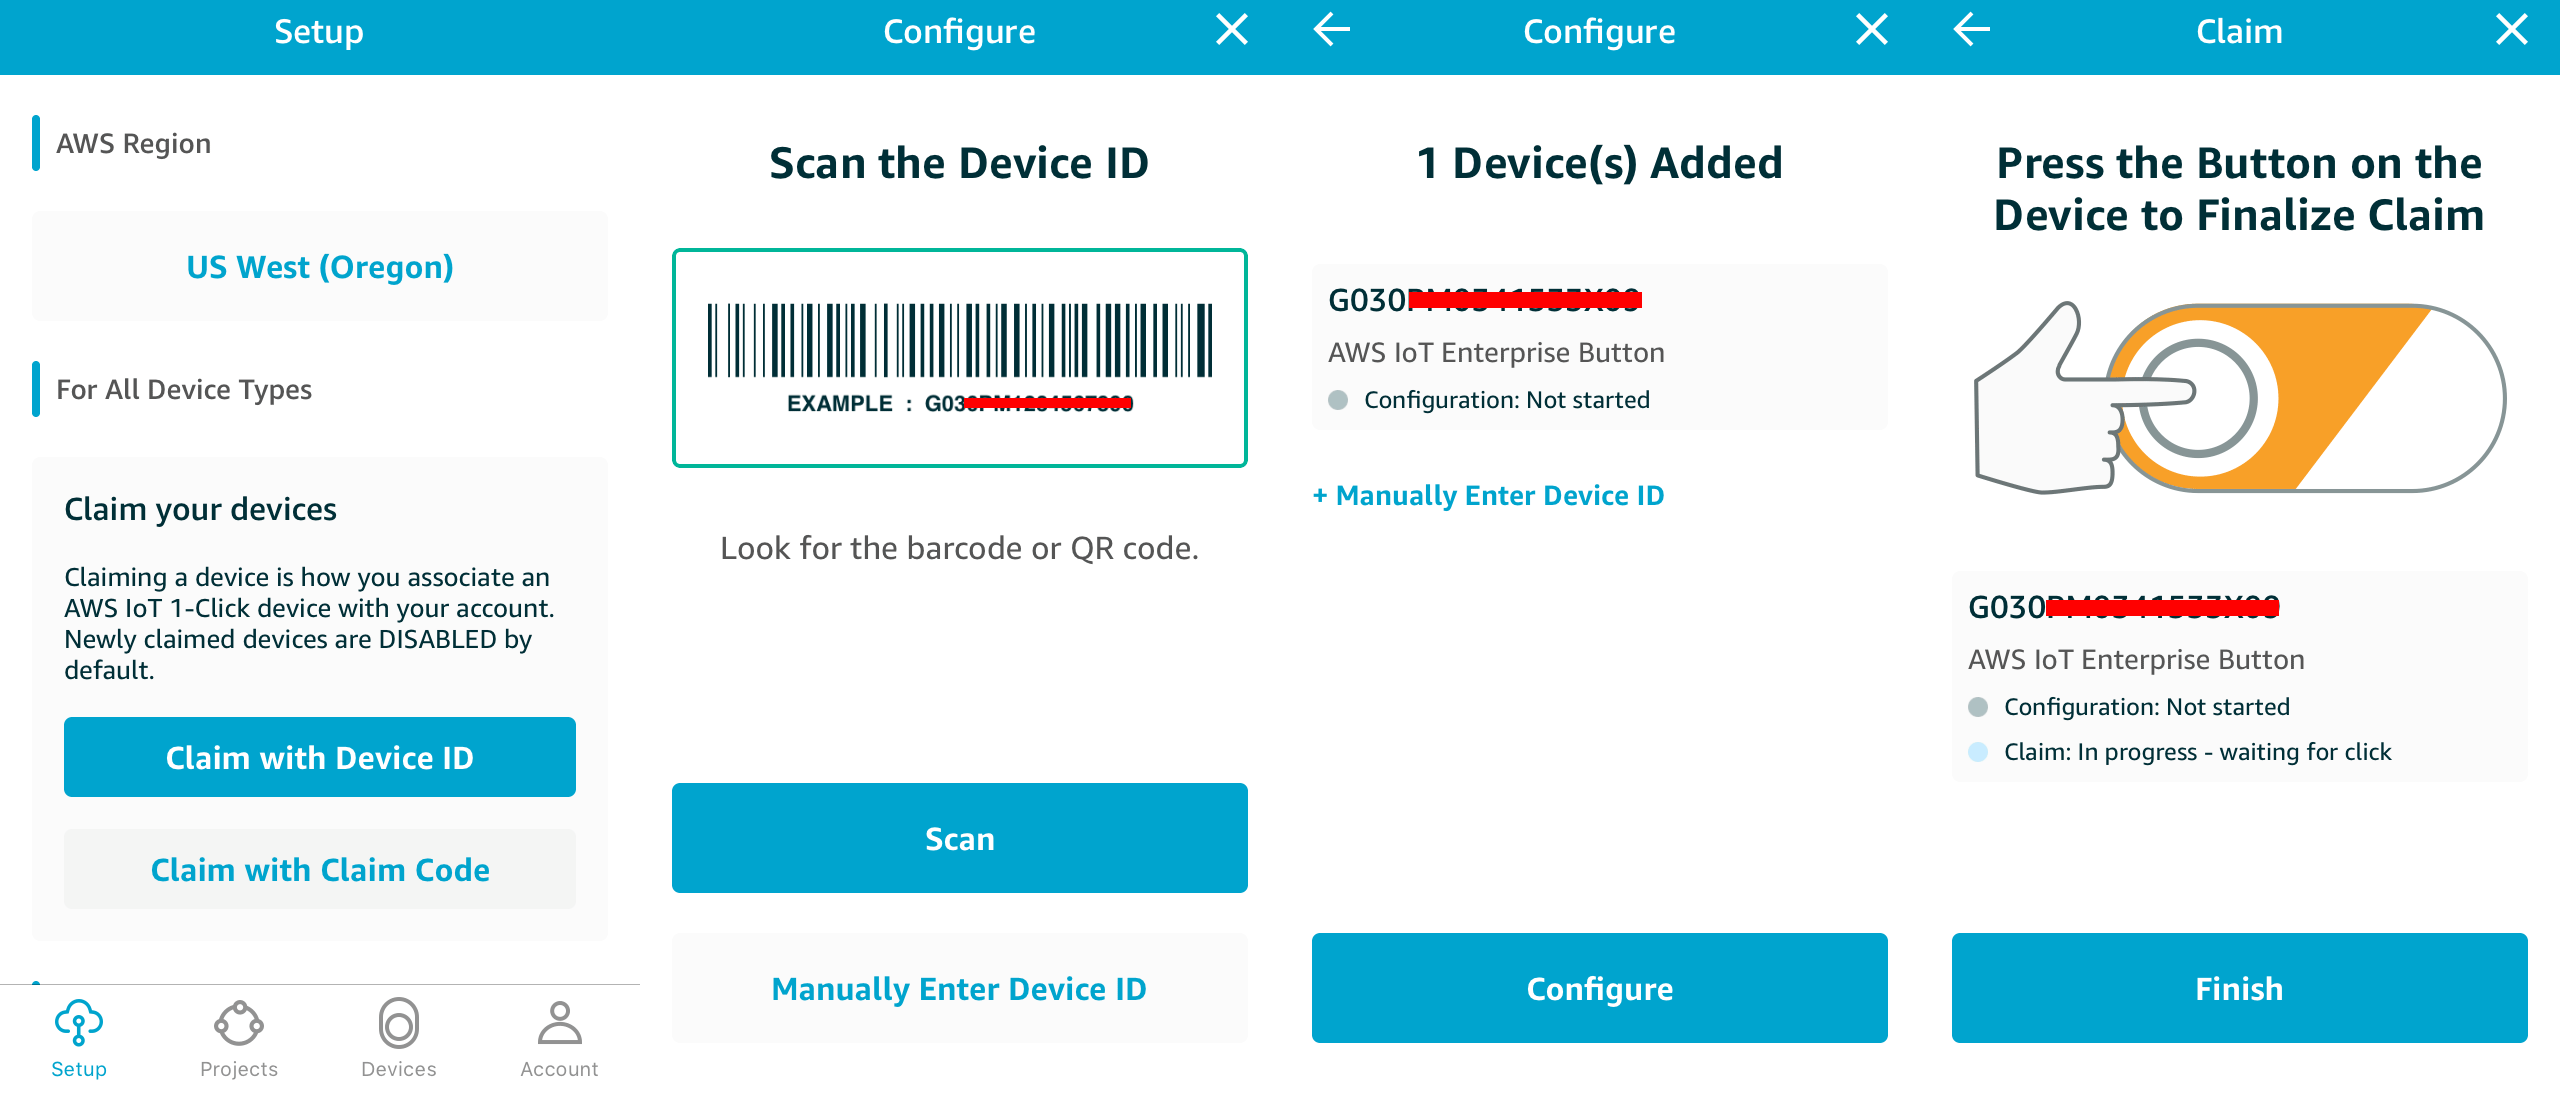
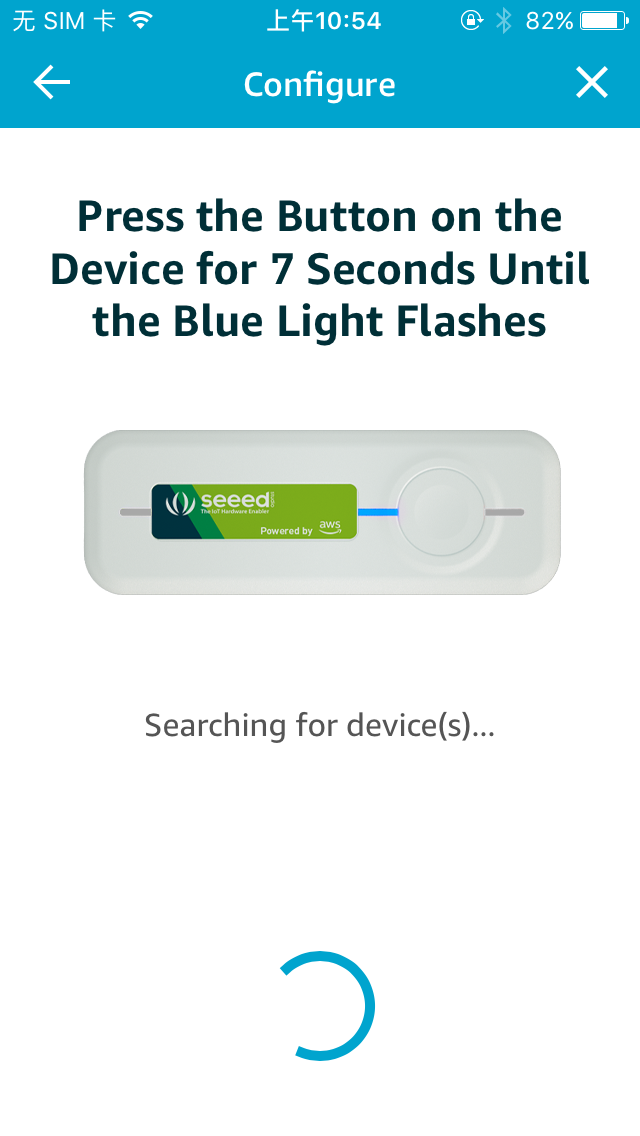
4.Press Configure
5.Press your Seeed IoT Button for AWS for 7 seconds until the blue light flashes
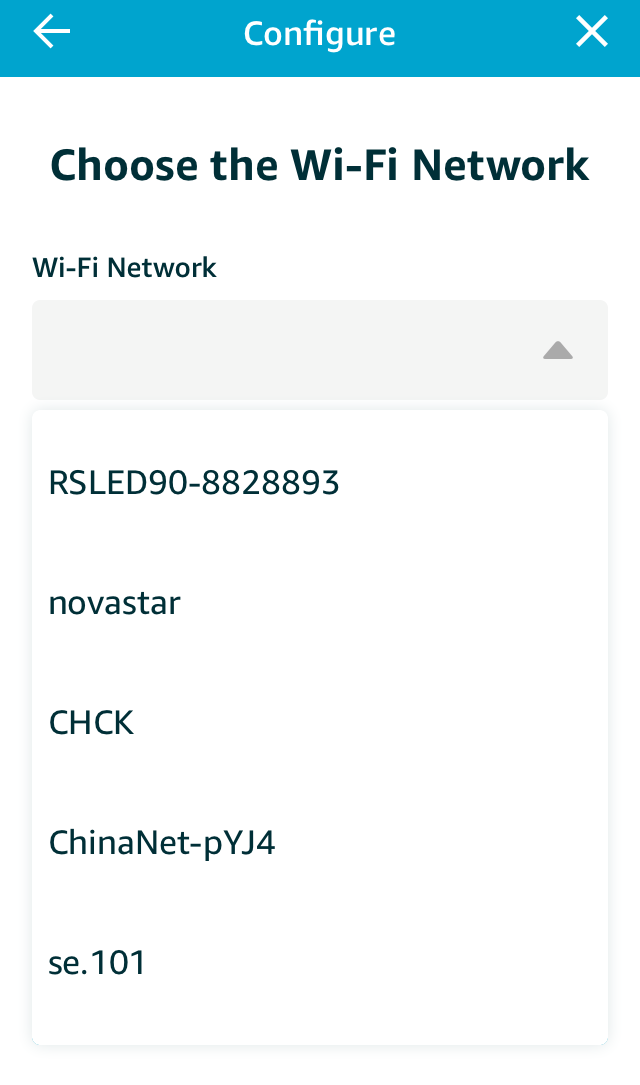
6.Select a Wi-Fi network from the list of networks. This is the Wi-Fi network you want your buttons to use
7.Input the password (if any) for the Wi-Fi network and Continue
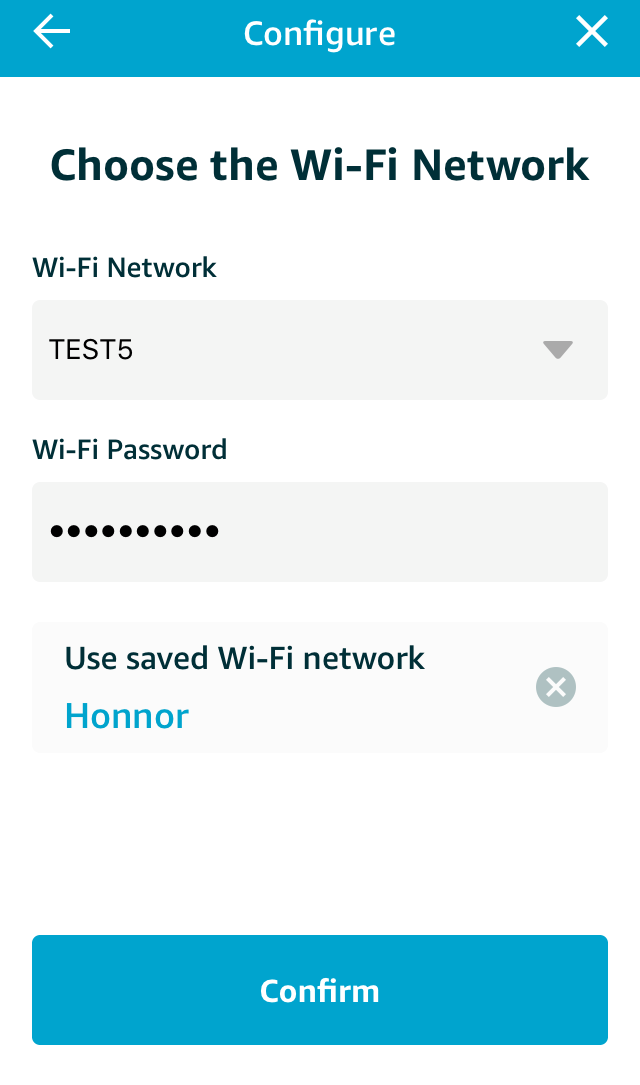
8.Wait until configuration succeeded is appeared in the App and press Finish. The configuration is done

Now you can start playing with your AWS 1-Click service!
Please make sure update to the latest firmware following this.
Operating Instructions
-
Single Click: Send single click event
-
Double-Click: Send double click event
-
Long Press(2s~5s): Send long press event
-
Long Press(>7s): Enter BLE network configuration mode. In this mode, other events are blocked. If you need to manually exit the BLE distribution mode, you can press and hold it for more than 7s again, and it will exit automatically in two minutes.
OTA Update
Long Press 15s to start searching for new version upgrades:
-
Long Press(>7s), the Wi-Fi Configuration LED starts to blink. If released now will enter network configuration mode.
-
Continue to press and hold >8s (total > 15s), Event Status LED starts to flash blue and enter OTA mode.
When it's the latest version, the Event Status LED blinks from Blue to Green. For more information, please refer to the table below:
FAQs
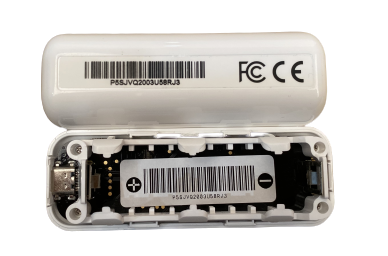
Q1. The outer enclosure SN (Serial Number) is rubbed off.
There is also a backup SN sticker inside the AWS button enclosure, underneath the battery.
Tech Support & Product Discussion
Thank you for choosing our products! We are here to provide you with different support to ensure that your experience with our products is as smooth as possible. We offer several communication channels to cater to different preferences and needs.