Getting Started with Scailable on NVIDIA® Jetson Devices
What is Scailable?
Scailable provides a platform for creating and managing Edge AI solutions at scale. With Scailable, you can simply configure any supported edge device (such as a router, gateway, or IPC) to turn it into a "smart" device. Smart devices can run advanced Artificial Intelligence (AI) and Machine Learning (ML) models on input data, such as a video stream, to turn the input into something meaningful, such as a count of the number of cars in the video.
Why Scailable on NVIDIA Jetson?
NVIDIA Jetson platform is a great candidate to run Scailable because, as an Edge AI device including NVIDIA SoMs, it is able to give a better inference performance after deploying various AI pipelines over-the-air at scale to these devices.
This wiki will walkthrough how you can easily install Scailable AI Manager on the NVIDIA Jetson platform and use Scailable Platform to remotely configure and manage your AI solution at scale.
Prerequisites
-
NVIDIA Jetson device running NVIDIA JetPack 5.0+ and connected to the internet
- We have tested this wiki with reComputer J4012 running JetPack 5.1.1. If you want to explore more NVIDIA Jetson devices offered by Seeed, please visit this page.
-
Host PC with Windows, Linux or Mac and connected to the internet
Install Scailable AI Manager
Step 1: Execute the below command to install Scailable AI Manager on the Jetson Orin device
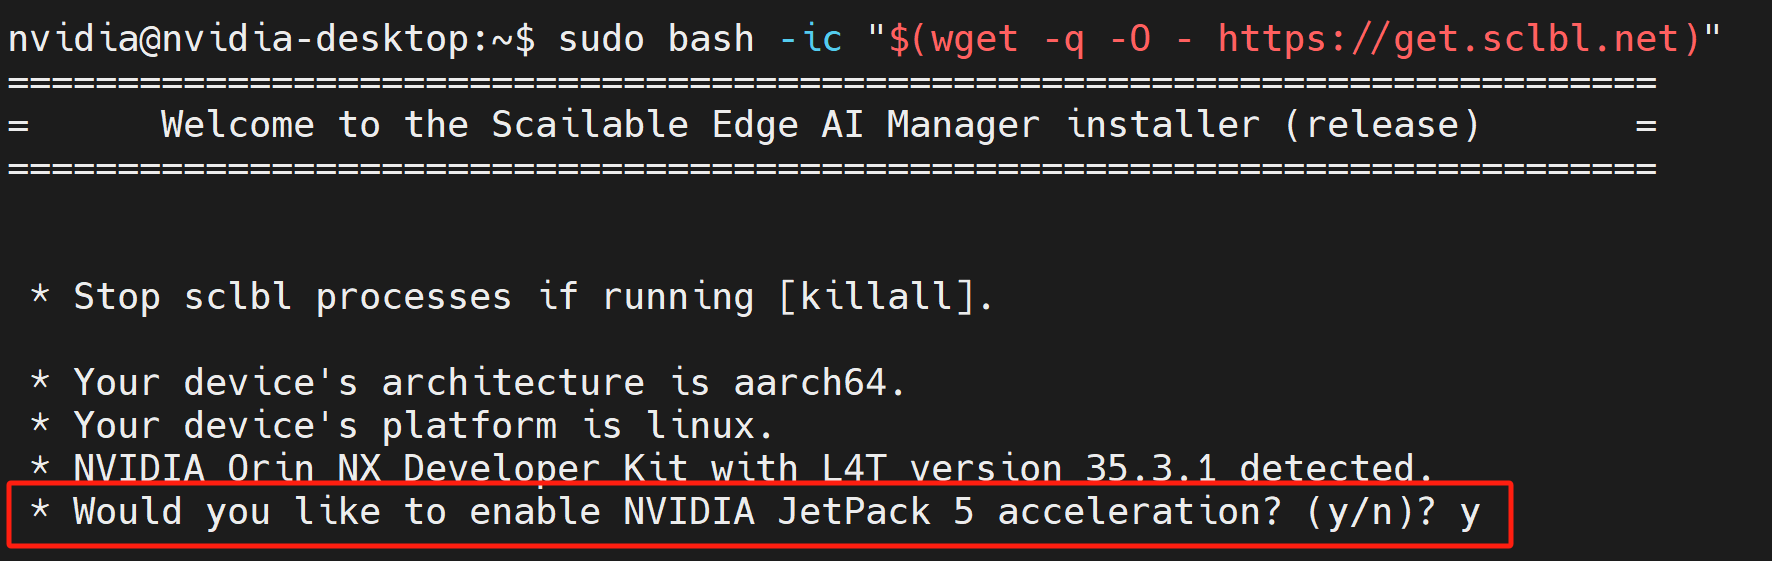
sudo bash -ic "$(wget -q -O - https://get.sclbl.net)"
During the installation, you need to enter "y" to the prompt which asks you to enable JetPack 5 support.
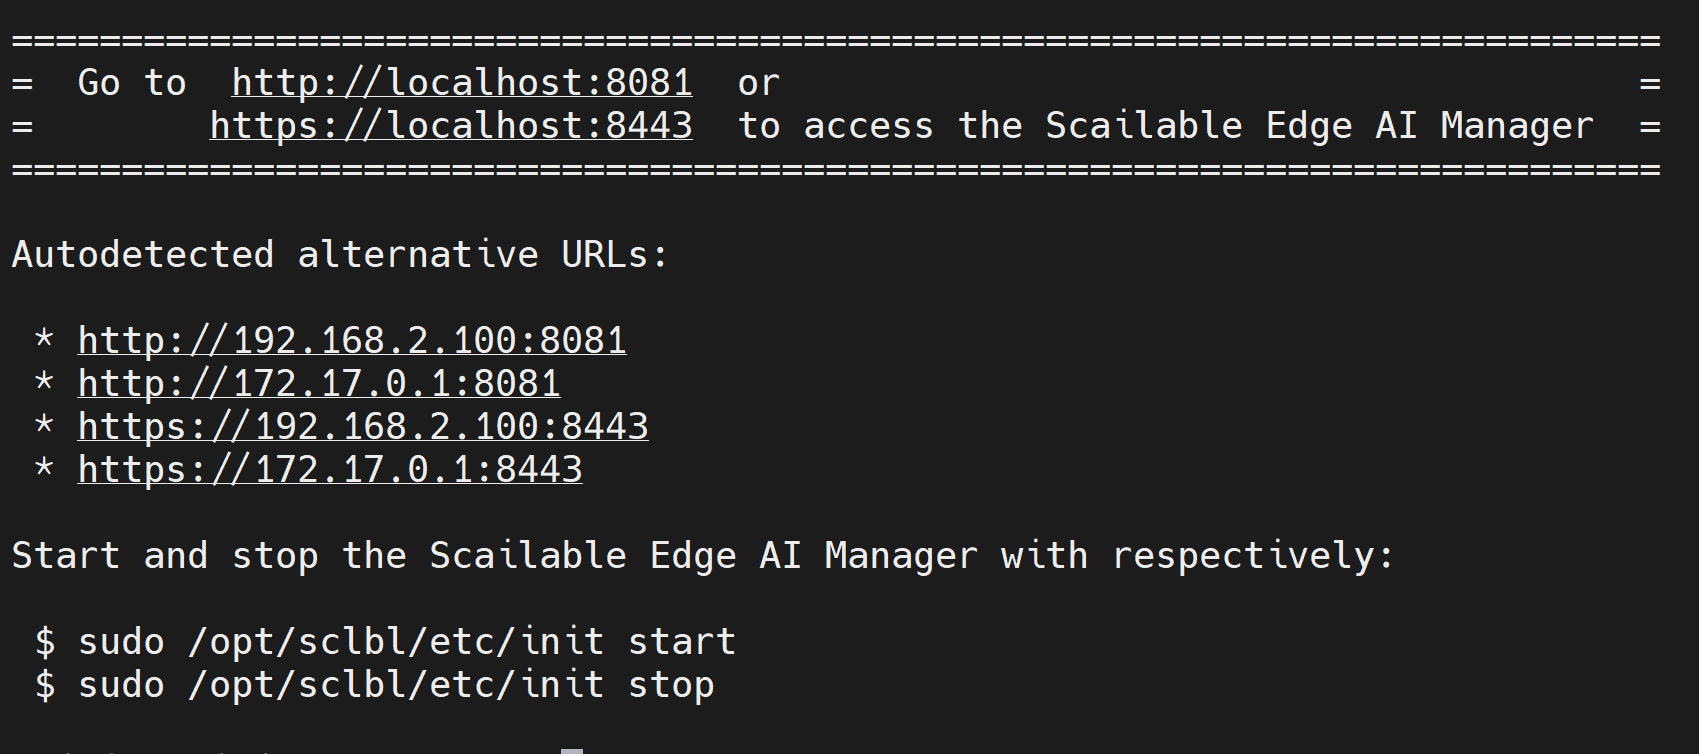
Step 2: You can enter the IP address of the Jetson device followed by :8081 on a web browser or simply enter the URL that you will see on the command line as follows
Register for Scailable account
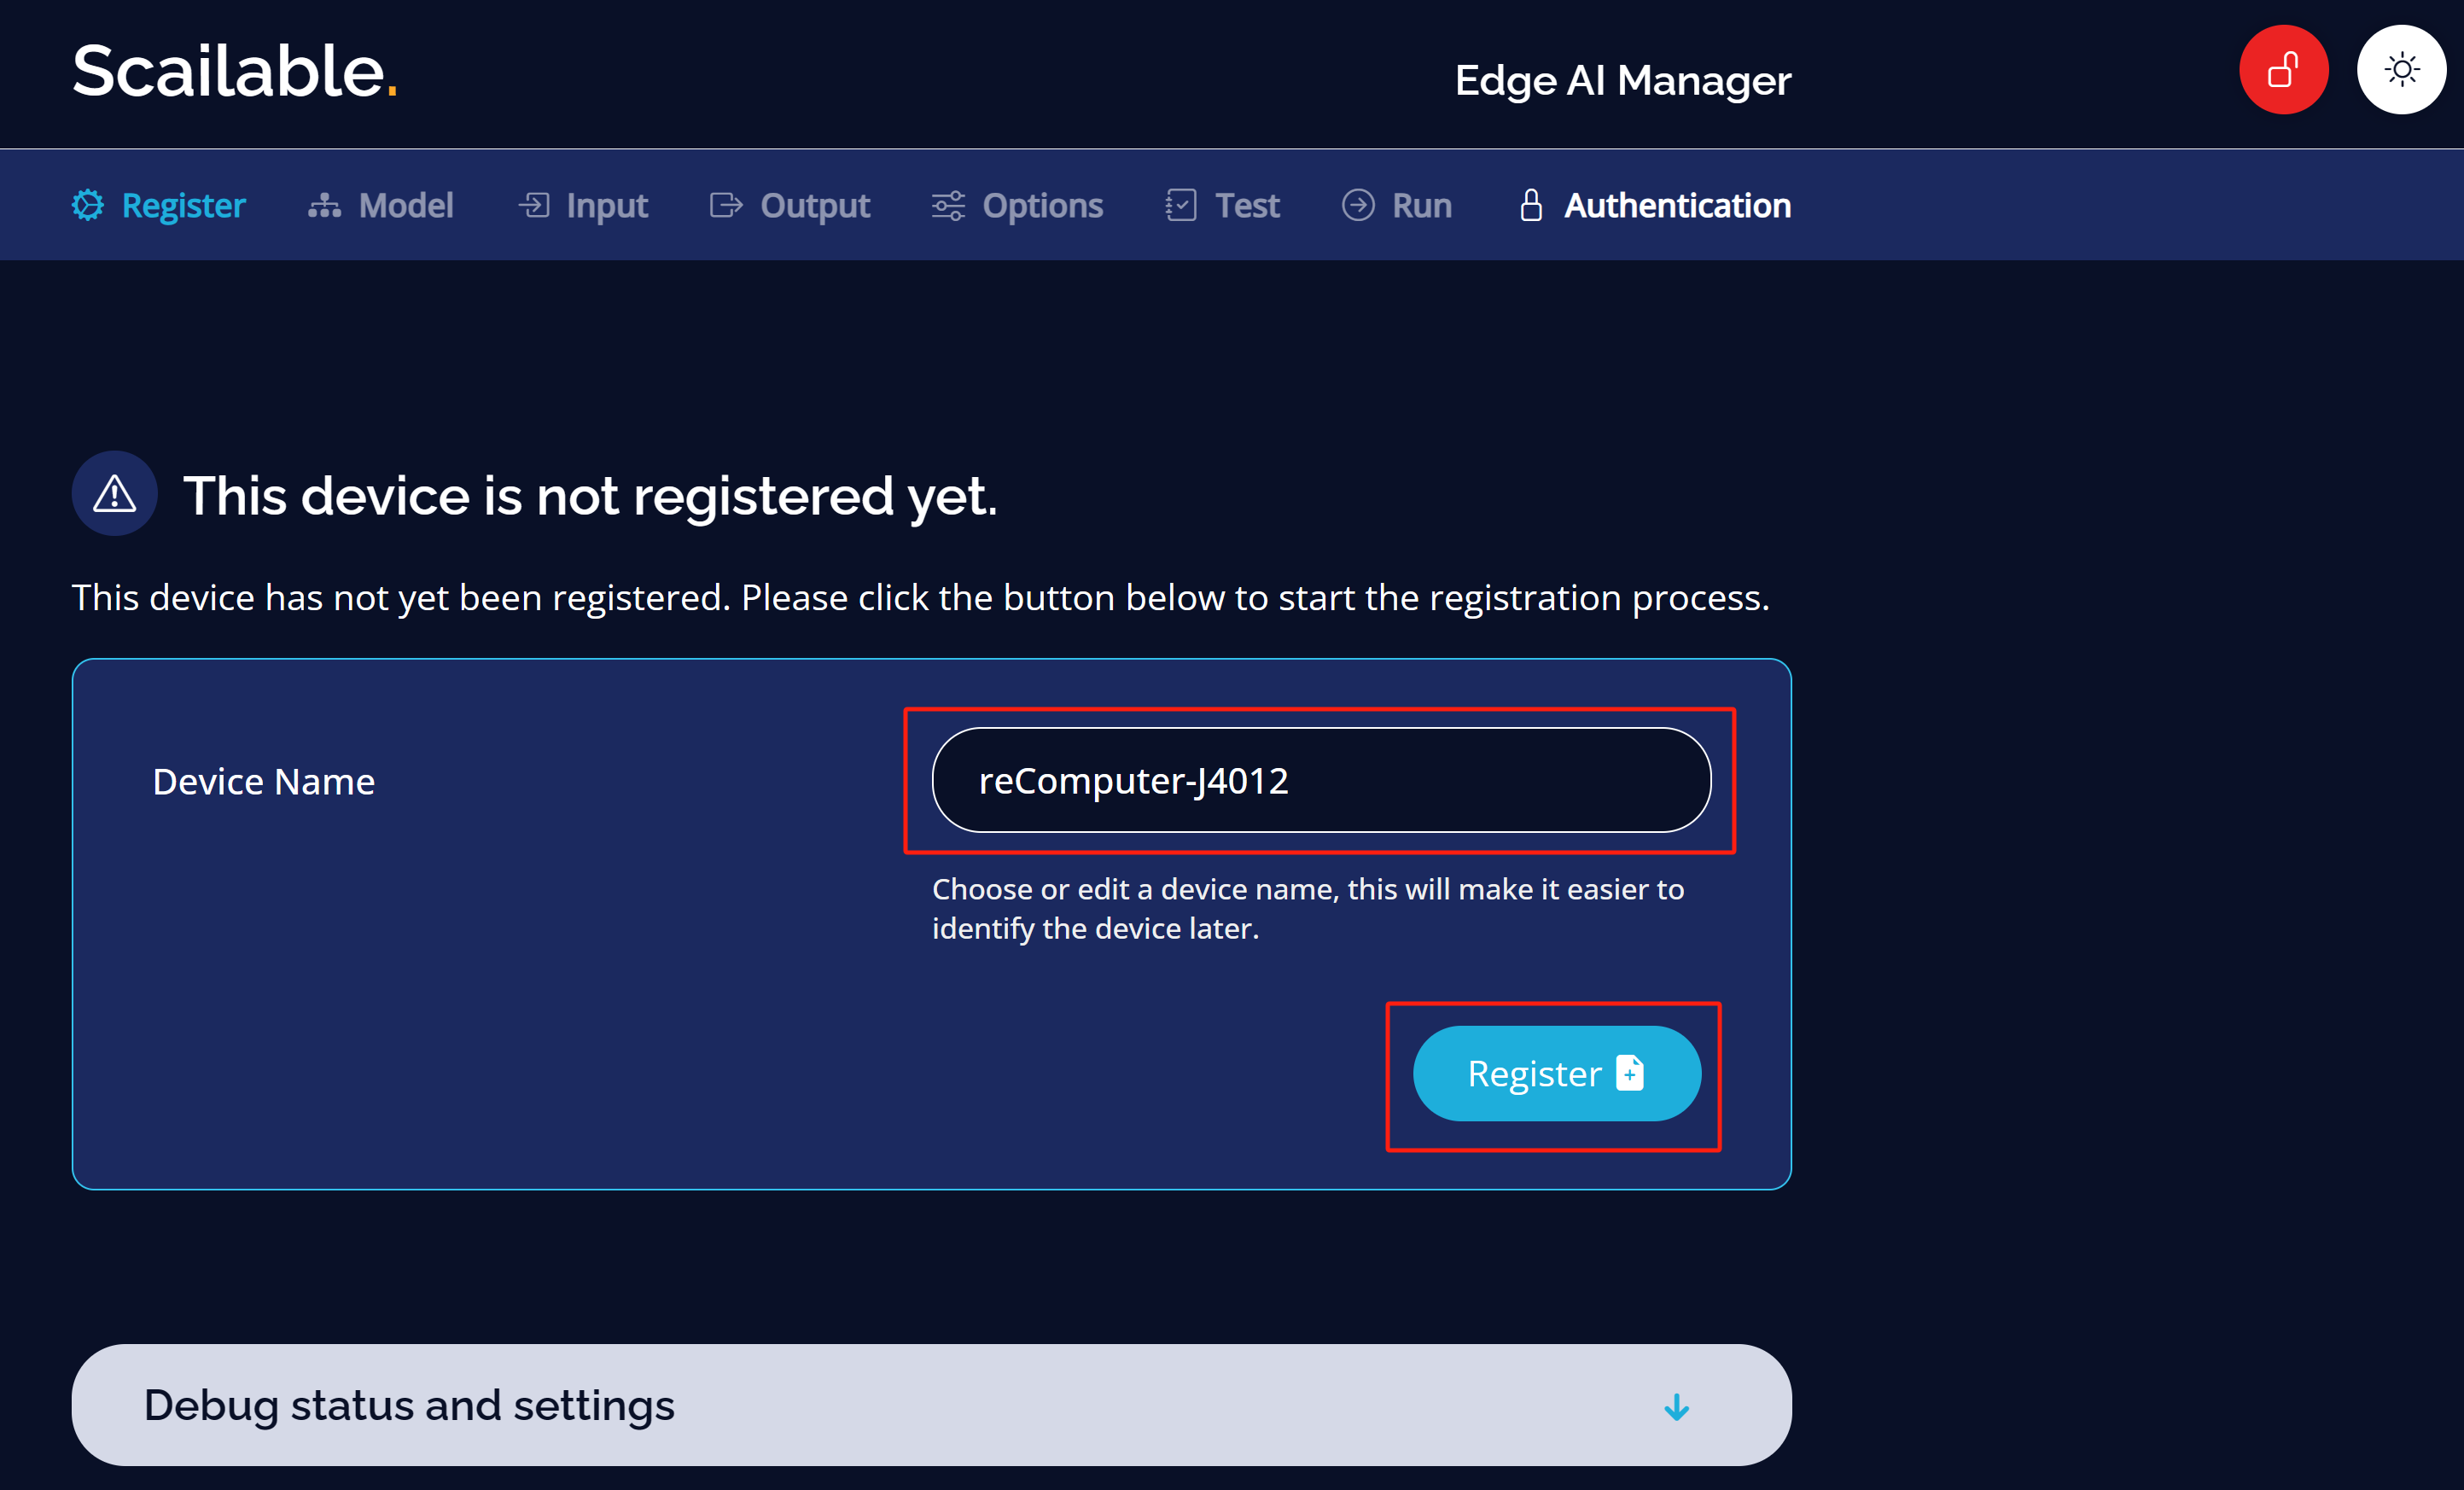
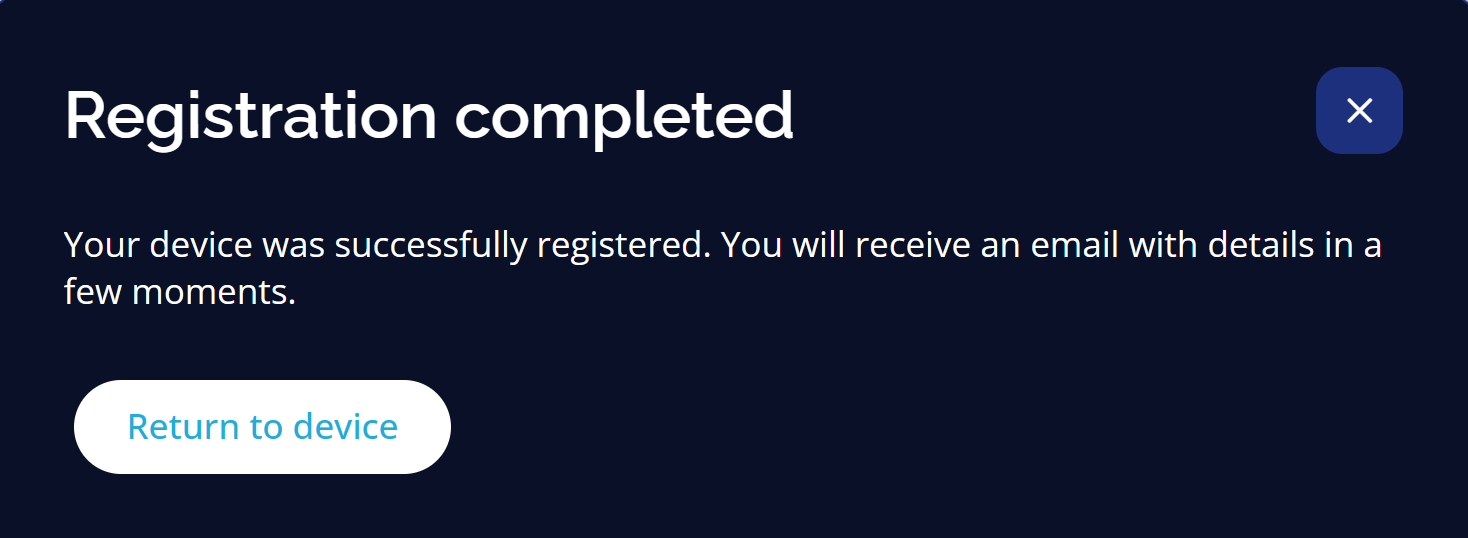
Step 1: Once the Scailable AI Manager shows up, register the device by giving it a name and click the Register button
Step 3: Confirm the device name that you created before, click Register and click Return to device
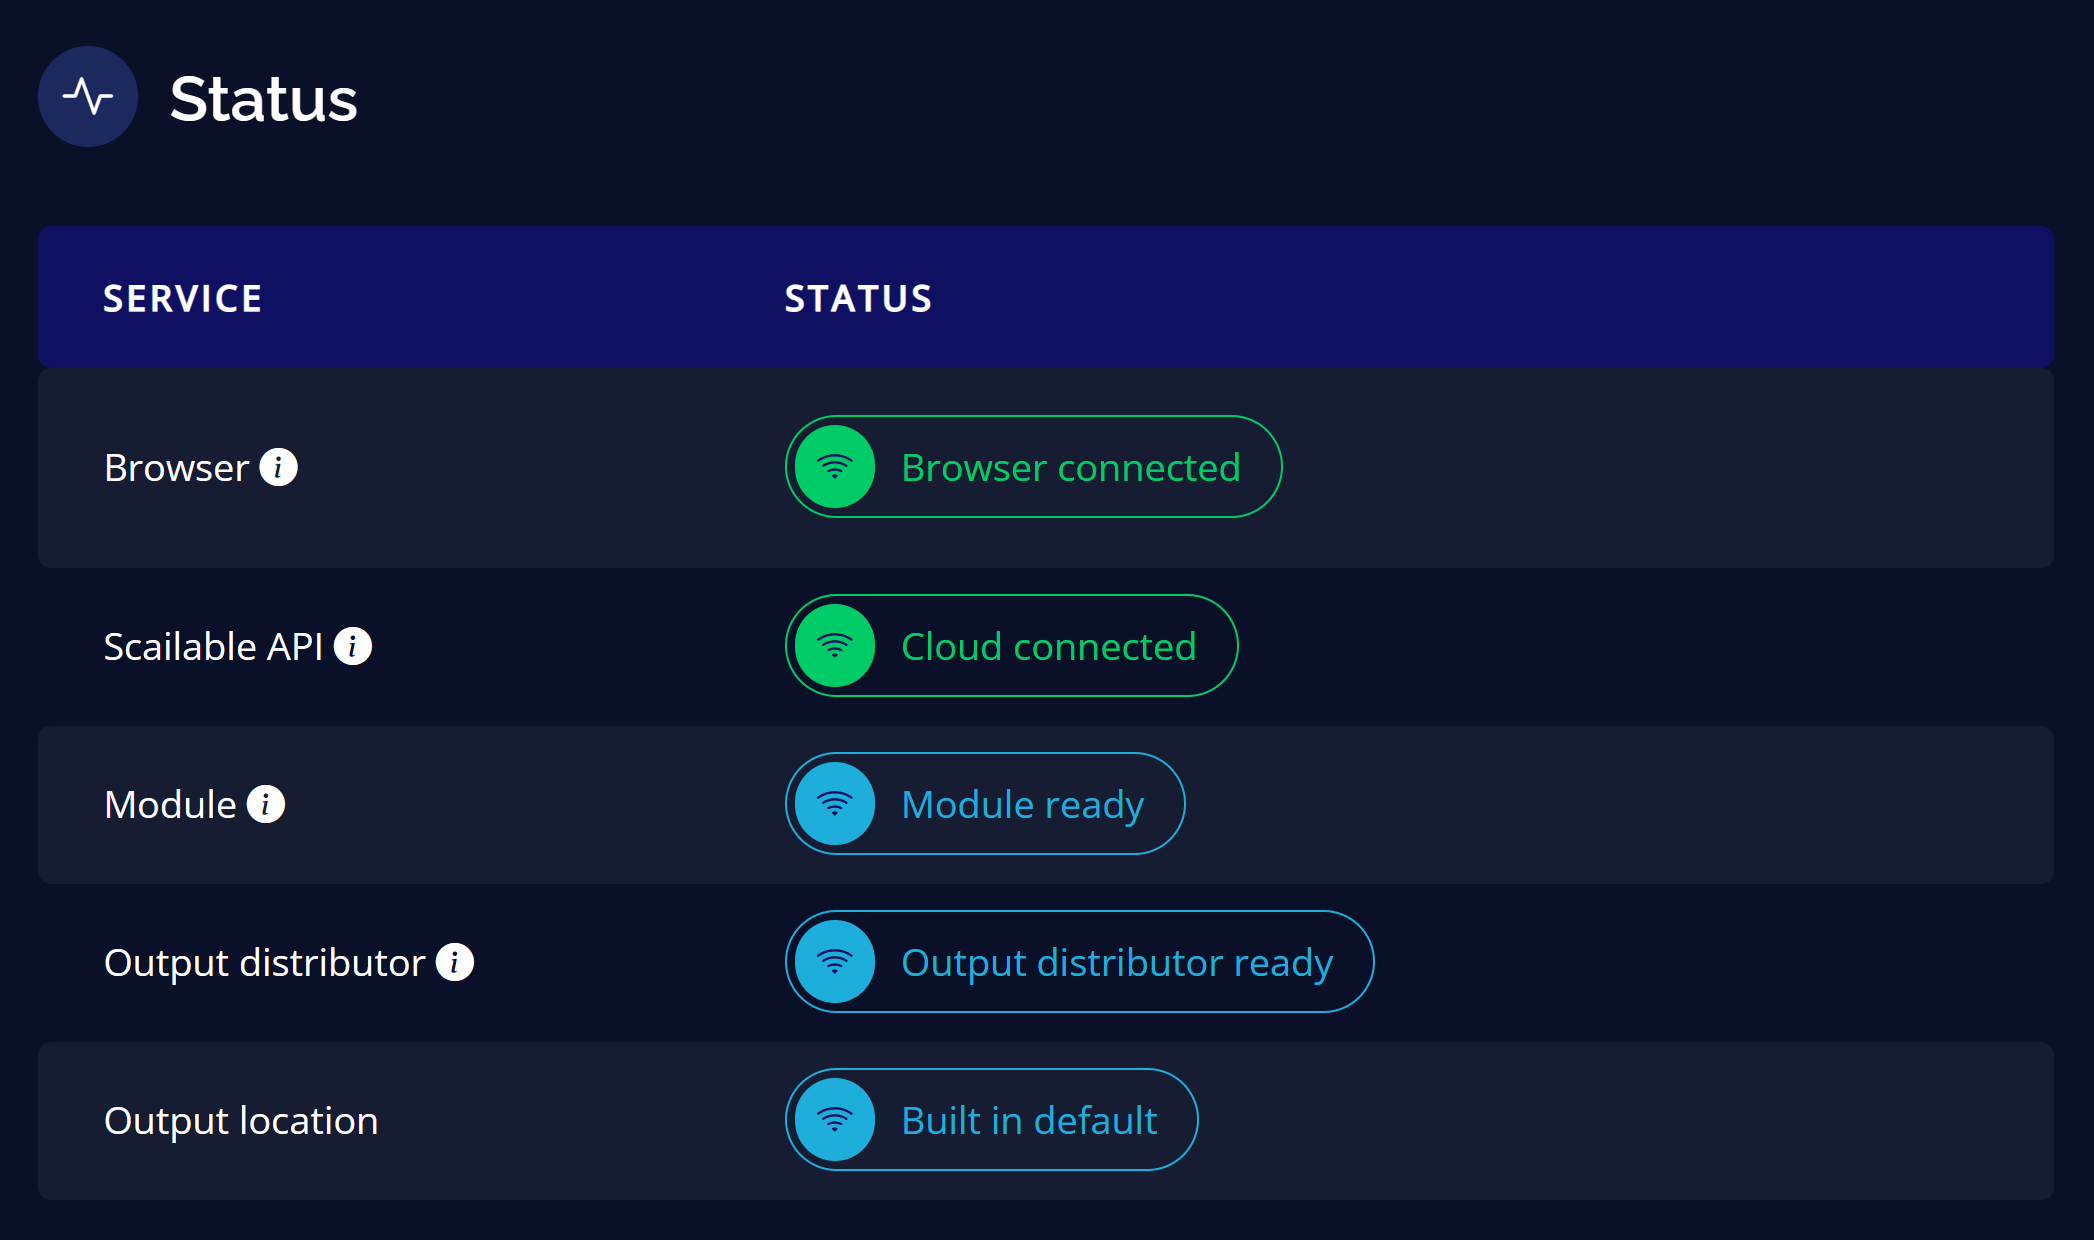
If everything went well, you will see all the status check are successful under the Status tab as follows
Run AI Application
Scailable comes pre-loaded with many different AI models for you to try out. However, if you want to use your own AI model, you can import it as well.
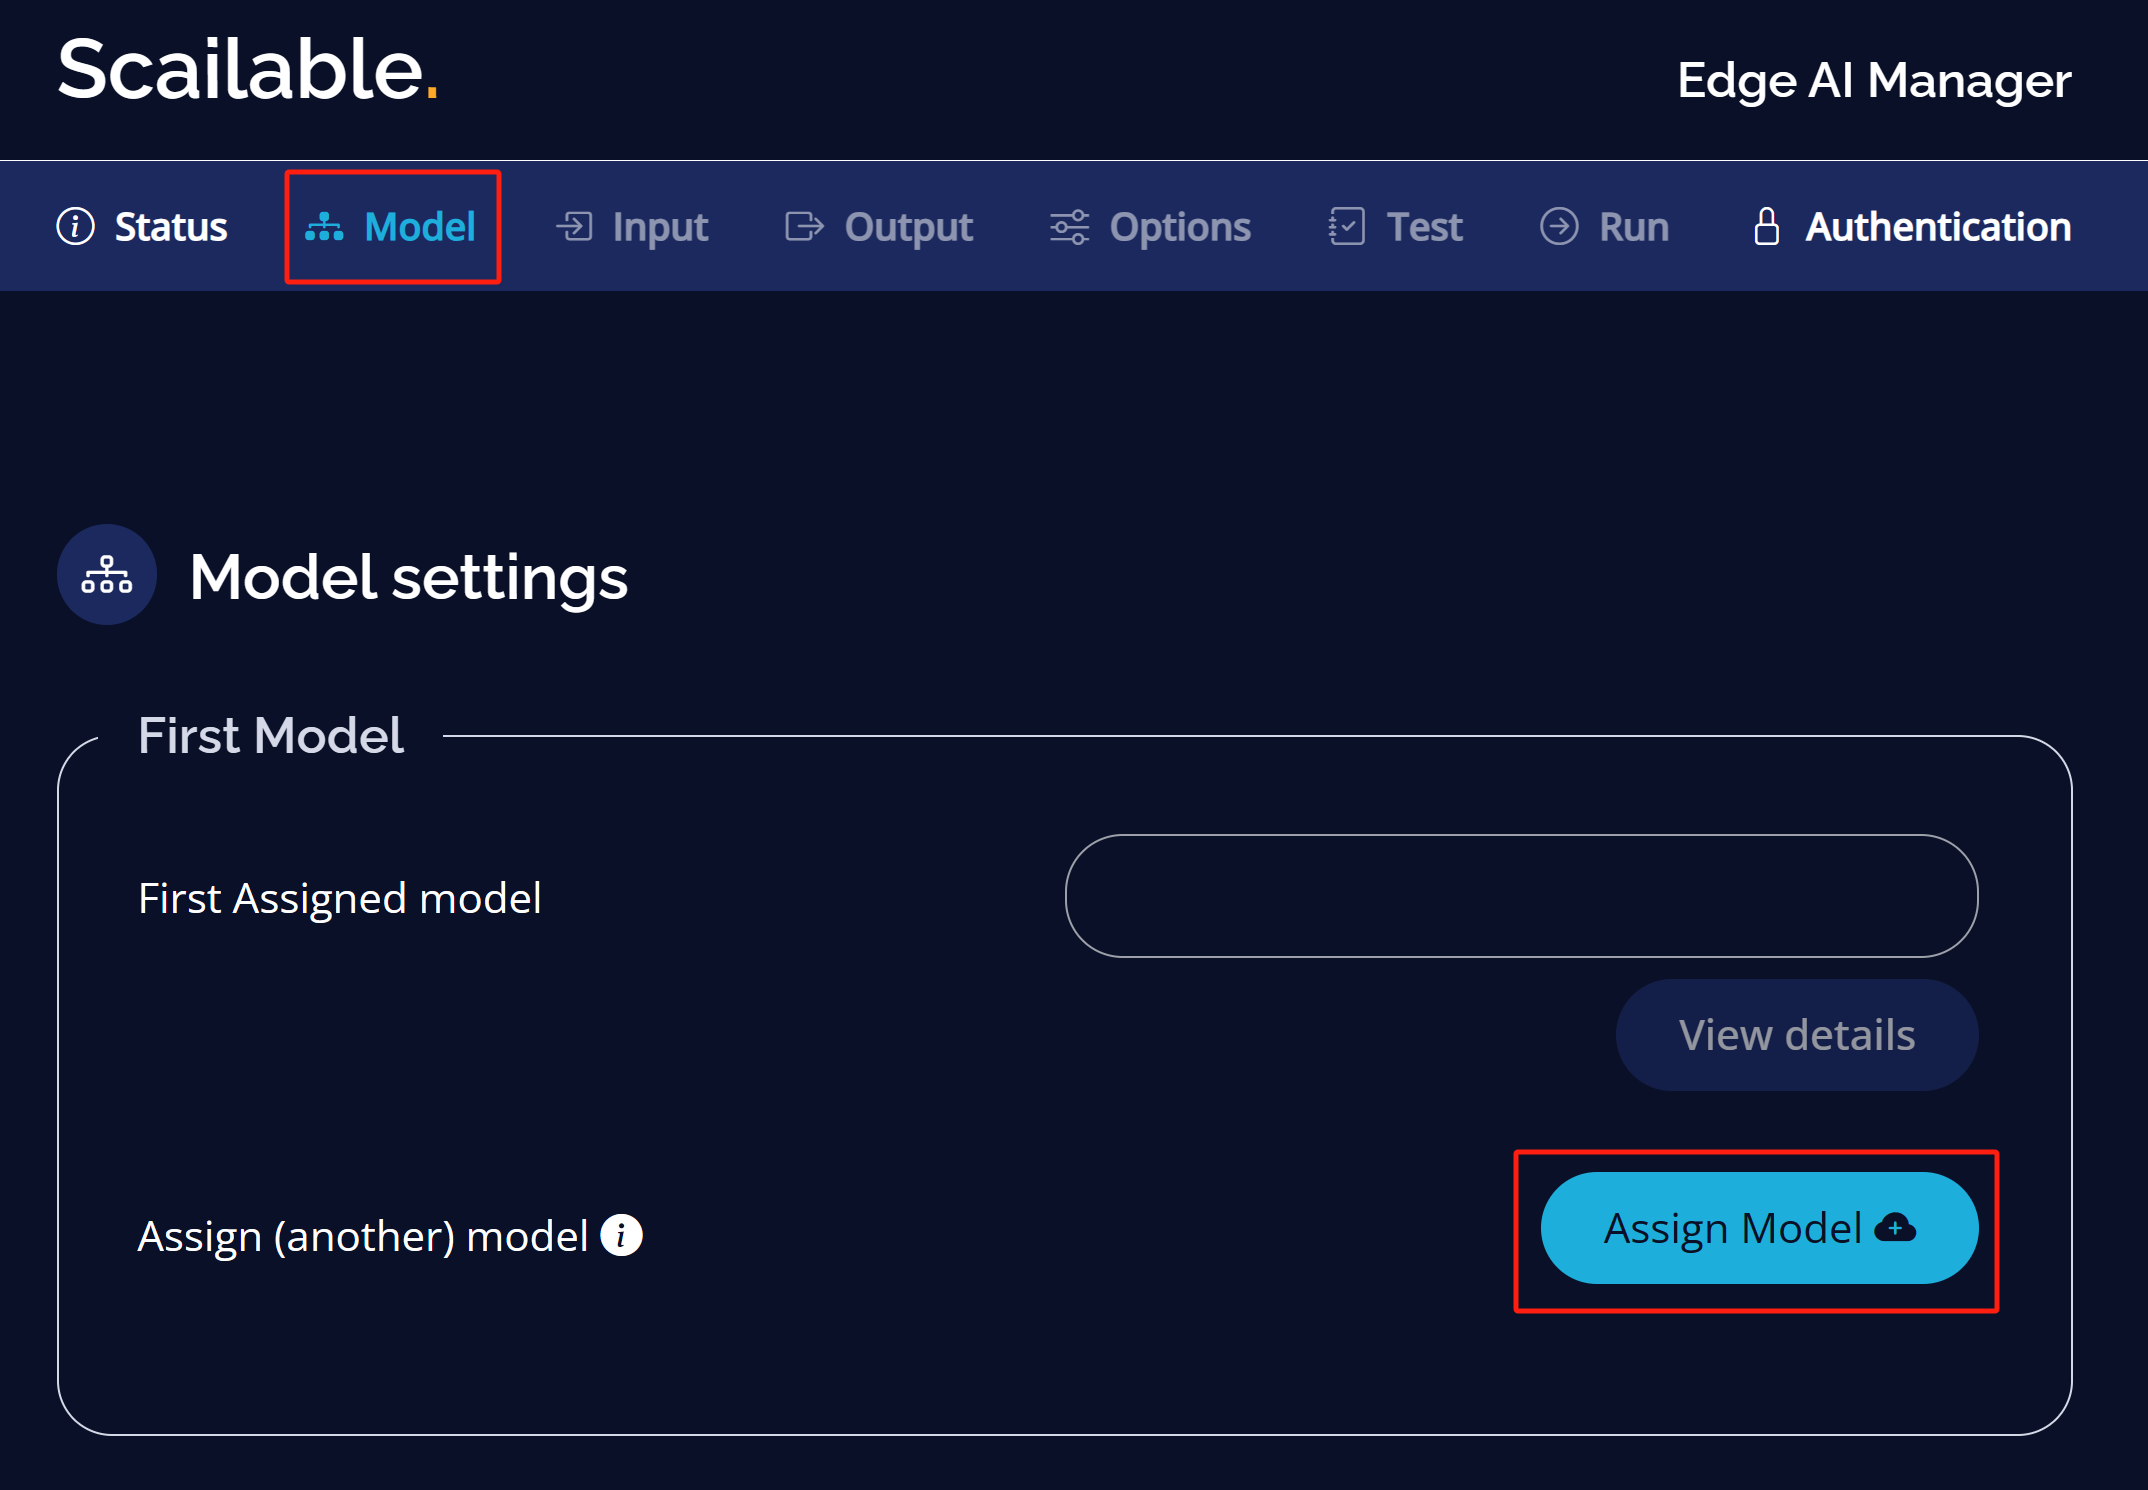
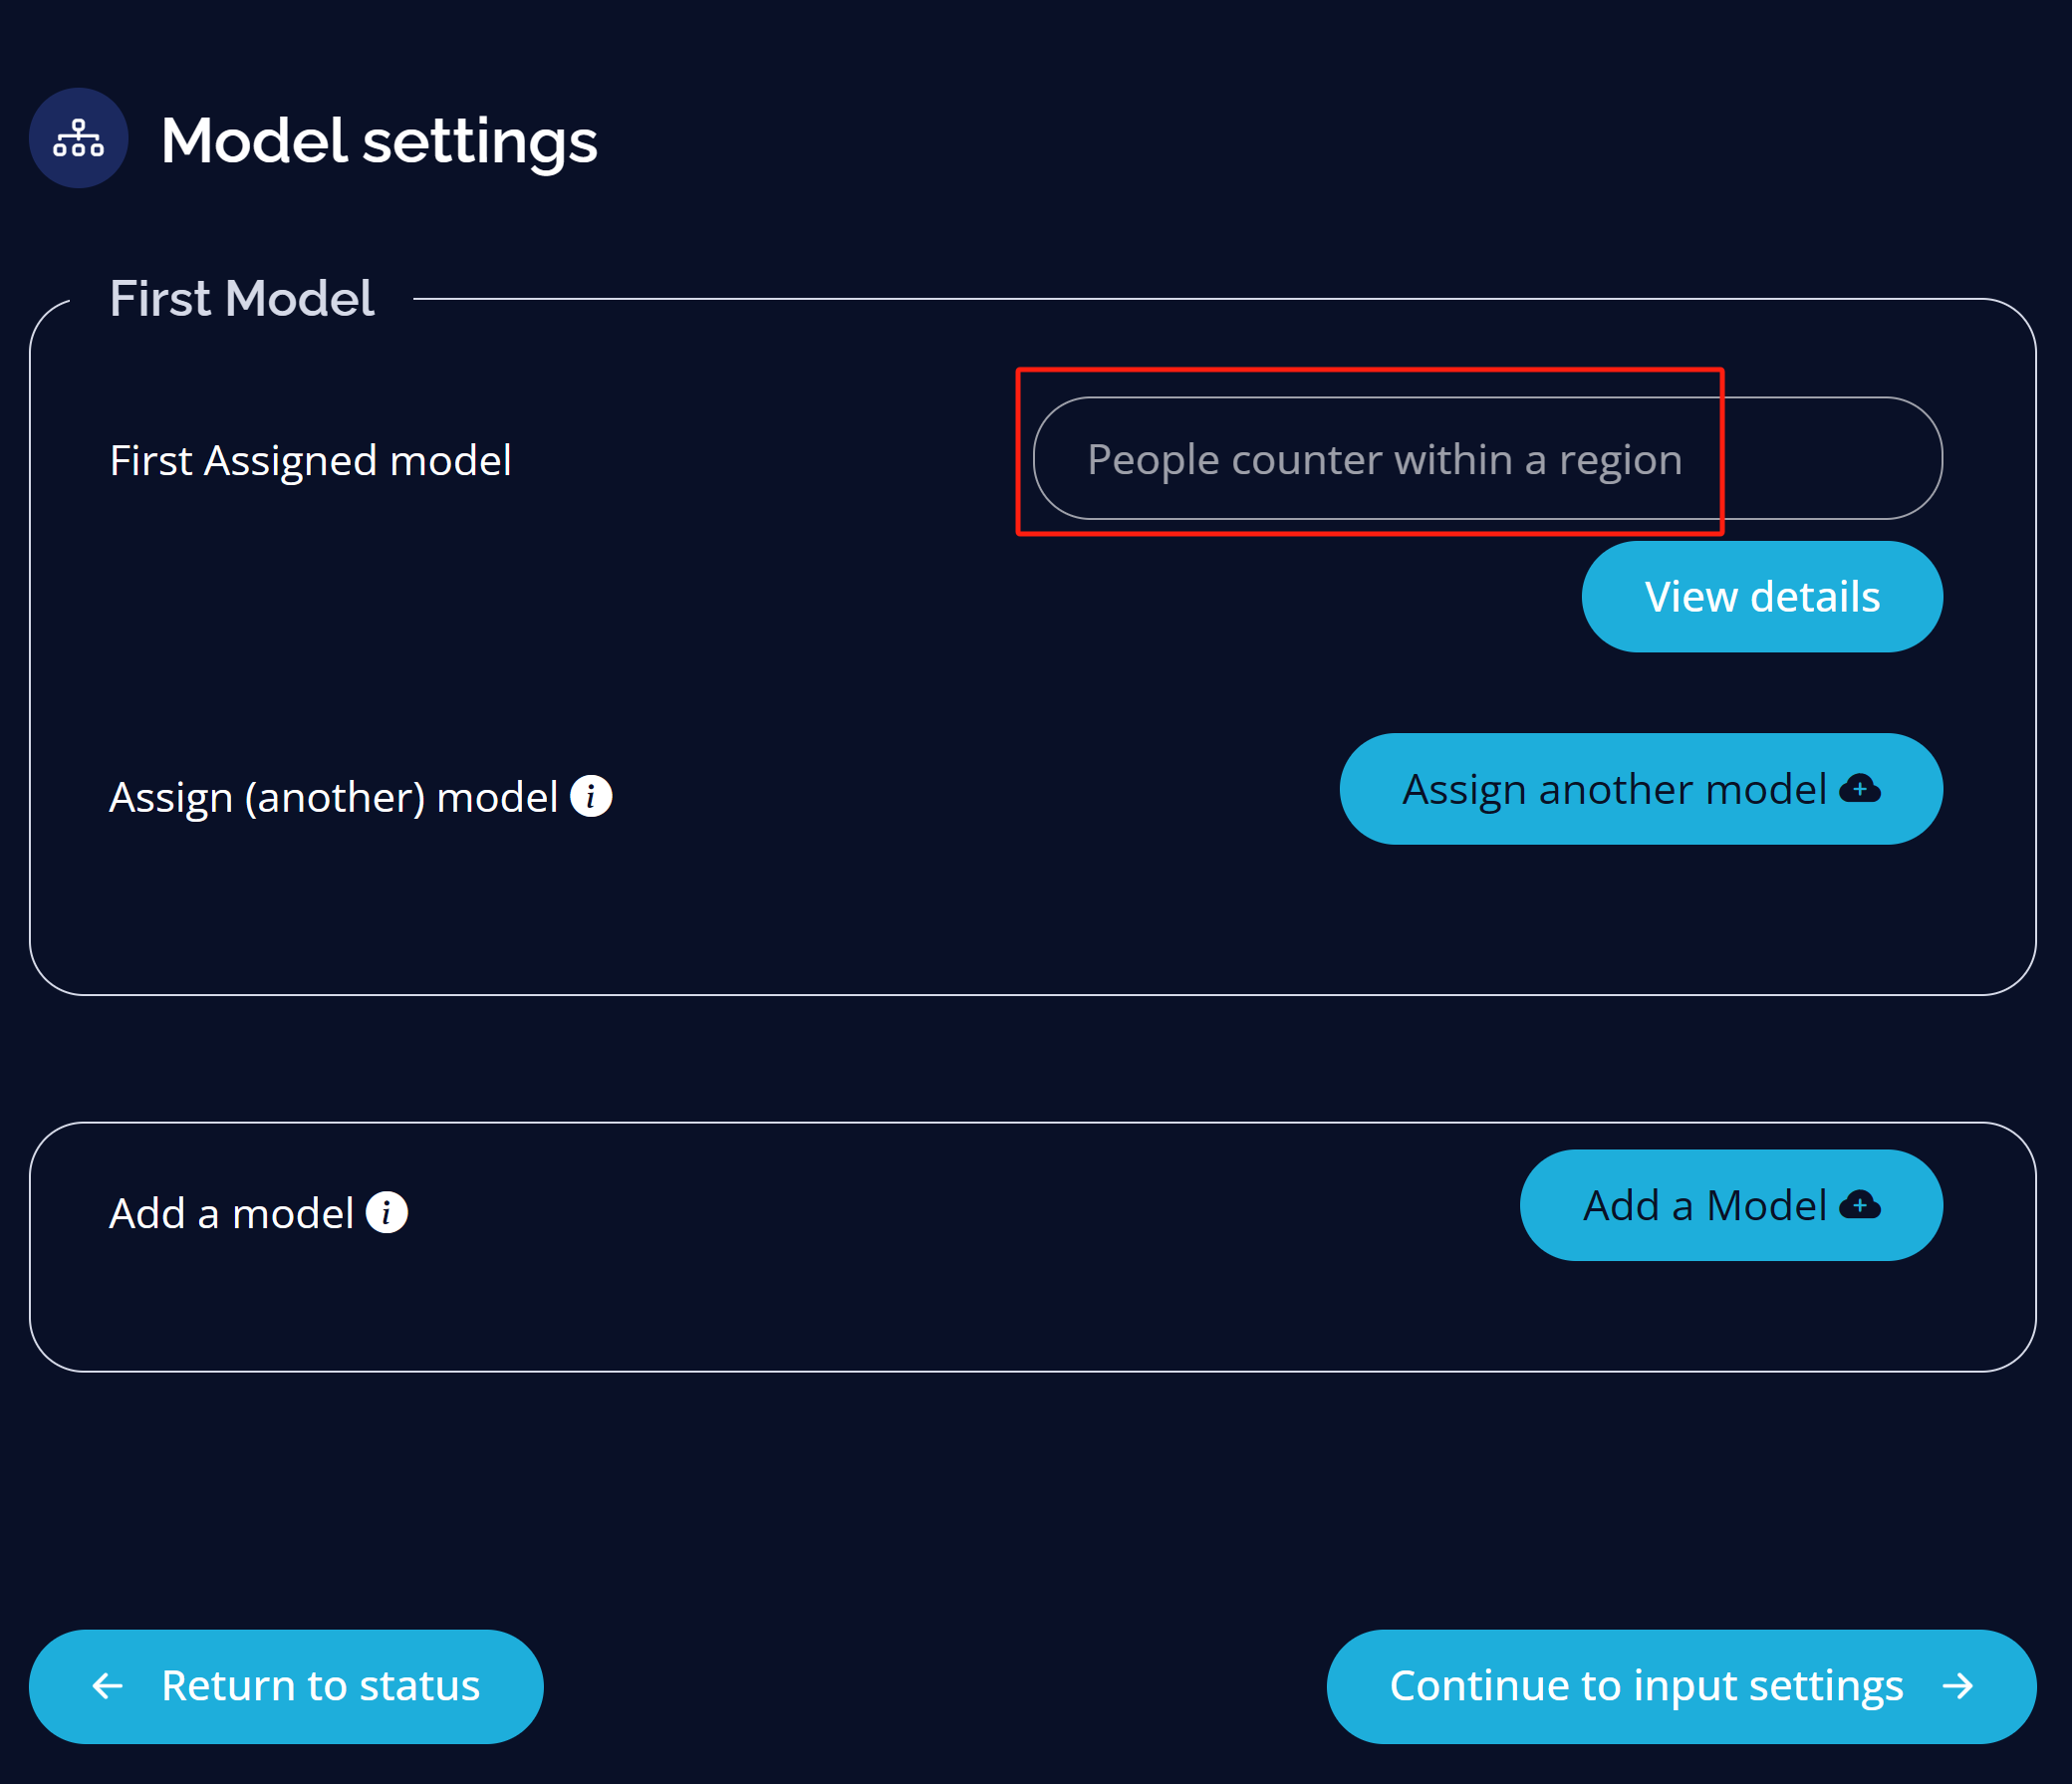
Step 1: Under the Model tab, inside First Model section, click Assign Model
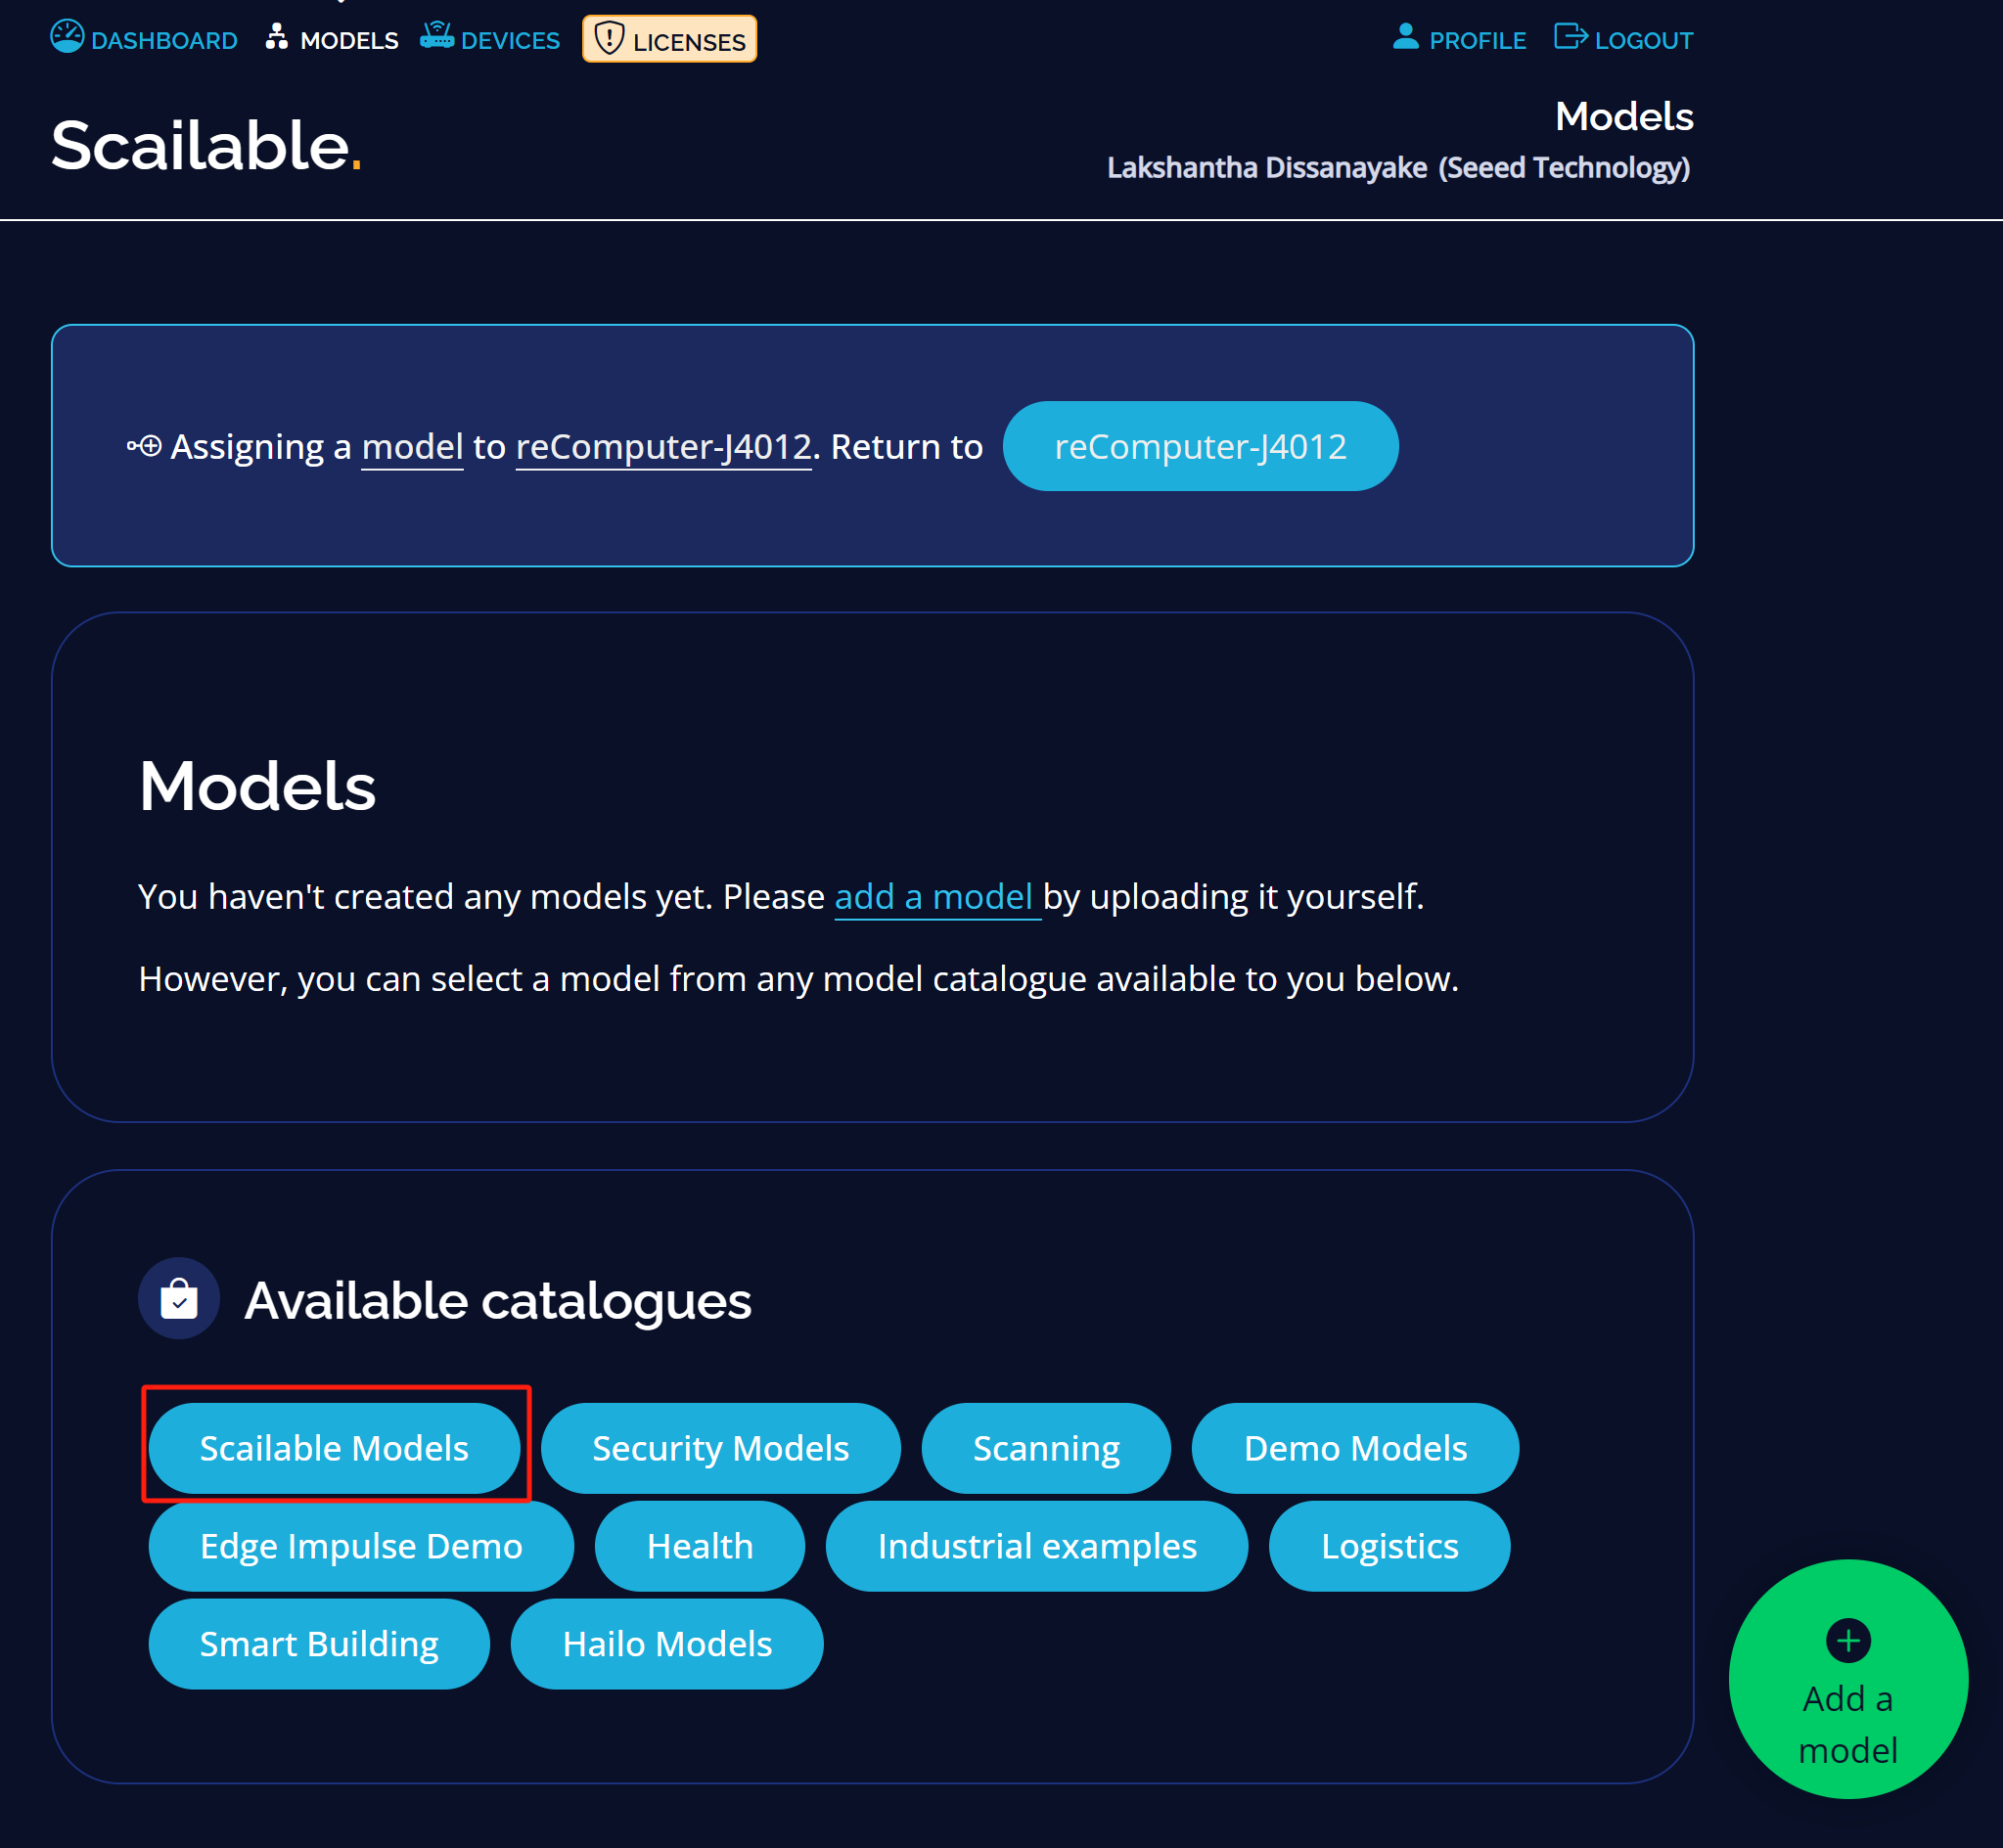
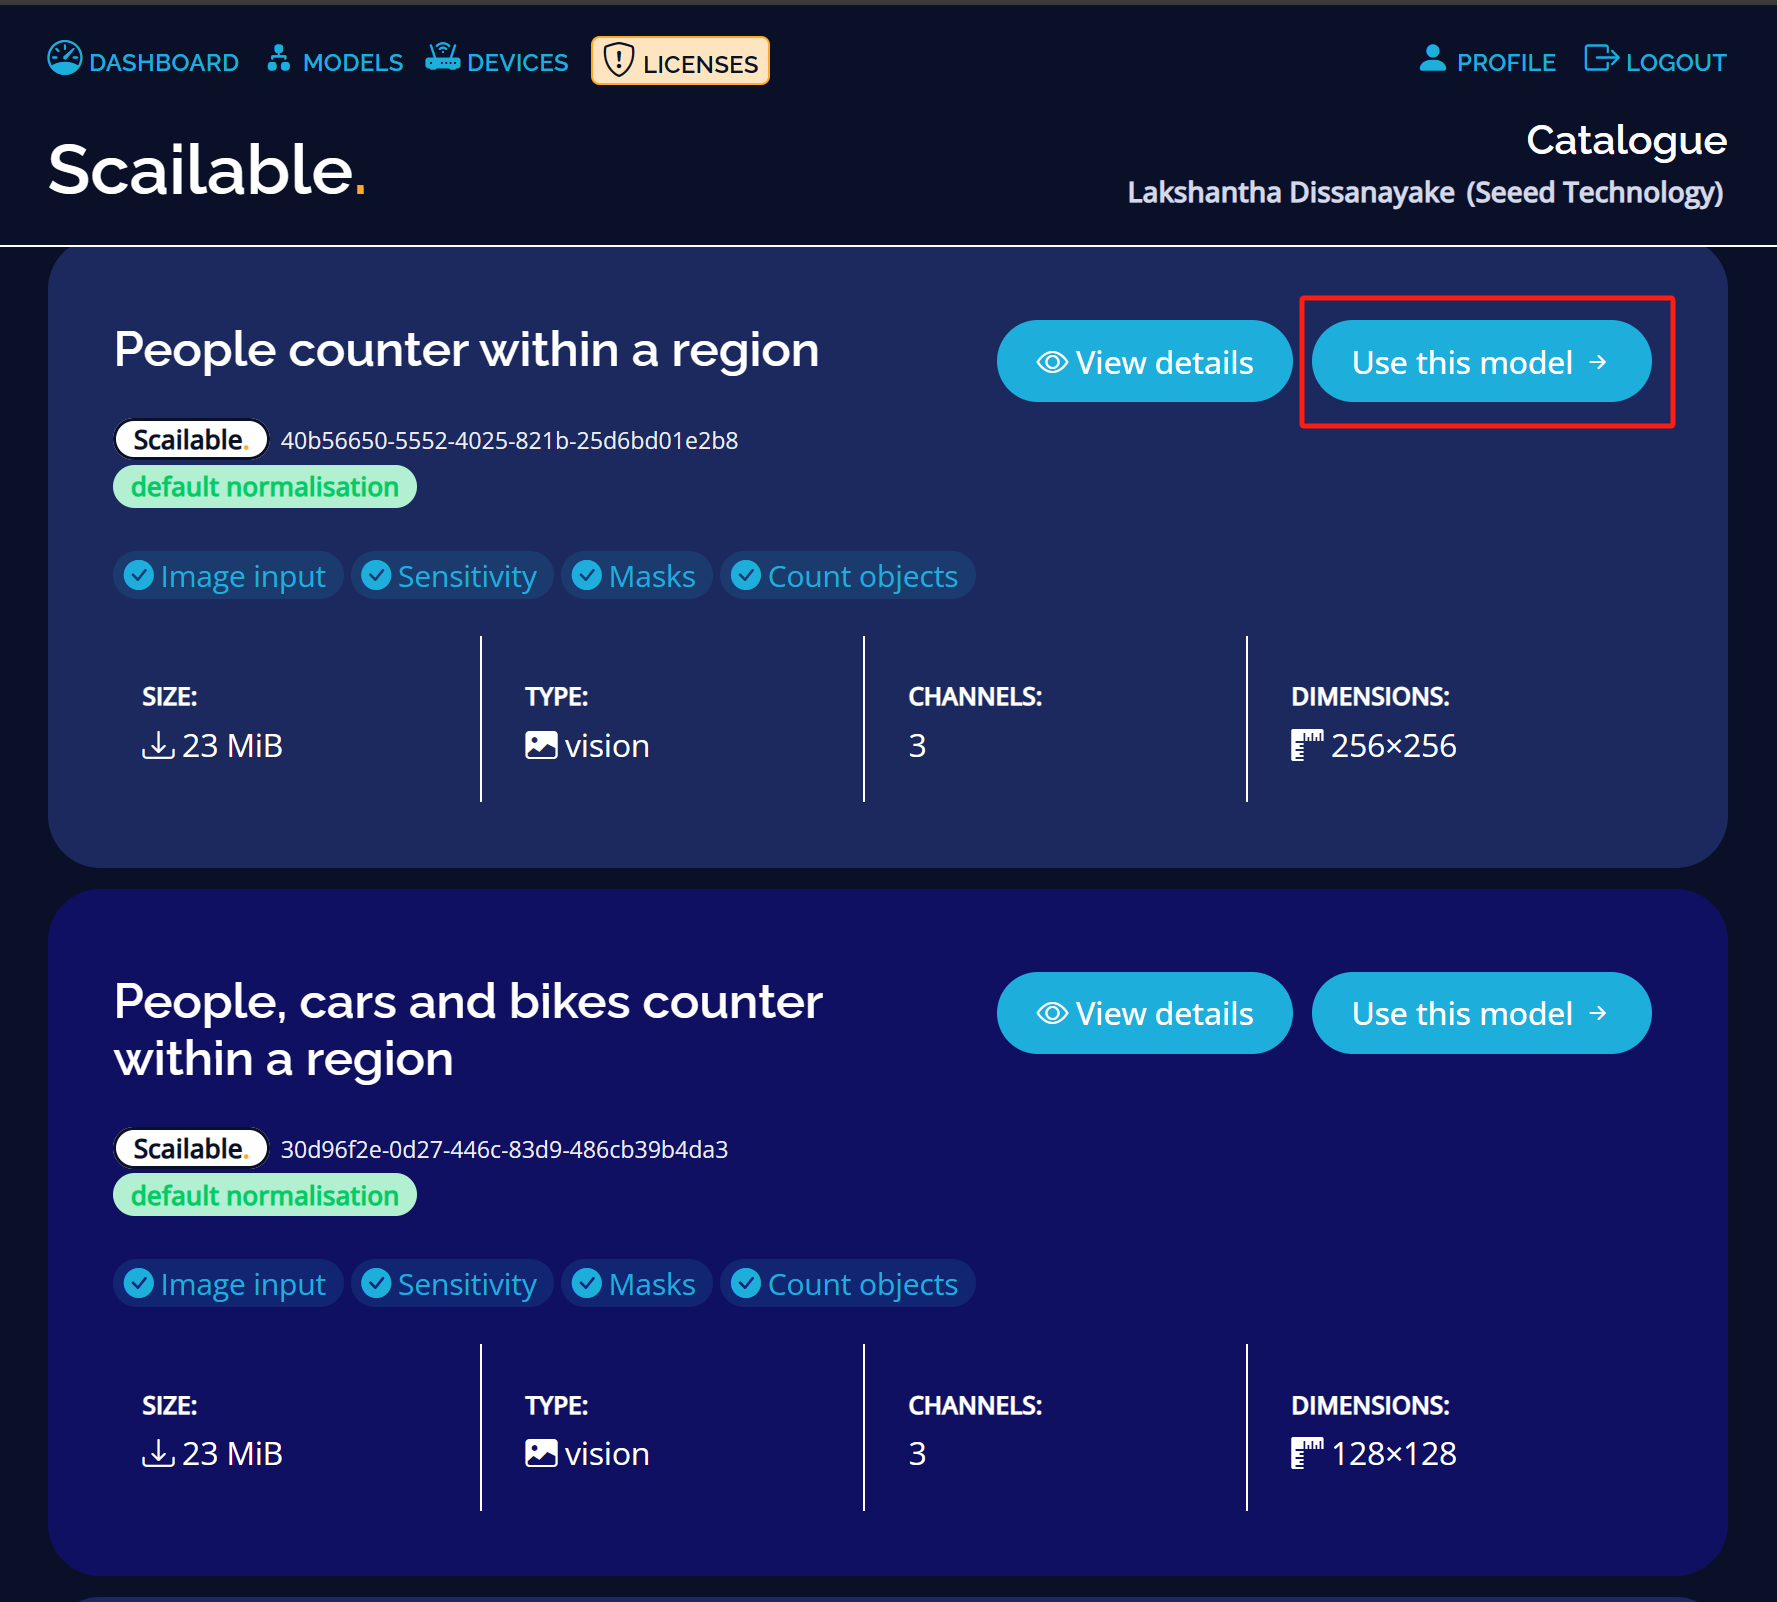
Step 2: Here you can either add your own model by clicking on add a model or use a pre-built model. Here we will choose Scailable Models
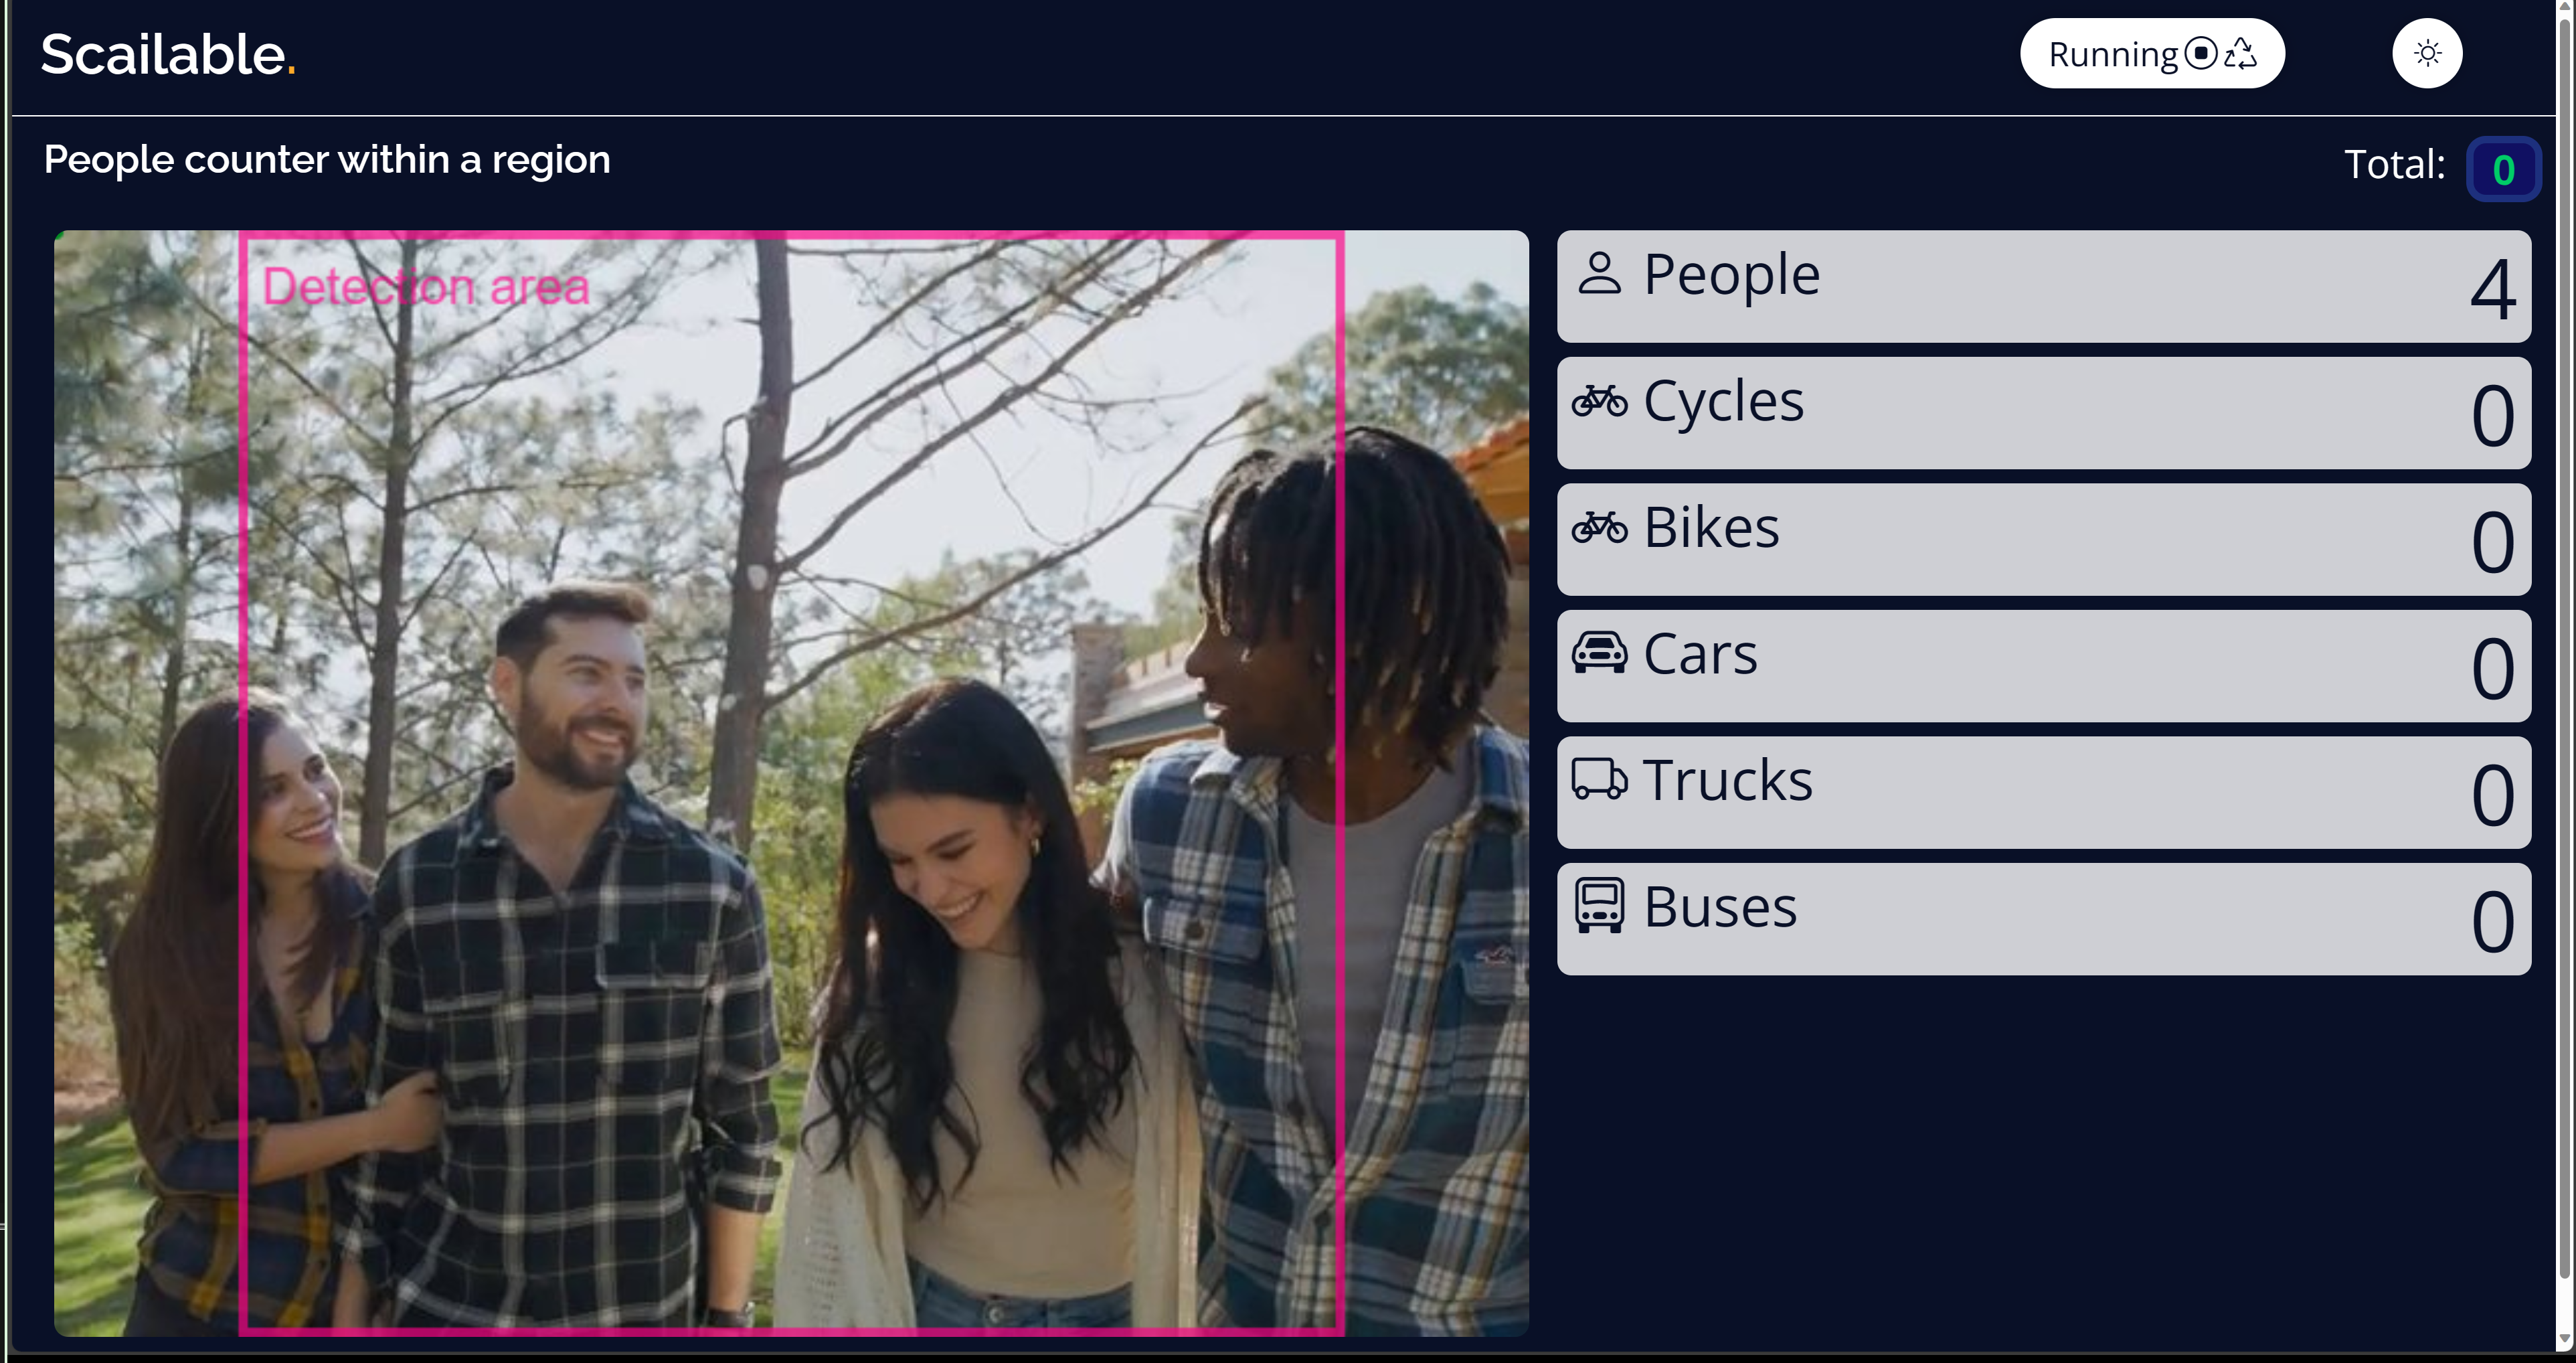
Step 3: As an example, we will choose People counter within a region model. Click Use this model
Now you will see the model is selected
Step 4: Under Input tab, select Video driver for the Input driver
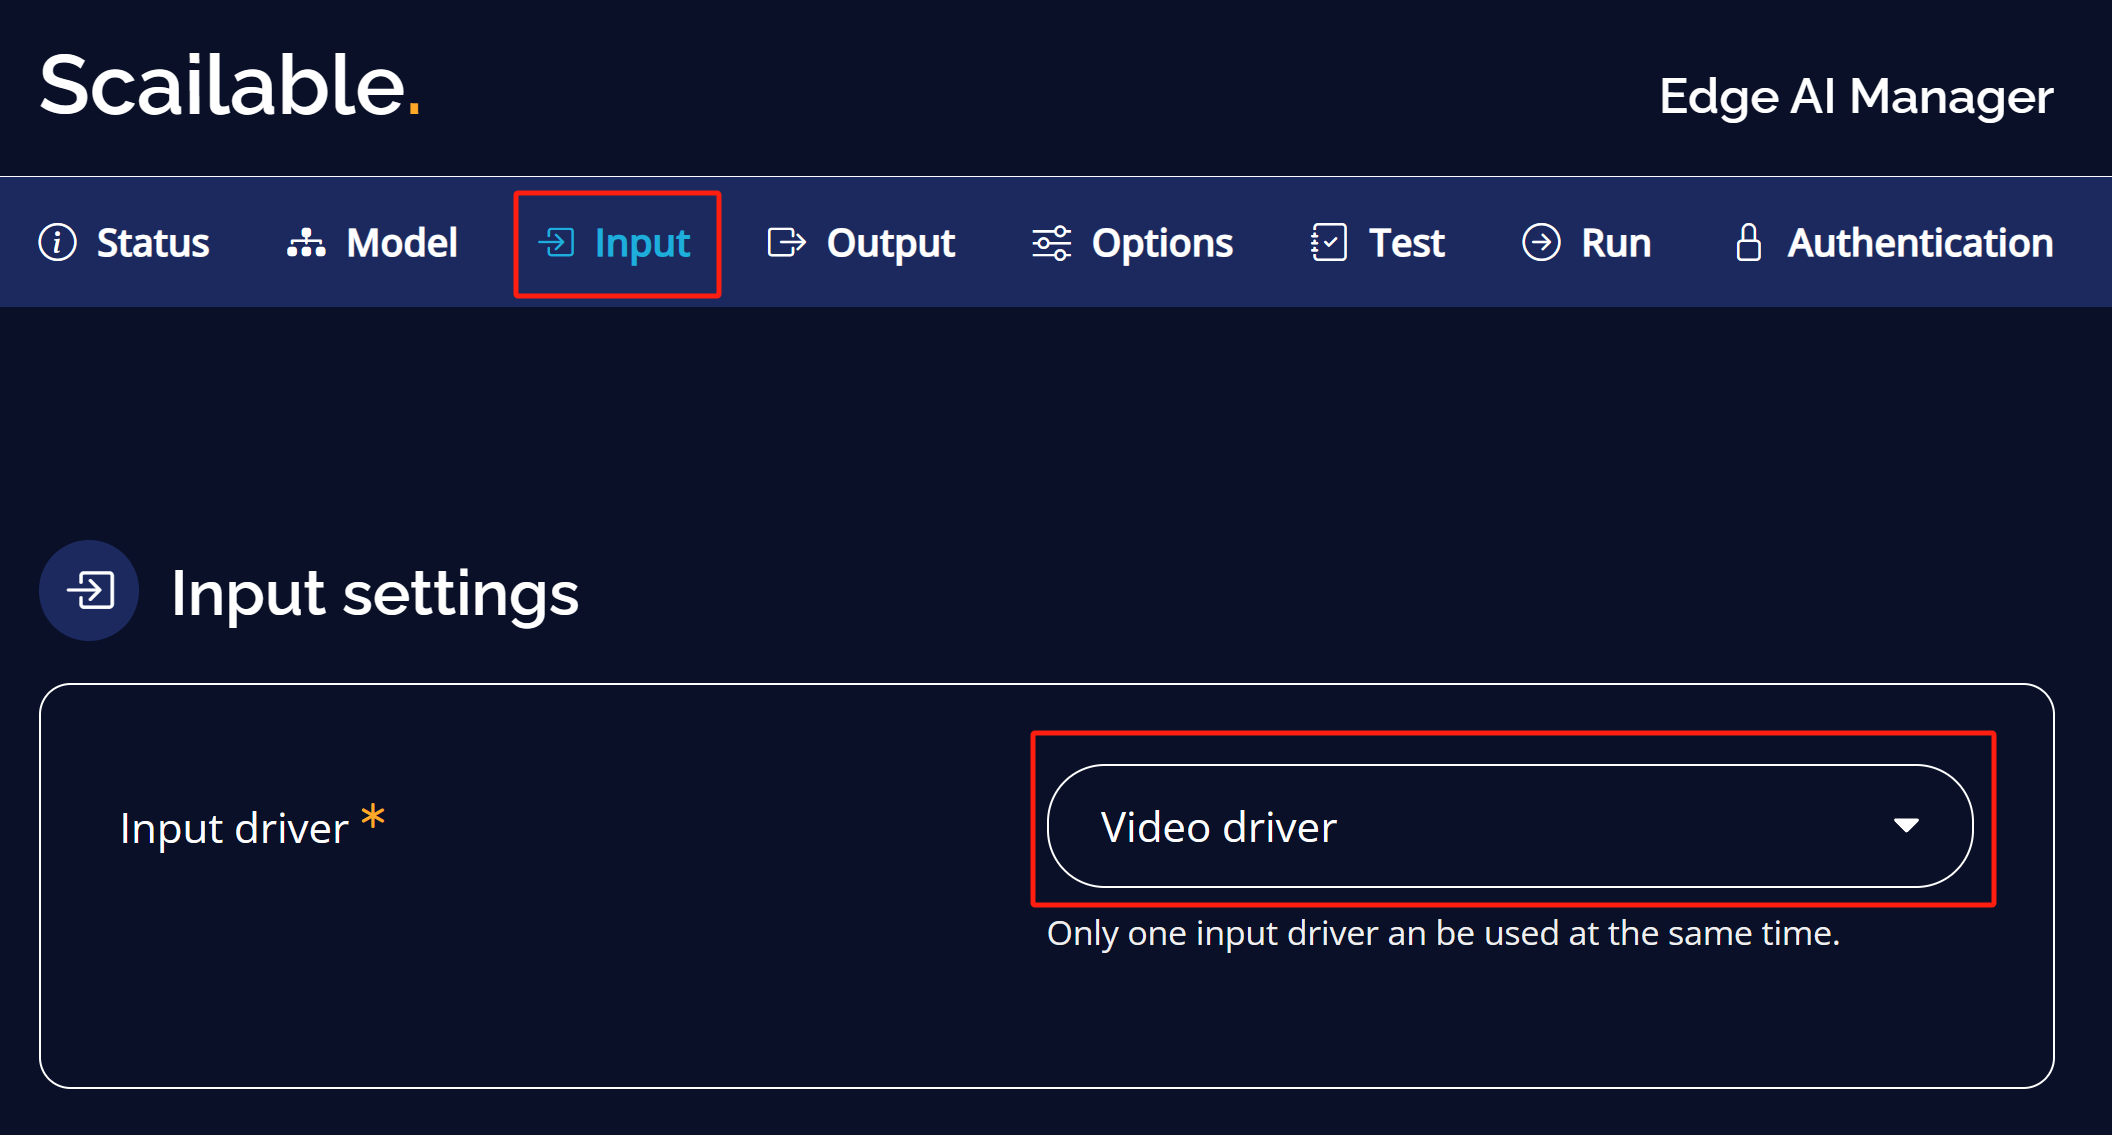
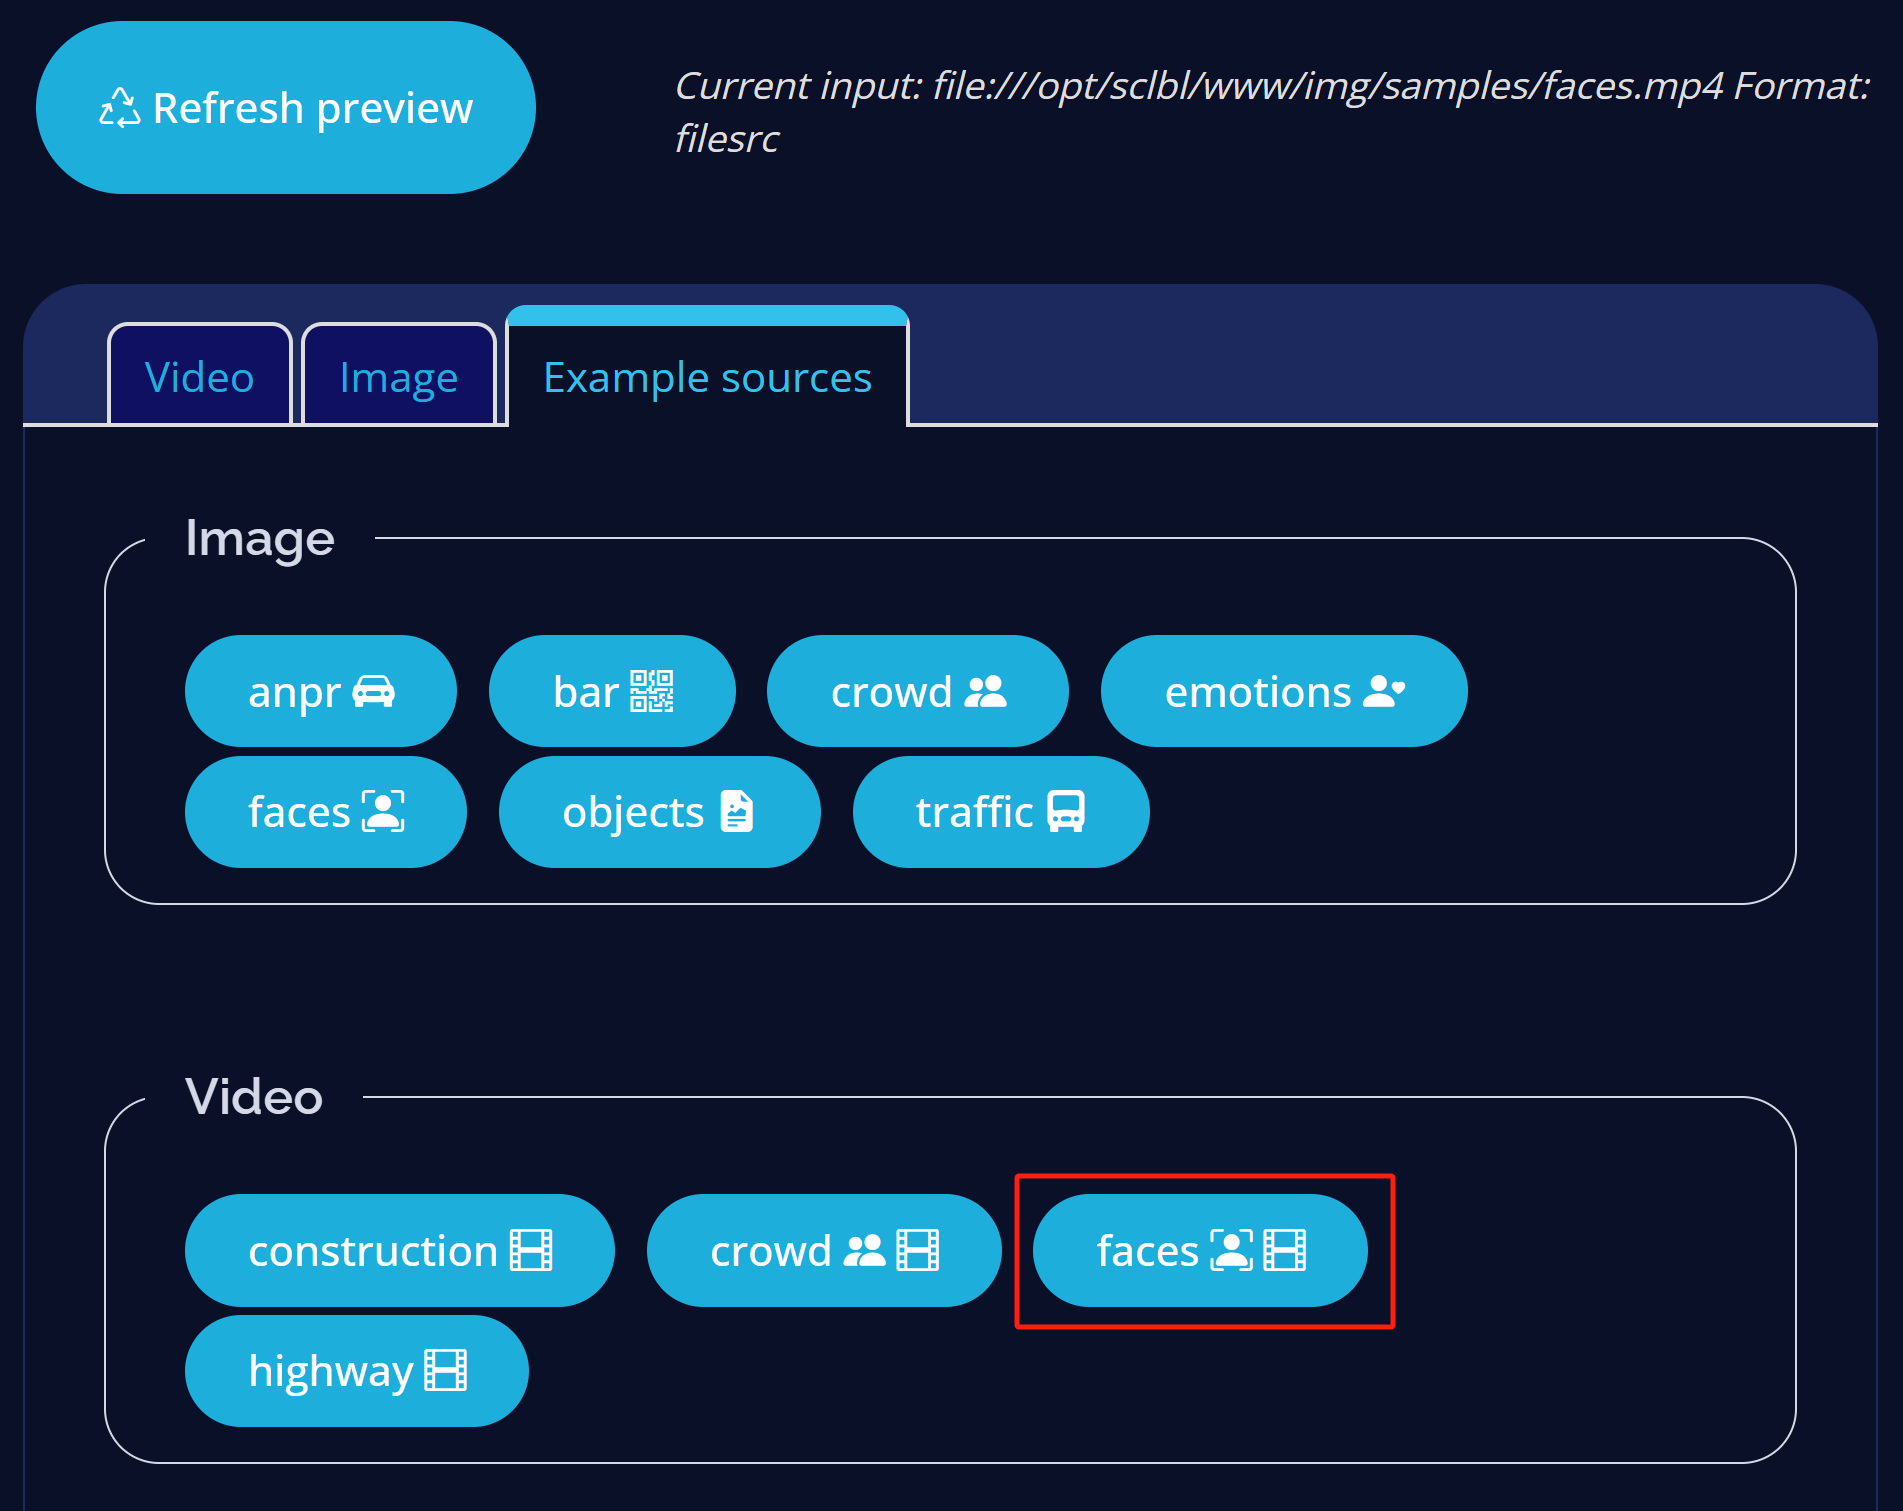
Here you can select either a video stream, image or example image/ video preloaded with Scailable
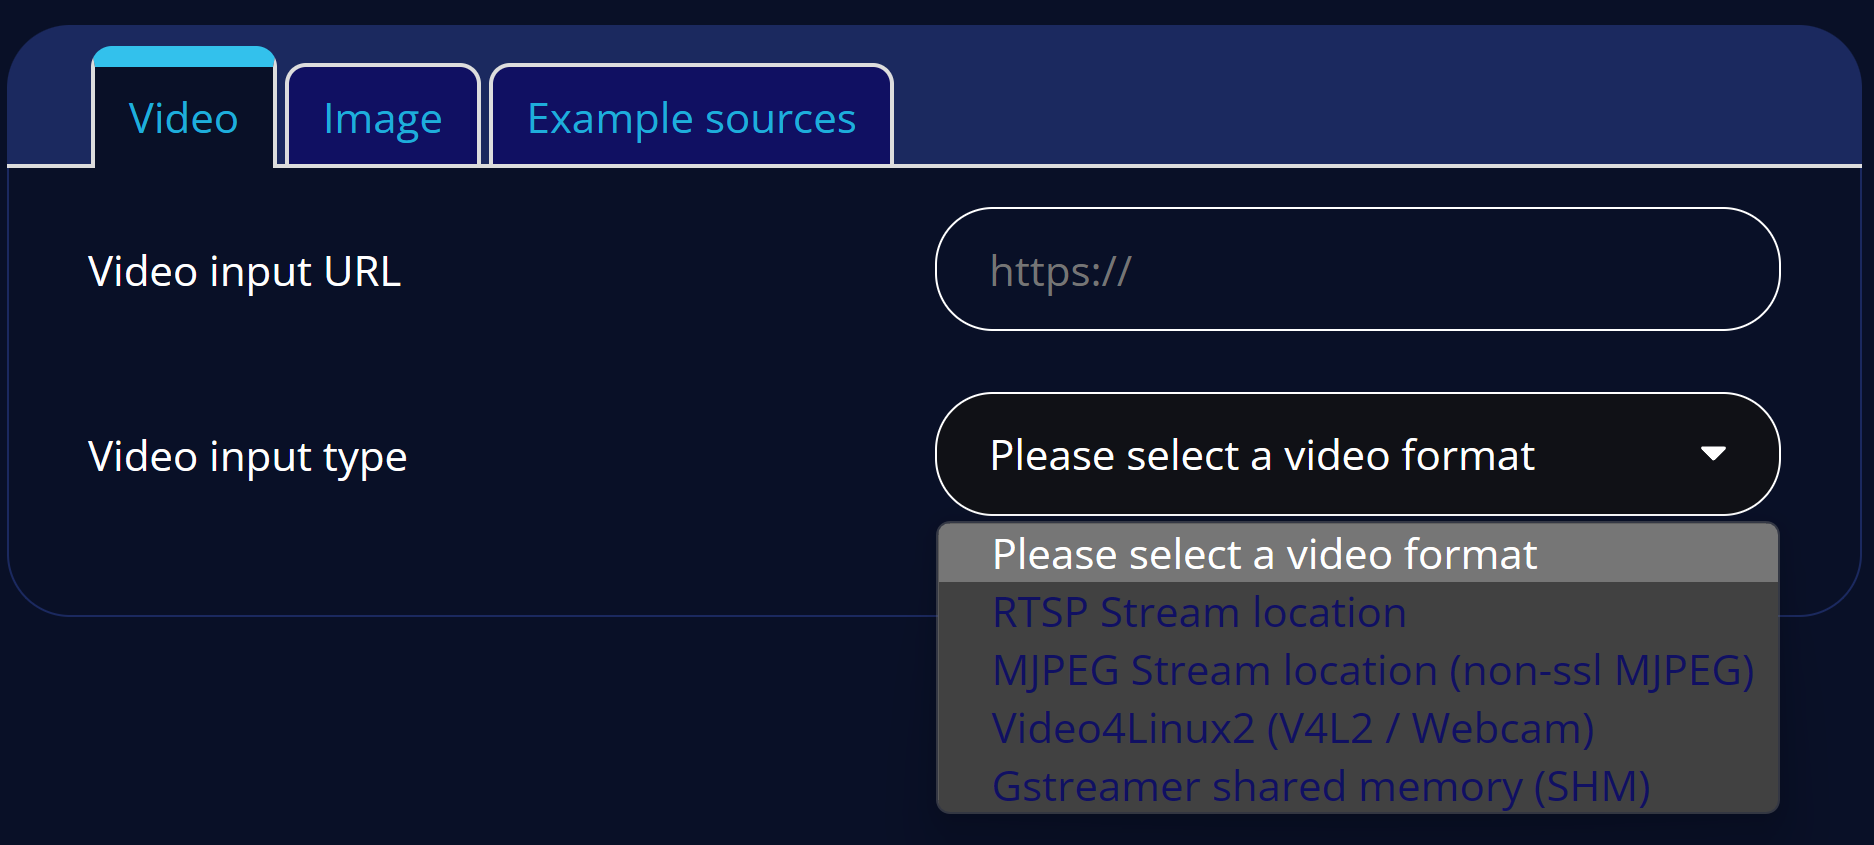
Step 5: For example, we will choose a pre-loaded video source that comes with Scailable which is faces
Step 6: Under output tab, keep the settings as default

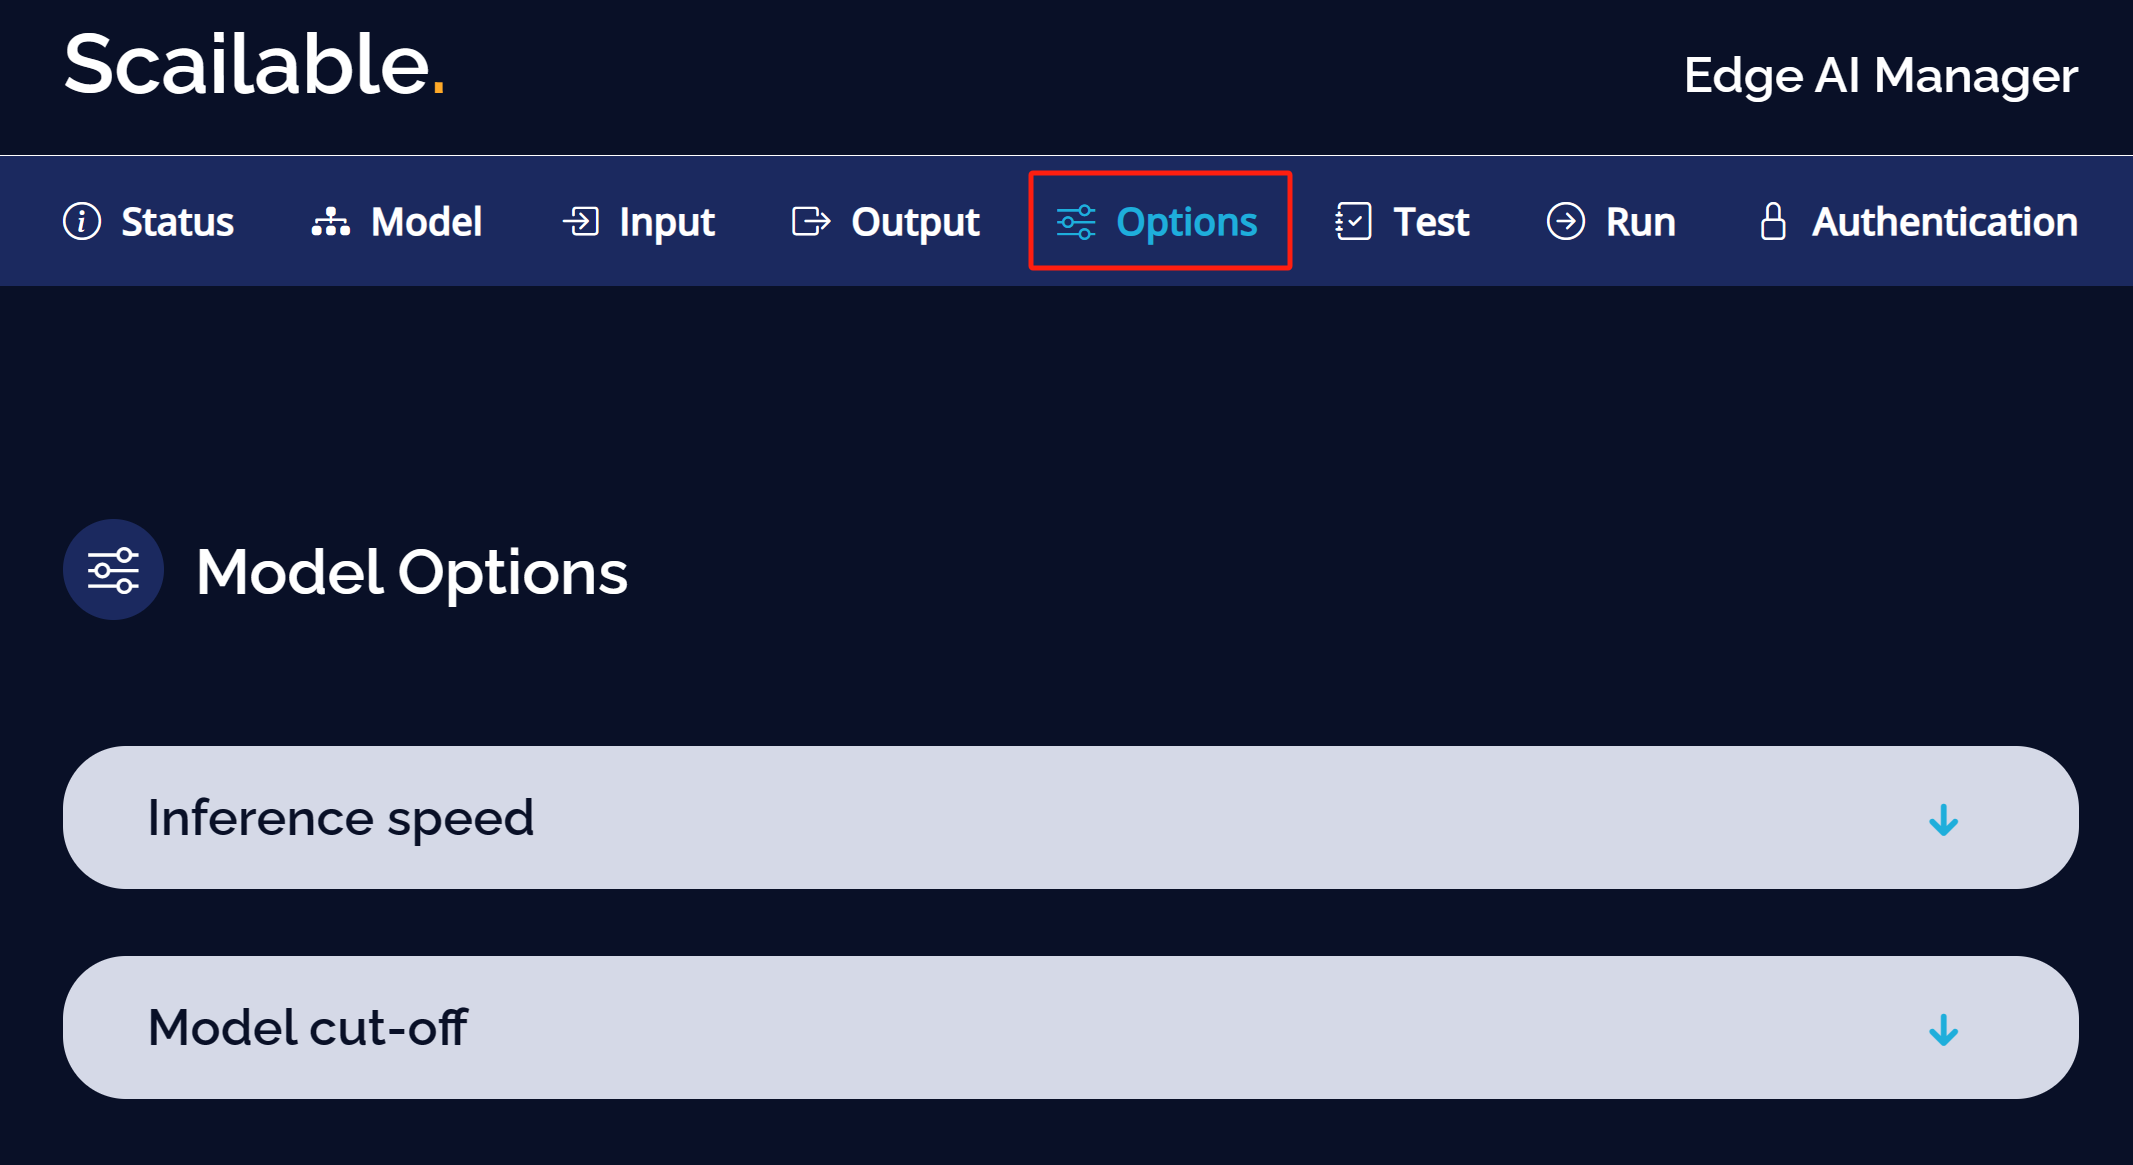
Step 7: Under Options tab, keep the settings as default
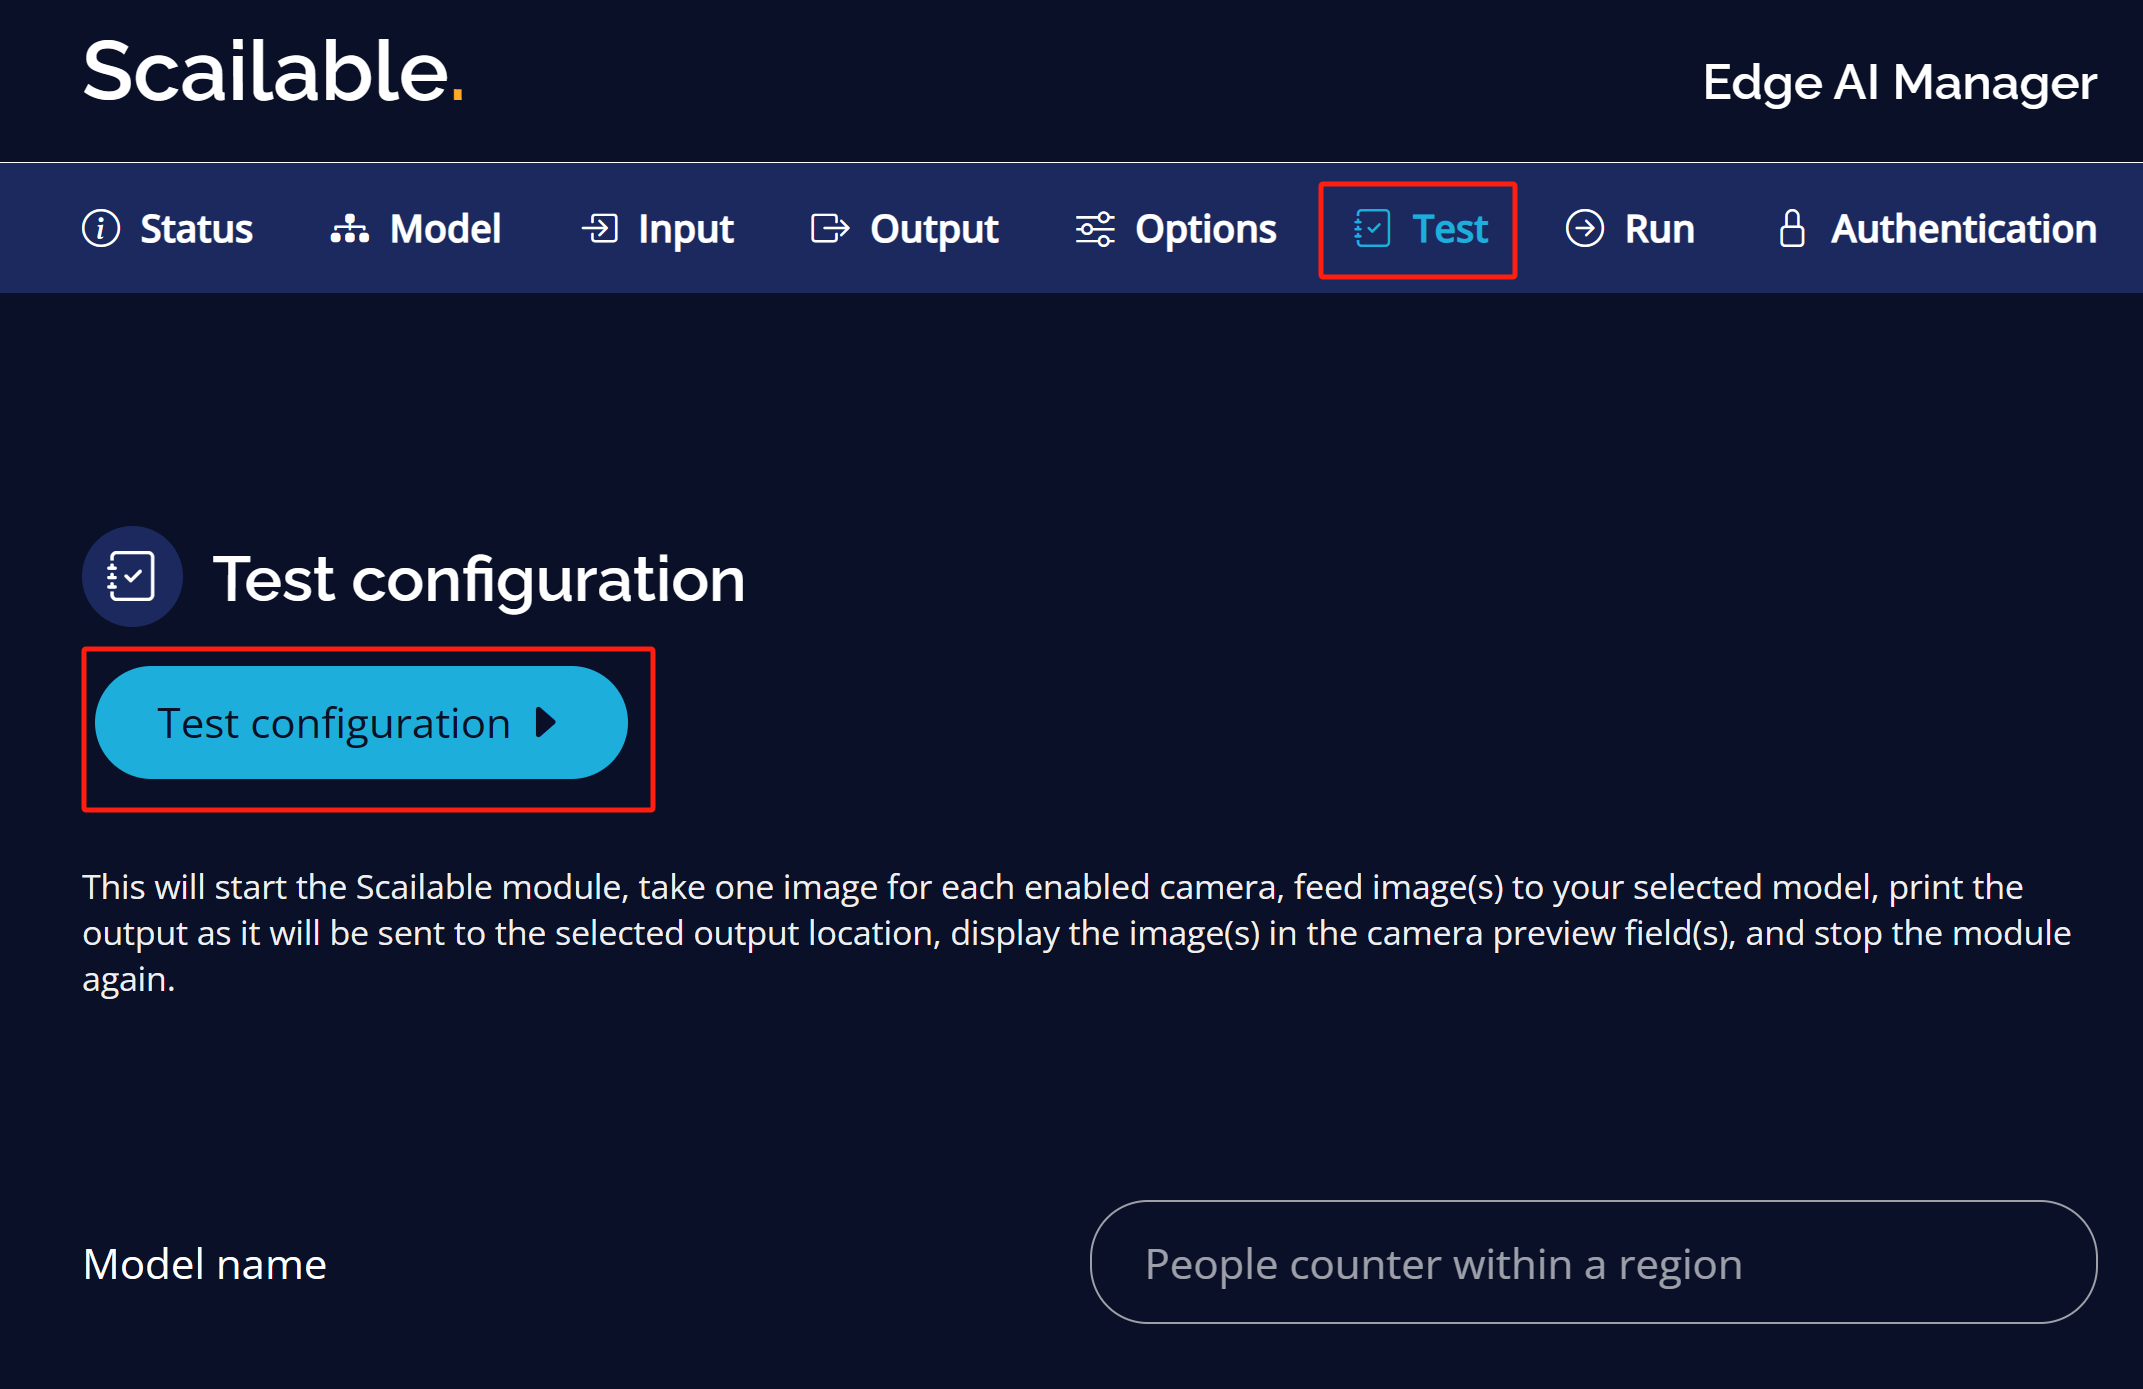
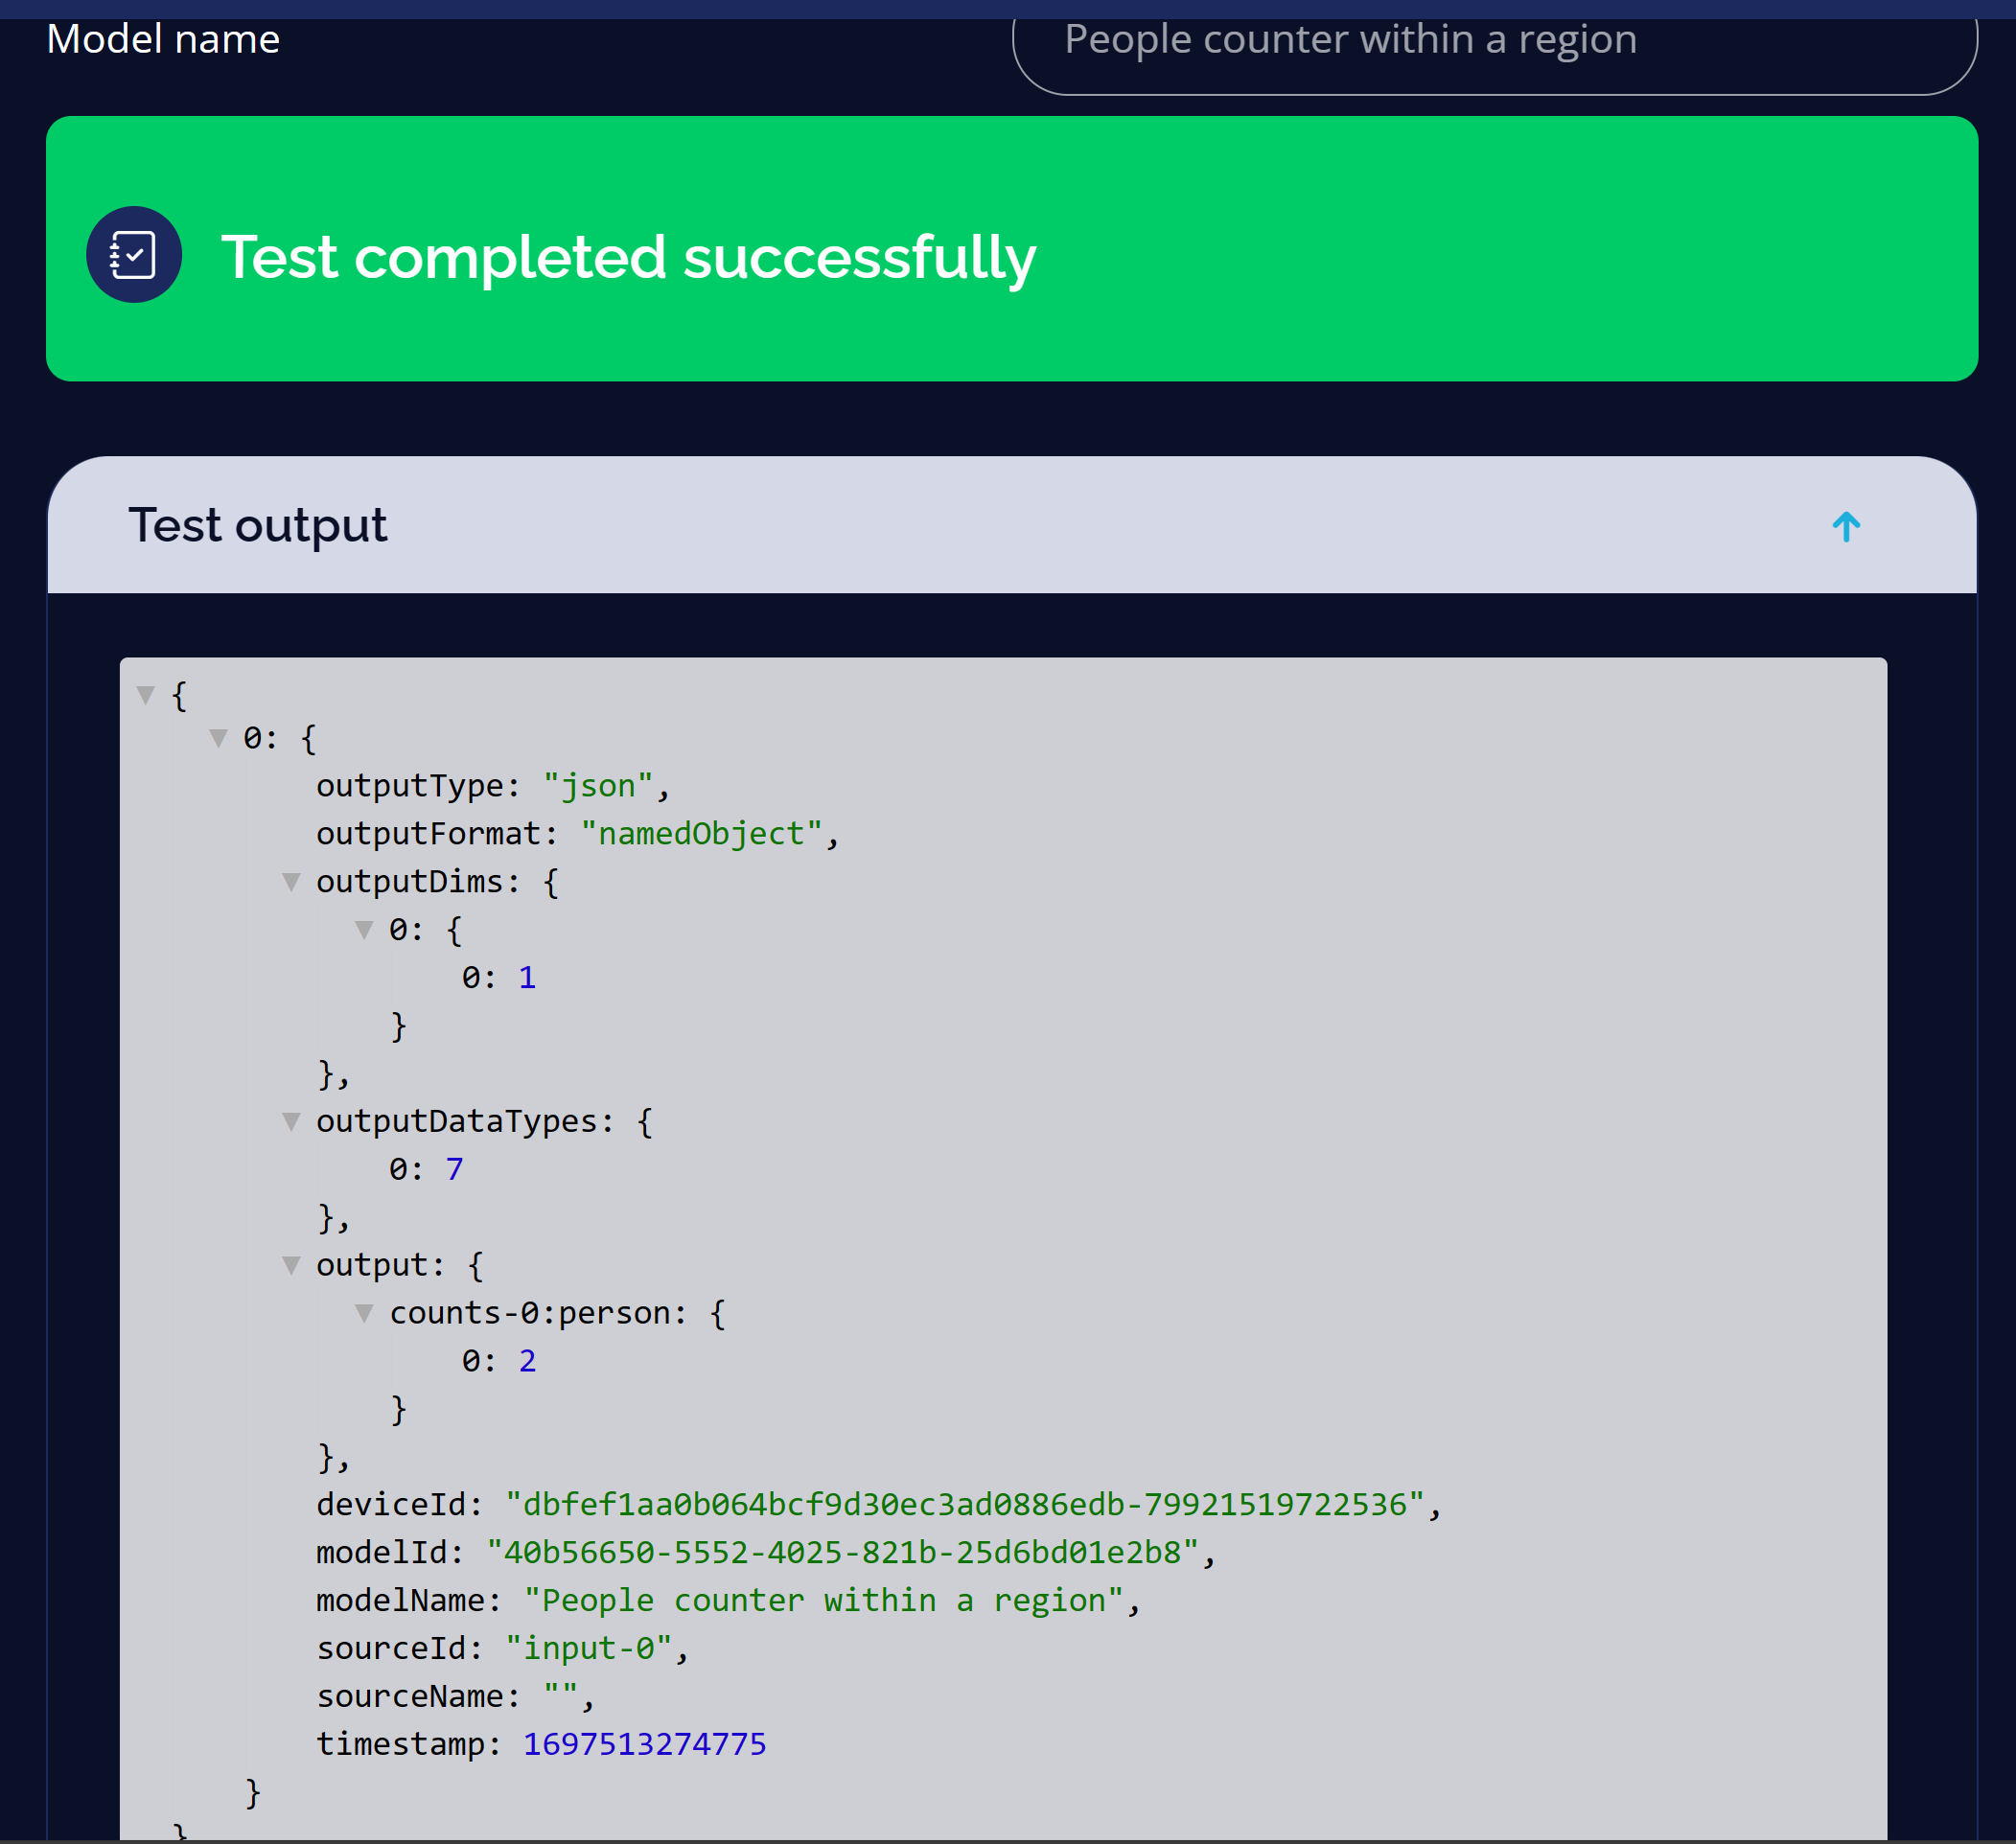
Step 7: Under Test tab, click Test configuration
You will see the following output if it is successful
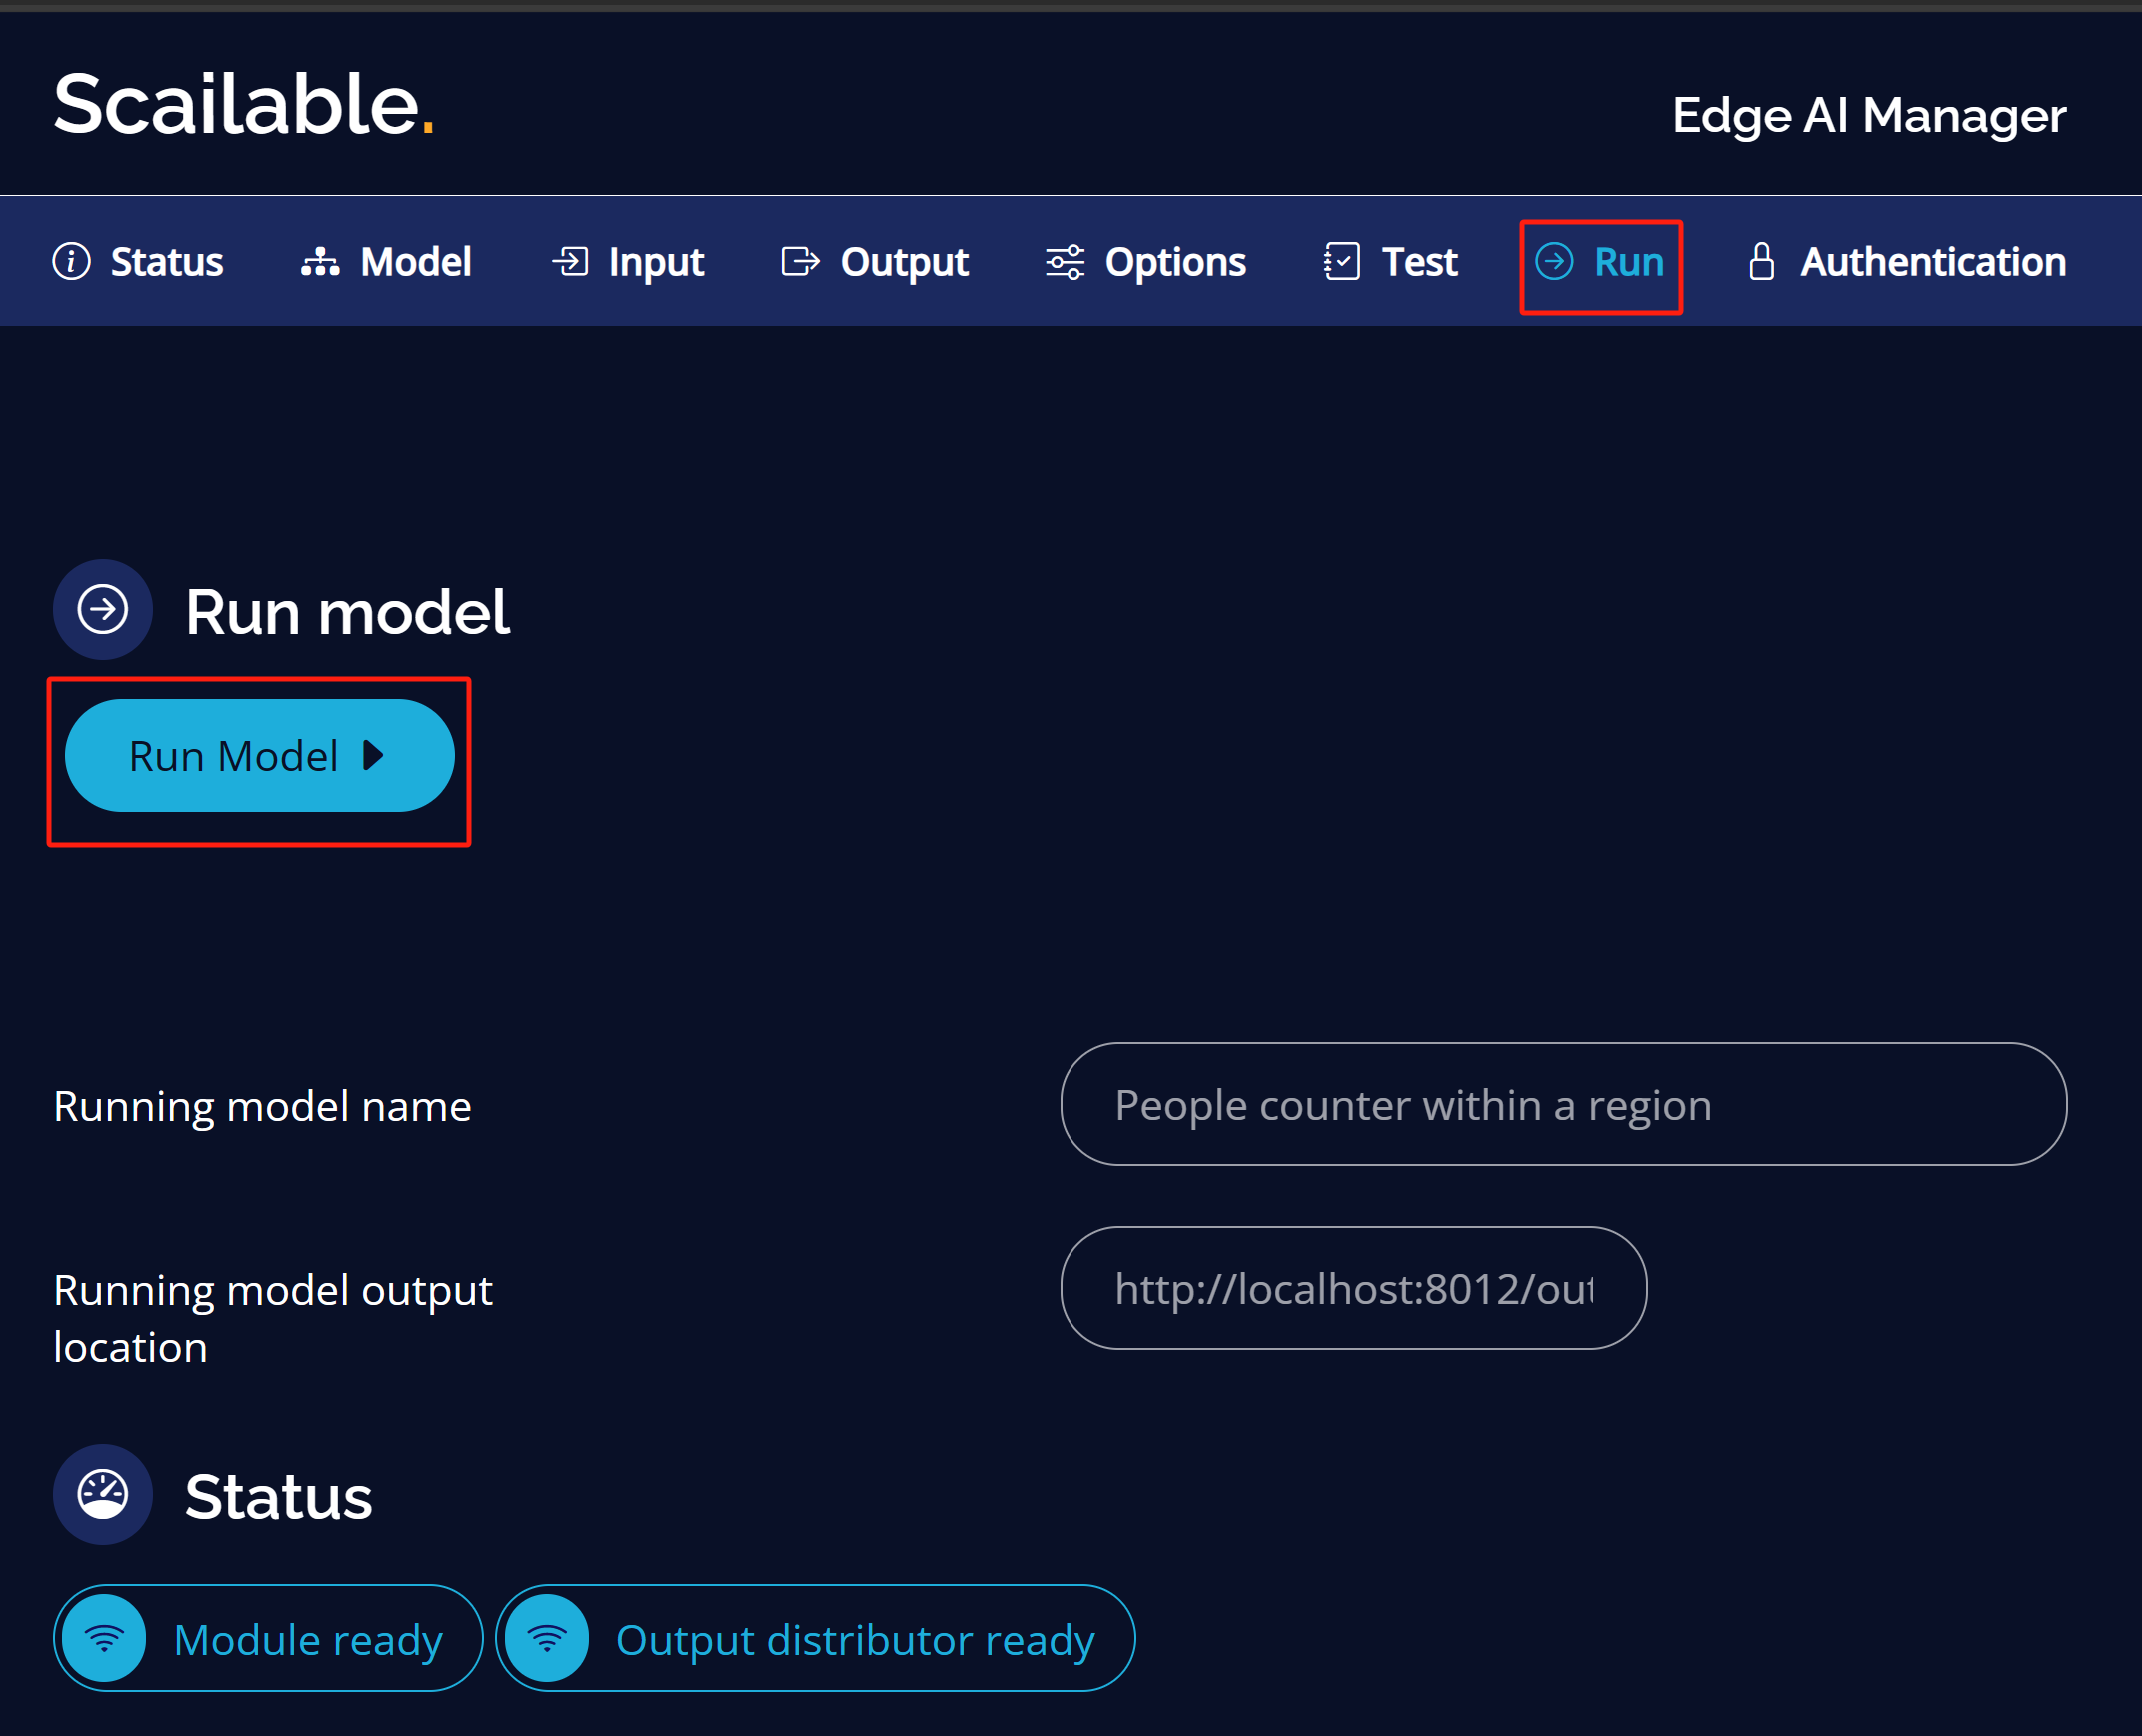
Step 8: Under Run tab, click Run Model
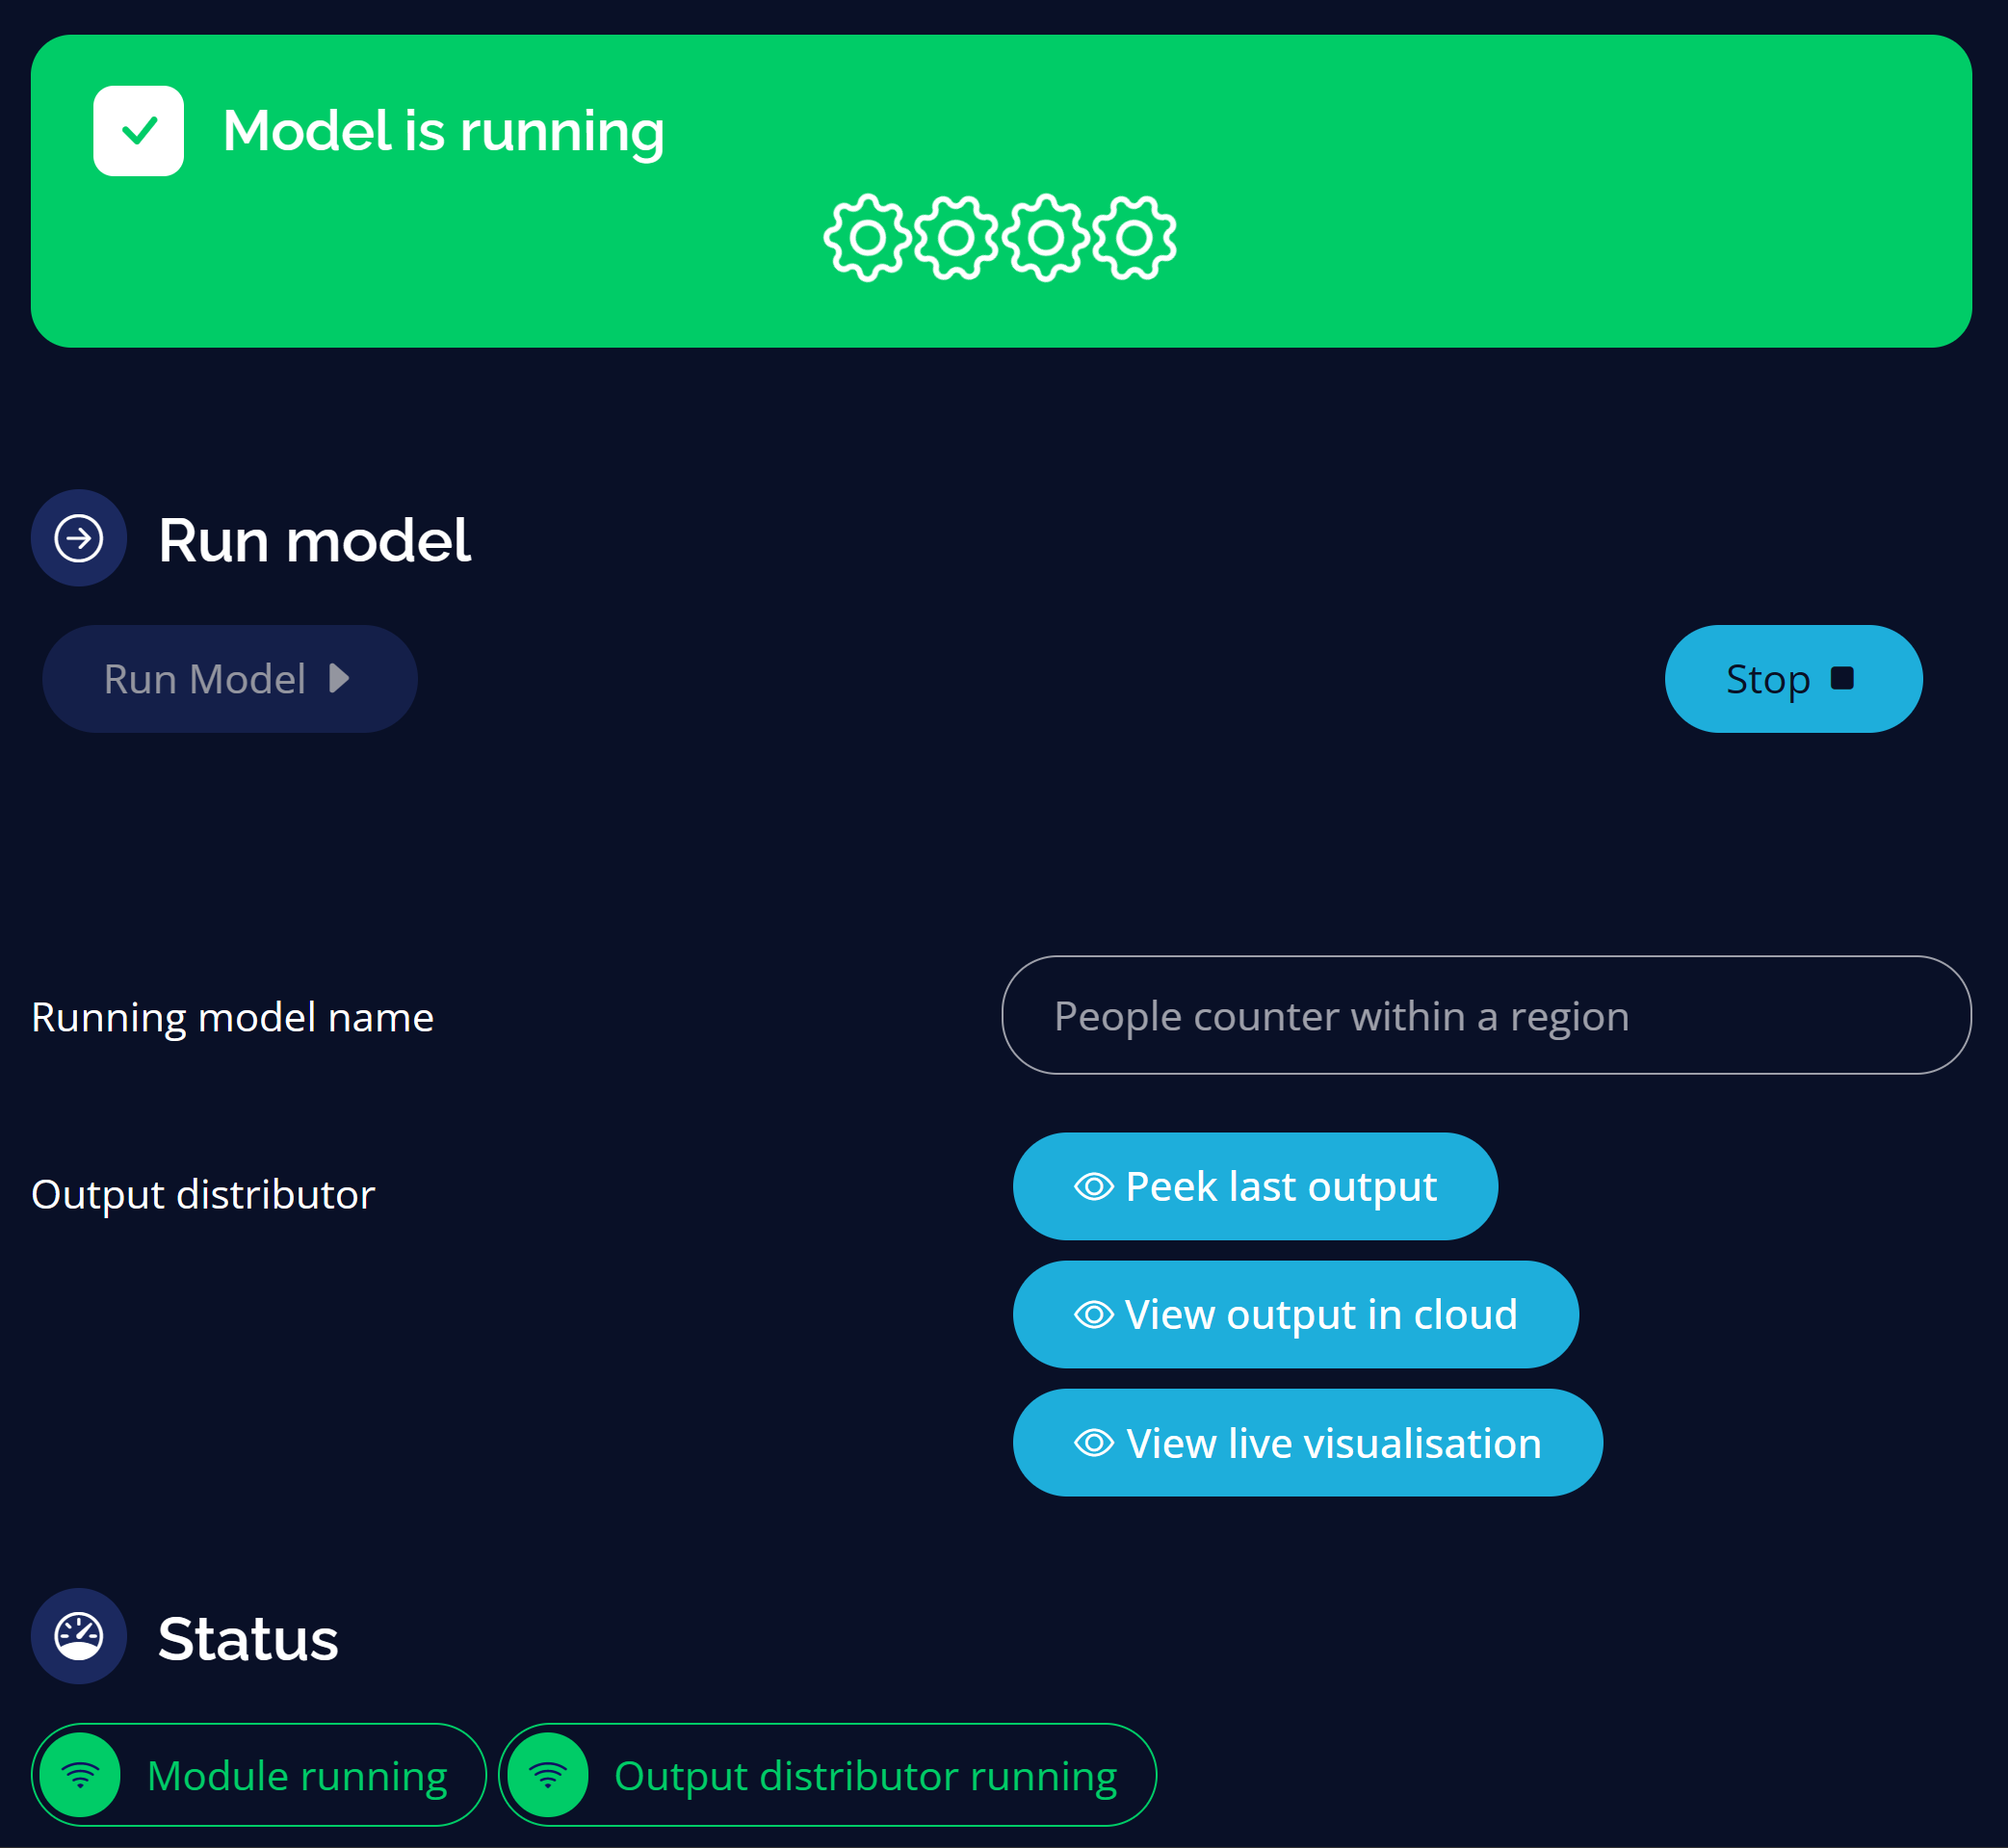
You will see the following output if it is running successfully
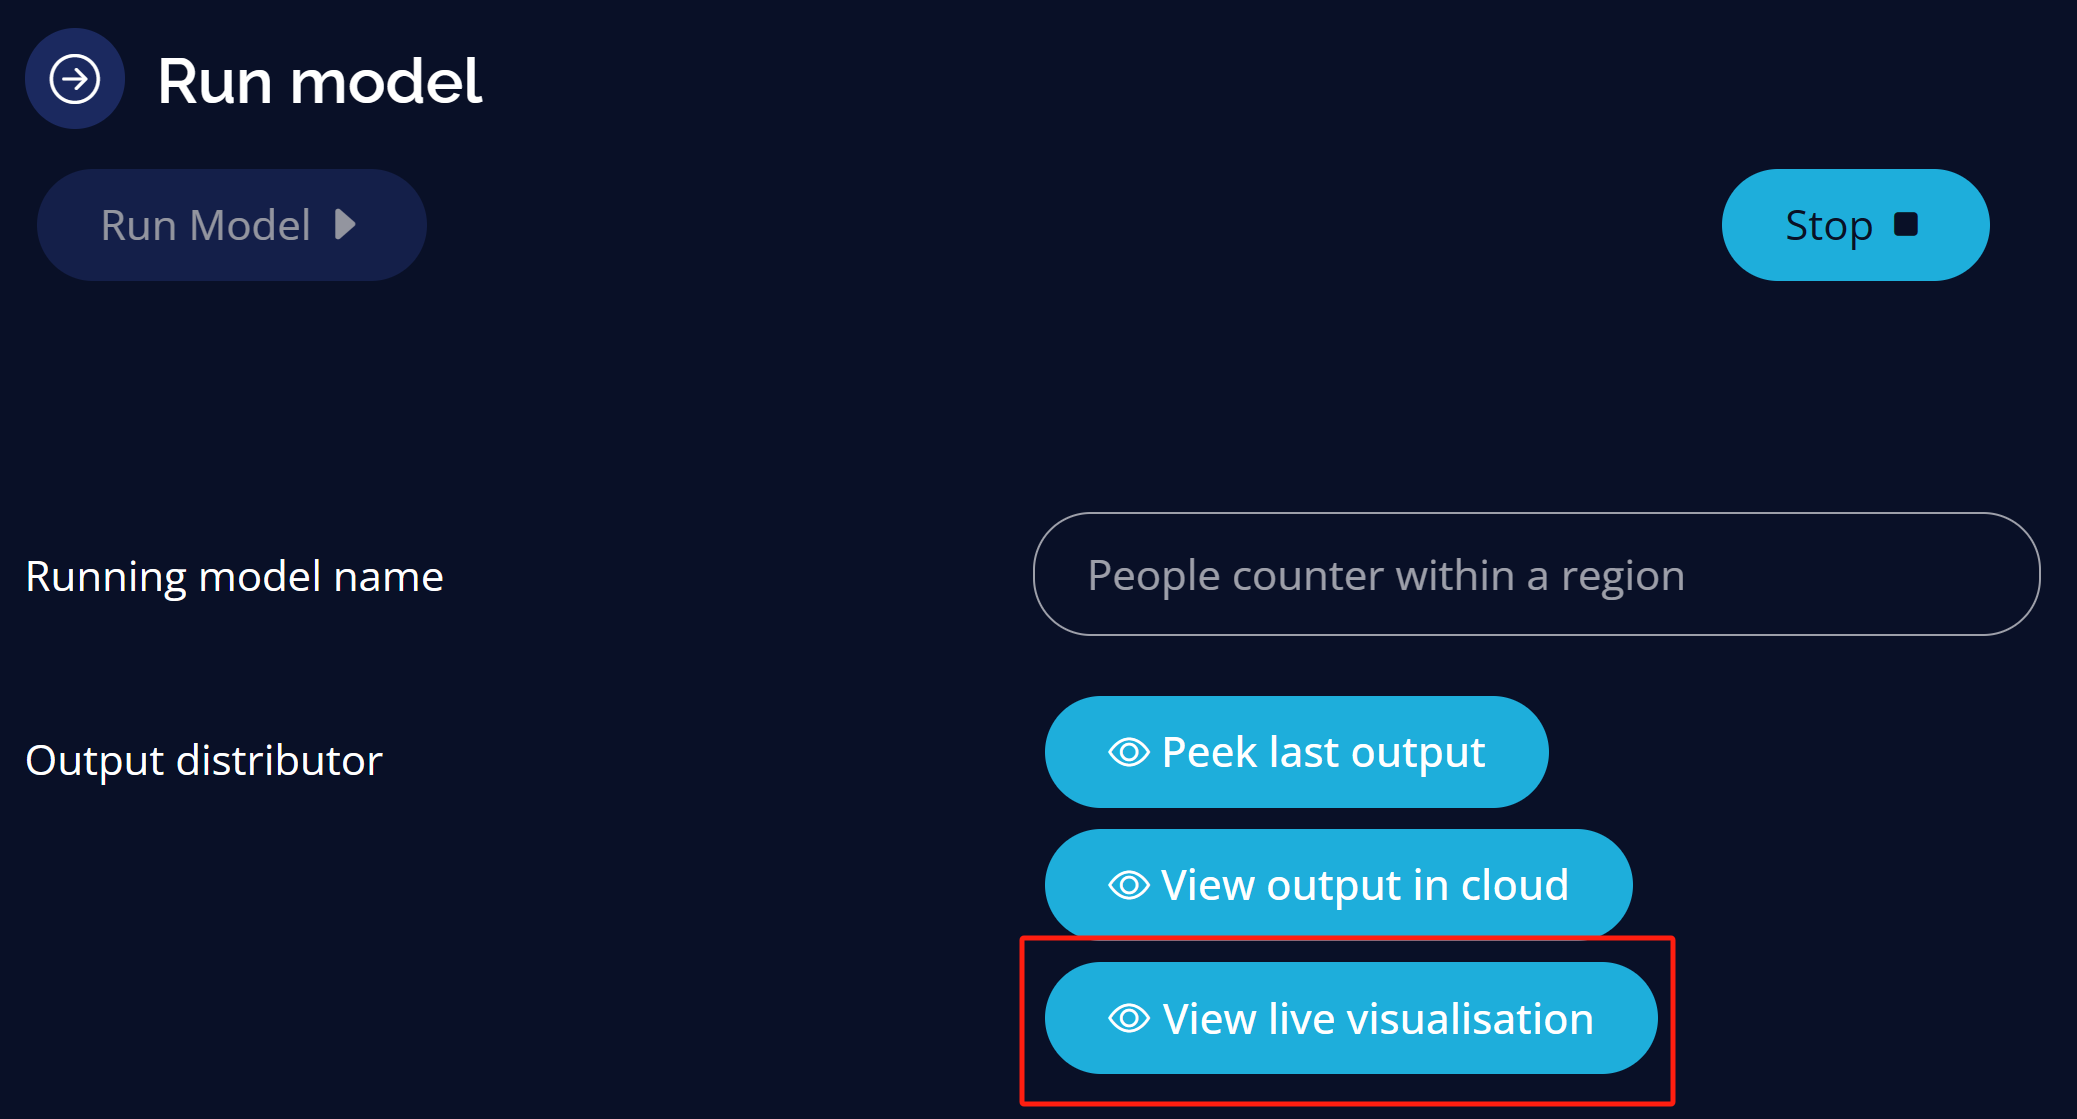
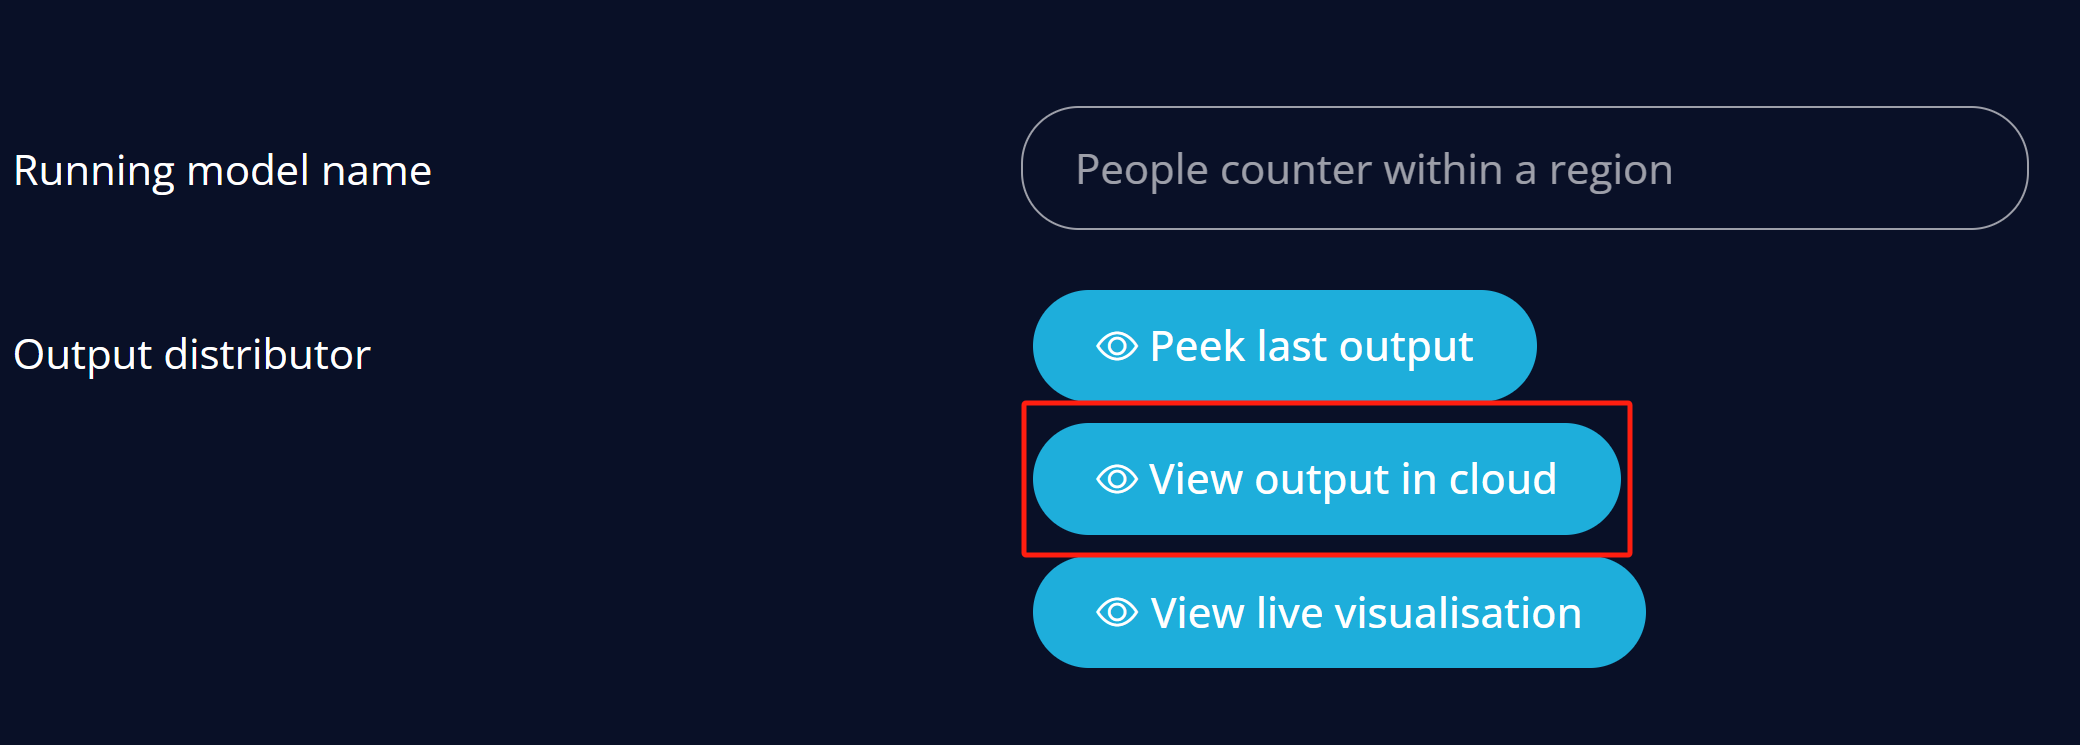
Step 9: Click View live visualization to preview inference results locally
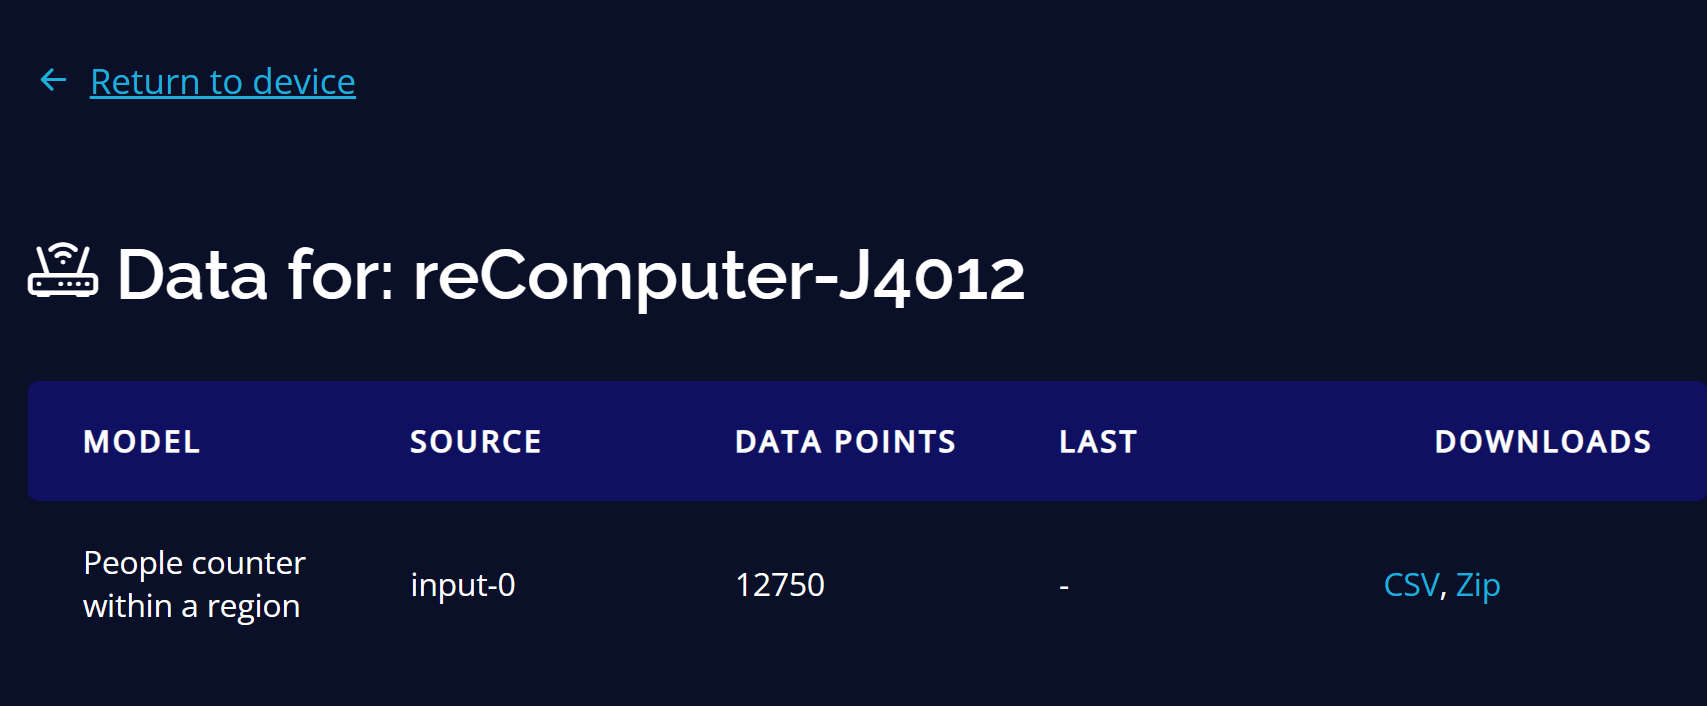
Step 10: Click View output in cloud to download the results in CSV or JSON formats
Deploy AI Models at Scale
Using Scailable, you can deploy a single model to multiple devices at scale with ease
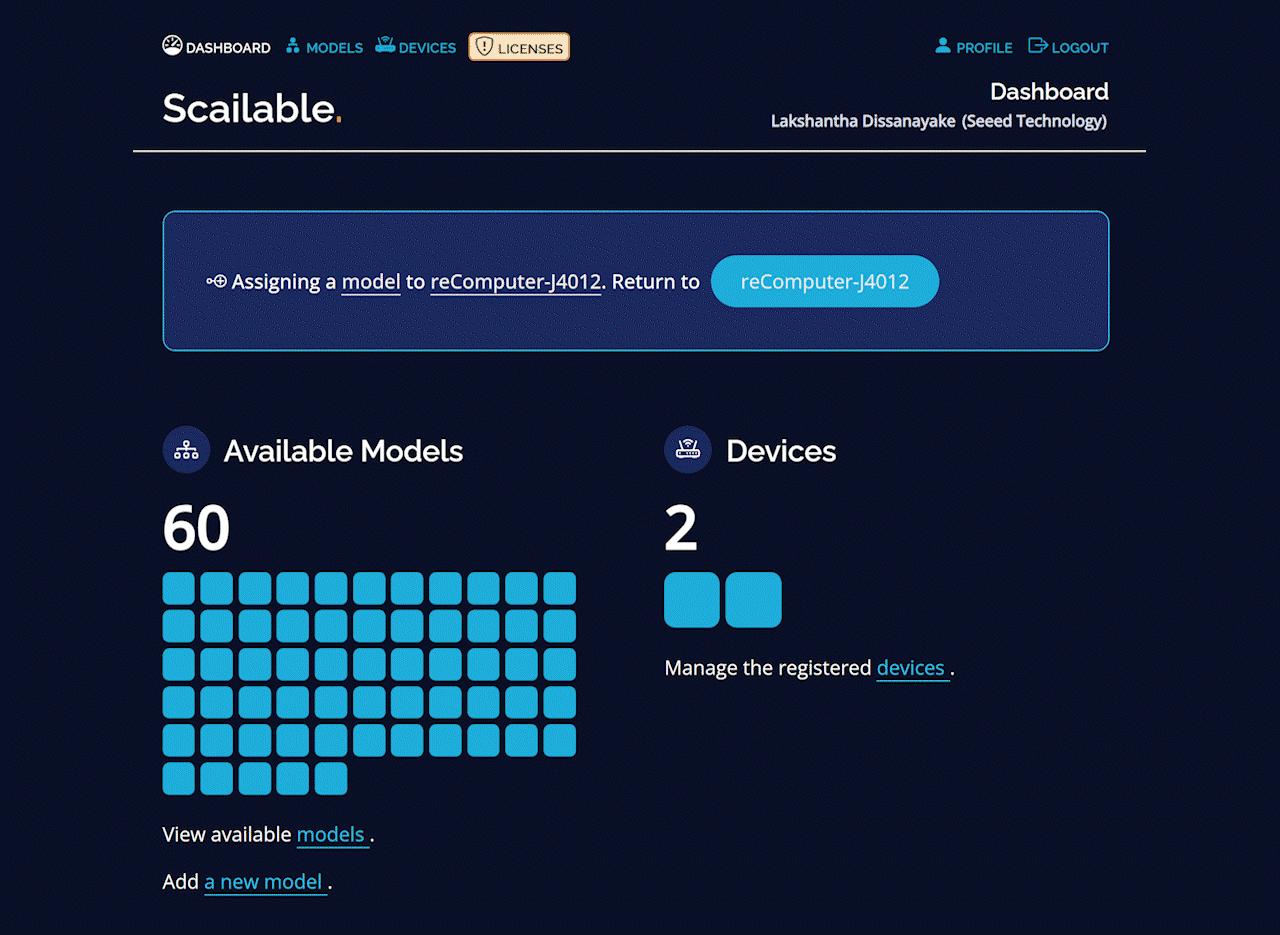
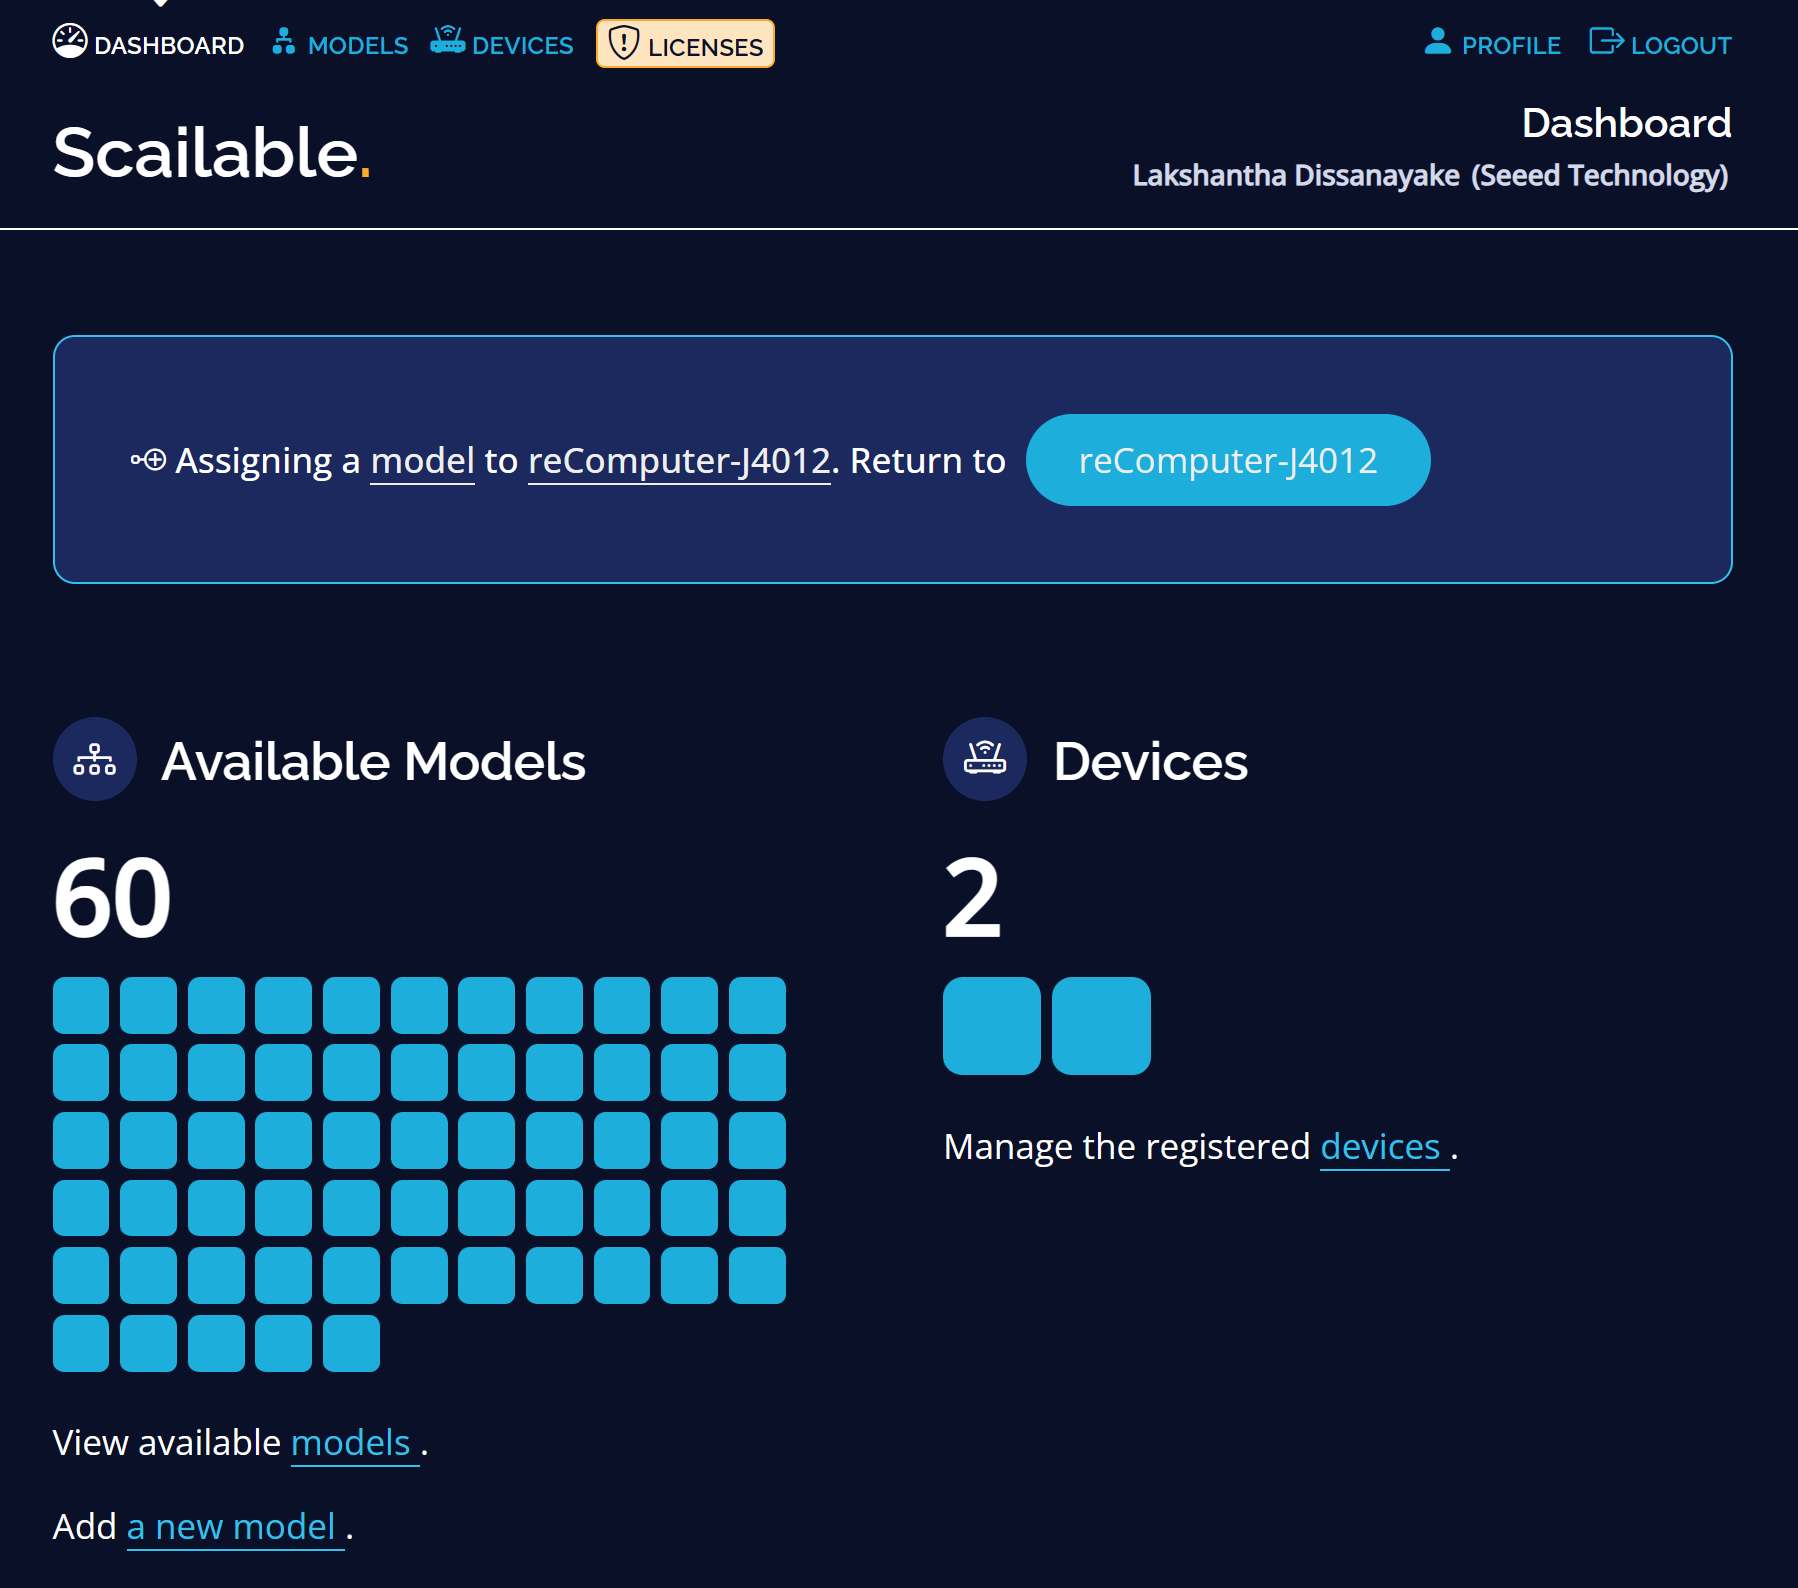
Step 1: Visit this webpage, login to your Scailable account and you will see the dashboard as follows
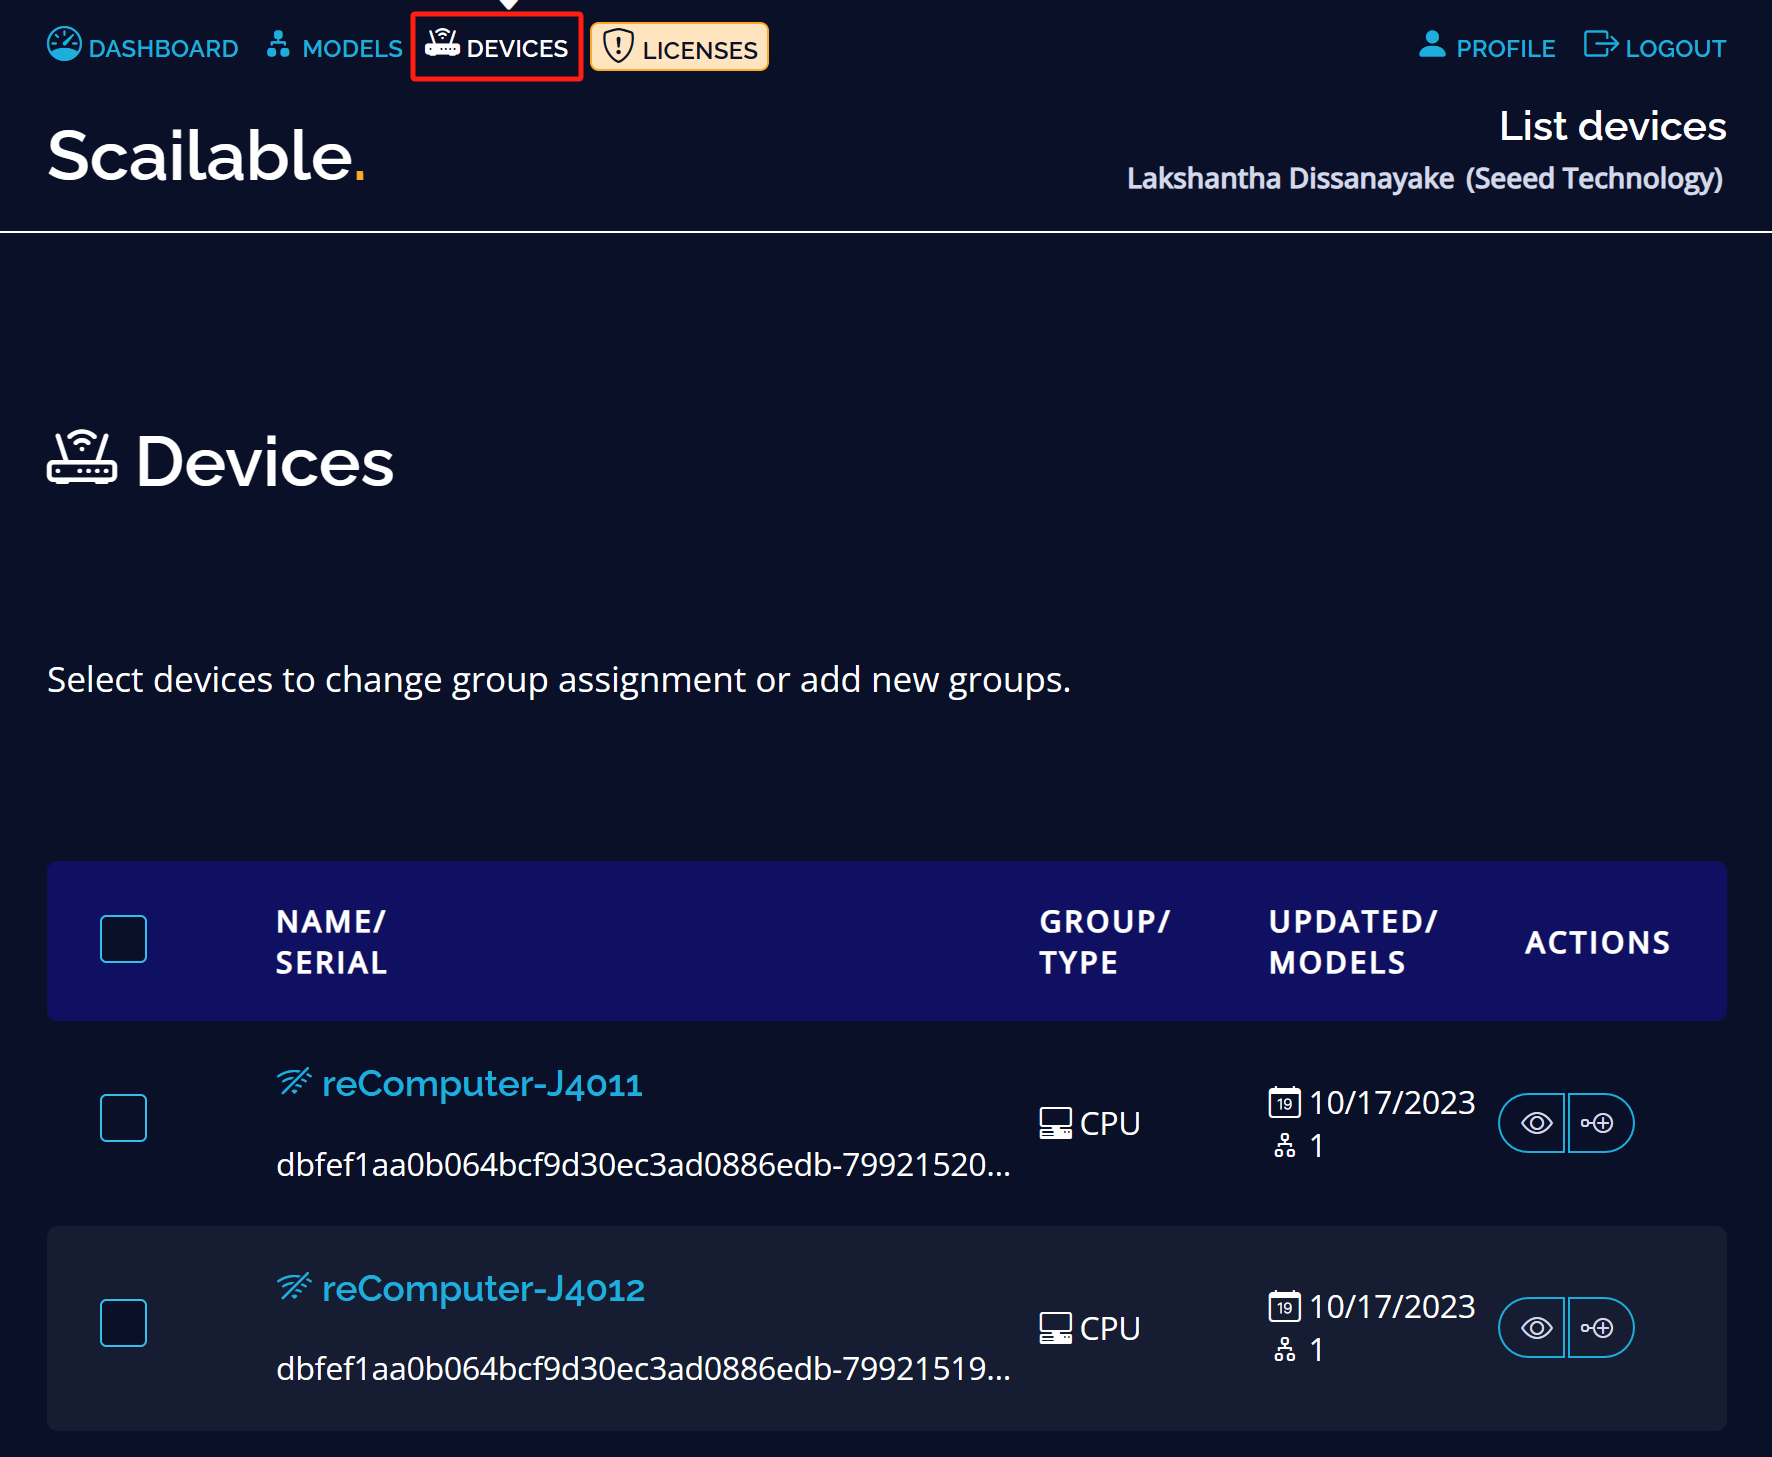
Step 2: Once you click DEVICES, you will see all your devices connected with your Scailable account
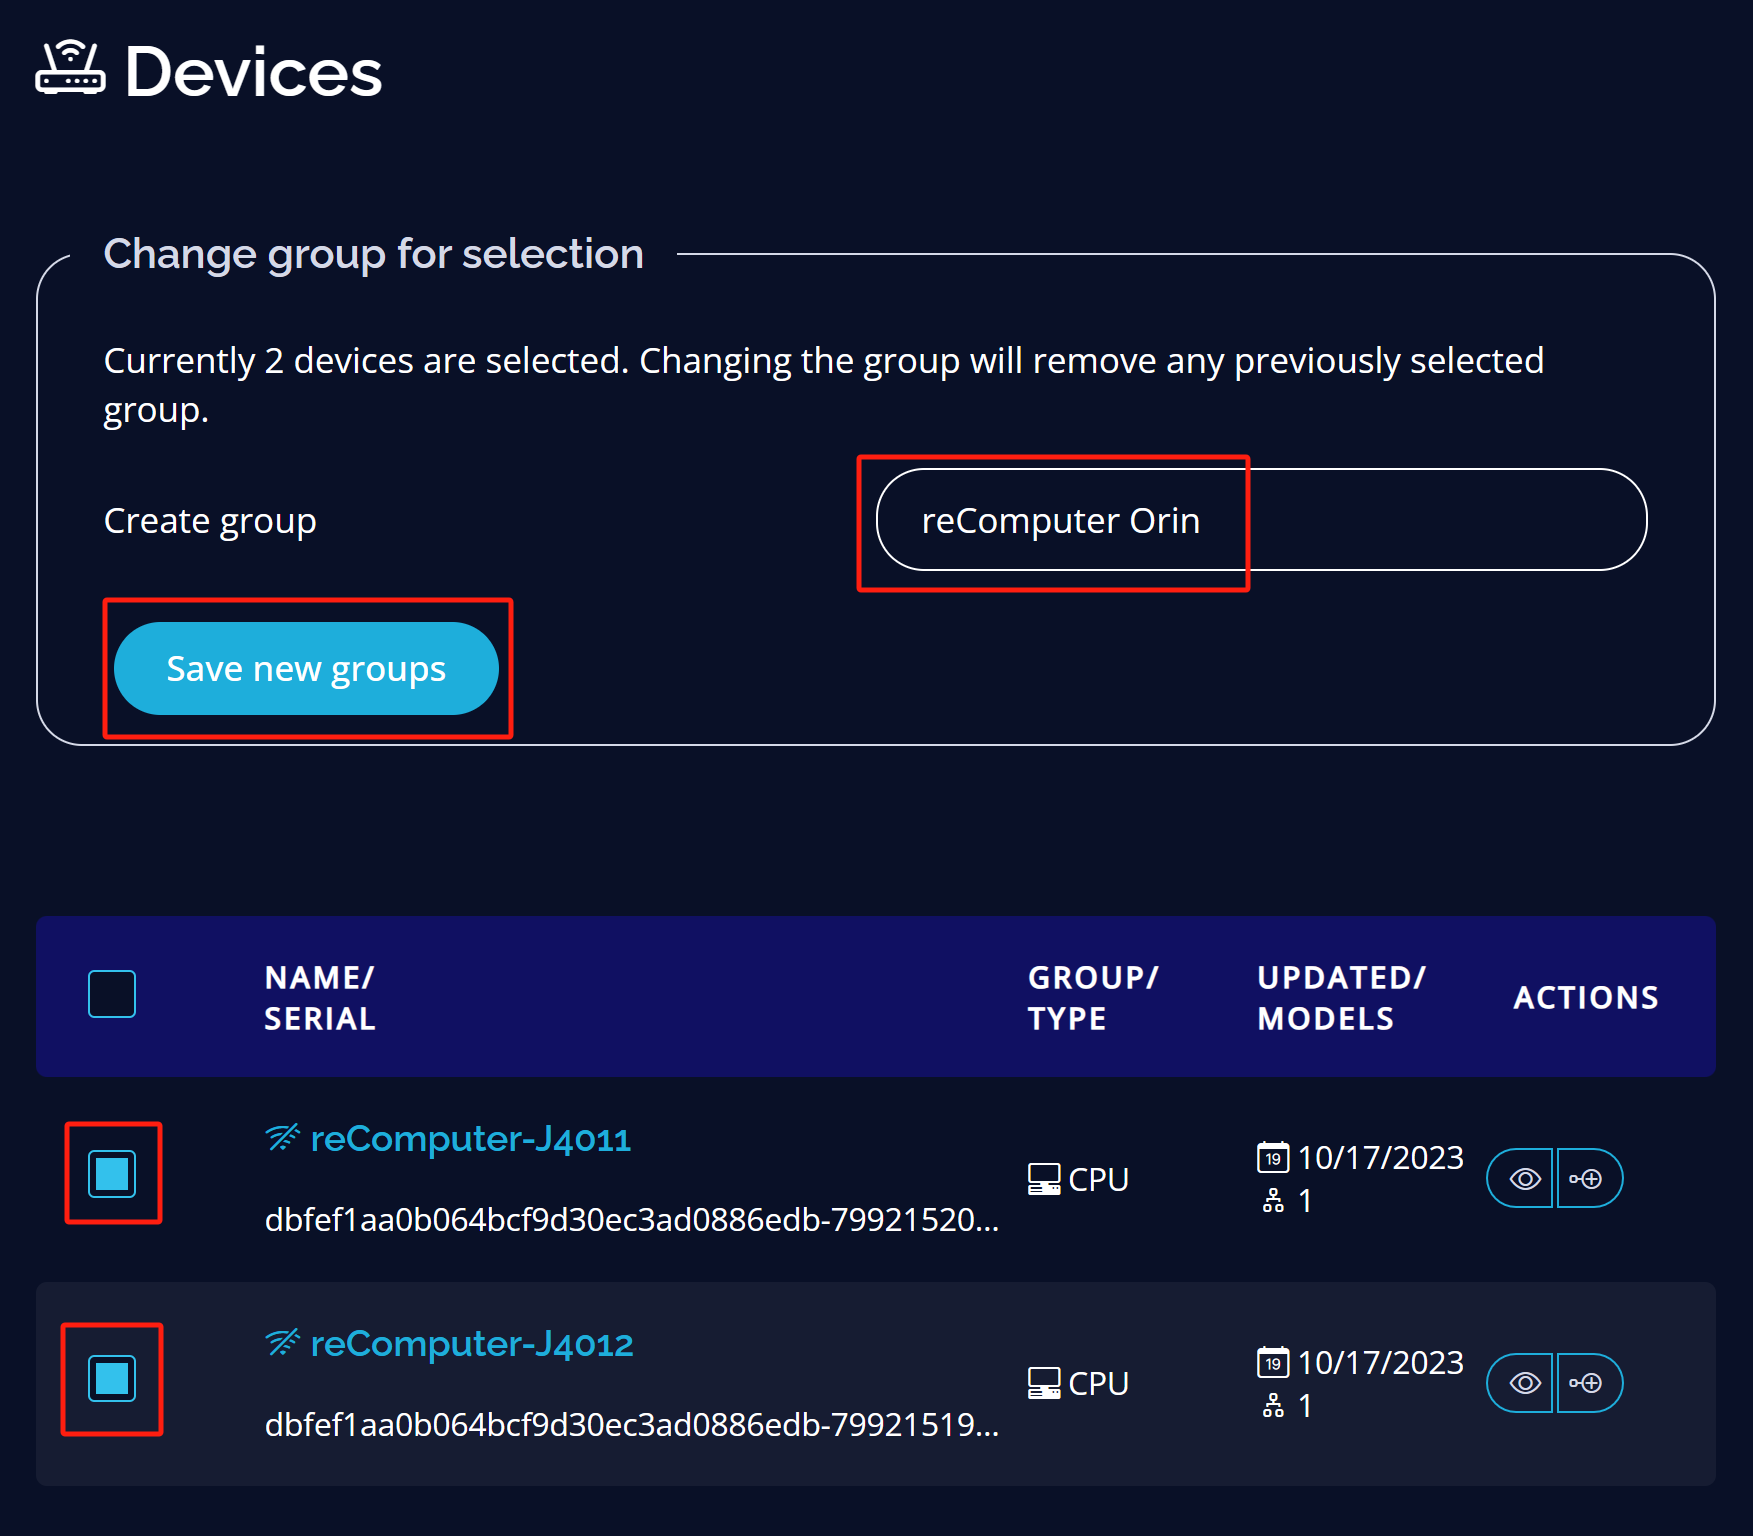
Step 3: Select all the devices by clicking on the check box, enter a name for the device group and click Save new groups
Step 4: Click Assign a model to all devices in group
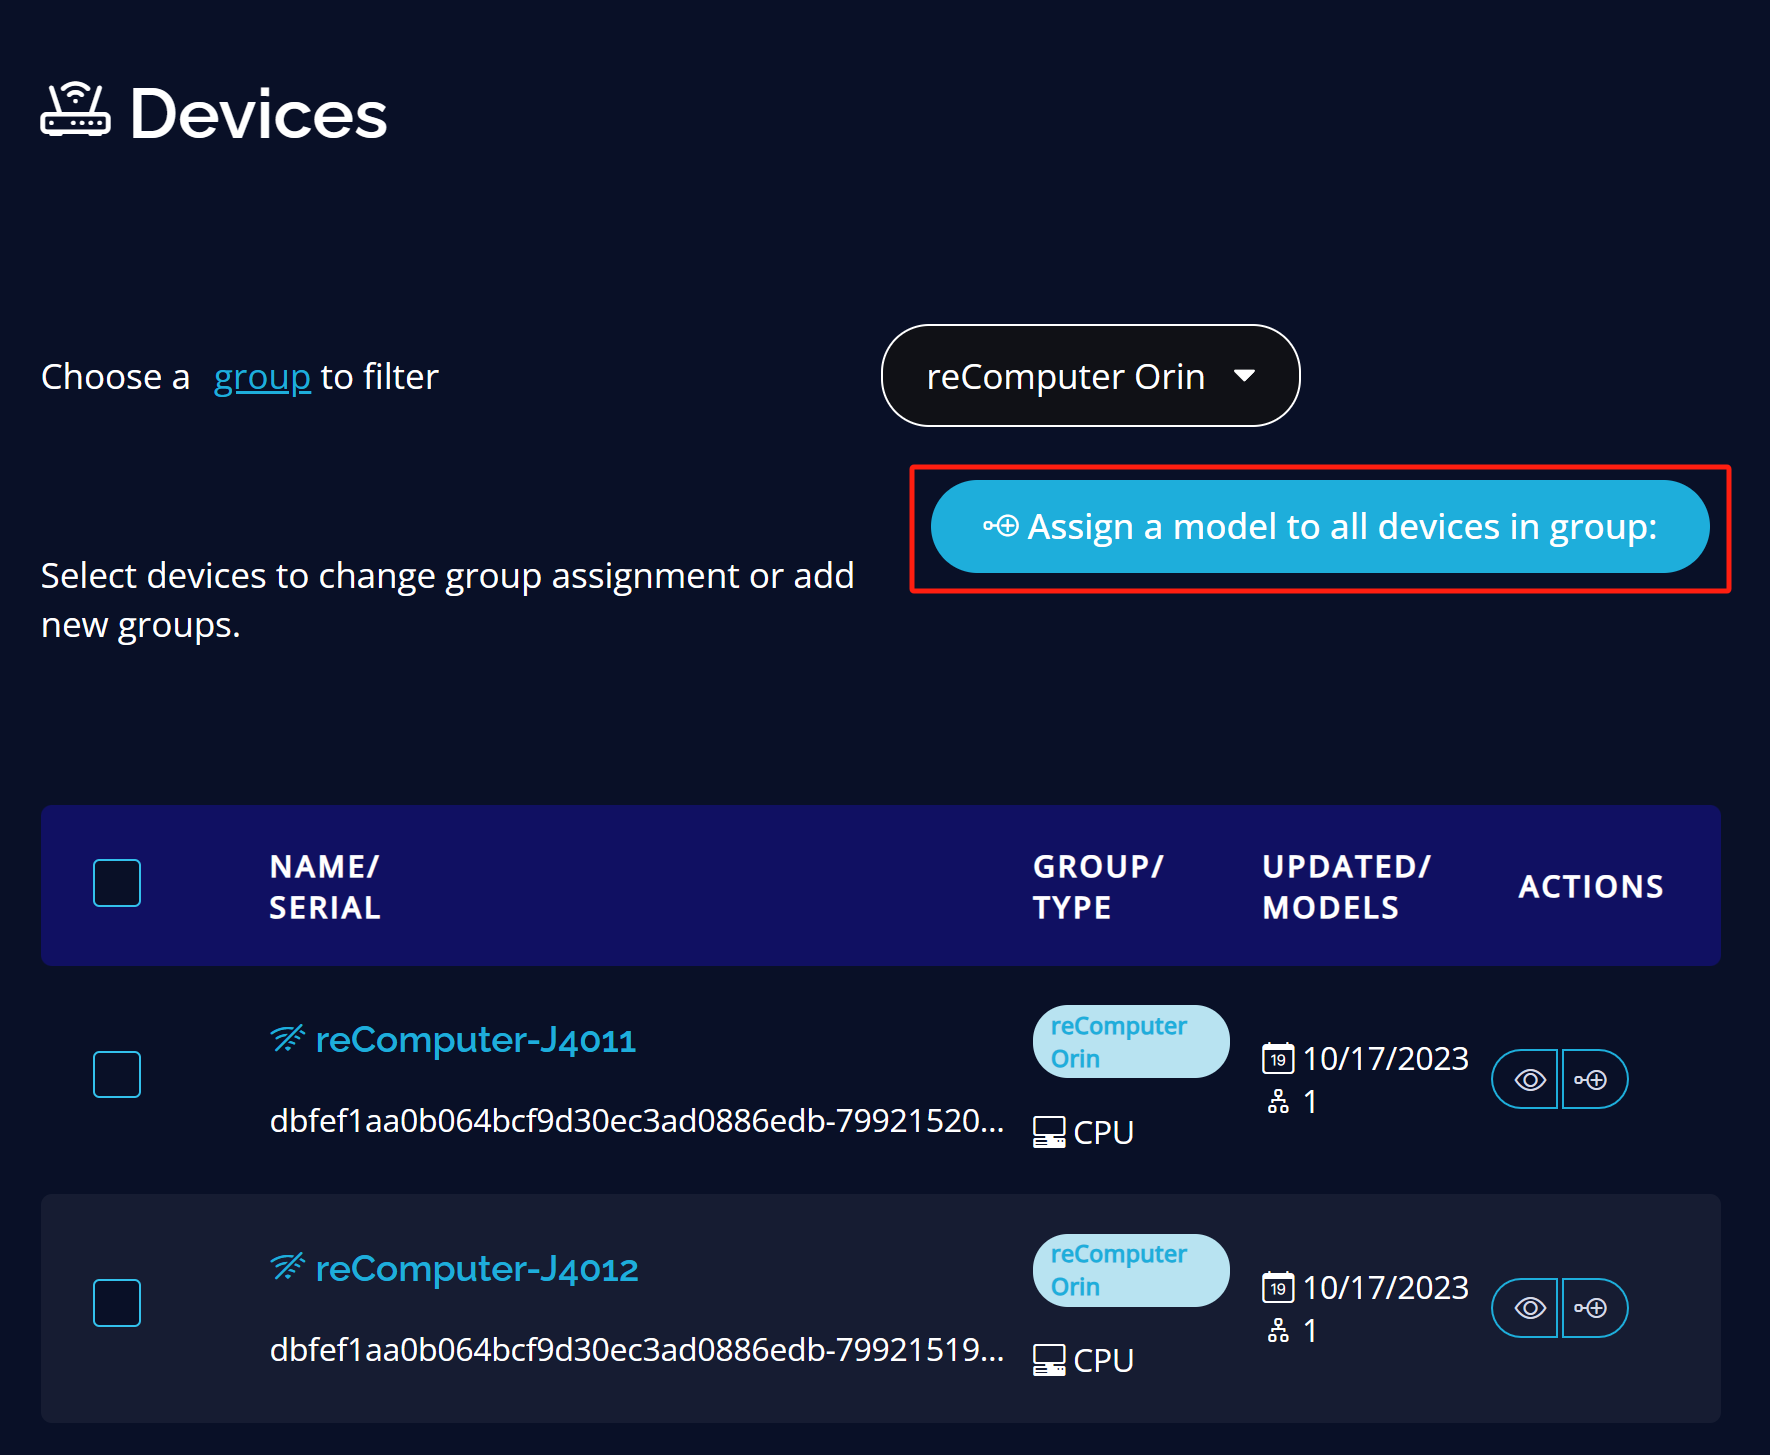
Step 5: Choose a model as we did before and the model will be deployed to all the devices in the group remotely
Upon successfully deploying the model remotely, you will see the following output

Learn more
Scailable offers very detailed and comprehensive documentation. So it is highly recommended to check them here.
Tech Support & Product Discussion
Thank you for choosing our products! We are here to provide you with different support to ensure that your experience with our products is as smooth as possible. We offer several communication channels to cater to different preferences and needs.