Wio Lite MG126

Wio Lite MG126 is a cost-effective SAMD21 based development board with the on-board MG126 Bluetooth Module. SAM D21 is an ARM Cortex-M0+ based microcontroller and the MG126 is a 2.4GHz single-mode Bluetooth transceiver module. The same with Wio Lite W600, this board is also compatible with Arduino zero( Used the same Arduino Core SAM D21) and has the same compatible form factor with Adafruit Feather series.
We break out the 3.3V I/O pins of SAM D21, SAM D21 chip has rich I / O resources, including 14 digital pins, 6 analog pins, 1 UART port, 1 I2C port, and 1 ICSP port. More and more boards in Seeed use type C interfaces to supply power and transmit data, so does the Wio Lite MG126. Meanwhile, there is a JST2.0 Li-Po battery port, you can use 3.5V or 4.2V Li-Po battery to power this board.
Now, let's talk about the Bluetooth Core, the MG126. MG126 is a 2.4GHz BLE RF transceiver with software configurable registers, embedded packet handling engine. It can work with ultra-low power. The Bluetooth air data rate of MG126 is 1Mbps and MG126 can talks with Arduino core at the speed of 4Mbps via the SPI interface.

Features
- Arduino Zero Compatible/ Adafruit Feather Compatible
- 2.4GHz ISM band operation with 2MHz channel spacing
- 1Mbps air data rate
- Ultra-low power
Specification
| Parameter | Value |
|---|---|
| Main Controller | |
| Microcontroller | SAM D21 |
| Digital I/O Pins | 14 |
| Analog Input Channels | 6 |
| DC Current per I/O Pin | 40 mA |
| IO Input Voltage | 3.3 V |
| SRAM | 32 KB |
| Flash | 256 KB |
| Maximum CPU Frequency | 48 MHz |
| Bluetooth | |
| Bluetooth Core | MG126 |
| Frequency Band | 2.4GHz ISM |
| Data Rate | 1Mbps air data rate |
| Communication with MCU | SPI (Max. 4Mbps) |
| Transmitter | Programmable output power: -28 ~ +4 dBm without an external RF PA 20mA at 0dBm output power |
| Receiver | Integrated channel filters -85 dBm sensitivity Programmable LNA gain |
| Antenna | On-board PCB antenna |
| Max. Bluetooth Connect Distance | 10 m |
| Others | |
| Power Input Port | USB Type C JST2.0 Lipo Battery |
| Operating Voltage | USB 5V Battery 4.2 V |
| Recoverable fuse | Protection current 1A |
| Battery Charge Current | 400 mA |
Hardware Overview

- The PCB antenna should not be shielded by metal when it is mounted, otherwise it will cause the attenuation of the Bluetooth signal;
- The positive and negative terminals of the battery are indicated on the back of the module. It is strictly prohibited to reverse the positive and negative terminals of the battery.
Getting Started
Before the start, please download the nRF Connect app from Google/Apple Store. nRF Connect is compatible with standard Bluetooth protocol functions, all examples are tested based on this app.
Hardware
Materials required
- Wio Lite Mg126 x1
- Computer x1
- USB typc cable x1
- Jumper x1
Some USB cables can only supply power and cannot transfer data. If you don't have a usb cable or don't know if your usb cable can transmit data, you can check Seeed USB type C support USB 3.1.
Connect the Wio Lite MG126 to your computer via the USB cable.
Software
Step 1. You need to Install an Arduino Software

Launch the Arduino application
Double-click the Arduino application (arduino.exe) you have previously downloaded.
If the Arduino Software loads in a different language, you can change it in the preferences dialog. See the Arduino Software (IDE) page for details.
Step 2. Add the Wio Lite MG126 Board into Arduino IDE
Open your Arudino IDE, click on File > Preferences, and copy the following url to Additional Boards Manager URLs
https://files.seeedstudio.com/arduino/package_seeeduino_boards_index.json

Click on Toos > Board > Board Manager. Search the board by name, just search the key word Seeeduino_Wio_Lite_MG126 and install the corresponding board.

Step 3. Select your board and port
You'll need to select the entry in the Tools > Board menu that corresponds to your Arduino. Selecting the Wio Lite MG126.

Select the serial device of the Arduino board from the Tools | Serial Port menu. This is likely to be COM3 or higher (COM1 and COM2 are usually reserved for hardware serial ports). To find out, you can disconnect your Arduino board and re-open the menu; the entry that disappears should be the Arduino board. Reconnect the board and select that serial port.
You may not find the MG126 examples in the File > Examples tab before you select the wio Lite MG126 board. When you select the board, the examples will appear here.
Step 4. Open the demo
Download the MG126 Library from Seeed Github. Then Refer to How to install library to install library for Arduino. Click on File > Examples >Seeeduino Wio Lite MG126 >analog_output.

You can find 7 demos in this folder. The button/get_bat_vol demos do not use the bluetooth library, and the rest do.

| Demo Name | Function | DeviceInfo |
|---|---|---|
| analog_output | The analog value on the development board is obtained via Bluetooth and displayed on the mobile app. | Wio_BLE_Analog |
| button | Press onboard user button and print in the serial monitor. | |
| echo_ble | Bluetooth echo server, that is, the mobile phone receives the data sent by the development board. | Wio_Lite_BLE |
| get_bat_vol | Get the external battery voltage | |
| rgb_led_matrix_control | Control the Grove - RGB LED Matrix to display | Wio_Led_matrix |
| serial_transparent_transmission | The serial port data is transparently transmitted, that is, the data sent by the mobile phone will be sent from the serial port of the development board, and the data sent to the serial port of the development board will be sent to the mobile phone. | Wio_Lite_Serial |
| temp_humidity | get the information from Grove - I2C High Accuracy Temp&Humi Sensor (SHT35),and sent it to your phone. | Wio_BLE_T&H |
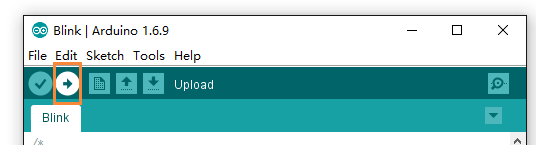
Step 5. Upload the program
Now, simply click the "Upload" button in the environment. Wait a few seconds and if the upload is successful, the message "Done uploading." will appear in the status bar.
When it is finished the information Done Uploading will Pop up in the lower left corner of Arduino IDE.
Step 6. Use the phone to connect MG126**
Open the nRF Connect app, click on the SCANNER and search for the name of the DeviceInfo in the page. Different demos have different DeviceInfo, the and the corresponding DeviceInfo of analog_output is Wio_BLE_Analog.
So, please choose the Wio_BLE_Analog in the bluetooth device list. Tap CONNECT, then click Automation IO > Analog, and the value of A0 pin will be displayed.

Due to the caching function of Bluetooth, every time you modify the feature value of Bluetooth (that is, download the example using different Bluetooth functions), you need to clear the cache of the app once, also you need to restart the phone.
Function interface
WiFi function interface
-
- Bluetooth package class
MG126_Ble
-
- Initialize the Bluetooth protocol stack and turn on Bluetooth
MG126_Ble .ble_init();
-
- Reporting messages via Bluetooth
sconn_notifydata();
Only some common interfaces are listed here, and other interfaces can view example.
Schematic Online Viewer
Resouces
-
[PDF] DS-MG126-BLE-Datasheet
Tech Support & Product Discussion
if you have any technical issue. submit the issue into our forum. Thank you for choosing our products! We are here to provide you with different support to ensure that your experience with our products is as smooth as possible. We offer several communication channels to cater to different preferences and needs.