loading Images
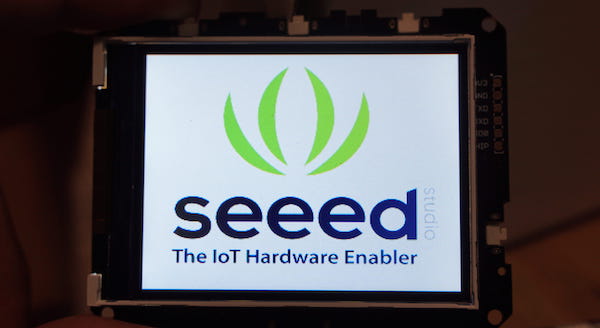
This repo describes how to load and display images from the SD card to the TFT LCD screen on Wio Terminal. This can be very useful implementation to your design and can be used in various places!
Libraries Installation
Installing the SD Card library for Wio Terminal
- visit File System Overview
Installing the TFT LCD Library For Wio Terminal
- visit TFT LCD Overview
Image Format configuration
STEP 1: Prepare the image
We need to convert the image format to Windows 24-bit BMP format and put the image in the right folder setup ready. We recommend to use Microsoft paint to do so.
-
Step 1-1: Using
Microsoft paintto resize the image to fit into the maximum pixel size of your screen display area -
Step 1-2: Then save the image by clicking
Save asfollowed byBMP picturethen from the file type dropdown select24-bit bitmap (.bmp)file. -
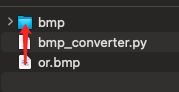
Step 1-3: Create a folder name
bmpand save your Windows.bmpformat images inside this folder.
STEP 2: Convert the 24-bit bitmap image to the microcontroller readable 8-bit or 16-bit bmp format
To display bmp images on our embedded system, we need to get rid of some information (head files) in our Windows bmp format. We wrote a python script to do this for us, so please choose one of the following two options to convert you images.
Option 1: Using Prebuilt Windows Executables (Windows only):
-
Step 2-1-1: We have prepared the executable by using the Pyinstaller package, you can download the executable by simply clicking bmp_converter.exe
-
Step 2-1-2: Put the downloaded
bmp_converter.exeinto the same directory with thebmp foldercreated inStep 1-3. -
Step 2-1-3: Double click to run the
bmp_converter.exe, then in the pop upterminalselect one of the two options: "Enter1for 8-bit colour convert; Enter2for 16-bit colour convert".
Option 2: Using Python Source Code (for cross platform)
You should have python installed on your computer
-
Step 2-2-1: Download the Python script bmp_converter.py , and save it in the same directory with the
bmp foldercreated inStep 1-3. -
Step 2-2-2: Open
cmdorterminalto run the Python script. First,cdto the directory that saved thebmp_converter.pyandbmp folder, then run the Python script. -
Step 2-2-3: Two options: Enter
1for 8-bit colour convert; Enter2for 16-bit colour convert

STEP 3: Image ready
Now, you are able to find converted the .bmp images inside another folder name rgb332(8-bit) or rgb565(16-bit) in the bmp folder.
Getting Started
Install the RawImage.h library
This library is used to make loading and displaying images much easier. Download the RawImage.h and attach this header file to your sketch location.
Image Initialisation in Arduino
- To display images on the screen
//To draw on 8-bit color image on screen, starting from point (x, y):
drawImage<uint8_t>("path to sd card iamge", x, y);

//To draw on 16-bit color image on screen, starting from point  (x, y):
drawImage<uint16_t>("path to sd card iamge", x, y);
- To initialise image (Not needed if using the above drawImage function)
//when using 8-bit colour, initialise the image following this:
Raw8 * img8 = newImage<uint8_t>("path to sd card image");

//when using 16-bit colour, initialise the image following this:
Raw16 * img16 = newImage<uint16_t>("path to sd card image");
Example code
# include"TFT_eSPI.h"
# include "Seeed_FS.h" //Including SD card library
# include"RawImage.h"  //Including image processing library
TFT_eSPI tft;

void setup() {
    //Initialise SD card
    if(!SD.begin(SDCARD_SS_PIN, SDCARD_SPI)) {
        while (1);
    }
    tft.begin();
    tft.setRotation(3);

    drawImage<uint8_t>("test.bmp", 0, 0); //Display this 8-bit image in sd card from (0, 0)

}

void loop() {
}
FAQs
If ImportError: No module named PIL happened:
- Install the python module by entering
pip install pillowin the cmd or terminal
Tech Support & Product Discussion
Thank you for choosing our products! We are here to provide you with different support to ensure that your experience with our products is as smooth as possible. We offer several communication channels to cater to different preferences and needs.