WiFi Usage
Start
Seeed Studio XIAO ESP32C3 supports WiFi connectivity with IEEE 802.11b/g/n. This wiki will introduce the basics of WiFi usage on this board.
⚠️ Please be careful when using the board as a hotspot (access point). It may overheat and cause burns.
Hardware set up
- Step 1. Connect the included WiFi/ Bluetooth antenna to the IPEX connector on the board

- Step 2. Connect XIAO ESP32C3 to your computer via a USB Type-C cable

Mode 1: STA Mode (Station Mode) - Scan WiFi networks
Scan Wi-Fi access points
In this example, we are going to use XIAO ESP32C3 to scan available WiFi networks around it. Here the board will be configured in Station (STA) Mode.
- Step 1. Copy and paste the code below into Arduino IDE
- Basic Wi-Fi Scan
- Advance Wi-Fi Scan
#include "WiFi.h"

void setup() {
  Serial.begin(115200);

  // Set WiFi to station mode and disconnect from an AP if it was previously connected
  WiFi.mode(WIFI_STA);
  WiFi.disconnect();
  delay(100);

  Serial.println("Setup done");
}

void loop() {
  Serial.println("scan start");

  // WiFi.scanNetworks will return the number of networks found
  int n = WiFi.scanNetworks();
  Serial.println("scan done");
  if (n == 0) {
    Serial.println("no networks found");
  } else {
    Serial.print(n);
    Serial.println(" networks found");
    for (int i = 0; i < n; ++i) {
      // Print SSID and RSSI for each network found
      Serial.print(i + 1);
      Serial.print(": ");
      Serial.print(WiFi.SSID(i));
      Serial.print(" (");
      Serial.print(WiFi.RSSI(i));
      Serial.print(")");
      Serial.println((WiFi.encryptionType(i) == WIFI_AUTH_OPEN) ? " " : "*");
      delay(10);
    }
  }
  Serial.println("");

  // Wait a bit before scanning again
  delay(5000);
}
/*
 *  This sketch demonstrates how to scan WiFi networks.
 *  The API is based on the Arduino WiFi Shield library, but has significant changes as newer WiFi functions are supported.
 *  E.g. the return value of `encryptionType()` different because more modern encryption is supported.
 */
#include "WiFi.h"

void setup() {
  Serial.begin(115200);

  // Set WiFi to station mode and disconnect from an AP if it was previously connected.
  WiFi.mode(WIFI_STA);
  WiFi.disconnect();
  delay(100);

  Serial.println("Setup done");
}

void loop() {
  Serial.println("Scan start");

  // WiFi.scanNetworks will return the number of networks found.
  int n = WiFi.scanNetworks();
  Serial.println("Scan done");
  if (n == 0) {
    Serial.println("no networks found");
  } else {
    Serial.print(n);
    Serial.println(" networks found");
    Serial.println("Nr | SSID                             | RSSI | CH | Encryption");
    for (int i = 0; i < n; ++i) {
      // Print SSID and RSSI for each network found
      Serial.printf("%2d", i + 1);
      Serial.print(" | ");
      Serial.printf("%-32.32s", WiFi.SSID(i).c_str());
      Serial.print(" | ");
      Serial.printf("%4ld", WiFi.RSSI(i));
      Serial.print(" | ");
      Serial.printf("%2ld", WiFi.channel(i));
      Serial.print(" | ");
      switch (WiFi.encryptionType(i)) {
        case WIFI_AUTH_OPEN:            Serial.print("open"); break;
        case WIFI_AUTH_WEP:             Serial.print("WEP"); break;
        case WIFI_AUTH_WPA_PSK:         Serial.print("WPA"); break;
        case WIFI_AUTH_WPA2_PSK:        Serial.print("WPA2"); break;
        case WIFI_AUTH_WPA_WPA2_PSK:    Serial.print("WPA+WPA2"); break;
        case WIFI_AUTH_WPA2_ENTERPRISE: Serial.print("WPA2-EAP"); break;
        case WIFI_AUTH_WPA3_PSK:        Serial.print("WPA3"); break;
        case WIFI_AUTH_WPA2_WPA3_PSK:   Serial.print("WPA2+WPA3"); break;
        case WIFI_AUTH_WAPI_PSK:        Serial.print("WAPI"); break;
        default:                        Serial.print("unknown");
      }
      Serial.println();
      delay(10);
    }
  }
  Serial.println("");

  // Delete the scan result to free memory for code below.
  WiFi.scanDelete();

  // Wait a bit before scanning again.
  delay(5000);
}
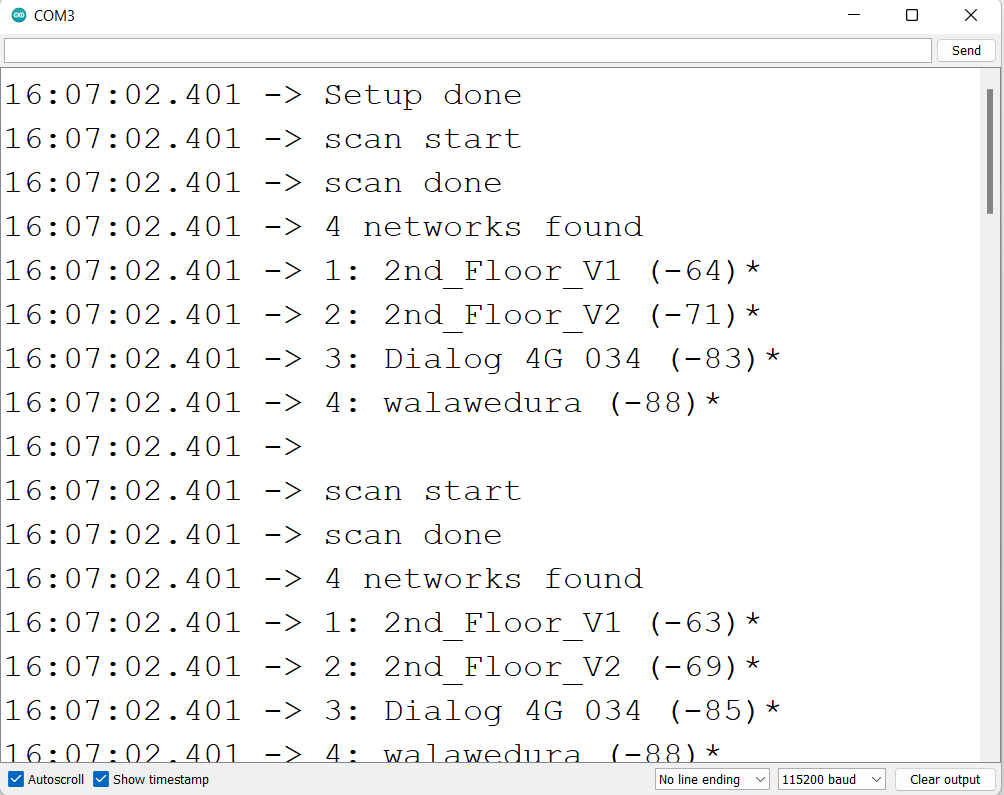
Step 2. Upload the codes and open the Serial Monitor to start scanning for WiFi networks
Connect to a WiFi network
In this example, we are going to use XIAO ESP32C3 to connect to a WiFi network.
- Step 1. Copy and paste the code below into Arduino IDE
- Basic Wi-Fi connect
- Advance Wi-Fi connect
#include <WiFi.h>

const char* ssid = "your-ssid";
const char* password = "your-password";

void setup() {
  Serial.begin(115200);
  delay(10);

  // We start by connecting to a WiFi network
  Serial.println();
  Serial.println();
  Serial.print("Connecting to ");
  Serial.println(ssid);

  WiFi.begin(ssid, password);

  while (WiFi.status() != WL_CONNECTED) {
    delay(500);
    Serial.print(".");
  }

  Serial.println("");
  Serial.println("WiFi connected");
  Serial.println("IP address: ");
  Serial.println(WiFi.localIP());
}
void loop() {}
#include <WiFi.h>

const char *ssid = "your-ssid";
const char *password = "your-password";

void setup() {
  Serial.begin(115200);
  delay(10);

  // We start by connecting to a WiFi network
  Serial.println();
  Serial.println();
  Serial.print("Connecting to ");
  Serial.println(ssid);

  WiFi.begin(ssid, password);

  // Will try for about 10 seconds (20x 500ms)
  int tryDelay = 500;

  while (WiFi.status() != WL_CONNECTED) {
    delay(500);
    Serial.print(".");
  }

  while (true) {
      switch (WiFi.status()) {
        case WL_NO_SSID_AVAIL: Serial.println("[WiFi] SSID not found"); break;
        case WL_CONNECT_FAILED:
          Serial.print("[WiFi] Failed - WiFi not connected! Reason: ");
          return;
          break;
        case WL_CONNECTION_LOST: Serial.println("[WiFi] Connection was lost"); break;
        case WL_SCAN_COMPLETED:  Serial.println("[WiFi] Scan is completed"); break;
        case WL_DISCONNECTED:    Serial.println("[WiFi] WiFi is disconnected"); break;
        case WL_CONNECTED:
          Serial.println("[WiFi] WiFi is connected!");
          Serial.print("[WiFi] IP address: ");
          Serial.println(WiFi.localIP());
          return;
          break;
        default:
          Serial.print("[WiFi] WiFi Status: ");
          Serial.println(WiFi.status());
          break;
      }
          delay(tryDelay);

    if (numberOfTries <= 0) {
      Serial.print("[WiFi] Failed to connect to WiFi!");
      // Use disconnect function to force stop trying to connect
      WiFi.disconnect();
      return;
    } else {
      numberOfTries--;
    }
  }

  Serial.println("");
  Serial.println("WiFi connected");
  Serial.println("IP address: ");
  Serial.println(WiFi.localIP());
}
void loop() {}
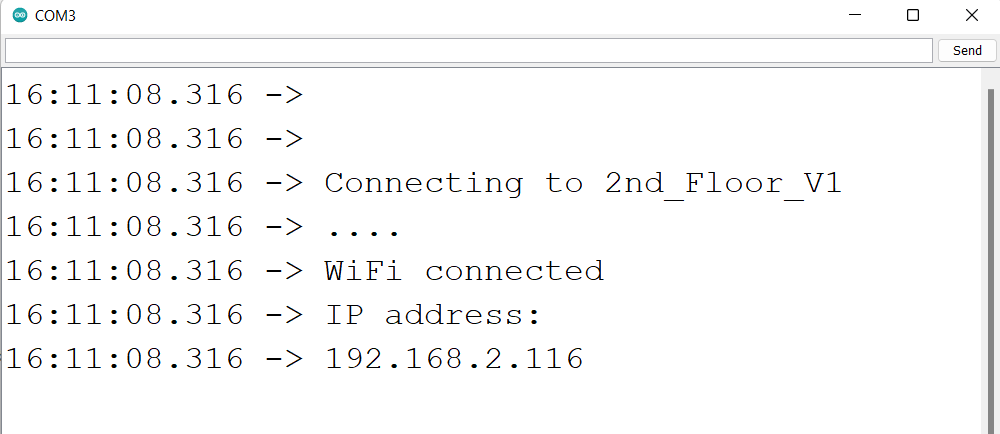
Step 2. Upload the codes and open the Serial Monitor to check that the board is connected to the WiFI network
Mode 2: Soft-AP mode (Working as STA) - Use as an Access Point
In this example, we are going to use XIAO ESP32C3 as a WiFi access point where other devices can be connected to it. This is similar to WiFi hotspot feature on mobile phones.
- Step 1. Copy and paste the code below into Arduino IDE
#include "WiFi.h"
void setup() {
  Serial.begin(115200);
  WiFi.softAP("ESP_AP", "123456789");
}

void loop() {
  Serial.print("Host Name:");
  Serial.println(WiFi.softAPgetHostname());
  Serial.print("Host IP:");
  Serial.println(WiFi.softAPIP());
  Serial.print("Host IPV6:");
#if ESP_ARDUINO_VERSION_MAJOR < 3
  Serial.println(WiFi.softAPIPv6());
#else
  Serial.println(WiFi.softAPlinkLocalIPv6());
#endif
  Serial.print("Host SSID:");
  Serial.println(WiFi.SSID());
  Serial.print("Host Broadcast IP:");
  Serial.println(WiFi.softAPBroadcastIP());
  Serial.print("Host mac Address:");
  Serial.println(WiFi.softAPmacAddress());
  Serial.print("Number of Host Connections:");
  Serial.println(WiFi.softAPgetStationNum());
  Serial.print("Host Network ID:");
  Serial.println(WiFi.softAPNetworkID());
  Serial.print("Host Status:");
  Serial.println(WiFi.status());
  delay(1000);
}
If your ESP32 development board version already update to 3.0.0, you need to change the code from softAPIPv6() to softAPlinkLocalIPv6().
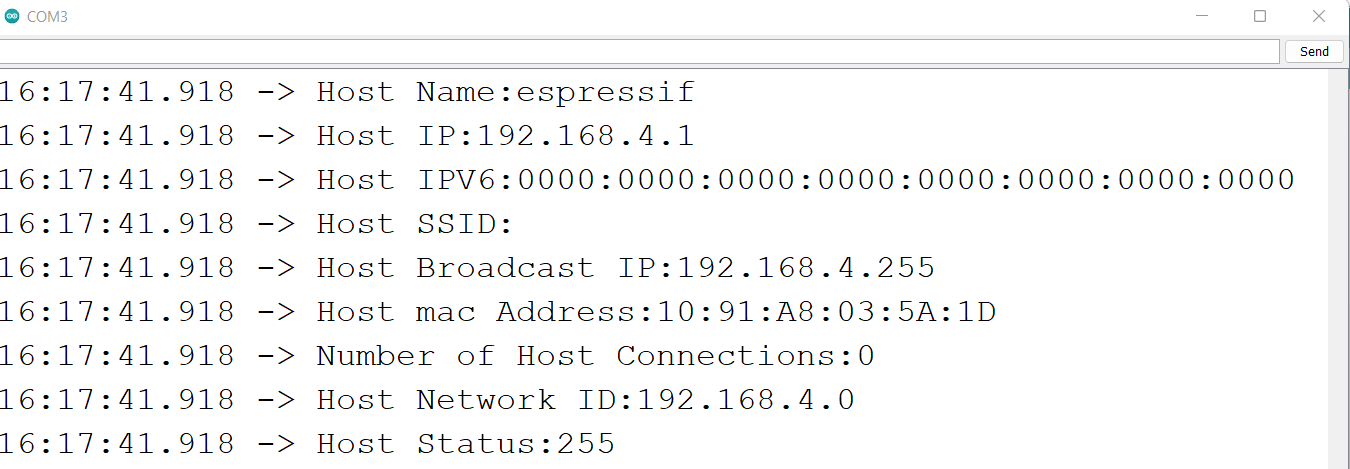
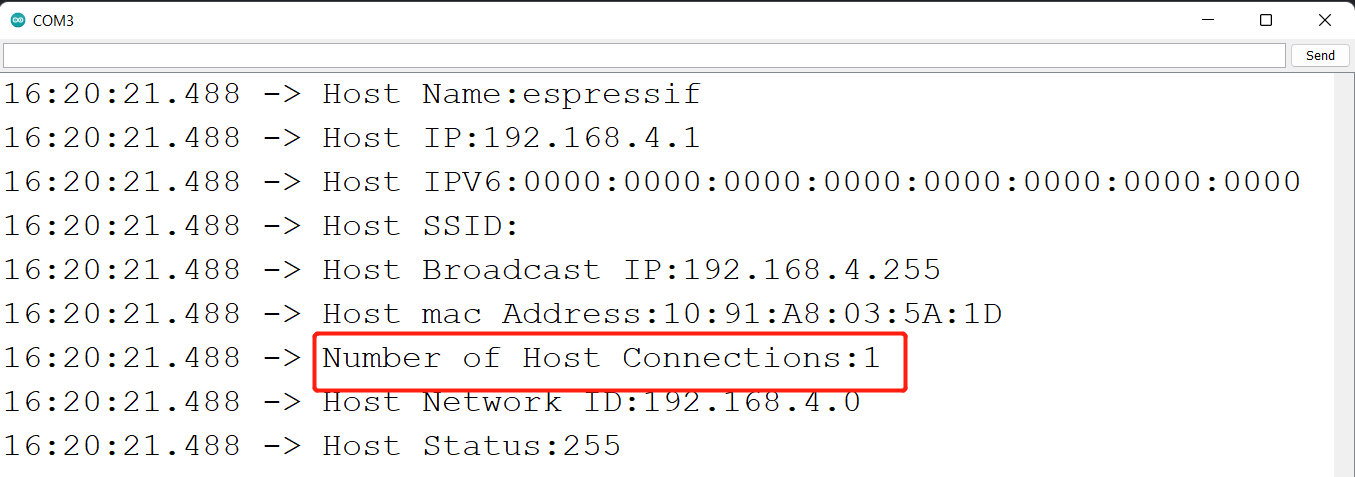
Step 2. Upload the codes and open the Serial Monitor to check more details about the WiFI access point
Step 3. Scan for WiFi networks on a PC or mobile phone and you will be able to connect to this newly created network using the password we specified in the code
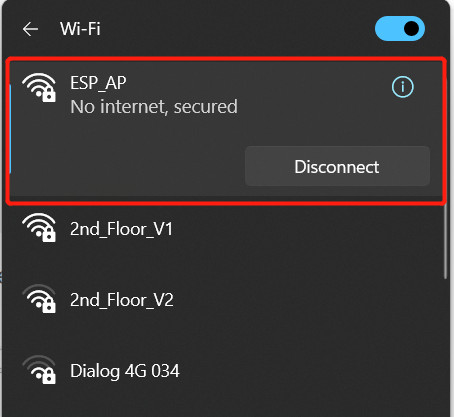
Now you will see that the Number of Host Connections on serial monitor has been updated to 1
XIAO ESP32C3 & Home Assistant
We are pleased to announce that we have made support for the XIAO ESP32C3 access to ESPHome and Home Assistant!
For more information on this section, please refer to the relevant tutorials.
Reference
Tech Support & Product Discussion
Thank you for choosing our products! We are here to provide you with different support to ensure that your experience with our products is as smooth as possible. We offer several communication channels to cater to different preferences and needs.