XIAO ESP32-S3 (Sense) GPIO Viewer
XIAO ESP32-S3 (Sense) GPIO Viewer is a MicroPython-based real-time GPIO monitor for the Seeed Studio XIAO ESP32-S3 (Sense). Displays live digital pin states (HIGH/LOW/TOUCH) through a local web interface using Thonny.
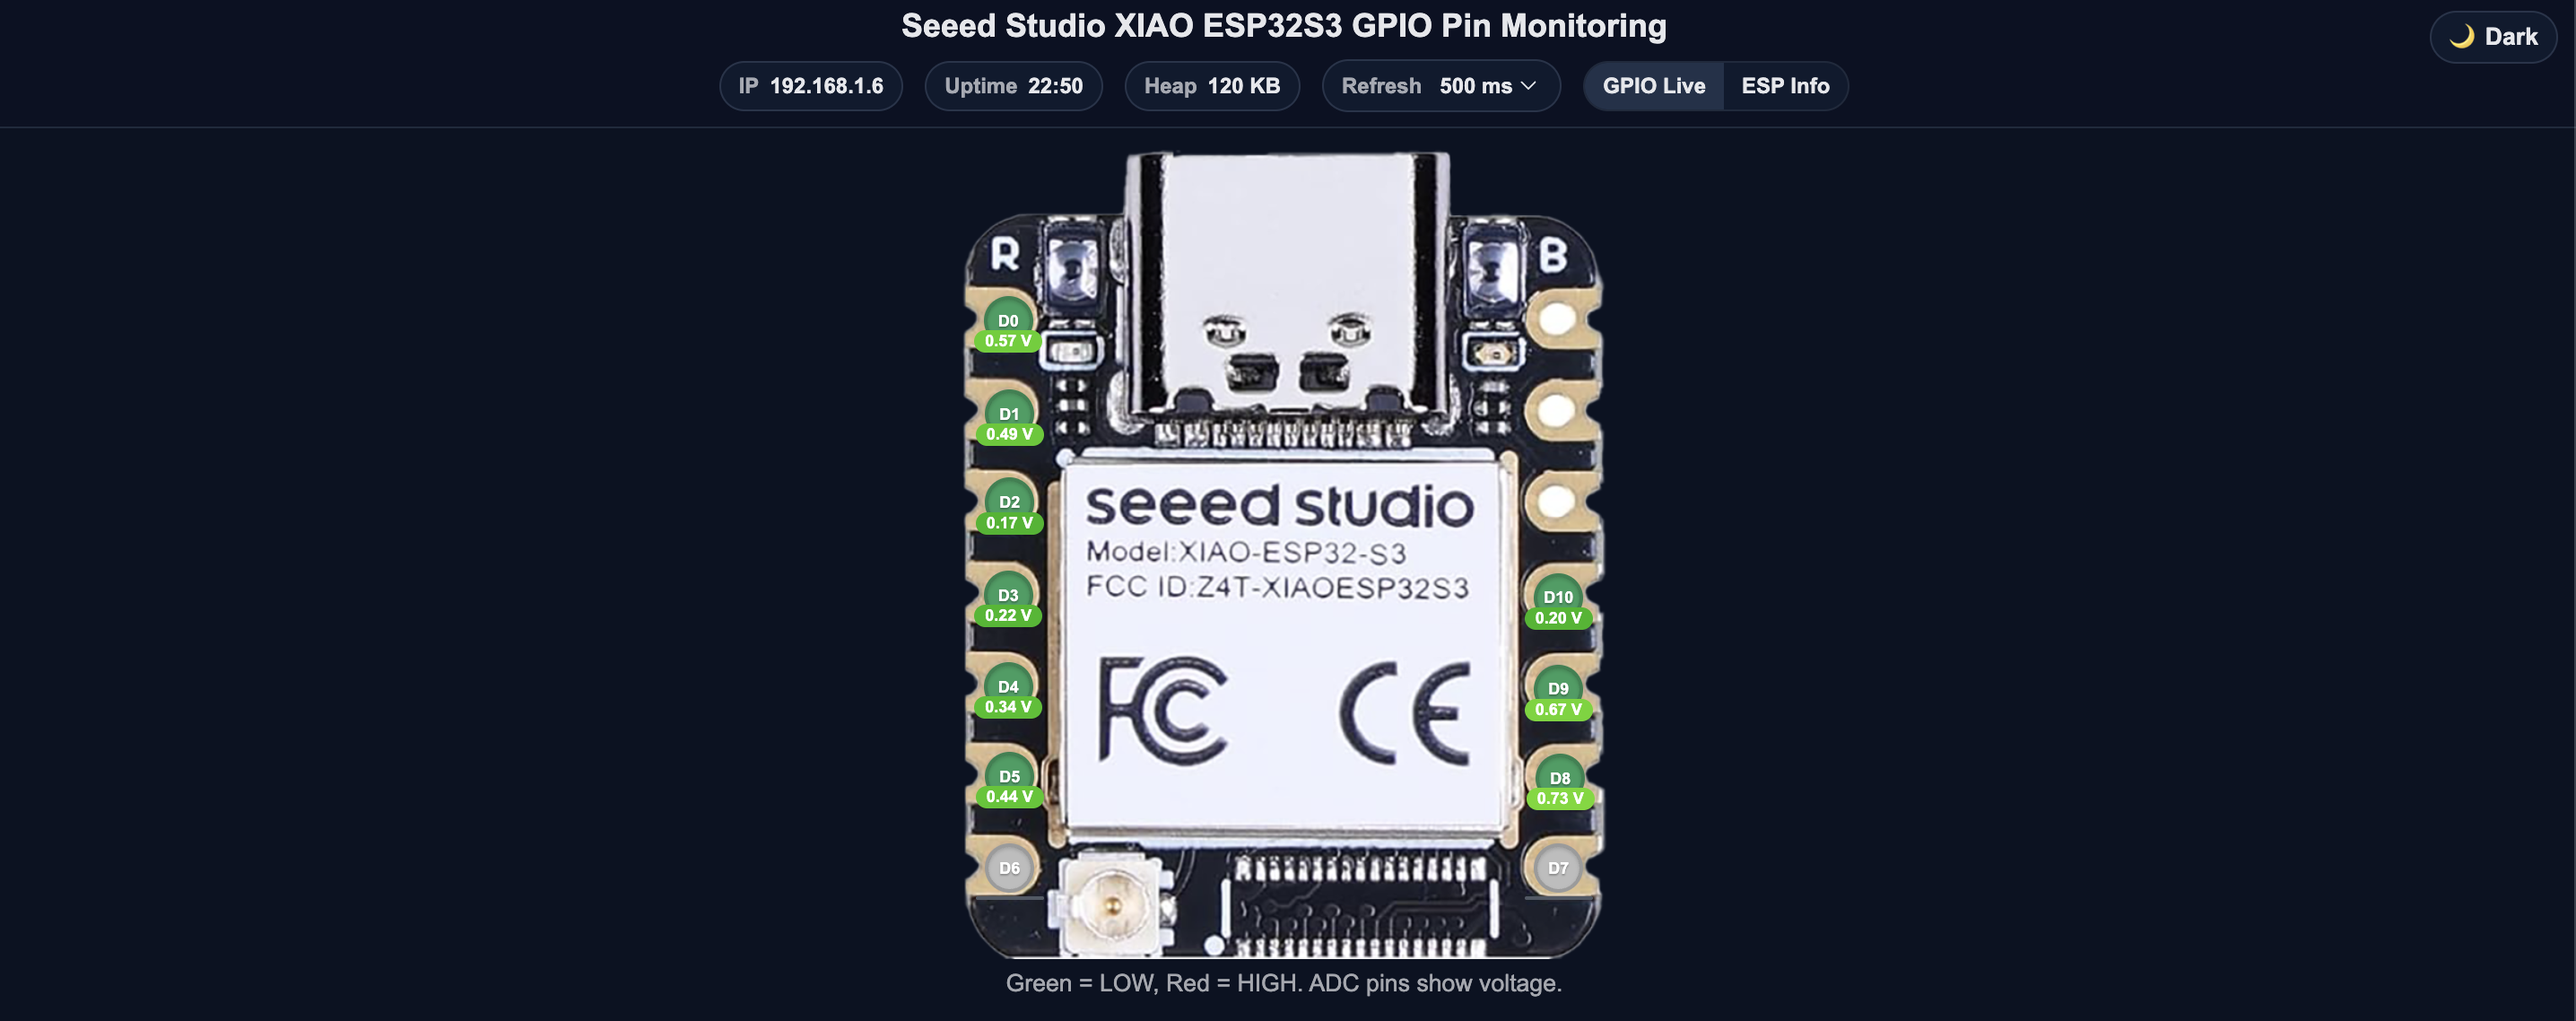
Information Displayed on the Web Page
- GPIO & I/O Monitoring: Displays real-time digital GPIO states, live ADC readings, and clear GPIO pin number mappings.
- Runtime Information: Reports current CPU frequency and system uptime to reflect real-time operating status.
- Memory & Storage: Shows heap memory usage, file system usage percentage, flash size, and PSRAM availability where supported.
- Network Information: Provides network diagnostics including IP address, connected Wi-Fi SSID, signal strength (RSSI), MAC address, gateway, and DNS server.
- Firmware & System: Identifies the chip model, number of CPU cores, MicroPython version, and firmware build information.

Features
- Displays live GPIO digital states and ADC readings, enabling visual debugging during prototyping and development
- Operates as a lightweight embedded web server running entirely on the XIAO ESP32-S3 (Sense), requiring no external software or cloud services after deployment
- Provides a browser-based interface accessible from any device on the same local network for real-time monitoring
- Simplifies validation of sensor inputs, relays, and peripheral modules without additional debugging tools
- Built with MicroPython for readability and rapid iteration, while maintaining minimal resource usage suitable for constrained embedded systems
Build Process
This is a beginner-friendly workflow using MicroPython and the Thonny IDE, it will walk you step-by-step from the very beginning, starting from downloading the tools you’ll need to running the GPIOViewer project on your XIAO ESP32-S3 (Sense).
Prepare Your Computer
Before we touch the XIAO board, let’s download and install Thonny IDE (your Python editor).
- Open your web browser (like Chrome or Safari).
- Go to https://thonny.org – This is the official site.
- Click the download link for your computer (Windows, macOS, or Linux).
- Once downloaded, run the installer and follow the on-screen prompts (click “Next” → “Install” → “Finish”).
Thonny is the program you’ll use to write and upload Python code to your board.
Install Python Tools Needed (Esptool)
To prepare the board for MicroPython, we need a small tool called esptool.
- On your computer, find and open Terminal (Mac/Linux) or Command Prompt (Windows).
- Type this and press Enter:
pip install esptool
This installs the tool that will let us put the MicroPython firmware onto your XIAO board.
Download the MicroPython Firmware
We need a special binary file that lets your XIAO board run MicroPython.
- Open your web browser to https://micropython.org/download/ESP32_GENERIC_S3/
- Click to download the latest .bin file (example: ESP32_GENERIC_S3-xxxxx.bin).
- Save it somewhere easy to find, like your Desktop.
Connect Your XIAO ESP32-S3 (Sense) to Your Computer
- Take a USB-C cable and plug the XIAO into your computer.
If the board doesn’t show up, press and hold the BOOT button while plugging in.
- After connecting, your computer will assign the board a COM port (Windows) or a tty device on Mac/Linux.
Flash (Install) MicroPython onto the Board
Now we put the MicroPython firmware onto your XIAO.
1. Erase the old flash memory
Find your board’s port and then in Terminal / Command Prompt type:
esptool --chip esp32s3 --port COMX erase-flash
Replace COMX with whatever port your system shows, on Mac it might be /dev/tty.usbmodemXXXX or /dev/tty.usbserialXXXX, while on Linux it may be /dev/ttyUSB0 or /dev/ttyACM0.
2. Write the firmware
Still in Terminal, first navigate to the bin file's storage location, then write to flash.
cd Desktop
esptool.py --chip esp32s3 --port COMX write_flash -z 0x0 ESP32_GENERIC_S3-xxxx.bin
Be sure the filename matches the .bin file you downloaded. This command installs MicroPython on your board.
Open Thonny and Connect to the Board
Close the terminal, unplug XIAO's USB cable, wait 5 seconds, then plug XIAO back in (just plug it in without pressing any buttons). Now you’ll see MicroPython running!
- Open Thonny on your computer.
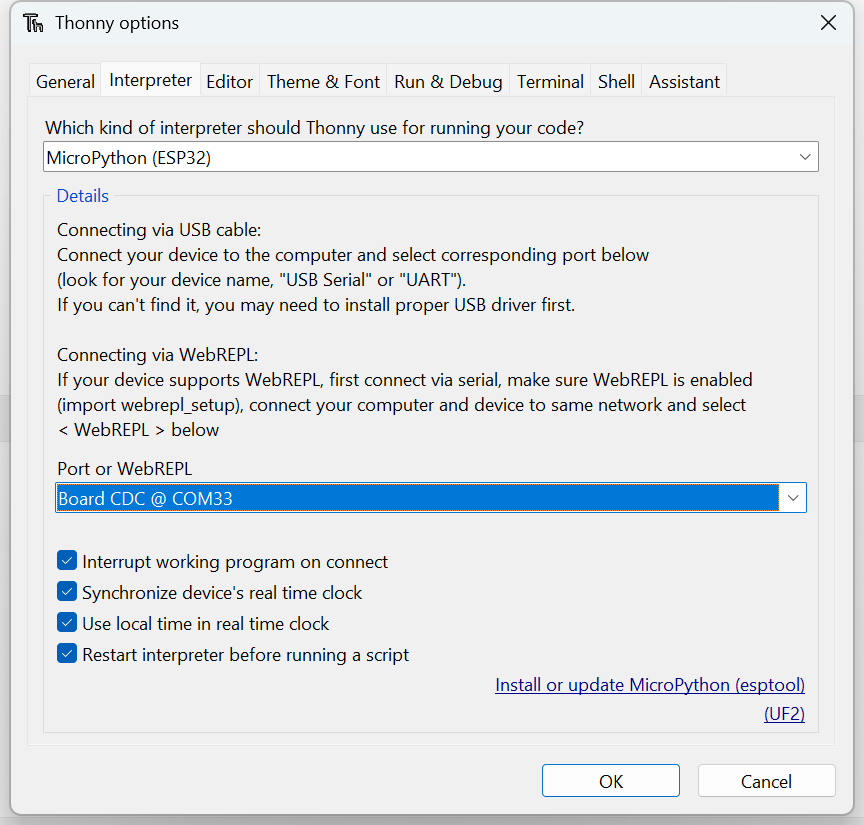
- Go to Run → Configure Interpreter.
- Set Interpreter to “MicroPython (ESP32)”.
- Choose the port that matches your XIAO.
- Click OK.
You should now see a MicroPython prompt at the bottom of Thonny where you can type Python commands. Try typing:
print("Hello from XIAO!")
and press Enter.

Download the GPIOViewer Project Files
Now that your board runs MicroPython:
- Open a browser and go to the GitHub project: https://github.com/TuzaaBap/Seeed-Studio-XIAO-ESP32S3-GPIOViewer/tree/main
- Click Code → Download ZIP to save the project to your computer.
- Extract the downloaded ZIP to a folder you’ll remember.
Upload the Project to Your Board
In Thonny:
- Open the Files sidebar (View → Files).
- Navigate to the project folder you extracted. You should see boot.py and main.py.
- Right-click
boot.py→ Upload to / (root). - Repeat for
main.py.
This puts the GPIOViewer code onto your XIAO and sets it to run when the board starts.
Configure Your Wi-Fi (inside boot.py)
Before starting the project:
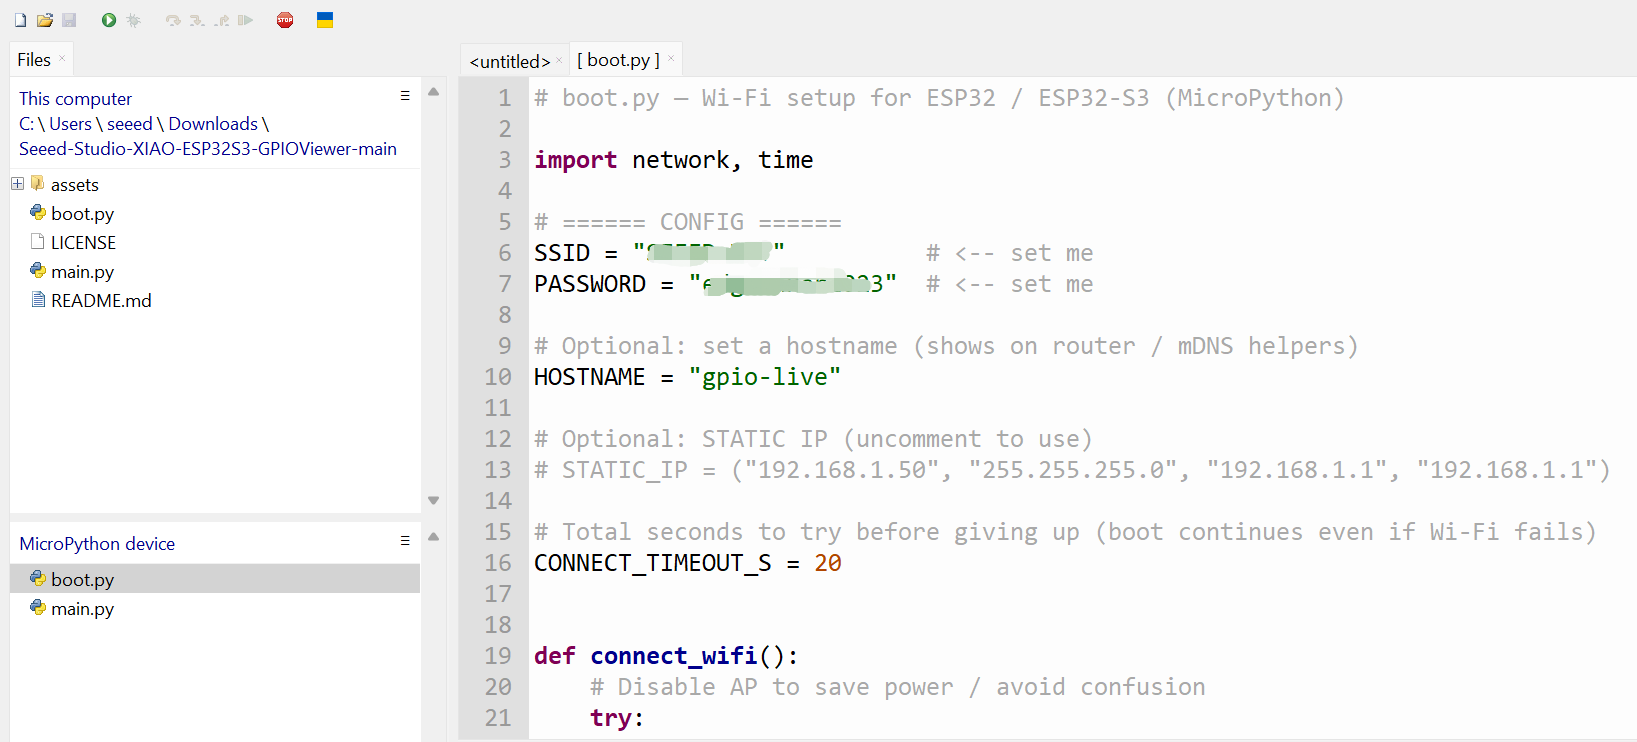
- In Thonny open the
boot.pyfile you uploaded. - Find the lines for your Wi-Fi SSID and password.
- Replace
"Your_WiFi_SSID"and"Your_WiFi_Password"with your home Wi-Fi name and password. - Save the file.
Run and View the GPIO Monitor
- With your board still connected, press Run (green button) in Thonny.
- After a few seconds, your board will connect to Wi-Fi.
- Look in the Thonny output — it will show the IP address the board receives.
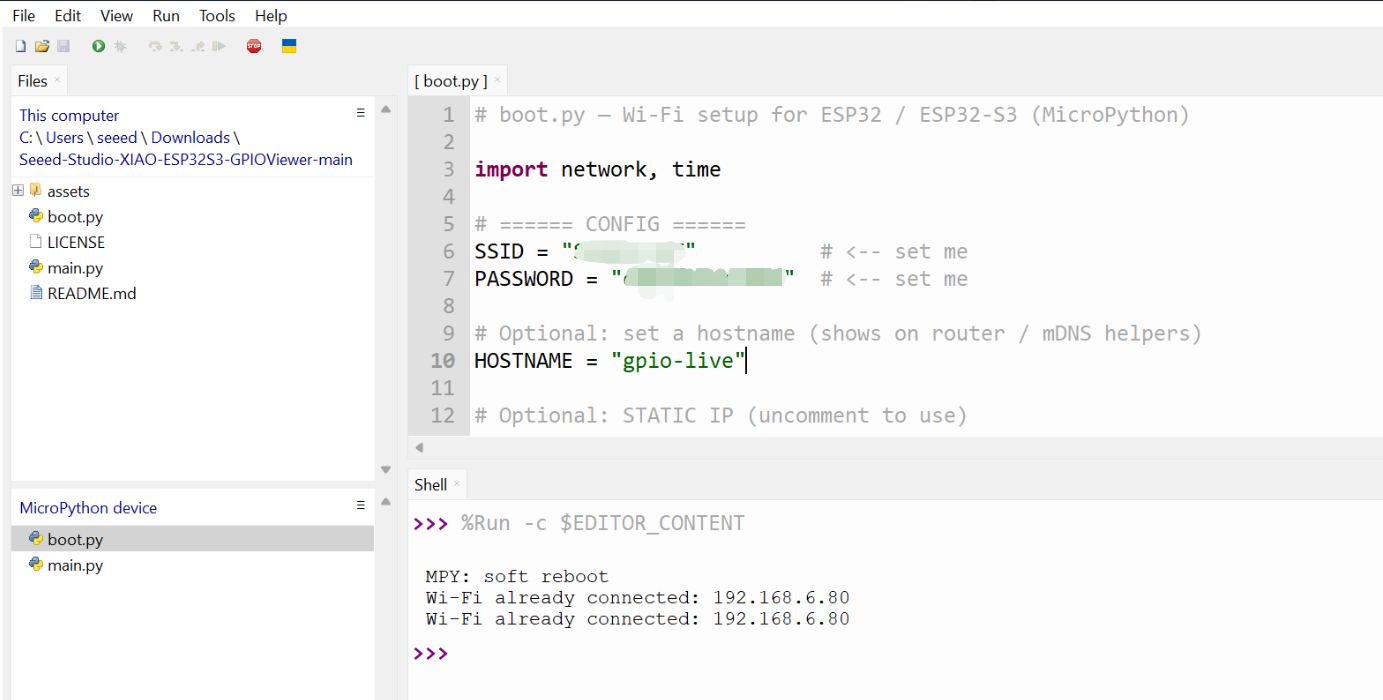
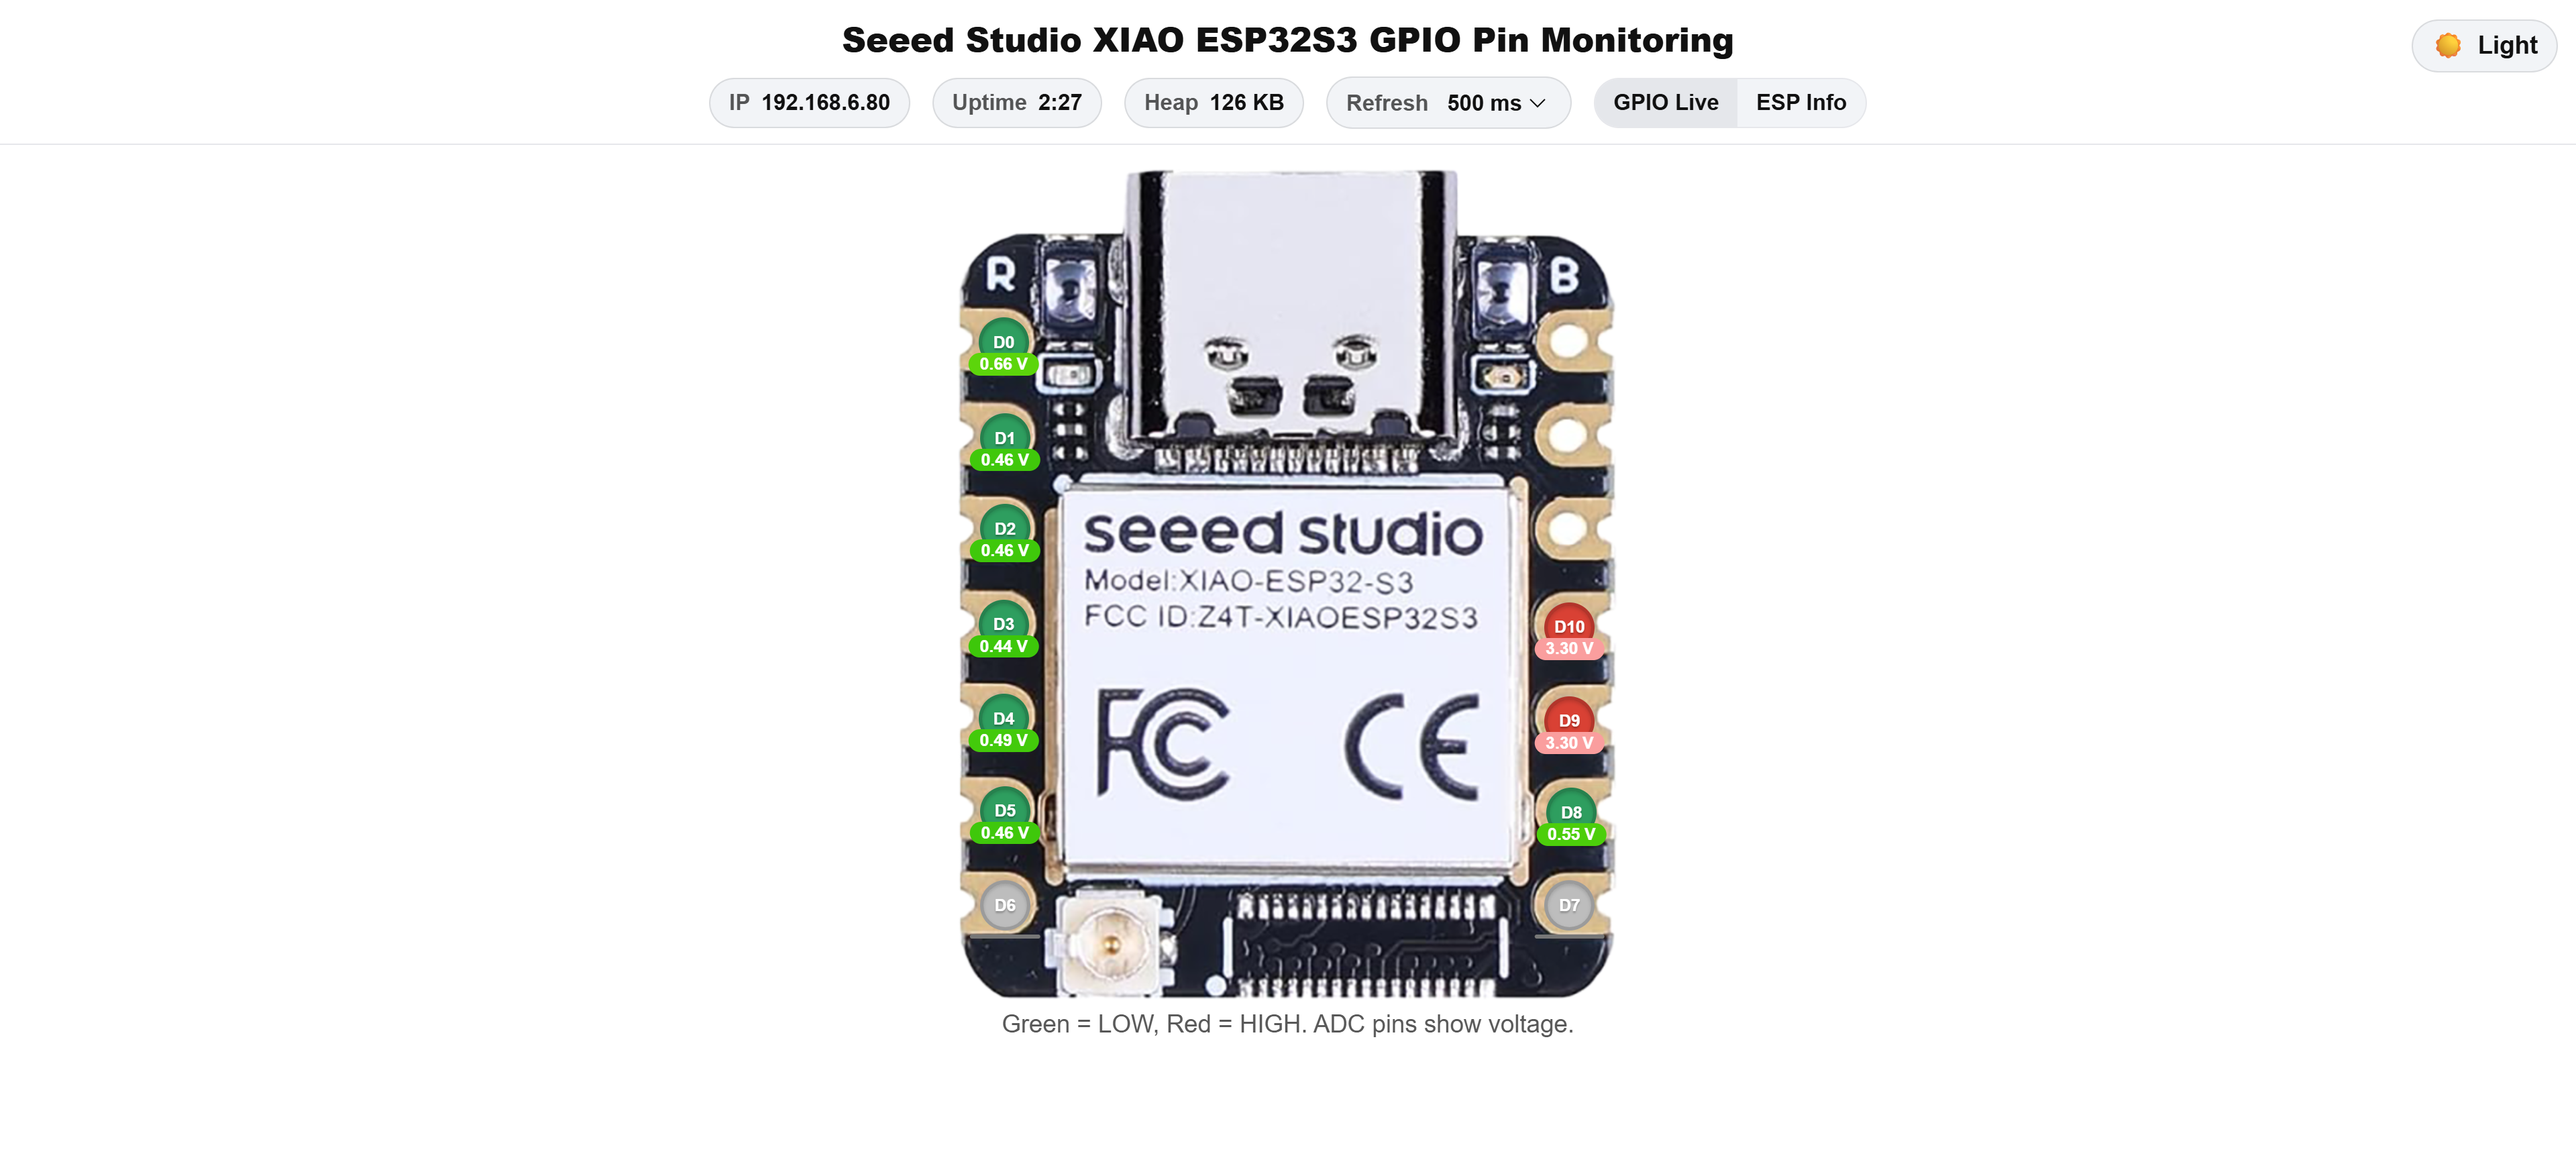
- On your computer, open a web browser and type that IP (for example http://192.168.6.80:8080).
- You will see the real-time GPIO dashboard showing pin states.
- Before Run, please connect the antenna to the XIAO ESP32-S3 (Sense).
- If you cannot open the webpage, the following situation occurs after Thonny reconnects to the board:
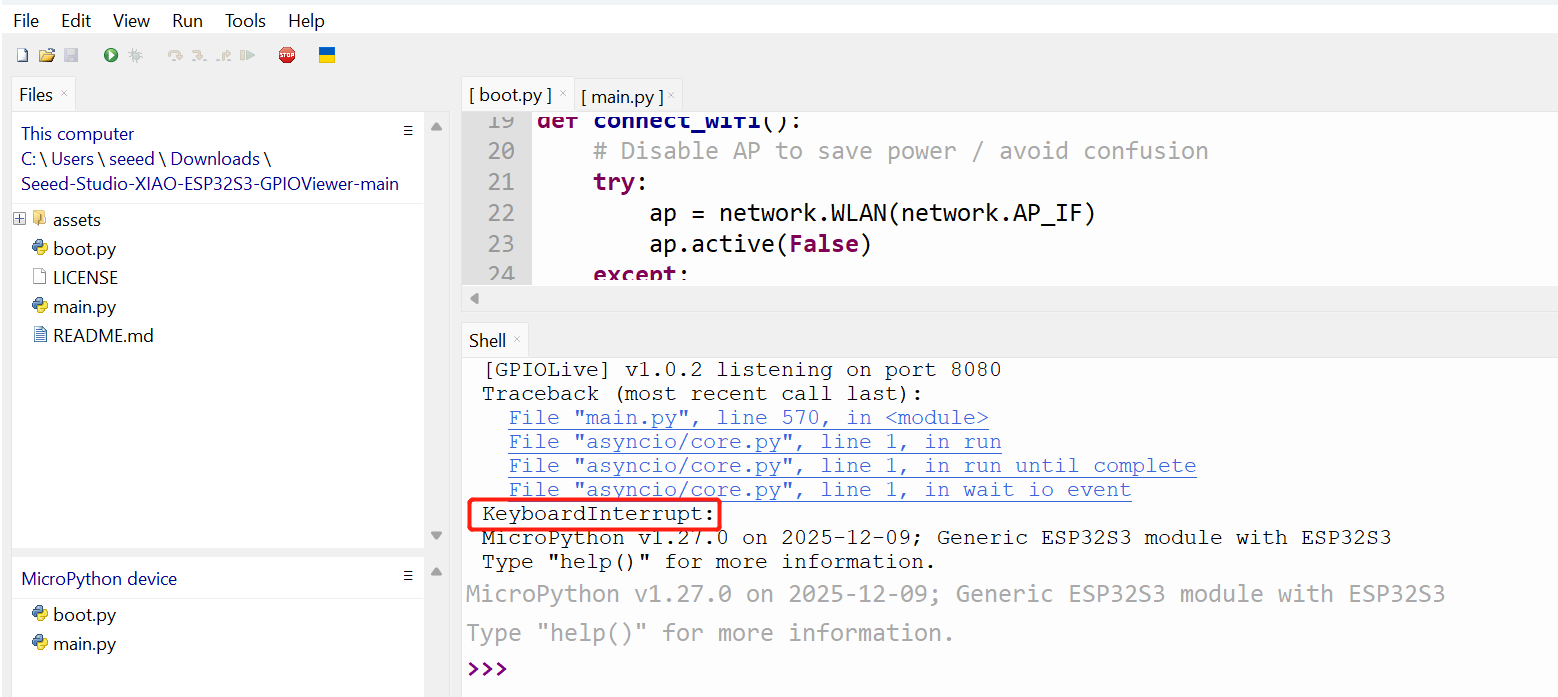
Don't worry, this is normal behavior in the MicroPython + Thonny + Web Server setup. Simply press the Reset button on the board once, or close Thonny.
✨ Contributor Project
- This project is supported by the Contributor Project.
- A special thanks to Utkarsh Bhor Patil for his dedicated efforts.
Tech Support & Product Discussion
Thank you for choosing our products! We are here to provide you with different support to ensure that your experience with our products is as smooth as possible. We offer several communication channels to cater to different preferences and needs.