Getting Started with XIAO IR Mate Smart IR Remote (For Home Assistant)
Welcome to the XIAO IR Mate Smart IR Remote! This device is specially designed for Home Assistant users, aiming to provide a seamless, efficient, and integrated smart infrared remote control solution. Through this guide, you will learn how to set up the device, connect it to your home network, integrate it into Home Assistant, and unlock its full potential, from basic signal learning to advanced smart air conditioner control.
Introduction
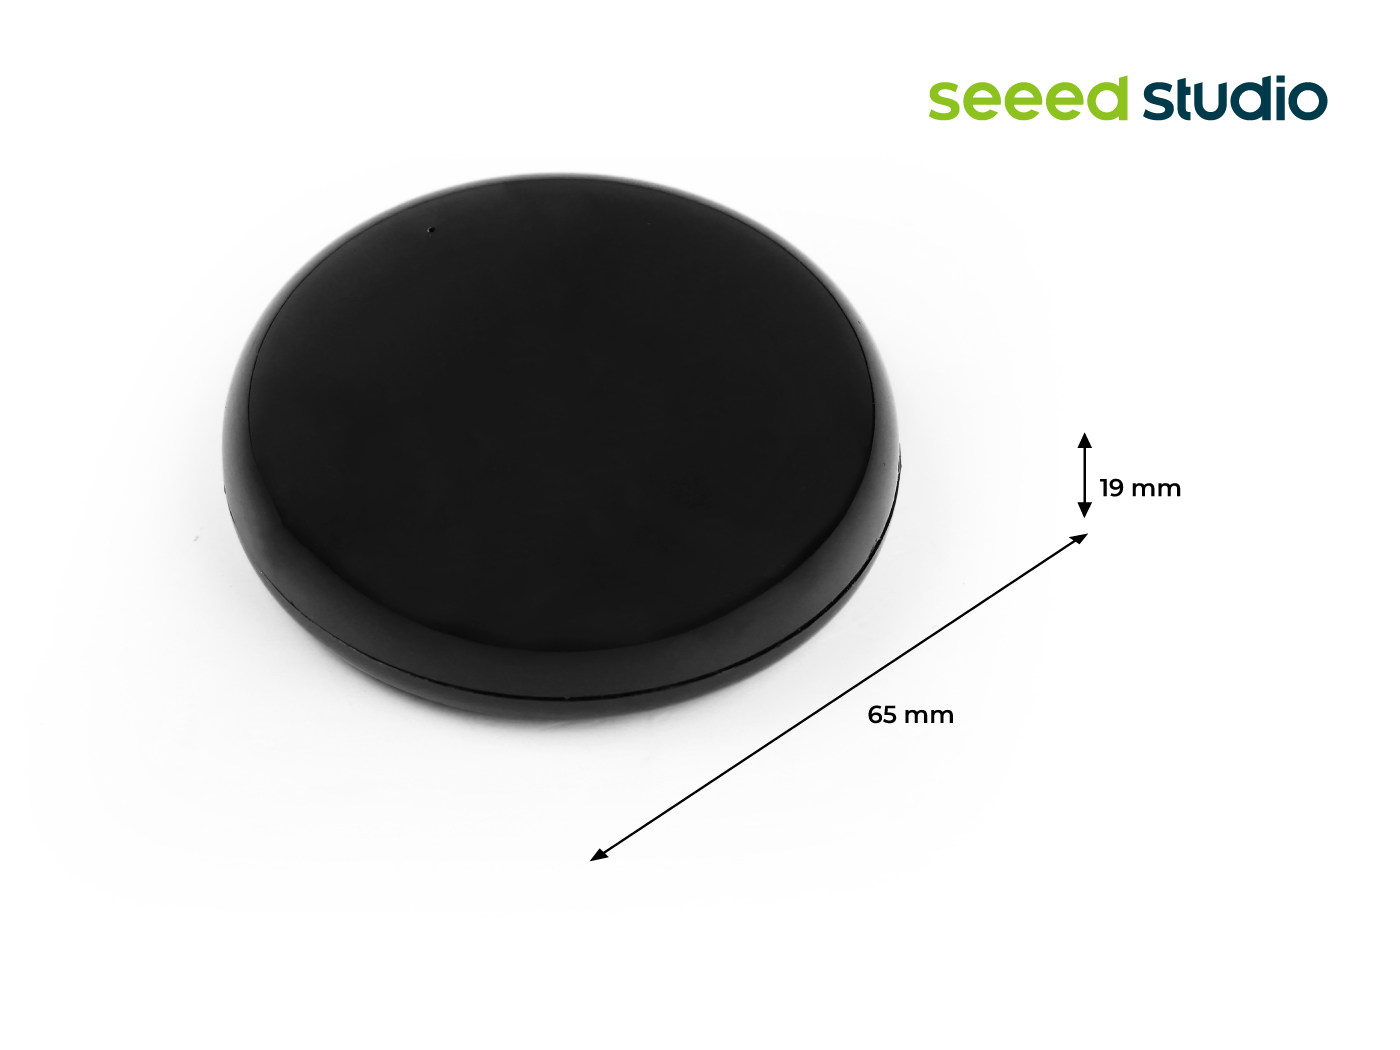
The XIAO IR Mate is a compact smart infrared module based on the Seeed Studio XIAO ESP32-C3. It integrates infrared transmission and reception, touch sensing, vibration feedback, and status indication. Connected via Wi-Fi, it can be perfectly integrated into your Home Assistant smart home ecosystem. Its core mission is to make all your traditional appliances that use infrared remotes (like TVs, air conditioners, fans, etc.) "smart" and allow you to control them through HA for automation.


- Seamless Integration with Home Assistant
Built on the ESPHome platform, IR Mate is automatically discovered by Home Assistant, offering simple entities for effortless automation and scripting.
- Powerful IR Learning and Transmitting
Equipped with three high-power IR emitters for 360° coverage and a high-sensitivity receiver. Supports learning up to 10 IR commands from standard remotes (e.g., controlling projectors, air conditioners, timers) for one-tap playback in Home Assistant.
- Intuitive Physical Interaction Feedback
Features a vibration motor and LED indicator. Short vibrations confirm actions, long vibrations signal learning mode, and the LED displays network status, simplifying setup and troubleshooting.
- Upgradeable to a Fanatic Smart AC Controller
Flash custom firmware to transform IR Mate into a smart AC remote. Set precise temperature, mode, and fan speed directly in Home Assistant, with automatic IR code generation, eliminating repetitive learning.
- Compact Design, USB-C Powered
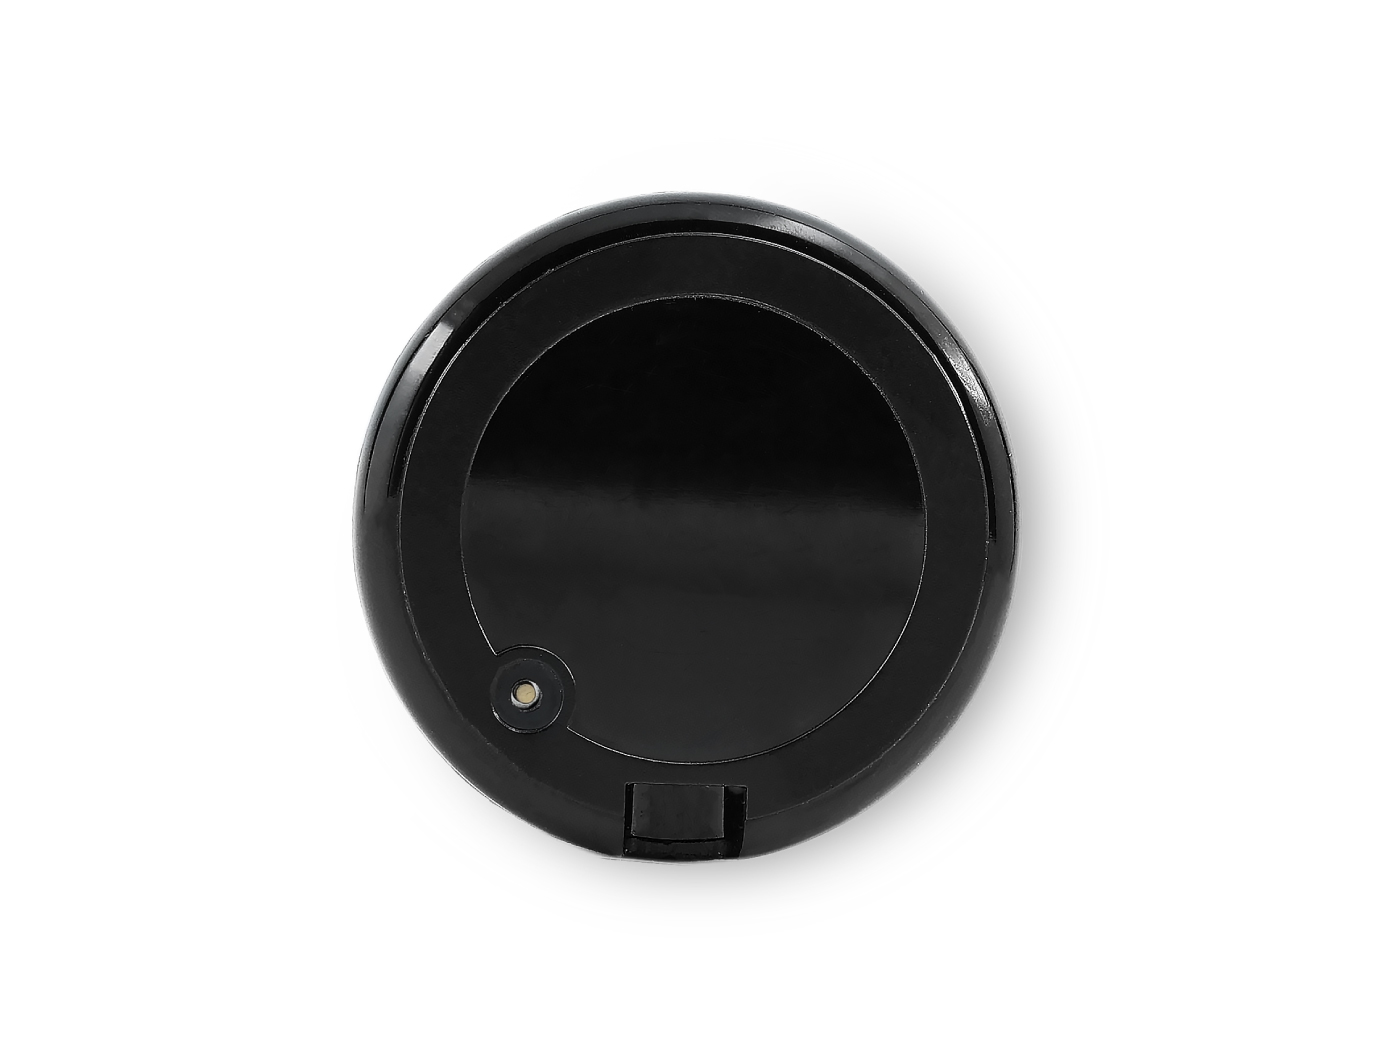
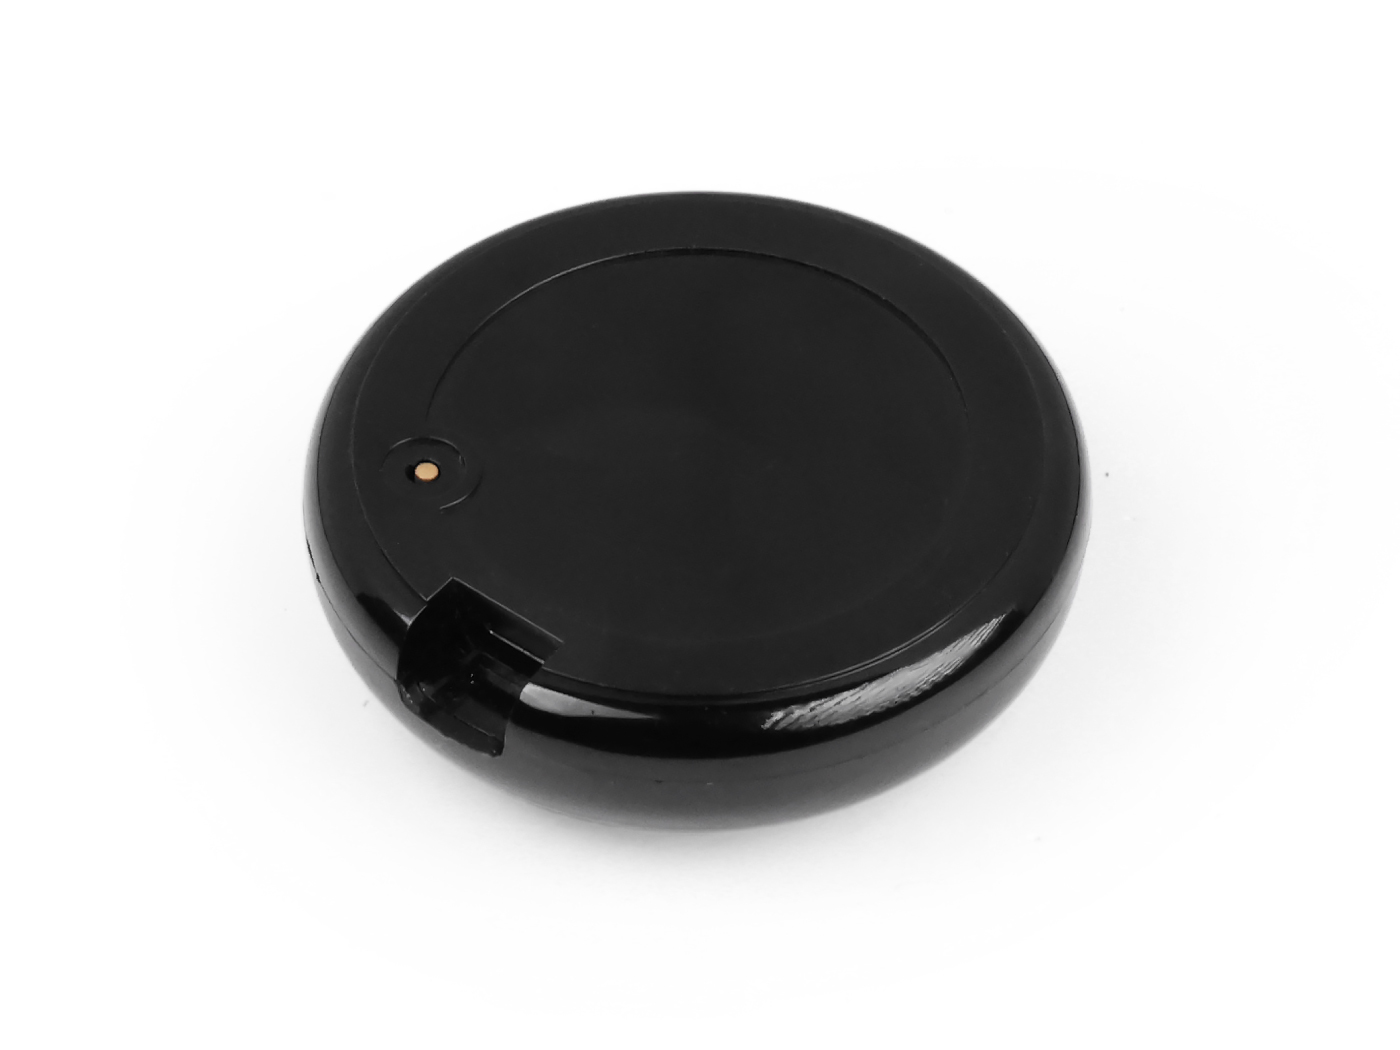
Hardware Overview
Understanding the basic components of the device will help you use it better:
- Main Controller: Seeed Studio XIAO ESP32-C3, providing powerful performance and Wi-Fi connectivity.
- Power Supply: Powered via the onboard Type-C port (5V).
- Infrared Emitter: 3 high-power infrared LEDs (using pin D1), ensuring 360° signal transmission without blind spots.
- Infrared Receiver: 1 high-precision infrared receiver (using pin D2), for learning signals from other remotes.
- Touch Sensor: The device integrates a touch module (using pin D3). A single touch triggers a short vibration (0.5 seconds) as operational feedback.
- Vibration Motor: A built-in vibration motor (using pin D4) provides clear tactile feedback with varying vibration durations.
- Status Indicator LED: An LED light (using pin D5) to indicate the device's different working states.
- Reset Button: A physical button on the device (connected to pin D0), used for rebooting or factory resetting.
First Use & Network Configuration (Factory Firmware)
When you first get the device, follow these steps to complete the initial setup.
Step 1: Power On
Use a standard USB Type-C cable to power the device. After startup, the device will enter a waiting-for-configuration state, and you will see the white LED blinking at a 1Hz frequency.
Step 2: Enter AP Provisioning Mode
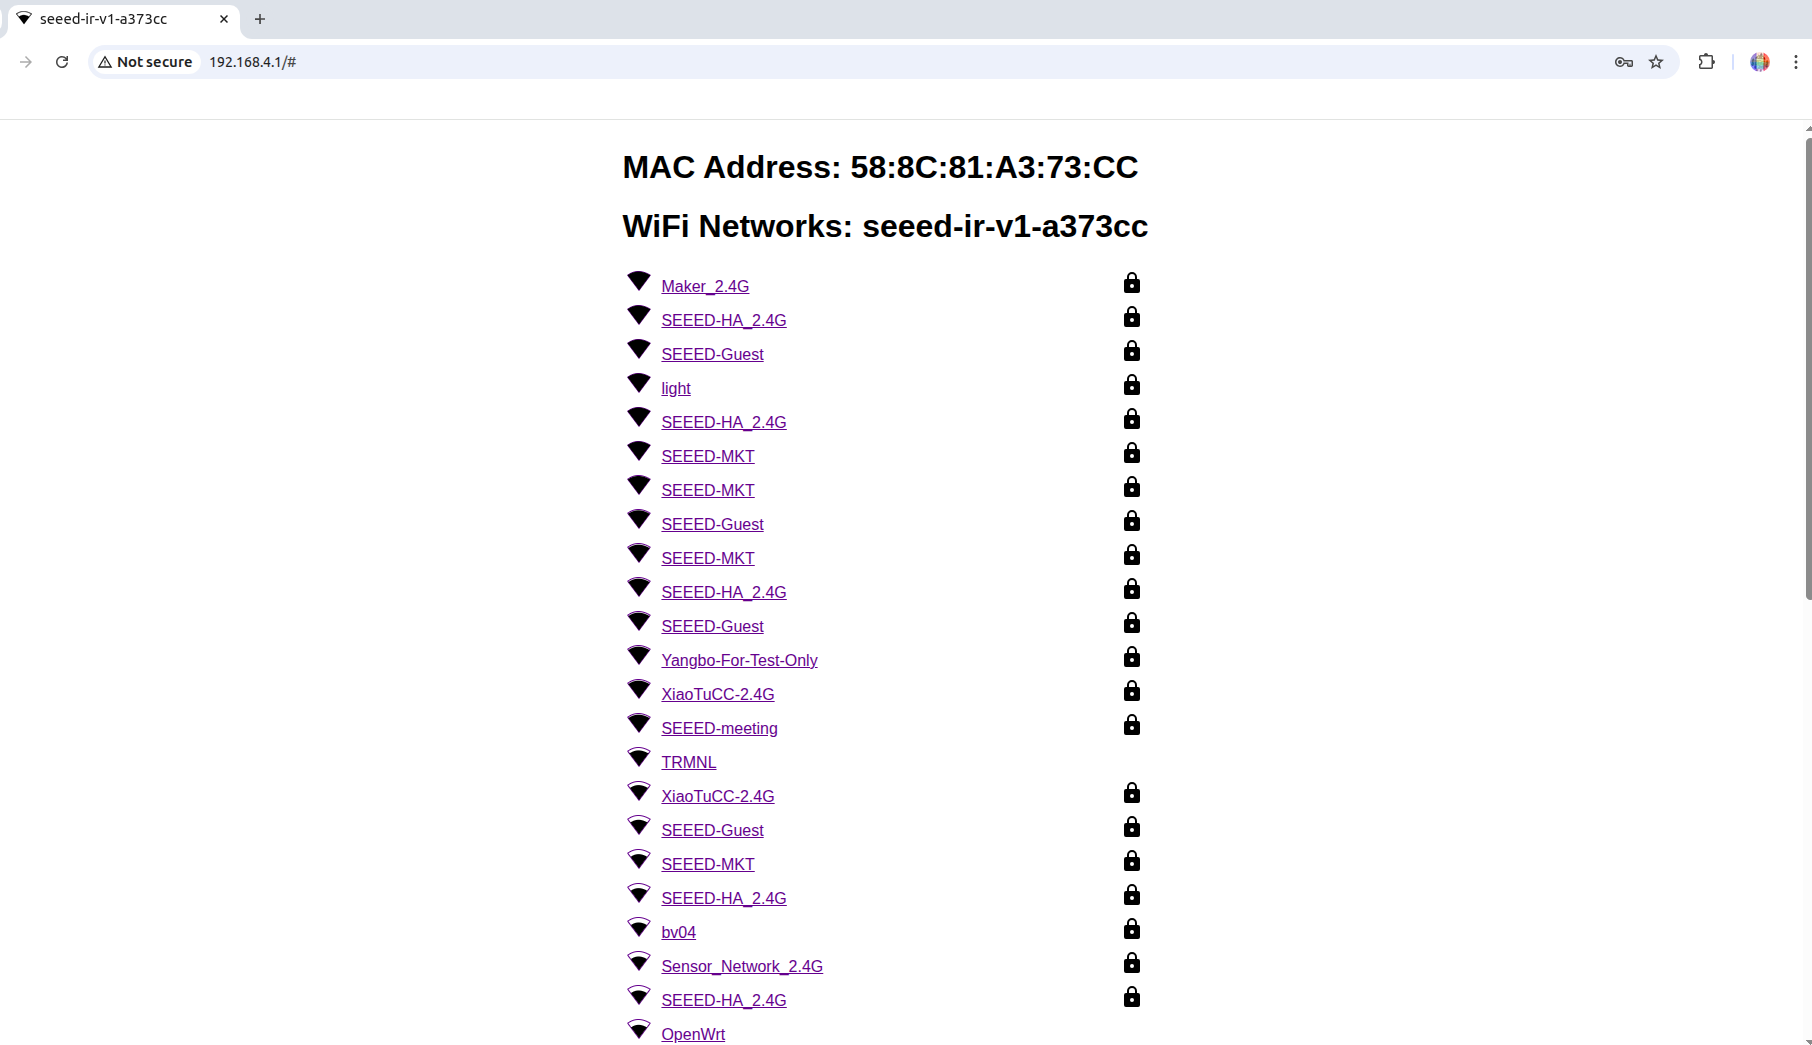
When the network is not configured, the device will automatically create a Wi-Fi hotspot (AP) named XIAO IR Mate (or Seeed_ir, depending on what you find).
Step 3: Connect to the Hotspot and Configure Network
- Open the Wi-Fi settings on your phone or computer, search for and connect to the network named XIAO IR Mate.
The hotspot has a default network password of ‘12345678’.
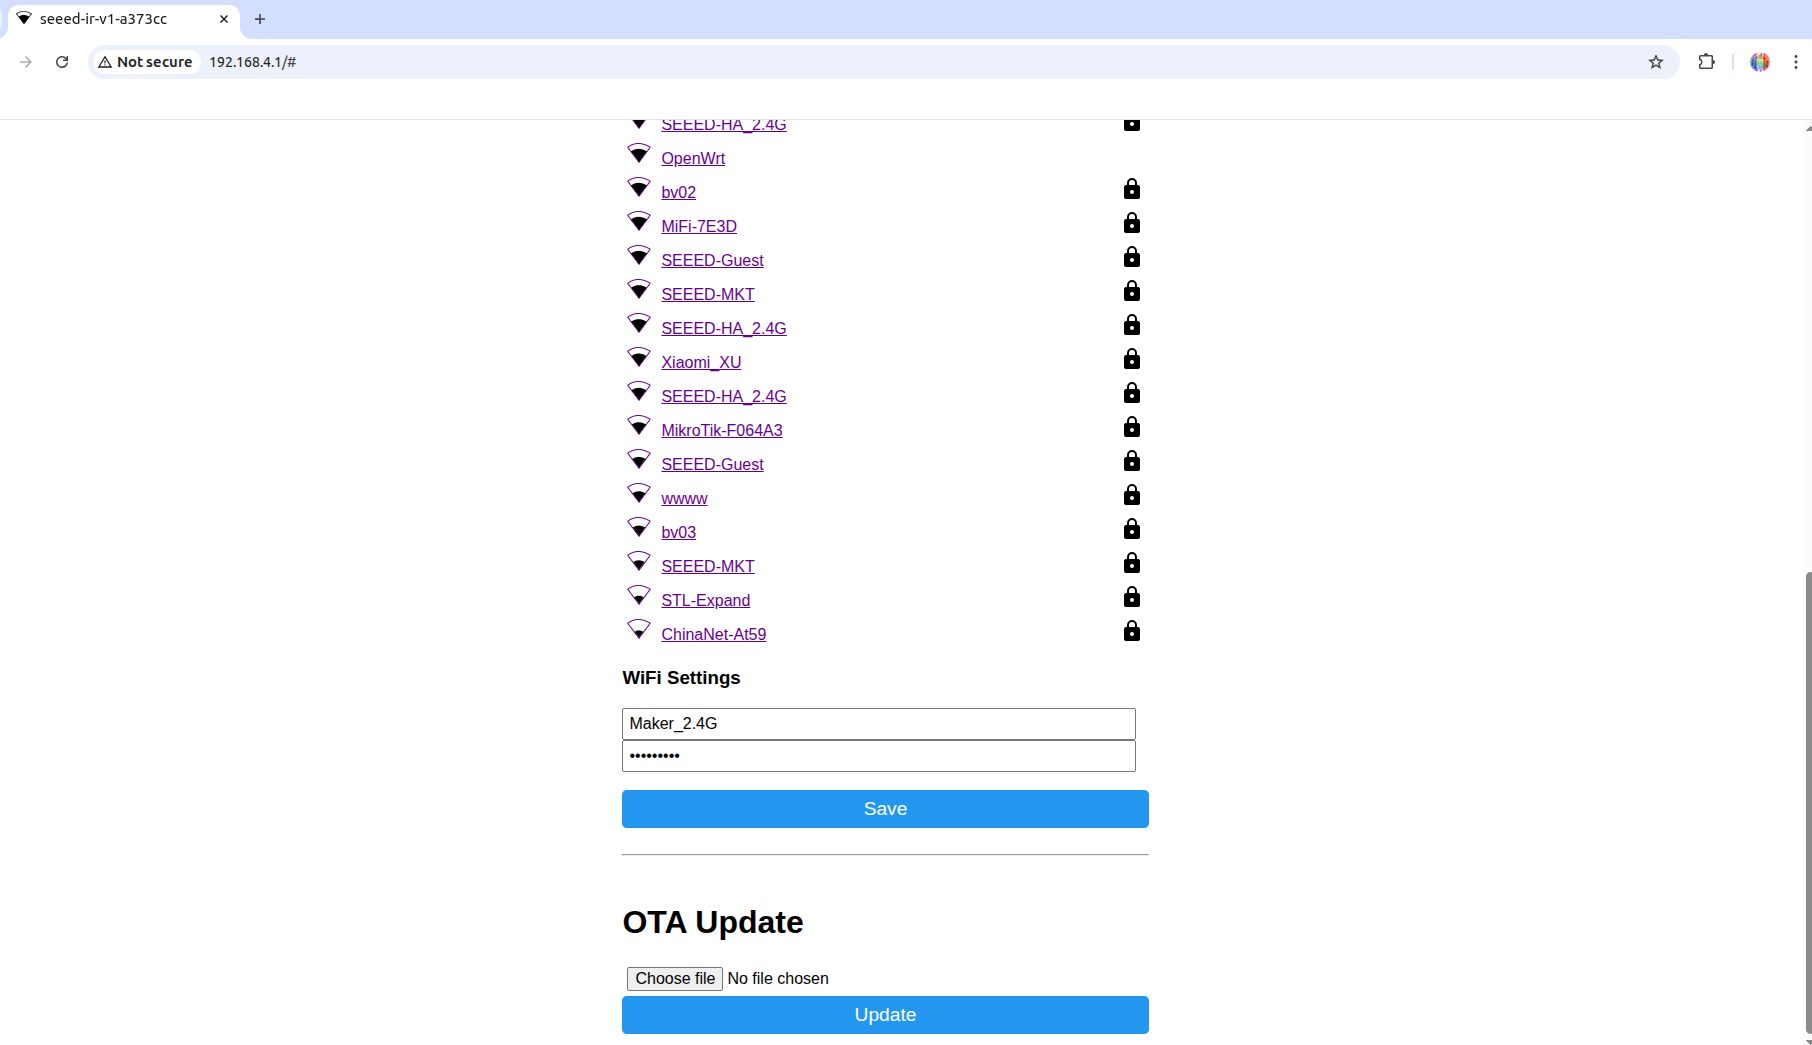
- After a successful connection, your device will usually automatically open a configuration page. If it doesn't, please manually open a browser and visit http://192.168.4.1.
- On this page, you will see a list of Wi-Fi networks. Please select your home's 2.4GHz Wi-Fi network (SSID) and enter the correct password.
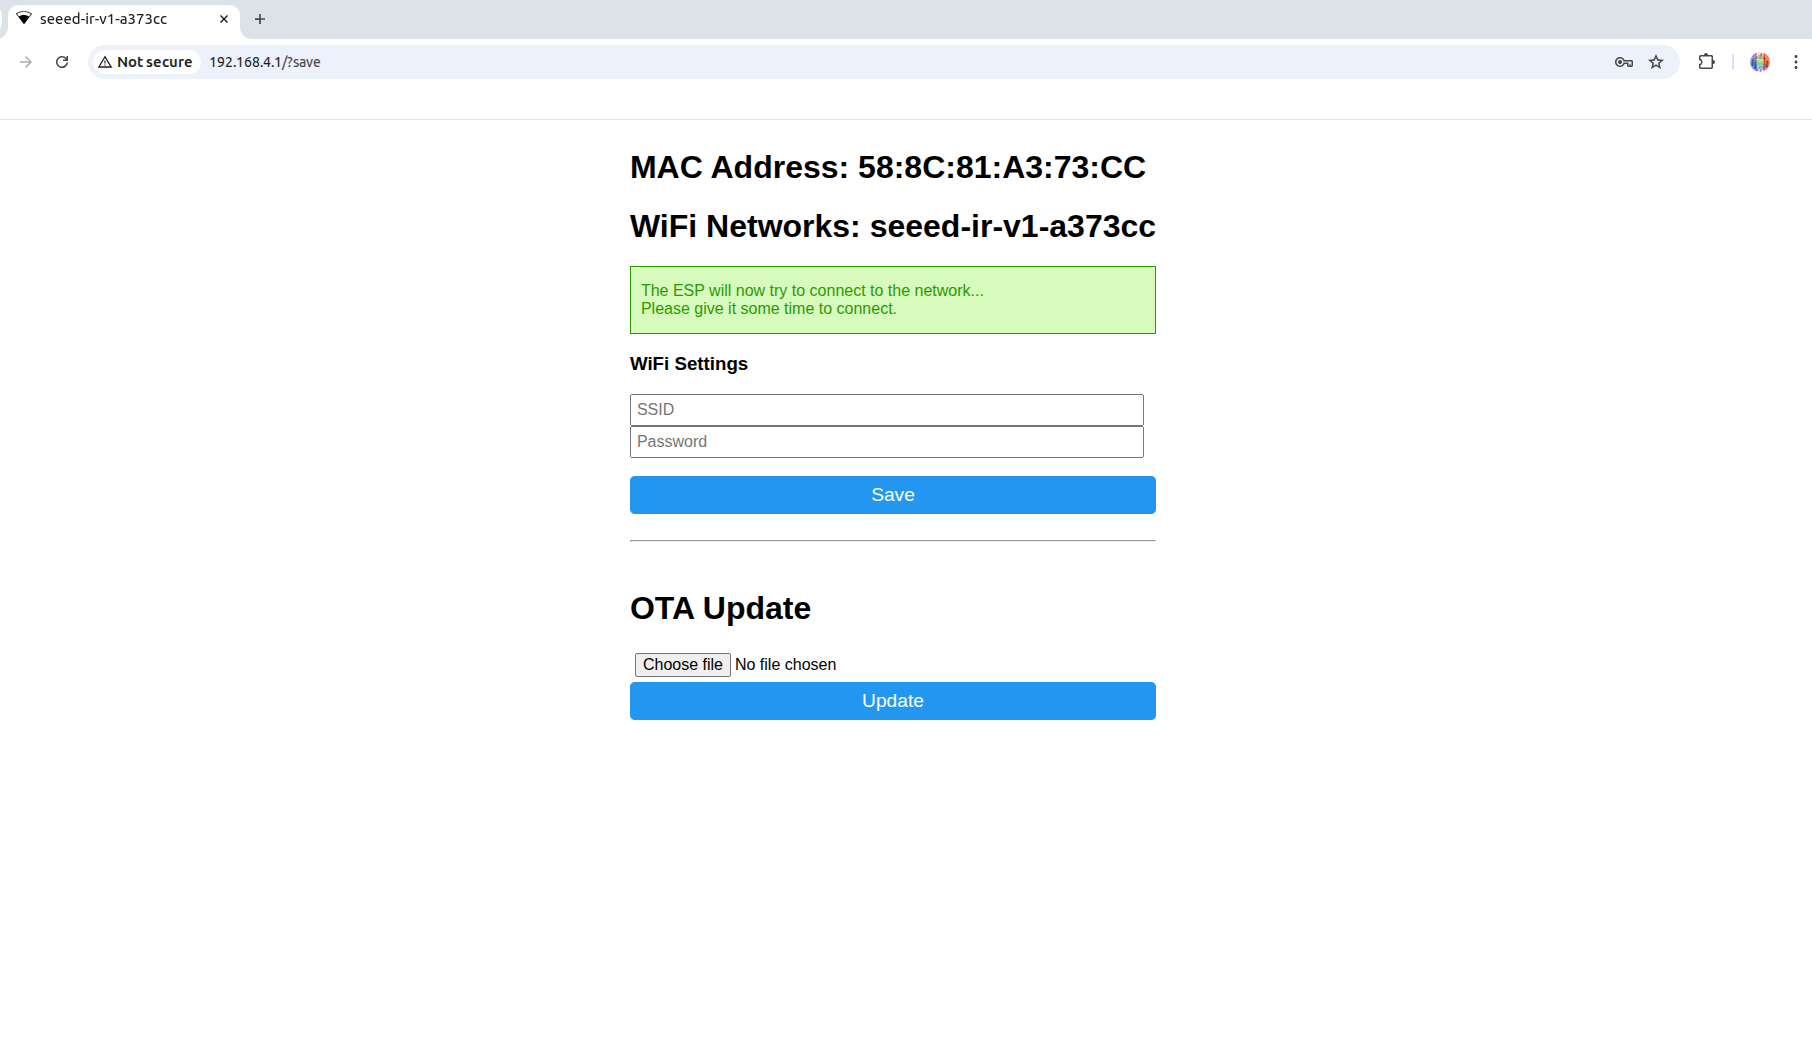
- Click "Connect" or "Save". The device will attempt to connect to the Wi-Fi network you provided.
Step 4: Connection Successful
Once the device successfully connects to your home Wi-Fi, the AP hotspot will automatically turn off, and the status indicator light will become solid on. The network configuration is now complete.
Home Assistant Integration (Factory Firmware)
The device firmware is based on ESPHome, making it very easy to integrate into Home Assistant.
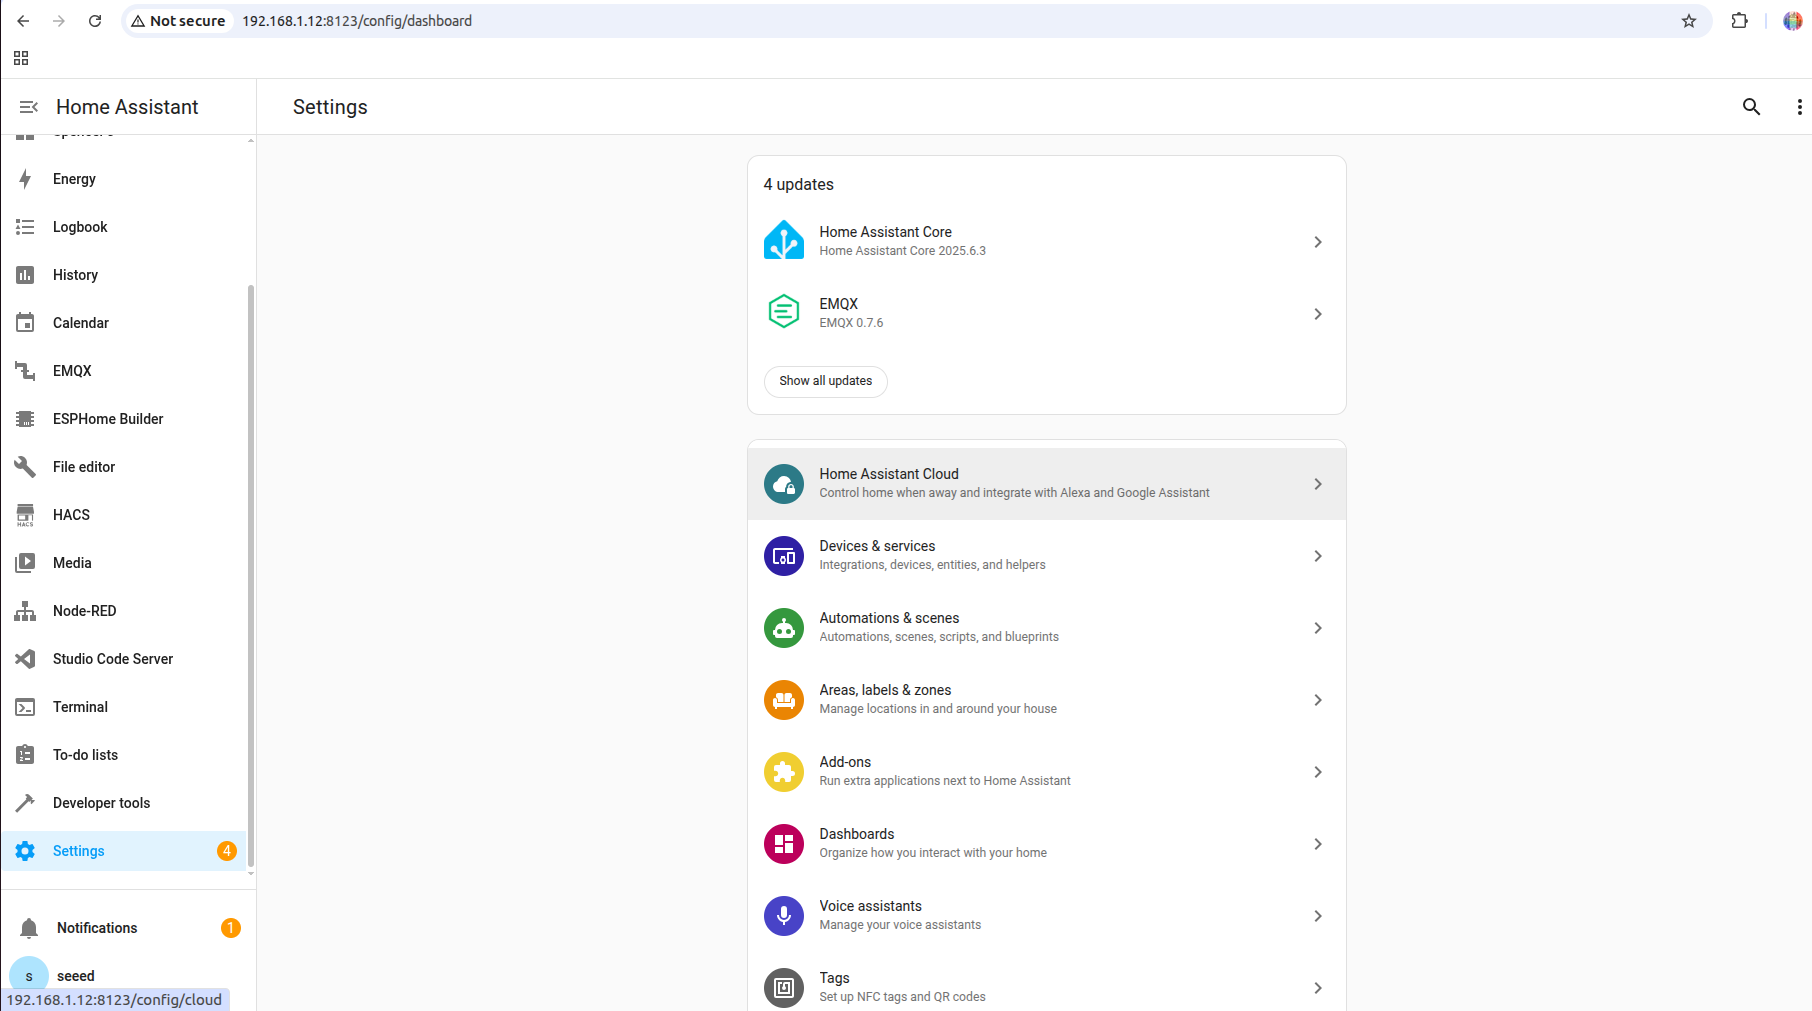
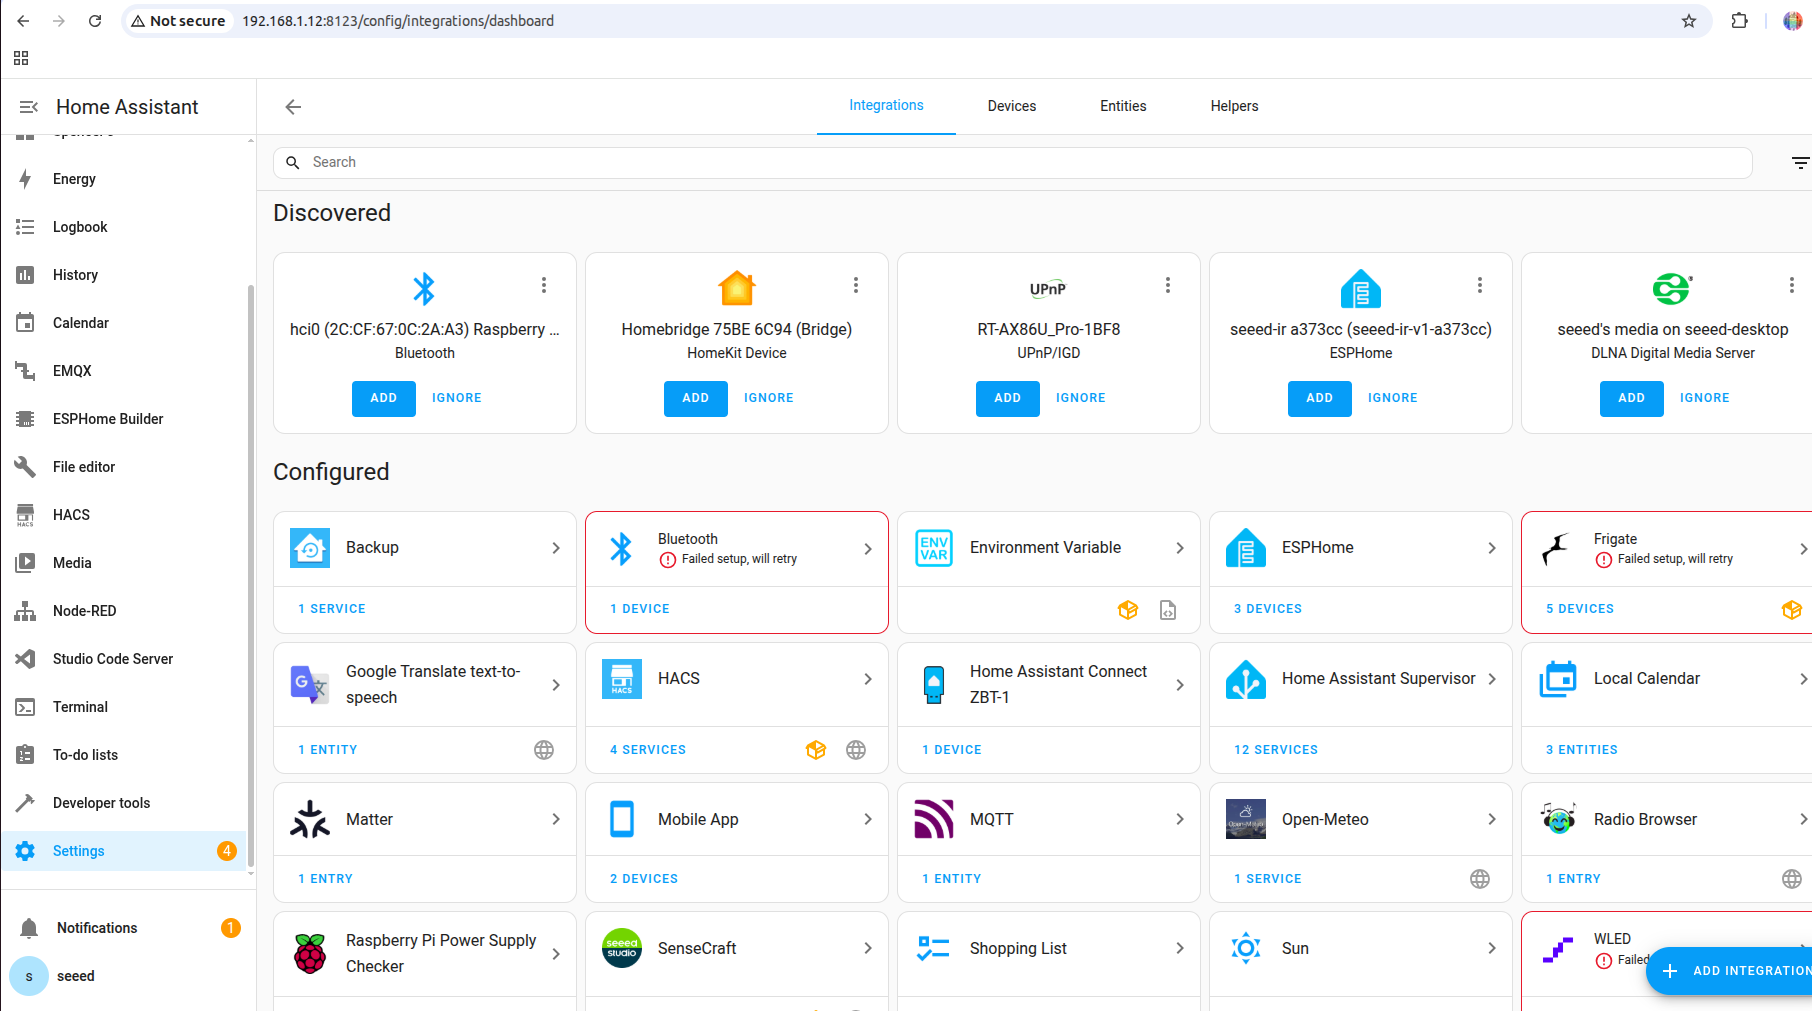
- Automatic Discovery: Ensure your Home Assistant host and the XIAO IR Mate are connected to the same local network. Typically, HA will automatically discover new ESPHome devices. You will see a notification in Settings > Devices & Services saying "New device discovered".
- Manual Addition: If not discovered automatically, you can click the [Add Integration] button in the bottom right corner, search for "ESPHome", and then enter the device's hostname (e.g., xiao-ir-mate) or IP address to add it manually.
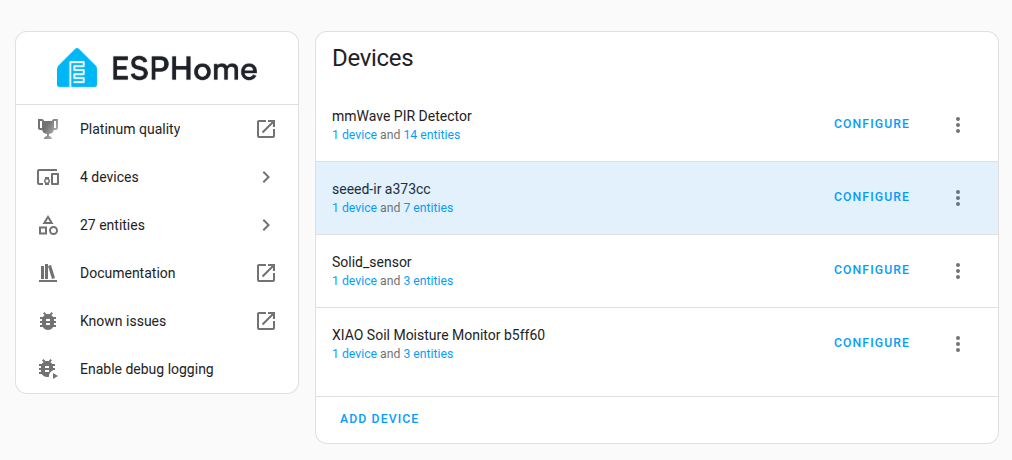
- Device Dashboard: After successful addition, the XIAO IR Mate will appear as a device in HA. Its dashboard will contain the following entities for controlling 10 different infrared signals:

Core Function Details (Factory Firmware)
If you want to restore your device or update its firmware, you can jump through the button below. We have created a page dedicated to XIAO Gadget Direct Flash Firmware.
IR Signal Learning
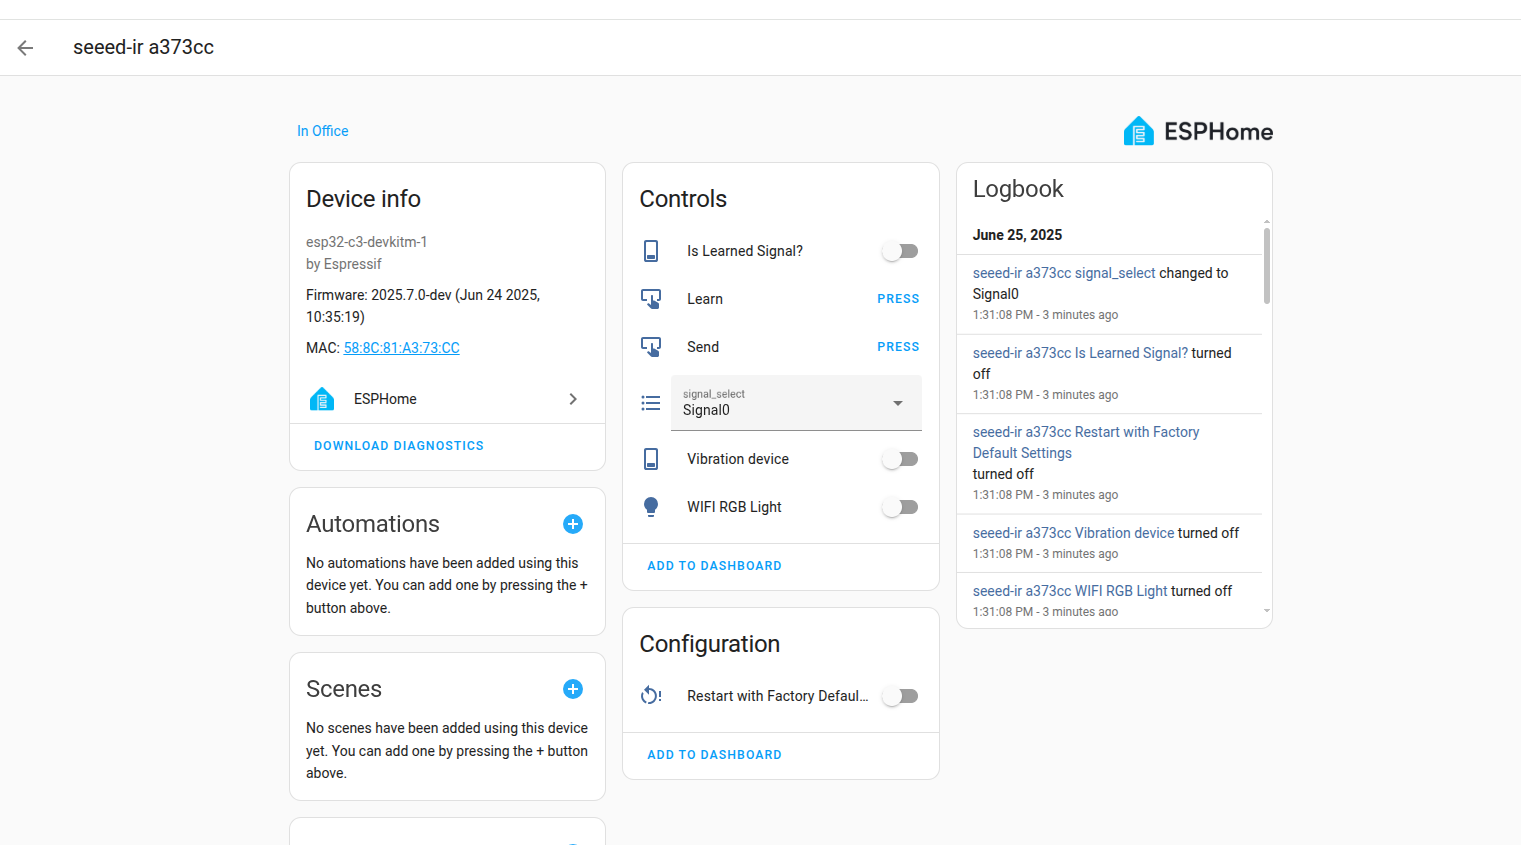
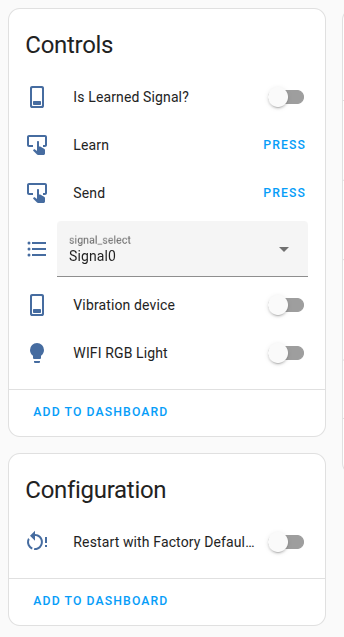
When you need to teach the IR Mate a new remote command, follow these steps. The factory firmware's core interface includes a signal slot selection list, along with Learn and Send buttons.
- In the Home Assistant device dashboard, first find the dropdown selection list named "Signal".
- Click the dropdown list and select the signal slot you want to use, for example, "signal_1".
- Once selected, find the "Learn" button and click "PRESS" next to it.
- The XIAO IR Mate will now enter learning mode and begin to vibrate continuously, indicating that you can start pairing.
- Point your original remote at the IR Mate's infrared receiver window and give a short press of the button you want to learn.
- After the IR Mate successfully receives and records the signal, the vibration will stop, signifying that the learning was successful.
- At this point, a status indicator named "Is Learned Signal" will automatically turn "ON", indicating that the currently selected signal slot in the dropdown list (i.e., "signal_1") now has a signal stored.
IR Signal Sending
Once a signal has been successfully learned, you can send it at any time.
- In the "Signal" dropdown list, ensure you have selected the signal slot you wish to send, for example, "signal_1".
- Find the "Send" button and click "PRESS" next to it.
- The XIAO IR Mate will immediately transmit the signal stored in the currently selected slot via its 3 infrared emitters.
- Note: If you select a signal slot in the dropdown list that has never been taught a signal, clicking the send button will have no effect.
Physical Interaction & Status Indication
In addition to HA control, you can also understand and control the device through physical interaction.
Status Indicator Light (White LED)
- Slow Blink (1Hz): The device is waiting to connect to a Wi-Fi network.
- Solid On: The device is successfully connected to the Wi-Fi network and operating normally.
Vibration Feedback
- Short Vibration (100ms): Used for general operation confirmation, such as when touching the device.
- Long Vibration (500ms): Used for important status alerts, such as entering learning mode or performing a factory reset.
RESET Button
- Short Press (within 1 second): The device will reboot, accompanied by a short vibration. This is very useful if the device becomes unresponsive.
- Long Press (over 5 seconds): The device will perform a factory reset. This action will erase all saved Wi-Fi credentials and all 10 learned infrared signals. When this action is performed, the device will emit a long vibration as a prompt. After completion, the device will restart and return to the initial waiting-for-configuration state (LED blinking).
Advanced Usage - Smart Air Conditioner Control
The basic "record-replay" mode provided by the factory firmware is universal, but it can be clumsy when controlling devices with multiple states like air conditioners (temperature, mode, fan speed, etc.). To achieve finer, more intelligent AC control, we can flash a specialized ESPHome firmware to transform the XIAO IR Mate from an "IR signal repeater" into a true "smart air conditioner controller."
In this chapter, we will use a Gree air conditioner as a detailed example, but this is by no means the only option. ESPHome's powerful ecosystem supports numerous air conditioner brands, and you can easily follow the concepts in this guide, making minor changes to the configuration code, to achieve smart control for other brands like Midea, Daikin, Panasonic, and more.
Core Advantages
- Stateful Control: No more simple replays. You can directly set "24°C, Cool, Auto Fan" in HA, and the device will immediately generate and send the correct infrared command.
- Friendlier UI: It appears as a standard Climate card in HA, making operation intuitive.
- Saves Space: No need to learn a separate signal for each temperature or mode; one configuration can control all AC functions.
Prerequisites
- Install ESPHome: If you haven't already, install and start the ESPHome add-on from the Home Assistant Add-on Store.
- Get Your AC Brand Protocol: ESPHome supports many AC brand protocols (like Gree, Midea, Daikin, etc.). You need to know your air conditioner's brand to select the correct protocol.
Flashing Custom Firmware
- Create a New Device Configuration
- Open the ESPHome interface in HA.
- Click the "+ NEW DEVICE" button in the bottom right, and in the pop-up window, click "Continue".
- Name your device (e.g., xiao-ir-ac-controller), and then select the board type as Seeed Studio XIAO ESP32C3.
- Edit the Configuration File
- Click the EDIT button on the newly created device card to enter the YAML configuration editor.
- Delete all default content in the editor.
- Completely copy and paste the code below into the editor:
seeed-ir-v2.yaml
# ==== AUTO-SYNC START: xiao_smart_ir_mate/xiao_smart_ir_mate.yaml ====

substitutions:
  name: "xiao-smart-ir-mate"
  friendly_name: "XIAO Smart IR Mate"

esphome:
  name: "${name}"
  friendly_name: "${friendly_name}"
  name_add_mac_suffix: True
  project:
    name: "xiao.smart-ir-mate"
    version: "2.0"

esp32:
  board: seeed_xiao_esp32c3
  framework:
    type: arduino

globals:
  - id: is_wifi_connected
    type: bool
    initial_value: 'false'

  - id: reset_press_time
    type: uint32_t
    initial_value: '0'

  - id: touch_timer
    type: unsigned long
    restore_value: no
    initial_value: '0'

  # open or close the learning mode
  - id: is_learning_mode
    type: bool
    initial_value: 'false'

  # signal index , you can select the signal index on ESPHome
  - id: signal_select_index
    type: int
    restore_value: no
    initial_value: '0'

  # Read the signals stored in nvs and store them in this vector
  - id: send_data_vector
    type: std::vector<long int>
    restore_value: no

  - id: filter_size
    type: int
    initial_value: '10'

# Enable logging
logger:
  level: INFO

# Enable Home Assistant API
api:

ota:
  - platform: esphome
    password: "15afb09b5aba7b3d6a6ba01180c60df5"

wifi:
 # ssid: !secret wifi_ssid
 # password: !secret wifi_password
  on_connect:
    - globals.set:
        id: is_wifi_connected
        value: 'true'
    - light.turn_on: rgb_light
    - lambda: |-
        ESP_LOGI("ir", "IP address: %s", ::esphome::wifi::global_wifi_component->wifi_sta_ip_addresses()[0].str().c_str());

  on_disconnect:
    - globals.set:
        id: is_wifi_connected
        value: 'false'

  # Enable fallback hotspot (captive portal) in case wifi connection fails
  ap:
    # ssid: "XIAO Smart IR Mate"
    password: "12345678"

captive_portal:

# Custom components
external_components:
  - source:
      type: git        # git component
      url: https://github.com/Seeed-Studio/xiao-esphome-projects  # Path where the component is github
      ref: main   # Branch name
    components: [Flash_comp]   # Explicitly specify the components to import

# Component name
Flash_comp:
  id: signal_nvs  # Component id

remote_transmitter:
  id: my_transmitter
  pin: GPIO3
  carrier_duty_percent: 50%

remote_receiver:
  - id: rcvr
    pin:
      number: GPIO4
      inverted: true
    # Idle time, if the low level exceeds this time, it is considered as a new segment of the signal
    # That is "segmentation"
    idle: 65500us
    # Important, this parameter is used to segment the infrared signal
    # If a certain segment of the infrared signal is too long, it may be divided into several segments
    # For such a case, you must send the infrared signal strictly according to the corresponding timing, otherwise it will fail
    # If you don't want it to be segmented, you can reduce the frequency and adjust the idle parameter to make it receive as complete as possible
    clock_resolution: "500000"
    # Receive data: using raw data
    # In the infrared parsing of esphome, a signal (e.g., NEC) may be parsed into multiple signals (e.g., JVC, Pronto, etc.).
    # Here, we only retain the original signal and do not decode the protocol.
    on_raw:
      - switch.turn_off: vibration_switch
      - lambda: |-
          if (id(is_learning_mode)) {
            if (x.size() > id(filter_size)){
              ESP_LOGI("ir", "Saved signal index: %d", id(signal_select_index));
              id(signal_nvs).save_to_nvs(id(signal_select_index), x);
              id(send_data_vector).clear();
              id(send_data_vector) = id(signal_nvs).load_from_nvs<long int>(id(signal_select_index));
              id(is_learning_mode) = false;
              // Learned the signal, turn on the switch
              id(is_learned_signal_script).execute(true);
            }
          }

button:
  # Button in learning mode, you need to open learning mode first, and the signal will be saved
  - platform: template
    id: learn
    name: "Learn"
    on_press:
      - switch.turn_on: vibration_switch
      - lambda: |-
          id(is_learning_mode) = true;
          ESP_LOGI("ir", "Learning mode activated!");

  # Button in sending mode, according to your current index, read the signal from nvs and send it
  # Since it's using a script to send, it will always trigger a log print whether the sending is successful or not
  # That is, it will print Sending signal index
  # So when there is a log print but the control doesn't work, you need to write a separate receiving code to analyze the data
  # It is recommended to use the example program in the Arduino IRremote library.
  - platform: template
    id: transmit
    name: "Send"
    on_press:
      - lambda: |-
          if (id(send_data_vector).size() > 0) {
            id(send_raw).execute();
            ESP_LOGI("ir", "Sending signal index: %d", id(signal_select_index));
            ESP_LOGI("ir", "Sending signal size: %d", id(send_data_vector).size());
          } else {
            ESP_LOGI("ir", "Signal index %d not learned", id(signal_select_index));
          }

# Signal selection dropdown list
# Provides ten signals to choose from, and records the index
select:
  - platform: template
    name: signal_select
    id: signal_select
    options:
      - "Signal0"
      - "Signal1"
      - "Signal2"
      - "Signal3"
      - "Signal4"
      - "Signal5"
      - "Signal6"
      - "Signal7"
      - "Signal8"
      - "Signal9"
    initial_option: "Signal0"
    optimistic: true
    on_value:
      - lambda: |-
          id(signal_select_index) = i;
          ESP_LOGI("ir", "Current selected signal index: %d", i);
          id(send_data_vector).clear();
          id(send_data_vector) = id(signal_nvs).load_from_nvs<long int>(id(signal_select_index));
          if (id(send_data_vector).size() > 0) {
            id(is_learned_signal_script).execute(true);
          } else {
            id(is_learned_signal_script).execute(false);
          }

switch:
  - platform: output
    id: vibration_switch
    name: "Vibration device"
    output: vibration_output

  - platform: factory_reset
    id: factory_switch
    name: "Restart with Factory Default Settings"

  # Has the signal been learned?
  # If the signal has been learned, turn on this switch.
  # Otherwise, turn off this switch.
  - platform: template
    id: is_learned_signal_switch
    name: "Is Learned Signal?"
    optimistic: true

light:
  - platform: esp32_rmt_led_strip
    rgb_order: GRB
    pin: GPIO7 # D5
    num_leds: 1
    chipset: WS2812
    name: "WIFI RGB Light"
    id: rgb_light
    rmt_symbols: 48

binary_sensor:
  - platform: gpio
    id: touch_pad
    pin:
      number: GPIO5 # D3
      mode: INPUT_PULLDOWN
    on_state:
      then:
        - lambda: |-
            id(vibe).execute(100);
            id(touch_timer) = millis();
            if (id(check_touch_delay).is_running()) {
              id(check_touch_delay).stop();
              delay(10);
            }
            id(check_touch_delay).execute();

  - platform: gpio
    id: reset_button
    pin:
      number: GPIO9 # D9
      mode: INPUT_PULLUP
    filters:
      invert

    on_press:
      then:
        - lambda: |-
            id(reset_press_time) = millis();

    on_release:
      then:
        - lambda: |-
            uint32_t press_duration = millis() - id(reset_press_time);
            if (press_duration < 5000) {
              id(vibe).execute(100);
              ESP_LOGI("ir", "Restart Device");
              ESP.restart();
            } else {
              // clear all learned signals
              for (int i = 0; i < 10; i++) {
                id(signal_nvs).clear_signal_by_index(i);
              }
              ESP_LOGI("ir", "Restart with Factory Default Settings");
              id(vibe).execute(500);
              id(factory_switch).turn_on();
            }

output:
  - platform: gpio
    id: vibration_output
    pin: GPIO6 # D4

script:
  - id: vibe
    parameters:
      delay_ms: int
    then:
      - switch.turn_on: vibration_switch
      - delay: !lambda return delay_ms;
      - switch.turn_off: vibration_switch

  - id: check_touch_delay
    then:
      - delay: 300ms
      - lambda: |-
          unsigned long current_time = millis();
          if (current_time - id(touch_timer) >= 300) {
            ESP_LOGI("check click", "single click action");
            id(transmit).press();
          }

  # Send infrared signal
  # The saved signal is the original signal, we do not encode or decode, just send
  - id: send_raw
    then:
      - remote_transmitter.transmit_raw:
          code: !lambda return id(send_data_vector);
          carrier_frequency: 38000Hz
          repeat: 1

  # Used to indicate whether the signal can be sent
  # If there is a signal, turn on the switch
  # Otherwise, turn off the switch
  - id: is_learned_signal_script
    parameters:
      is_learned_signal: bool
    then:
      - lambda: |-
          if (is_learned_signal) {
            id(is_learned_signal_switch).turn_on();
          } else {
            id(is_learned_signal_switch).turn_off();
          }

interval:
  - id: blink_rgb
    interval: 500ms
    then:
      - lambda: |-
          if (!id(is_wifi_connected)) {
            static int state = 0;
            if (state == 1) {
              auto call = id(rgb_light).turn_on();
              call.set_rgb(1.0, 1.0, 1.0);
              call.set_transition_length(0);
              call.perform();
            } else {
              auto call = id(rgb_light).turn_off();
              call.set_transition_length(0);
              call.perform();
            }
            state = !state;
          }
# ==== AUTO-SYNC END ====
- Customize Your Configuration
- Wi-Fi: If you don't use
!secretfiles, uncomment thewifi:section and replaceYour_WiFi_SSIDandYour_WiFi_Passwordwith your own Wi-Fi information. - Select the correct AC protocol: This is the most critical step! The example uses
platform: gree. If your air conditioner is not a Gree, replace it with your brand's platform. How to find supported brands? Please visit the ESPHome Climate Components page, which lists all supported brands and their platform names (e.g.,daikin,midea,panasonic_ac, etc.).- After selecting the corresponding platform, you may also need to fine-tune parameters like
modelor supported modes according to the documentation for that platform.
- After selecting the corresponding platform, you may also need to fine-tune parameters like
- Wi-Fi: If you don't use
- Compile and Flash
- Save your YAML configuration.
- Connect your XIAO IR Mate to the computer running HA via a USB cable.
- Click the INSTALL button on the device card.
- Select the "Plug into this computer" option.
- ESPHome will compile the firmware and flash it to your device through the browser. Follow the on-screen prompts to complete the process.
- After a successful flash, the device will automatically reboot and connect to your configured Wi-Fi.
Usage in Home Assistant
After flashing and rebooting, your device will appear in Home Assistant as a new Climate entity (e.g., climate.gree_air_conditioner). You can add a "Thermostat Card" to your dashboard to get a fully functional AC control panel, allowing you to freely adjust the temperature, mode, fan speed, and swing, just like a native smart air conditioner!
Further Outlooks: Open Your Mind
Congratulations! By now, you've mastered the two core uses for the XIAO IR Mate: one is the out-of-the-box "universal remote learning" function, and the other is the "professional climate controller" mode for precise air conditioner control.
But don't stop there, because this is just the beginning! The real fun of the XIAO IR Mate lies in its incredible flexibility. Think of it as a "creative building block" defined by you, which you can use to build things far beyond your imagination. Here are two mind-opening ideas to inspire you:
Idea 1: Revive Old Remotes into Universal Scene Switches
Application Scenario
Look around you. Do you have a lot of idle old remotes lying around? Remotes for old TVs, DVDs, or stereos, with plenty of buttons and a great feel, now just collecting dust in a drawer. Wouldn't it be cool if you could use the buttons on these remotes to control your smart lights, robot vacuum, or even complex "welcome home" scenes?
How It Works
The core of this idea is to transform the XIAO IR Mate from a "transmitter" into a "listener." It no longer actively controls other devices but quietly listens for signals from any old remote, then tells Home Assistant: "I heard a signal, you decide what to do!"
-
Implementation Steps
-
Configure a "Listener" Firmware: In your ESPHome firmware, the core configuration is the
remote_receivercomponent. The device's only job after powering on is to "listen up" for IR signals. -
Identify Each Button's "Secret Code": Pick up an old remote and press any button while pointing it at the device. In the ESPHome logs, you'll see the button's unique IR code (like a string of
RAWdata or anNECprotocol code). Jot down this "secret code." -
Create Automation Rules in HA: In Home Assistant, set up an automation with the trigger condition: "When XIAO IR Mate detects a specific IR secret code."
-
Define the Action: The action for the rule can be anything! For example:
-
When it detects the "Volume +" button from the TV remote -> Start the robot vacuum to begin cleaning.
-
When it detects the "Play" button from an Apple Remote -> Turn on the bathroom light.
-
When it detects the "Red" button from the DVD remote -> Execute the "Away Mode" scene.
-
-
-
Advantages of This Approach
-
Upcycling and Eco-Friendly: Gives new life to idle hardware, putting e-waste back to work, which saves money and is good for the environment.
-
Real Tactile Button Experience: Compared to a touchscreen, a physical remote with dozens of distinct, solid-feeling buttons is more direct and satisfying for many scenarios.
-
High Wife Acceptance Factor (WAF): For family members not used to phone apps or smart speakers (like the elderly or children), telling them "press this button to turn on the light" is the most intuitive and easy-to-learn interaction.
-
A "Smart Switch" That Doesn't Need Recharging: A traditional remote's batteries can often last a year or two, which is far more convenient than many smart gadgets that need frequent charging.
-
Idea 2: Create a Universal "IoT Magic Button"
Core Concept
Does the touch button on the device really have to be just for controlling IR? Of course not! We can turn it into a magic button that controls anything in your house. The key is to "decouple"—to completely separate the physical action of "pressing the button" from the smart action of "what actually happens."
-
Implementation Steps
-
Make the Button Just a "Reporter": In the firmware, configure the touch button (for single-tap, double-tap, long-press) not to perform any specific task, but only to send an "event notification" to Home Assistant. For example, on a double-tap, it just reports to HA: "Hey! I was double-tapped!"
-
Let HA Be the "Commander": In Home Assistant, create automations that specifically listen for these various "reports" (events) from the button.
-
Connect Everything, Do Anything: Once HA receives a report, it can command any device in your home to act!
-
Receives a "single-tap" report -> Toggles all the Zigbee lights in the house on/off.
-
Receives a "double-tap" report -> Commands the robot vacuum to start cleaning.
-
Receives a "long-press" report -> Executes a "Movie Mode" scene, closing the curtains, dimming the lights, and turning on the projector and sound system.
-
-
-
Advantages of This Approach
-
Break Boundaries, Endless Possibilities: Your touch button is no longer just a part of an "IR remote," but a physical switch for your entire smart home, capable of controlling any device connected to HA.
-
Define Flexibly, Change on a Whim: Today a double-tap starts the vacuum, but tomorrow you want it to play music? Just edit the automation in the HA interface, no need to touch the firmware at all.
-
The Most Intuitive Interaction: Give your family the simplest way to control things. A physical button with haptic feedback is often much more convenient and elegant than opening a phone app.
-
In short, don't just see the XIAO IR Mate as an IR tool. Think of it as a mini-robot connected to Wi-Fi, with a sense of touch and a "voice" (the IR emitter). What it can do is limited only by your imagination!
Frequently Asked Questions (FAQ)
Q: Why can't I find the XIAO IR Mate's hotspot on my phone? A: Please confirm that the device is properly powered via Type-C. Check if the white LED is blinking. If the light is off, try changing the cable or power supply. If the device has been successfully configured on a network before, it will not create an AP hotspot again unless the network connection fails or it has been factory reset by long-pressing the RESET button.
Q: What should I do if IR learning fails? (Factory Firmware) A: Please ensure your original remote has sufficient battery power and is held as close as possible to the IR Mate's receiver (usually the black, semi-transparent component). Also, avoid performing the learning process under strong light or near other sources of infrared interference.
Q: The device shows as offline in HA? A: Please check that your home Wi-Fi is working properly and that the IR Mate is within Wi-Fi signal range. You can try short-pressing the RESET button to reboot the device.
Q: After flashing custom firmware, how do I restore the factory firmware? A: You would need to obtain the factory firmware's
.binfile or its ESPHome YAML source file, and then flash it again via ESPHome to overwrite the custom firmware.
Q: How do I use the learned signals (factory firmware) or the AC control (advanced firmware) in automations? A: In HA's automation or script editor, choose "Call service".
Resources
Tech Support & Product Discussion
Thank you for choosing our products! We are here to provide you with different support to ensure that your experience with our products is as smooth as possible. We offer several communication channels to cater to different preferences and needs.