Getting Started with alwaysAI on NVIDIA® Jetson Devices
alwaysAI is an essential Computer Vision development platform for creating and deploying machine learning applications on Edge devices such as NVIDIA® Jetson devices. Developing and deploying these applications is simply too complex and time-consuming, requiring deep knowledge of a huge array of computer vision technologies and techniques that are more relevant and accessible to specialists than everyday developers. alwaysAI removes these barriers and makes creating computer vision apps easy, fast and effective.
Hardware supported
alwaysAI is supported by the following Jetson-related hardware:
-
Kits by Seeed:
- reComputer J1010 built with Jetson Nano
- reComputer J1020 built with Jetson Nano
- reComputer J2011 built with Jetson Xavier NX 8GB
- reComputer J2012 built with Jetson Xavier NX 16GB
-
Carrier Boards by Seeed:
- Jetson Mate
- Jetson SUB Mini PC
- Jetson Xavier AGX H01 Kit
- A203 Carrier Board
- A203 (Version 2) Carrier Board
- A205 Carrier Board
- A206 Carrier Board
-
Official Development Kits by NVIDIA:
- NVIDIA® Jetson Nano Developer Kit
- NVIDIA® Jetson Xavier NX Developer Kit
- NVIDIA® Jetson AGX Xavier Developer Kit
- NVIDIA® Jetson TX2 Developer Kit
- NVIDIA® Jetson AGX Orin Developer Kit
-
Official SoMs by NVIDIA:
- NVIDIA® Jetson Nano module
- NVIDIA® Jetson Xavier NX module
- NVIDIA® Jetson TX2 NX module
- NVIDIA® Jetson TX2 module
- NVIDIA® Jetson AGX Xavier module
Prerequisites
- Any of the above Jetson devices running JetPack 4.6 with all SDK components installed (check this wiki for a reference on installation)
- Host PC with Windows, Linux or Mac
- USB webcam or MIPI CSI camera supported by your Jetson device
Getting started
Deploying your first computer vision project only takes a couple of minutes! By the end of this wiki, you will be able to detect objects on a live video feed from a camera connected to a Jetson device and also on a pre-loaded video file.
- Setup environment for development computer
- Setup environment for Jetson device
- Sign up for alwaysAI account
- Create a project using alwaysAI dashboard
- Deploy your project on the Jetson device using development computer
- Object detection on live video feed from camera
- Object detection on pre-loaded video file
Setup environment for development computer
Now you need to setup the development environment. Here you can use either a windows, Linux or Mac computer.
In this guide, we will use a windows development computer. However, if you want to setup Mac or Linux as your developmenmt PC, please visit here to learn more.
-
Step 1. Download and install alwaysAI desktop application and command-line interface by clicking here
-
Step 2. After the installation is finished, open a command-line interface and type the following
aai -v
If you see a version number printed, you have successfully installed alwaysAI CLI. The version number at the time of writing this wiki is 1.4.3
- Step 3. Check whether OpenSSH is already installed in your OS. You need OpenSSH on the development machine to connect to your edge device and deploy the machine learning projects.
ssh -V
If you see a version number printed, you have OpenSSH already installed. For example OpenSSH_for_Windows_8.1p1, LibreSSL 3.0.2. As of late 2018, Windows 10 supports OpenSSH out of the box. Check out this article on the Microsoft docs site for more information on installing OpenSSH on Windows
Setup environment for Jetson device
Next you need to setup the environment on the edge device (Jetson device in this case).
Step 1. When running our machine learning project on the Jetson device, edgeIQ runtime is used which is available as a docker image. You do not need to install Docker because it already comes pre-installed with JetPack. However you need to add the "docker" group to your user so that you do not need root priviledges (sudo) to access Docker. Access the Jetson device and execute the following in a terminal
sudo usermod -aG docker $USER
Step 2. To apply the new group membership, log out of the Jetson device and back in, or type the following
su - $USER
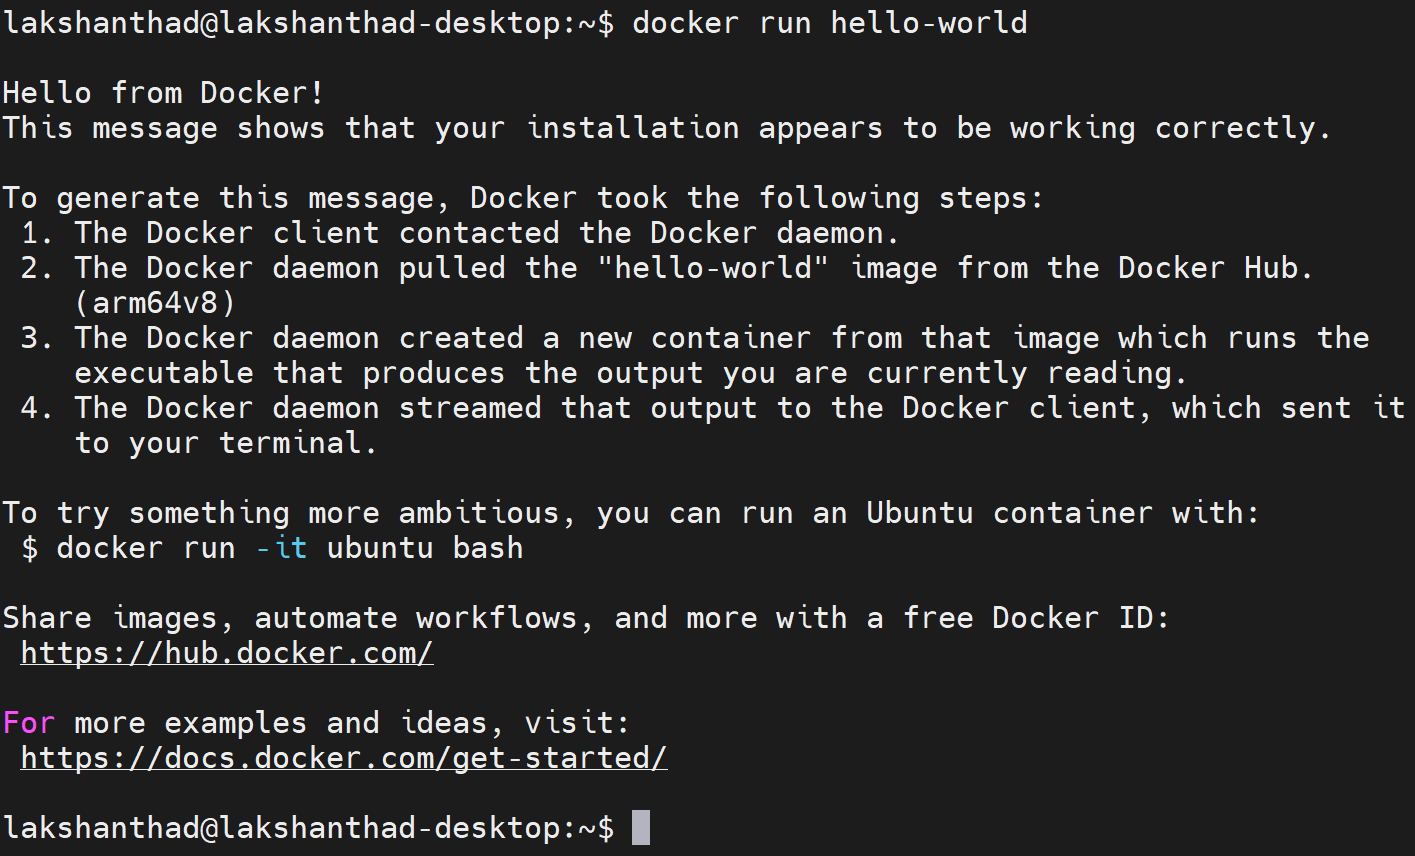
Step 3. Test your docker installation without sudo
docker run hello-world
Sign up for alwaysAI account
-
Step 1. Visit this page to sign up for an alwaysAI account
-
Step 2. Fill out the form and click Sign Up for Free to finish the sign up process
Create a project using alwaysAI dashboard
After completing the environment setups on development machine and Jetson device, signing up for an alwaysAI account, we can start to create a new object detection project using alwaysAI dashboard.
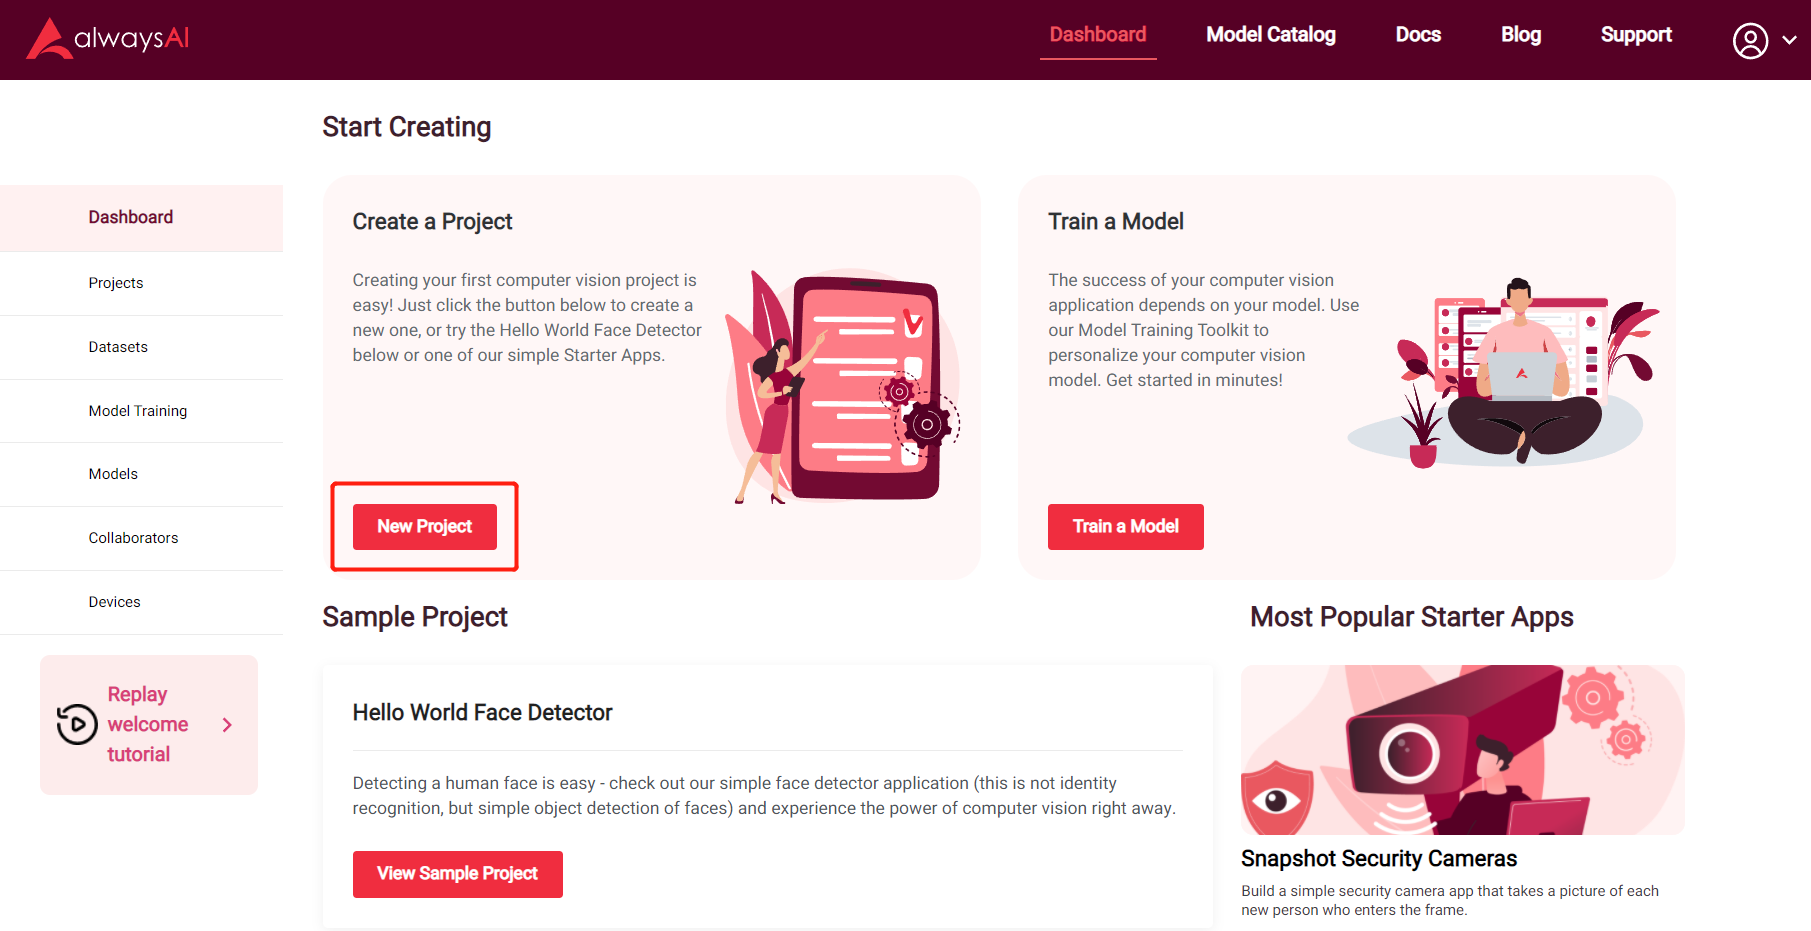
Step 1. Visit the alwaysAI dashboard and create a new project by clicking New Project button
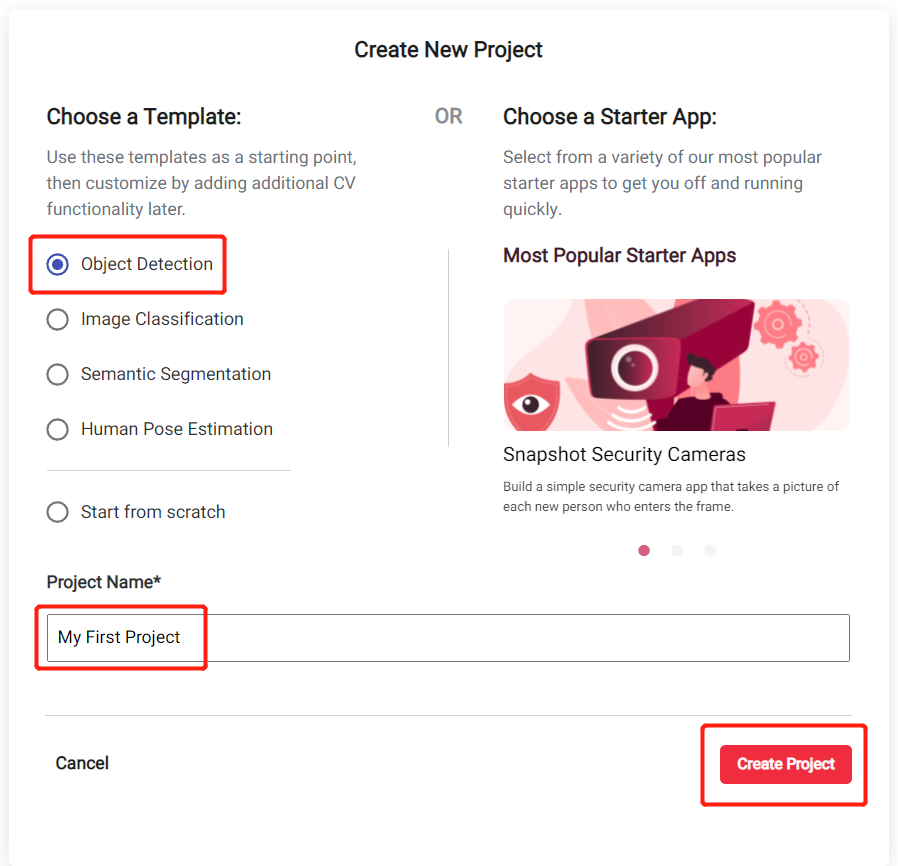
Step 2. Choose Object Detection as a starting template, enter a project name and click Create Project
Step 3. Click Click Here To View Your Project to enter your newly created project
Now you will see information about the newly created project such as the model used and other useful details
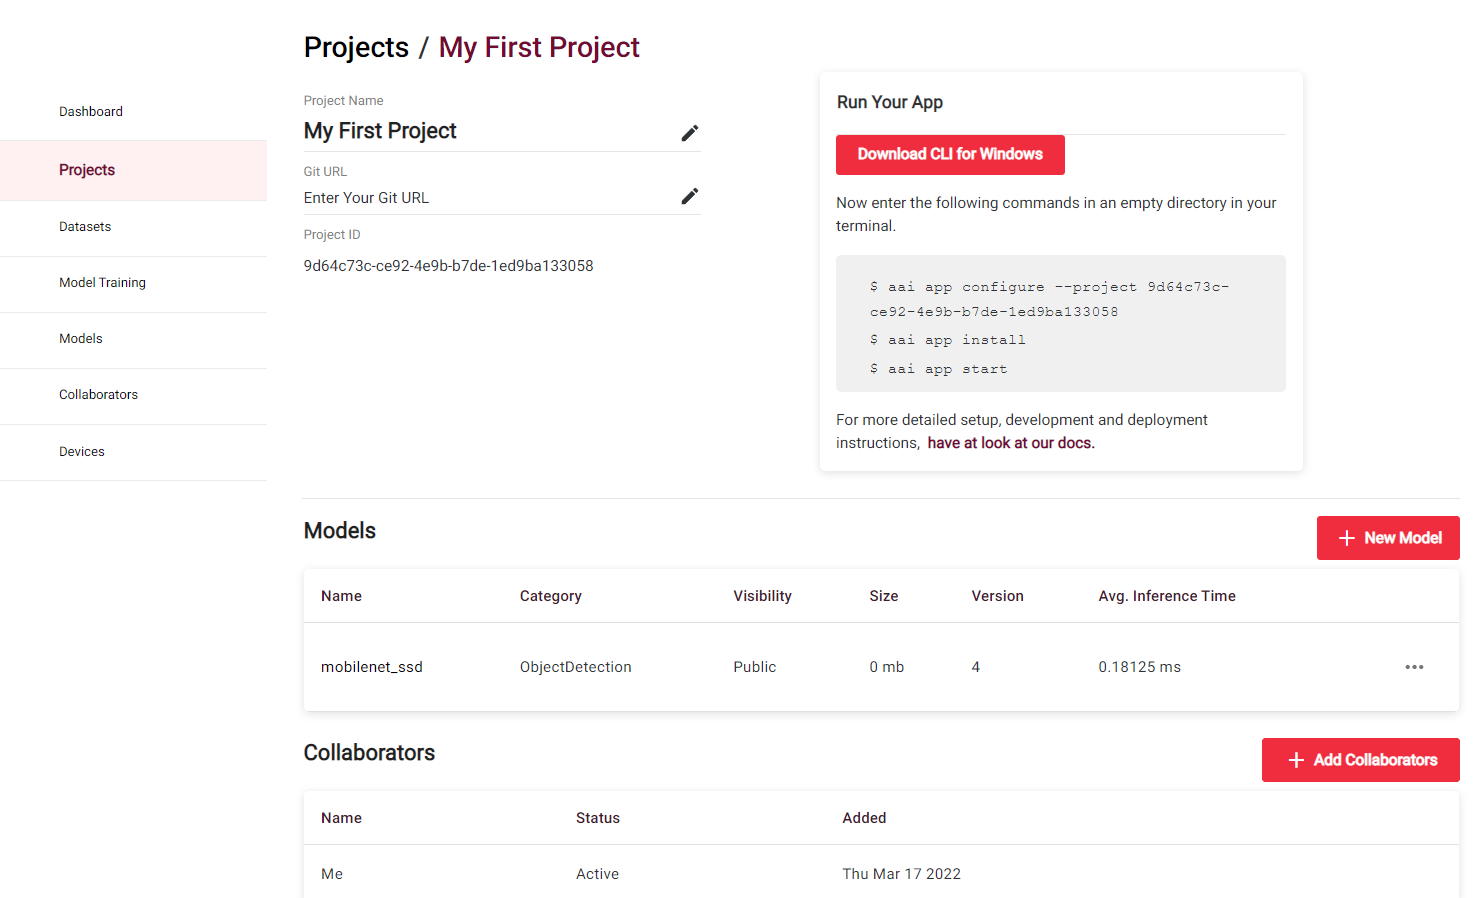
For the default Object Detection Project, mobilenet_ssd is used as the model which has been trained with Pascal VOC dataset. This means, this application can recognize 20 objects classes such as person, bird, cat, cow, dog, horse, sheep, aeroplane, bicycle, boat, bus, car, motorbike, train, bottle, chair, dining table, potted plant, sofa, tv/monitor.
However, this model is not optimized to run for Jetson hardware and will run with very low fps. Therefore we will choose a model which is optimized for Jetson Xavier NX with TensorRT support.
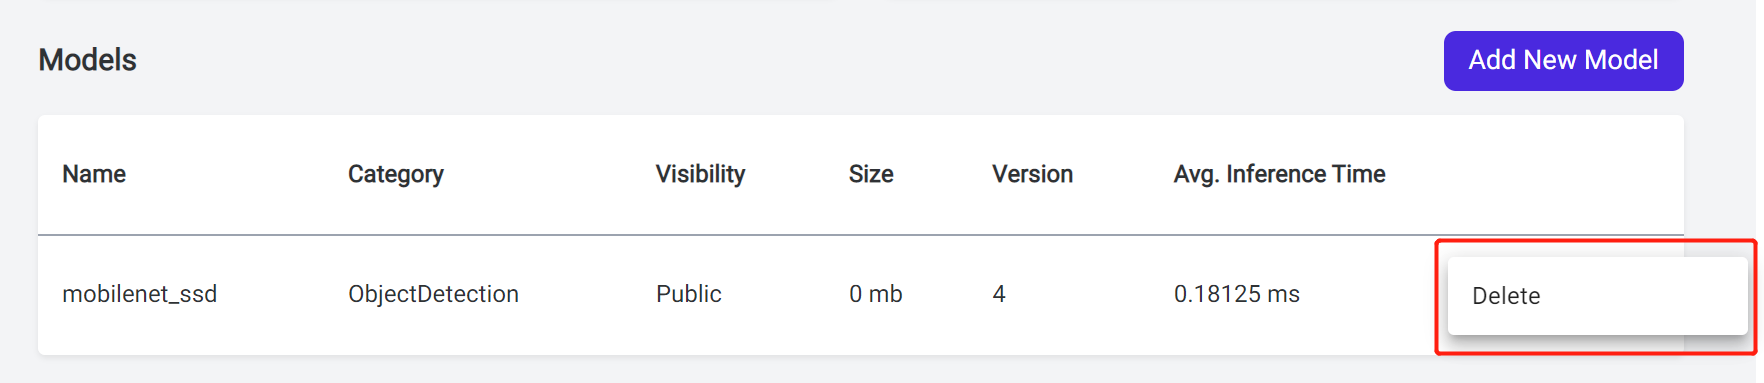
Step 4. Click on the three dots next to the model and click Delete
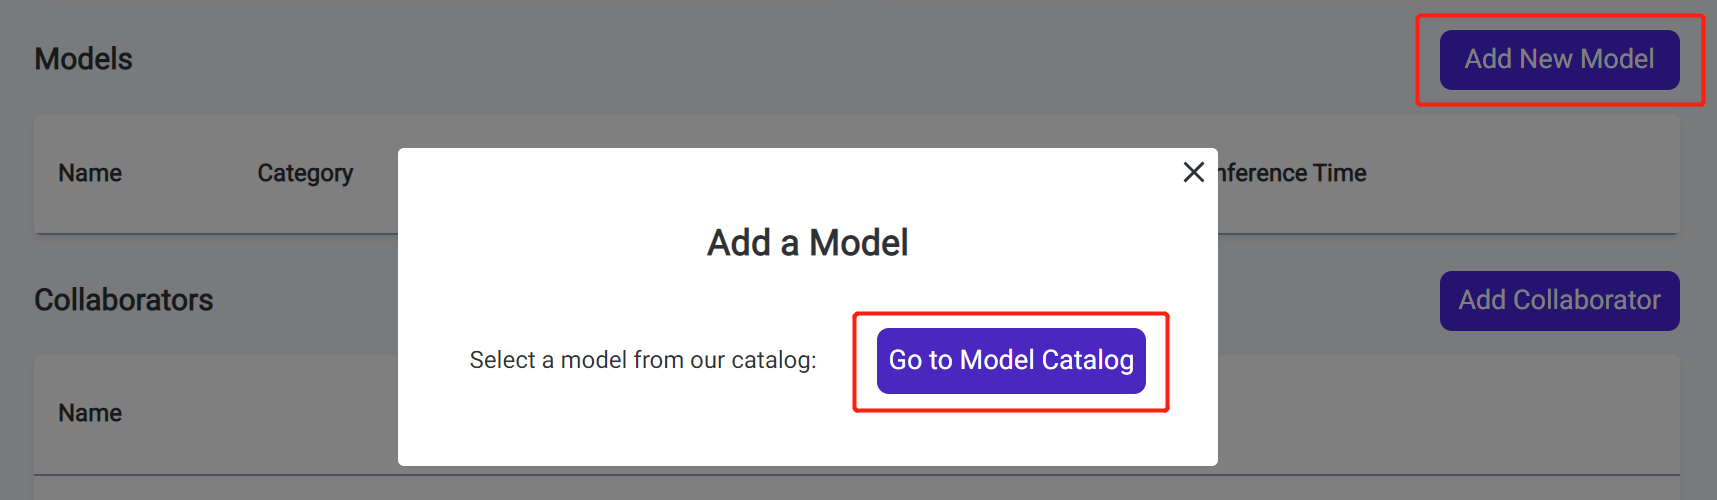
Step 5. Click Add New Model and click Go to Model Catalog to enter the alwaysAI Model Catalog
Step 6. Type ssd_mobilenet_v1_coco_2018_01_28_xavier_nx in the search box and click + Use this Model
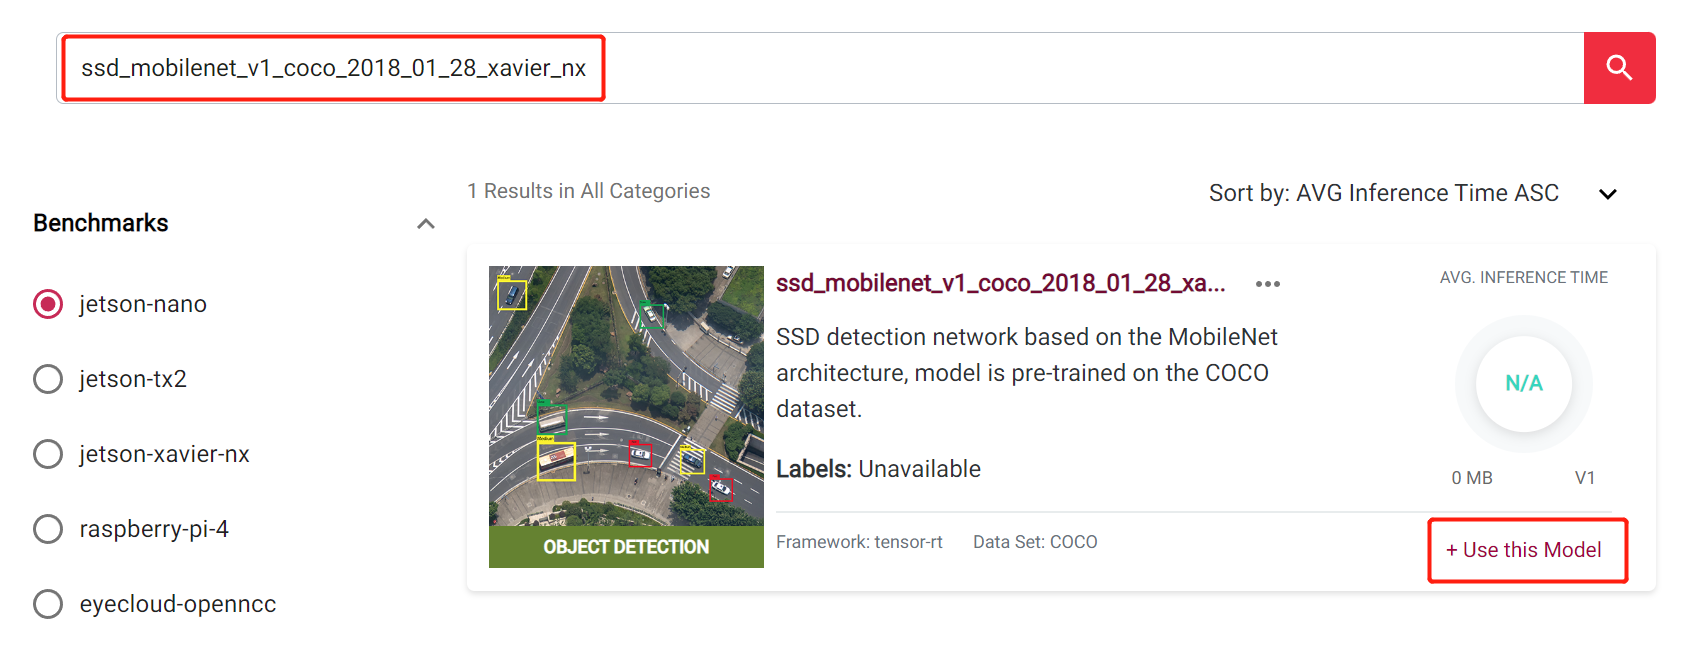
This model which has been trained with COCO dataset which can recognize 80 objects classes such as person, bicycle, car, motorcycle, airplane, bus, train, truck, boat, traffic light, fire hydrant, stop sign, parking meter, bench, bird, cat, dog, horse, sheep, cow, elephant, bear, zebra, giraffe, backpack, umbrella, handbag, tie, suitcase, frisbee, skis, snowboard, sports ball, kite, baseball bat, baseball glove, skateboard, surfboard, tennis racket, bottle, wine glass, cup, fork, knife, spoon, bowl, banana, apple, sandwich, orange, broccoli, carrot, hot dog, pizza, donut, cake, chair, couch, potted plant, bed, dining table, toilet, tv, laptop, mouse, remote, keyboard, cell phone, microwave, oven, toaster, sink, refrigerator, book, clock, vase, scissors, teddy bear, hair drier, toothbrush
Step 7. Select the previously created project (My First Project in this case) and click Add To Project
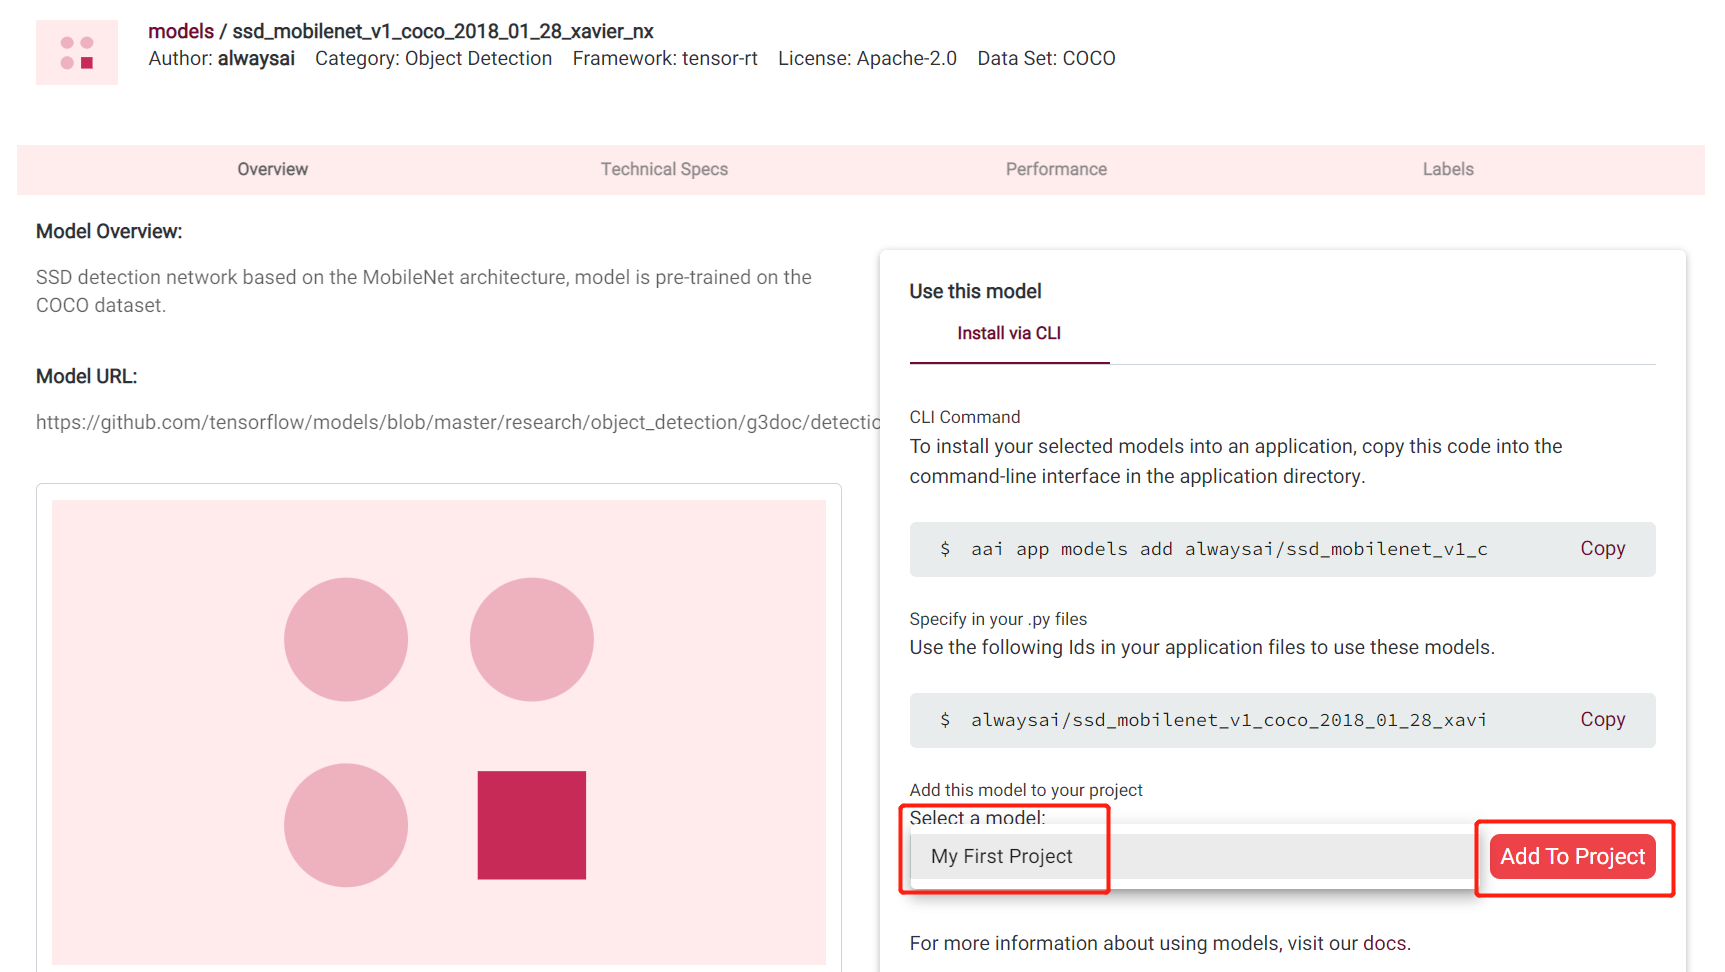
Now we have successfully added the model to our project!
Deploy your project on the Jetson device using development computer
Now we will deploy the project that we created before on to the Jetson device using the development computer via SSH
Step 1. On the development machine, create a new folder, open a command-line interface inside the new folder and type the following
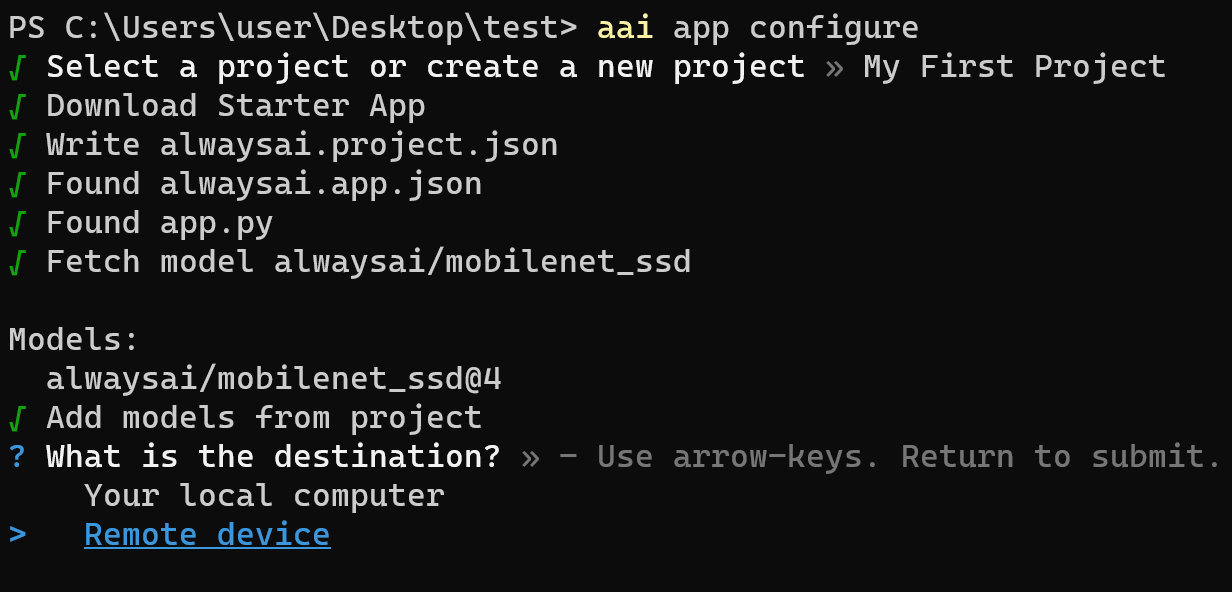
aai app configure
You wil be prompted to enter the username and password of alwaysAI account when you run the above command for the very first time
Step 2. Select the project that you created before on alwaysAI dashboard

Step 3. Choose Remote device as destination
Step 4. Press Y to create the private key file

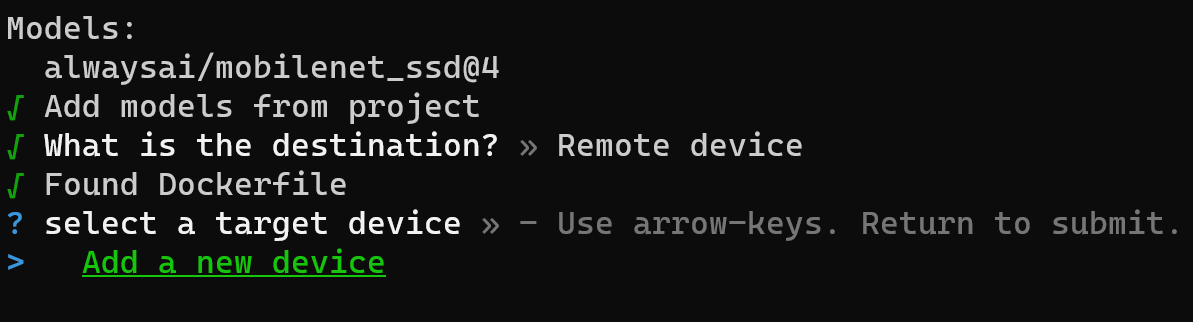
Step 5. Click Add a new device to add your Jetson device as a remote device
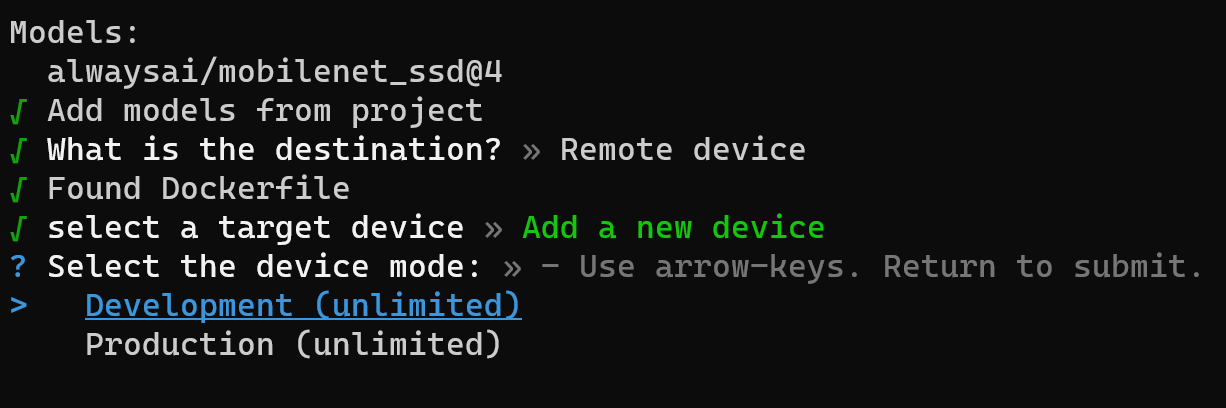
Step 6. Choose device mode as Development
Step 7. Enter a device name

Step 8. Enter the username of Jetson device along with hostname/IP address as follows

Here username of Jetson device is lakshanthad and IP address is 192.168.2.156
Step 9. Enter the password of Jetson device when prompted

Step 10. When it asks for the location to run the app, leave the default location and press ENTER. Here the default location is set as alwaysai/test. This is the project directory inside the Jetson device
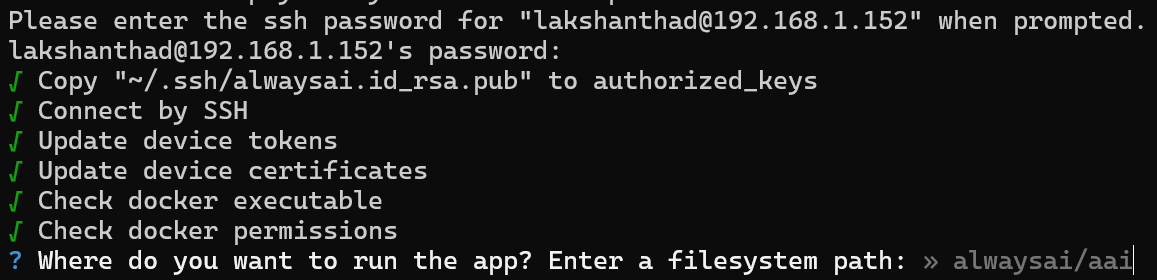
Now we have successfully initialized the project on the Jetson device using the development computer via SSH

Before moving to installing the app on the Jetson device, we need to make a small change in the main code to change the model name and the inference engine type.
Step 11. In the directory you created on your PC for alwaysAI, open app.py and change the model name and inference engine type as follows
def main():
    obj_detect = edgeiq.ObjectDetection("alwaysai/ssd_mobilenet_v1_coco_2018_01_28_xavier_nx")
    obj_detect.load(engine=edgeiq.Engine.TENSOR_RT)
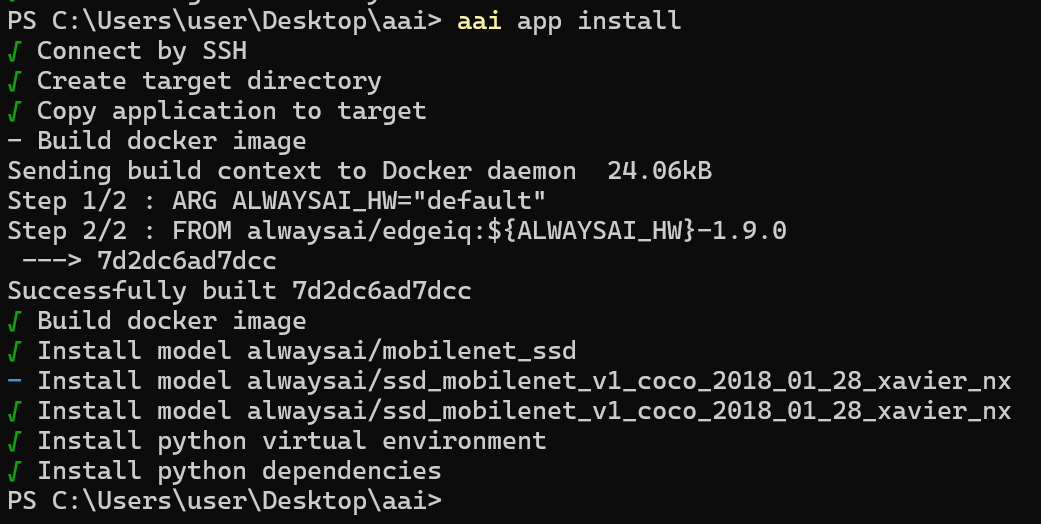
Step 12. Type the following to install the app
aai app install
You will see the following output if it is successfully installed
If you encounter errors at this step, you can first try to redeploy using the aai app install --clean method. Double check that the jetpack version is the requested version 4.6. This can be checked by typing the command sudo apt-cache show nvidia-jetpack. If the version number is correct, make sure that you completed the Jetson system installation along with theJetson SDK components**. This will help you solve most issues.
Object detection on live video feed from camera
Now we will run the object detection on a live video feed from a USB camera connected to the Jetson device. You can also use MIPI CSI cameras which are supported by the Jetson device that you are using
Step 1. Connect USB camera/ MIPI CSI camera to the Jetson device
Step 2. Run the following
aai app start
Now you will see the following output on the command-line
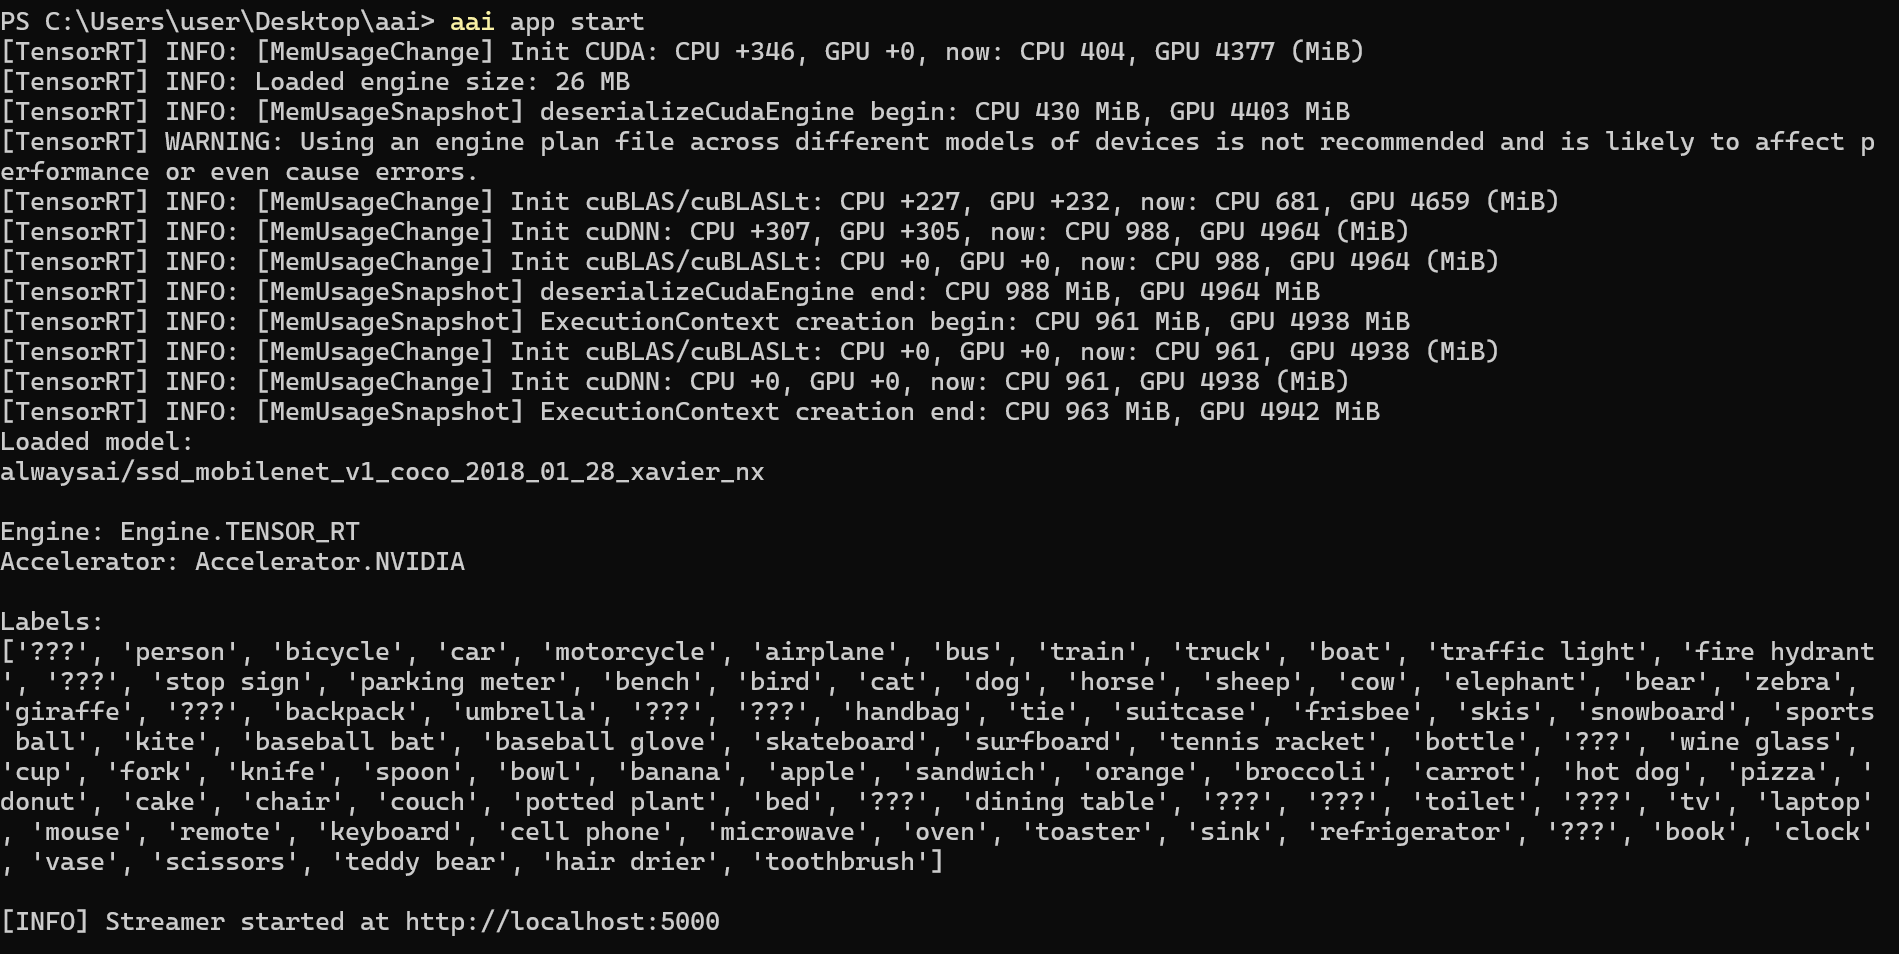
Step 3. Open a web browser and type the http://localhost:5000 to open the video stream
http://localhost:5000
As you can see, the people are being detected in real-time and the confidence percentage for each label is shown on the interface. Also the inference time on the Jetson Xavier is 0.009s which is about 111 fps.
The above is another demo using the same model.
Object detection on pre-loaded video file
Here we will run the object detection on a pre-loaded video file.
Step 1. Place the video file inside the alwaysAI project directory of Jetson device. According to our example, it is /home/<username>/alwaysai/test
Step 2. On the development computer, open app.py file inside the test folder that we created before and replace this section of the code
with edgeiq.WebcamVideoStream(cam=0) as video_stream, \
                edgeiq.Streamer() as streamer:
with this one
with edgeiq.FileVideoStream(
            'file name goes here', play_realtime=True) as video_stream, \
                edgeiq.Streamer() as streamer:
And then replace file name goes here with the name of the video file and the file extension. Make sure the filename should be inside single inverted commas.
Step 3. Intall the app again
aai app install
Step 4. Finally run the app
aai app start
Here you will see the same output on the command line as before, and once you open a web browser with the same address as mentioned before, you will see object detection being performed on the pre-loaded video, giving similar output as before.
Filter objects to be detected
You can also filter specific objects that you want the model to detect. For example, the above COCO datatset that we used is able to detect 80 object types. However, we can filter to only detect people.
You simply need to add the results.predictions line after results to app.py file
while True:
    frame = video_stream.read()
    results = obj_detect.detect_objects(framconfidence_level=.5)
    results.predictions = edgefilter_predictions_by_label(resulpredictions, ['person'])
    frame = edgeiq.markup_image(
alwaysAI Applications on GitHub
alwaysAI provides a wide-range of ready to use applications on alwaysAI GitHub repository. You can checkout the different applications here.
License Plate Detector
For demo purposes, we will explain how to deploy one of these applications which is the License Plate Detector to a Jetson device. So, you can repeat the same steps for other applications as well.
Step 1. On the development computer, create a new folder for our project and enter it
Step 2. Download this repo as a .zip or clone it if you have Git installed on your PC
By default, the model used for this example is not optimized to run on Jetson Nano. Therefore we will first load a Jetson nano optimized model.
Step 3. Enter the newly downloaded/ cloned repo, open a command-line inside and execute the following
aai app models add alwaysai/vehicle_license_mobilenet_ssd_nano
Step 4. Open app.py, change the model name and inference engine
def main():
    obj_detect = edgeiq.ObjectDetection(
            "alwaysai/vehicle_license_mobilenet_ssd_nano")
    obj_detect.load(engine=edgeiq.Engine.TENSOR_RT)
Step 5. Execute the following
aai app configure
You wil be prompted to enter the username and password of alwaysAI account when you run the above command for the very first time
Step 6. Select Create new project

Step 7. Type a Project Name
Step 8. Select to initialize project As an empty app

Step 9. Repeat the same steps as Deploy your project on the Jetson device using development computer section, starting from Step 3 until Step 11
Step 10. Once the app is installed on Jetson, run the following command to start the app
aai app start
Now you will see the following output on the command-line
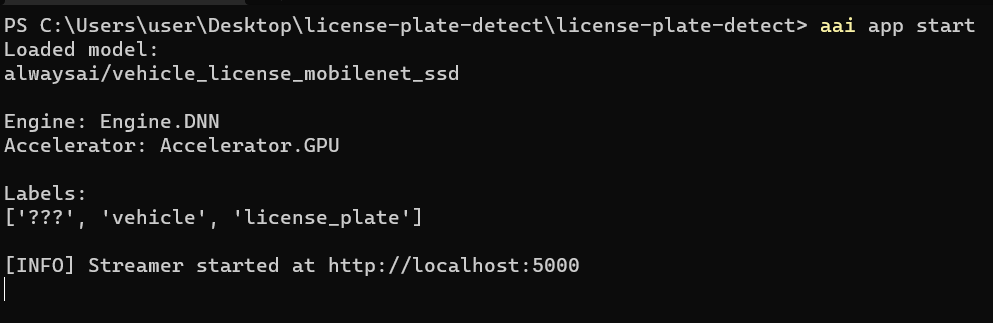
As you can see, we are using the vehicle_license_mobilenet_ssd model and this model is able to identify vehicles and license plates.
Step 11. Open a web browser on your PC and type the following to open the video stream
http://localhost:5000
In this demo, the inference is being performed on the 2 videos here and as you can see, the vehicles and the license plates on the video stream are being detected and the confidence percentage for each label is shown on the interface.
Use Webcam inference
If you want to perform the same inference as above on a real-time video stream from a webcam, please follow the below steps
Step 1. Navigate to the folder that we created before for our project and open app.py
Step 2. Copy and paste the code from here
Step 3. Intall the app again
aai app install
Step 4. Finally run the app
aai app start
Here you will see the same output on the command line as before, and once you open a web browser with the same address as mentioned before, you will see object detection being performed on a real-time video stream from the webcam giving similar output as before.
alwaysAI Enterprise Edition
alwaysAI also has an enterprise edition with the following features:
- Access to Freemium with 1 production device deployment for - a year
- 20 Hours of alwaysAI Cloud model training
- 30 days access to alwaysAI Cloud Dataset Storage
You can learn more about alwaysAI Enterprise Edition here.
Train your own model and deploy
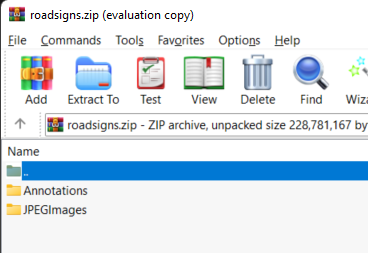
Step 1. Prepare your dataset for training. Make sure your dataset is in PascalVOC format and then arrange all the images and labels in 2 directories and zip the file as follows
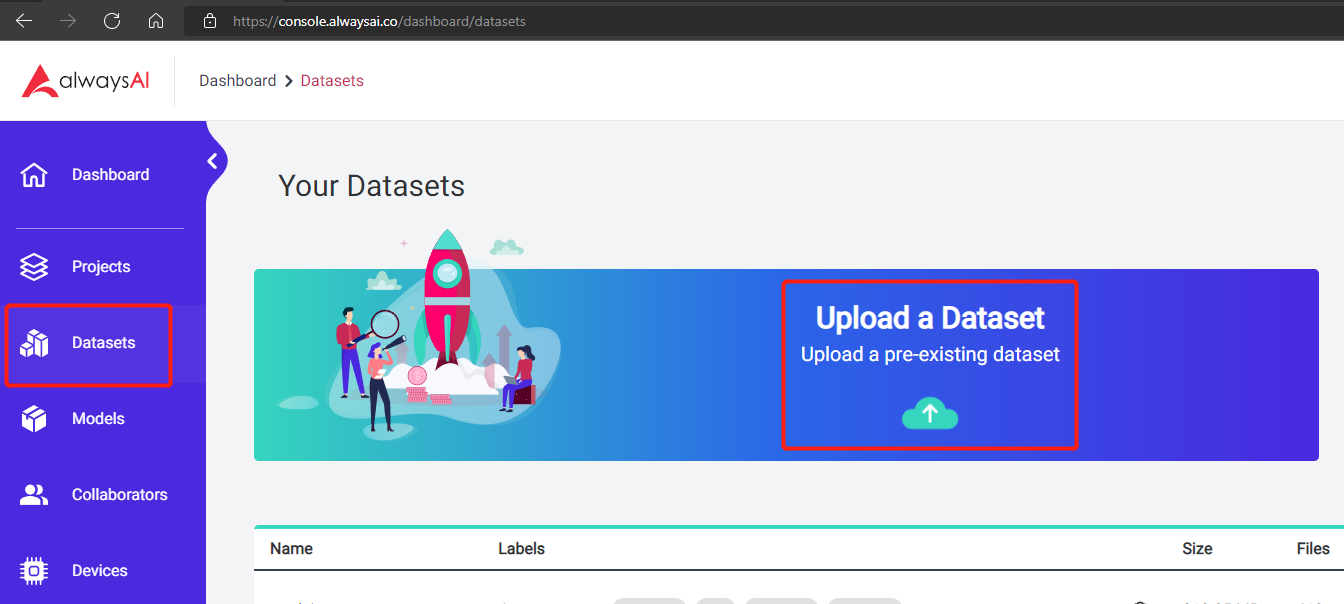
Step 2. Go to alwaysAI dashboard, click Datasets on the left navigation pane and click Upload a Dataset
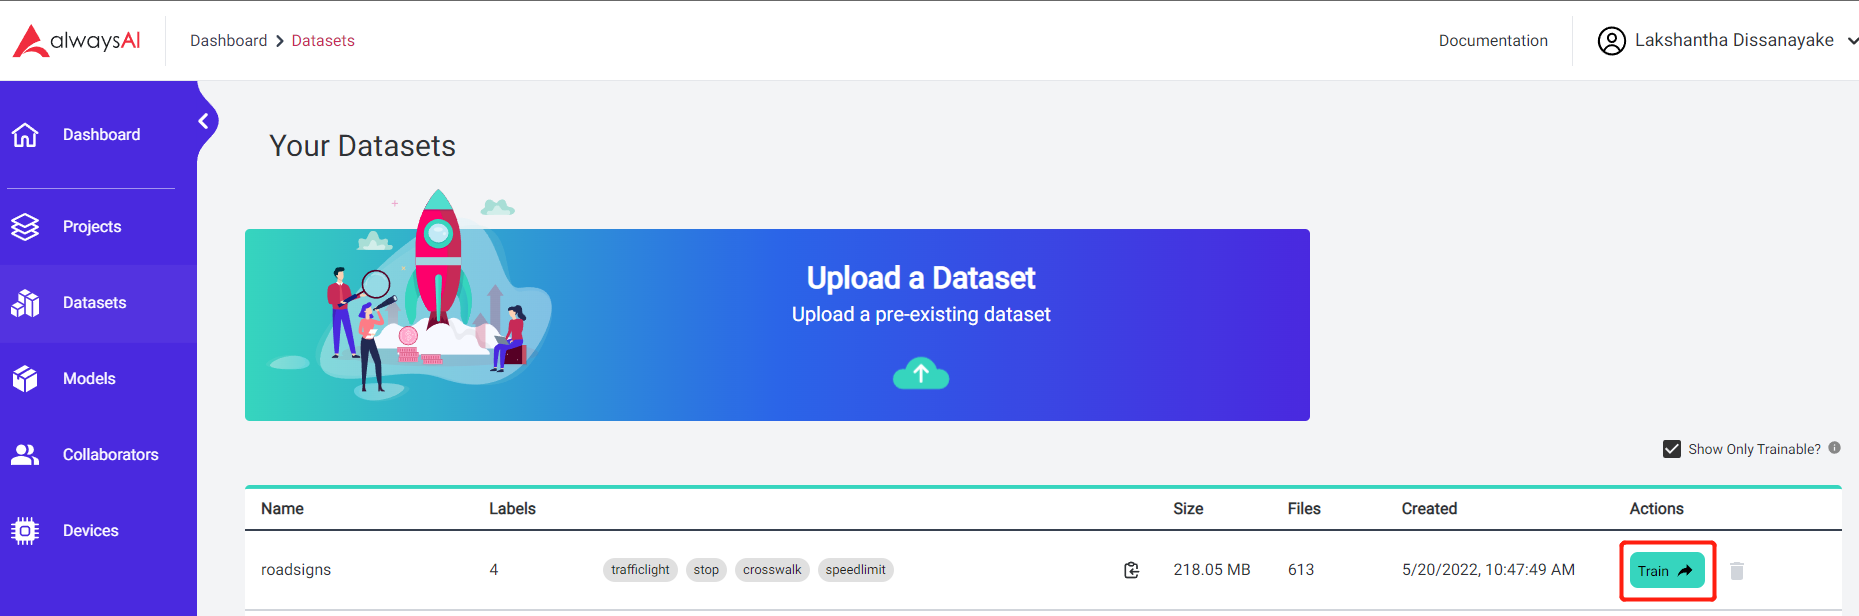
Step 3. After the dataset uploading is finished, click Train
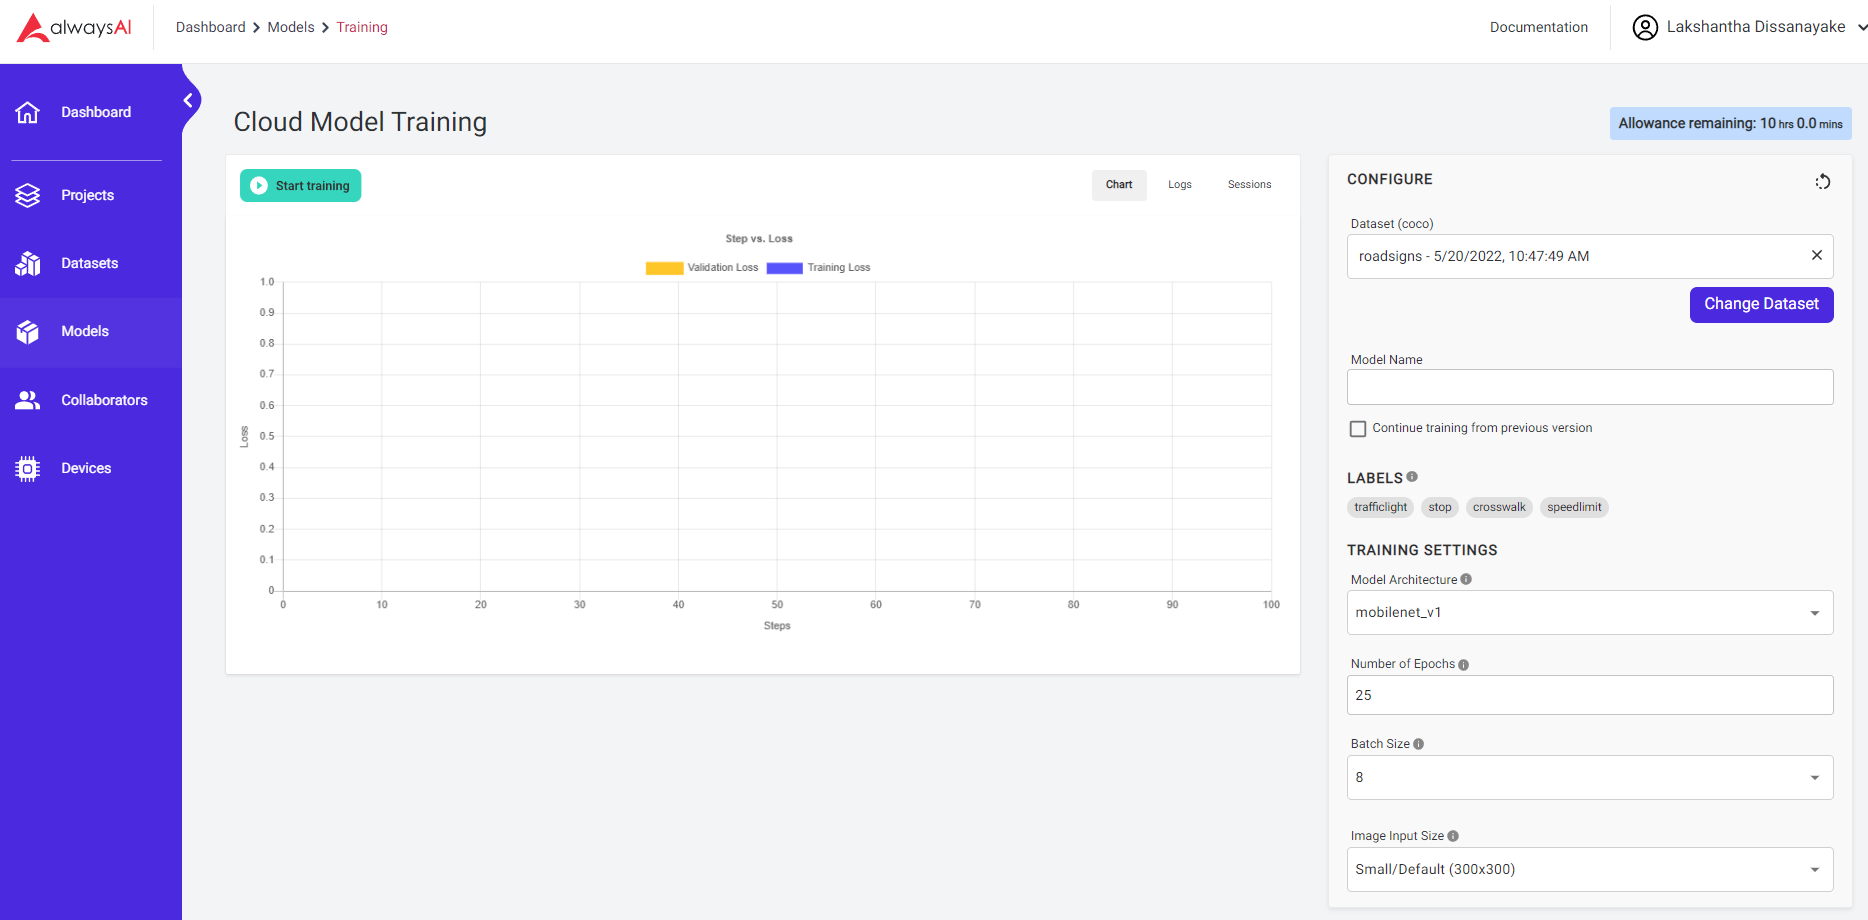
Step 4. Here you can change training settings according to your preference and then click Start training
You will see the following output after the training is finished
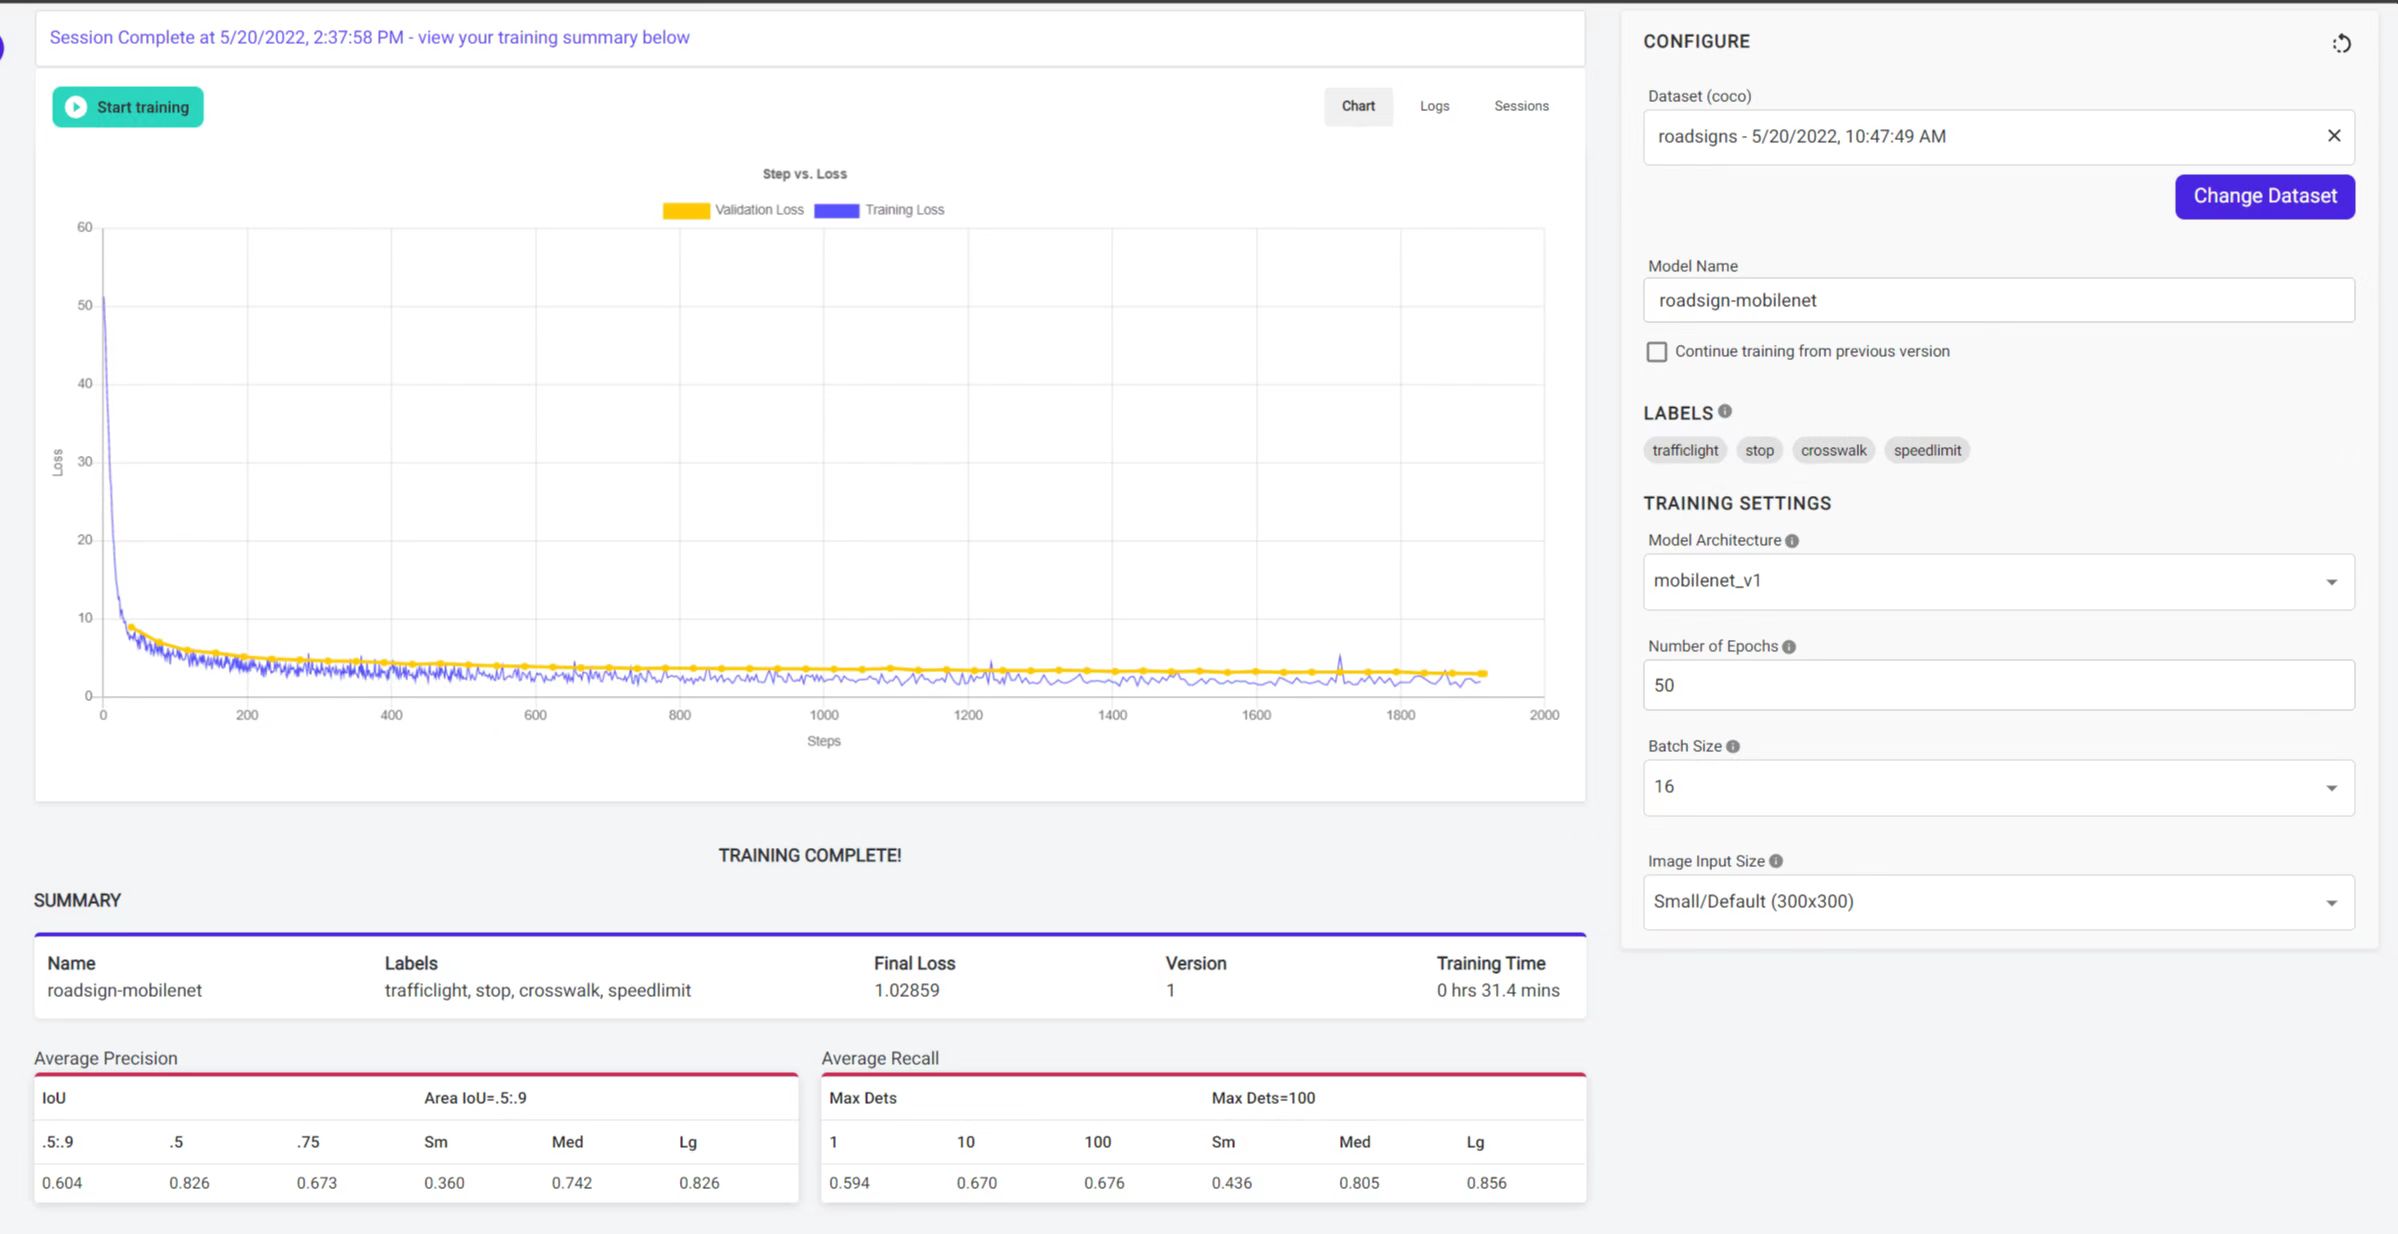
Now the trained model is available in your account. You can use this model on your object detection project as follows
Step 5. Navigate to Models > My Models and click on the model that we just trained
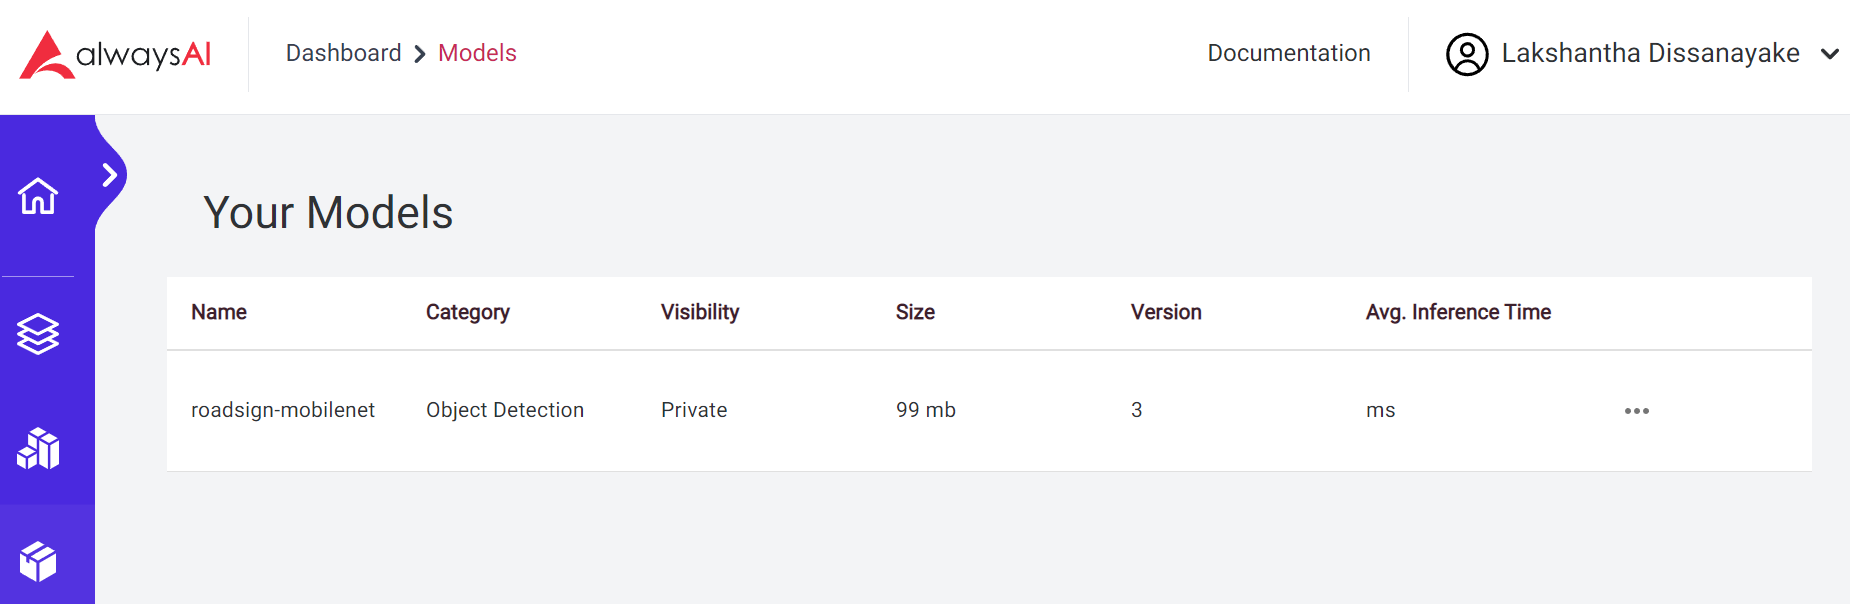
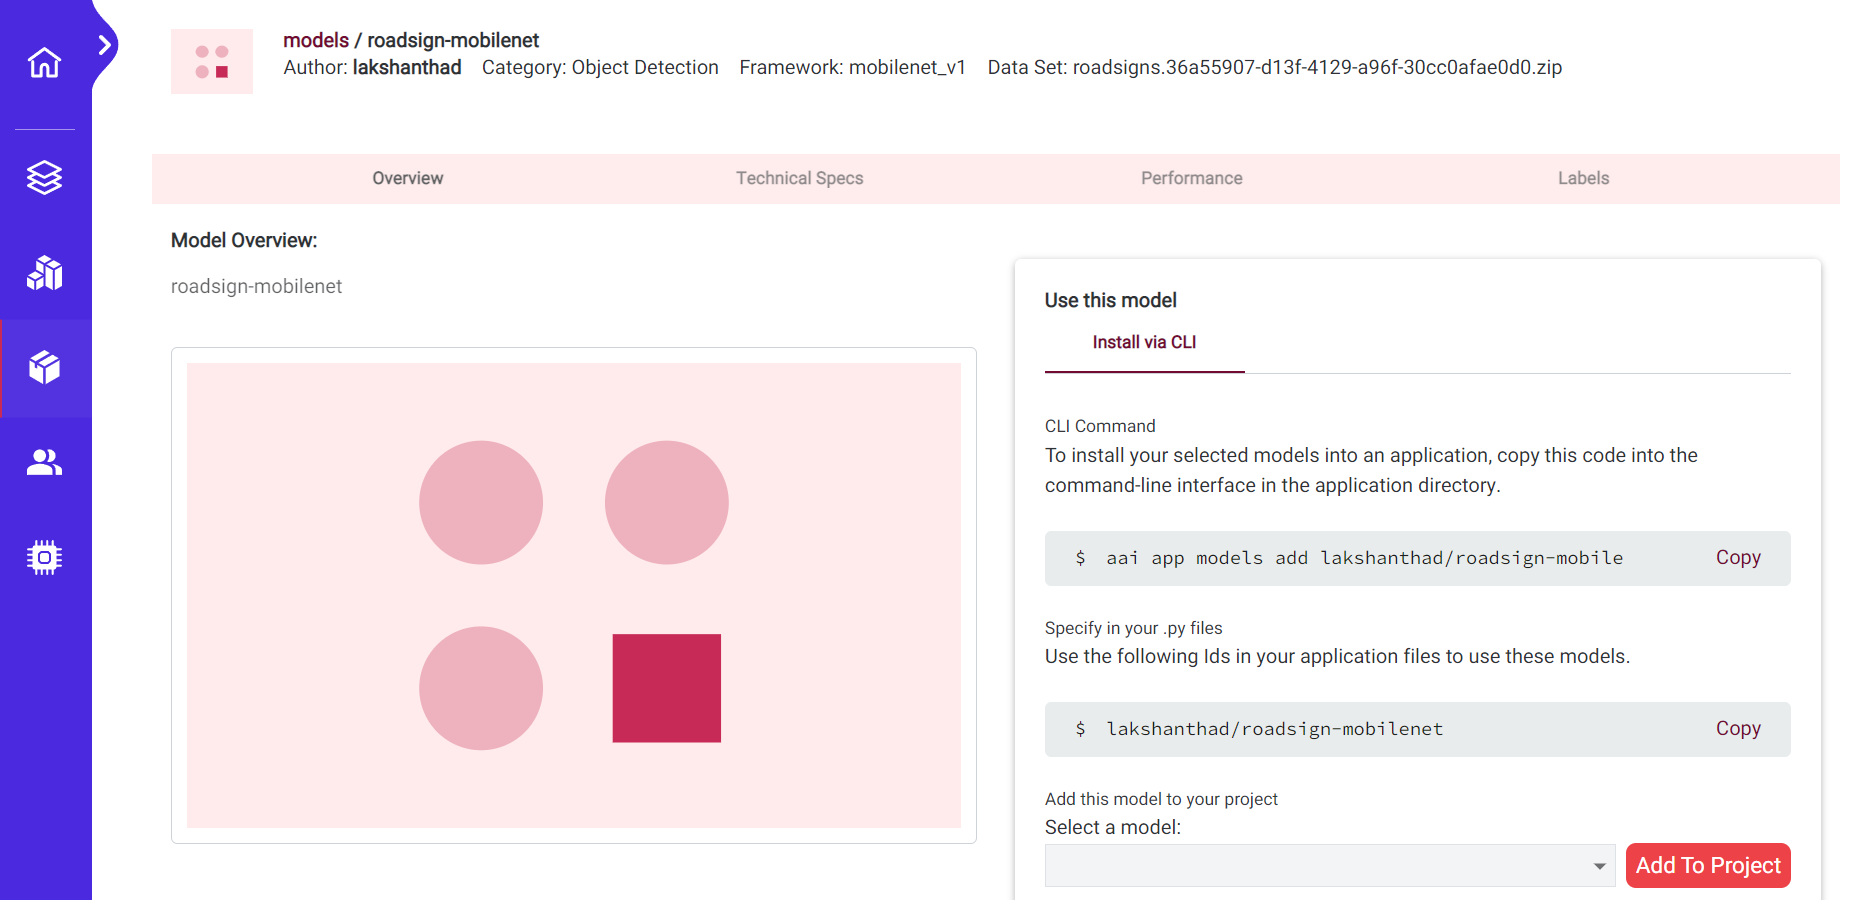
Step 6. As you can see, you can use the command below in the root directory of your object detection app
aai app models add lakshanthad/roadsign-mobilenet
Step 7. After that change the model name in app.py and run the app again
lakshanthad/roadsign-mobilenet
Resources
- [Web Page] AlwaysAI Documentation
Tech Support & Product Discussion
Thank you for choosing our products! We are here to provide you with different support to ensure that your experience with our products is as smooth as possible. We offer several communication channels to cater to different preferences and needs.