Bulk Configuration of the ChirpStack on M2 Gateway
This tutorial will guide you through using a Python script to batch-add and activate LoRaWAN devices in ABP (Activation By Personalization) mode via the gRPC interface on the gateway’s built-in ChirpStack platform. This method is ideal for scenarios requiring the deployment of a large number of devices (such as sensor nodes) at once, significantly improving configuration efficiency.
1. Preparation
Before you begin, please ensure that you meet the following requirements:
-
A M2 indoor gateway running ChirpStack, and you know its IP address.
-
You have created at least one Application and obtained its Application ID.
-
You have created a Device Profile (ABP type) and obtained its Device Profile ID.
-
You have prepared a batch of devices to be configured and have recorded the following information for each device:
dev_eui(device unique identifier)name(device name, optional)description(device description, optional)dev_addr(device address)nwk_s_key(network session key)app_s_key(application session key)
You are responsible for assigning keys to ABP devices. Ensure that each device’s dev_addr is unique within the network and that the keys comply with the LoRaWAN specification (a 32-character hexadecimal string, i.e., 16 bytes).
2. Setting Up the Environment
-
Obtain the Script Files Download or create the following two files and place them in the same directory:
chirpstack-v3-bulk-deploy.py– Main python scriptdevice_list.xlsx– Excel file containing the device list (to be filled in later)
You can also download the scripts from HERE.
- Install Python Dependencies
This script requires Python 3.7 or later and depends on
grpcio,openpyxl, andchirpstack-api. We recommend using a virtual environment to avoid contaminating your system’s Python installation.
For macOS/Linux user:
# create project directory
mkdir chirpstack-bulk-deploy && cd chirpstack-bulk-deploy

# create virtual environment
python3 -m venv .venv

# activate the virtual environment
source .venv/bin/activate

# install dependencies
pip install chirpstack-api openpyxl
For Windows user:
# create project directory
mkdir chirpstack-bulk-deploy
cd chirpstack-bulk-deploy

# create virtual environment
python -m venv .venv

# activate the virtual environment
.venv\Scripts\activate

# install dependencies
pip install chirpstack-api openpyxl
3. Prepare the Equipment Checklist (Excel file)
Create a file named device_list.xlsx using Excel, WPS, or LibreOffice. The first row must contain the column headers; the script will use these headers to identify the columns. The column names (case-sensitive) are as follows:
| dev_eui | name | description | dev_addr | nwk_s_key | app_s_key |
|---|---|---|---|---|---|
| 0016c001f0abcde1 | abp-device-1 | test device | 02010101 | 2B7E151628AED2A6ABF7158809CF4F31 | 2B7E151628AED2A6ABF7158809CF4F41 |
| ... | abp-device-2 | test device | ... | ... | ... |
dev_eui must be a 16-digit hexadecimal string (e.g., 0101010101010101).
nwk_s_key and app_s_key must be 32-digit hexadecimal strings (i.e., 16 bytes).
If a device’s dev_eui is empty, the script will automatically skip that line.
If name or description is empty, the script will fill in an empty string.
4. Modify the script configuration
Open chirpstack-v3-bulk-deploy.py and modify the configuration parameters at the top of the file to match your actual environment.
# ===== Configuration =====
GRPC_SERVER = "192.168.x.x:8080" # replace with the real IP of the gateway + ChirpStack gRPC port(default 8080)
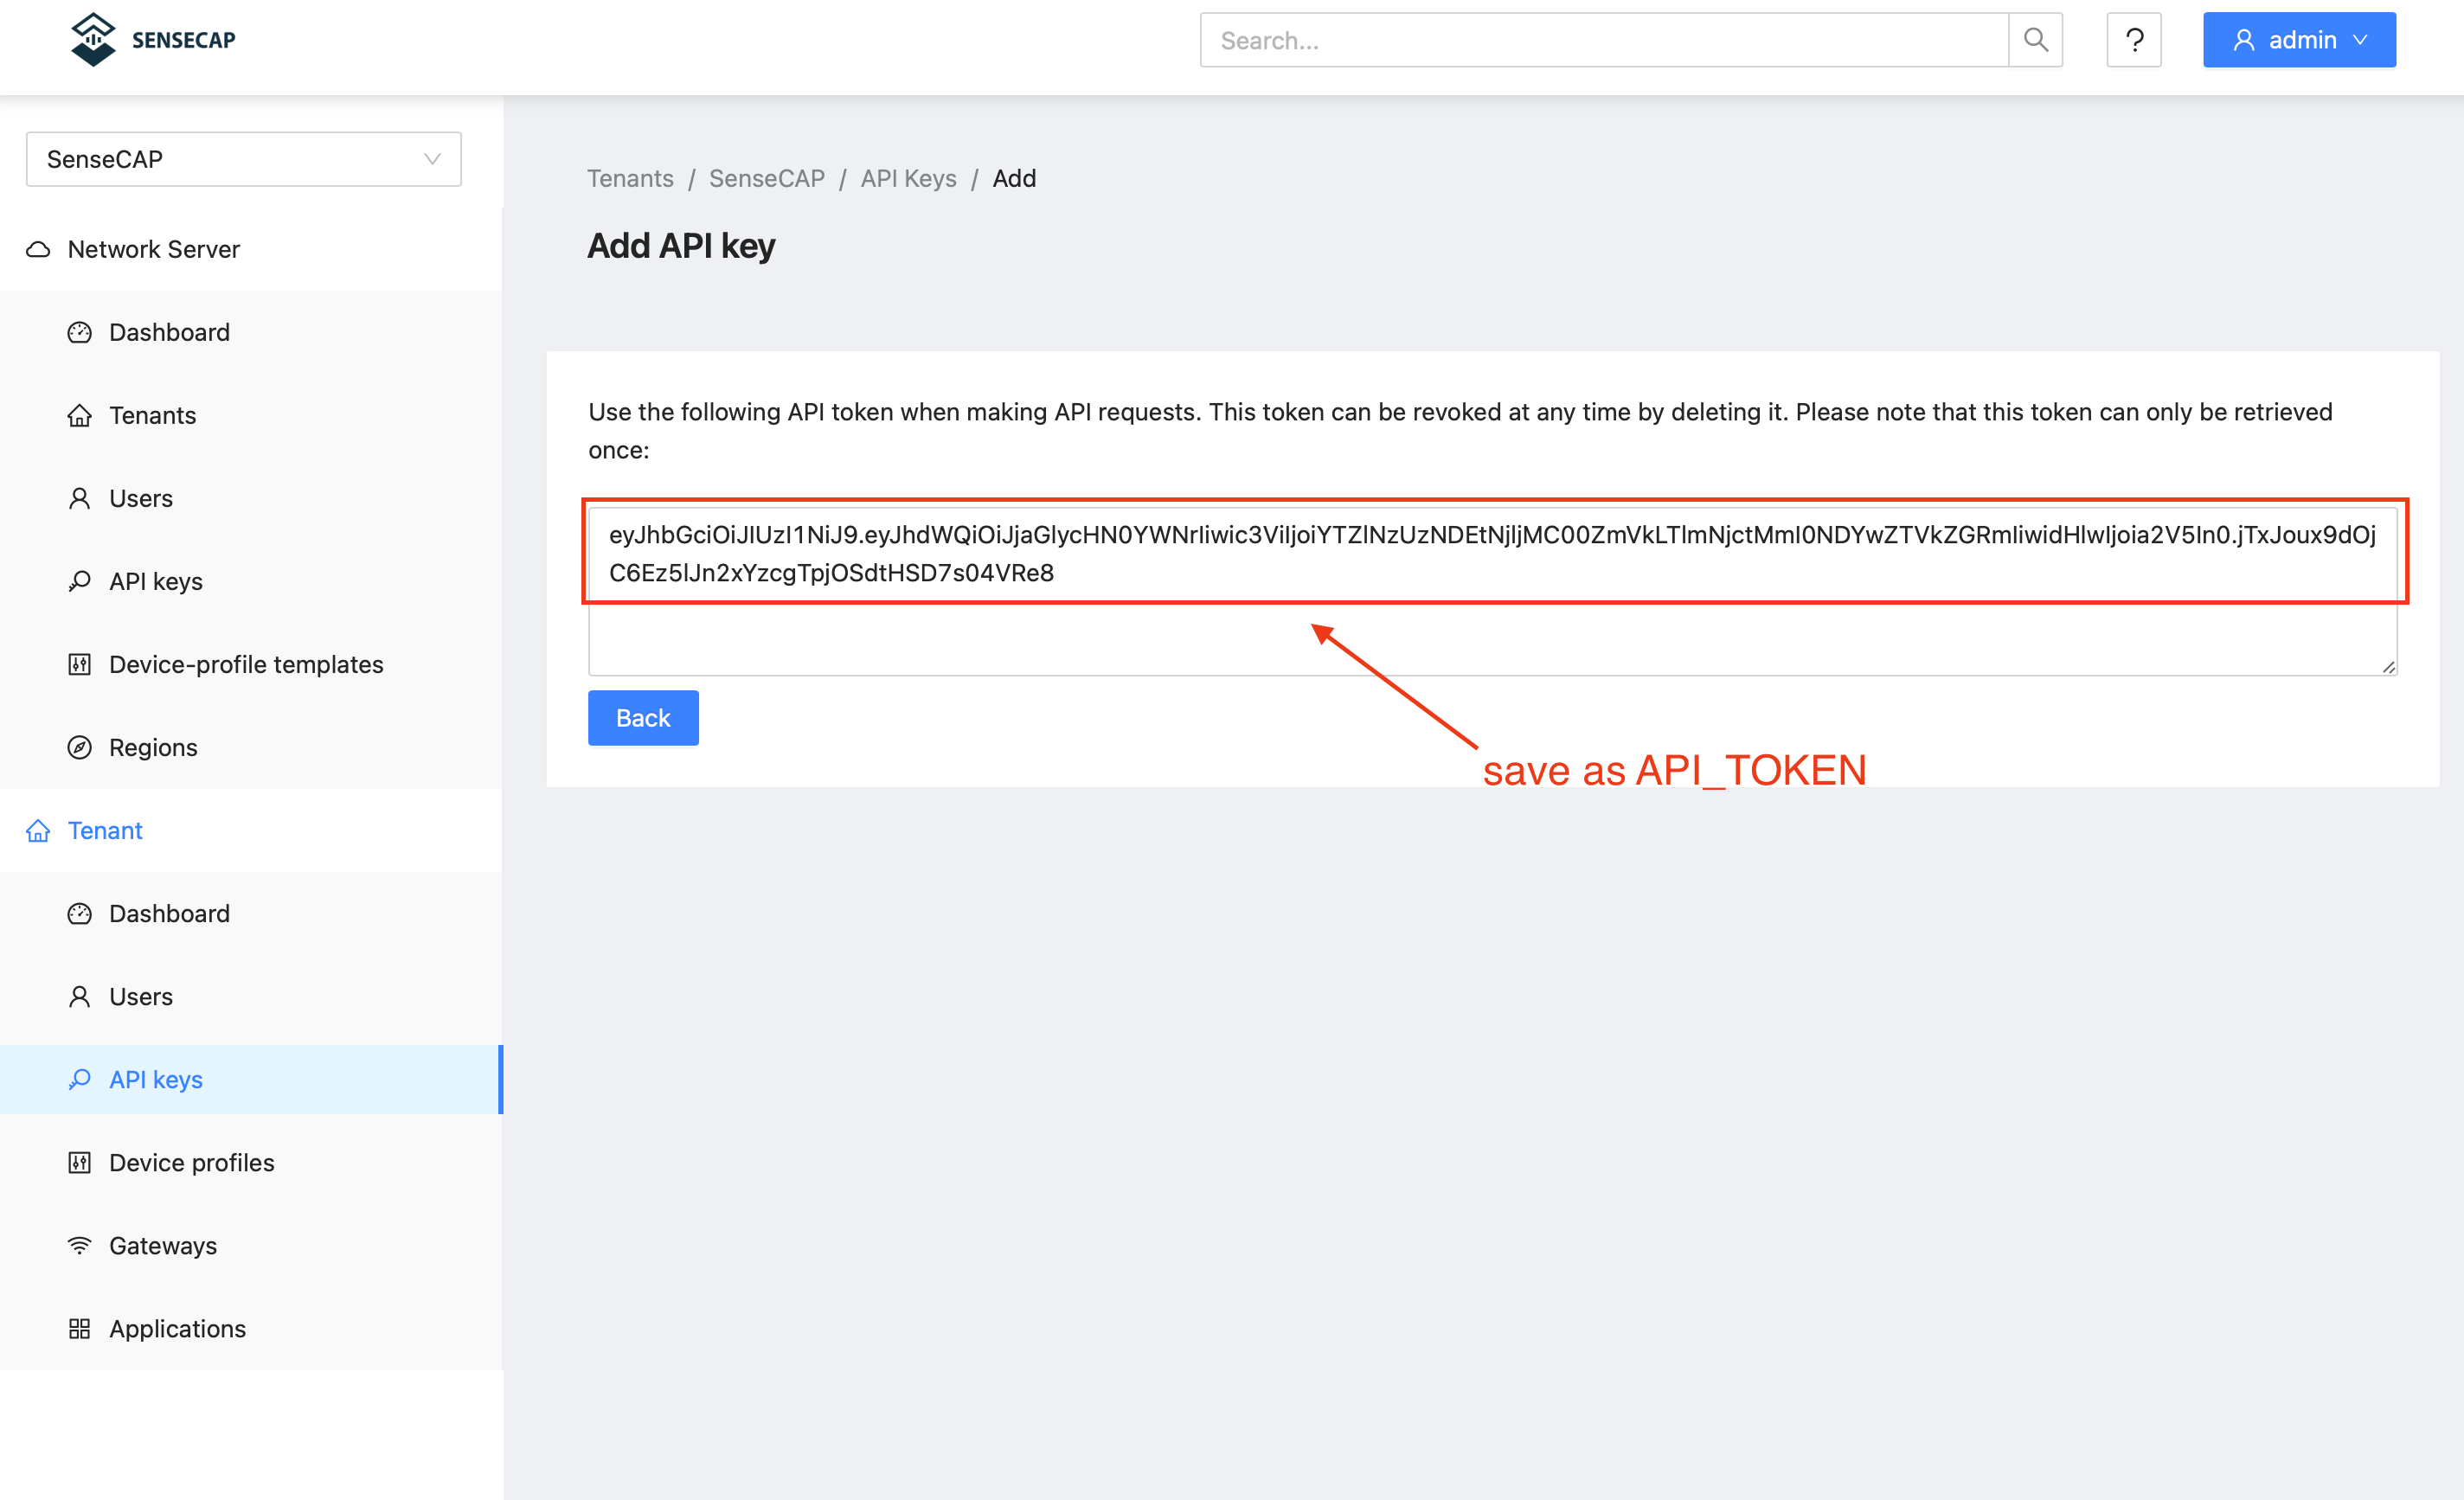
API_TOKEN = "YOUR API TOKEN"
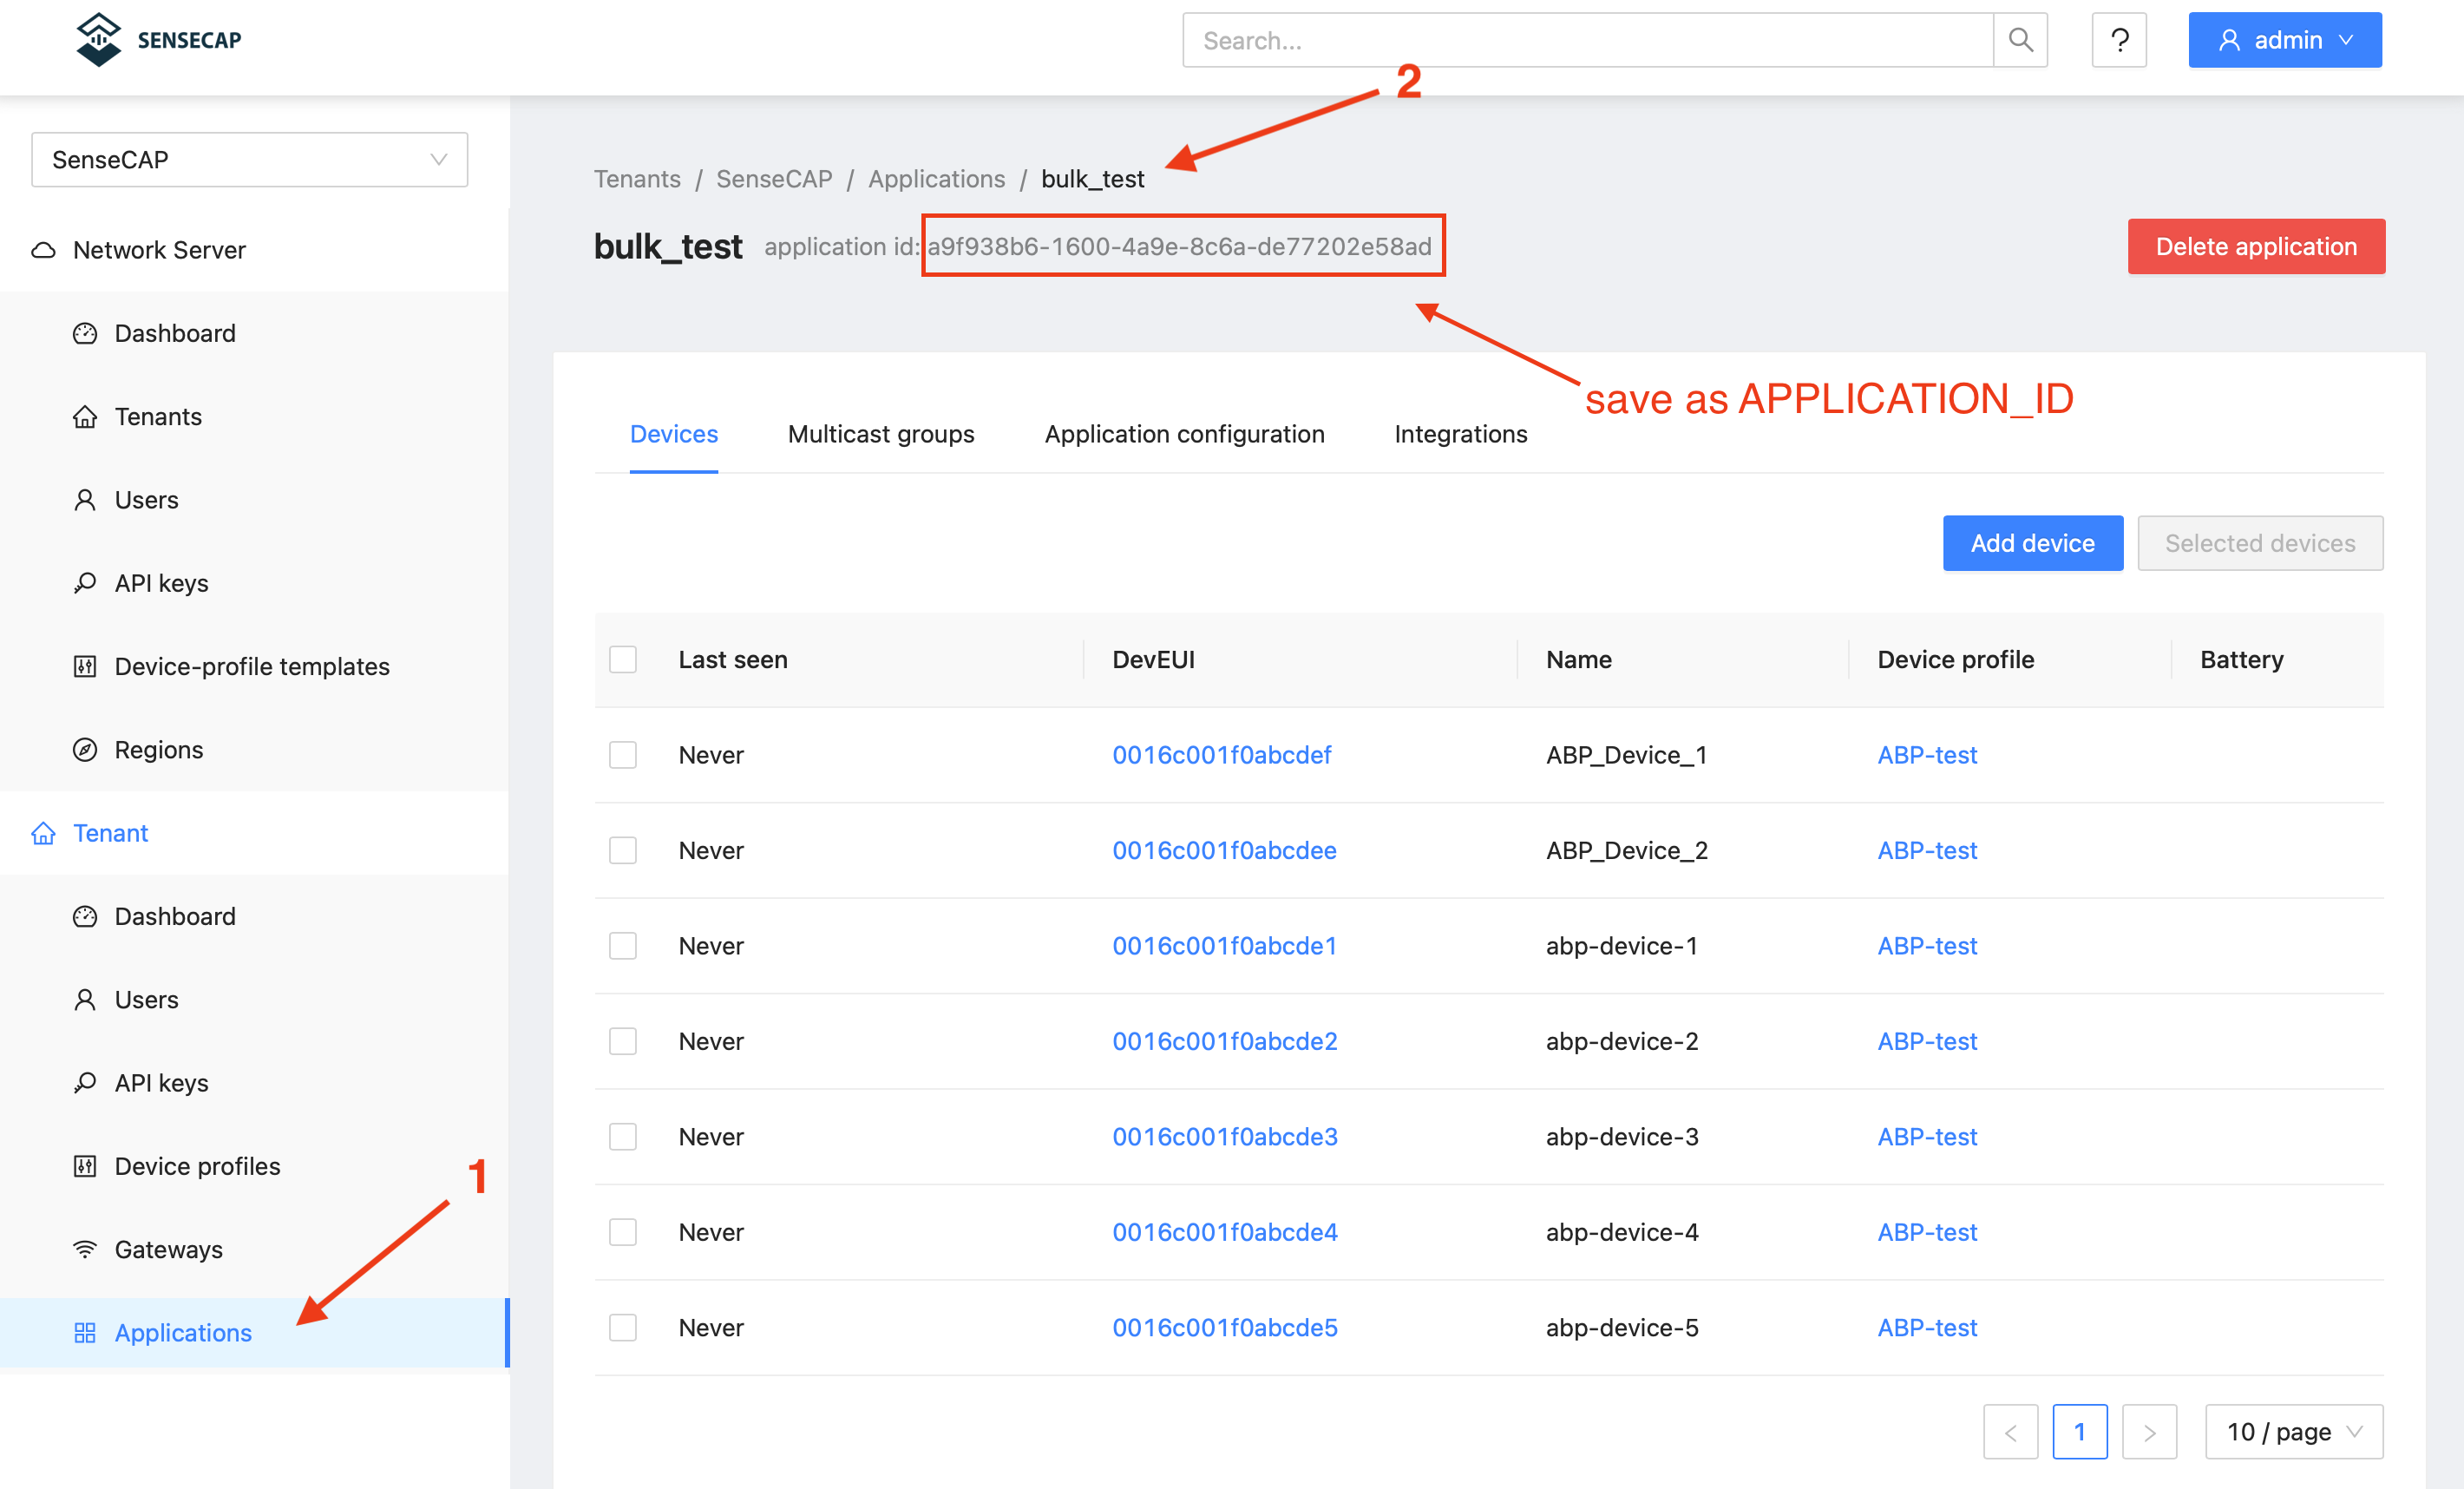
APPLICATION_ID = "YOUR APPLICATION ID"
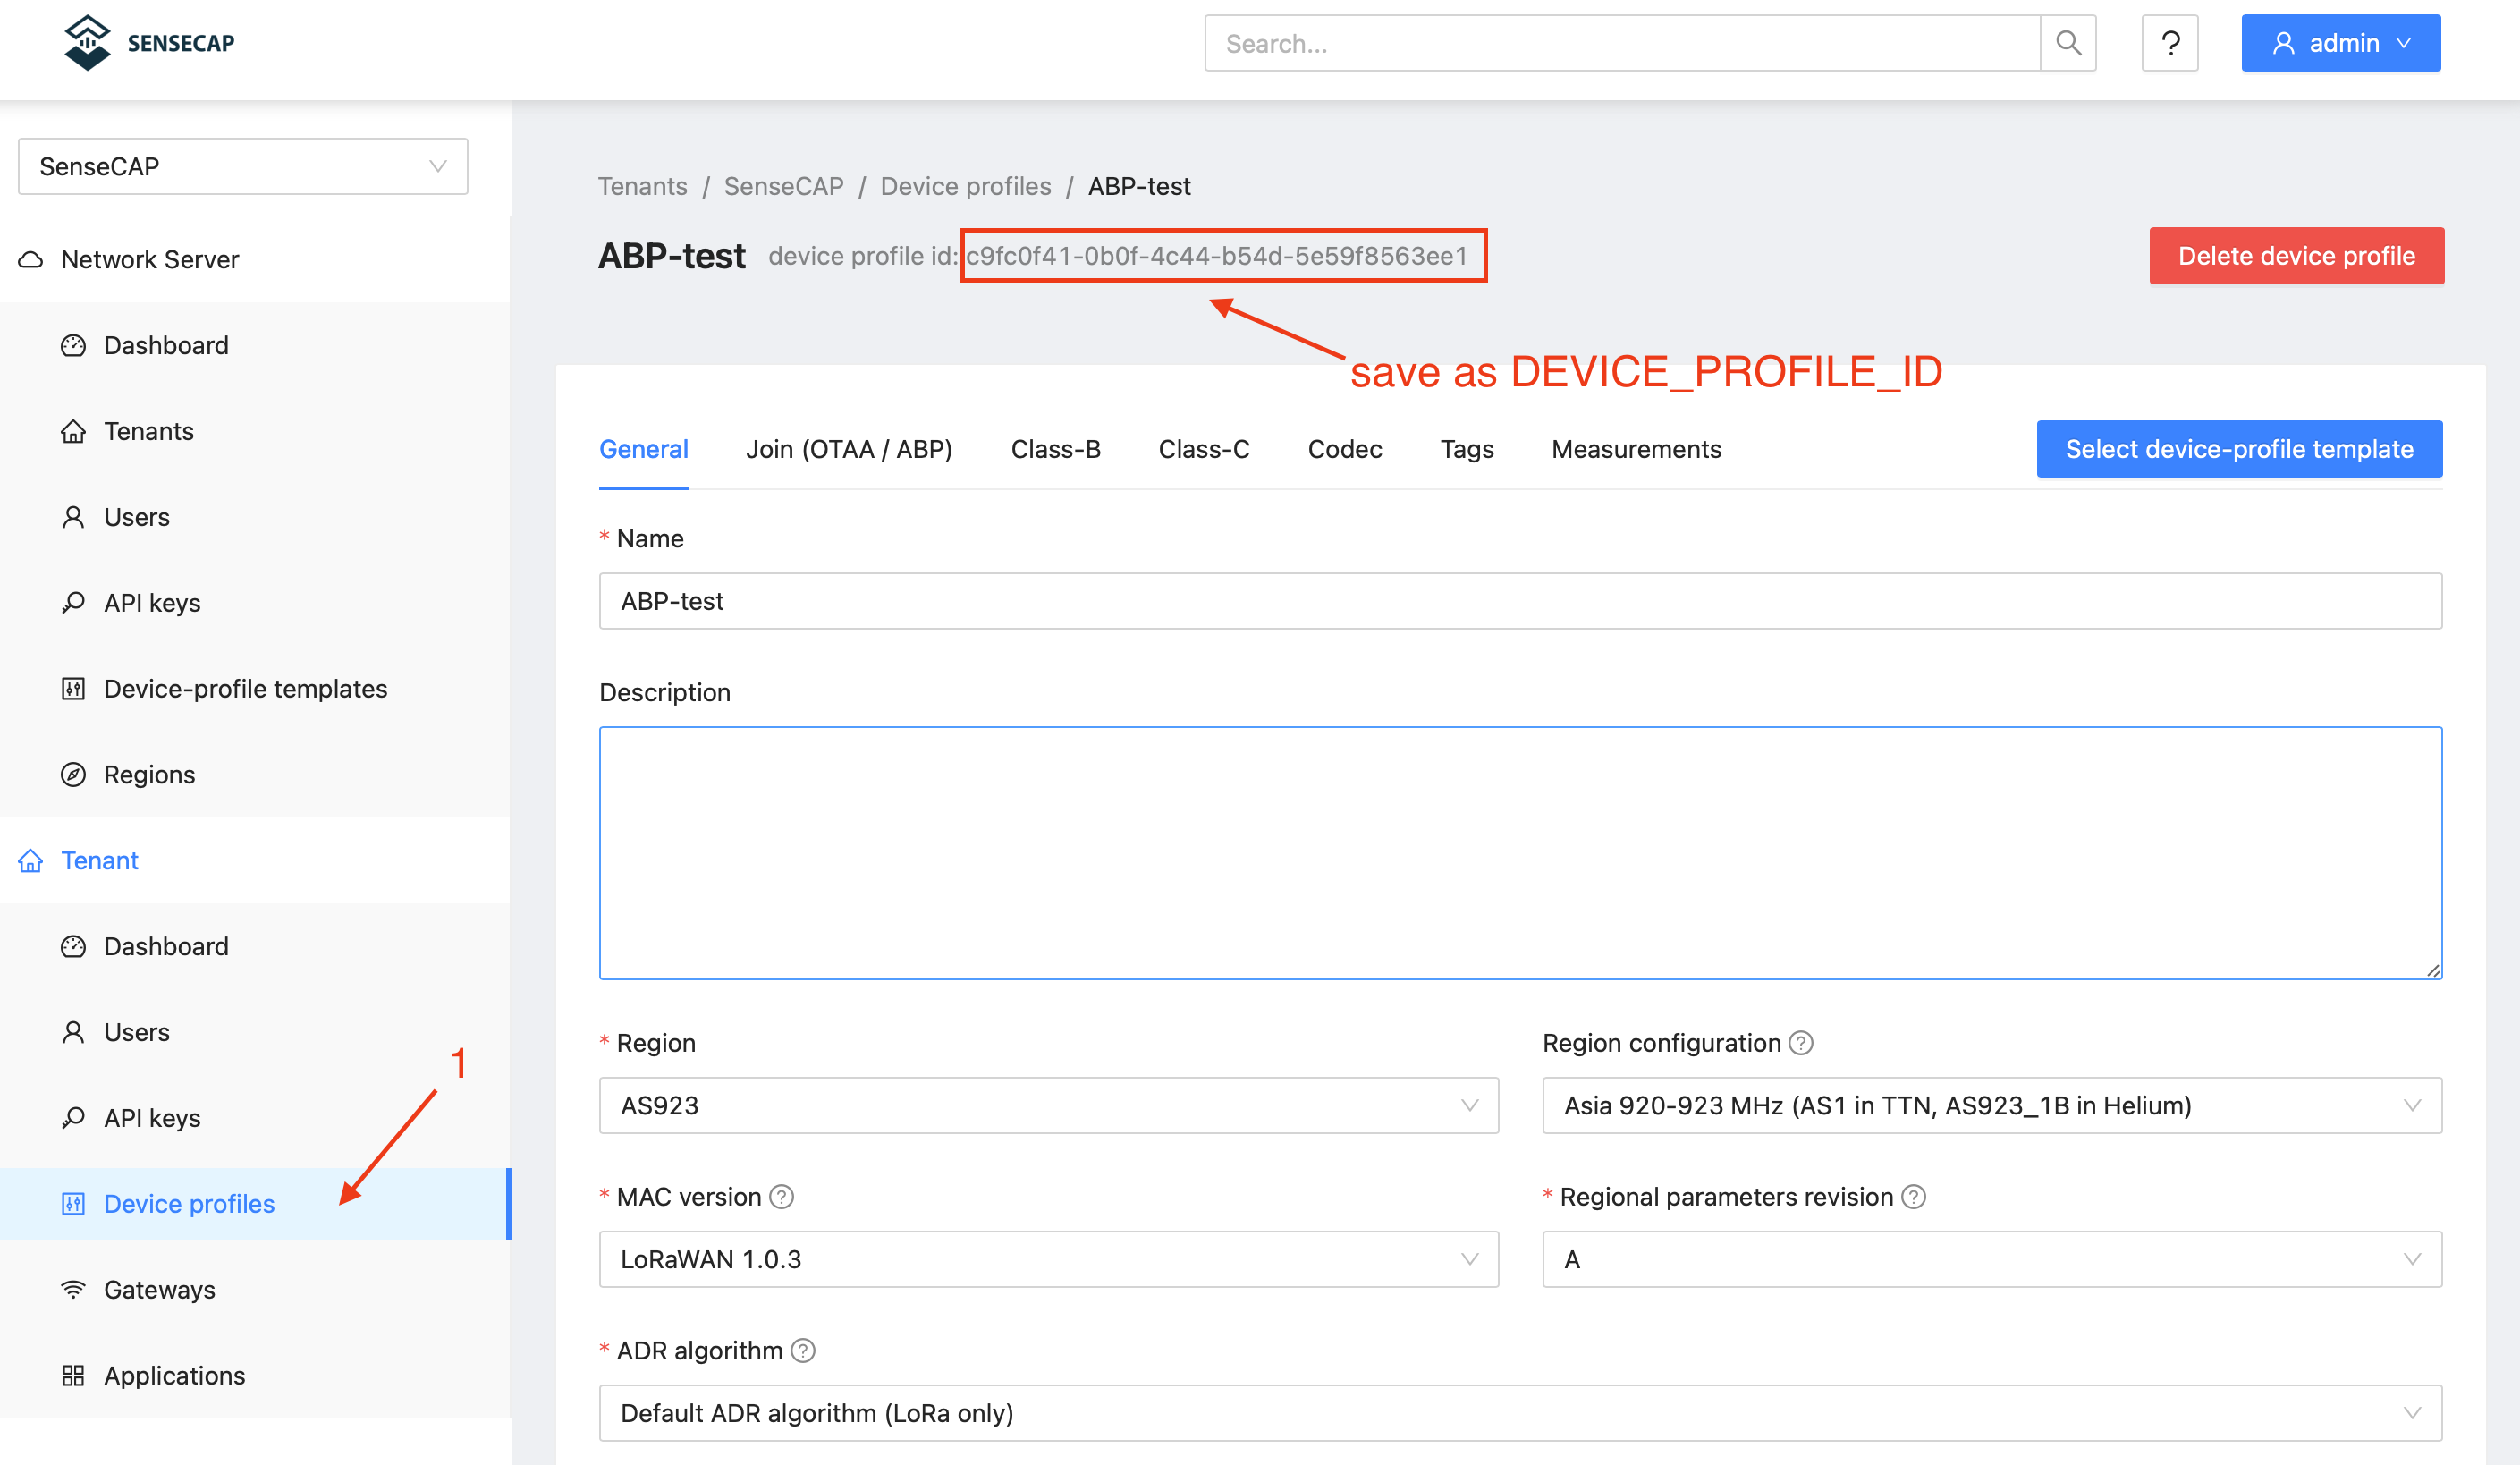
DEVICE_PROFILE_ID = "YOUR DEVICE PROFILE ID"
EXCEL_FILE = "device_list.xlsx"
# =================
Parameter Description:
-
GRPC_SERVER: The gateway’s IP address and the ChirpStack gRPC port. The default ChirpStack gRPC port is 8080. Ensure that your computer is on the same subnet as the gateway or has routable access to it.
-
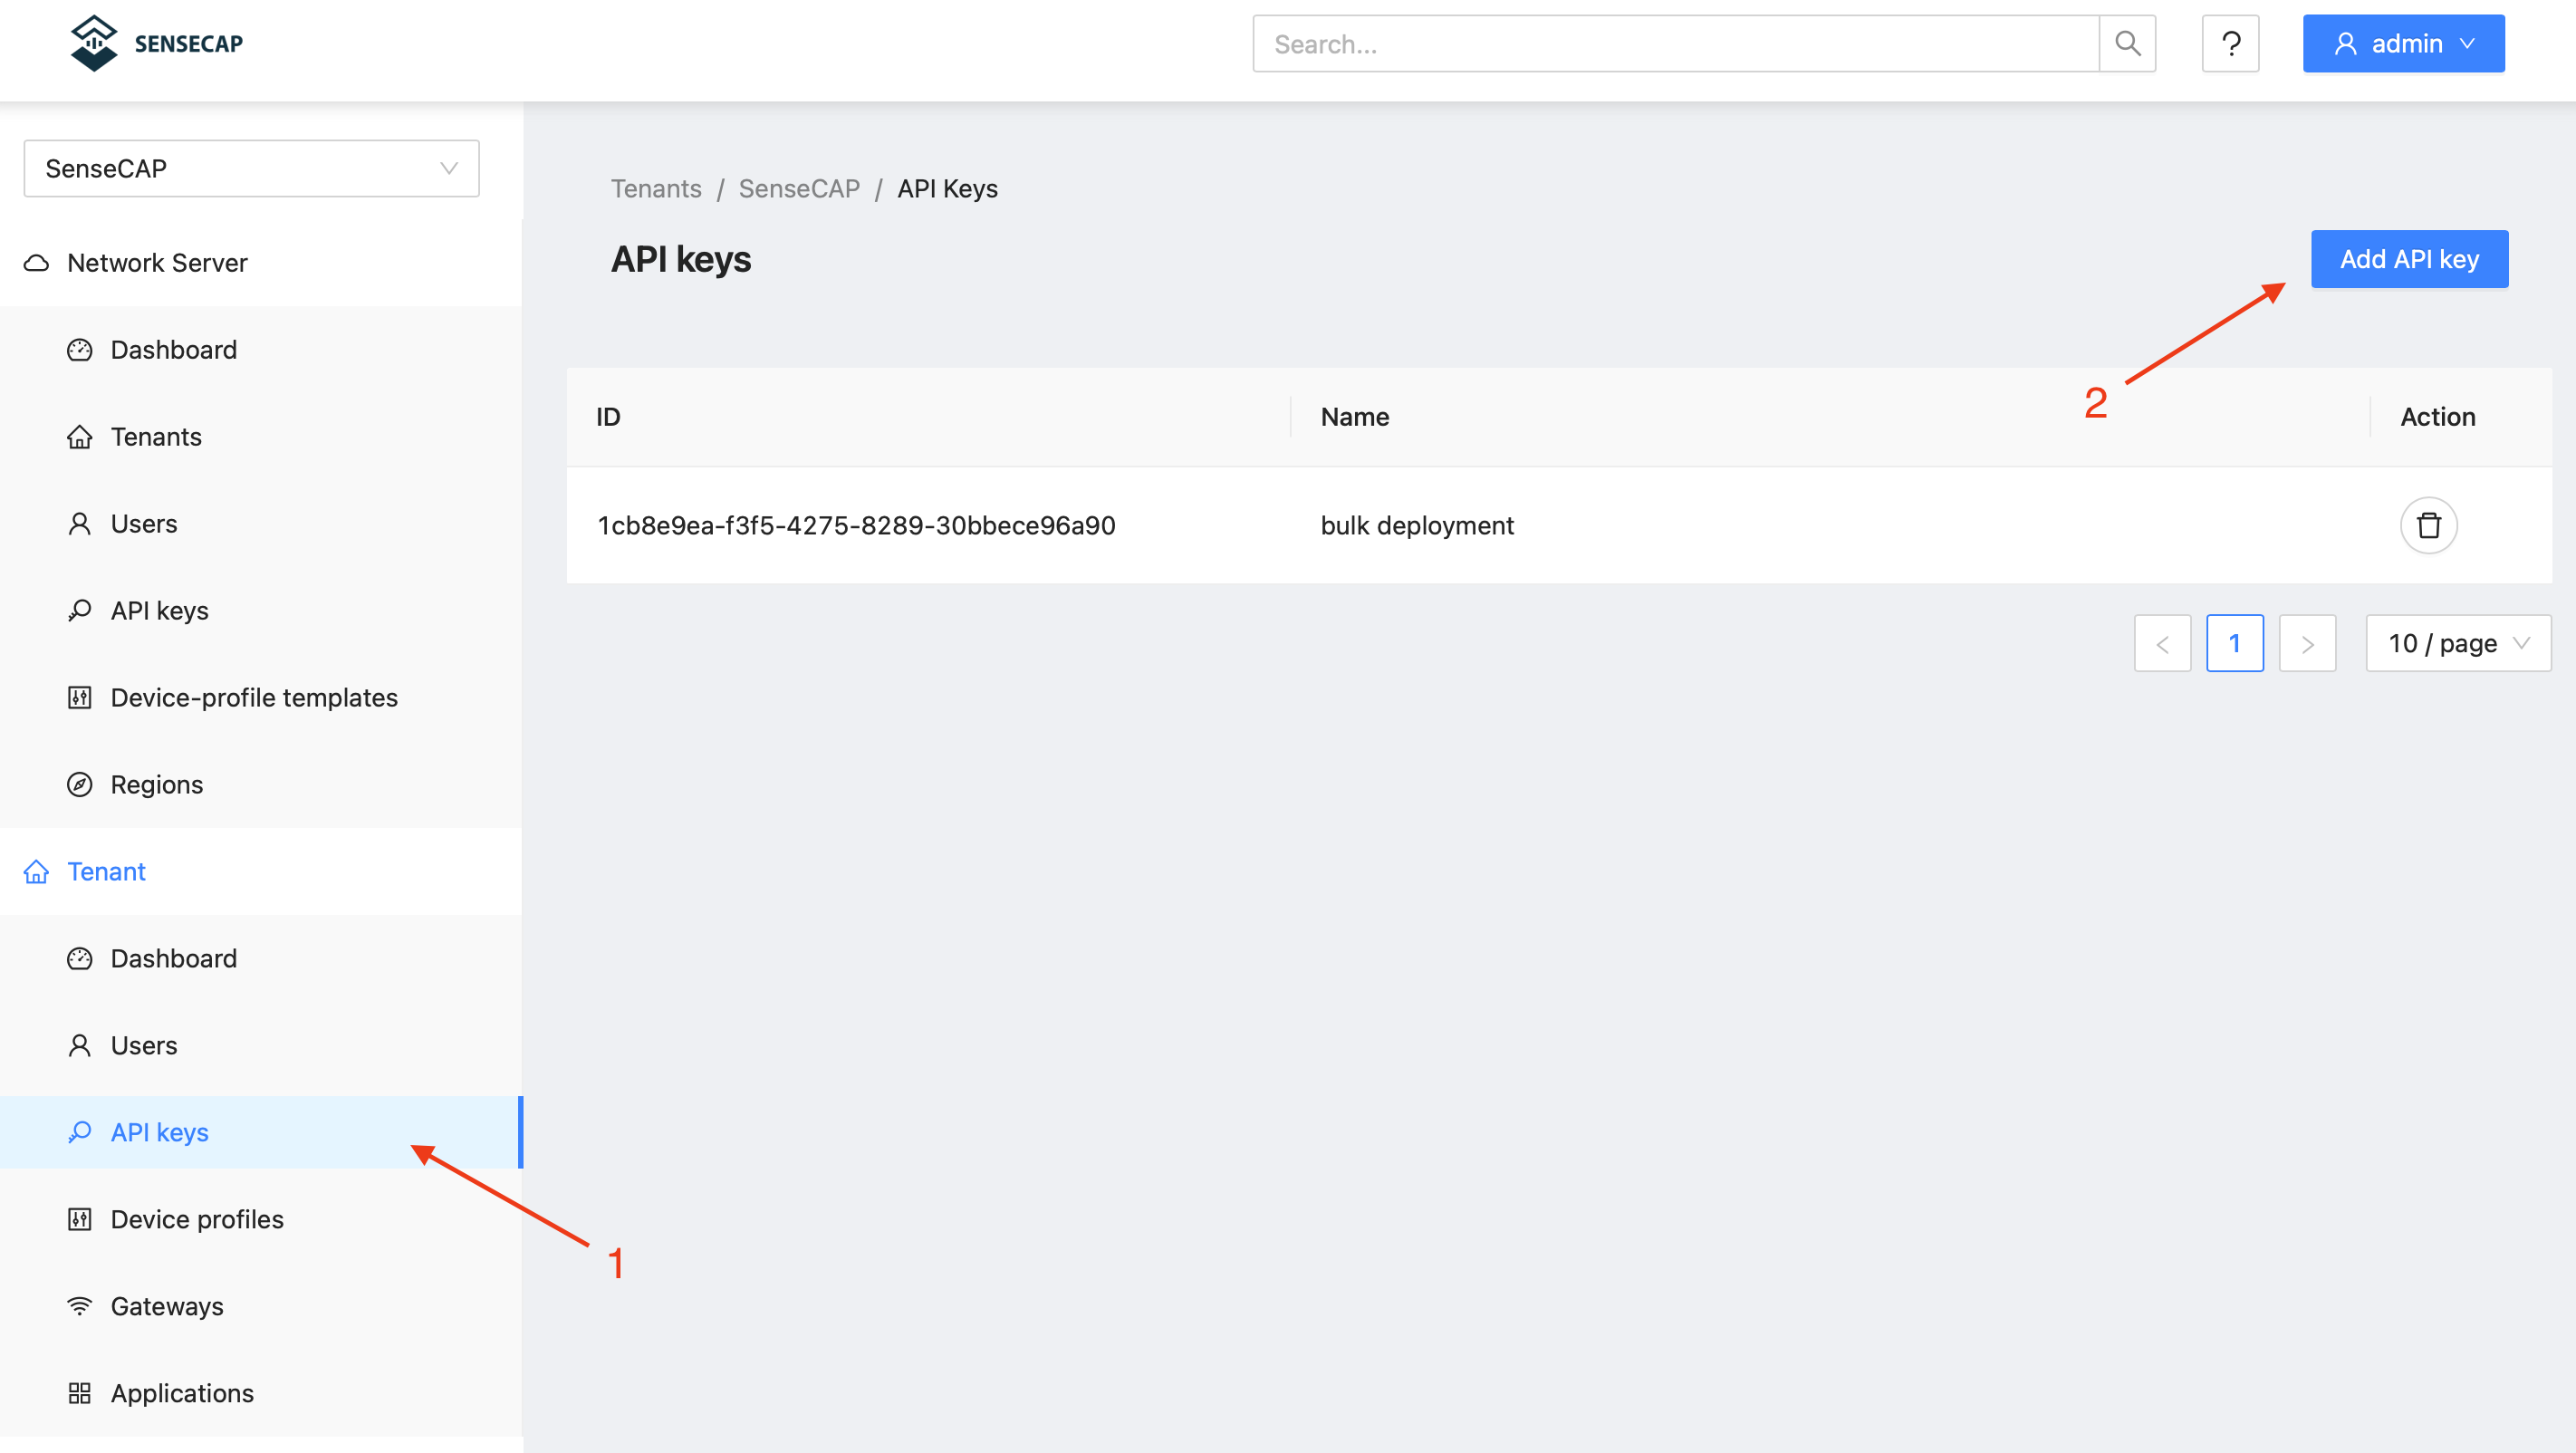
API_TOKEN: ChirpStack API key. To obtain it: Log in to the ChirpStack web interface → User menu in the top-right corner → “API Keys” → Create a new API key and assign it at least the following permissions: Device: create, Device: activate, and Device keys: create.
- APPLICATION_ID: The UUID of the target application. In the ChirpStack web interface → Applications → select your application.
- DEVICE_PROFILE_ID: The UUID of the device profile. Path: Device profiles → Select your ABP profile → Obtain from the URL.
- EXCEL_FILE: The name of the Excel file; by default, it is located in the same directory as the script.
API tokens have high-level permissions; do not disclose them or upload them to public repositories.
5. Run the script for bulk deployment
Ensure that the virtual environment is active and that chirpstack-v3-bulk-deploy.py and device_list.xlsx are in the same directory, then run:
python3 chirpstack-v3-bulk-deploy.py
The execution process prints logs in real time. Here is an example of a successful execution:
Starting batch configuration of ABP devices...
✓ Successfully read 2 devices from device_list.xlsx
✓ Device 0101010101010101 created
✓ Device 0101010101010101 keys configured
✓ Device 0101010101010101 ABP activated
----------------------------------------
✓ Device 0202020202020202 created
✓ Device 0202020202020202 keys configured
✓ Device 0202020202020202 ABP activated
----------------------------------------
...
Batch configuration completed.
Tech Support & Product Discussion
Thank you for choosing our products! We are here to provide you with different support to ensure that your experience with our products is as smooth as possible. We offer several communication channels to cater to different preferences and needs.