Grove - 三轴数字加速度计(±16g)
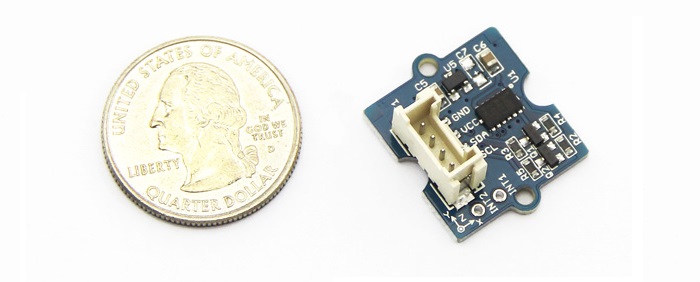
三轴数字加速度计是方向检测、手势检测和运动检测等项目中的关键部件。这款三轴数字加速度计(±16g)基于低功耗芯片 ADXL345。它具有高达 10,000g 的高冲击耐受性和可配置的每秒采样率。对于不需要太大测量范围的应用来说,这是一个很好的选择,因为它耐用、节能且成本效益高。

规格
- 工作电压:3.0 - 5.5V
- 测试范围:±16
- 灵敏度:3.9mg / LSB
- 待机电流:0.1μA(待机模式下 Vcc = 2.5 V(典型值))
- 10000 g 高冲击耐受性
- ECOPACK®RoHS 和“绿色”标准兼容
- 支持 Suli 库
- 更多关于 Grove 模块的详细信息,请参考 Grove 系统
演示
使用 Arduino
每个加速度计在发货前都经过单独测试。但在极少数情况下,您可能需要自行重置零偏移。以下是如何读取原始数据并从该加速度计中获取以 g 为单位的数据(即 g 力)的示例。

- 步骤1: 将其插入 Grove - Base Shield 的 I2C 端口。
- 步骤2: 下载 Digital Accelerometer(±16g) Library .zip 并将其解压到 Arduino 安装文件夹中的 arduino-1.0\libraries。如果您不知道如何为 Arduino 安装库,请参考教程 如何安装 Arduino 库。
- 步骤3: 如果您已安装库,直接通过以下路径打开示例代码: ** 文件 -> 示例 -> DigitalAccelerometer_ADXL345 -> ADXL345_demo_code. **
- 步骤4: 上传代码并打开串行监视器(通常在右上角)。如果您不知道如何上传代码,请参考教程 上传代码。
- 步骤5: 结果将以以下图片中的格式显示,摇动 Grove,您会发现数字发生变化。
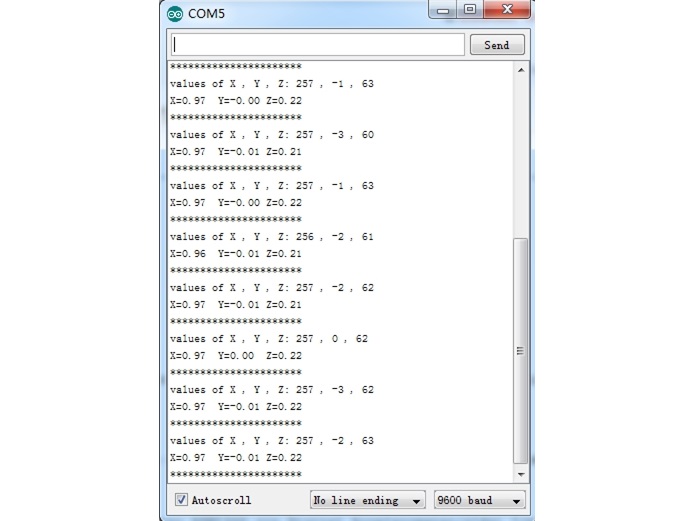
该传感器的输出包括两部分:原始数据和转换为重力单位“g”的三轴加速度信息。
使用 Codecraft 编程
硬件
步骤1. 使用 Grove 电缆将 Grove - 三轴数字加速度计(±16g) 连接到 Seeeduino 的 I2C 端口。如果您使用的是 Arduino,请使用 Base Shield。
步骤2. 使用 USB 电缆将 Seeeduino/Arduino 连接到您的电脑。
软件
步骤1. 打开 Codecraft,添加 Arduino 支持,并将主程序拖到工作区域。
如果这是您第一次使用 Codecraft,请参考 Codecraft 使用 Arduino 指南。
步骤2. 按下图拖动代码块或打开页面底部可下载的 cdc 文件。
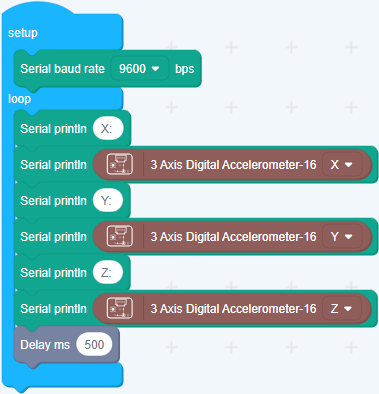
将程序上传到您的 Arduino/Seeeduino。
当代码上传完成后,您将在串行监视器中看到加速度显示。
使用 Raspberry Pi
-
步骤1: 您需要准备一个 Raspberry Pi 和一个 GrovePi 或 GrovePi+。
-
步骤2: 您需要完成开发环境的配置,否则请参考 这里。

-
步骤3: 连接
- 使用 Grove 电缆将传感器插入 GrovePi 的 I2C 插座 i2c-x(1~3)。
-
步骤4: 进入演示代码所在目录:
cd yourpath/GrovePi/Software/Python/
查看代码
nano grovepi_tilt_switch.py # 按 "Ctrl+x" 退出 #
import smbus
from time import sleep

# 为当前版本的树莓派选择正确的 i2c 总线
revision = ([l[12:-1] for l in open('/proc/cpuinfo','r').readlines() if l[:8]=="Revision"]+['0000'])[0]
bus = smbus.SMBus(1 if int(revision, 16) >= 4 else 0)

# ADXL345 常量
EARTH_GRAVITY_MS2   = 9.80665
SCALE_MULTIPLIER    = 0.004

DATA_FORMAT         = 0x31
BW_RATE             = 0x2C
POWER_CTL           = 0x2D

BW_RATE_1600HZ      = 0x0F
BW_RATE_800HZ       = 0x0E
BW_RATE_400HZ       = 0x0D
BW_RATE_200HZ       = 0x0C
BW_RATE_100HZ       = 0x0B
BW_RATE_50HZ        = 0x0A
BW_RATE_25HZ        = 0x09

RANGE_2G            = 0x00
RANGE_4G            = 0x01
RANGE_8G            = 0x02
RANGE_16G           = 0x03

MEASURE             = 0x08
AXES_DATA           = 0x32

class ADXL345:

    address = None

    def __init__(self, address = 0x53):
        self.address = address
        self.setBandwidthRate(BW_RATE_100HZ)
        self.setRange(RANGE_2G)
        self.enableMeasurement()

    def enableMeasurement(self):
        bus.write_byte_data(self.address, POWER_CTL, MEASURE)

    def setBandwidthRate(self, rate_flag):
        bus.write_byte_data(self.address, BW_RATE, rate_flag)

    # 设置 10 位读数的测量范围
    def setRange(self, range_flag):
        value = bus.read_byte_data(self.address, DATA_FORMAT)

        value &= ~0x0F;
        value |= range_flag;
        value |= 0x08;

        bus.write_byte_data(self.address, DATA_FORMAT, value)

    # 返回传感器当前每个轴的读数
    #
    # 参数 gforce:
    #    False(默认):结果以 m/s^2 返回
    #    True          :结果以 g 返回
    def getAxes(self, gforce = False):
        bytes = bus.read_i2c_block_data(self.address, AXES_DATA, 6)

        x = bytes[0] | (bytes[1] << 8)
        if(x & (1 << 16 - 1)):
            x = x - (1<<16)

        y = bytes[2] | (bytes[3] << 8)
        if(y & (1 << 16 - 1)):
            y = y - (1<<16)

        z = bytes[4] | (bytes[5] << 8)
        if(z & (1 << 16 - 1)):
            z = z - (1<<16)

        x = x * SCALE_MULTIPLIER
        y = y * SCALE_MULTIPLIER
        z = z * SCALE_MULTIPLIER

        if gforce == False:
            x = x * EARTH_GRAVITY_MS2
            y = y * EARTH_GRAVITY_MS2
            z = z * EARTH_GRAVITY_MS2

        x = round(x, 4)
        y = round(y, 4)
        z = round(z, 4)

        return {"x": x, "y": y, "z": z}

if __name__ == "__main__":
    # 如果直接运行,将创建类的实例并输出当前读数
    adxl345 = ADXL345()

    axes = adxl345.getAxes(True)
    print "ADXL345 on address 0x%x:" % (adxl345.address)
    print "   x = %.3fG" % ( axes['x'] )
    print "   y = %.3fG" % ( axes['y'] )
    print "   z = %.3fG" % ( axes['z'] )
5.运行演示代码。
sudo python grove_tilt_switch.py
使用 Beaglebone Green
要开始编辑存储在 BBG 上的程序,可以使用 Cloud9 IDE。 作为一个简单的练习,可以创建一个简单的应用程序来让 BeagleBone 上的 4 个用户可编程 LED 中的一个闪烁,以熟悉 Cloud9 IDE。
如果这是您第一次使用 Cloud9 IDE,请访问此链接。
-
步骤1:将 Grove - UART 插座设置为 Grove - GPIO 插座,请参考此链接。
-
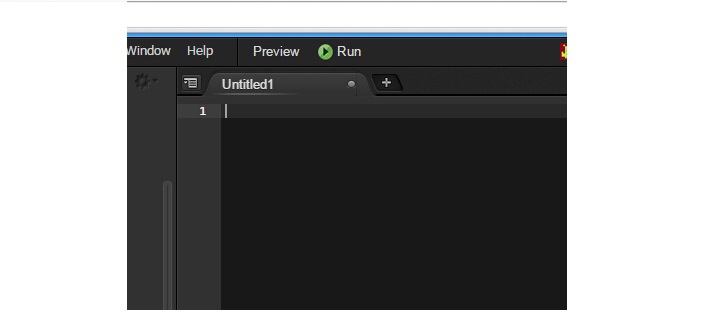
步骤2:点击右上角的 "+" 创建一个新文件。
-
步骤3:将以下代码复制并粘贴到新标签页中。
import smbus
import time

bus = smbus.SMBus(1)

# ADXL345 设备地址
ADXL345_DEVICE = 0x53

# ADXL345 常量
EARTH_GRAVITY_MS2   = 9.80665
SCALE_MULTIPLIER    = 0.004

DATA_FORMAT         = 0x31
BW_RATE             = 0x2C
POWER_CTL           = 0x2D

BW_RATE_1600HZ      = 0x0F
BW_RATE_800HZ       = 0x0E
BW_RATE_400HZ       = 0x0D
BW_RATE_200HZ       = 0x0C
BW_RATE_100HZ       = 0x0B
BW_RATE_50HZ        = 0x0A
BW_RATE_25HZ        = 0x09

RANGE_2G            = 0x00
RANGE_4G            = 0x01
RANGE_8G            = 0x02
RANGE_16G           = 0x03

MEASURE             = 0x08
AXES_DATA           = 0x32

class ADXL345:

    address = None

    def __init__(self, address = ADXL345_DEVICE):
        self.address = address
        self.setBandwidthRate(BW_RATE_100HZ)
        self.setRange(RANGE_2G)
        self.enableMeasurement()

    def enableMeasurement(self):
        bus.write_byte_data(self.address, POWER_CTL, MEASURE)

    def setBandwidthRate(self, rate_flag):
        bus.write_byte_data(self.address, BW_RATE, rate_flag)

    # 设置 10 位读数的测量范围
    def setRange(self, range_flag):
        value = bus.read_byte_data(self.address, DATA_FORMAT)

        value &= ~0x0F;
        value |= range_flag;
        value |= 0x08;

        bus.write_byte_data(self.address, DATA_FORMAT, value)

    # 返回传感器当前每个轴的读数
    #
    # 参数 gforce:
    #    False(默认):结果以 m/s^2 返回
    #    True          :结果以 g 返回
    def getAxes(self, gforce = False):
        bytes = bus.read_i2c_block_data(self.address, AXES_DATA, 6)

        x = bytes[0] | (bytes[1] << 8)
        if(x & (1 << 16 - 1)):
            x = x - (1<<16)

        y = bytes[2] | (bytes[3] << 8)
        if(y & (1 << 16 - 1)):
            y = y - (1<<16)

        z = bytes[4] | (bytes[5] << 8)
        if(z & (1 << 16 - 1)):
            z = z - (1<<16)

        x = x * SCALE_MULTIPLIER
        y = y * SCALE_MULTIPLIER
        z = z * SCALE_MULTIPLIER

        if gforce == False:
            x = x * EARTH_GRAVITY_MS2
            y = y * EARTH_GRAVITY_MS2
            z = z * EARTH_GRAVITY_MS2

        x = round(x, 4)
        y = round(y, 4)
        z = round(z, 4)

        return {"x": x, "y": y, "z": z}

if __name__ == "__main__":
    # 如果直接运行,将创建类的实例并输出当前读数
    adxl345 = ADXL345()

    while True:
        axes = adxl345.getAxes(True)
        print "ADXL345 on address 0x%x:" % (adxl345.address)
        print "   x = %.3fG" % ( axes['x'] )
        print "   y = %.3fG" % ( axes['y'] )
        print "   z = %.3fG" % ( axes['z'] )
        time.sleep(2)
-
第4步:通过点击磁盘图标保存文件,文件扩展名为 .py。
-
第5步:将 Grove - 3轴数字加速度计(±16g)连接到 BBG 的 Grove I2C 插座。
-
第6步:运行代码。你会发现终端每隔2秒输出一次重力信息。
在线原理图查看器
资源
- Eagle 文件.zip
- Suli兼容库
- ADXL345 数据手册.pdf
- 3轴数字加速度计(±16g)的 GitHub 仓库
- Grove - 3轴数字加速度计(±16g)
- Codecraft CDC 文件
项目
Grove - 3轴数字加速度计简介:如何使用3轴数字加速度计。
技术支持与产品讨论
感谢您选择我们的产品!我们提供多种支持渠道,确保您使用我们的产品时体验顺畅。我们提供多种沟通方式以满足不同的需求和偏好。