Grove - 红外接收器
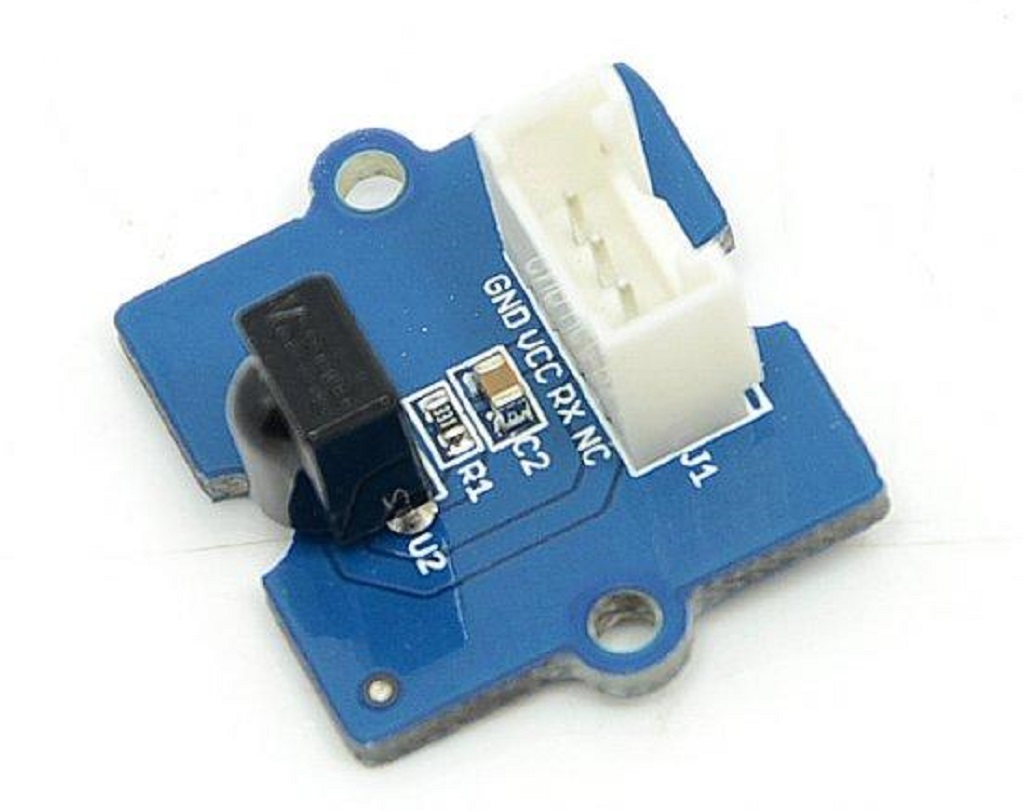
红外接收器用于接收红外信号,也用于遥控检测。红外接收器上有一个红外检测器,用于获取红外发射器发出的红外光。红外检测器内部有一个解调器,用于寻找38 KHz的调制红外信号。红外接收器可以在10米范围内很好地接收信号。如果超过10米,接收器可能无法获取信号。我们经常将两个Grove模块——红外接收器和Grove - 红外发射器配合使用。

版本
| 产品版本 | 变更 | 发布日期 |
|---|---|---|
| Grove - 红外接收器 v1.0 | 初始版本 | 2015年11月1日 |
| Grove - 红外接收器 v1.1 | 更改丝印 | 2016年7月24日 |
规格参数
- 电压:3.3-5V
- 距离:10m
更多关于Grove模块的详细信息请参考Grove系统
支持的平台
| Arduino | Raspberry Pi | |||
|---|---|---|---|---|
上述提到的支持平台是/是该模块软件或理论兼容性的指示。在大多数情况下,我们只为Arduino平台提供软件库或代码示例。不可能为所有可能的MCU平台提供软件库/演示代码。因此,用户必须编写自己的软件库。
入门指南
Grove - 红外发射器可以发送数据,而 Grove - 红外接收器将接收这些数据。
与 Arduino 一起使用
如果这是您第一次使用 Arduino,我们强烈建议您在开始之前查看 Arduino 入门指南。
硬件
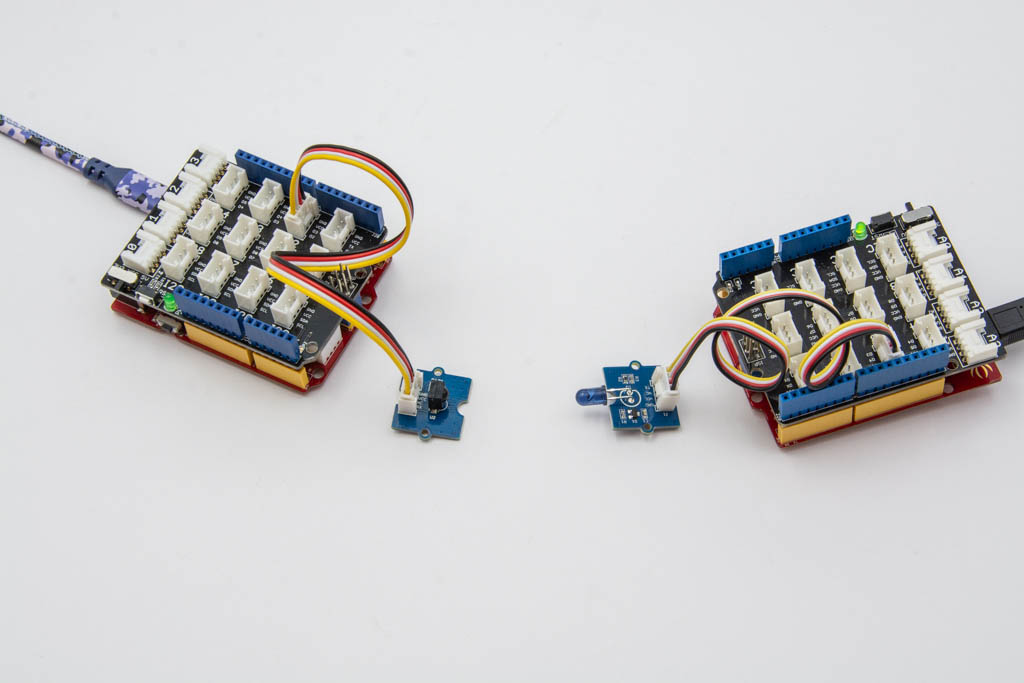
- 步骤 1. 准备以下物品:
| Seeeduino V4.2 | Base Shield | Grove - 红外发射器 | Grove - 红外接收器 |
|---|---|---|---|
 |  |  |  |
| 立即购买 | 立即购买 | 立即购买 | 立即购买 |
-
步骤 2. 将 Grove - 红外发射器连接到其中一个 Grove-Base Shield 的 D3 端口。
-
步骤 3. 将 Grove - 红外接收器连接到另一个 Grove-Base Shield 的 D2 端口。
-
步骤 4. 将 Grove - Base Shield 插入 Seeeduino。
-
步骤 5. 通过 USB 线将 Seeeduino 连接到 PC。
如果我们没有 Grove Base Shield,我们也可以按照以下方式直接将此模块连接到 Seeeduino。
| Seeeduino | Grove - 红外发射器 |
|---|---|
| 5V | 红色 |
| GND | 黑色 |
| Not Conencted | 白色 |
| D3 | 黄色 |
| Seeeduino | Grove - 红外接收器 |
|---|---|
| 5V | 红色 |
| GND | 黑色 |
| Not Conencted | 白色 |
| D2 | 黄色 |
软件
-
步骤 1. 从 Github 下载 Seeed_Arduino_IR。
-
步骤 2. 参考 如何安装库 为 Arduino 安装库。
将以下发送示例代码复制到 Arduino IDE:
发送示例代码:
/* send.ino Example sketch for IRLib2
* Illustrates how to send a code.
*/
#include <IRLibSendBase.h> // First include the send base
//Now include only the protocols you wish to actually use.
//The lowest numbered protocol should be first but remainder
//can be any order.
#include <IRLib_P01_NEC.h>
#include <IRLib_P02_Sony.h>
#include <IRLibCombo.h> // After all protocols, include this
// All of the above automatically creates a universal sending
// class called "IRsend" containing only the protocols you want.
// Now declare an instance of that sender.
IRsend mySender;
#define IR_SEND_PWM_PIN D3
void setup() {
Serial.begin(9600);
delay(2000); while (!Serial); //delay for Leonardo
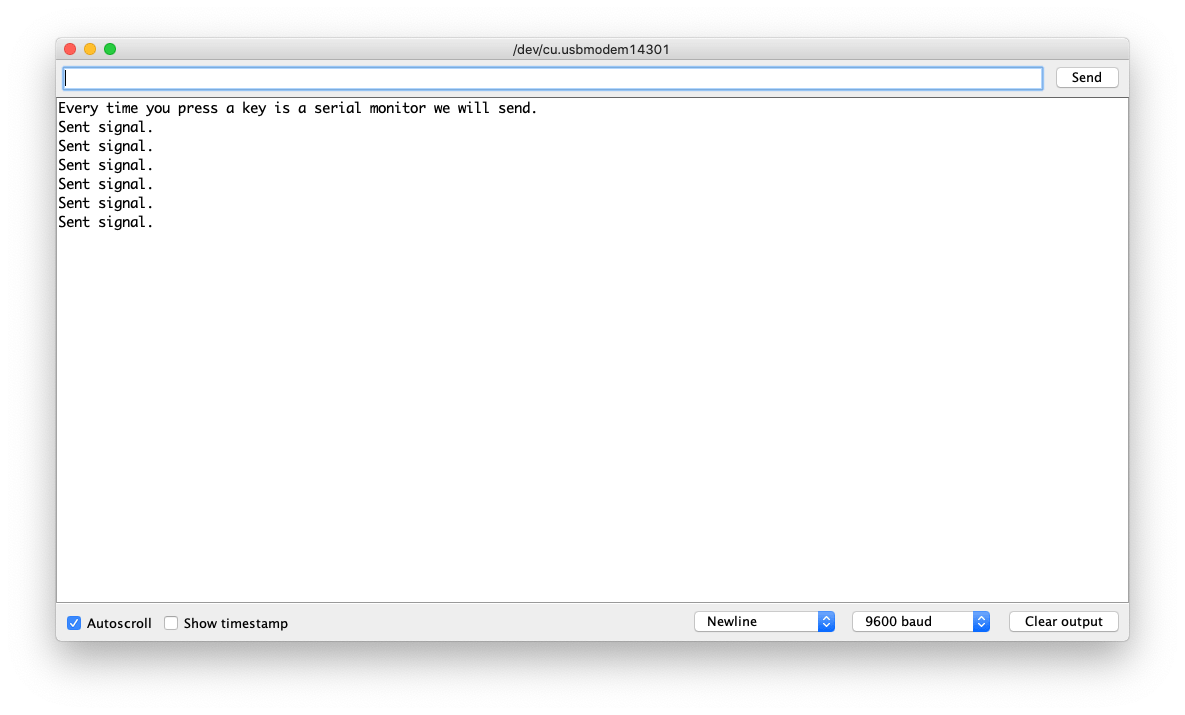
Serial.println(F("Every time you press a key is a serial monitor we will send."));
}
void loop() {
if (Serial.read() != -1) {
//send a code every time a character is received from the
// serial port. You could modify this sketch to send when you
// push a button connected to an digital input pin.
//Substitute values and protocols in the following statement
// for device you have available.
mySender.send(SONY,0xa8bca, 20);//Sony DVD power A8BCA, 20 bits
//mySender.send(NEC,0x61a0f00f,0);//NEC TV power button=0x61a0f00f
Serial.println(F("Sent signal."));
}
}
将以下接收示例代码复制到 Arduino IDE:
接收示例代码:
/* rawR&cv.ino Example sketch for IRLib2
* Illustrate how to capture raw timing values for an unknow protocol.
* You will capture a signal using this sketch. It will output data the
* serial monitor that you can cut and paste into the "rawSend.ino"
* sketch.
*/
// Recommend only use IRLibRecvPCI or IRLibRecvLoop for best results
#include <IRLibRecvPCI.h>
IRrecvPCI myReceiver(2);//pin number for the receiver
void setup() {
Serial.begin(9600);
delay(2000); while (!Serial); //delay for Leonardo
myReceiver.enableIRIn(); // Start the receiver
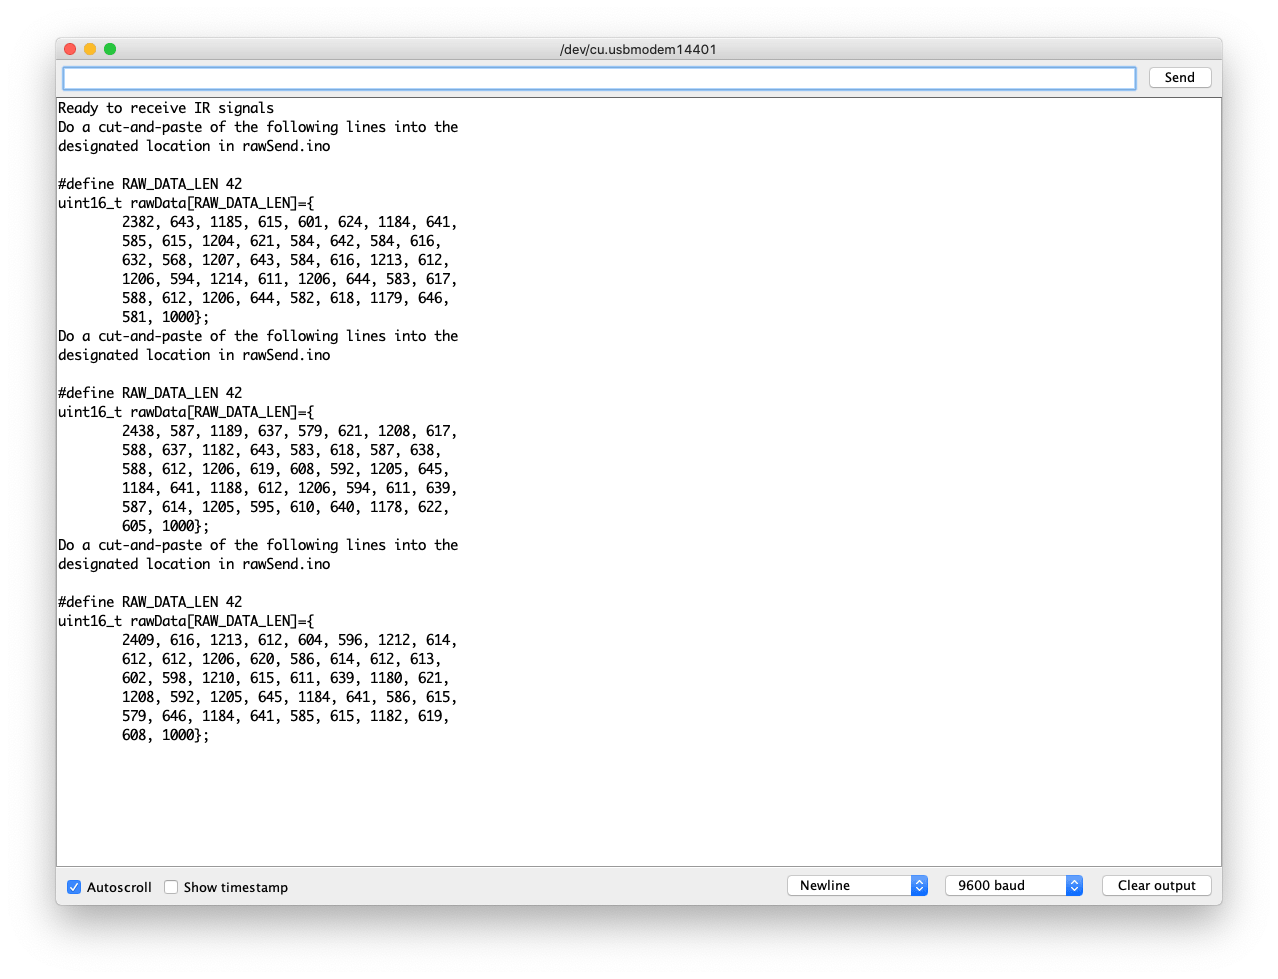
Serial.println(F("Ready to receive IR signals"));
}
void loop() {
//Continue looping until you get a complete signal received
if (myReceiver.getResults()) {
Serial.println(F("Do a cut-and-paste of the following lines into the "));
Serial.println(F("designated location in rawSend.ino"));
Serial.print(F("\n#define RAW_DATA_LEN "));
Serial.println(recvGlobal.recvLength,DEC);
Serial.print(F("uint16_t rawData[RAW_DATA_LEN]={\n\t"));
for(bufIndex_t i=1;i<recvGlobal.recvLength;i++) {
Serial.print(recvGlobal.recvBuffer[i],DEC);
Serial.print(F(", "));
if( (i % 8)==0) Serial.print(F("\n\t"));
}
Serial.println(F("1000};"));//Add arbitrary trailing space
myReceiver.enableIRIn(); //Restart receiver
}
}
- 步骤 7. 通过点击 工具-> 串口监视器 打开 Arduino IDE 的串口监视器。或者同时按下 ++ctrl+shift+m++ 键。
对于发送示例,串口应该是这样的:
对于接收示例,串口监视器应该是这样的:
有关该库的更高级用法,请查看 Seeed_Arduino_IR。
原理图在线查看器
资源
- [Zip] Grove - 红外接收器 eagle 文件
- [Lib] 红外发送和接收库
- [Lib] LinkIt ONE 红外接收库
- [Pdf] TSOP282 数据手册
项目
红外 LaunchPad 到 LaunchPad 通信:使用 Grove 红外发射器和接收器从一个 LaunchPad 向另一个发送文本!
技术支持与产品讨论
可升级为工业传感器
通过 SenseCAP S2110 控制器和 S2100 数据记录器,您可以轻松将 Grove 转换为 LoRaWAN® 传感器。Seeed 不仅帮助您进行原型设计,还为您提供了使用 SenseCAP 系列坚固的工业传感器扩展项目的可能性。
IP66 外壳、蓝牙配置、与全球 LoRaWAN® 网络的兼容性、内置 19 Ah 电池以及来自 APP 的强大支持使 SenseCAP S210x 成为工业应用的最佳选择。该系列包括土壤湿度、空气温湿度、光照强度、CO2、EC 和 8 合 1 气象站传感器。为您下一个成功的工业项目尝试最新的 SenseCAP S210x。
