Grove - 寻线传感器 V1.1
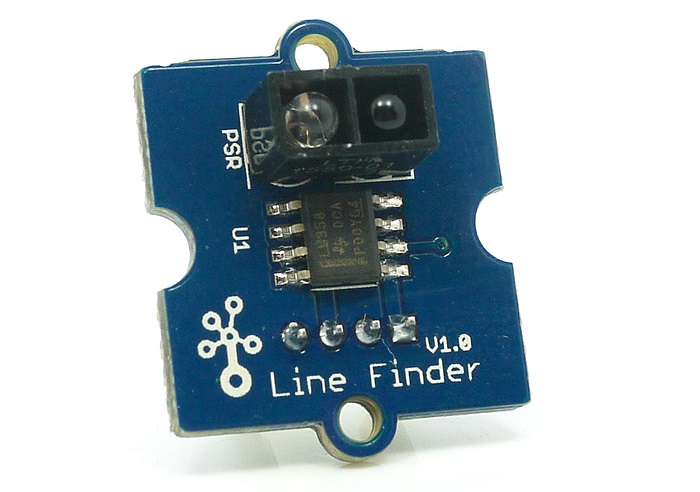
Grove-寻线传感器专为循线机器人设计。它具有一个红外发射LED和一个红外敏感光电晶体管。它可以向微控制器输出数字信号,使机器人能够跟随白色背景上的黑线,或反之亦然。

版本
| 产品版本 | 变更 | 发布日期 |
|---|---|---|
| Grove-寻线传感器 V1.0 | 初始版本 | 2010年1月29日 |
| Grove-寻线传感器 V1.1 | 添加测试点 | 2015年12月28日 |
规格参数
| 参数 | 值/范围 |
|---|---|
| 电源供电 | 5V |
| 数字输出模式 | TTL(检测到黑色时为高电平,检测到白色时为低电平) |
| 连接器 | 4针扣式Grove接口 |
| 尺寸 | 20mm*20mm |
| ROHS | 是 |
| 光反射二极管 | RS-06WD |
| 比较器 | MV358 |
!!!Tip 更多关于Grove模块的详细信息请参考Grove系统
支持的平台
| Arduino | Raspberry Pi | |||
|---|---|---|---|---|
上述提到的支持平台是/是该模块软件或理论兼容性的指示。在大多数情况下,我们只为Arduino平台提供软件库或代码示例。不可能为所有可能的MCU平台提供软件库/演示代码。因此,用户必须编写自己的软件库。
开始使用
与Arduino一起使用
硬件
- 步骤1. 准备以下物品:
| Seeeduino V4.2 | Base Shield | Grove - Button |
|---|---|---|
 |  |  |
| 立即获取 | 立即获取 | 立即获取 |
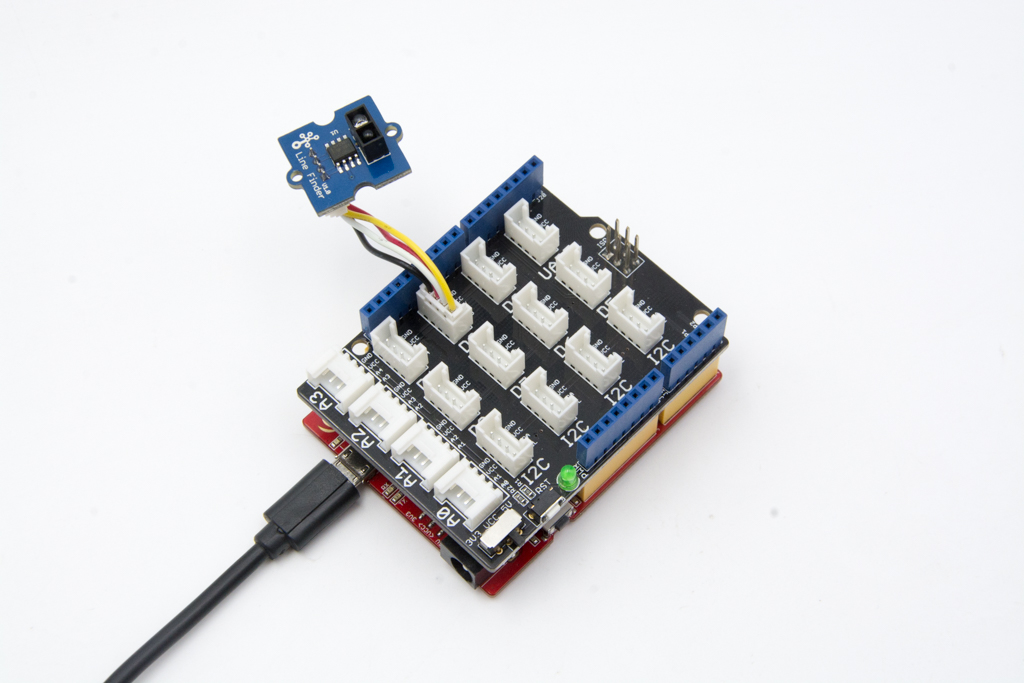
- 步骤2. 将Grove-line finder连接到Grove-Base Shield的D3端口。
- 步骤3. 将Grove - Base Shield插入Seeeduino。
- 步骤4. 通过USB线将Seeeduino连接到PC。
如果我们没有Grove Base Shield,我们也可以直接将Grove-Line finder连接到Seeeduino,如下所示。
| Seeeduino | Grove-Line finder |
|---|---|
| 5V | 红色 |
| GND | 黑色 |
| 未连接 | 白色 |
| D3 | 黄色 |
软件
- 步骤1. 将代码复制到Arduino IDE中并上传。
//------------------------------------------------------------
//Name: Line finder digital mode
//Function: detect black line or white line
//Parameter:   When digital signal is HIGH, black line
//             When digital signal is LOW, white line
//-------------------------------------------------------------
int signalPin =  3;    // connected to digital pin 3
void setup()   {
  pinMode(signalPin, INPUT); // initialize the digital pin as an output:
  Serial.begin(9600);  // initialize serial communications at 9600 bps:
}
// the loop() method runs over and over again,
// as long as the Arduino has power
void loop()
{
  if(HIGH == digitalRead(signalPin))
    Serial.println("black");
  else  Serial.println("white");  // display the color
  delay(1000);                  // wait for a second
}
- 步骤2. 打开串口,当将传感器放在黑线上方时我们会看到"black",当在白色区域时会看到"white"。
white
white
white
black
black
black
black
black
与Codecraft一起使用
硬件
步骤1. 将Grove - Line Finder连接到Base Shield的D3端口。
步骤2. 将Base Shield插入您的Seeeduino/Arduino。
步骤3. 通过USB线将Seeeduino/Arduino连接到您的PC。
软件
步骤1. 打开Codecraft,添加Arduino支持,并将主程序拖到工作区域。
如果这是您第一次使用Codecraft,请参阅使用Arduino的Codecraft指南。
步骤2. 按照下图拖拽代码块或打开可在本页面末尾下载的cdc文件。
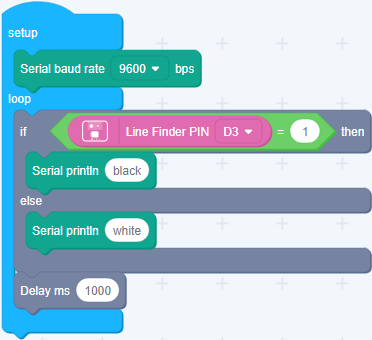
将程序上传到您的Arduino/Seeeduino。
当代码上传完成后,您将在串口监视器中看到是否找到线条。
与Raspberry Pi一起使用
硬件
- 步骤1. 准备以下物品:
| Raspberry pi | GrovePi_Plus | Grove - Line Finder |
|---|---|---|
 |  | |
| 立即获取 | 立即获取 | 立即获取 |
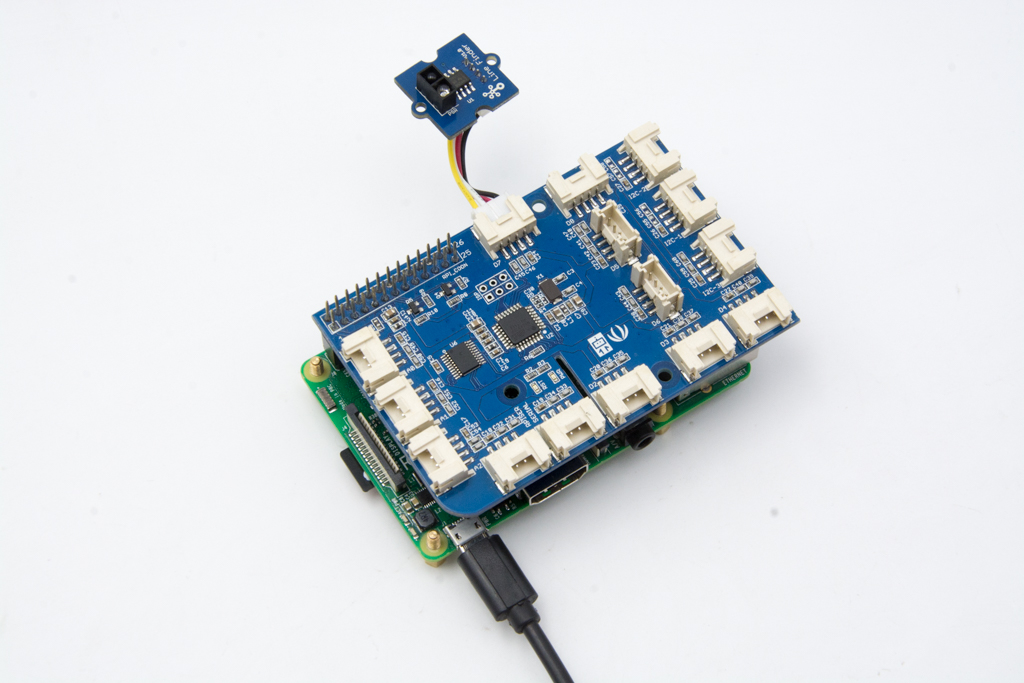
- 步骤2. 将GrovePi_Plus插入Raspberry。
- 步骤3. 将Grove-Line Finder连接到GrovePi_Plus的D7端口。
- 步骤4. 通过USB线将Raspberry连接到PC。
软件
- 步骤1. 按照设置软件配置开发环境。
- 步骤2. Git克隆Github仓库。
cd ~
git clone https://github.com/DexterInd/GrovePi.git
- 步骤3. 执行以下命令。
cd ~/GrovePi/Software/Python
python grove_line_finder.py
这是grove_line_finder.py代码。
import time
import grovepi

# Connect the Grove Line Finder to digital port D7
# SIG,NC,VCC,GND
line_finder = 7

grovepi.pinMode(line_finder,"INPUT")

while True:
    try:
        # Return HIGH when black line is detected, and LOW when white line is detected
        if grovepi.digitalRead(line_finder) == 1:
            print ("black line detected")
        else:
            print ("white line detected")

        time.sleep(.5)

    except IOError:
        print ("Error")
- 步骤4. 当传感器在黑线上方时,我们会看到检测到黑线。
pi@raspberrypi:~/GrovePi/Software/Python $ python grove_line_finder.py
black line detected
black line detected
white line detected
white line detected
Grove-寻线器原理图 V1.0
Grove-寻线器原理图 V1.1
资源
- [Eagle&PDF] Grove-寻线器原理图 V1.0
- [Eagle&PDF] Grove-寻线器原理图 V1.1
- [数据手册] LMV358.PDF
- [Codecraft] CDC 文件
技术支持与产品讨论
可升级为工业传感器
通过 SenseCAP S2110 控制器和 S2100 数据记录器,您可以轻松地将 Grove 转换为 LoRaWAN® 传感器。Seeed 不仅帮助您进行原型设计,还为您提供了通过 SenseCAP 系列坚固的工业传感器扩展项目的可能性。
IP66 外壳、蓝牙配置、与全球 LoRaWAN® 网络的兼容性、内置 19 Ah 电池以及来自 APP 的强大支持,使 SenseCAP S210x 成为工业应用的最佳选择。该系列包括土壤湿度、空气温湿度、光照强度、CO2、EC 和 8 合 1 气象站传感器。为您下一个成功的工业项目尝试最新的 SenseCAP S210x。
