Grove - PH 传感器套件 (E-201C-Blue)

您是否正在寻找一个易于使用且性价比高的 PH 传感器/测量仪?您是否想要在 Arduino 或 Raspberry Pi 上使用 PH 传感器/测量仪?那么,这款新的 Grove - PH 传感器将满足您的所有需求。PH 传感器测量水基溶液中的氢离子活性,我们通常用它来测量液体的 PH 值。它广泛应用于化学工业、制药工业、染料工业以及需要进行酸碱性测试的科学研究中。该套件中的驱动板支持 3.3V 和 5V 系统。配备标准 BNC 探头接口和 Grove 连接器,与 Arduino 和 Raspberry Pi 配合使用非常方便。
本产品未通过 RoHS 认证。
特性
- 紧凑尺寸,便于部署。
- 支持 Arduino 和 Raspberry Pi。
- 性价比高。
规格参数
| 项目 | 数值 |
|---|---|
| 工作电压 | 3.3V/5V |
| 范围 | 0-14PH |
| 分辨率 | ±0.15PH(STP) |
| 响应时间 | <1min |
| 探头接口 | BNC |
| 测量温度 | 0-60℃ |
| 内阻 | ≤250MΩ(25℃) |
| 碱误差 | 0.2PH(1mol/L)Na+,PH14)(25℃) |
支持的平台
| Arduino | Raspberry Pi |
|---|---|
|
|
开始使用
所需材料
| Seeeduino Lotus | Grove-PH传感器套件 |
|---|---|
|
|
| 立即购买 | 立即购买 |
硬件连接

请轻柔地插入USB线缆,将Grove-PH传感器接口插入Seeeduino Lotus板接口,否则可能会损坏端口。
-
步骤1. 使用Grove线缆将Grove-PH传感器插入Seeeduino Lotus板的A2接口。
-
步骤2. 通过USB线缆将Seeeduino Lotus连接到PC。
-
步骤3. 下载代码,请参考软件部分。
-
步骤4. 运行代码,结果将显示在Arduino IDE的串口监视器屏幕上。
软件
如果这是您第一次使用Arduino,我们强烈建议您在开始之前查看Arduino入门指南。
-
步骤1. 下载示例代码。
-
步骤2. 复制整个Grove-PH_Sensor_kit文件并粘贴到您的Arduino IDE库文件中。
-
步骤3. 使用Arduino IDE打开pH_meter_V1_1文件。
-
步骤4. 上传示例代码。如果您不知道如何上传代码,请查看如何上传代码。
软件代码
/*
  # This sample code is used to test the pH meter V1.1.
  # Editor : YouYou
  # Date   : 2014.06.23
  # Ver    : 1.1
  # Product: analog pH meter
  # SKU    : SEN0161
*/
#define SensorPin A2            //pH meter Analog output to Arduino Analog Input 0
#define Offset 41.02740741      //deviation compensate
#define LED 13
#define samplingInterval 20
#define printInterval 800
#define ArrayLenth  40    //times of collection
#define uart  Serial
int pHArray[ArrayLenth];   //Store the average value of the sensor feedback
int pHArrayIndex = 0;
void setup(void)
{
  pinMode(LED, OUTPUT);
  uart.begin(9600);
  uart.println("pH meter experiment!");    //Test the uart monitor
}
void loop(void)
{
  static unsigned long samplingTime = millis();
  static unsigned long printTime = millis();
  static float pHValue, voltage;
  if (millis() - samplingTime > samplingInterval)
  {
    pHArray[pHArrayIndex++] = analogRead(SensorPin);
    if (pHArrayIndex == ArrayLenth)pHArrayIndex = 0;
    voltage = avergearray(pHArray, ArrayLenth) * 5.0 / 1024;
    pHValue = -19.18518519 * voltage + Offset;
    samplingTime = millis();
  }
  if (millis() - printTime > printInterval)  //Every 800 milliseconds, print a numerical, convert the state of the LED indicator
  {
    uart.print("Voltage:");
    uart.print(voltage, 2);
    uart.print("    pH value: ");
    uart.println(pHValue, 2);
    digitalWrite(LED, digitalRead(LED) ^ 1);
    printTime = millis();
  }
}
double avergearray(int* arr, int number) {
  int i;
  int max, min;
  double avg;
  long amount = 0;
  if (number <= 0) {
    uart.println("Error number for the array to avraging!/n");
    return 0;
  }
  if (number < 5) { //less than 5, calculated directly statistics
    for (i = 0; i < number; i++) {
      amount += arr[i];
    }
    avg = amount / number;
    return avg;
  } else {
    if (arr[0] < arr[1]) {
      min = arr[0]; max = arr[1];
    }
    else {
      min = arr[1]; max = arr[0];
    }
    for (i = 2; i < number; i++) {
      if (arr[i] < min) {
        amount += min;      //arr<min
        min = arr[i];
      } else {
        if (arr[i] > max) {
          amount += max;  //arr>max
          max = arr[i];
        } else {
          amount += arr[i]; //min<=arr<=max
        }
      }//if
    }//for
    avg = (double)amount / (number - 2);
  }//if
  return avg;
}
-
在检测目标溶液之前,传感器必须使用指定的校准液进行校准,并且在检测新种类的溶液之前,必须将其放入指定的缓冲液(PH=7)或清水中并擦拭。
-
在测量之前,电极必须使用已知PH值的标准缓冲溶液进行校准。为了获得更准确的结果,已知的PH值应该可靠,并且更接近被测量的值。
-
测量完成后,应戴上电极保护套。保护套中应放置少量3.3mol/L氯化钾溶液,以保持电极球泡湿润。
-
电极的前端必须保持清洁和干燥,绝对防止输出两端短路,否则会导致测量结果不准确或无效。
-
电极长期使用后,如果发现梯度略有不准确,可以将电极下端浸泡在4% HF(氢氟酸)中3-5秒,用蒸馏水清洗,然后浸泡在氯化钾溶液中使其恢复新状态。
-
传感器不得长时间浸泡在检测液体中。
- 步骤5. 当传感器放入指定的校准液(PH=9.18)中时,会有一个电压值和一个PH值:

- 步骤6. 同样地,当传感器放入指定的校准液(PH=4)中时,会有一个电压值和一个PH值。

- 步骤 7. 由于PH检测的线性特性,可以计算出k值和偏移值,接下来请将偏移值和k值(与pHValue相同)插入到软件代码的第10行和第34行中:
- 步骤 8. 最后,您可以自由地检测您的液体了。
原理图在线查看器
资源
技术支持与产品讨论
请将任何技术问题提交到我们的论坛。
可升级为工业传感器
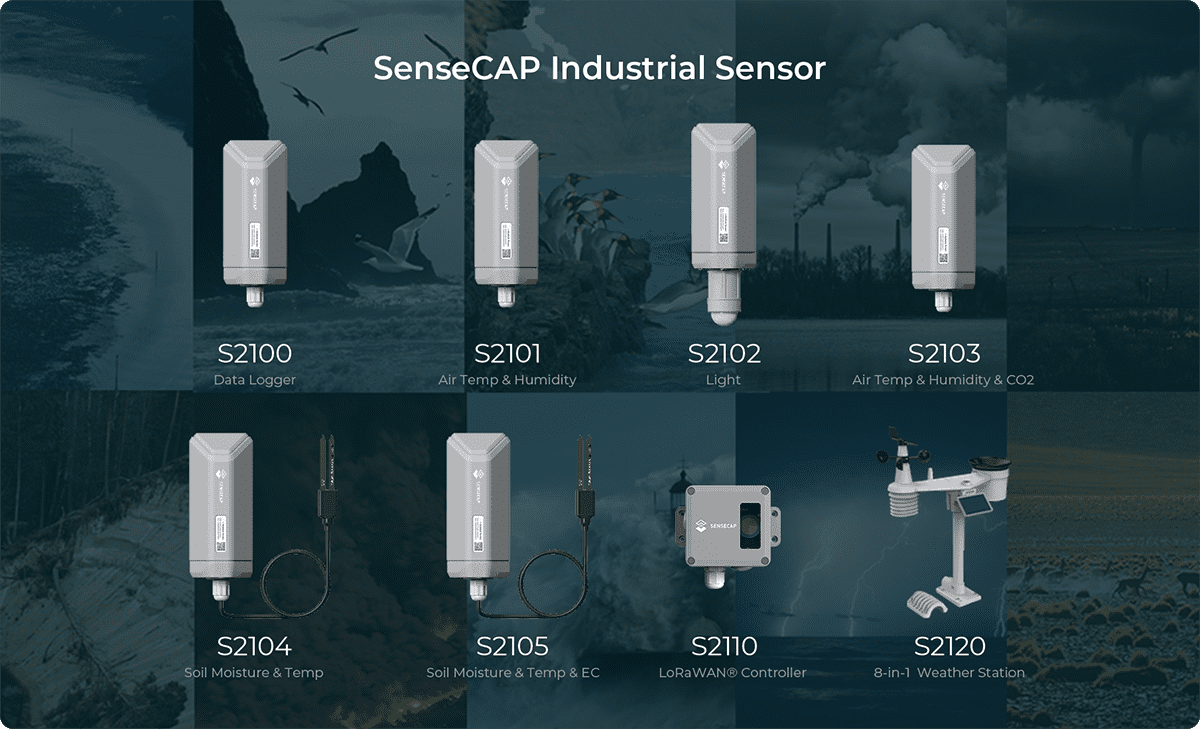
通过SenseCAP S2110控制器和S2100数据记录器,您可以轻松地将Grove转换为LoRaWAN®传感器。Seeed不仅帮助您进行原型设计,还为您提供了通过SenseCAP系列强大的工业传感器扩展项目的可能性。
IP66外壳、蓝牙配置、与全球LoRaWAN®网络的兼容性、内置19Ah电池以及APP的强大支持,使SenseCAP S210x成为工业应用的最佳选择。该系列包括土壤湿度、空气温湿度、光照强度、CO2、EC传感器以及8合1气象站。为您下一个成功的工业项目尝试最新的SenseCAP S210x。


