Grove - DS1307 RTC(实时时钟)用于 Arduino
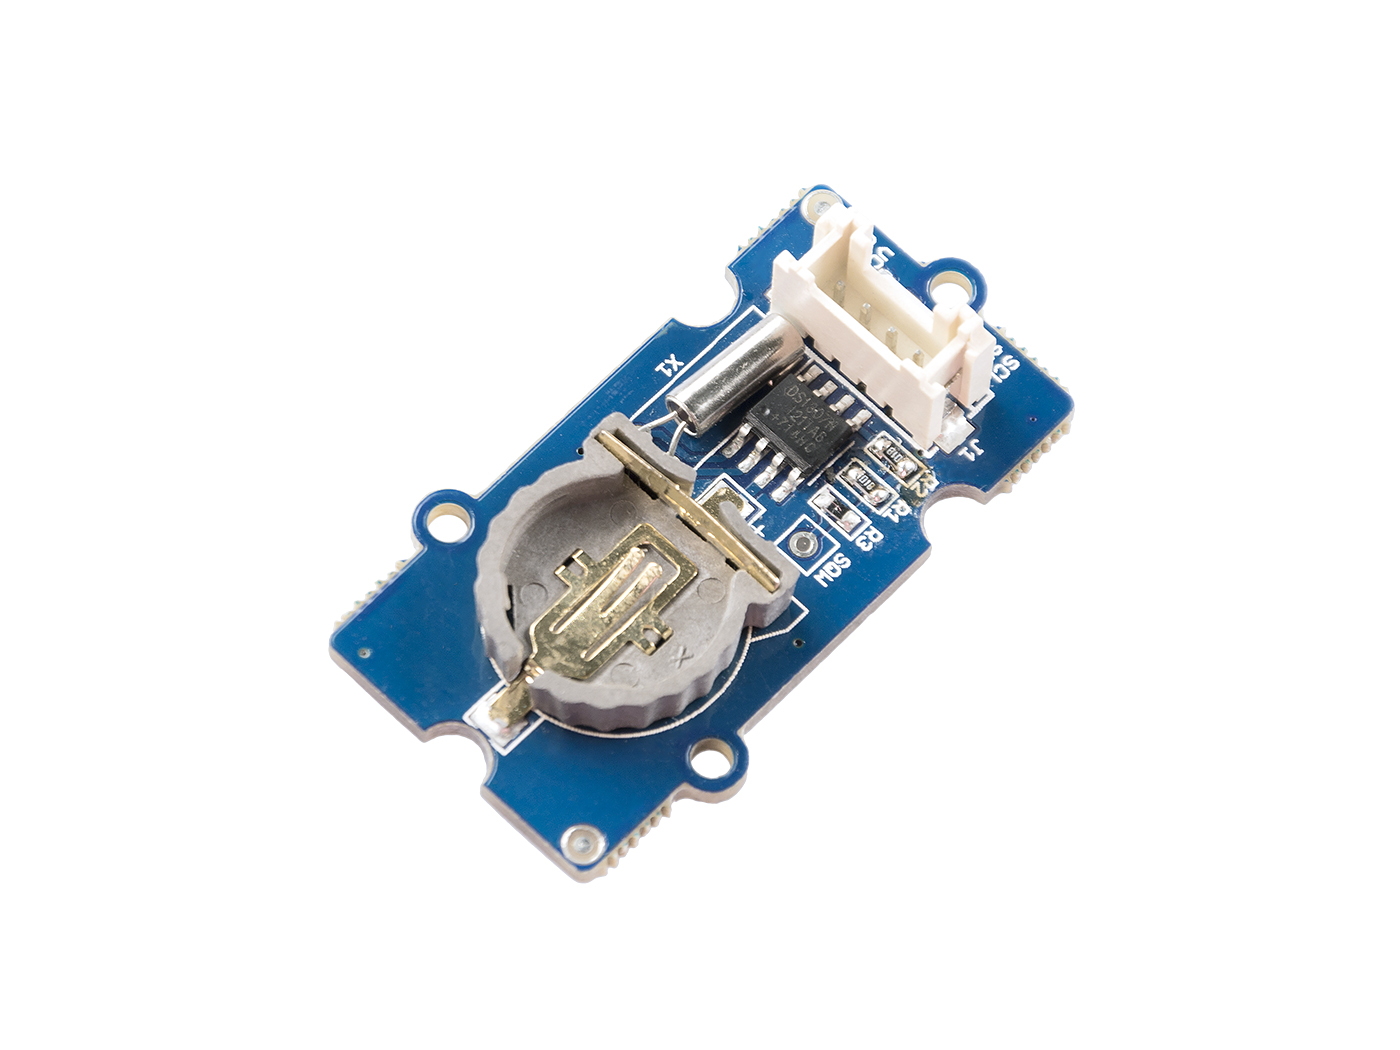
RTC 模块基于时钟芯片 DS1307,支持 I2C 协议。它使用锂电池(CR1225)。时钟/日历提供秒、分钟、小时、星期、日期、月份和年份。月份的最后一天会自动调整为少于 31 天的月份,包括对闰年的修正。时钟可以以 24 小时或 12 小时格式运行,并带有 AM/PM 指示器,有效期至 2100 年。为了获得稳定的性能,必须在电池座中放置一个 3 伏 CR1225 锂电池。如果仅使用主电源,模块可能无法正常工作,因为晶体可能无法振荡。
电池不包含在内。
预读
如果您对 Arduino 的 RTC 不熟悉,强烈建议提前阅读以下介绍:
规格
- PCB 尺寸:2.0cm*4.0cm
- 接口:2.0mm 间距针头
- IO 结构:SCL、SDA、VCC、GND
- ROHS:是
- VCC:3.3~5.5V
- 逻辑高电平输入:2.2~VCC+0.3 V
- 逻辑低电平输入:-0.3~+0.8 V
- 电池电压:2.0~3.5 V
有关 Grove 模块的更多详细信息,请参考 Grove 系统
支持的平台
| Arduino | Raspberry Pi | |||
|---|---|---|---|---|
 |  |  |  |  |
上述提到的支持平台仅表示模块的软件或理论兼容性。在大多数情况下,我们仅为 Arduino 平台提供软件库或代码示例。不可能为所有可能的 MCU 平台提供软件库或演示代码。因此,用户需要自行编写软件库。
入门指南
使用 Arduino
硬件
- 步骤 1. 准备以下物品:
| Seeeduino V4.2 | Base Shield | Grove-RTC |
|---|---|---|
 |  |  |
| 立即购买 | 立即购买 | 立即购买 |
- 步骤 2. 将 Grove-RTC 连接到 Grove-Base Shield 的 I2C 端口。
- 步骤 3. 将 Grove-Base Shield 插入 Seeeduino。
- 步骤 4. 使用 USB 数据线将 Seeeduino 连接到电脑。
为了获得稳定的性能,必须在电池座中放置一个 3 伏 CR1225 锂电池。如果仅使用主电源,模块可能无法正常工作,因为晶体可能无法振荡。
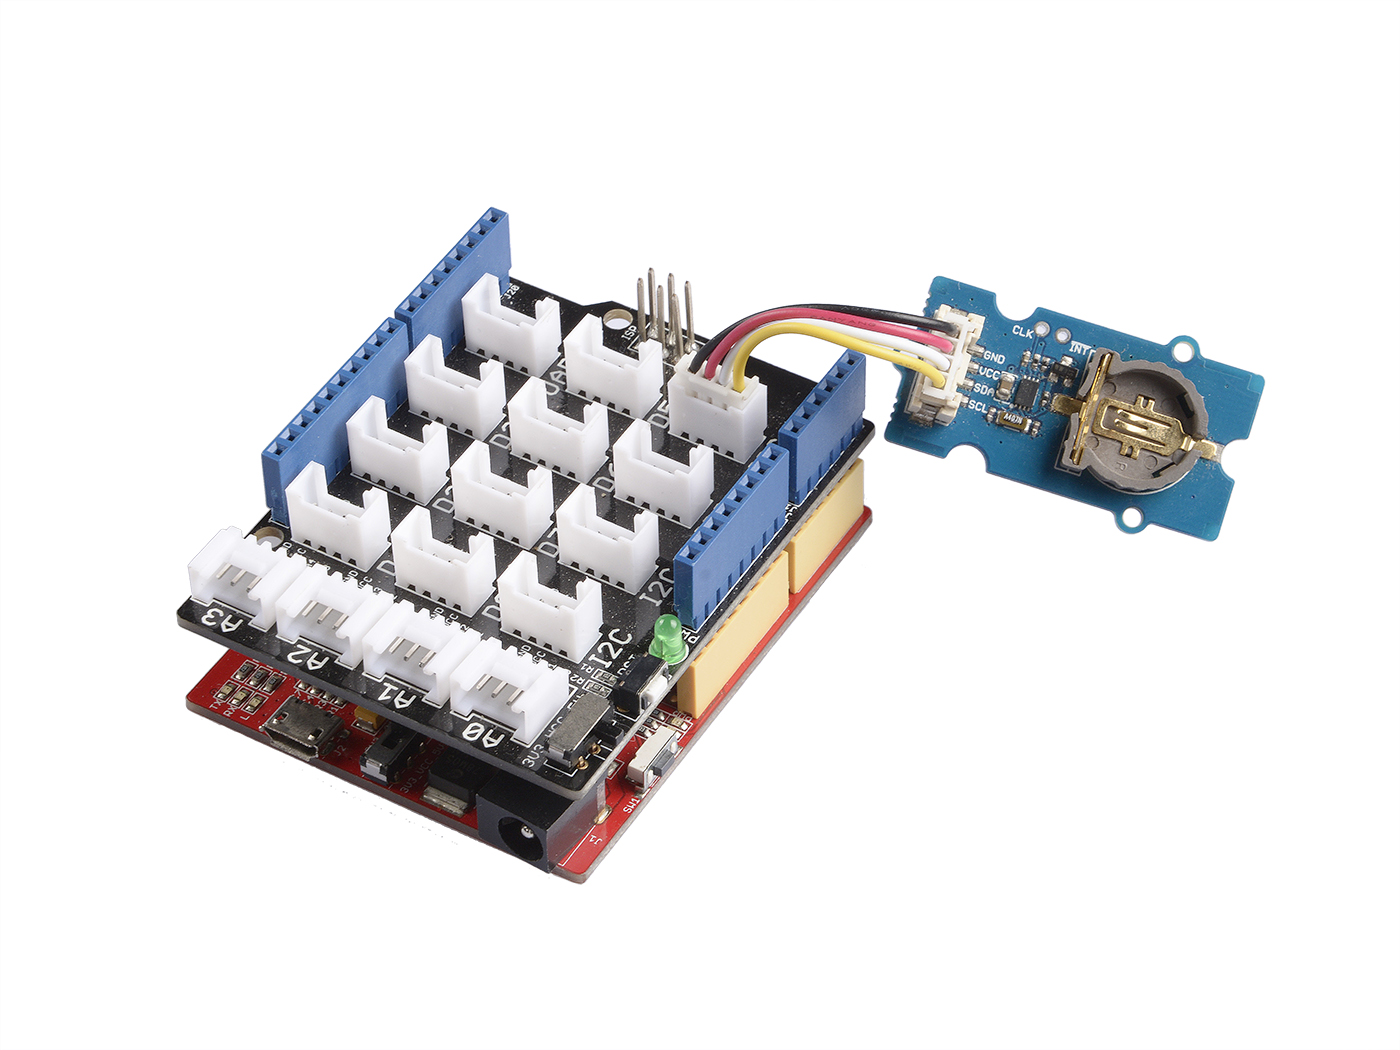
如果没有 Base Shield,也可以直接将 Grove-RTC 连接到 Arduino 板。请按照以下连接方式。
| Seeeduino_v4 | Grove-RTC |
|---|---|
| 5V | VCC |
| GND | GND |
| SDA | SDA |
| SCL | SCL |
软件
步骤 1. 下载 RTC 库。
步骤 2. 参考 如何安装库 为 Arduino 安装库。
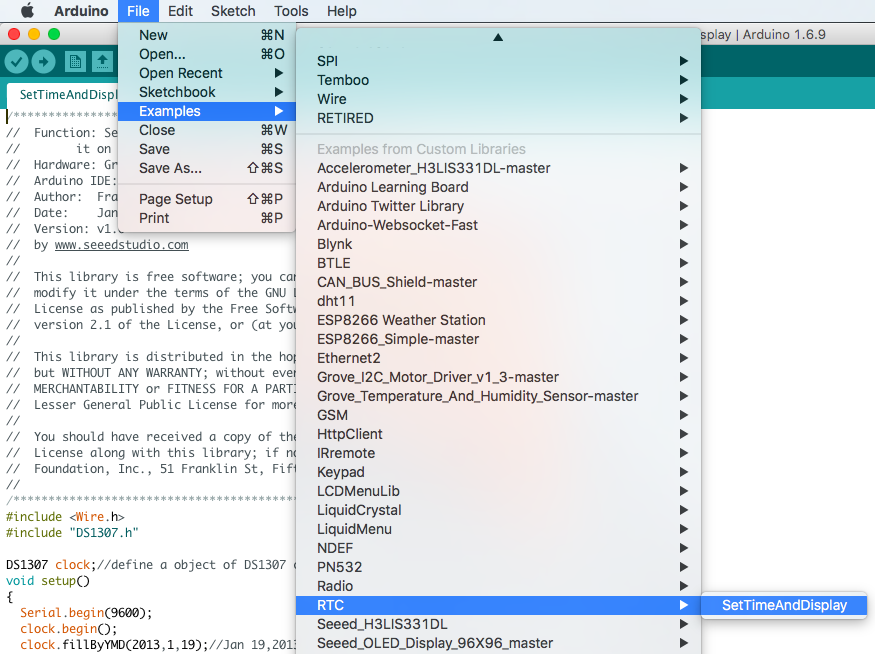
步骤 3. 创建一个新的 Arduino 草图,并将以下代码粘贴到其中,或者通过路径直接打开代码:File -> Example -> RTC -> SetTimeAndDisplay。
#include <Wire.h>
#include "DS1307.h"

DS1307 clock;//定义一个 DS1307 类的对象
void setup()
{
    Serial.begin(9600);
    clock.begin();
    clock.fillByYMD(2013,1,19);//2013年1月19日
    clock.fillByHMS(15,28,30);//15:28:30
    clock.fillDayOfWeek(SAT);//星期六
    clock.setTime();//将时间写入 RTC 芯片
}
void loop()
{
    printTime();
}
/*函数:在串口监视器上显示时间*/
void printTime()
{
    clock.getTime();
    Serial.print(clock.hour, DEC);
    Serial.print(":");
    Serial.print(clock.minute, DEC);
    Serial.print(":");
    Serial.print(clock.second, DEC);
    Serial.print("  ");
    Serial.print(clock.month, DEC);
    Serial.print("/");
    Serial.print(clock.dayOfMonth, DEC);
    Serial.print("/");
    Serial.print(clock.year+2000, DEC);
    Serial.print(" ");
    Serial.print(clock.dayOfMonth);
    Serial.print("*");
    switch (clock.dayOfWeek)//友好的星期显示
    {
        case MON:
        Serial.print("MON");
        break;
        case TUE:
        Serial.print("TUE");
        break;
        case WED:
        Serial.print("WED");
        break;
        case THU:
        Serial.print("THU");
        break;
        case FRI:
        Serial.print("FRI");
        break;
        case SAT:
        Serial.print("SAT");
        break;
        case SUN:
        Serial.print("SUN");
        break;
    }
    Serial.println(" ");
}
步骤 4. 设置时间。将函数参数更改为当前日期/时间。请注意参数的格式。
clock.fillByYMD(2013,1,19);//2013年1月19日
clock.fillByHMS(15,28,30);//15:28:30
clock.fillDayOfWeek(SAT);//星期六
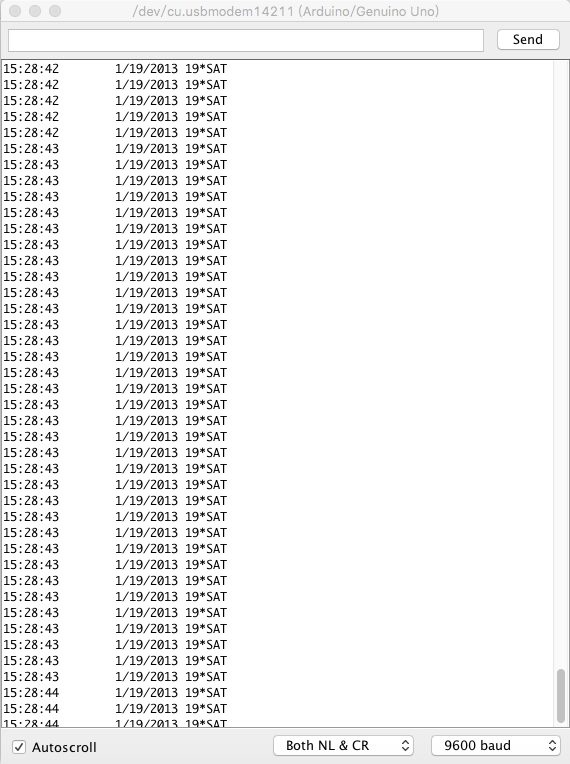
步骤 5. 上传代码并打开串口监视器以接收传感器数据。
使用 Raspberry Pi
硬件
- 步骤 1. 准备以下物品:
| Raspberry Pi | GrovePi_Plus | Grove-RTC |
|---|---|---|
 |  |  |
| 立即购买 | 立即购买 | 立即购买 |
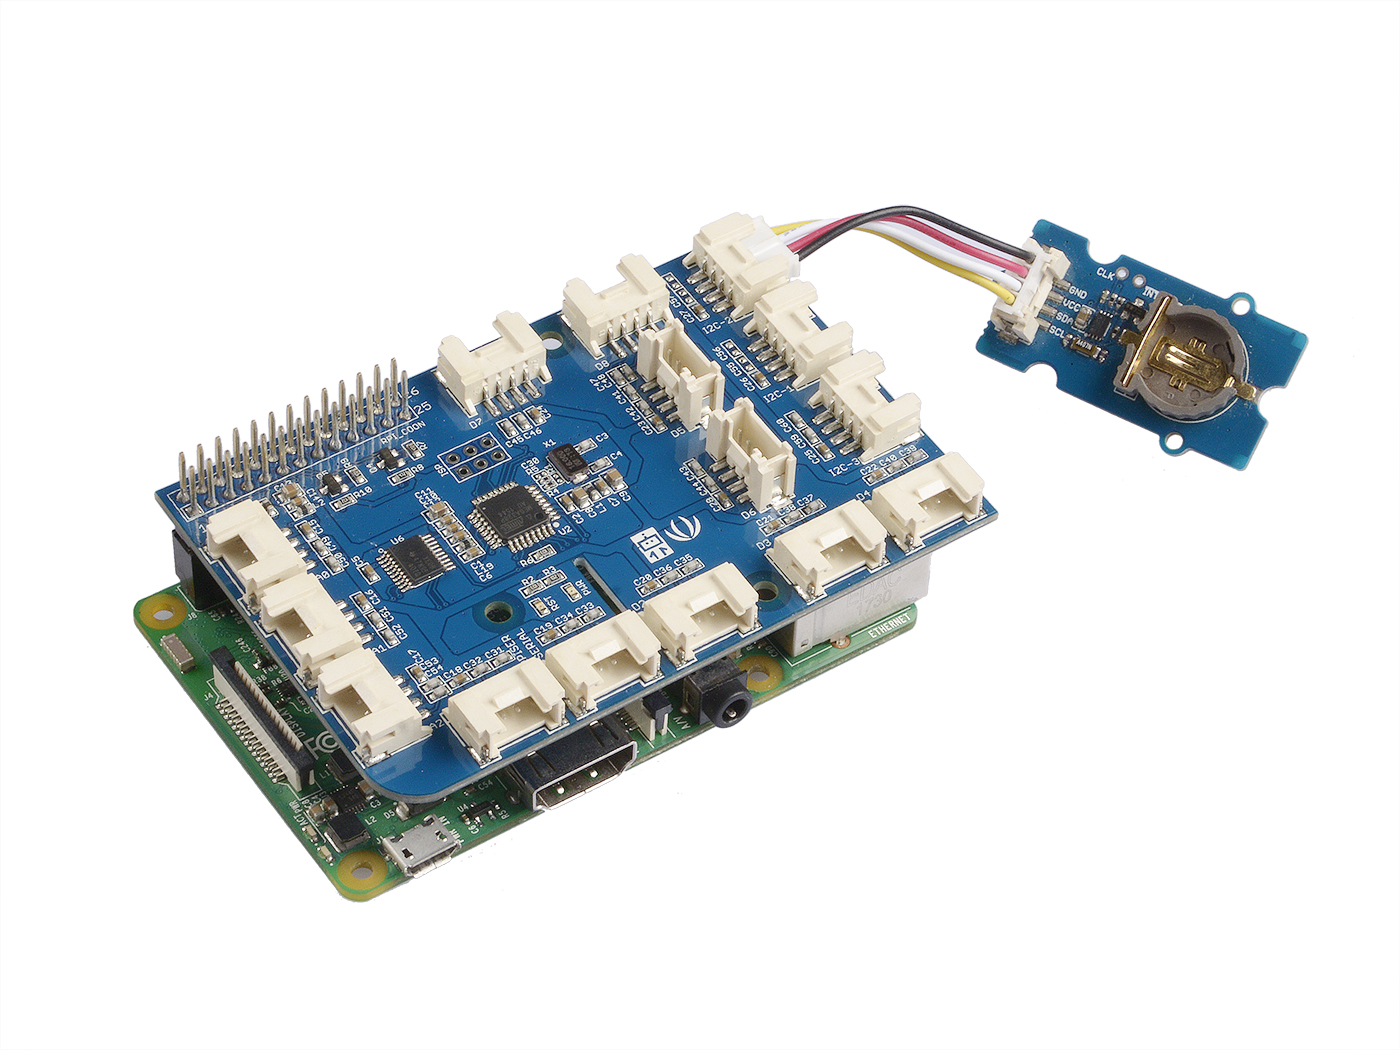
- 步骤 2. 将 GrovePi_Plus 插入 Raspberry Pi。
- 步骤 3. 将 Grove-RTC 连接到 GrovePi_Plus 的 I2C 端口。
- 步骤 4. 使用 USB 数据线将 Raspberry Pi 连接到电脑。
软件
- 步骤 1. 按照 设置软件 配置开发环境。
- 步骤 2. Git 克隆 Github 仓库。
cd ~
git clone https://github.com/DexterInd/GrovePi.git
- 步骤 3. 执行以下命令以使用此传感器。
cd ~/GrovePi/Software/Python
python grove_i2c_rtc.py
以下是代码:
#!/usr/bin/env python
#
# GrovePi 示例代码,用于使用 Grove I2C RTC (https://www.seeedstudio.com/wiki/Grove_-_RTC)
#
# GrovePi 连接了 Raspberry Pi 和 Grove 传感器。您可以在此了解更多关于 GrovePi 的信息:http://www.dexterindustries.com/GrovePi
#
# 对此示例有疑问?请在论坛上提问:http://forum.dexterindustries.com/c/grovepi
#
'''
## 许可证
MIT 许可证 (MIT)
GrovePi for the Raspberry Pi: 一个开源平台,用于将 Grove 传感器连接到 Raspberry Pi。
版权所有 (C) 2017 Dexter Industries
特此免费授予任何获得本软件及相关文档文件(“软件”)副本的人使用、复制、修改、合并、发布、分发、再许可和/或销售软件副本的权利,并允许提供软件的人这样做,但须符合以下条件:
上述版权声明和本许可声明应包含在软件的所有副本或主要部分中。
本软件按“原样”提供,不附带任何形式的明示或暗示保证,包括但不限于适销性、适合特定用途和非侵权的保证。在任何情况下,作者或版权持有人均不对因使用本软件或与本软件相关的行为而产生的任何索赔、损害或其他责任负责,无论是合同诉讼、侵权行为或其他行为。
'''

import time
import grovepi

# 将 Grove 实时时钟连接到任意 I2C 端口,例如 I2C-1
# 地址为 I2C 地址 0x68
# SCL,SDA,VCC,GND

while True:
    try:
        print(grovepi.rtc_getTime())
        time.sleep(.5)

    except IOError:
        print ("Error")
-
步骤 4. 以下是结果。

演示 2: Grove_rtc
您也可以使用此演示来显示常规时间。请创建 grove_rtc.py 文件并复制以下代码。
    '''
     * Grove-RTC.py
     * Raspberry Pi 演示
     *
     * 版权所有 (c) 2014 seeed technology inc.
     * 网站    : community.seeedstudio.com/
     * 作者     : Lambor
     * 创建时间 : 2014年11月
     * 更新日志 :
     *
     * MIT 许可协议 (MIT)
     *
     * 特此免费授予任何获得此软件及相关文档文件(“软件”)副本的人使用本软件的权限,
     * 包括但不限于使用、复制、修改、合并、发布、分发、再许可和/或销售本软件的副本,
     * 并允许获得本软件的人这样做,条件是以下版权声明和许可声明包含在本软件的所有副本或重要部分中。
     *
     * 本软件按“原样”提供,无任何形式的明示或暗示担保,包括但不限于适销性、
     * 特定用途适用性和非侵权的担保。在任何情况下,作者或版权持有人均不对因使用本软件或其他交易
     * 而产生的任何索赔、损害或其他责任负责,无论是合同诉讼、侵权行为或其他原因。
     *
     '''

    #!/usr/bin/python
import time
import smbus


    bus = smbus.SMBus(1)    # 0 = /dev/i2c-0 (端口 I2C0), 1 = /dev/i2c-1 (端口 I2C1)

class DS1307():
        def __init__(self):
            self.MON = 1
            self.TUE = 2
            self.WED = 3
            self.THU = 4
            self.FRI = 5
            self.SAT = 6
            self.SUN = 7
            self.DS1307_I2C_ADDRESS = 0x68

            print '开始'

        def decToBcd(self, val):
            return ( (val/10*16) + (val%10) )

        def bcdToDec(self,  val):
            return ( (val/16*10) + (val%16) )

        def begin(self, news):
            print news

        def startClock(self):
            bus.write_byte(self.DS1307_I2C_ADDRESS, 0x00)
            self.second = bus.read_byte(self.DS1307_I2C_ADDRESS) & 0x7f
            bus.write_byte_data(self.DS1307_I2C_ADDRESS, 0x00, self.second)

            print '启动时钟..'

        def stopClock(self):
            bus.write_byte(self.DS1307_I2C_ADDRESS, 0x00)
            self.second = bus.read_byte(self.DS1307_I2C_ADDRESS) | 0x80
            bus.write_byte_data(self.DS1307_I2C_ADDRESS, 0x00, self.second)

            print '停止时钟..'

        def setTime(self):
            data = [self.decToBcd(self.second), self.decToBcd(self.minute), \
                    self.decToBcd(self.hour), self.decToBcd(self.dayOfWeek), \
                    self.decToBcd(self.dayOfMonth), self.decToBcd(self.month), \
                    self.decToBcd(self.year)]

            bus.write_byte(self.DS1307_I2C_ADDRESS, 0x00)
            bus.write_i2c_block_data(self.DS1307_I2C_ADDRESS,0x00,data)

            print '设置时间..'

        def getTime(self):
            bus.write_byte(self.DS1307_I2C_ADDRESS, 0x00)
            data = bus.read_i2c_block_data(self.DS1307_I2C_ADDRESS,0x00)
            #以下部分需要掩码,因为某些位是控制位
            self.second = self.bcdToDec(data[0] & 0x7f)
            self.minute = self.bcdToDec(data[1])
            self.hour = self.bcdToDec(data[2] & 0x3f)  #如果是12小时制需要更改此处
            self.dayOfWeek = self.bcdToDec(data[3])
            self.dayOfMonth = self.bcdToDec(data[4])
            self.month = self.bcdToDec(data[5])
            self.year = self.bcdToDec(data[6])

            print '获取时间..'

        def fillByHMS(self, _hour,  _minute,  _second):
            self.hour = _hour
            self.minute = _minute
            self.second = _second

            print '通过时分秒填充..'

        def fillByYMD(self, _year,  _month,  _day):
            self.year = _year - 2000
            self.month = _month;
            self.dayOfMonth = _day

            print '通过年月日填充..'

        def fillDayOfWeek(self,  _dow):
            self.dayOfWeek = _dow

            print '填充星期..'

    if __name__ == "__main__":
        clock = DS1307()
        clock.fillByYMD(2015,3,5)
        clock.fillByHMS(12,42,30)
        clock.fillDayOfWeek(clock.THU)
        clock.setTime()
        while True:
            clock.getTime()
            print clock.hour, ":", clock.minute, ":", \
                    clock.second, " ", clock.dayOfMonth, "/", \
                    clock.month, "/", clock.year,"  ", "星期", \
                    ":", clock.dayOfWeek
            time.sleep(1)
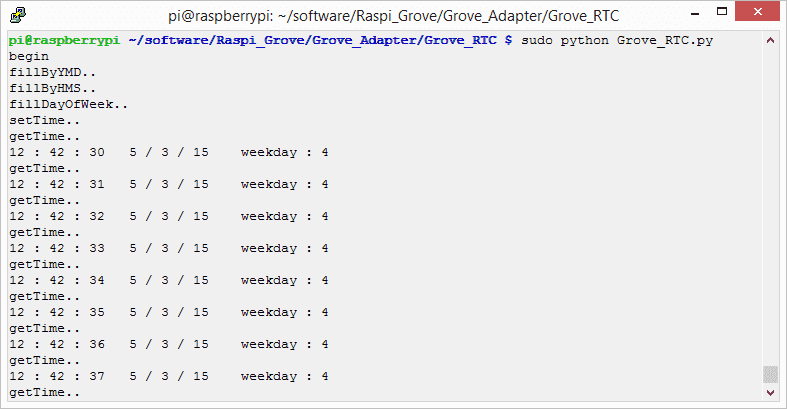
执行以下命令以使用此传感器:
sudo python grove_rtc.py
以下是结果。
原理图在线查看器
资源
- [Eagle] Grove-RTC 的 Eagle 格式文件
- [PDF] Grove-RTC 原理图 PDF 格式
- [PDF] Grove-RTC PCB PDF 格式
- [Library] RTC 的 Github 仓库
- [Datasheet] DS1307 数据手册
项目
使用 Arduino 的实时时钟:是否曾想过制作一个按计划激活的项目?使用实时时钟 (RTC) 是实现这一目标的绝佳方式!
彩色时钟:一个显示您的能量水平并在您接近时向您问候的时钟
技术支持与产品讨论
感谢您选择我们的产品!我们为您提供多种支持,以确保您使用我们的产品时体验顺畅。我们提供多种沟通渠道,以满足不同的偏好和需求。

