基于 Edge Impulse 的安全帽检测
介绍
在工业或建筑工地等工作环境中,安全帽是必需的,对于保护人们的头部免受坠落物体、与其他物体碰撞、碎片、雨水和电击造成的伤害至关重要。它提高了安全性,但有时人们在个人和工业层面都低估了其重要性。因此,基于视频的监控来检测安全帽可以成为这一安全问题的优化解决方案。
因此,感谢 Louis Moreau 和 Mihajlo Raljic,我们提供了这个基础项目,我们将训练一个嵌入式机器学习模型来检测安全帽并将其部署到 Jetson Nano。Jetson NX 和 Jetson AGX 都受支持。

入门指南
Edge Impulse 使开发者能够通过嵌入式机器学习创建下一代智能设备解决方案。边缘机器学习将使今天由于成本、带宽或功耗限制而被丢弃的 99% 传感器数据得到有价值的利用。在这里,我们将应用 Edge Impulse 来训练嵌入式机器学习模型。
硬件
所需硬件
在这个项目中,所需的设备如下所示:
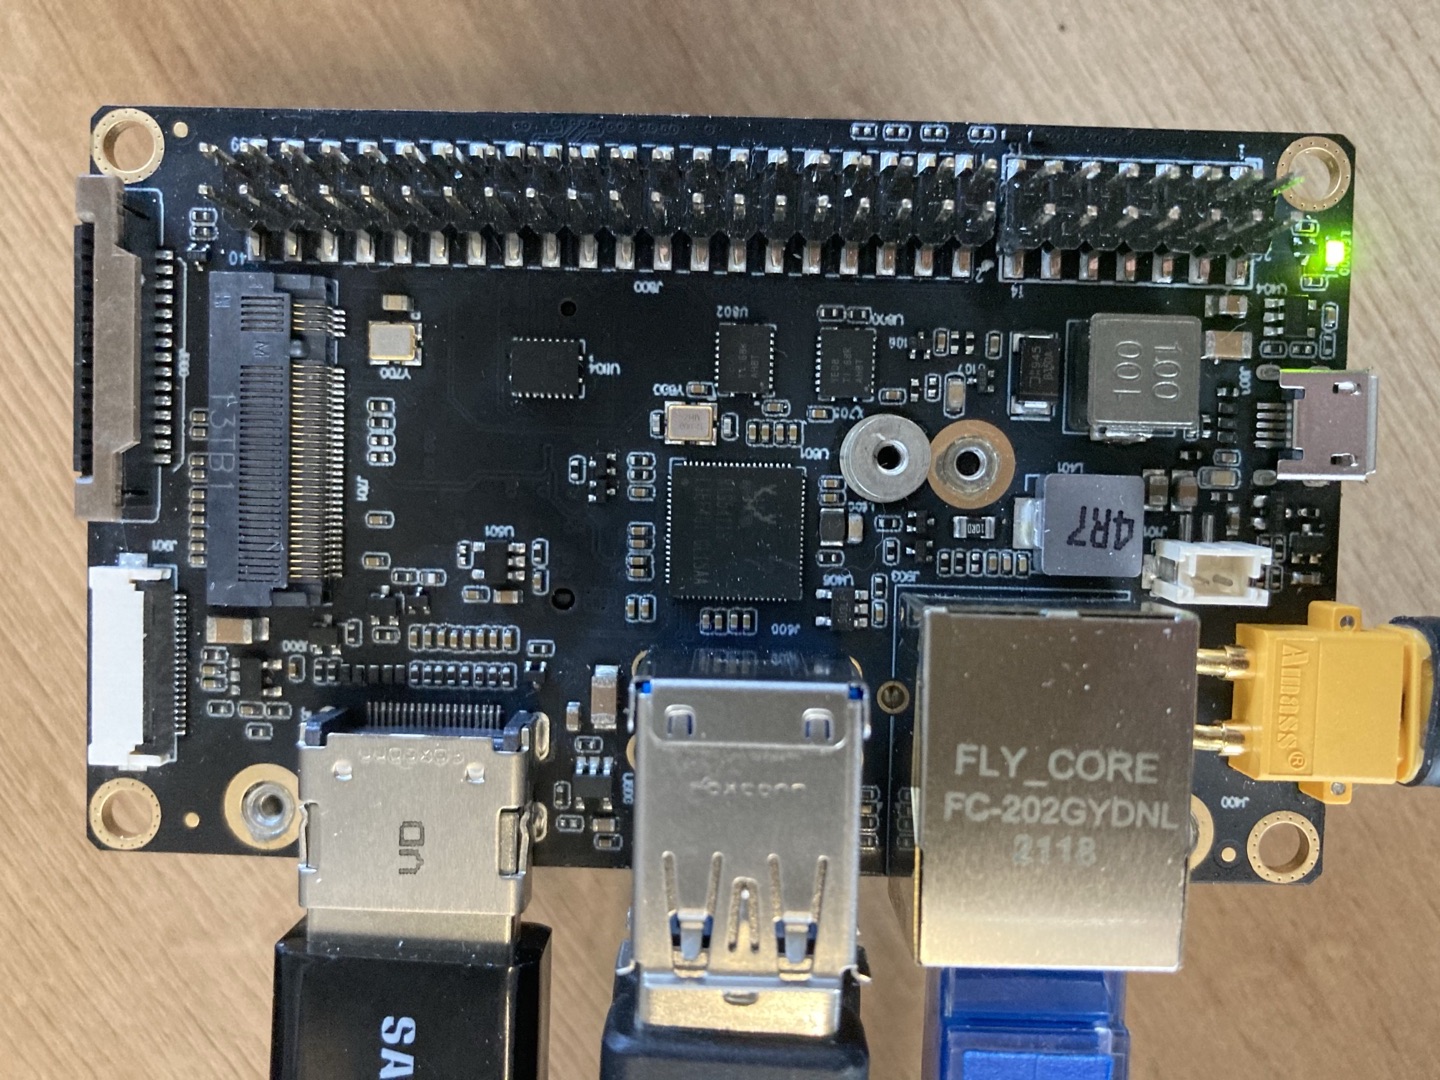
- NVIDIA Jetson Nano 或 NVIDIA Xavier NX 或 NVIDIA Xavier AGX
- PC
- USB 摄像头
- HDMI 显示屏
硬件设置
PC 和 NVIDIA Jetson Nano 都应该通电并连接到互联网。建议将 NVIDIA Jetson Nano 设置为 PC。
软件
- Edge Impusle
- 适用于 NVIDIA Jetson Nano 的 Ubuntu 系统
在这里,我们将训练一个嵌入式机器学习模型来检测安全帽。有几种方法可以实现这一点。
准备工作
在开始我们的项目之前,需要先完成一些准备工作。
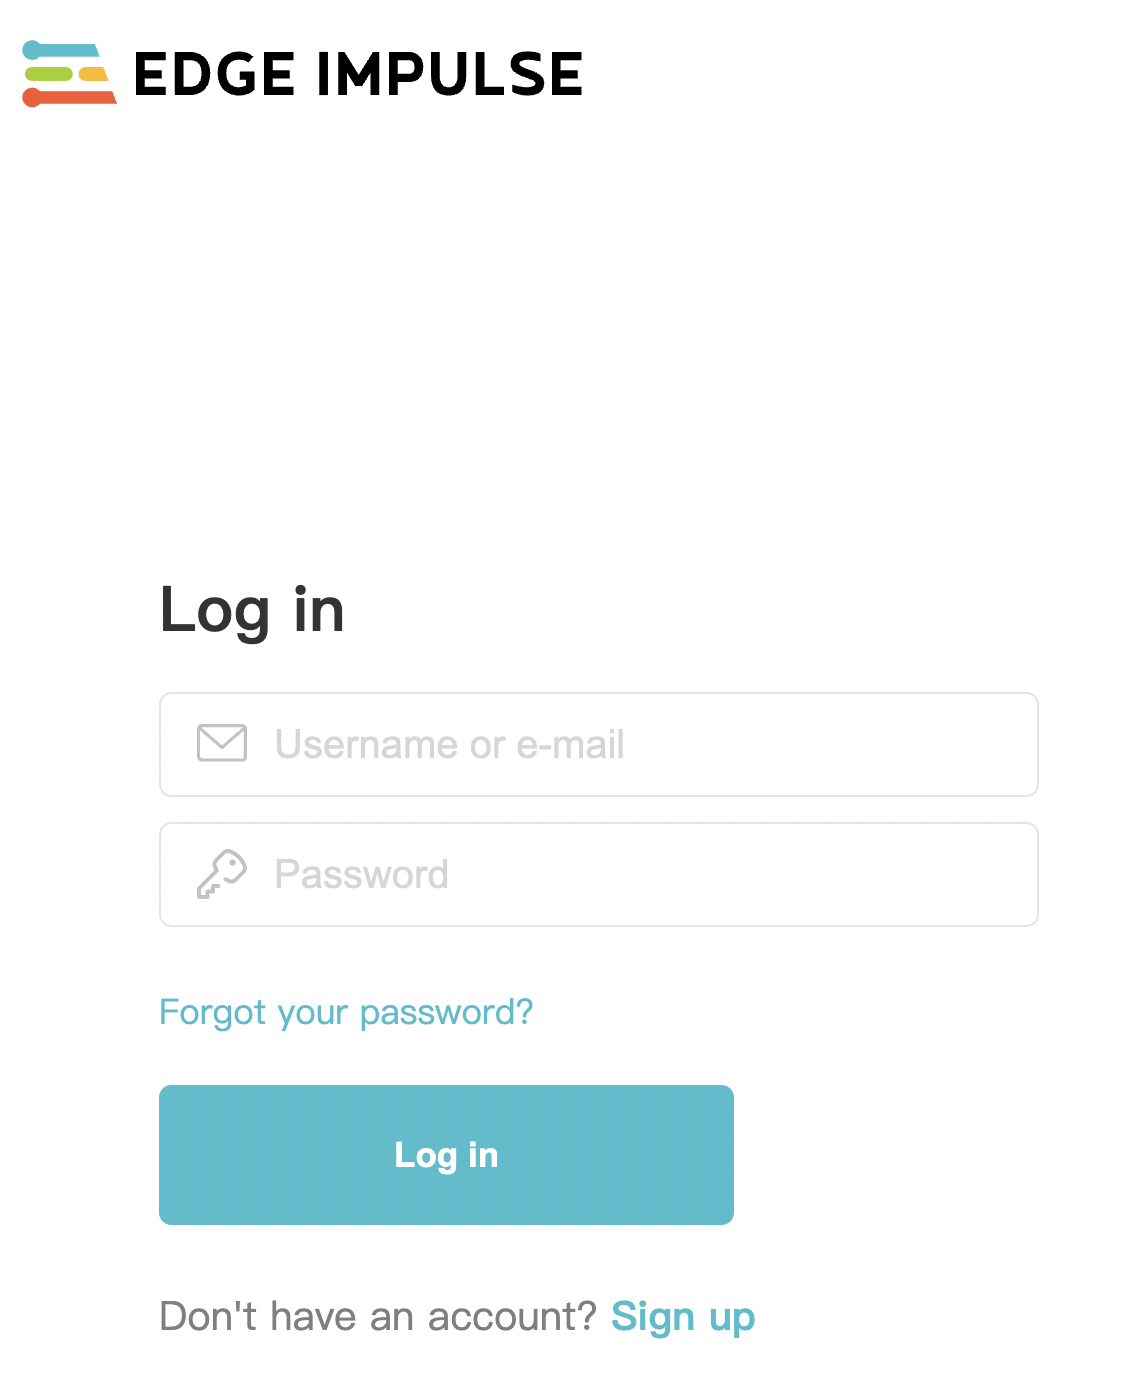
- 步骤 1. 打开 Edge Impulse 网站,并注册一个账户。
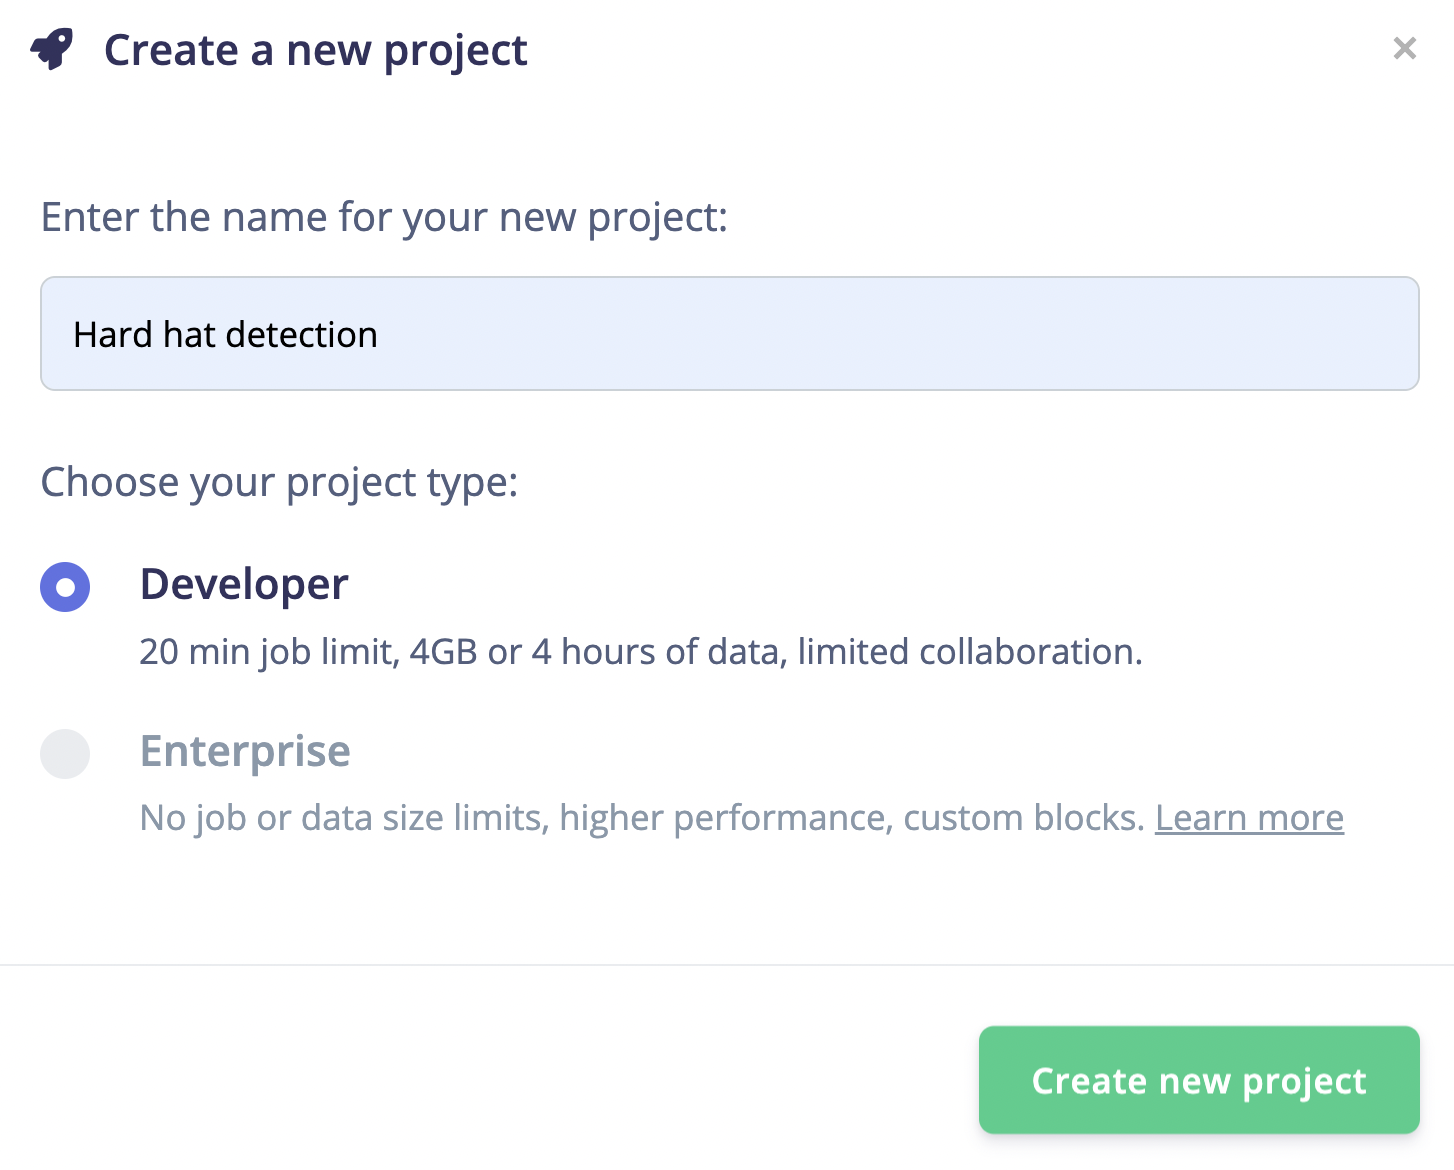
- 步骤 2. 点击"Create new project"并输入项目名称。
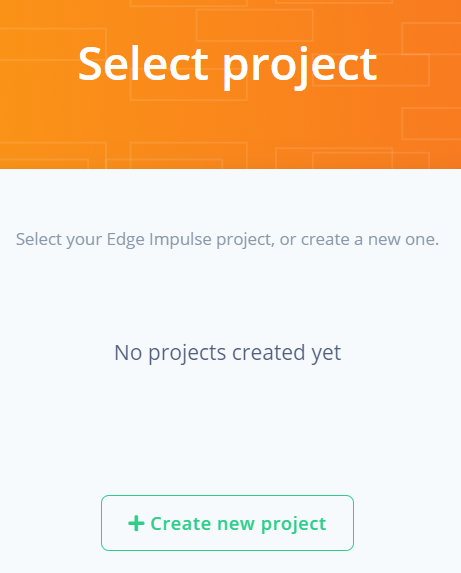
在这里我们输入"Hard hat detection"。
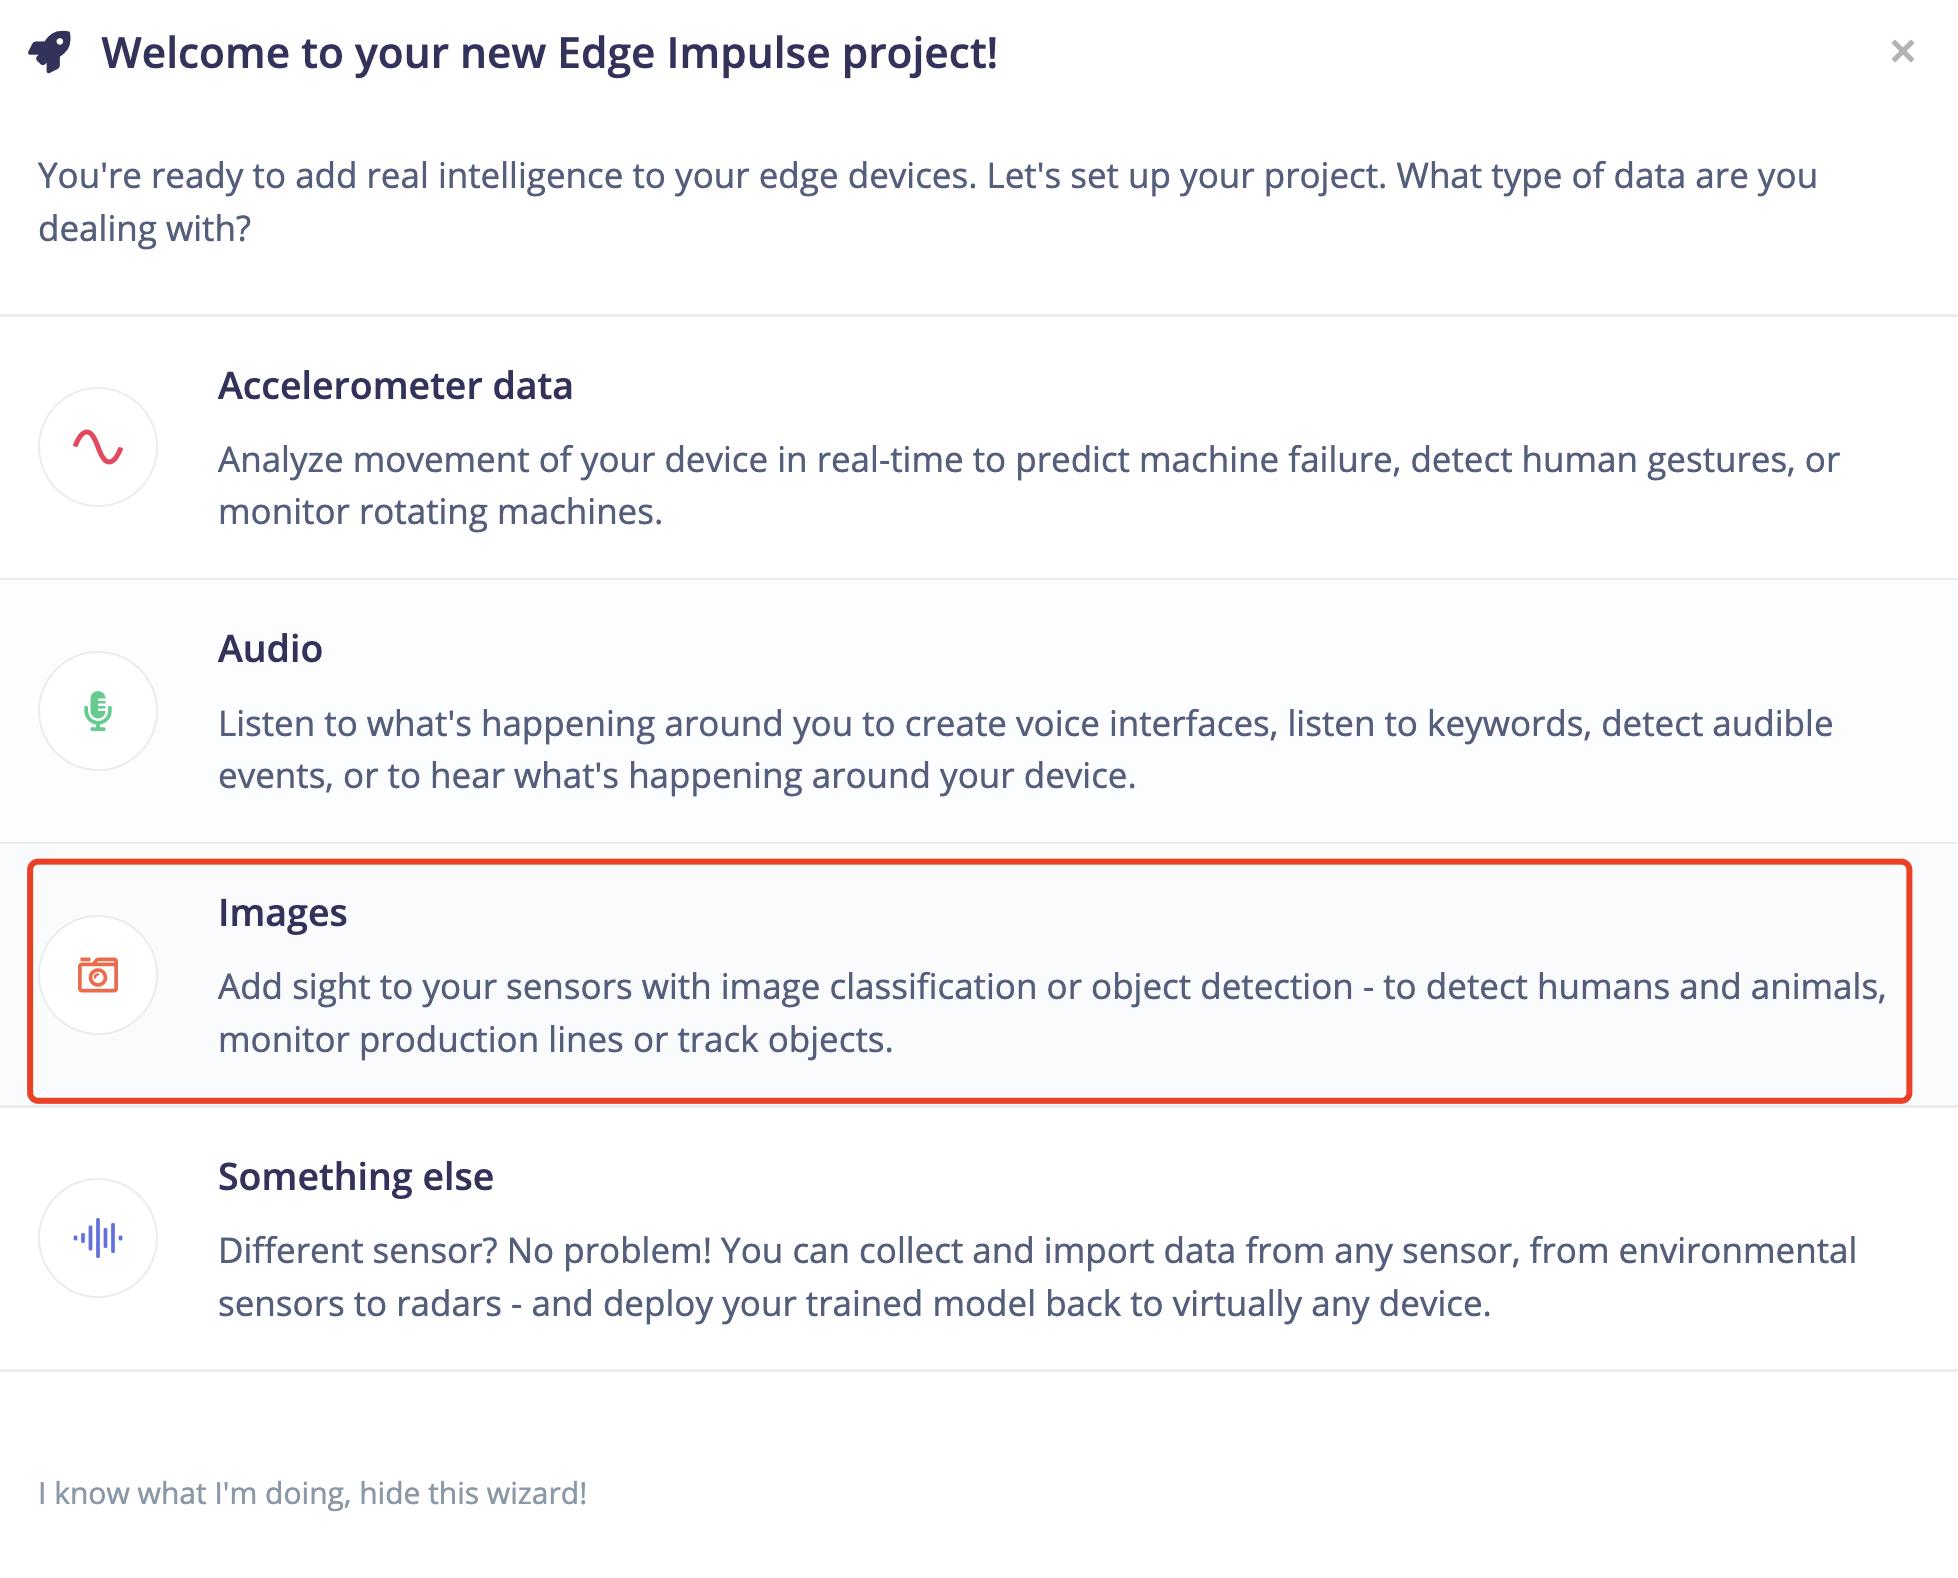
- 步骤 3. 我们将训练一个嵌入式机器学习模型来检测安全帽,因此在这里应该选择"image"选项。
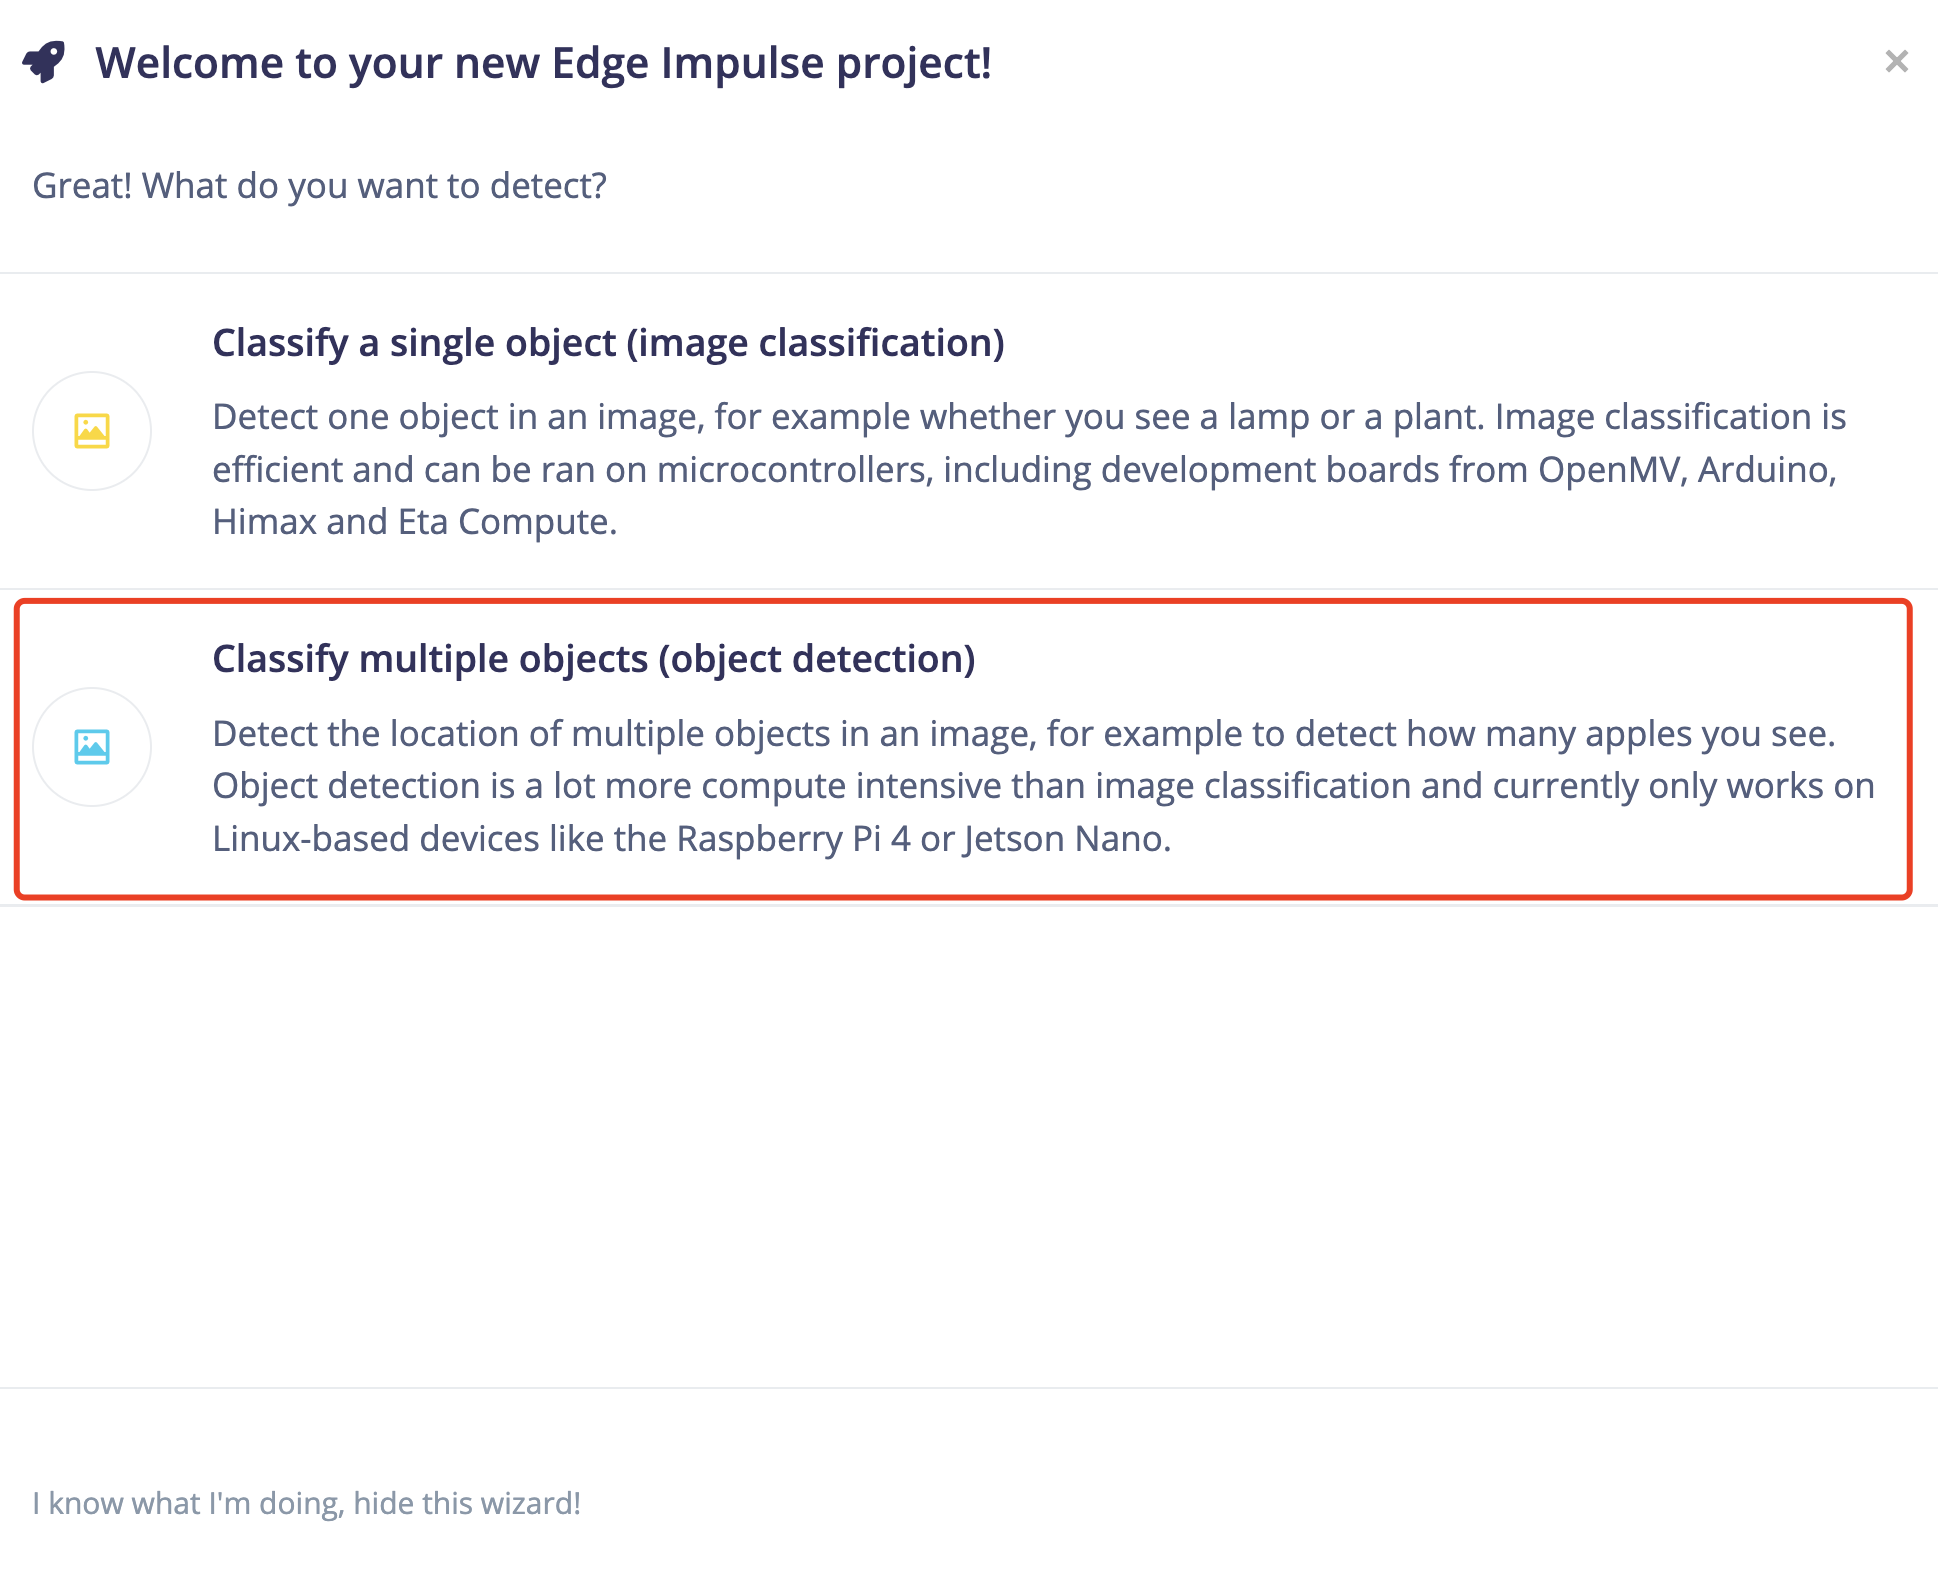
- 步骤 4. 将配置设置为"Classify multiple objects (object detection)"。
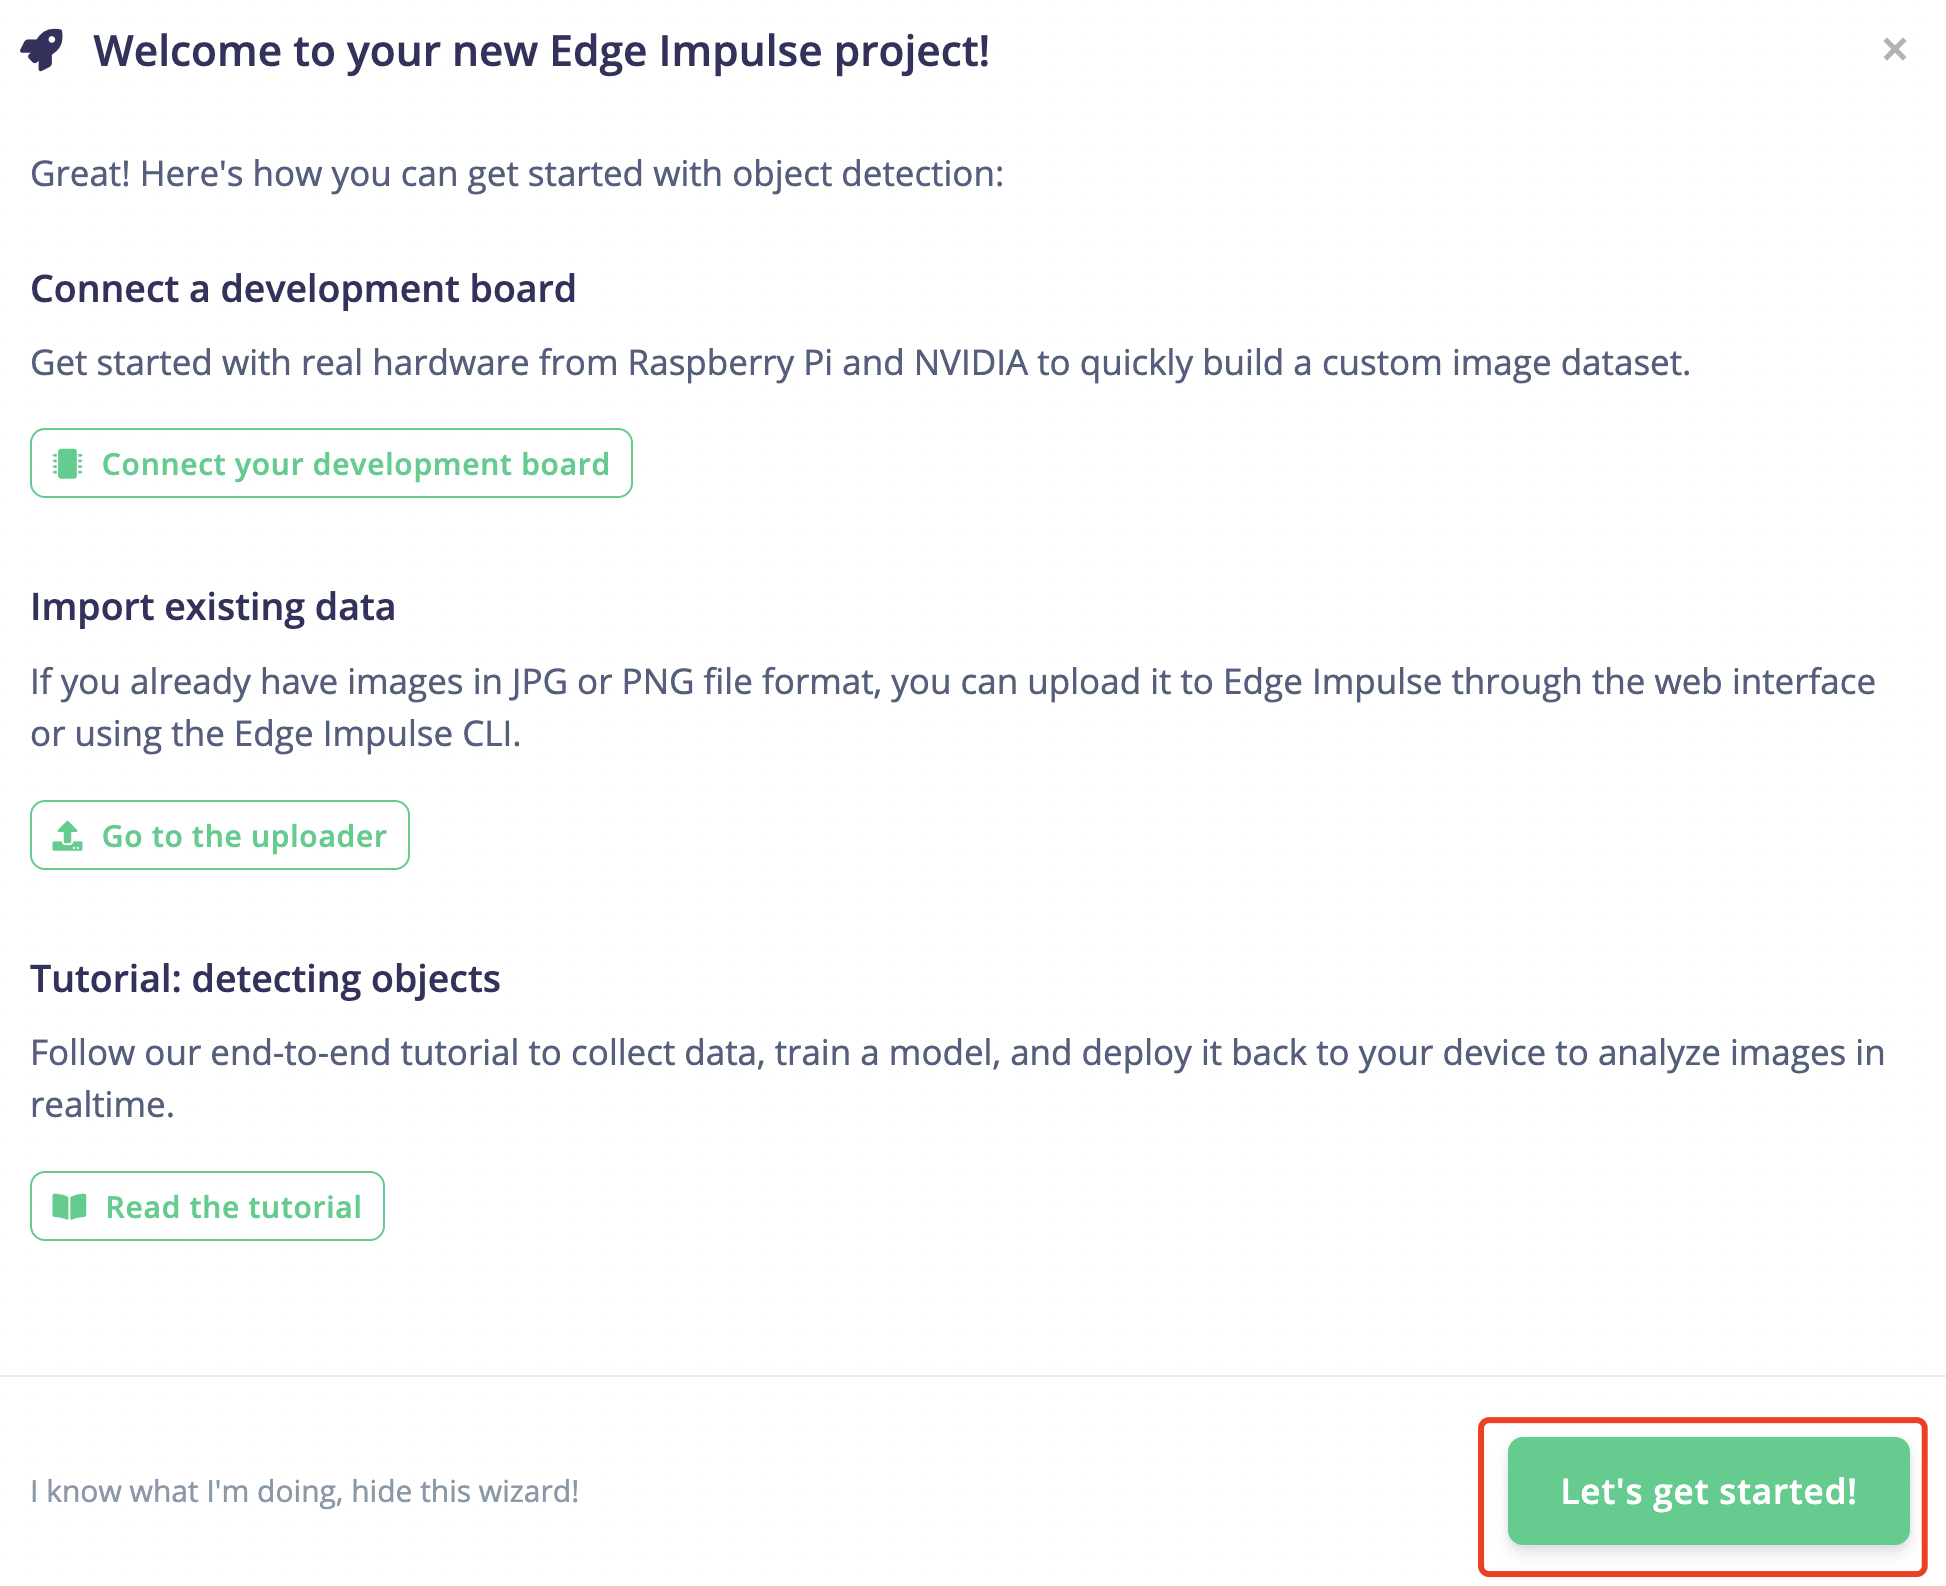
现在我们可以开始项目了。
安全帽检测机器学习模型训练
基于输入公共数据集的机器学习模型训练
Edge Impulse 提供了多种收集数据的方式。首先我们将把公共数据上传到网站并尝试开发一个嵌入式机器学习模型。
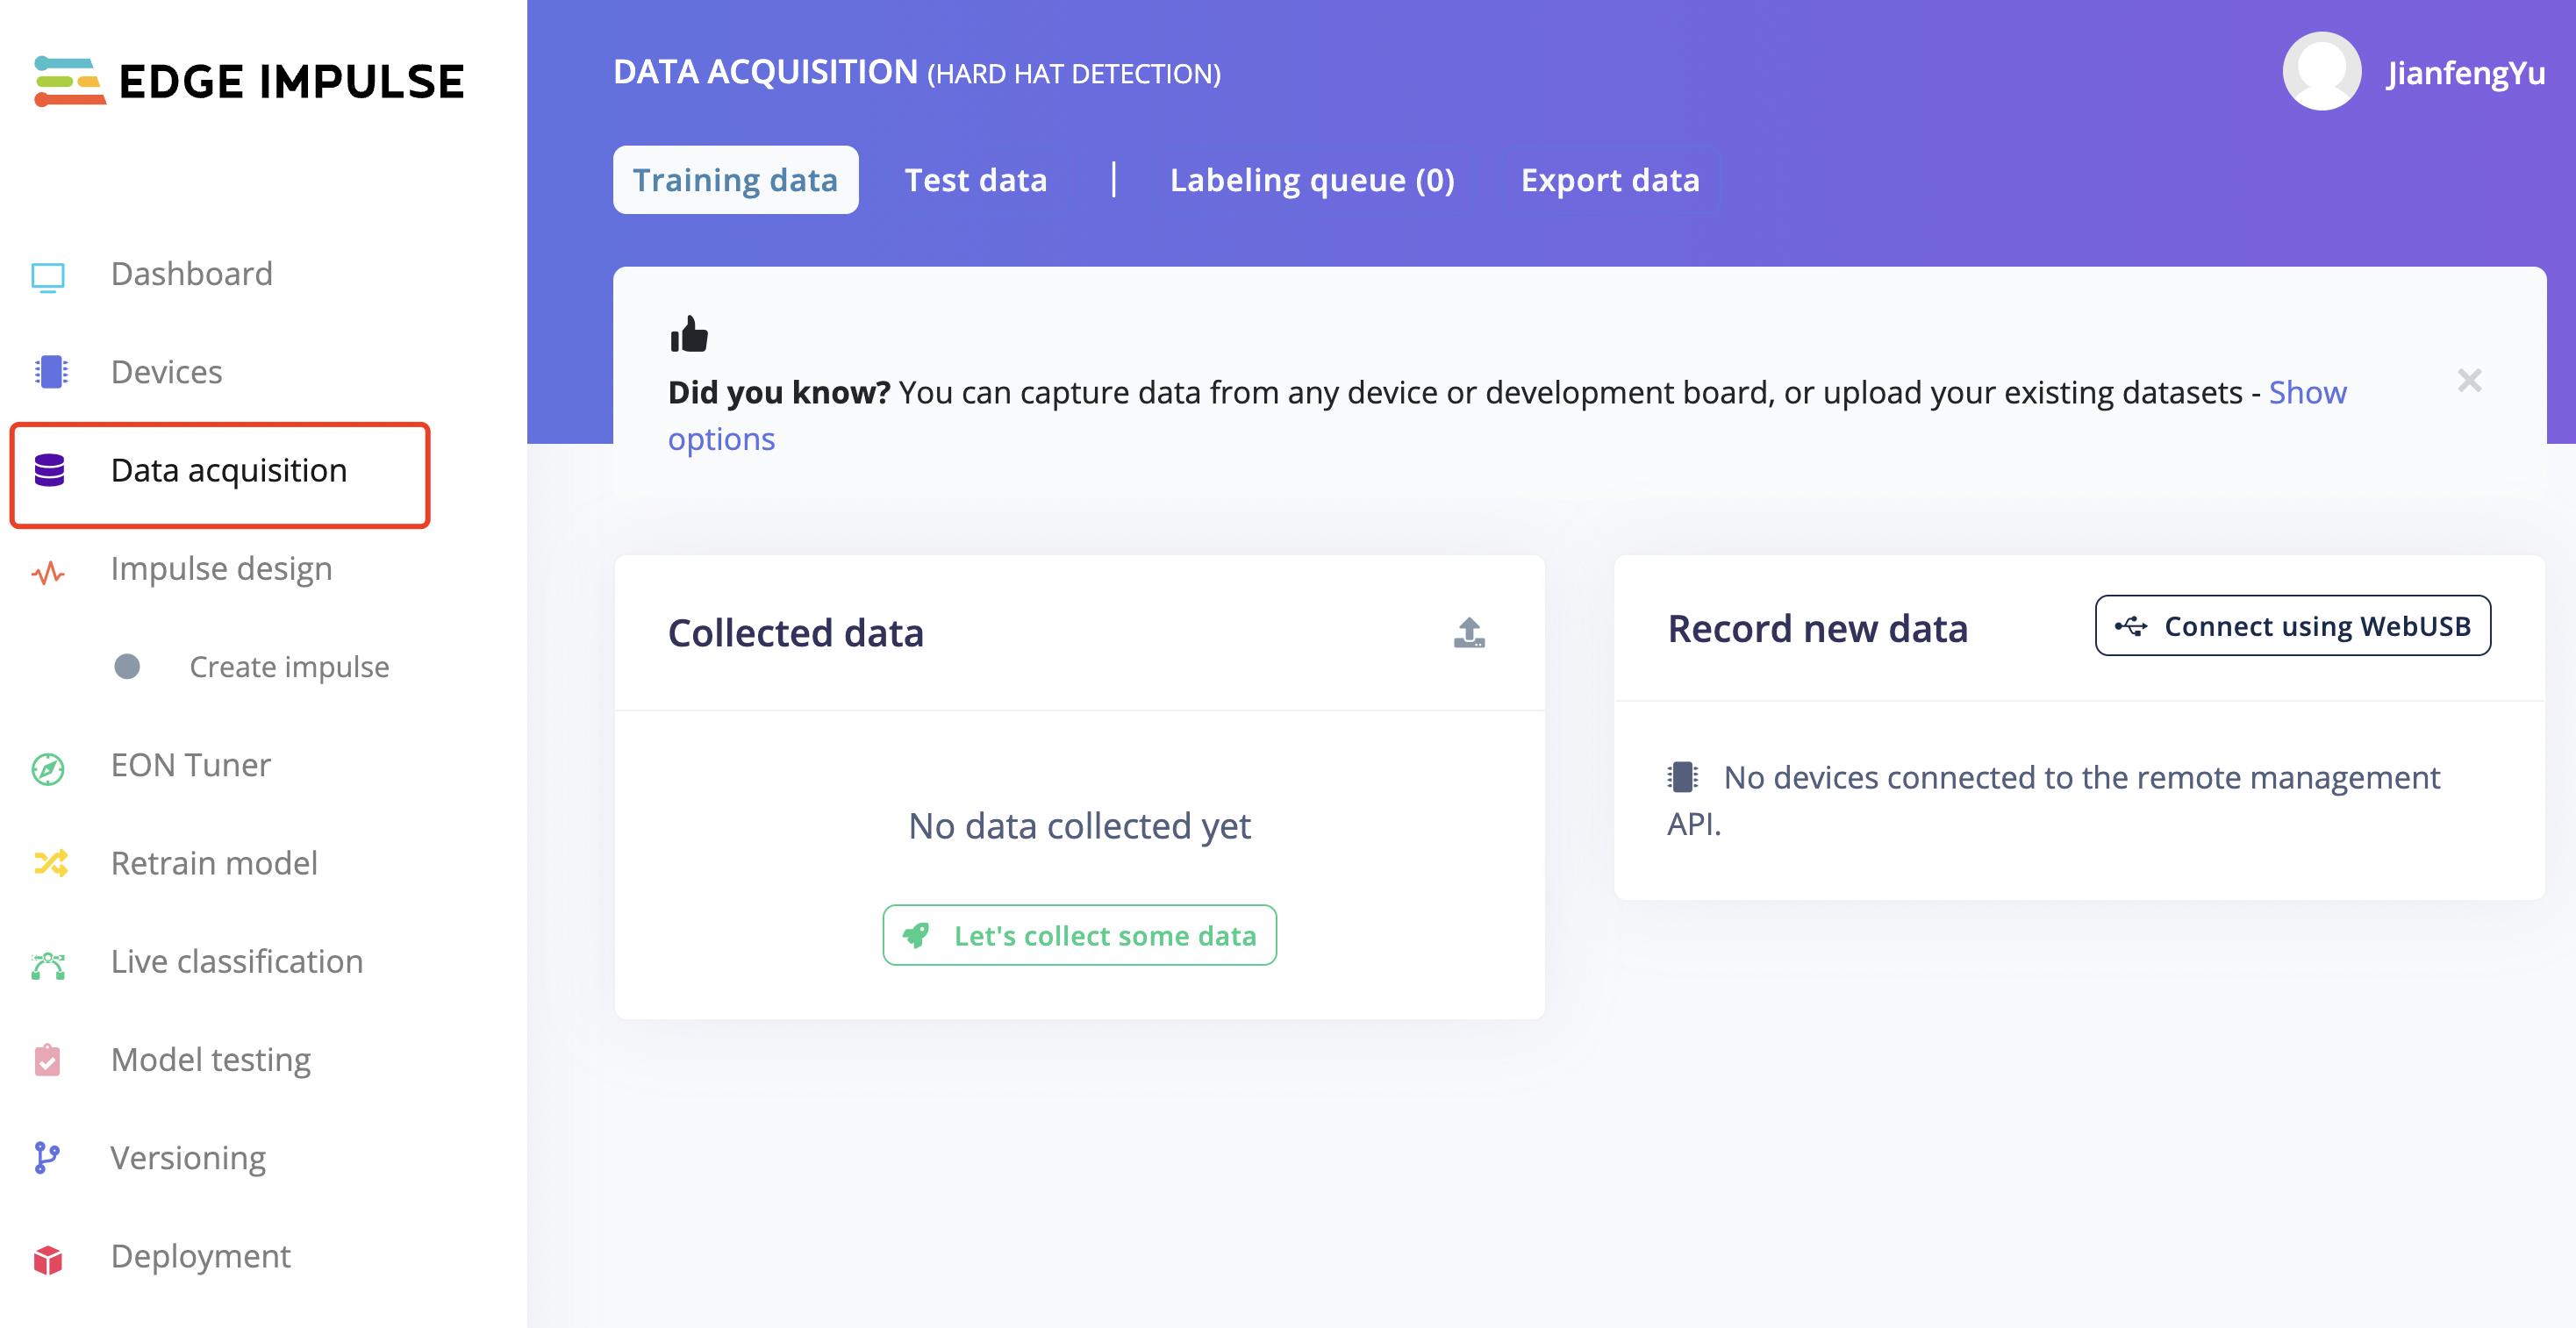
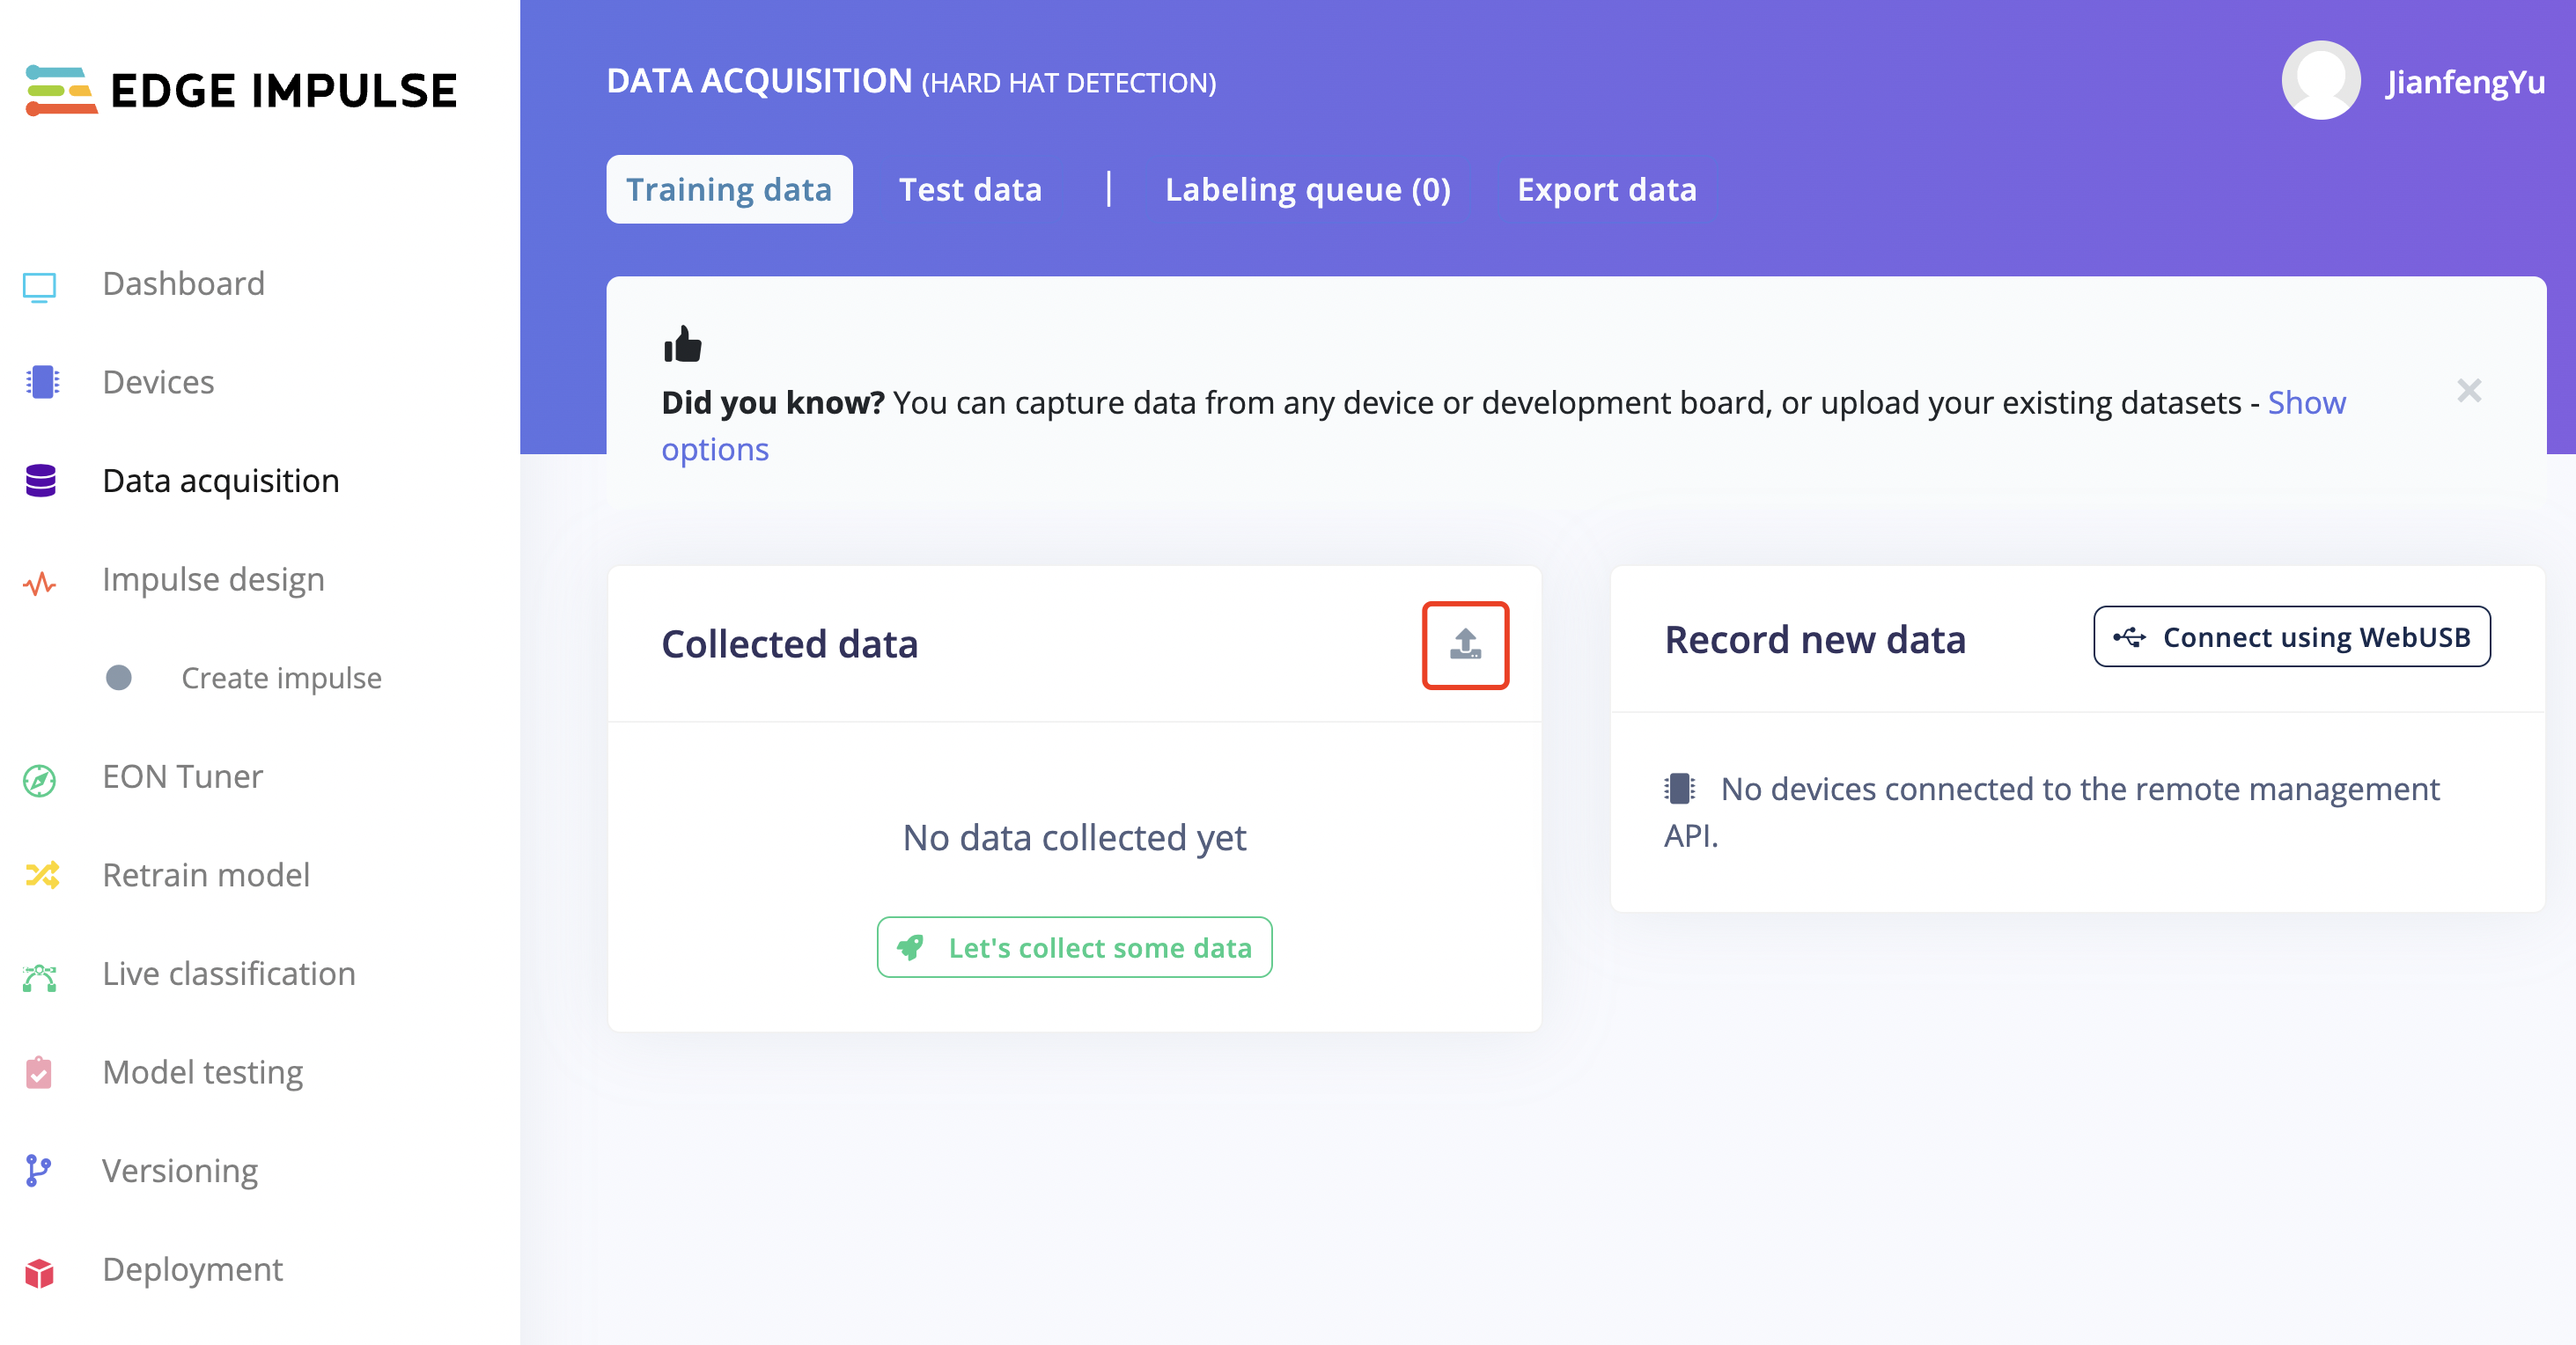
- 步骤 1. 在左侧栏选择"Data acauistion"页面并收集数据。
- 步骤 2. 从 Flickr-Faces-HQ Dataset Github 选择并下载数据集。
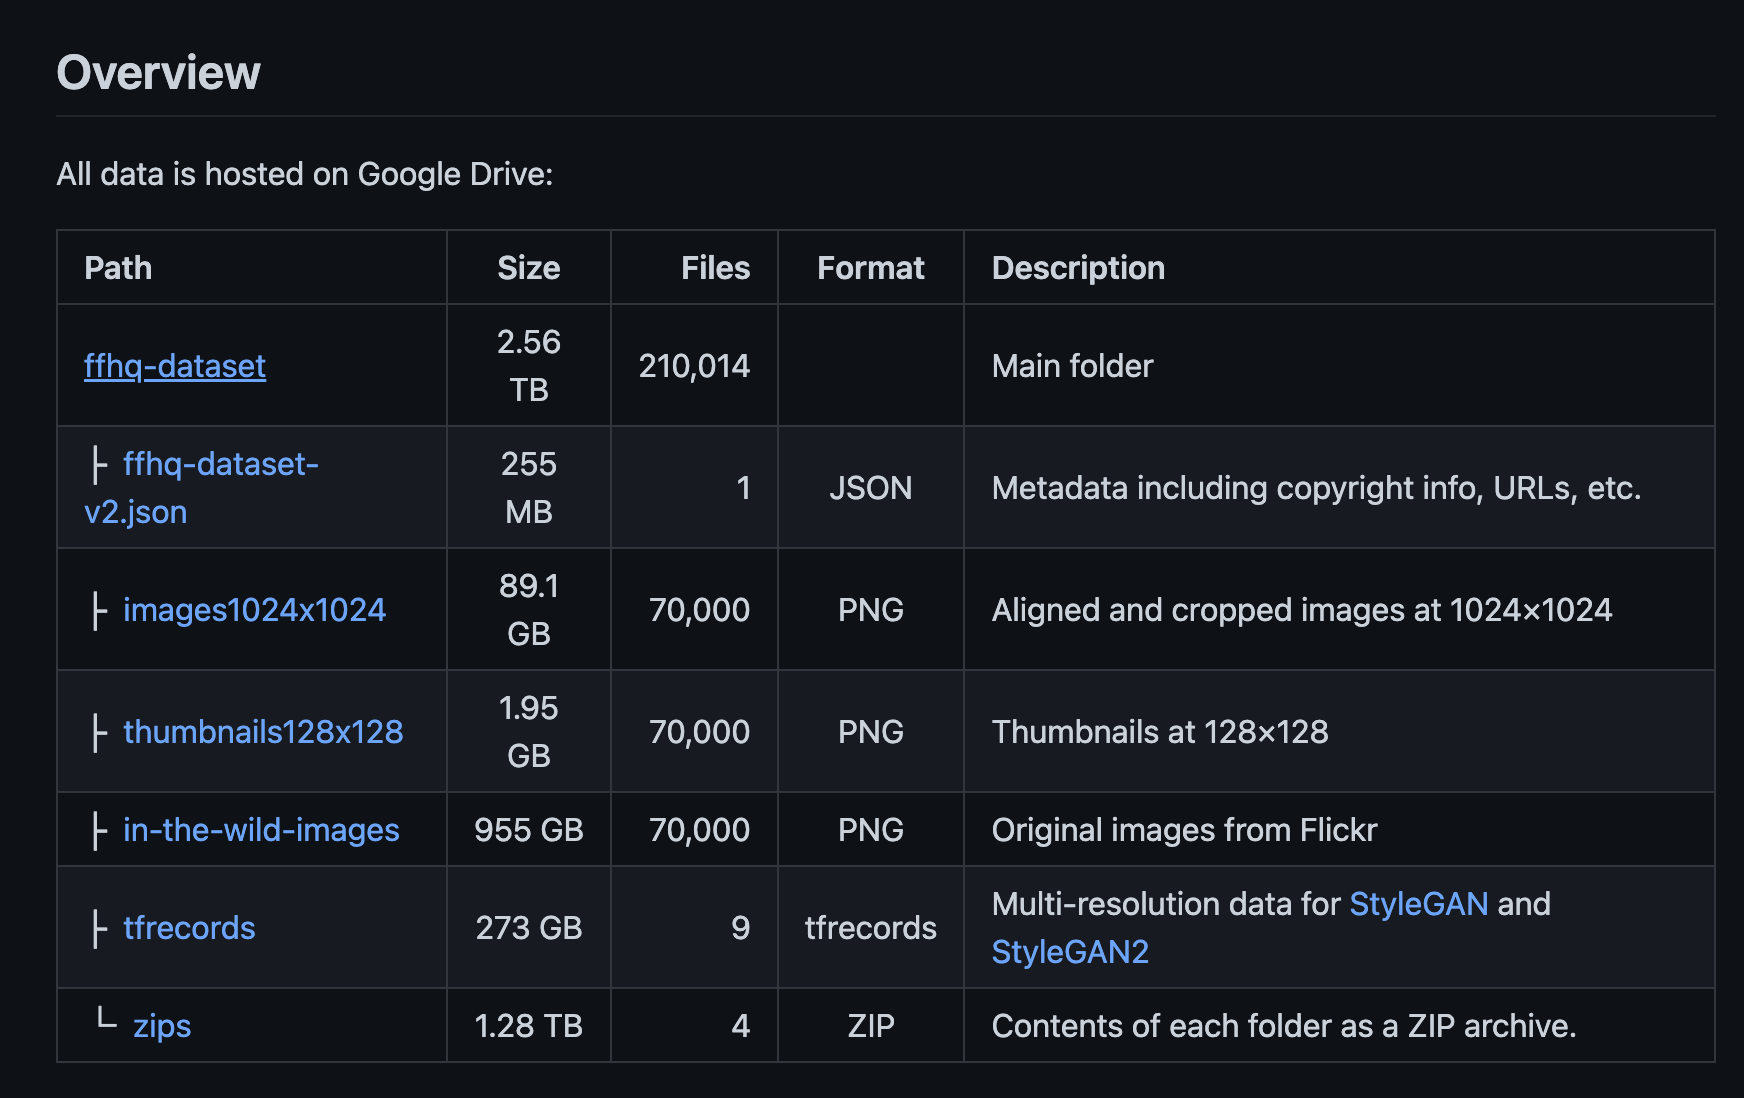
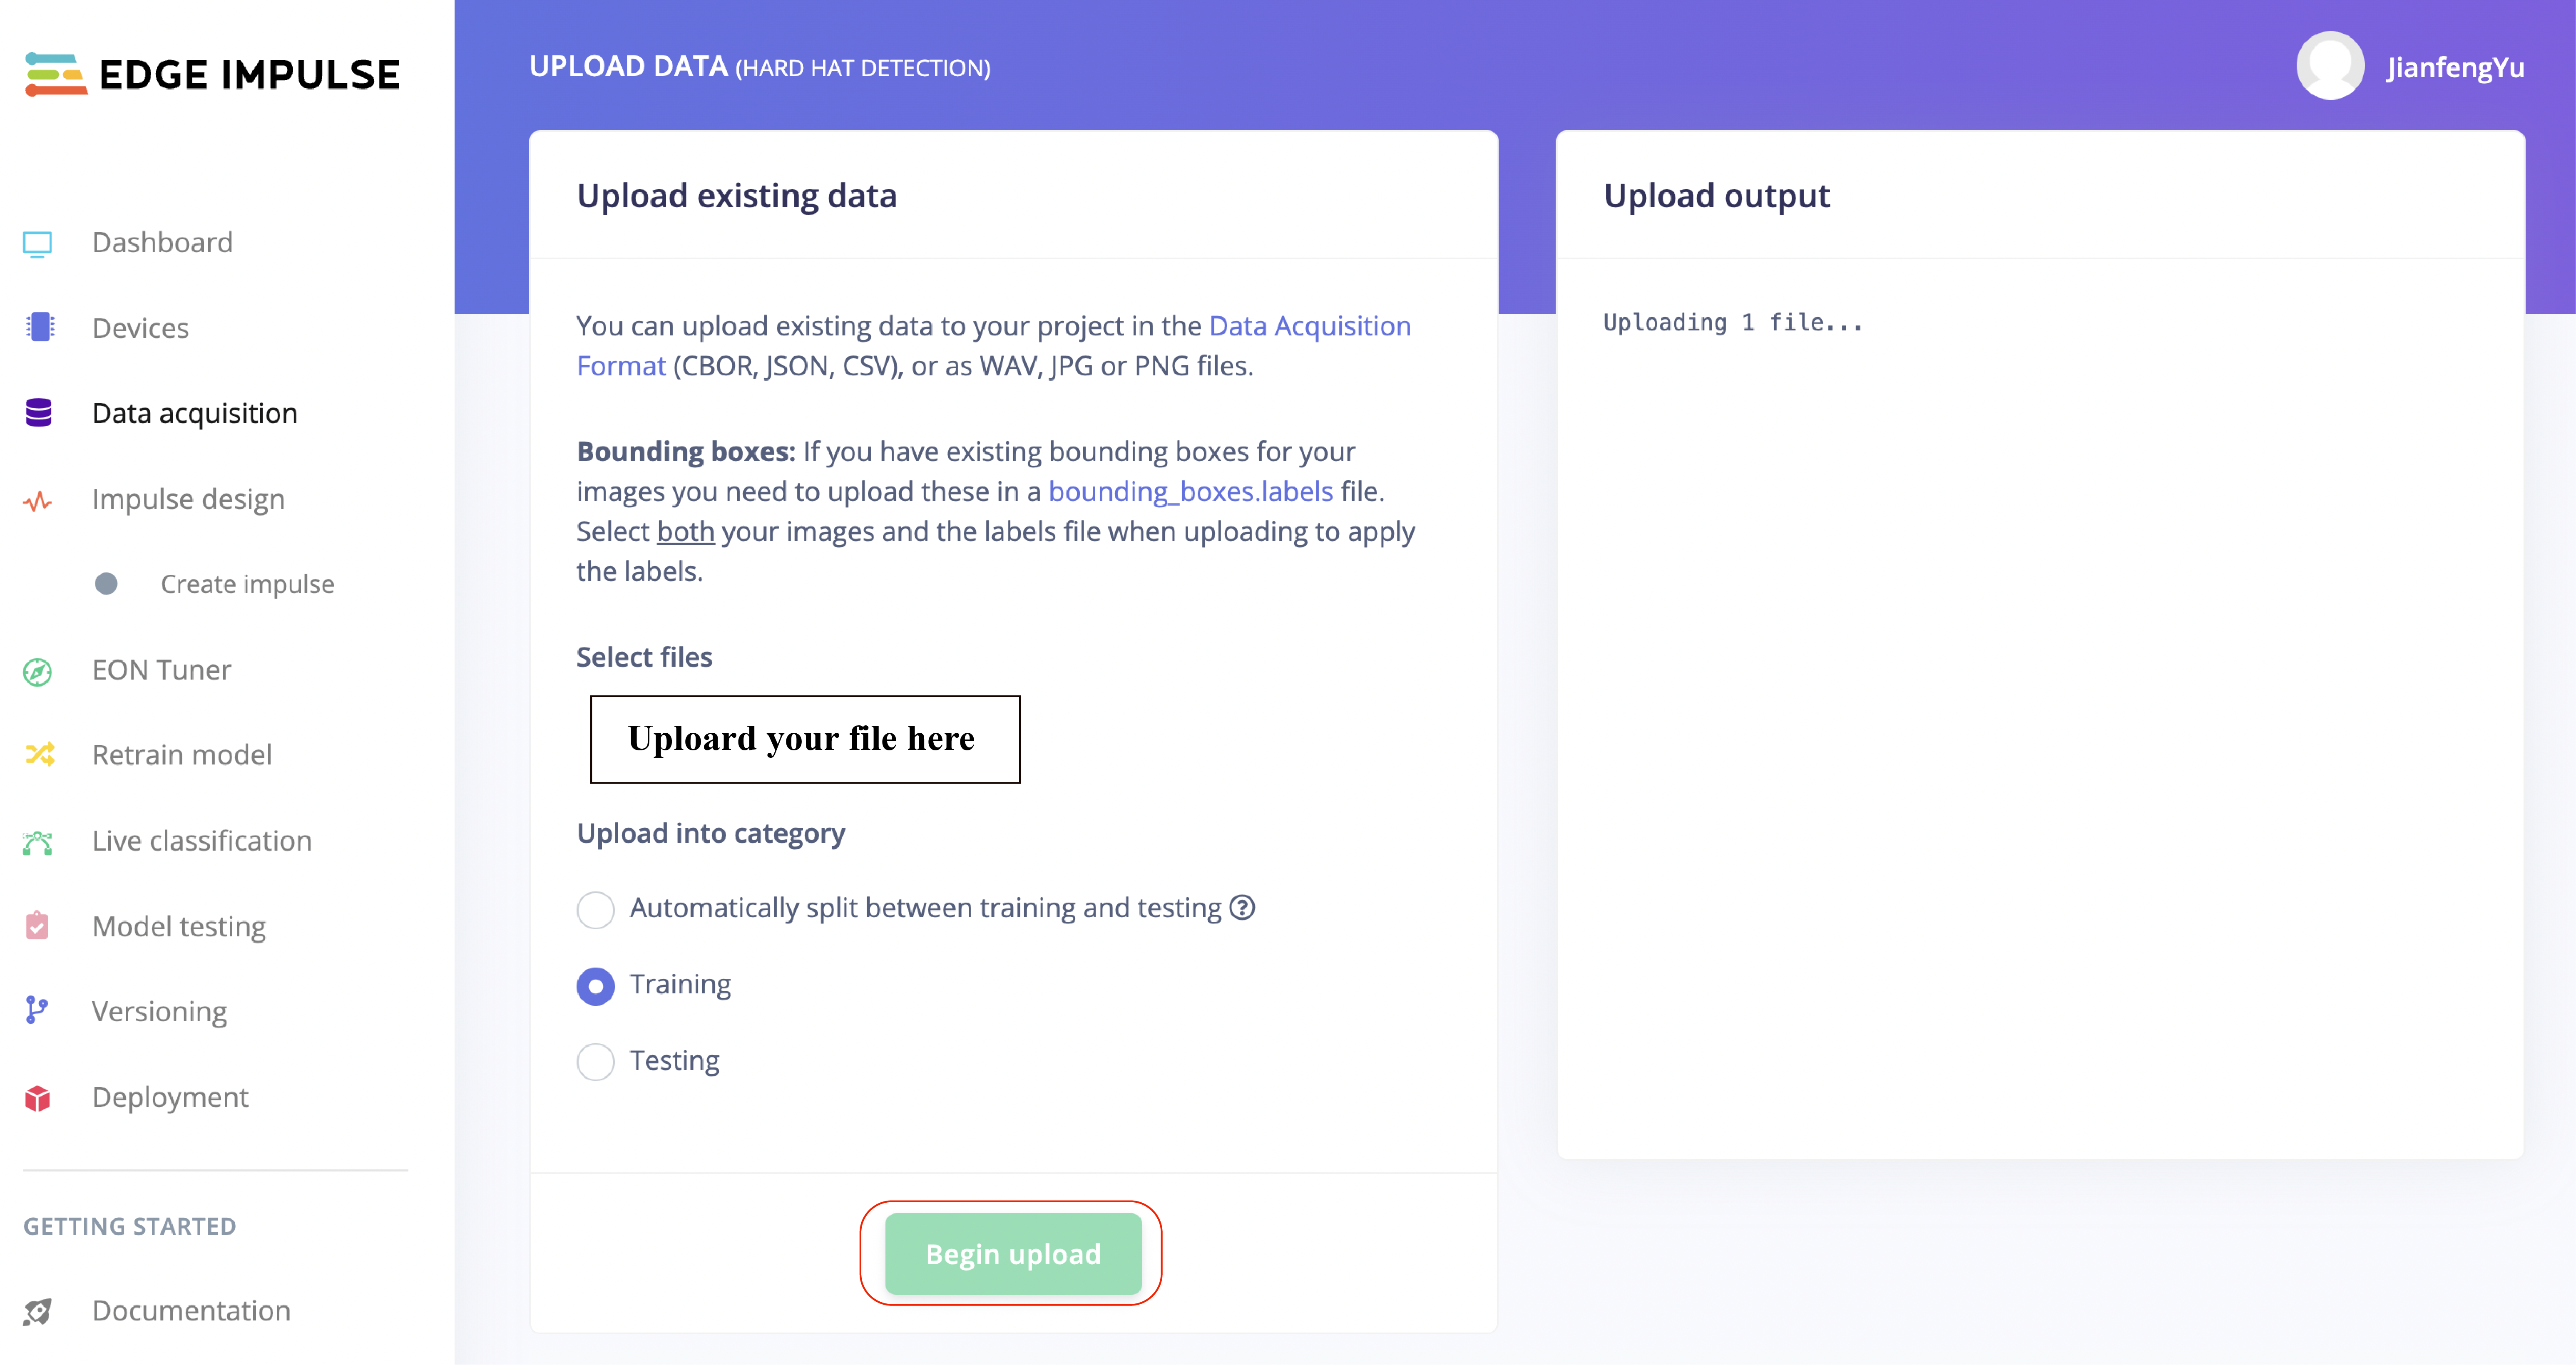
在"Data acquisition"页面点击"upload data"按钮并上传下载的数据集。
可以选择将现有数据以数据采集格式(CBOR、JSON、CSV)或 WAV、JPG 或 PNG 文件的形式上传到项目中。
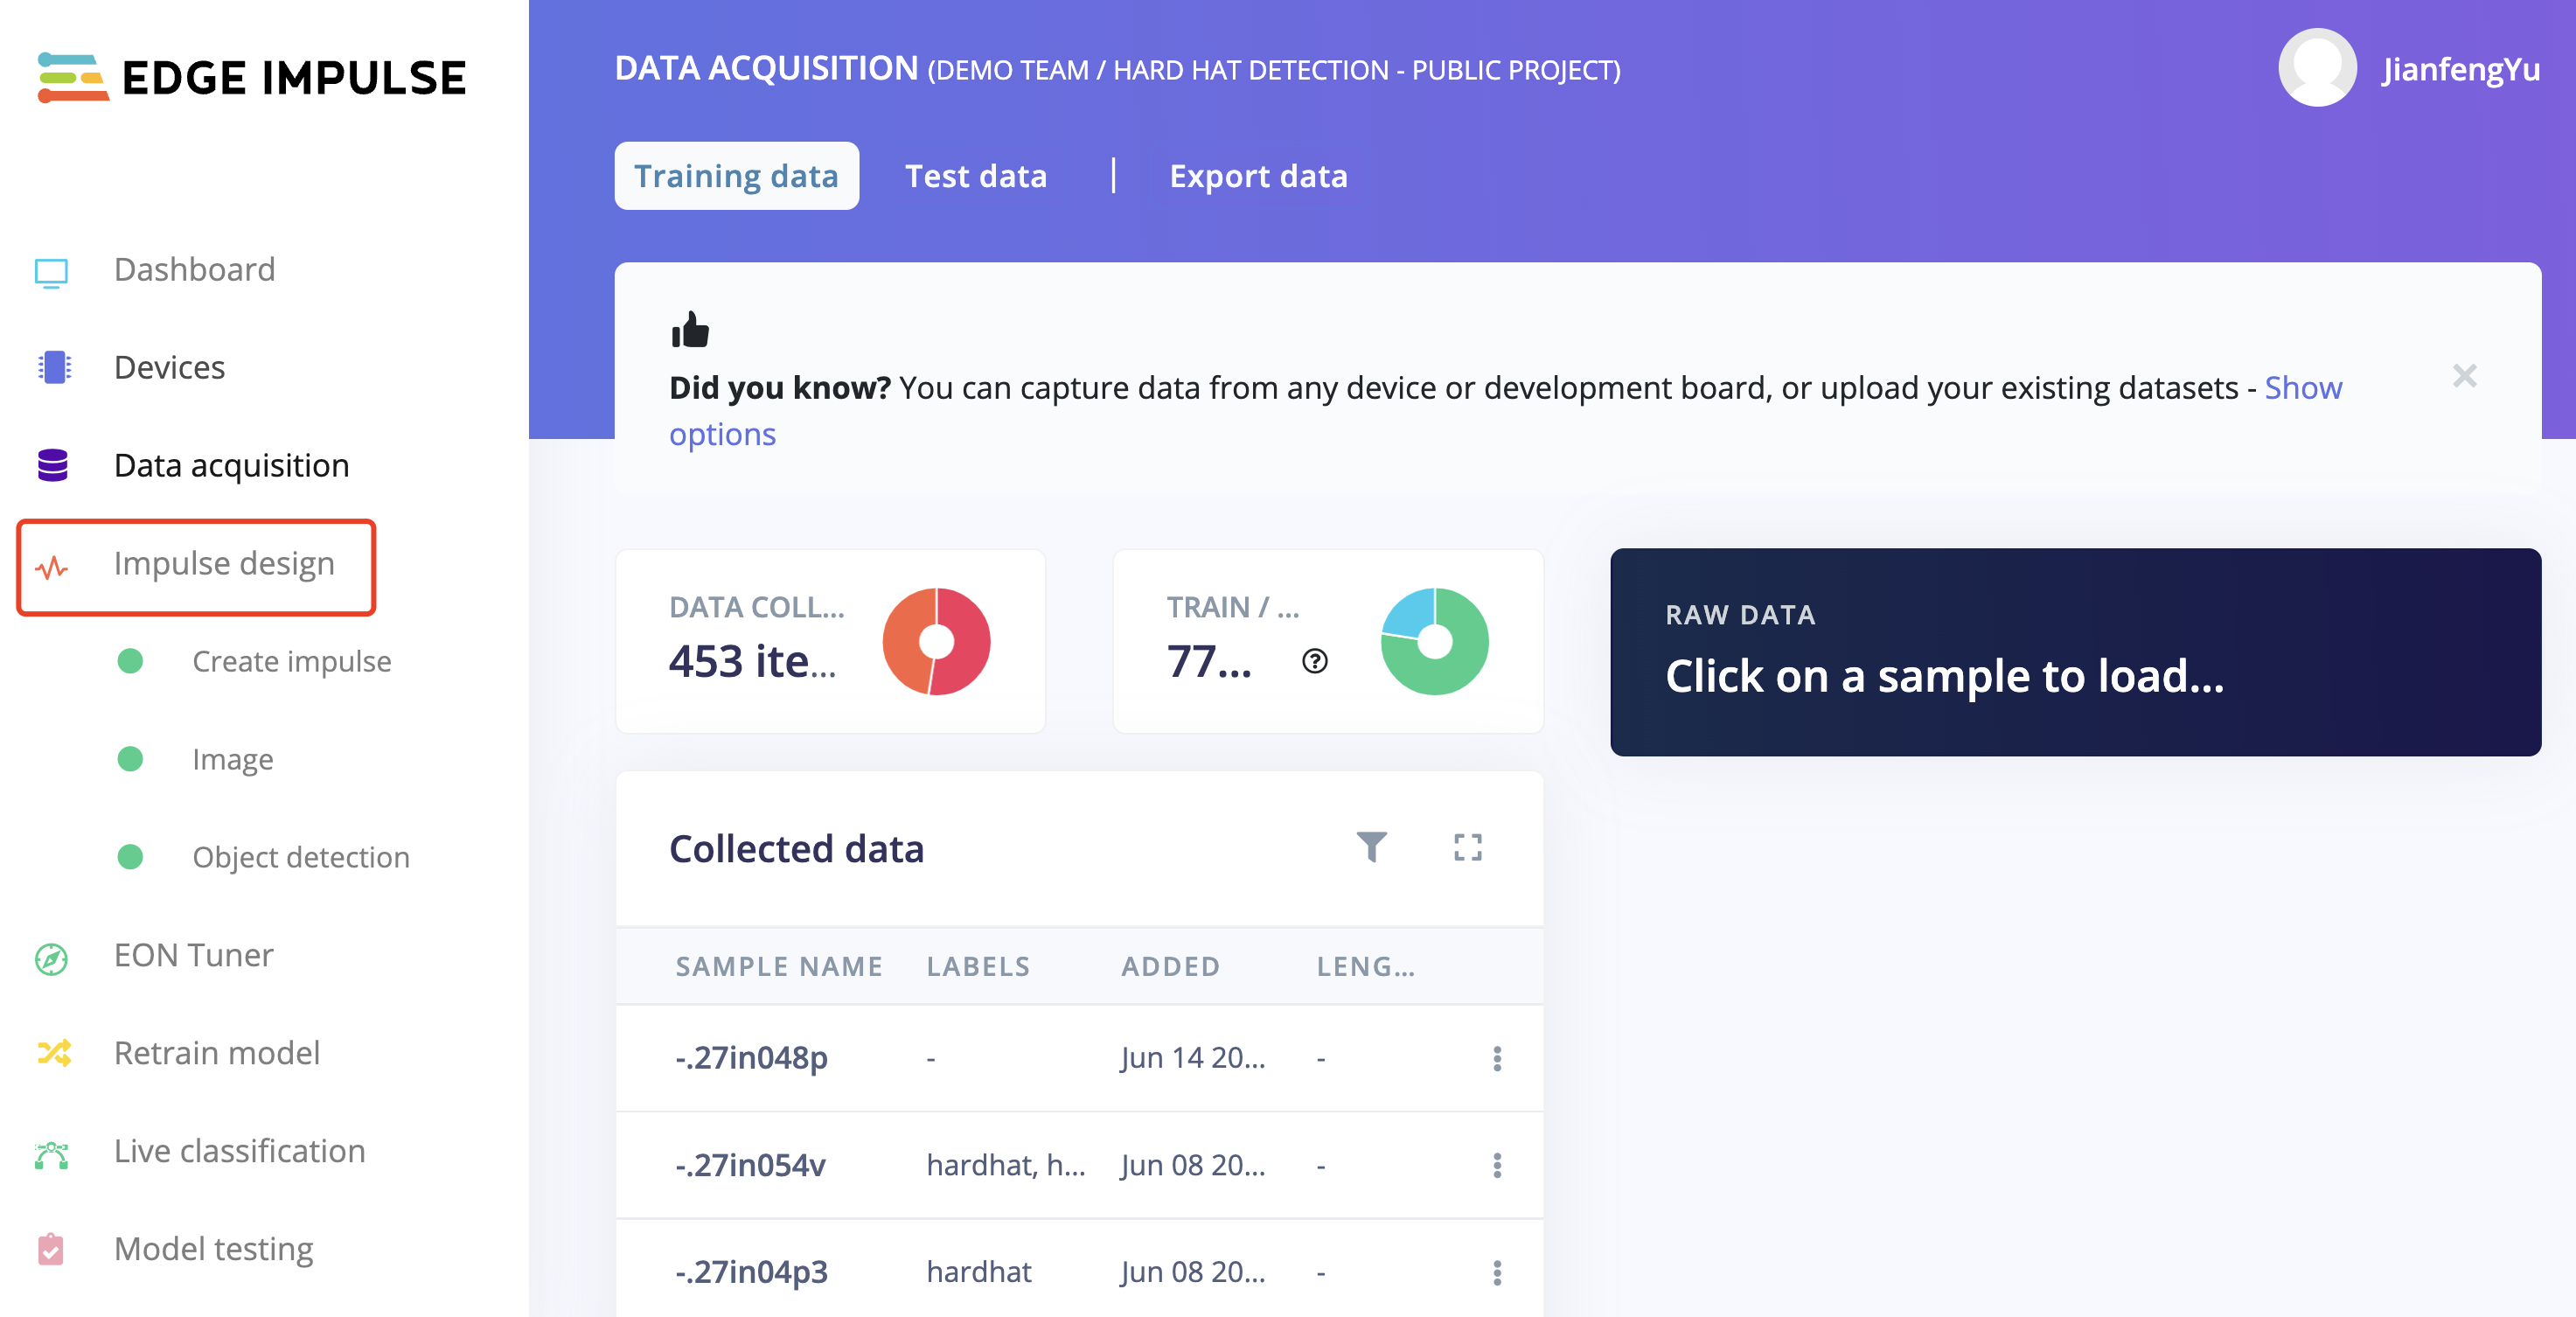
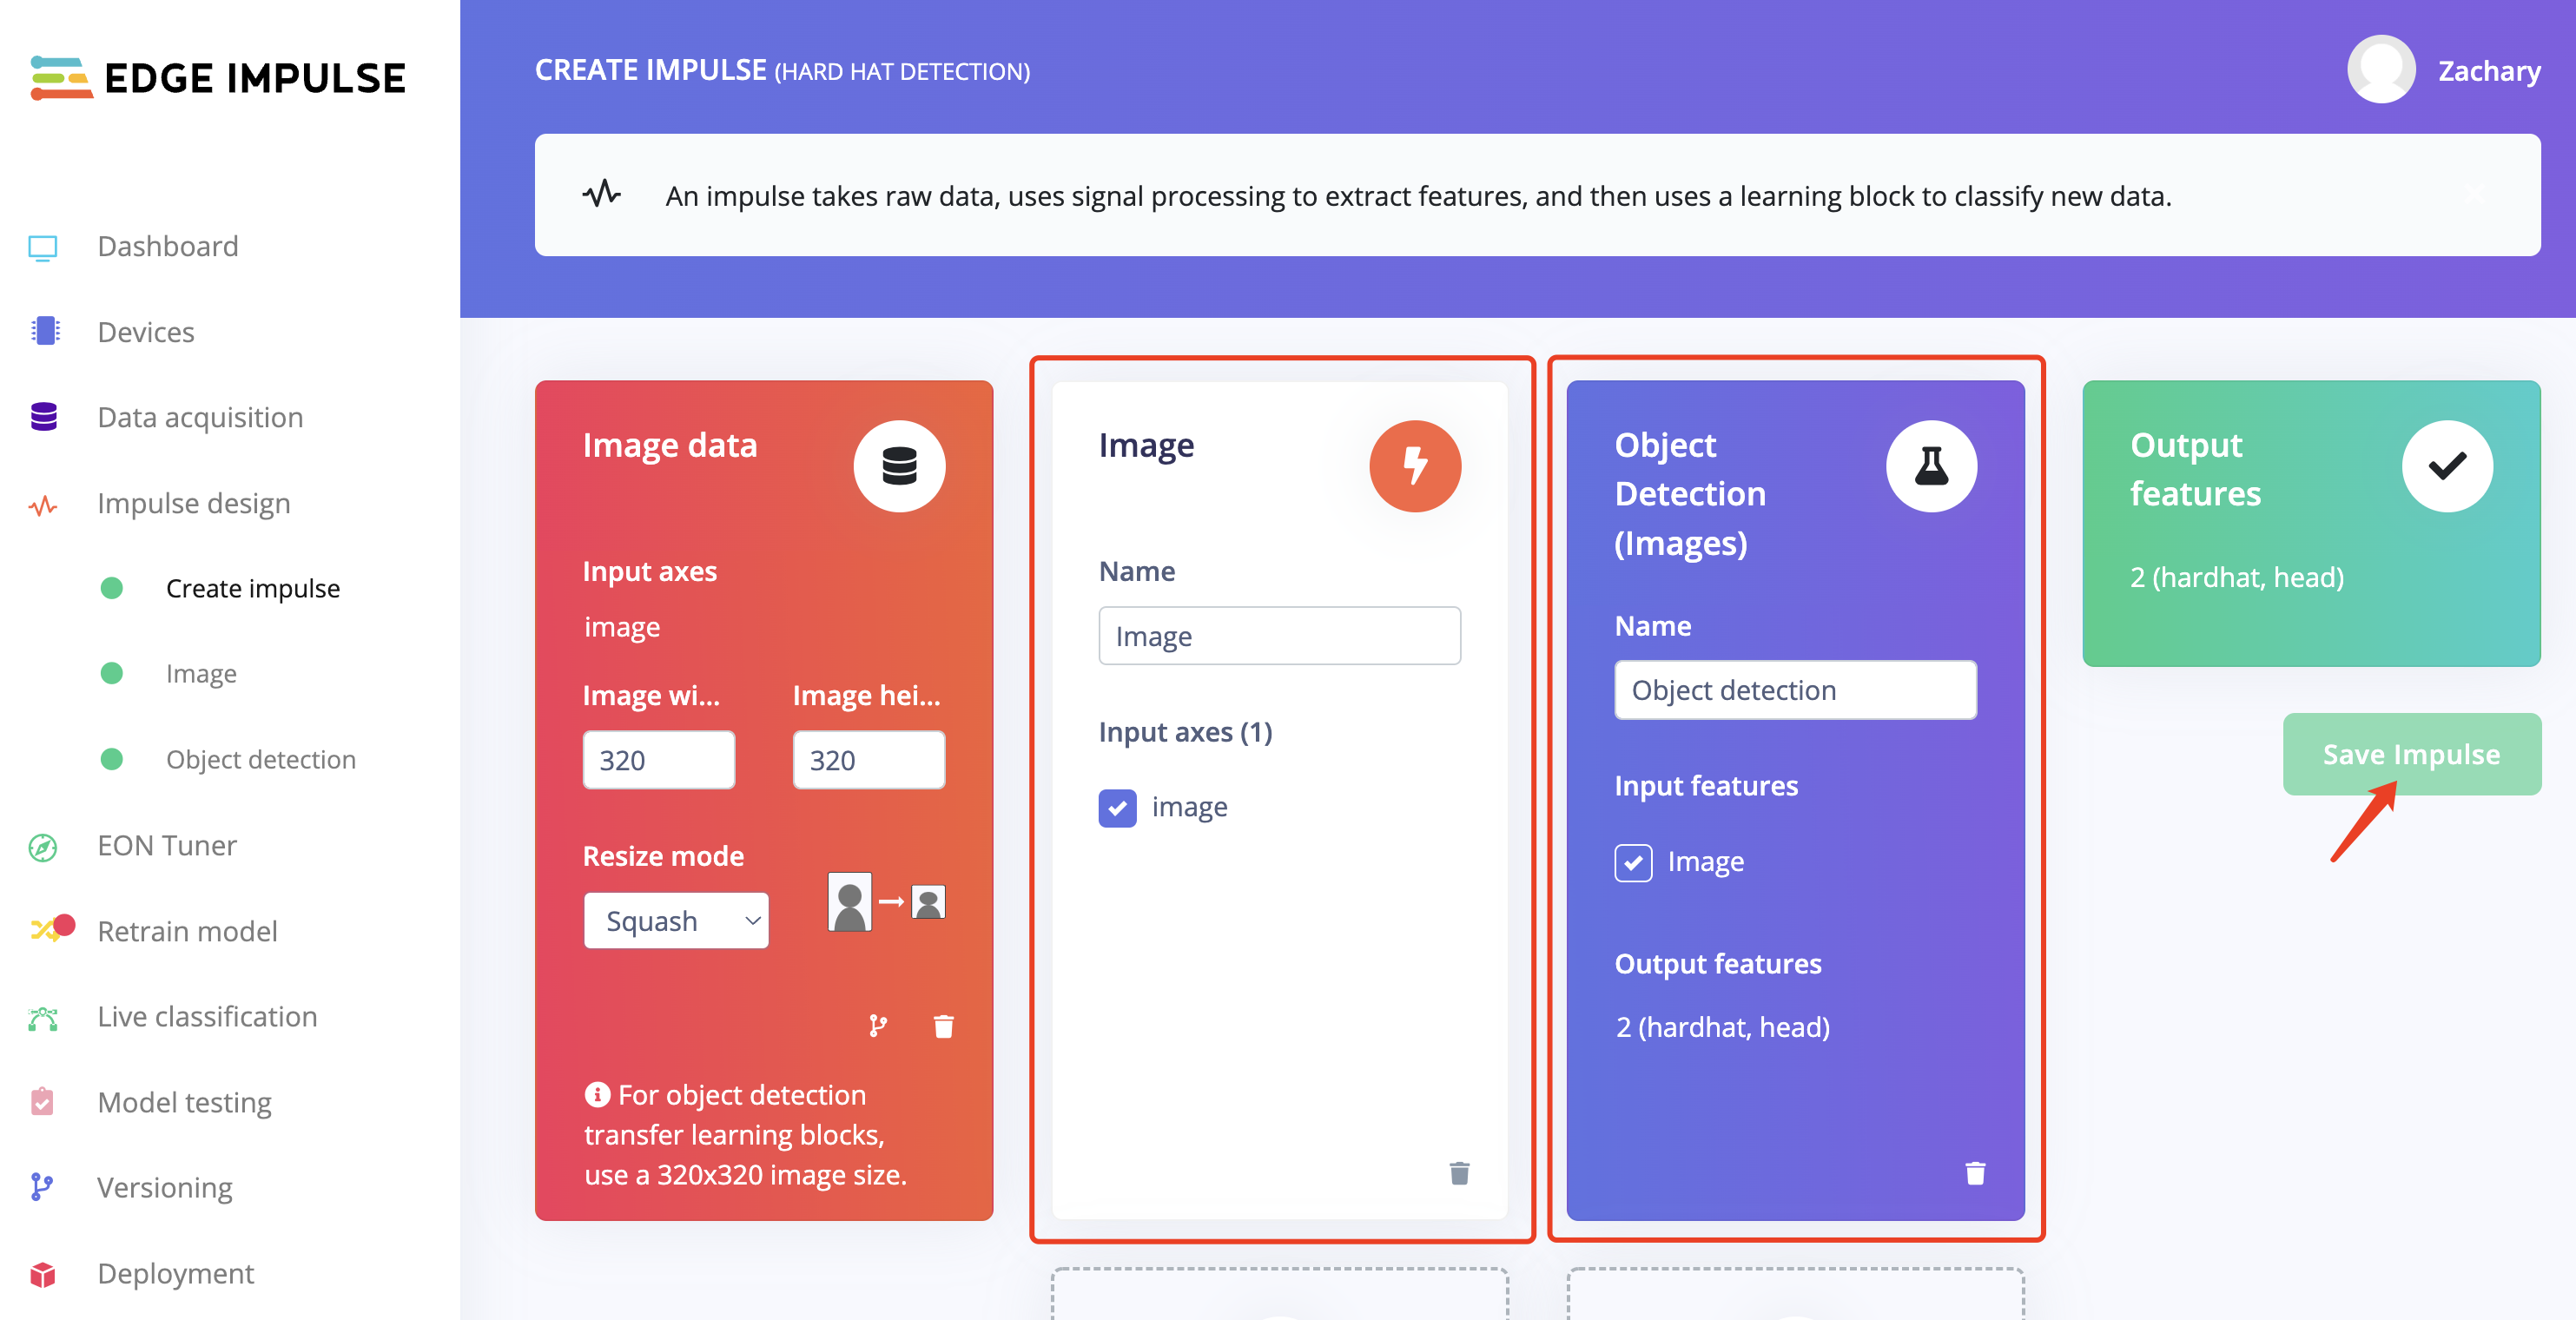
- 步骤 3. 上传完成后,收集的数据将填充标记的图像。点击页面左侧的"Impulse desigh"继续。
- 步骤 4. 选择合适的图像处理块和图像学习块并保存脉冲。
- 步骤 5. 点击页面左侧的"image"。
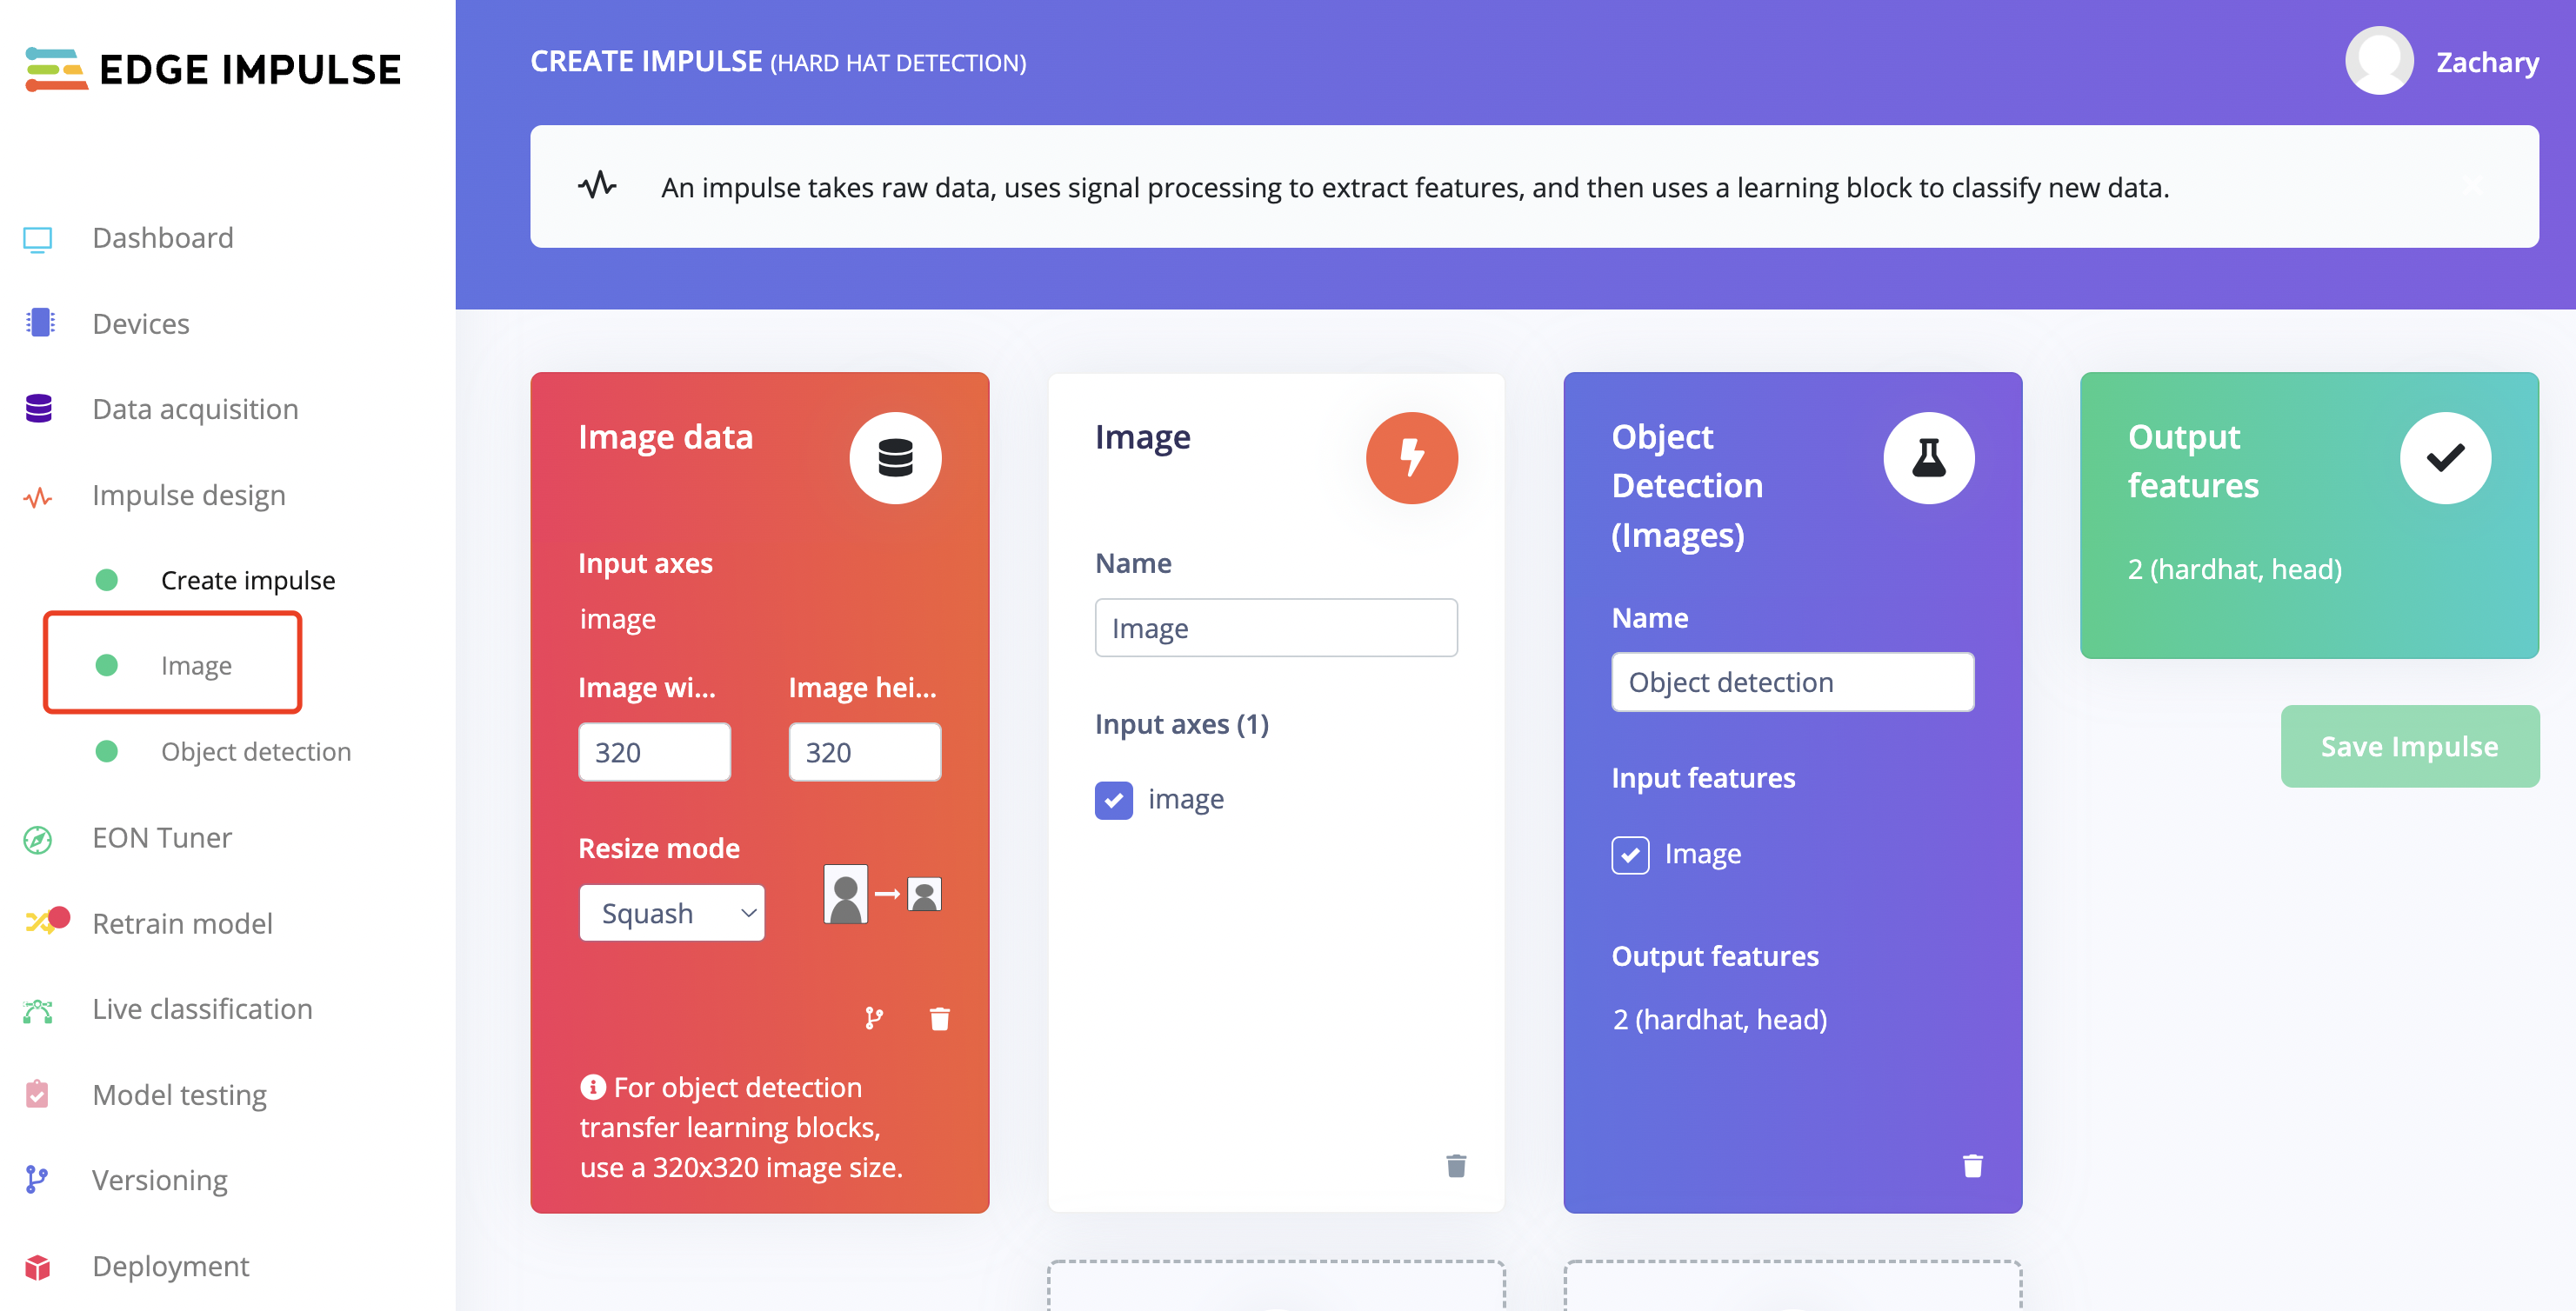
配置为"GRB"并点击"Save Parameters",页面将自动跳转到"Generate features"站点。

然后我们就能够生成特征。
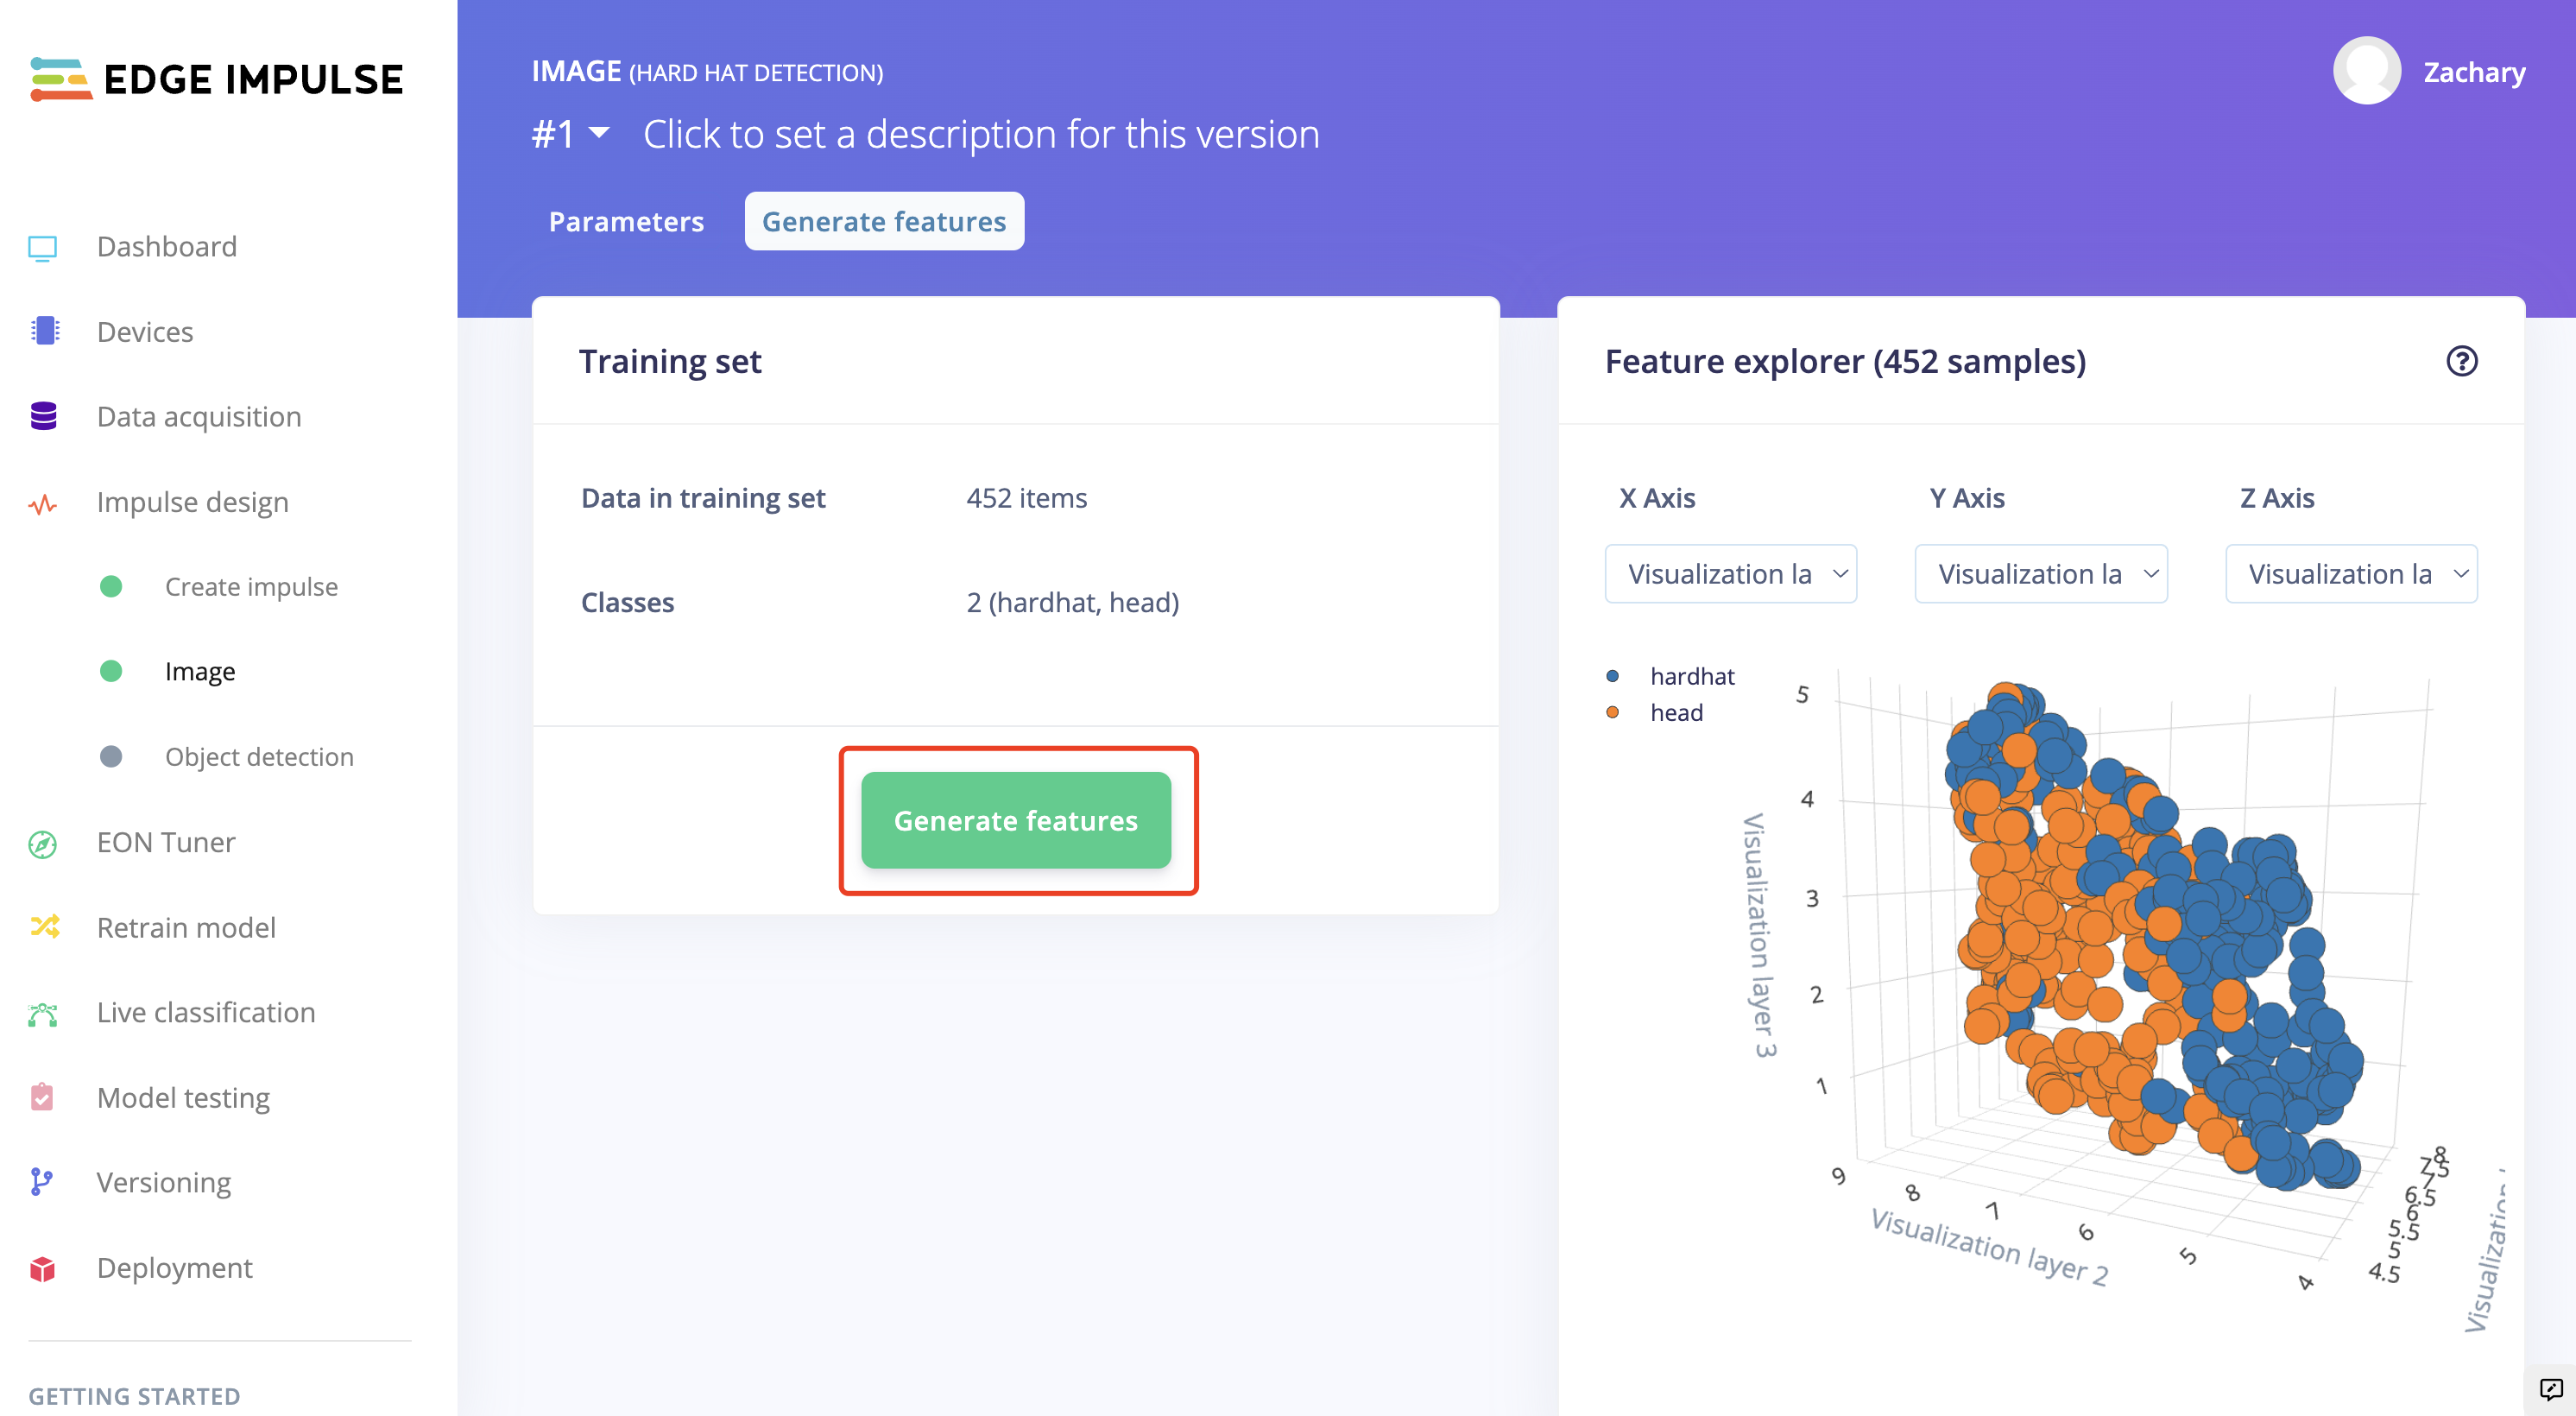
- 步骤 6. 当显示"Job completed"时,点击页面左侧的"Object detection"。
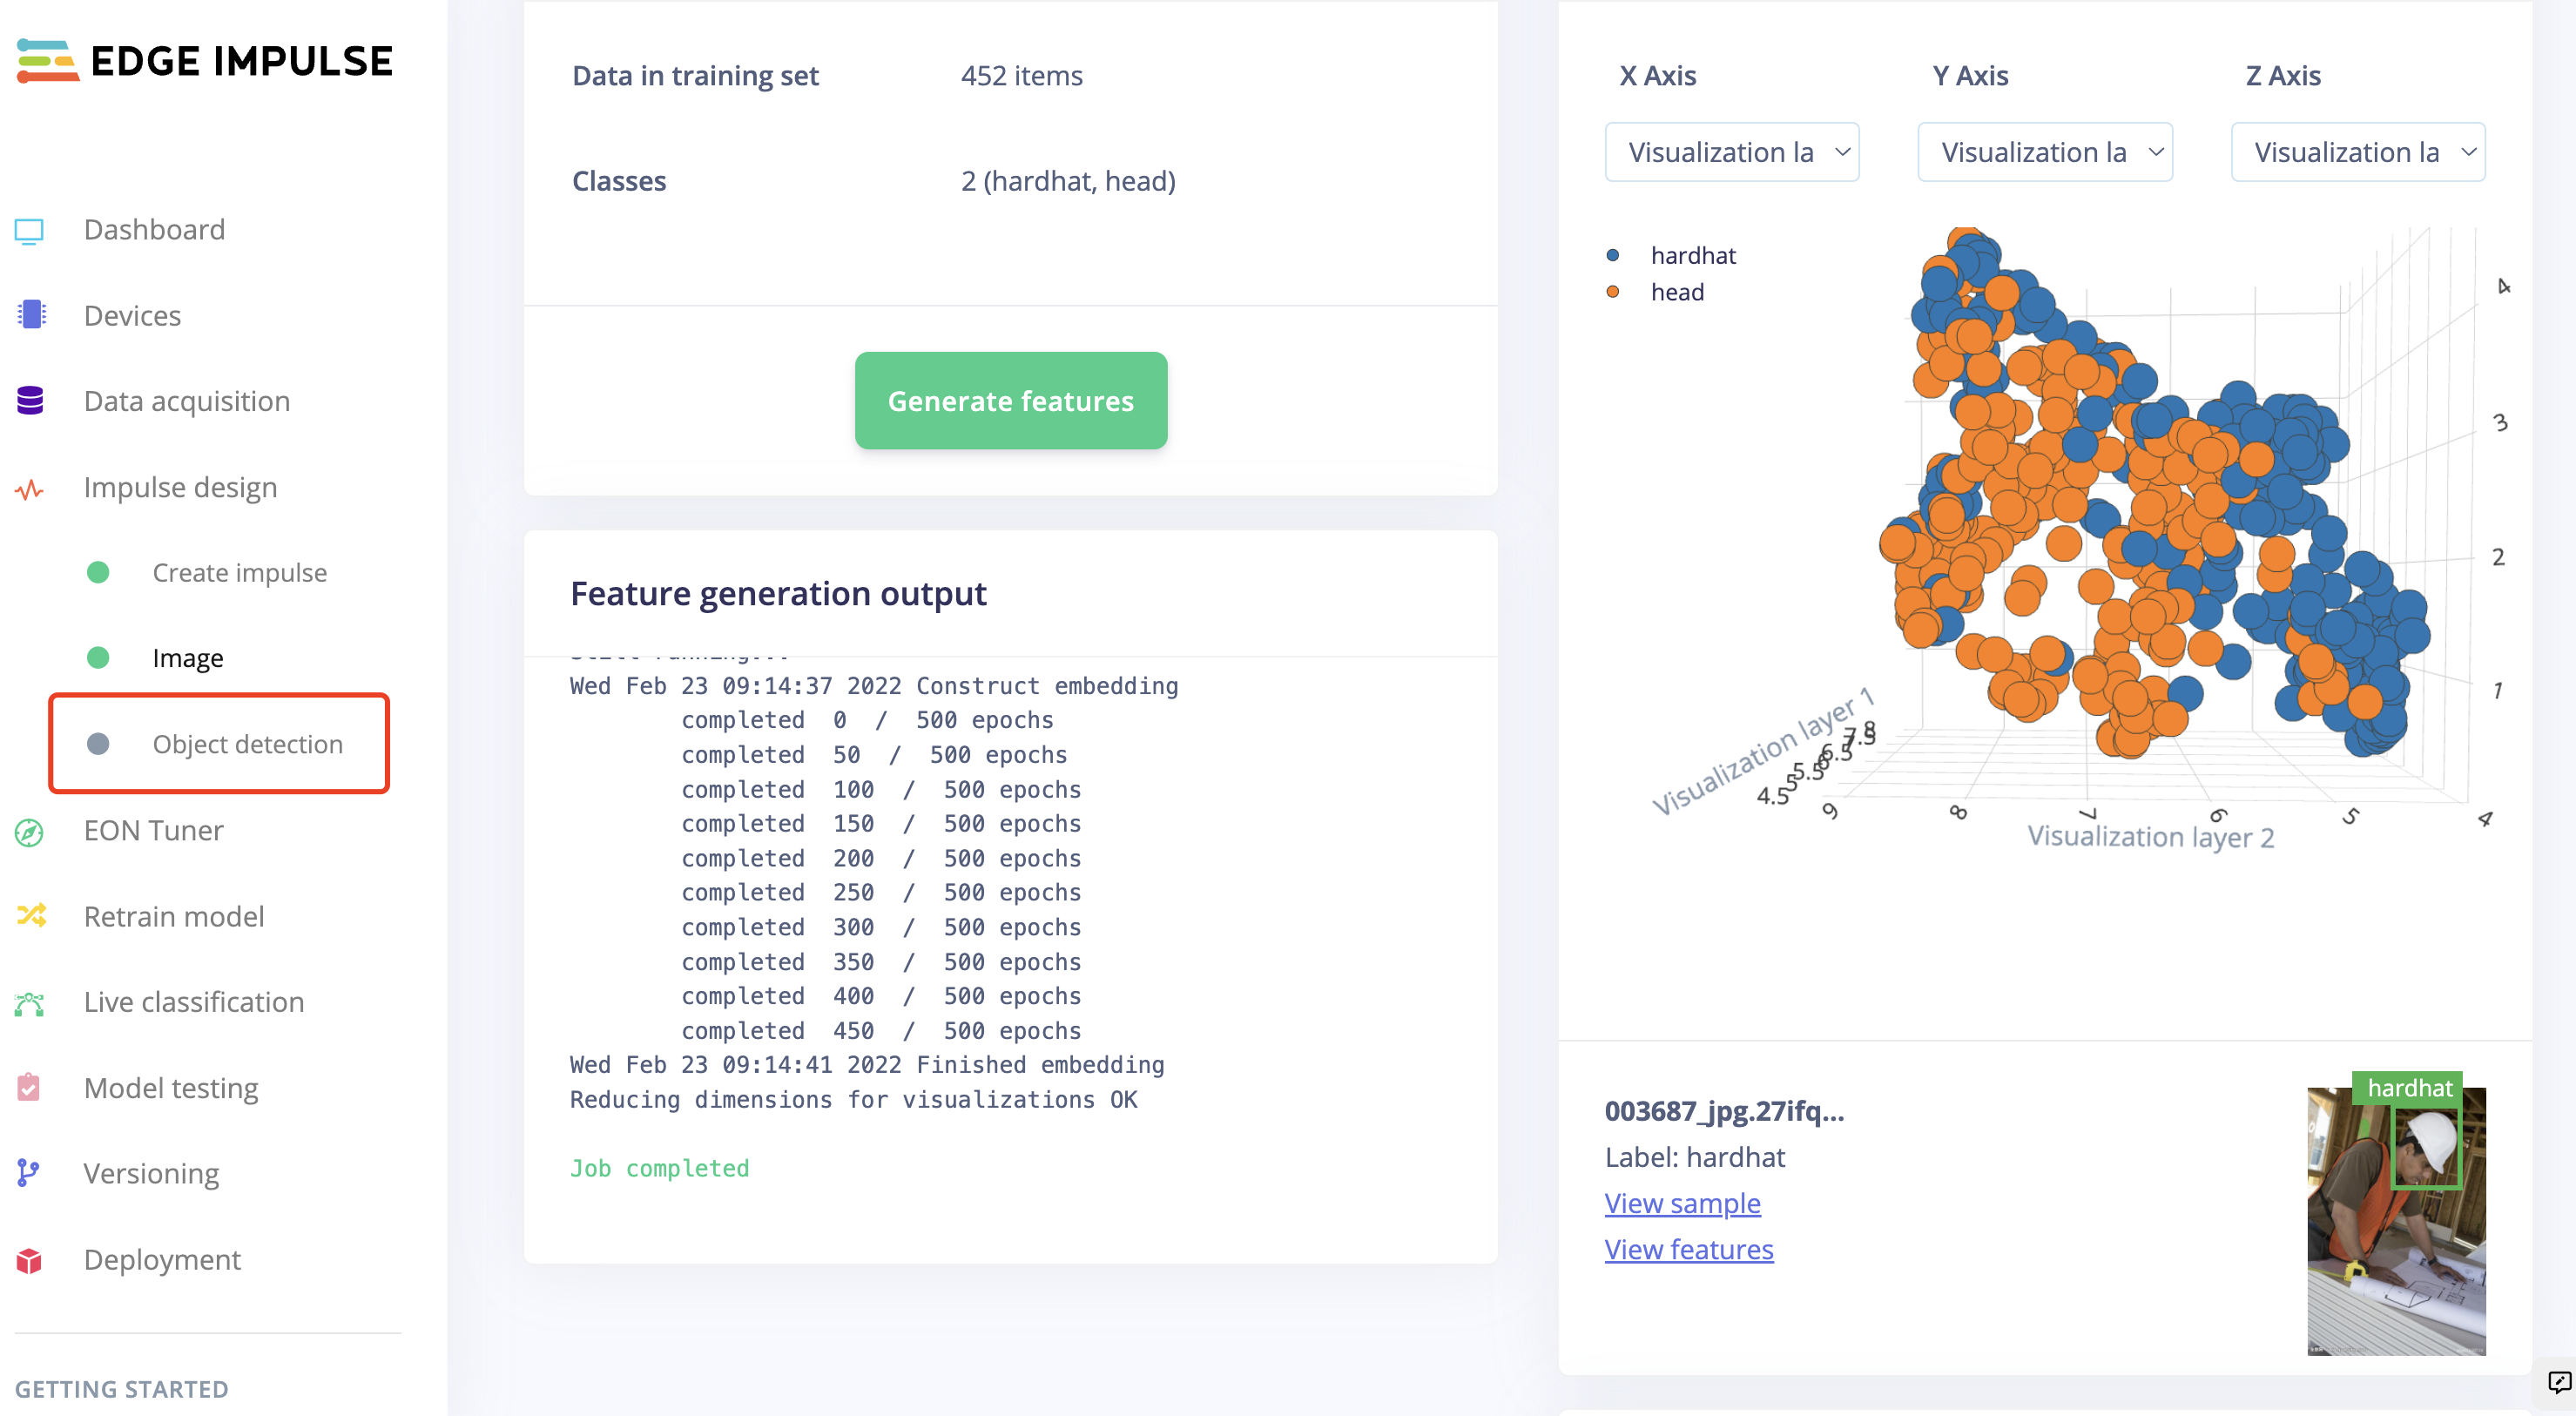
点击"start training"让 Edge Impulse 基于生成的特征训练模型。

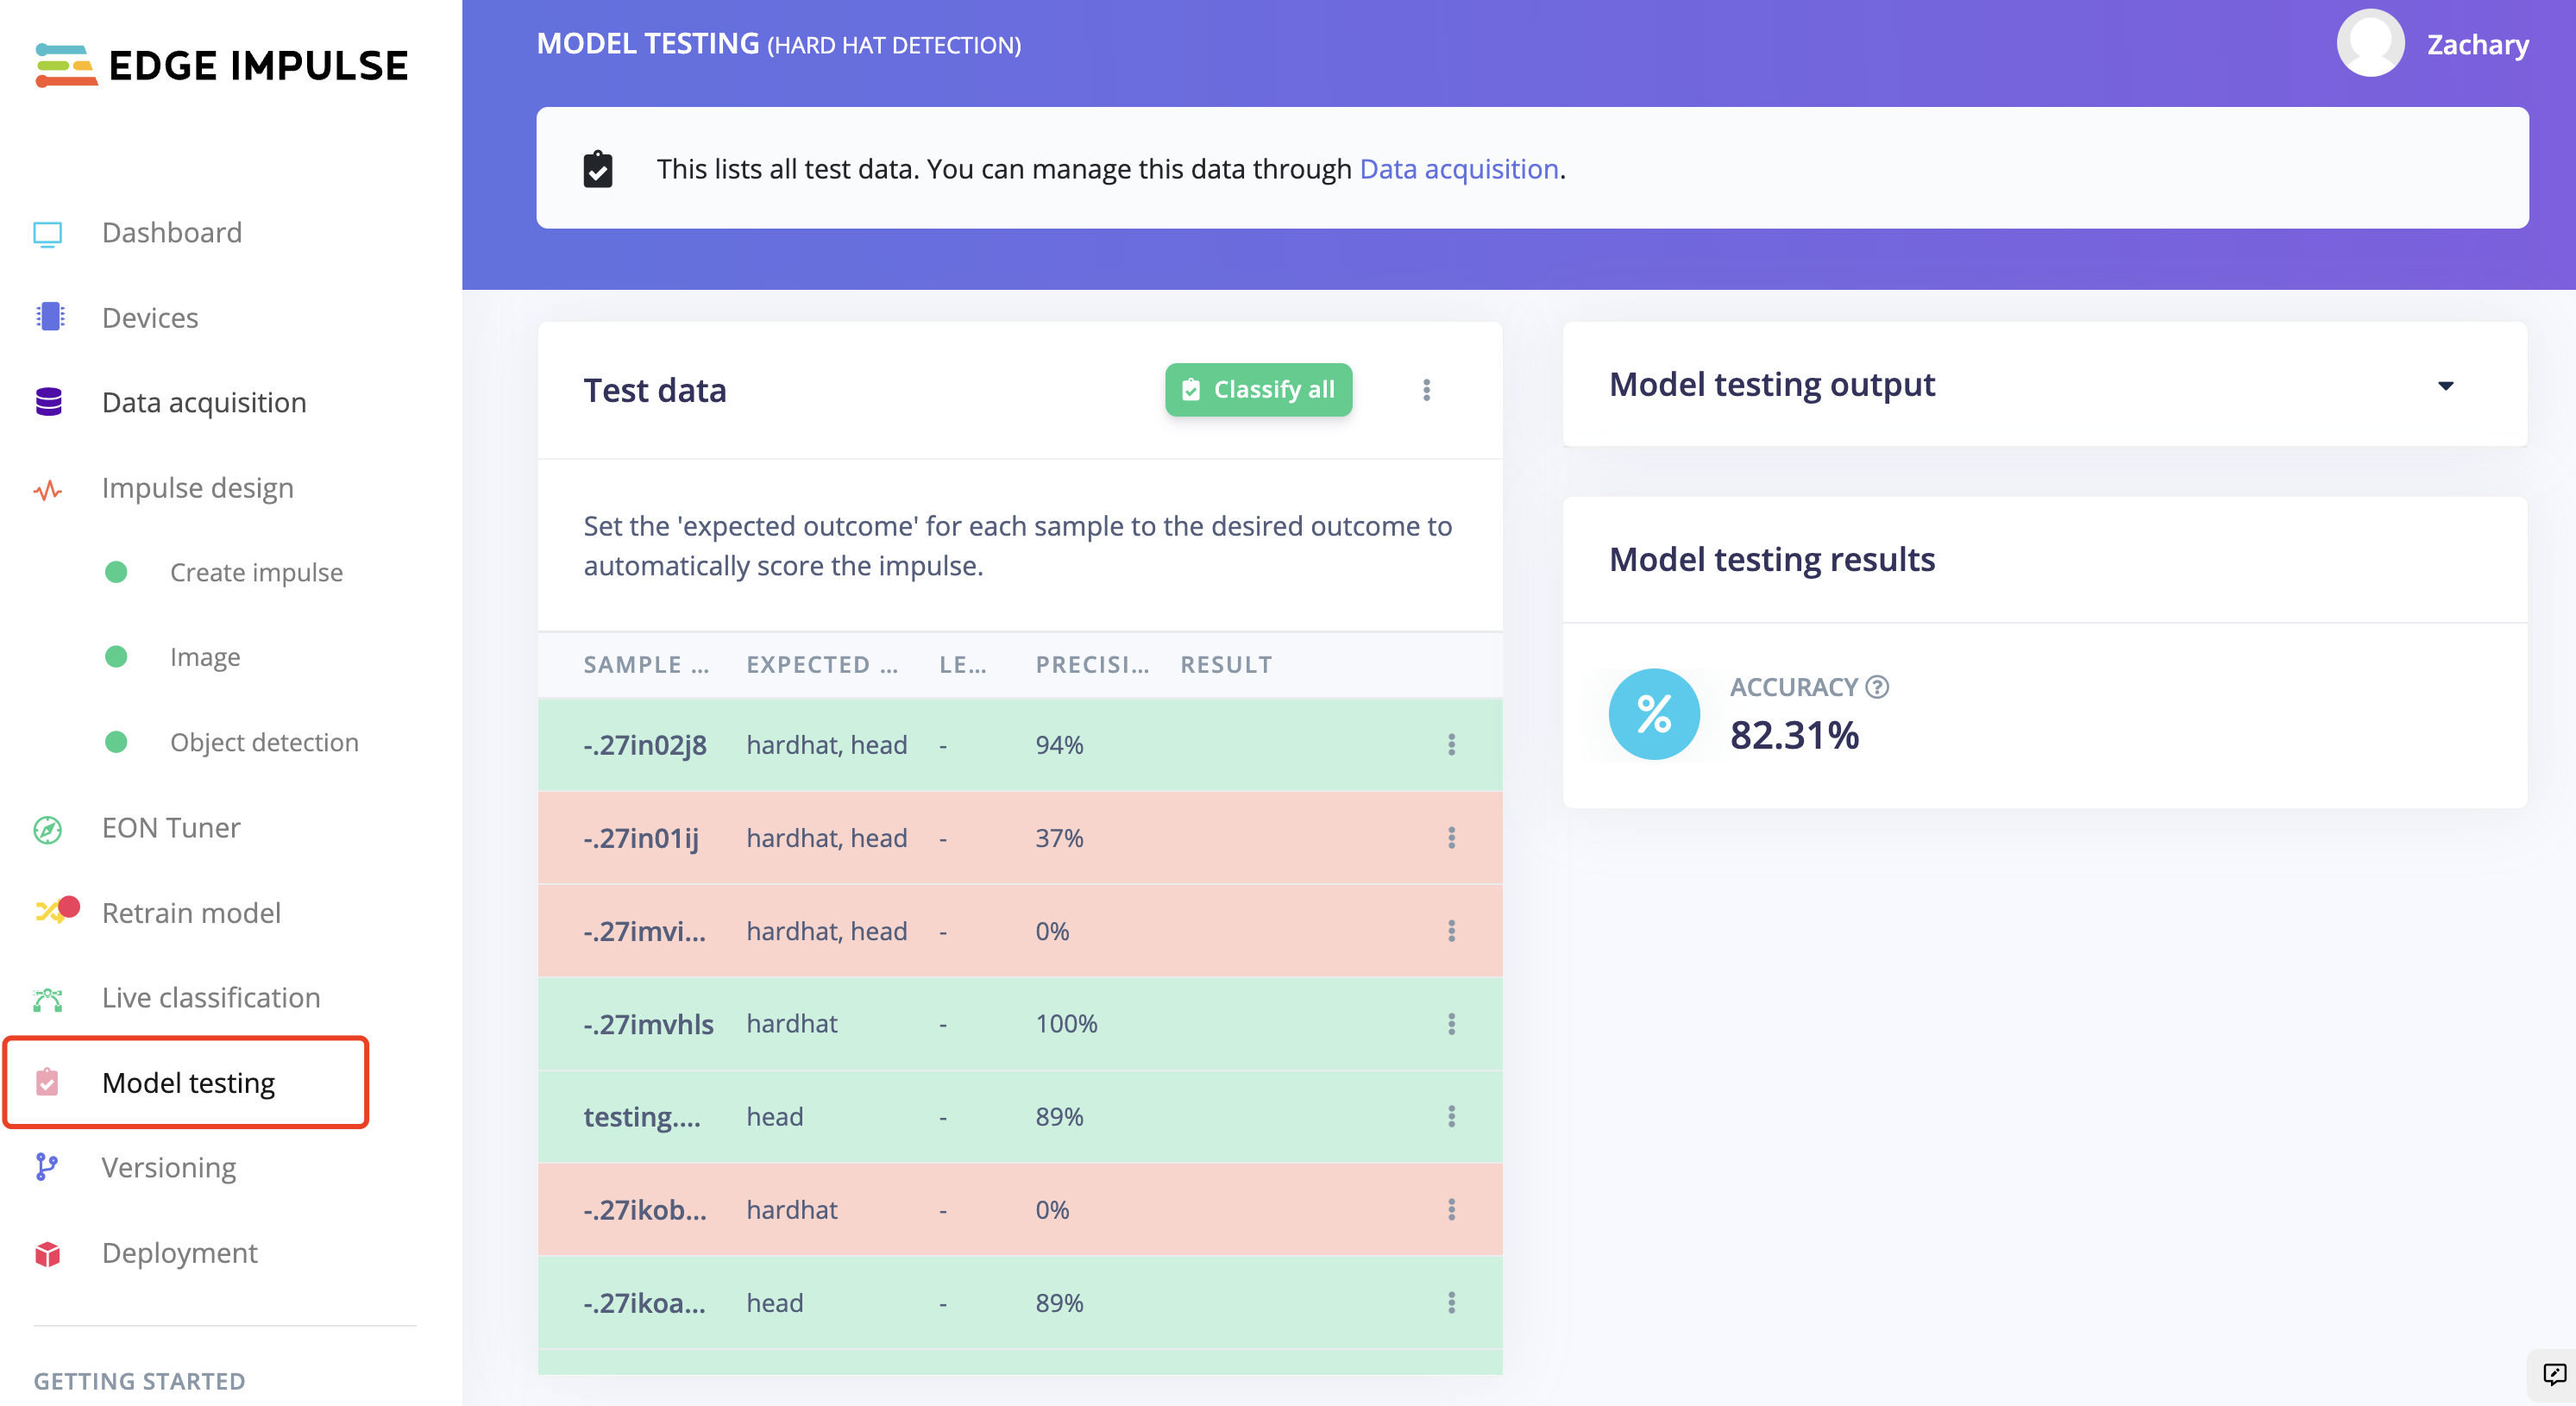
- 步骤 7. 一旦显示"job done",点击"Model testing"检查模型的工作效果。
基于自定义 PC 摄像头数据集的机器学习模型训练
Edge Impulse 提供了多种收集数据的方式。这里我们将自定义自己的图像,并通过 PC 摄像头拍摄图片将它们上传到网站。
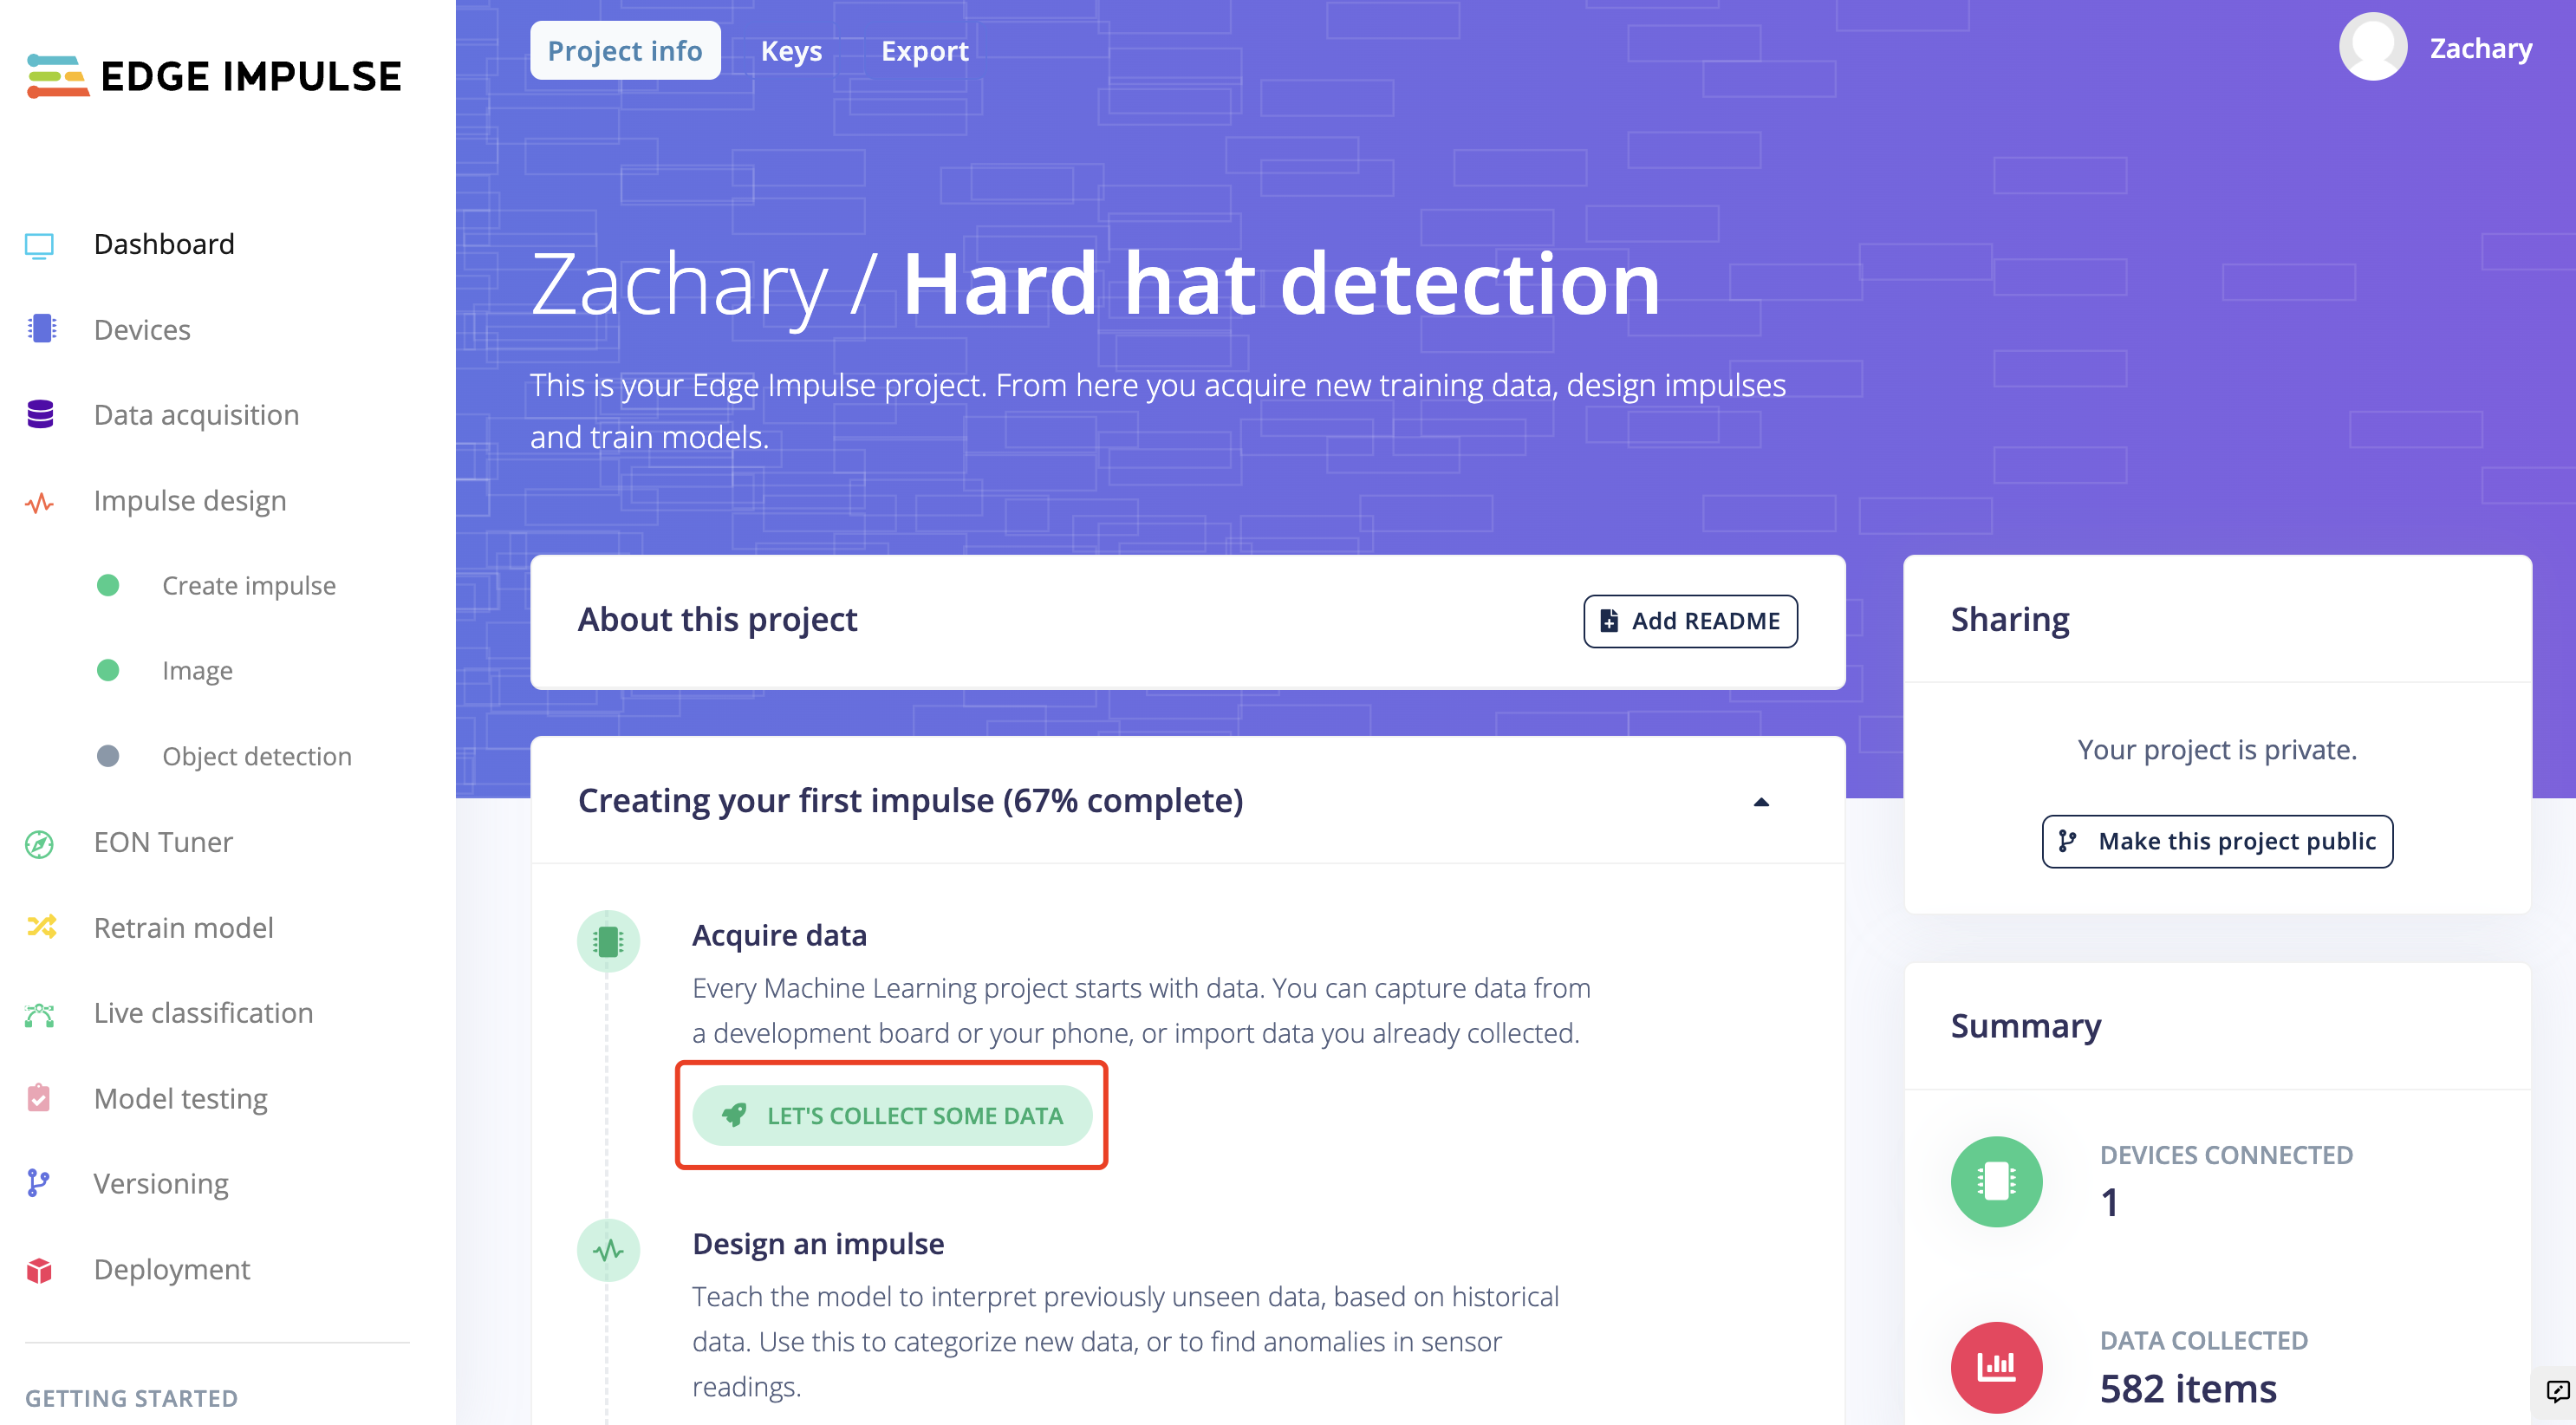
- 步骤 1. 停留在"Dashboard"页面,然后点击"LET'S COLLECT SOME DATA"。
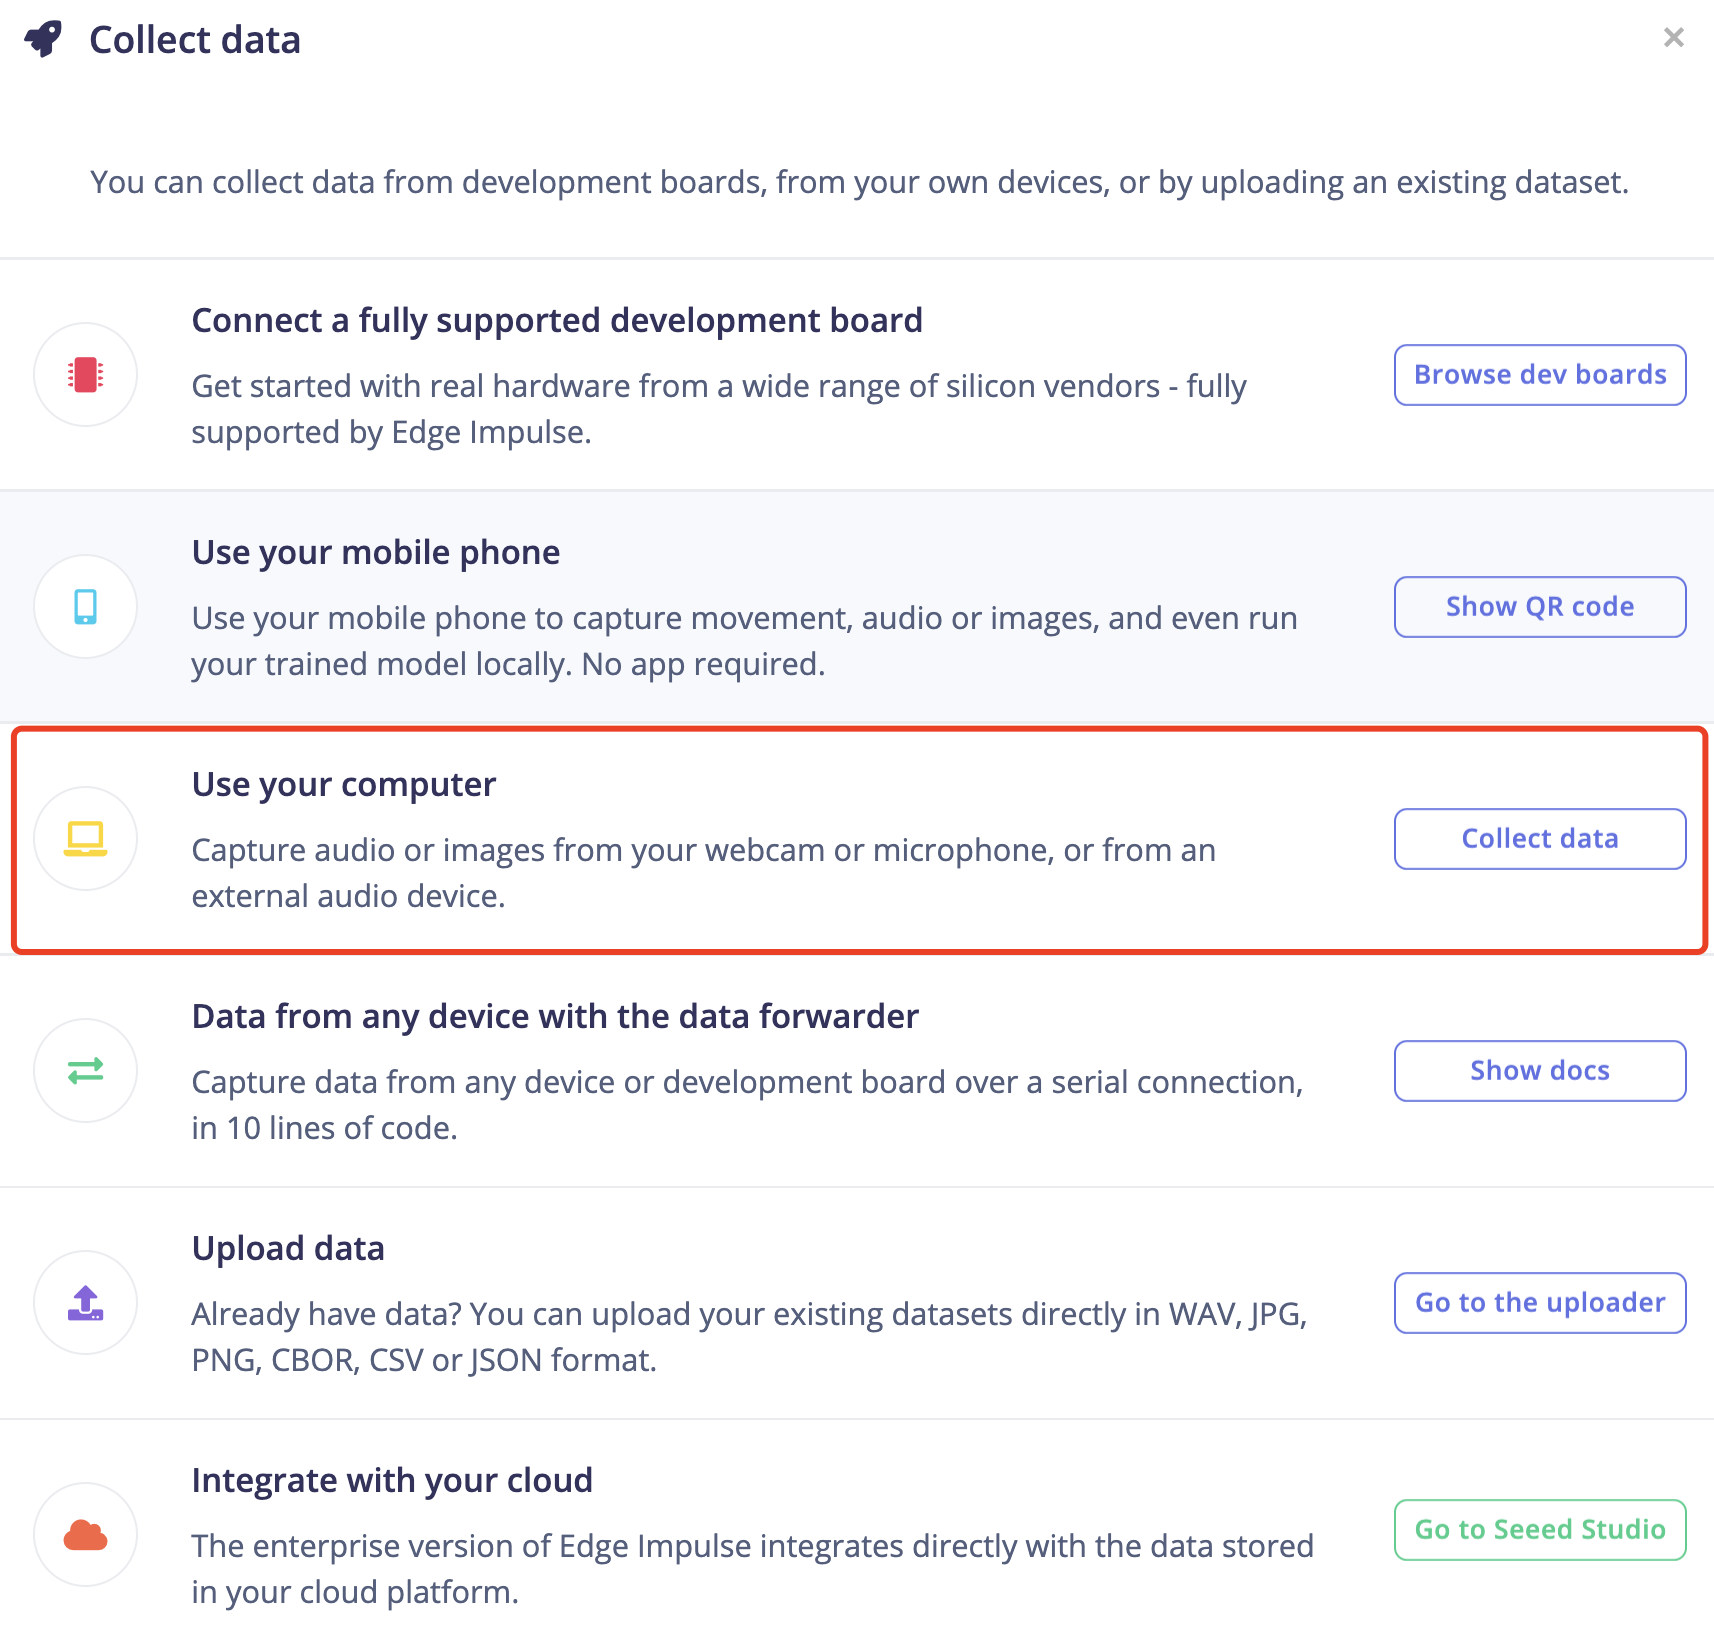
有多个选项可以选择来收集数据,这里我们使用计算机来进行。
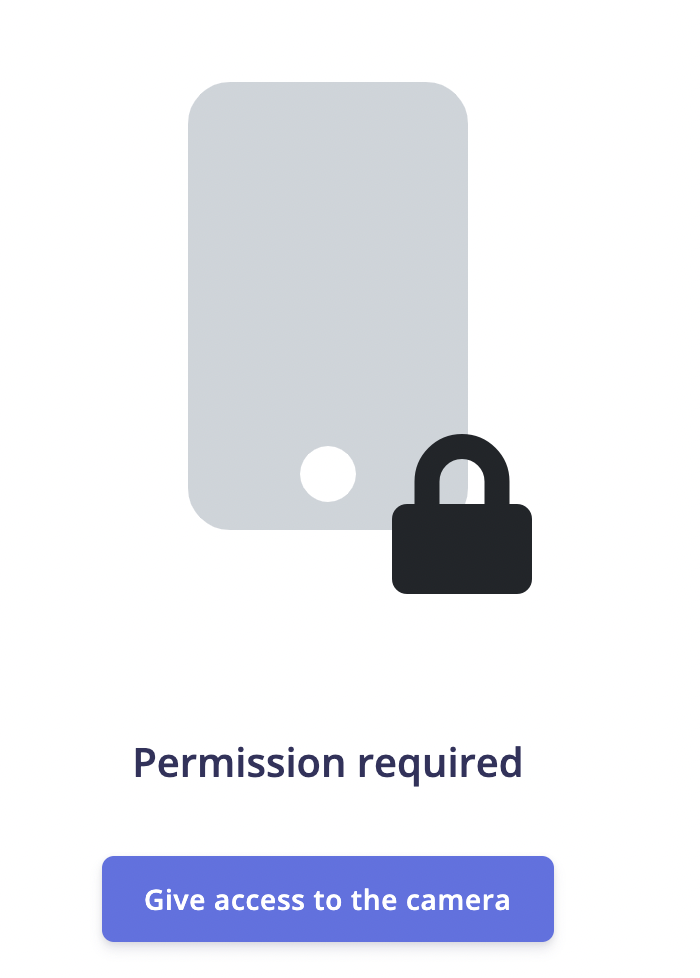
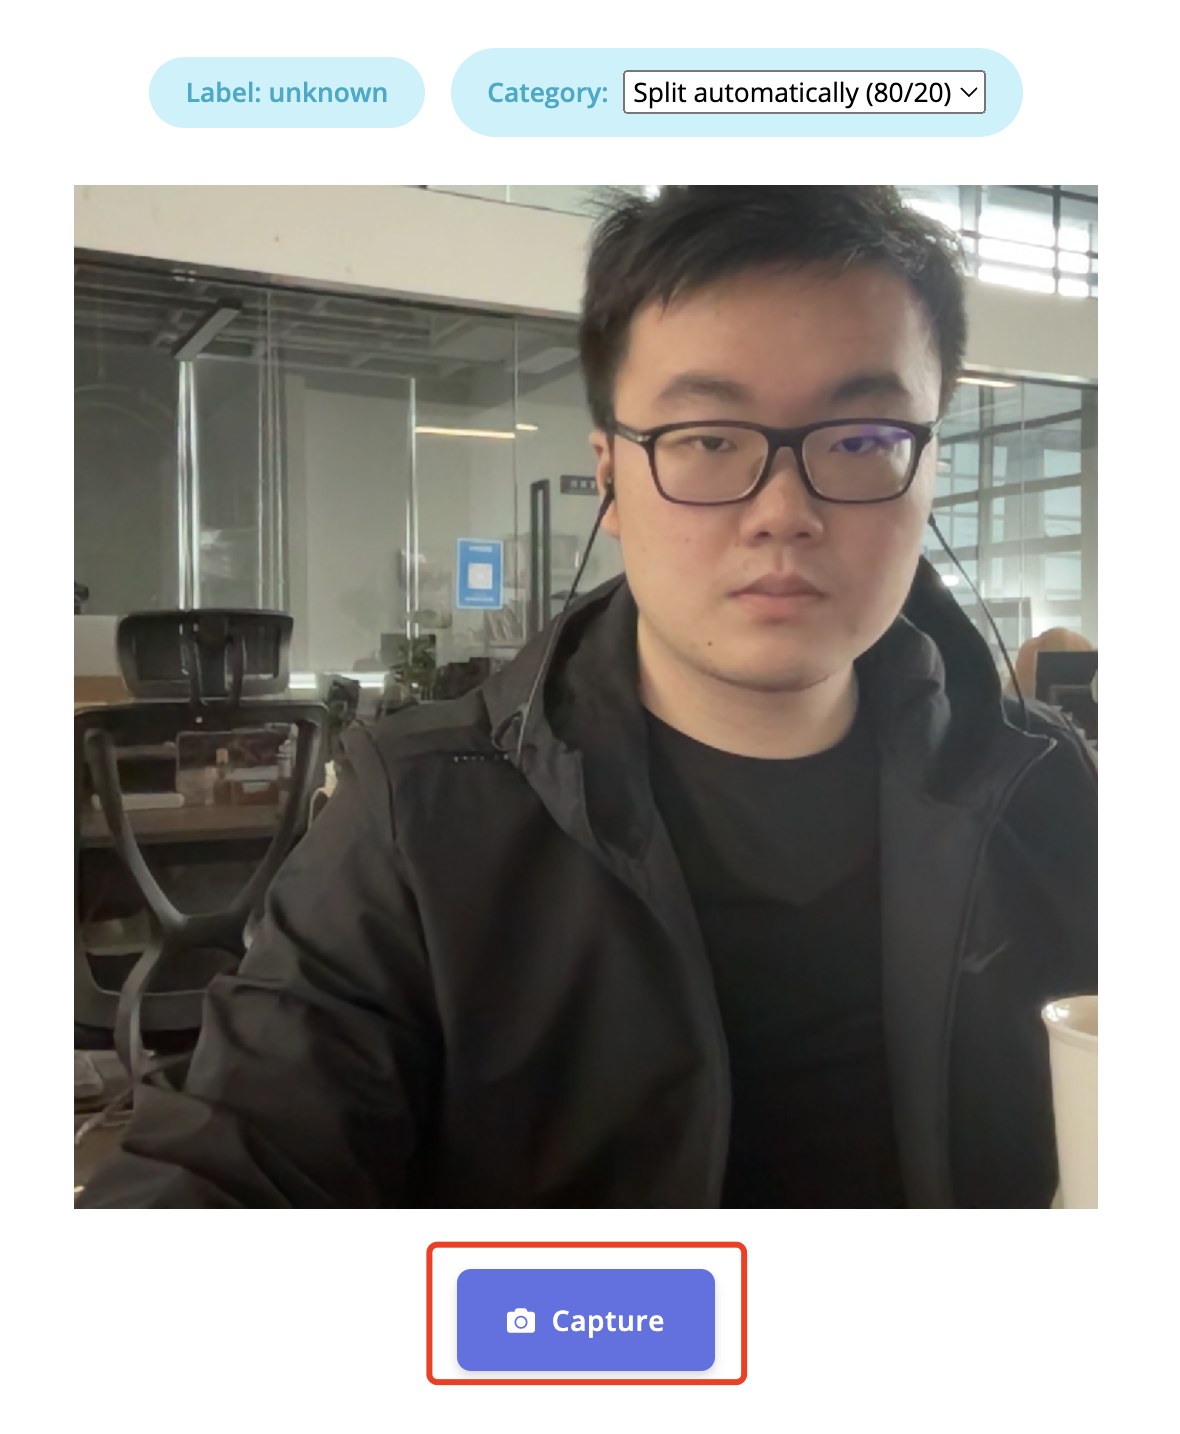
- 步骤 2. 稍等片刻,页面将显示已连接到计算机。点击"Collecting images?"然后"Give access to the camera"。
- 步骤 3. 点击"Capture"拍摄自己或他人的照片。图像数据需要在该部分标记为"Hard Hat"和"Head"。为了快速标记图片,强烈建议在进行下一个类别之前完成一个类别的数据采集,即建议先完成"Hard Hat"图片的拍摄,然后再进行"Head"图片的拍摄。
拍摄的图片将自动存储在"Data acquistion"中。为了训练模型的更好性能,强烈建议收集尽可能多的图片,并在不同类别中收集相同数量的数据。
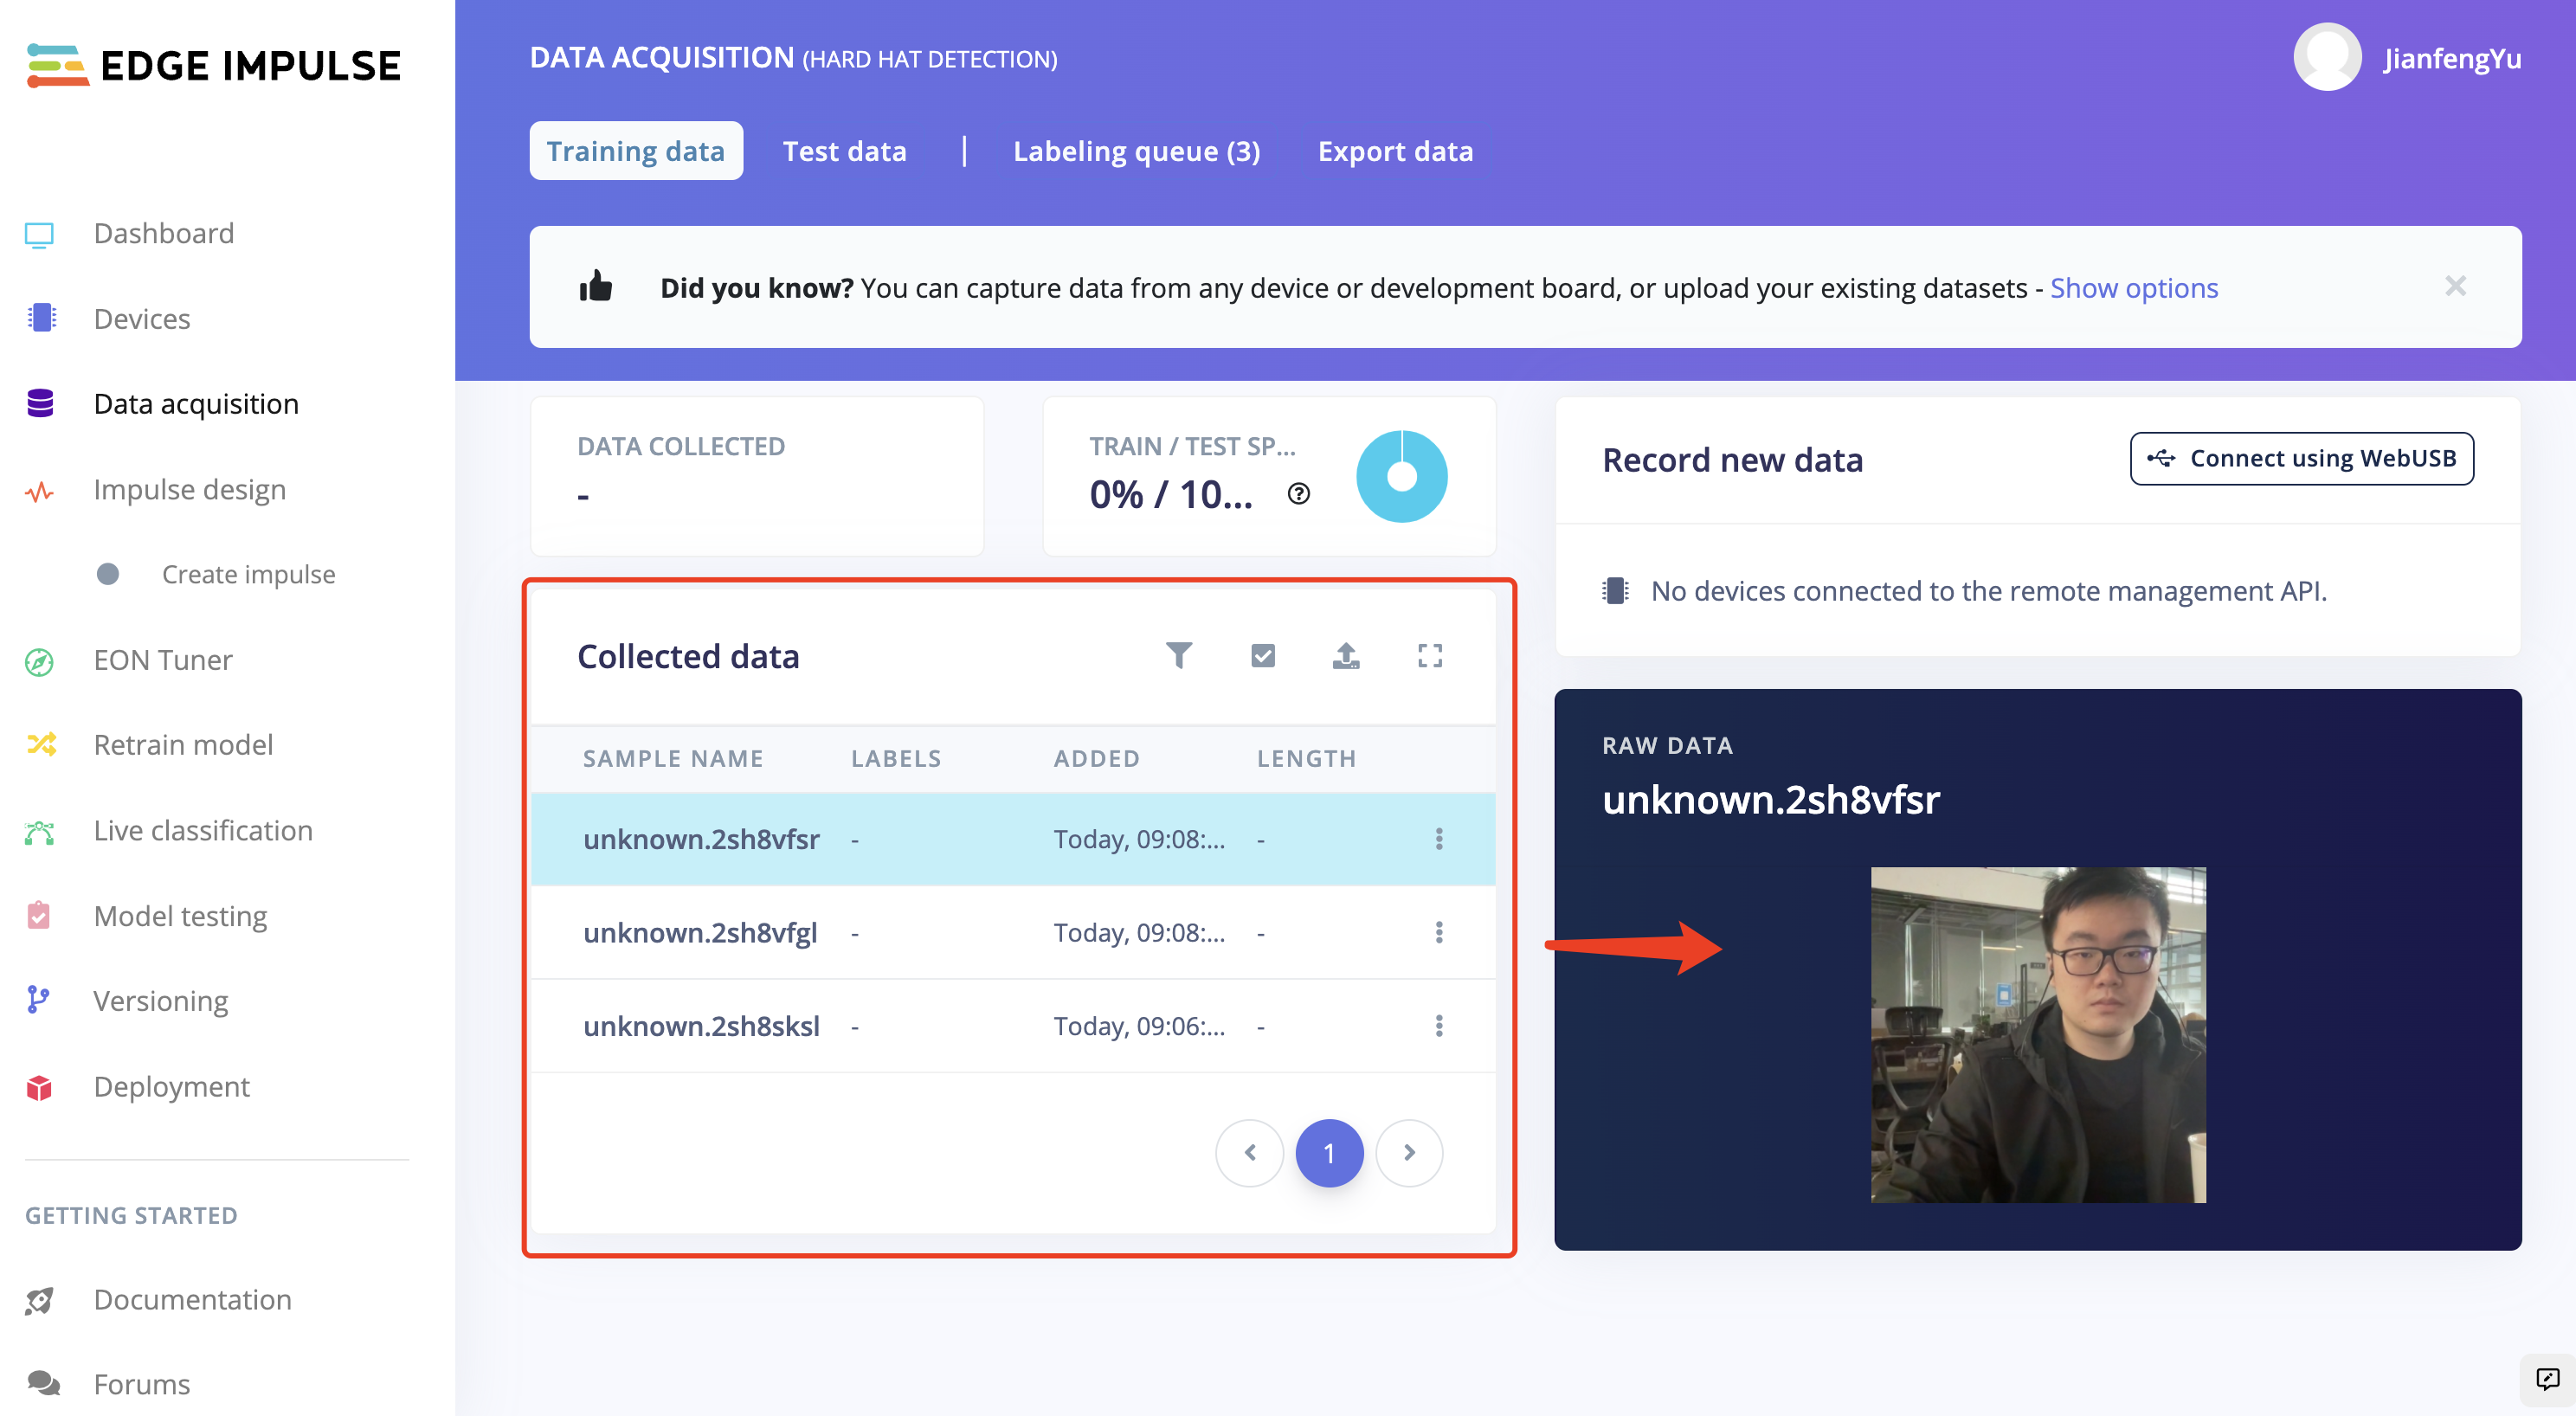
- 步骤 4. 点击"Labeling queue"通过在图片上用方框圈出头部来标记数据。

使用鼠标在对象周围拖拽一个框来添加标签。然后点击 Save labels 进入下一项。
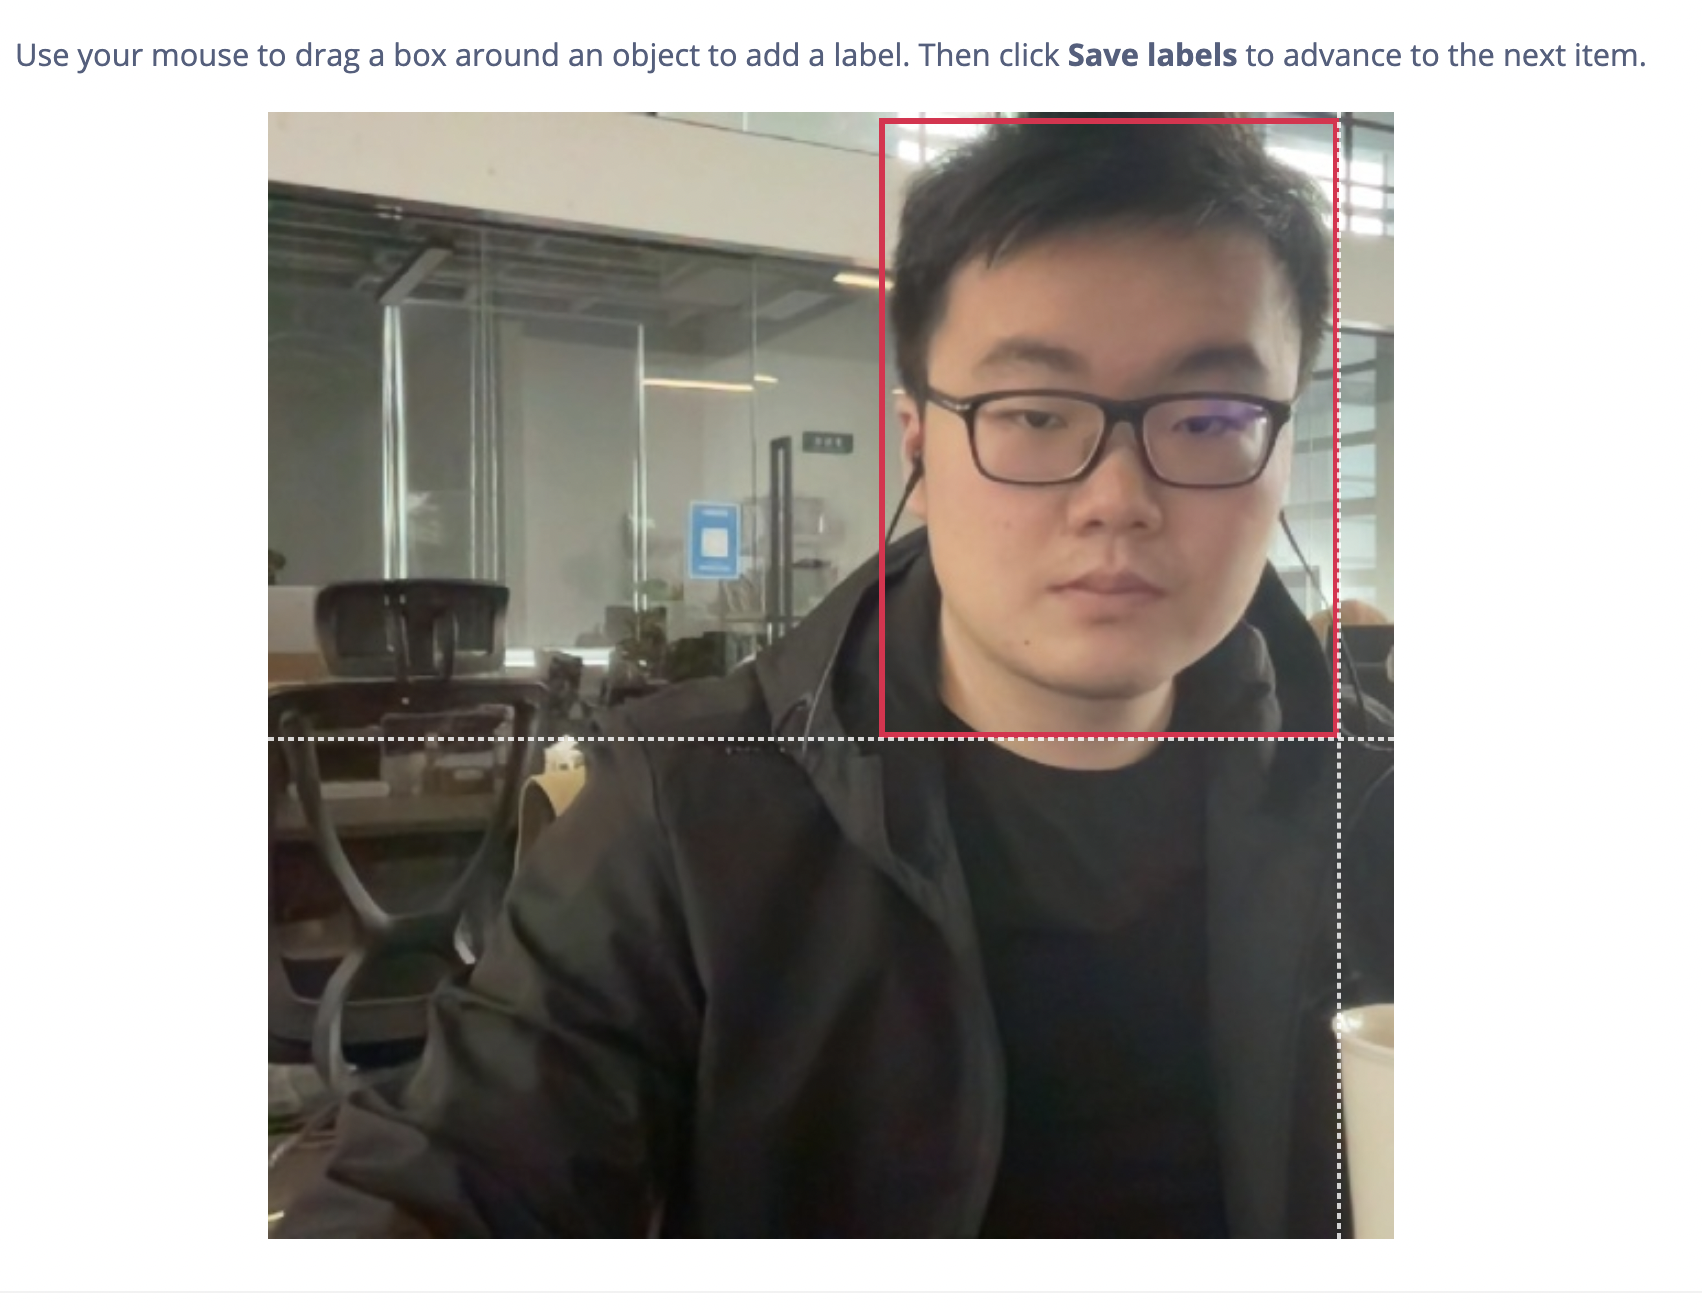
将标签设置为"Head"和"Hard Hat"并填写对话框。请确保方框框住人头部区域。

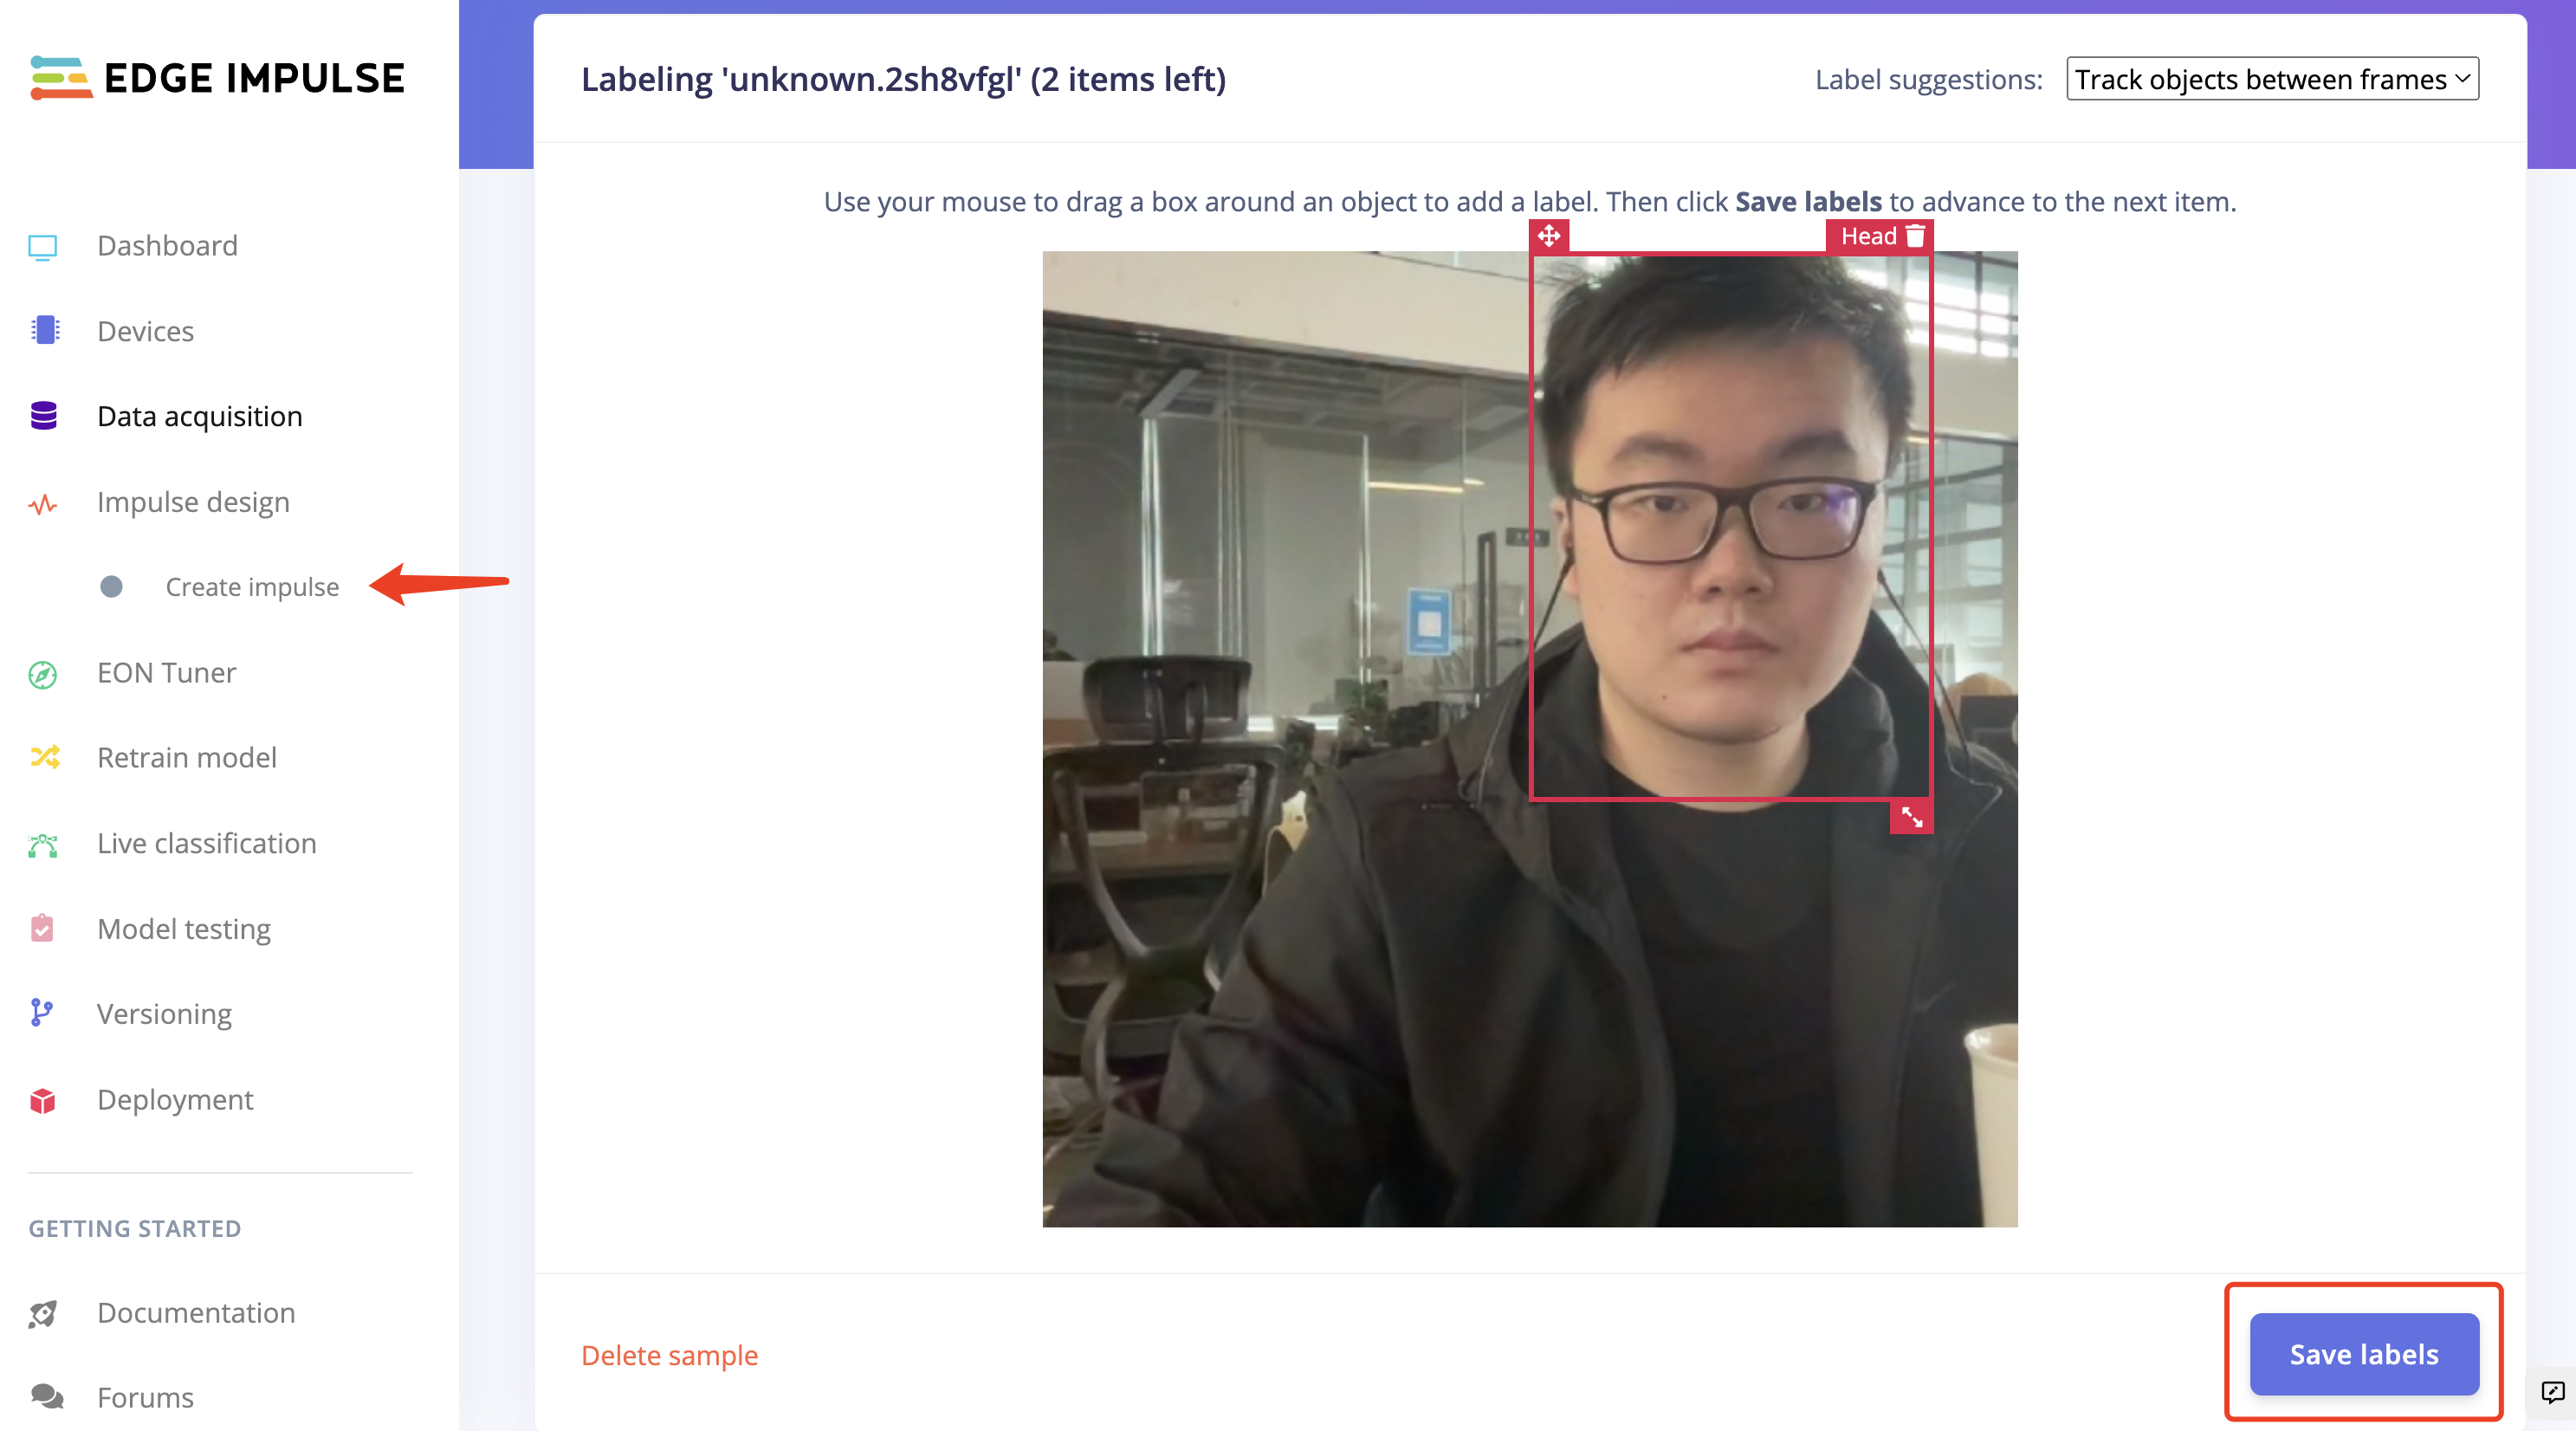
- 步骤 5. 当数据已被标记后,点击"Save labels"移动到"Impulse design"
- 步骤 6. 选择合适的图像处理块和图像学习块并保存脉冲。
- 步骤 7. 点击页面左侧的"image"。
配置为"GRB"并点击"保存参数",页面将自动跳转到"生成特征"站点。
然后我们就能够生成特征了。
- 步骤 8. 当显示"作业完成"时,点击页面左侧的"目标检测"。
点击"开始训练",让Edge Impulse基于生成的特征训练模型。
- 步骤 9. 一旦显示"作业完成",点击"模型测试"来检查模型的工作效果。
基于定制化NVIDIA Jetson相机数据集的机器学习模型训练
Edge Impulse提供了多种数据收集方式。这里我们将定制自己的图像,并通过连接到Nvidia Jetson Nano的相机拍摄图片,将它们上传到网站。
- 步骤 1. 根据硬件,设置NVIDIA Jetson Nano开发者套件或NVIDIA Jetson Nano 2GB开发者套件以连接外部显示器和键盘。为Jetson Nano连接屏幕显示器。
- 步骤 2. 确保您的Jetson Nano已连接到互联网,并在Edge Impulse中设置设备。
您可以使用以下命令检查网络:
ping -c 3 www.google.com
如果网络运行正常,结果应该是这样的:
3 packets transmitted, 3 received, 0% packet loss, time 2003ms
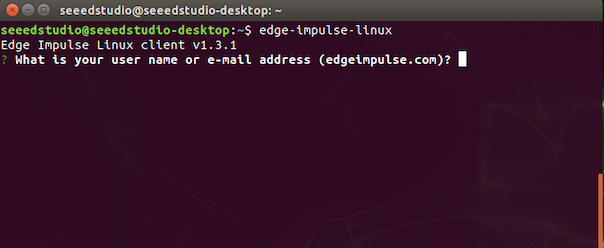
使用以下命令开始运行设置:
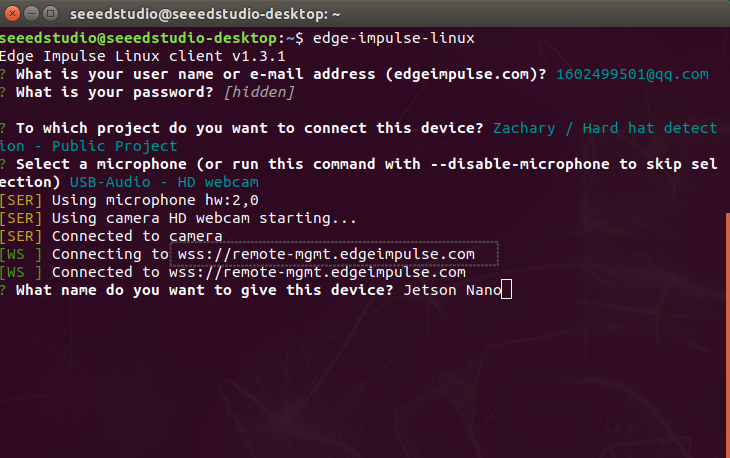
edge-impulse-linux
然后网站将请求 Edge Impulse 账户。
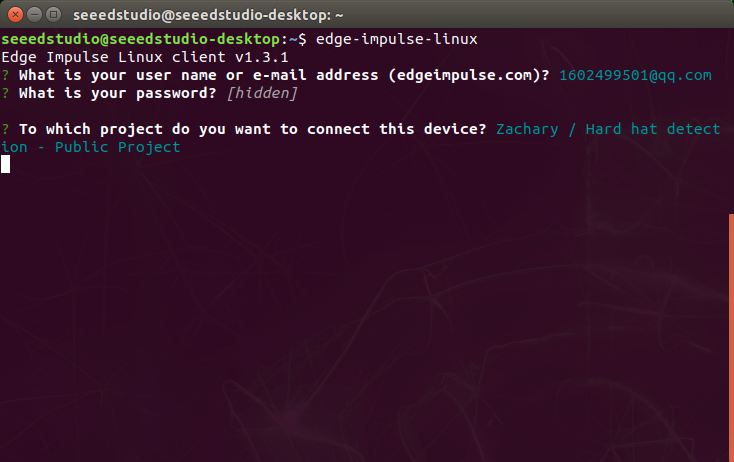
显示如下内容意味着连接已完成。我们在 Edge Impulse 中保存的所有项目都是可选择的。
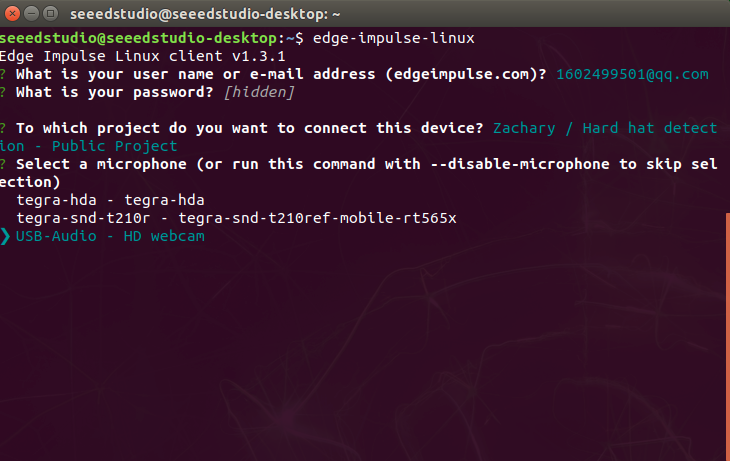
我们正在拍摄照片,所以这里我们需要选择我们的 USB 摄像头来应用到网站中。
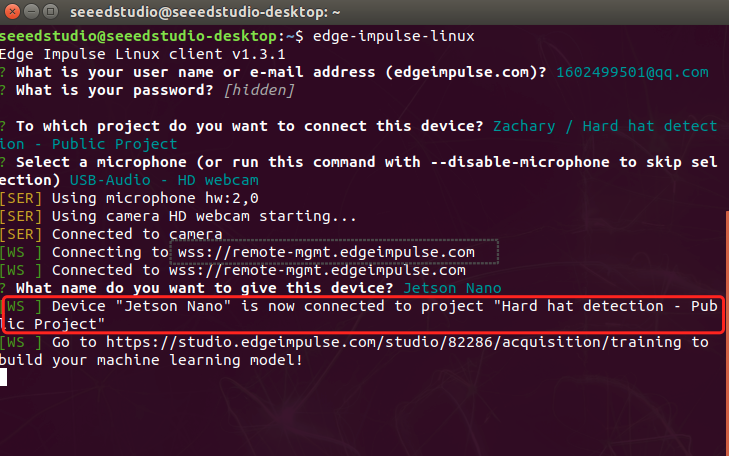
为我们想要连接到网站的设备命名
可以清楚地看到设备 Jetson Nano 现在已连接到项目。
- 步骤 3. 返回到 Edge Impulse 页面并选择"Devices"列。连接的 Jetson Nano 显示如下:

- 步骤 4. 选择我们连接到 Edge Impulse 的设备并移动到"Data acquisation"页面。点击"Capture"来拍摄您自己或其他人的照片。图像数据需要在该部分中标记为"Hard Hat"和"Head"。为了快速标记图片,强烈建议在移动到下一个类别之前完成一个类别的数据采集,即建议先完成"Hard Hat"图片的拍摄,然后再移动到"Head"图片的拍摄。
拍摄的图片将自动存储在"Data acquistion"中。为了训练模型获得更好的性能,强烈建议收集尽可能多的图片,并在不同类别中收集相同数量的数据。
-
步骤 5. 当数据收集完成后,移动到"Impulse design"
-
步骤 6. 选择合适的处理图像块和图像学习块并保存脉冲。
- 步骤 7. 点击页面左侧的"image"。
配置为"GRB"并点击"Save Parameters",页面将自动转到"Generate features"站点。
然后我们就能够生成特征。
- 步骤 8. 当显示"Job completed"时,点击页面左侧的"Object detection"。
点击"start training"并让 Edge Impulse 基于生成的特征训练模型。
- 步骤 9. 一旦显示"job done",点击"Model testing"来检查模型的工作情况。
建议混合使用我们上面提供的方法并检查每个模型的性能,看看哪一个更好。
将 ML 模型部署到 Jetson Nano
现在我们将把训练好的 ML 模型部署到 Jetson Nano 中,并应用代码使其运行。
通过 Edge Impulse Linux CLI 部署 ML 模型
- 步骤 1. 根据硬件,设置 NVIDIA Jetson Nano Developer Kit 或 NVIDIA Jetson Nano 2GB Developer Kit 以连接外部显示器和键盘。为 Jetson Nano 连接屏幕显示器。
- 步骤 2. 确保您的 Jetson Nano 已连接到互联网,并在 Edge Impulse 中设置设备。
!!!Note 如果您已经在"基于自定义 NVIDIA Jetson 相机数据集的 ML 模型训练"部分中将 Jetson Nano 与 Edge Impulse 连接,则可以跳过此步骤。
您可以使用以下命令检查网络连接:
ping -c 3 www.google.com
如果网络运行正常,结果应该是这样的:
3 packets transmitted, 3 received, 0% packet loss, time 2003ms
使用以下命令开始运行设置:
edge-impulse-linux
网站将请求 Edge Impulse 账户。
显示如下内容意味着连接已完成。我们在 Edge Impulse 中保存的所有项目都是可选择的。
我们正在拍摄照片,所以这里我们需要选择我们的 USB 摄像头来应用到网站中。
为我们想要连接到网站的设备命名
可以清楚地看到设备 Jetson Nano 现在已连接到项目。
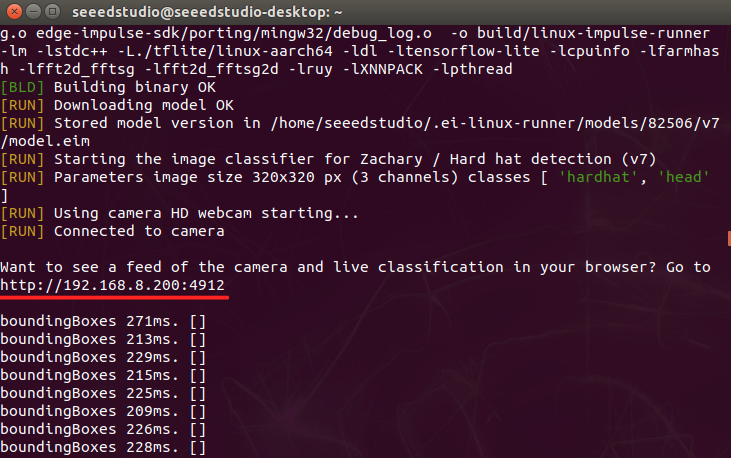
- 步骤 3. 通过以下代码将 ML 模型下载到 Jetson Nano。
edge-impulse-linux-runner
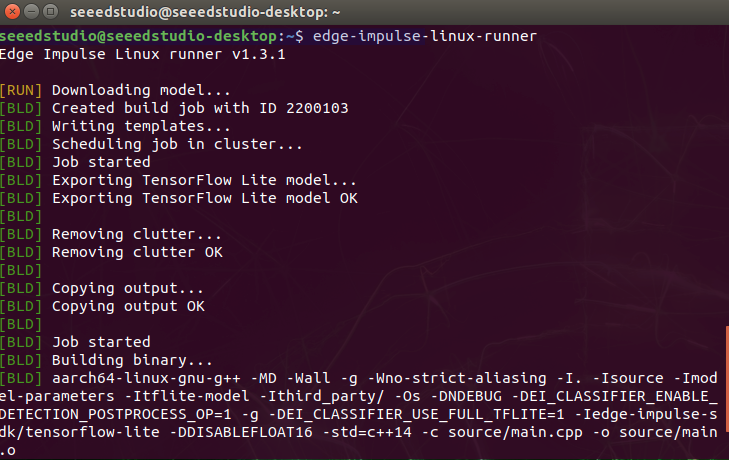
成功连接如下所示,模型将自动激活。
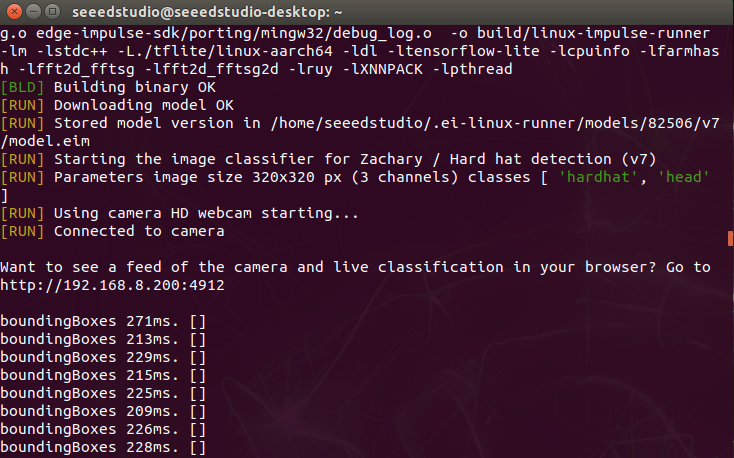
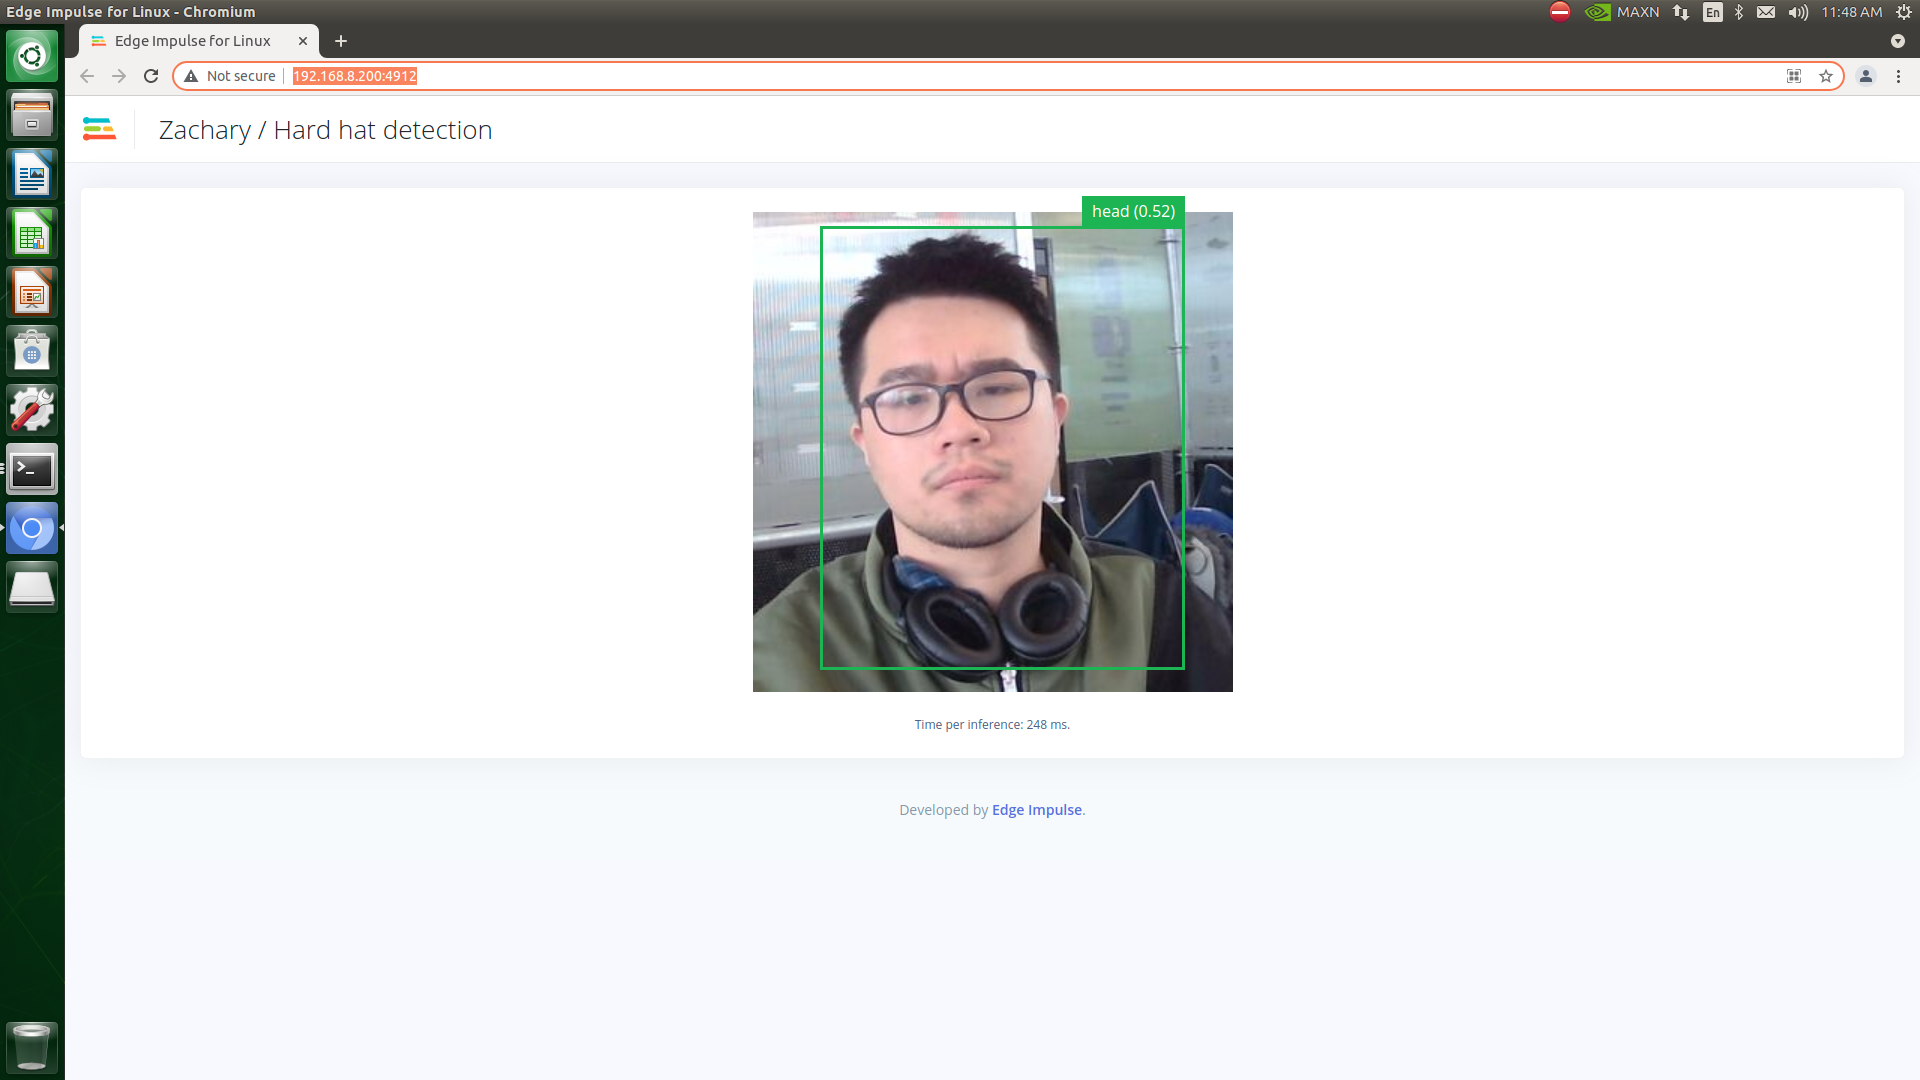
- 步骤 4. 复制显示的地址并用浏览器打开。
检测结果将在浏览器中显示。
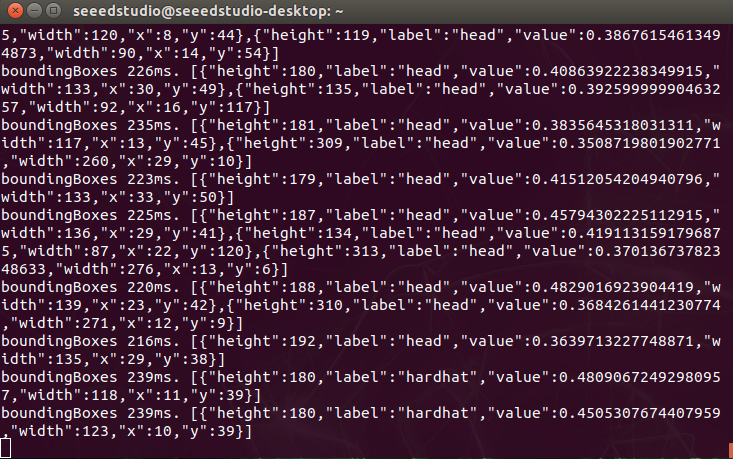
数据输出结果如下所示:
通过 Linux Python SDK 部署 ML 模型
在这个项目中,我们将应用模型通过显示"禁止进入"和"欢迎"来在屏幕上显示安全帽检测结果。Edge Impulse 提供了一个库,使得在 Linux 机器上使用 Python 运行 ML 模型和传感器数据收集成为可能。该 SDK 是开源的,托管在 GitHub 上。您也可以尝试我们已经设置好的镜像。
-
步骤 1. 为 Linux 安装最新版本的 Python 3(>=3.7)。
-
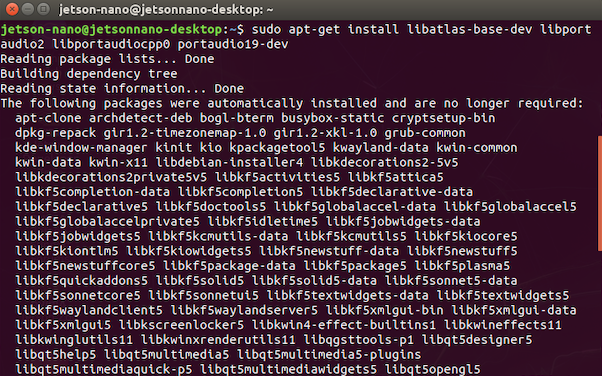
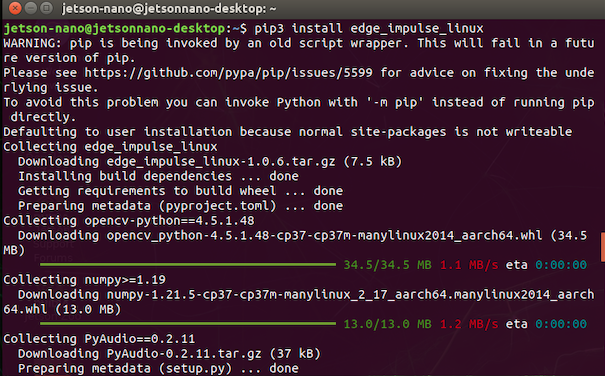
步骤 2. 使用以下命令安装 Linux Python SDK:
sudo apt-get install libatlas-base-dev libportaudio2 libportaudiocpp0 portaudio19-dev
pip3 install edge_impulse_linux
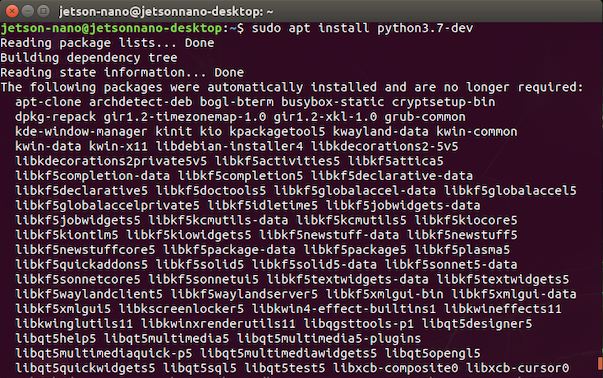
- 步骤 3. 使用以下命令安装 Edge Impulse for Linux CLI:
sudo apt install python3.7-dev
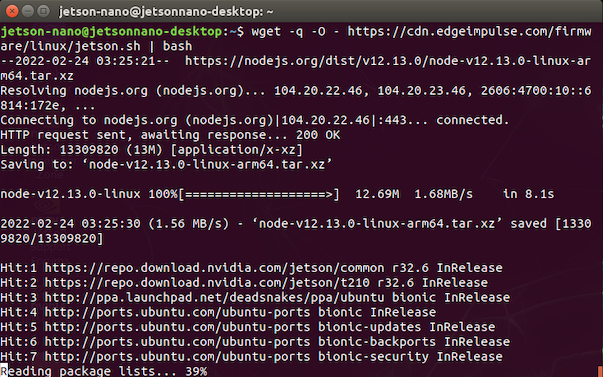
wget -q -0 - https://cdn.edgeimpulse.com/firmware/linux/jetson.sh | bash
- 步骤 4. 通过以下命令将 ML 模型下载到 Jetson Nano:
edge-impulse-linux-runner --download modelfile.eim
如果这是 Jetson Nano 和 Edge Impulse 之间的首次连接,网站将要求您的 Edge Impulse 账户信息来登录。
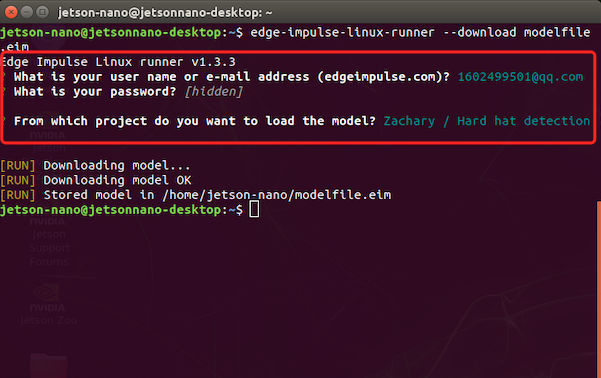
!!!Note 这会将文件下载到 modelfile.eim 中,如果您想切换项目,可以通过添加 '--clean' 来完成。
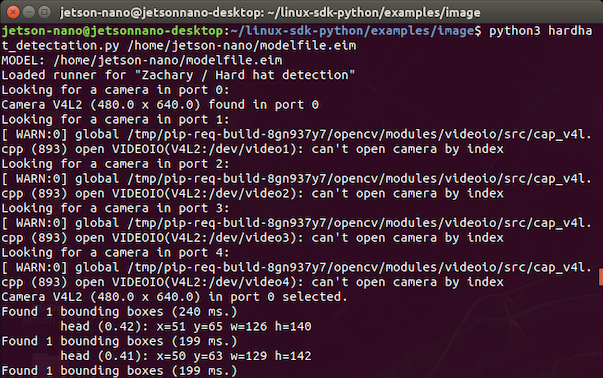
- 步骤 5. 运行 hardhat_detectation.py 以使用以下命令应用 ML 模型。代码可能需要一个外部文件。
python3 hardhat_detectation.py /home/jetson-nano/modelfile.eim
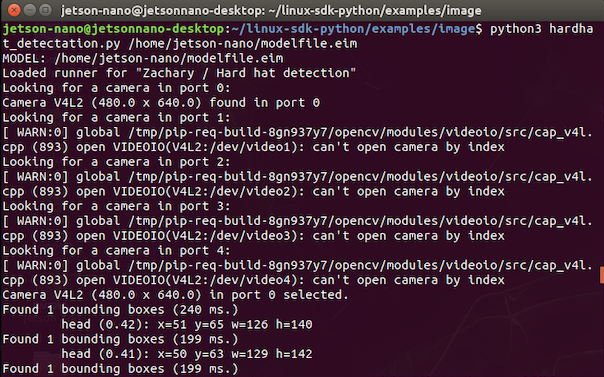
- 步骤 6. 结果应该看起来与这些相似:
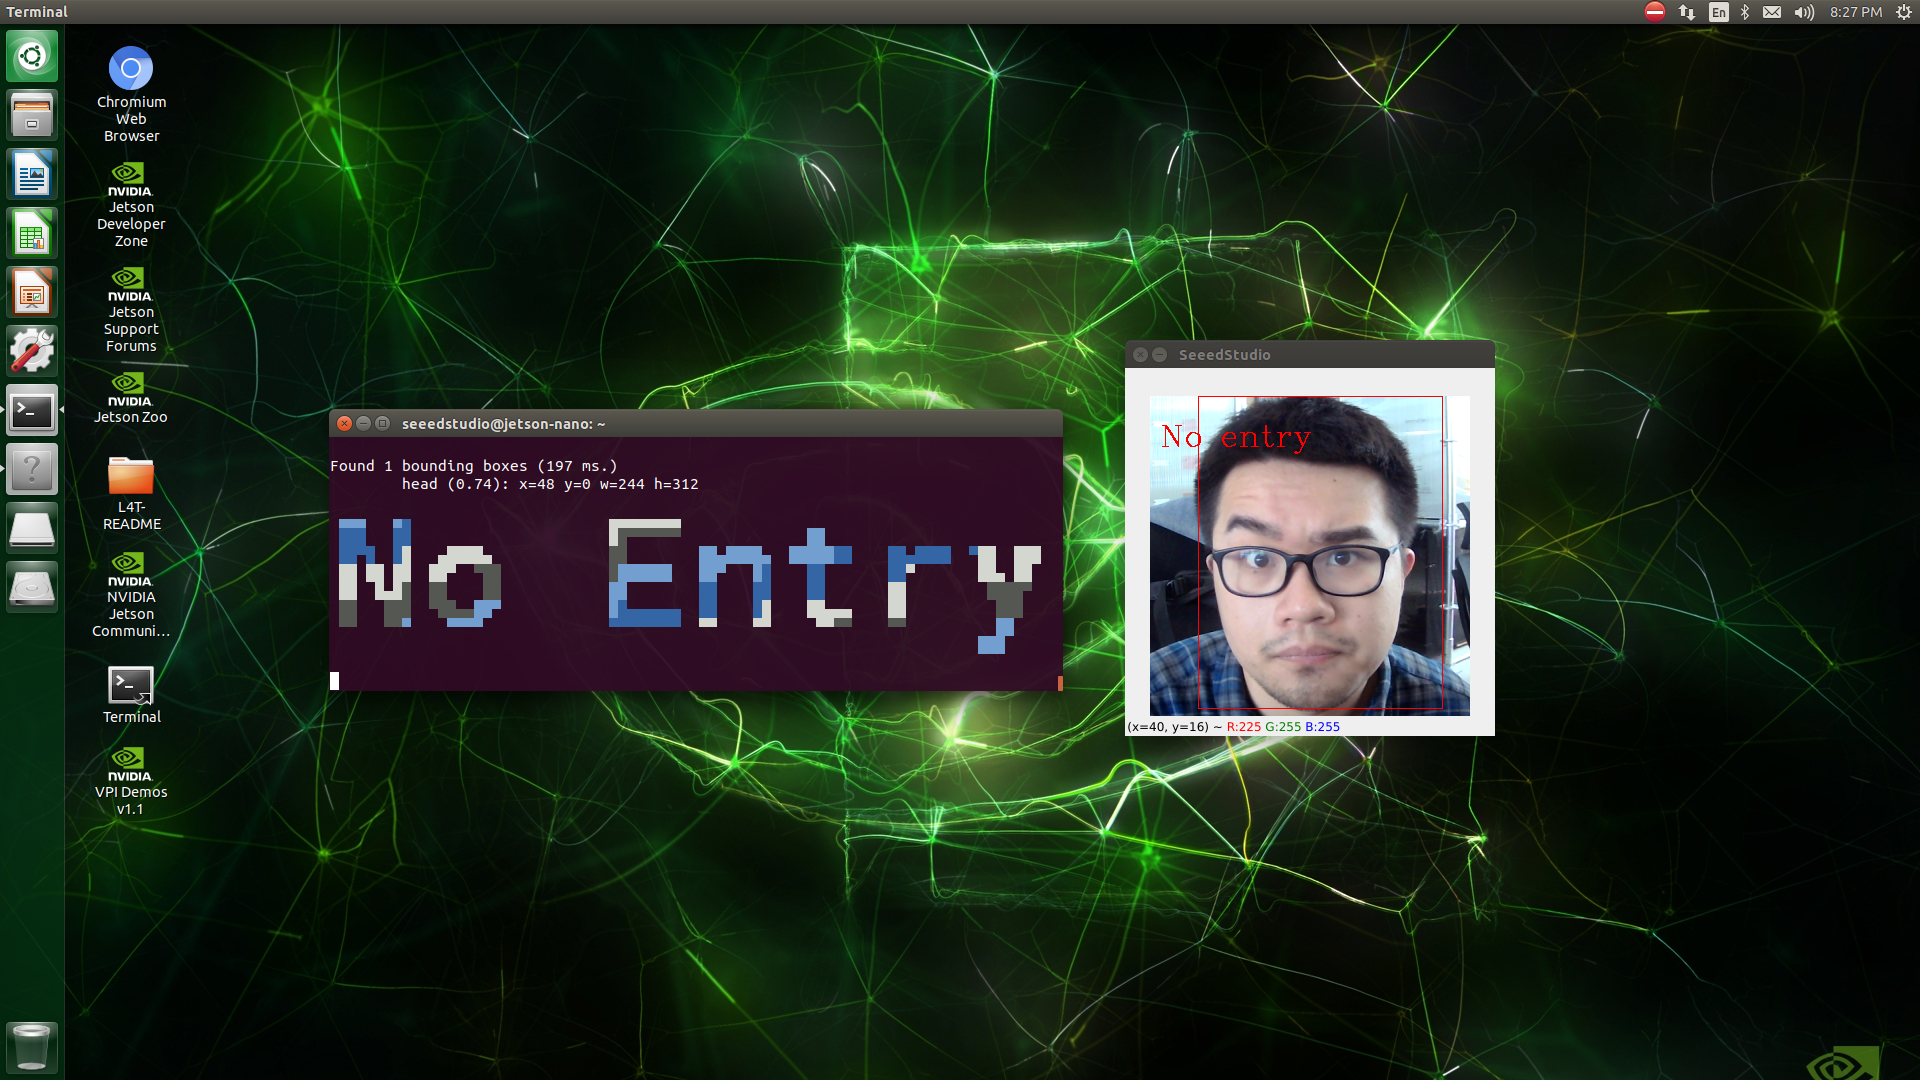

或者它可以是一个图像,在5分钟内为PPE检测管道部署您的ML应用程序?请继续关注我们!
技术支持与产品讨论
感谢您选择我们的产品!我们在这里为您提供不同的支持,以确保您使用我们产品的体验尽可能顺畅。我们提供多种沟通渠道,以满足不同的偏好和需求。