单总线温度传感器 DS18B20
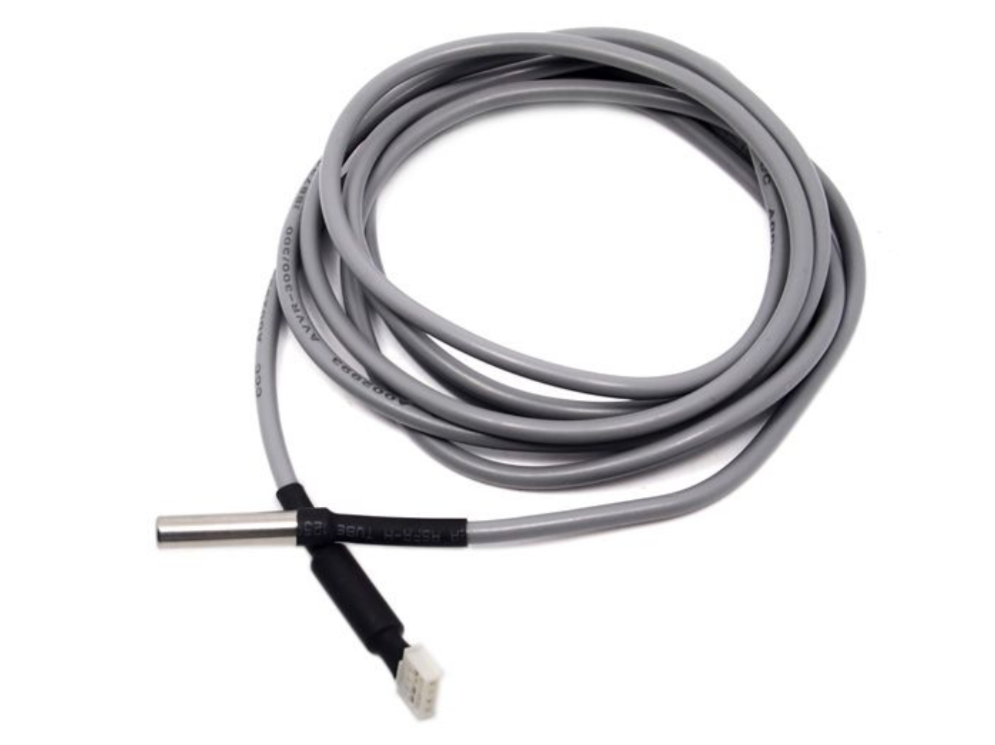

这款2米长的单总线温度传感器具有防水探头和长线形状,适用于浸入式温度检测。该传感器内部的芯片是DS18B20,被广泛采用。原始版本内部包含三根线,您需要添加一个额外的电阻才能使其工作。对于这款传感器,我们将其调整为Grove接口,并预装了一个电阻,这样您就可以像使用常规Grove传感器一样使用它。本文将说明该传感器在树莓派上的使用方法,让我们开始吧!
可升级为工业传感器
使用SenseCAP S2110控制器和S2100数据记录器,您可以轻松将Grove转换为LoRaWAN®传感器。Seeed不仅帮助您进行原型设计,还为您提供了使用SenseCAP系列坚固工业传感器扩展项目的可能性。
SenseCAP S210x系列工业传感器为环境感知提供开箱即用的体验。请参考具有更高性能和鲁棒性的S2101无线温湿度传感器,用于空气质量监测。该系列包括土壤湿度、空气温湿度、光照强度、CO2、EC传感器以及8合1气象站。尝试最新的SenseCAP S210x,助力您下一个成功的工业项目。
| SenseCAP工业传感器 |
 |
| S2101 空气温湿度传感器 |
特性
- 数据接口仅需一根线
- 防水
- Grove 兼容
- 接受 3.0V 至 5.5V 电源供电
- 宽温度范围:-55°C 至 +125°C
- 高精度:±0.5°C(-10°C 至 +85°C)
电缆部分不能长时间置于高于 70°C 的温度下。
规格参数
| 工作电压 | 3.0-5.5V |
| 芯片 | DS18B20 |
| 长度 | 2m |
| 工作温度 | -55°C 至 +125°C |
支持的平台
| Arduino | Raspberry Pi | |||
|---|---|---|---|---|
入门指南
在本节之后,您只需几个步骤就可以让单总线温度传感器运行起来。
与 Arduino 一起使用
所需材料
| Seeeduino Lotus V1.1 | 单总线温度传感器 |
|---|---|
 |  |
| 立即购买 | 立即购买 |
硬件连接
请轻柔地插入 USB 电缆,将单总线温度传感器接口插入 Seeeduino Lotus V1.1 接口,否则可能会损坏端口。
-
步骤 1. 使用 Grove 电缆将单总线温度传感器插入 Seeeduino Lotus V1.1 的 D2 接口。
-
步骤 2. 通过 USB 电缆将 Seeeduino Lotus V1.1 连接到 PC。
-
步骤 3. 下载代码,请参考软件部分。
-
步骤 4. 运行代码,结果将显示在您的 Arduino IDE 中的串口监视器屏幕上。
软件
如果这是您第一次使用 Arduino,我们强烈建议您在开始之前查看Arduino 入门指南。
-
步骤 1. 下载 Onewire 库 和 Arduino 温度控制库
-
步骤 2. 复制整个 OneWire 和 Arduino-Temperature-Control-Library 文件并将它们粘贴到您的 Arduino IDE 库文件中。
-
步骤 3. 从下面的软件代码上传演示代码。如果您不知道如何上传代码,请查看如何上传代码。
软件代码
// Include the libraries we need
#include <OneWire.h>
#include <DallasTemperature.h>

// Data wire is plugged into port 2 on the Arduino
#define ONE_WIRE_BUS 2


// Setup a oneWire instance to communicate with any OneWire devices (not just Maxim/Dallas temperature ICs)
OneWire oneWire(ONE_WIRE_BUS);

// Pass our oneWire reference to Dallas Temperature.
DallasTemperature sensors(&oneWire);

/*
 * The setup function. We only start the sensors here
 */
void setup(void)
{
  // start serial port
  Serial.begin(115200);
  Serial.println("Dallas Temperature IC Control Library Demo");

  // Start up the library
  sensors.begin();
}

/*
 * Main function, get and show the temperature
 */
void loop(void)
{
  // call sensors.requestTemperatures() to issue a global temperature
  // request to all devices on the bus
  Serial.print("Requesting temperatures...");
  sensors.requestTemperatures(); // Send the command to get temperatures
  Serial.println("DONE");
  // After we got the temperatures, we can print them here.
  // We use the function ByIndex, and as an example get the temperature from the first sensor only.
  float tempC = sensors.getTempCByIndex(0);

  // Check if reading was successful
  if(tempC != DEVICE_DISCONNECTED_C)
  {
    Serial.print("Temperature for the device 1 (index 0) is: ");
    Serial.println(tempC);
  }
  else
  {
    Serial.println("Error: Could not read temperature data");
  }
}
如果一切顺利,您可以转到串口监视器查看如下结果:

与 Raspberry Pi 一起使用
所需材料
| Raspberry Pi 4 Model B | Grove - Base Hat for Raspberry Pi | One Wire Temperature Sensor |
|---|---|---|
 |  | |
| 立即购买 | 立即购买 | 立即购买 |
硬件连接
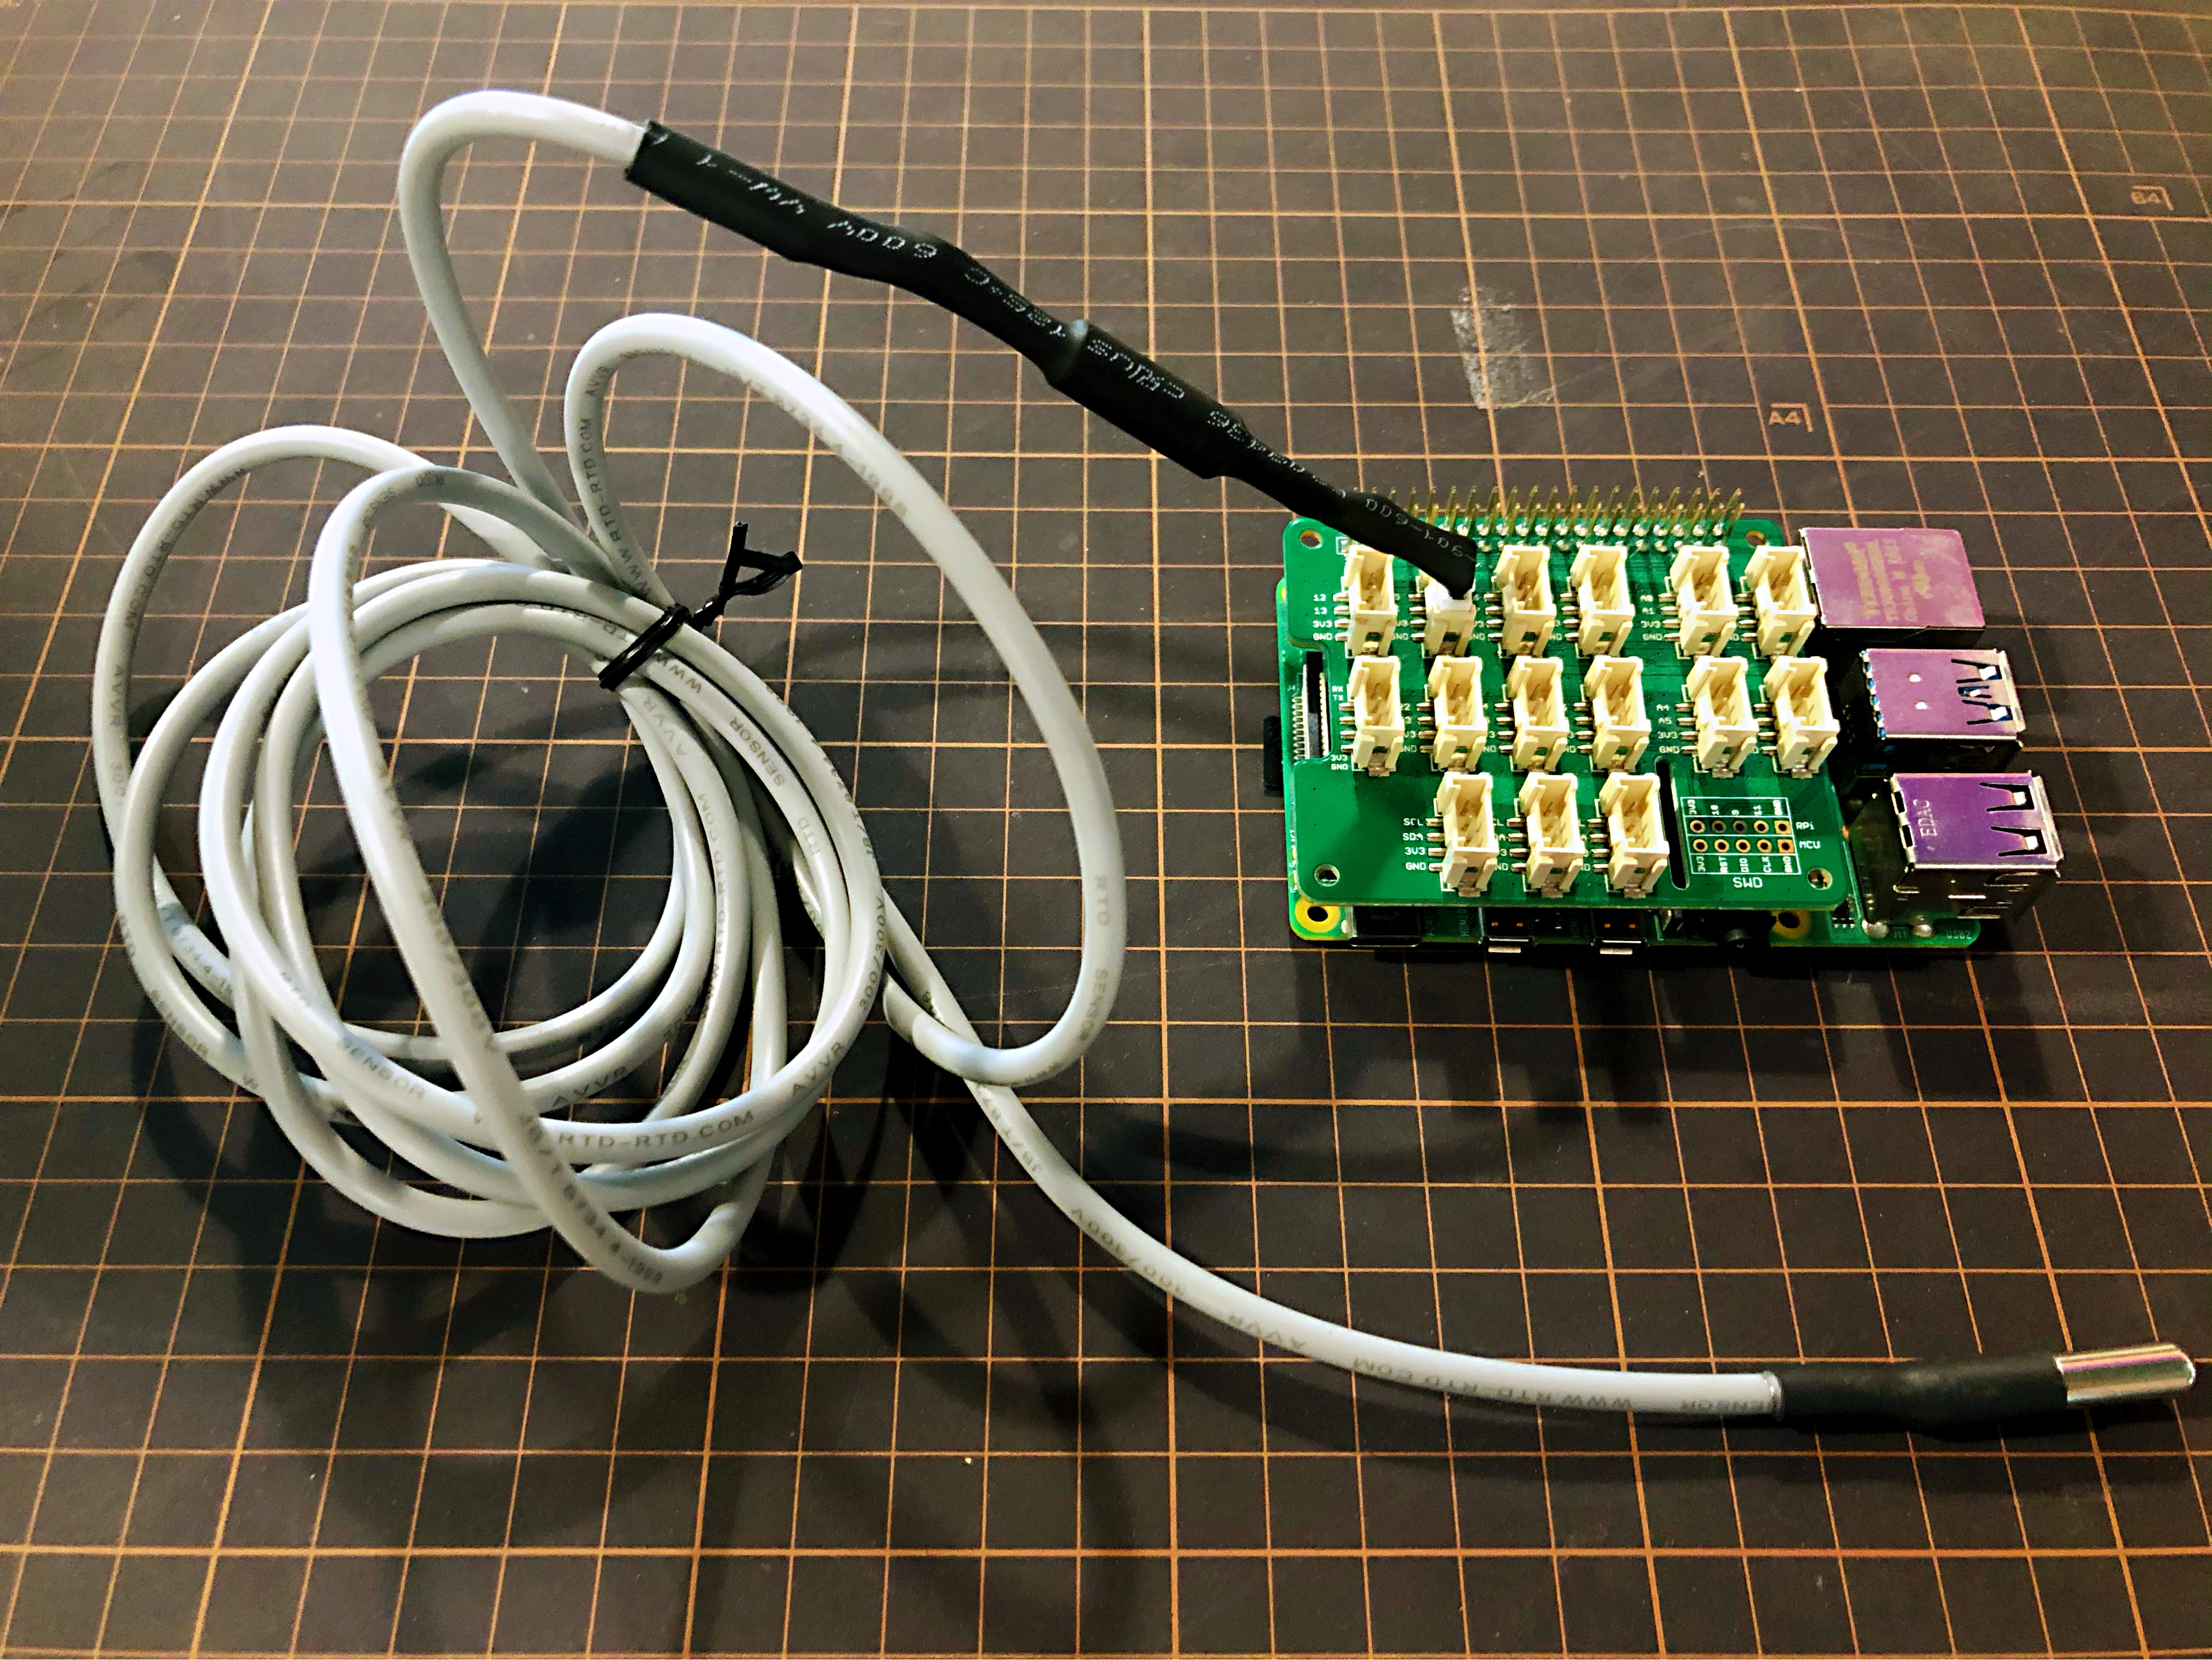
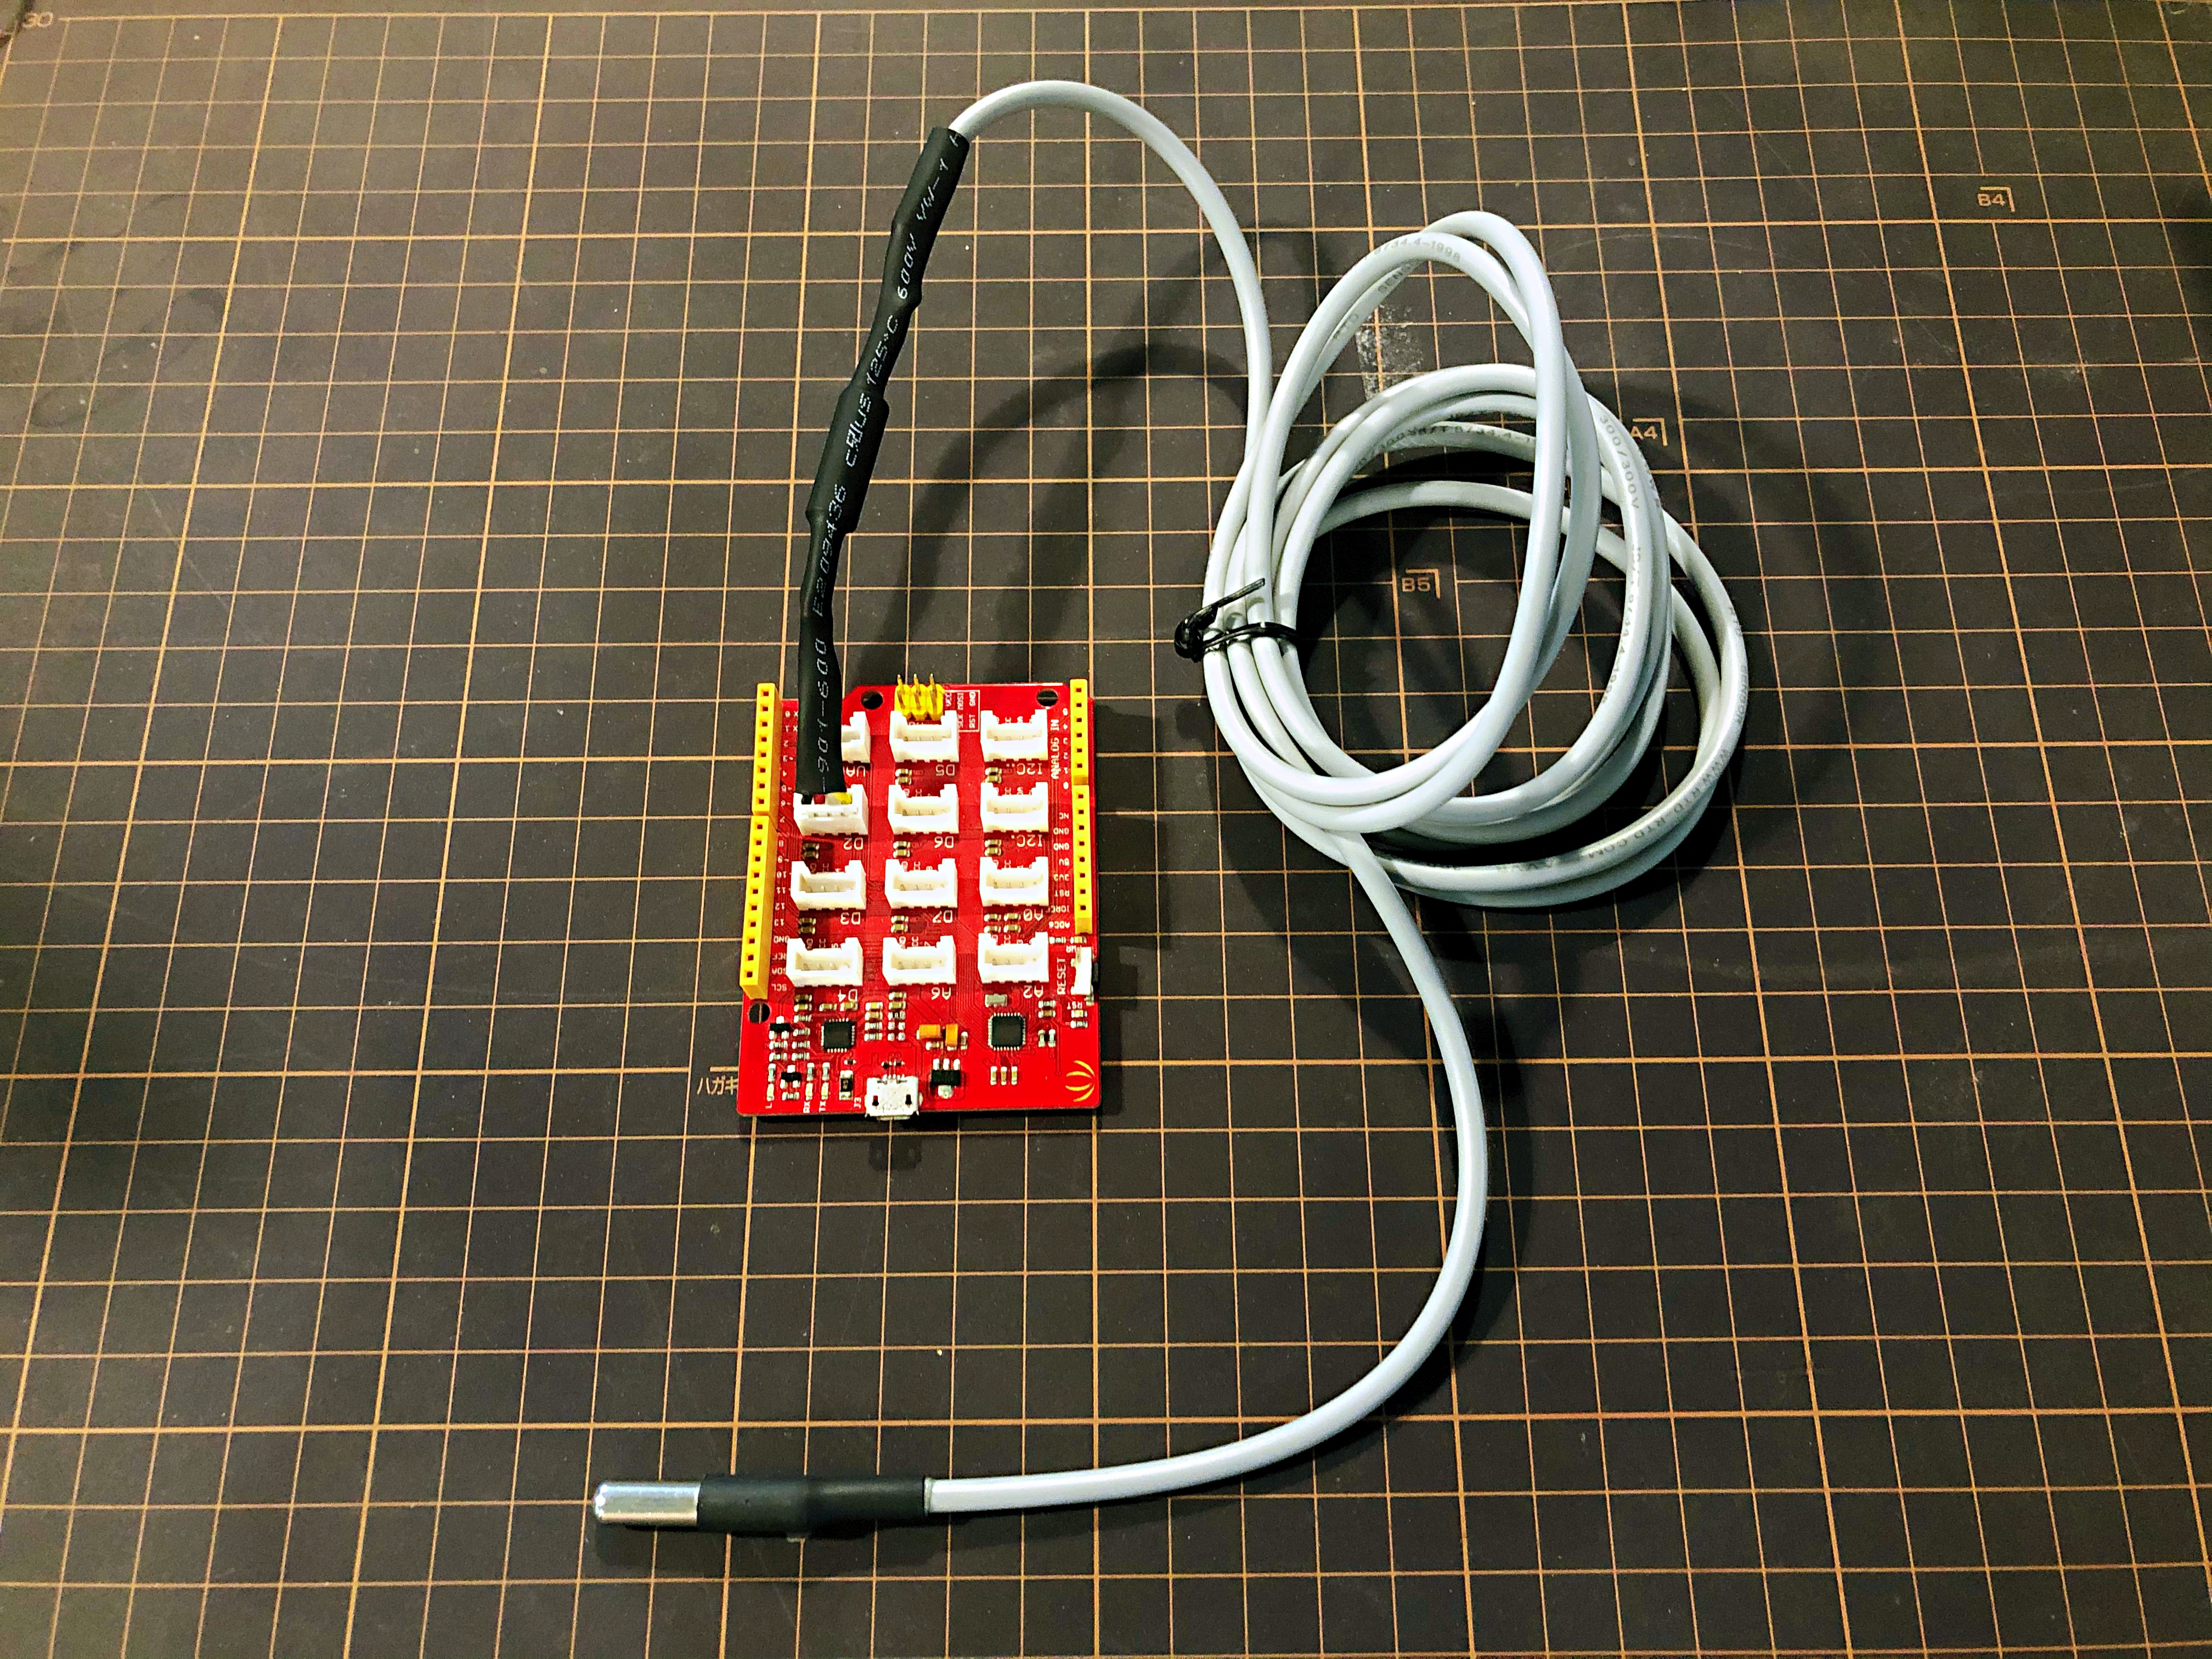
步骤 1. 将 One Wire Temperature Sensor 连接到 Grove - Base Hat for Raspberry Pi 的 D5 端口,插入 Raspberry Pi 4 Model B。然后将 Raspberry Pi 4 Model B 与 PC 连接。
步骤 2. 访问 Raspberry Pi 系统后,git clone Seeed_Python_DS18B20 并通过插入以下命令安装 grove.py:
pip3 install Seeed-grove.py
或者在支持的 GNU/Linux 系统(如 Raspberry Pi)上,您可以从 PyPI 本地安装驱动程序:
pip3 install seeed-python-Ds18b20
步骤 3. 要进行系统范围安装(在某些情况下可能需要):
sudo pip3 install seeed-python-Ds18b20
您可以插入以下命令从 PyPI 本地升级驱动程序:
pip3 install --upgrade seeed-python-Ds18b20
软件
import seeed_ds18b20
import time

def main():
    DS18B20 = seeed_ds18b20.grove_ds18b20()
    print("Please use Ctrl C to quit")
    while True:
        temp_c,temp_f = DS18B20.read_temp
        print('temp_c %.2f C   temp_f %.2f F' % (temp_c,temp_f),end=" ")
        print('\r', end='')
        time.sleep(0.5)

if __name__ == "__main__":
    main()
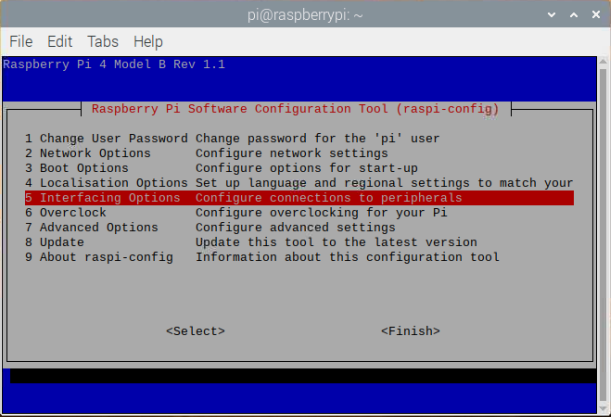
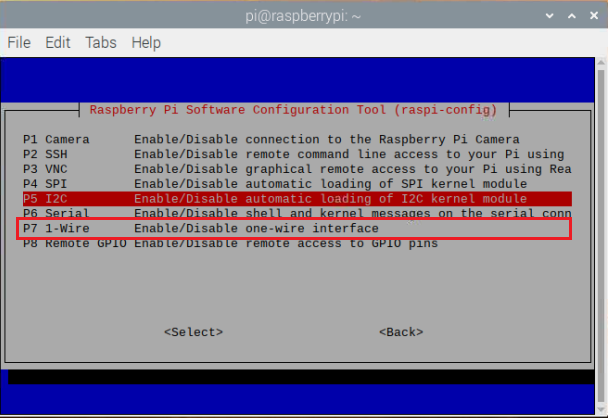
在 Raspberry Pi 上运行演示代码时,您可能会被提醒启用 1-Wire 接口。然后您应该使用命令 sudo raspi-config 并重启以启用 1-Wire 设备:
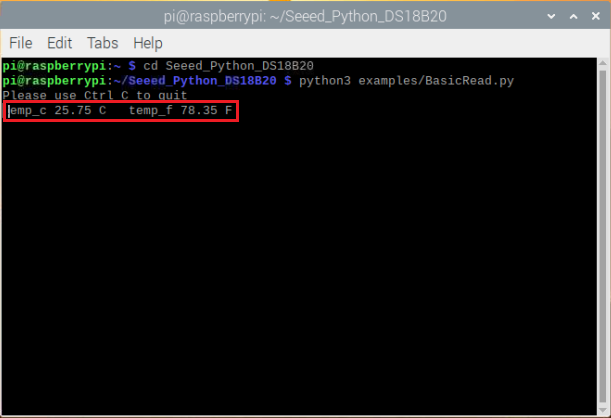
步骤 4. 通过以下命令运行演示:
cd Seeed_Python_DS18B20
python3 examples/BasicRead.py
如果一切正常,结果将显示如下:
资源
[PDF] DS18B20-数据手册。
技术支持与产品讨论
感谢您选择我们的产品!我们在这里为您提供不同的支持,确保您使用我们产品的体验尽可能顺畅。我们提供多种沟通渠道,以满足不同的偏好和需求。