Wio Terminal 显示加速度计读数
概述
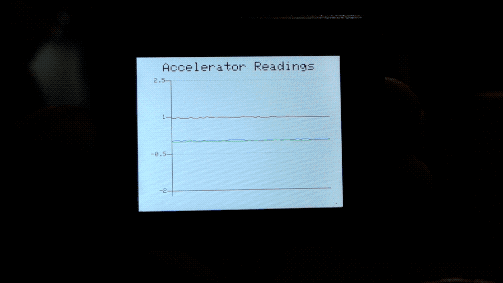
此示例演示如何在 Wio Terminal 上绘制折线图。在此示例中,3轴加速度计读数(3组数据)被绘制到一个折线图中,以显示 Wio Terminal 的实时位置!
特性
-
3轴加速度计读数显示在一个折线图中
-
Wio Terminal 的实时位置显示
所需的 Arduino 库
-
访问 Seeed_Arduino_Linechart 并将整个仓库下载到您的本地驱动器。
-
安装板载加速度计库
Seeed_Arduino_LIS3DHTR,请访问 Seeed_Arduino_LIS3DHTR 获取更多信息。
Arduino 说明
-
下载
AcceratorReadings.ino文件并通过Arduino IDE上传到您的 Wio Terminal。确保您已安装所有库。 -
在不同轴向移动 Wio Terminal 并查看显示内容,您也可以打开
Serial Plotter来查看效果!
代码
- 初始化 LCD 和加速度计
#include"LIS3DHTR.h" //包含加速度计库
#include"seeed_line_chart.h" //包含折线图库

TFT_eSPI tft;
LIS3DHTR<TwoWire>  lis;

#define MAX_SIZE 50 //数据的最大大小
doubles accelerator_readings[3];
TFT_eSprite spr = TFT_eSprite(&tft);  // Sprite

void setup() {
    tft.begin();
    tft.setRotation(3);
    spr.createSprite(TFT_HEIGHT,TFT_WIDTH);
    spr.setRotation(3);

    lis.begin(Wire1);
    lis.setOutputDataRate(LIS3DHTR_DATARATE_25HZ);
    lis.setFullScaleRange(LIS3DHTR_RANGE_2G);

    Serial.begin(115200);
}
- 读取加速度计数据并加载数据
请参考折线图获取更多信息。
void loop() {
    spr.fillSprite(TFT_WHITE);
    float x_raw = lis.getAccelerationX();
    float y_raw = lis.getAccelerationY();
    float z_raw = lis.getAccelerationZ();
    ...

    if (accelerator_readings[0].size() == MAX_SIZE) {
      for (uint8_t i = 0; i<3; i++){
        accelerator_readings[i].pop(); //this is used to remove the first read variable
      }
    }

    accelerator_readings[0].push(x_raw); //store x-axis readings
    accelerator_readings[1].push(y_raw); //store y-axis readings
    accelerator_readings[2].push(z_raw); //store z-axis readings
    ...
}
- 标题配置
请参考折线图获取更多信息。
auto header =  text(0, 0)
            .value("Accelerator Readings")
            .align(center)
            .valign(vcenter)
            .width(spr.width())
            .thickness(2);

header.height(header.font_height(&spr) * 2);
header.draw(&spr); // Header height is the twice the height of the font
- 折线图配置
要在一个图表中绘制多条线,您可以将双精度数组传递给折线图,如 content.value({doubles[0],doubles[1],doubles[2]...}),如下所示。还可以使用 .color() 为每条线设置颜色,其中颜色的顺序将与传递数据的顺序匹配。
auto content = line_chart(20, header.height()); //(x,y)折线图开始的位置
     content
            .height(spr.height() - header.height() * 1.5) //折线图的实际高度
            .width(spr.width() - content.x() * 2) //折线图的实际宽度
            .based_on(-2.0) //y轴的起始点,必须是浮点数
            .show_circle(false) //在每个点绘制圆圈,默认为开启
            .value({accelerator_readings[0],accelerator_readings[1], accelerator_readings[2]}) //将数据传递给折线图
            .max_size(MAX_SIZE)
            .color(TFT_BLUE, TFT_RED, TFT_GREEN)
            .backgroud(TFT_WHITE)
            .draw(&spr);
完整代码
#include"LIS3DHTR.h" //包含加速度计库
#include"seeed_line_chart.h" //包含折线图库

TFT_eSPI tft;
LIS3DHTR<TwoWire>  lis;

#define MAX_SIZE 50 //数据的最大大小
doubles accelerator_readings[3];
TFT_eSprite spr = TFT_eSprite(&tft);  // 精灵

void setup() {
    tft.begin();
    tft.setRotation(3);
    spr.createSprite(TFT_HEIGHT,TFT_WIDTH);
    spr.setRotation(3);

    lis.begin(Wire1);
    lis.setOutputDataRate(LIS3DHTR_DATARATE_25HZ);
    lis.setFullScaleRange(LIS3DHTR_RANGE_2G);

    Serial.begin(115200);
}

void loop() {
    spr.fillSprite(TFT_WHITE);
    float x_raw = lis.getAccelerationX();
    float y_raw = lis.getAccelerationY();
    float z_raw = lis.getAccelerationZ();

    //这用于在串口绘图器上打印输出,请查看串口绘图器!
    Serial.print(x_raw);
    Serial.print(",");
    Serial.print(y_raw);
    Serial.print(",");
    Serial.println(z_raw);

    if (accelerator_readings[0].size() == MAX_SIZE) {
      for (uint8_t i = 0; i<3; i++){
        accelerator_readings[i].pop(); //这用于移除第一个读取的变量
      }
    }
    accelerator_readings[0].push(x_raw); //读取变量并存储在数据中
    accelerator_readings[1].push(y_raw);
    accelerator_readings[2].push(z_raw);

    //折线图标题的设置
    auto header =  text(0, 0)
                .value("加速度计读数")
                .align(center)
                .valign(vcenter)
                .width(spr.width())
                .thickness(2);

    header.height(header.font_height(&spr) * 2);
    header.draw(&spr); // 标题高度是字体高度的两倍

  //折线图的设置
    auto content = line_chart(20, header.height()); //(x,y) 折线图开始的位置
         content
                .height(spr.height() - header.height() * 1.5) //折线图的实际高度
                .width(spr.width() - content.x() * 2) //折线图的实际宽度
                .based_on(-2.0) //y轴的起始点,必须是浮点数
                .show_circle(false) //在每个点绘制圆圈,默认是开启的。
                .value({accelerator_readings[0],accelerator_readings[1], accelerator_readings[2]}) //将数据传递给折线图
                .max_size(MAX_SIZE)
                .color(TFT_BLUE, TFT_RED, TFT_GREEN)
                .backgroud(TFT_WHITE)
                .draw(&spr);

    spr.pushSprite(0, 0);
    delay(50);
}