使用 Wio Terminal 进行机器学习 - 手势识别
本教程将演示如何使用 Wio Terminal 在 TensorFlow Lite 的帮助下设置一个简单的手势识别机器学习演示。
此示例修改自 Arduino 团队与 TensorFlow Lite 团队的官方演示。更多信息和参考资料,请访问 Get started with machine learning on Arduino。为了使演示与 Wio Terminal 兼容,进行了一些修改。
参考资料: How-to Get Started with Machine Learning on Arduino
零件清单
特性
-
在 Wio Terminal 上进行机器学习
-
手势识别
-
TensorFlow Lite
所需的 Arduino 库
-
安装板载加速度计库
Seeed_Arduino_LIS3DHTR,请访问 Wio Terminal IMU 获取更多信息。 -
安装 Arduino TensorFlow Lite 库,请访问 Wio Terminal TensorFlow Lite 获取更多信息。
从 Wio Terminal 训练 IMU 数据
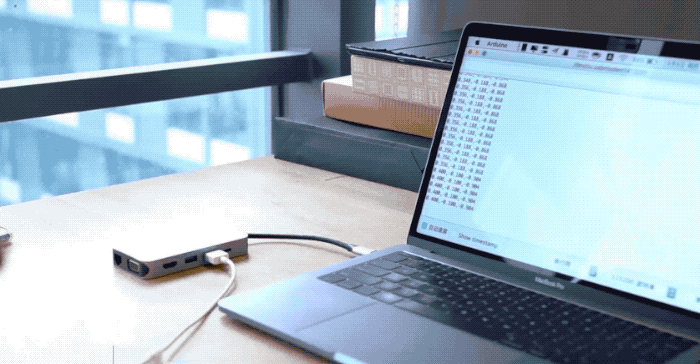
就像其他机器学习项目一样,我们将获取一些传感器数据用于后续训练模型。首先,我们将运行一个简单的 Arduino 程序来从 Wio Terminal 流式传输传感器数据。
复制以下代码并将代码上传到 Wio Terminal:
#include"LIS3DHTR.h"
LIS3DHTR<TwoWire> lis;

const float accelerationThreshold = 2; // threshold of significant in G's
const int numSamples = 119;

int samplesRead = numSamples;

void setup() {
  Serial.begin(9600);
  lis.begin(Wire1);

  if (!lis) {
    Serial.println("ERROR");
    while(1);
  }

  lis.setOutputDataRate(LIS3DHTR_DATARATE_25HZ); //Data output rate
  lis.setFullScaleRange(LIS3DHTR_RANGE_2G); //Scale range set to 2g

  Serial.println("Acceleration in G's");
  Serial.println("X\tY\tZ");
}

void loop() {
  float x, y, z;

  while (samplesRead == numSamples) {
    x=lis.getAccelerationX();
    y=lis.getAccelerationY();
    z=lis.getAccelerationZ();


     float aSum = fabs(x) + fabs(y) + fabs(z);

      // check if it's above the threshold
      if (aSum >= accelerationThreshold) {
        // reset the sample read count
        samplesRead = 0;
        break;
      }
  }

  while (samplesRead < numSamples) {
    x=lis.getAccelerationX();
    y=lis.getAccelerationY();
    z=lis.getAccelerationZ();

    samplesRead++;

    Serial.print(x, 3);
    Serial.print(',');
    Serial.print(y, 3);
    Serial.print(',');
    Serial.print(z, 3);
    Serial.println();

    if (samplesRead == numSamples) {
      Serial.println();
    }
  }
}
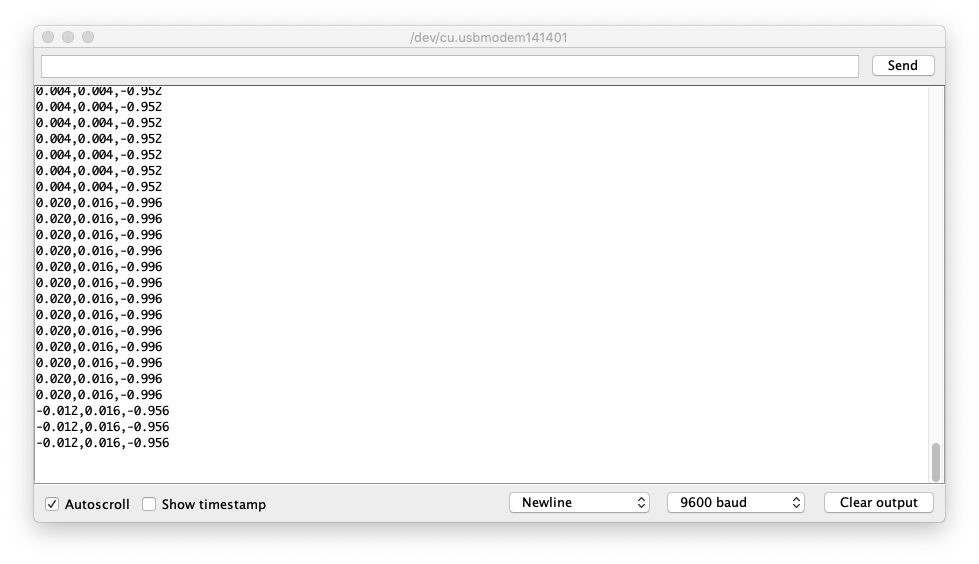
或者在这里下载代码并将代码上传到Wio Terminal。如果你打开串口监视器,你应该能够看到IMU数据。
捕获手势训练数据
将IMU数据捕获为CSV并用于TensorFlow:
-
打开串口监视器,拿起Wio Terminal。
-
做一个出拳手势,确保你已经触发了捕获。
-
重复相同的动作至少10次,训练数据越多越好。
-
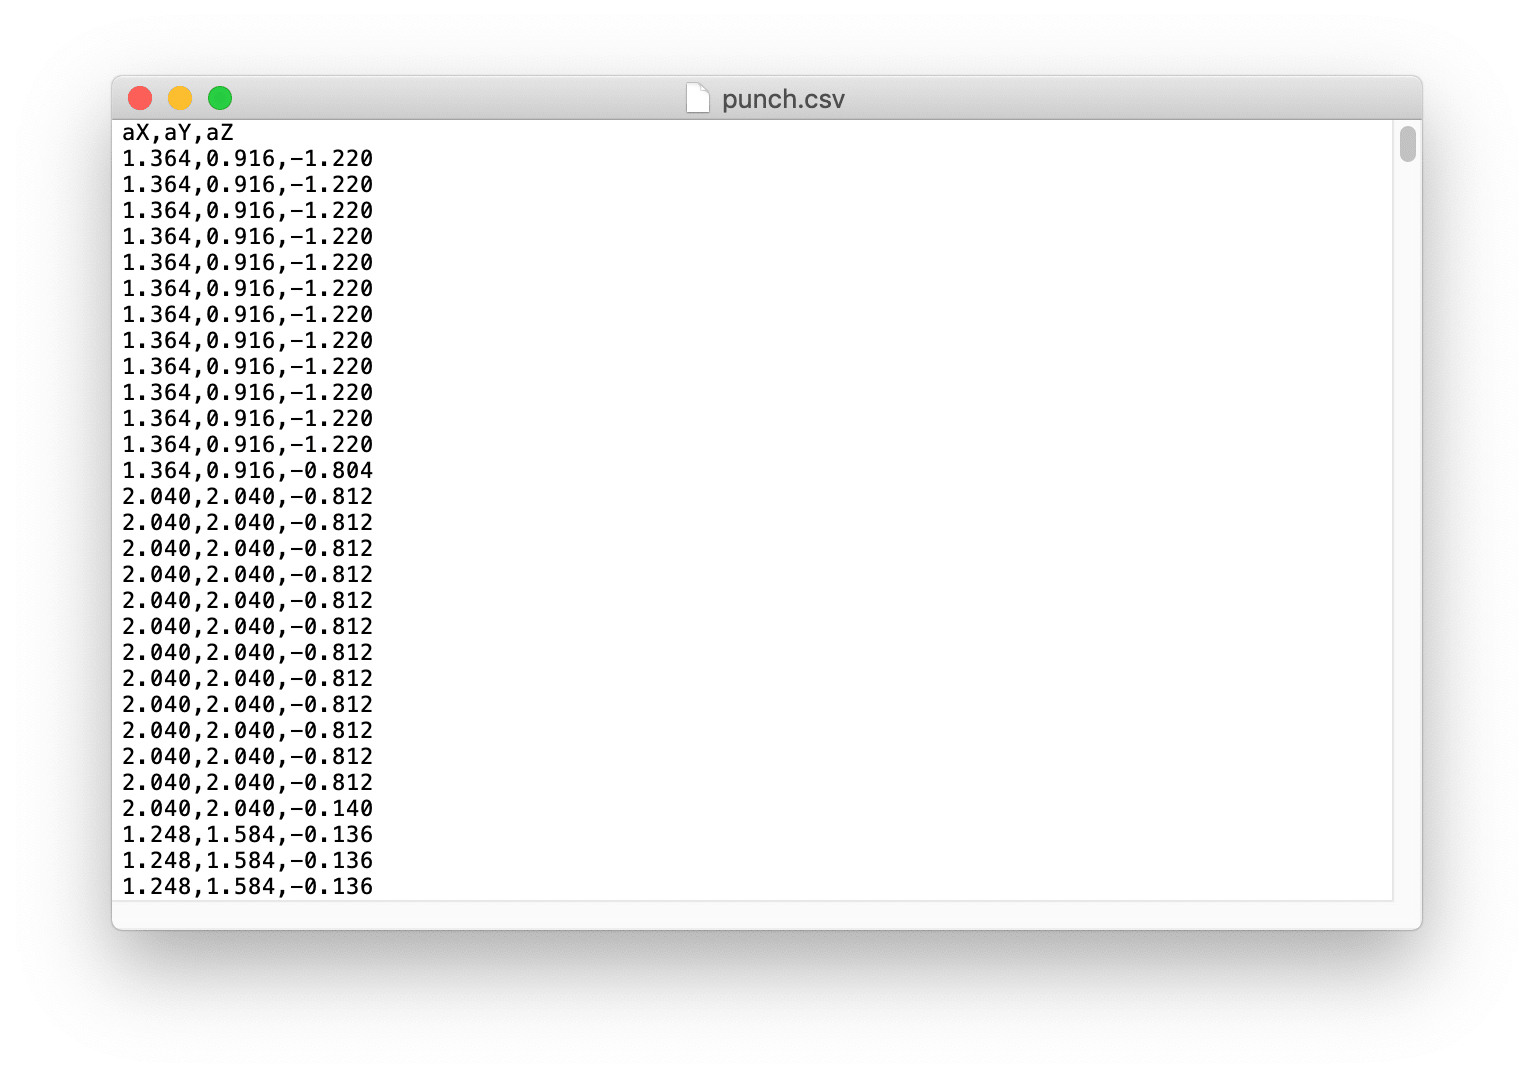
从串口监视器复制并粘贴数据到一个名为**
punch.csv**的新文本文件中。 -
清除并重置Wio Terminal,这次重复上述所有步骤,但使用弯曲手势并保存为**
flex.csv**。
注意: 如果你使用的是Linux或Mac,你可以直接将传感器数据从Wio Terminal输出到.csv文件,使用:
cat /dev/cu.usbmodem[nnnnn] > punch.csv
检查 .csv 文件
打开 punch.csv 和 flex.csv 文件,确保 csv 文件的第一行是 aX,aY,aZ,参考下图:
在 TensorFlow 中训练数据
这里我们将使用由 Arduino 团队创建的 Google Colab 项目。Colab 提供了一个 Jupyter notebook,允许我们在网页浏览器中运行 TensorFlow 训练。该 colab 将设置环境、训练模型并将模型转换为 TensorFlow Lite 模式,然后将模型编码为 Arduino 头文件。
点击这里访问 Google Colab 项目。
Google Colab 项目中的修改
需要在 Google Colab 项目中进行一些修改以适配 Wio Terminal:
-
Setup the Python Environment 中不需要更改。
-
Upload Data 中不需要更改。
-
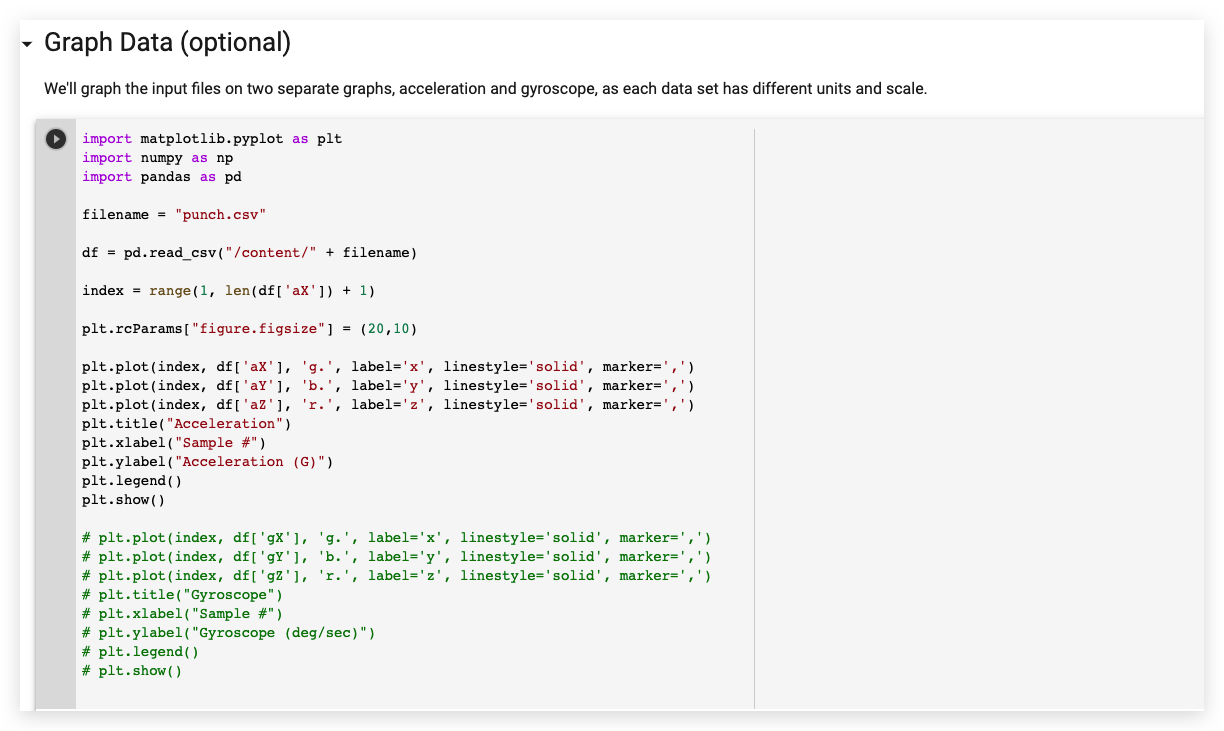
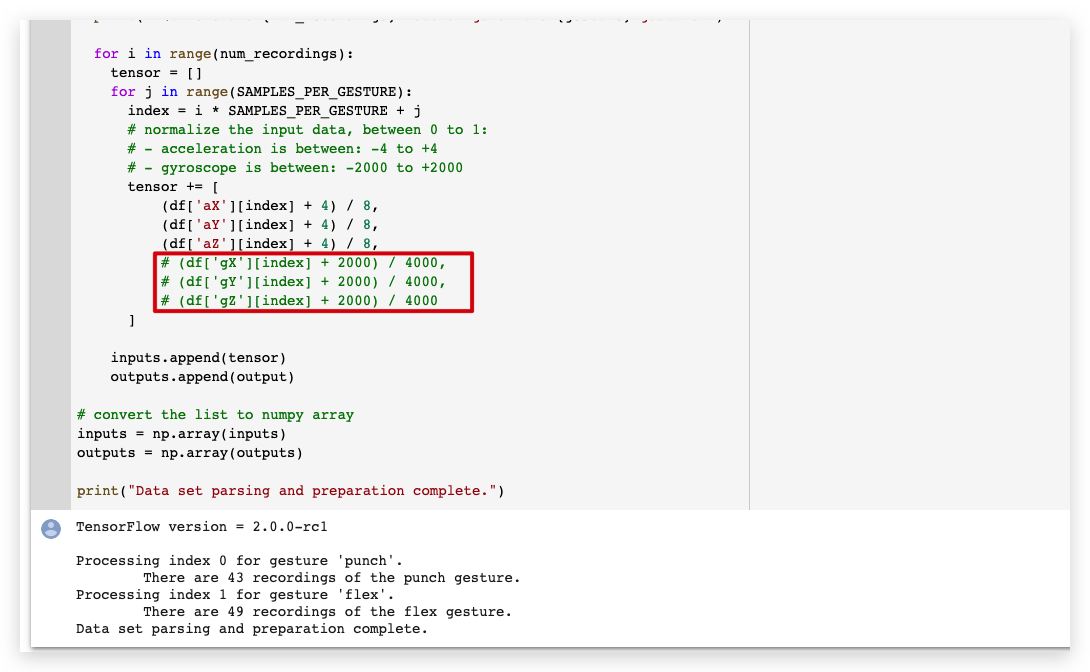
在 Graph Data 中,注释掉所有陀螺仪数据部分,如下所示:
- 在 Parse and prepare the data 中,注释掉所有陀螺仪数据部分,如下所示:
-
Randomize and split the input and output pairs for training 中不需要更改。
-
Build & Train the Model 中不需要更改。
-
Graph the loss 中不需要更改。
-
Graph the loss again, skipping a bit of the start 中不需要更改。
-
Graph the mean absolute error 中不需要更改。
-
Run with Test Data 中不需要更改。
-
Convert the Trained Model to Tensor Flow Lite 中不需要更改。
-
Encode the Model in an Arduino Header File 中不需要更改。
从左侧面板下载 model.h 文件。
在 Wio Terminal 上上传代码
- 下载模型头文件后,打开 IMU_Classifier.ino 或在 Arduino IDE 中复制以下代码:
/*
  IMU 分类器
  此示例使用板载 IMU 开始从板载 IMU 读取加速度和陀螺仪
  数据,一旦读取足够的样本,它就会使用
  TensorFlow Lite (Micro) 模型尝试将运动分类为已知手势。
  注意:直接使用 C/C++ 指针、命名空间和动态内存通常
        在 Arduino 示例中不被推荐,未来 TensorFlowLite 库
        可能会改变以使草图更简单。
  电路:
  - Arduino Nano 33 BLE 或 Arduino Nano 33 BLE Sense 开发板。
  创建者:Don Coleman, Sandeep Mistry
  修改者:Dominic Pajak, Sandeep Mistry
  此示例代码属于公共领域。

  修改以适配 Wio Terminal - Anson (Seeed Studio)
*/

#undef min
#undef max
#include <TensorFlowLite.h>
#include <tensorflow/lite/experimental/micro/kernels/all_ops_resolver.h>
#include <tensorflow/lite/experimental/micro/micro_error_reporter.h>
#include <tensorflow/lite/experimental/micro/micro_interpreter.h>
#include <tensorflow/lite/schema/schema_generated.h>
#include <tensorflow/lite/version.h>

#include "model.h"
#include"LIS3DHTR.h"
LIS3DHTR<TwoWire> lis;


const float accelerationThreshold = 2; // 显著性阈值,单位为 G
const int numSamples = 119;

int samplesRead = numSamples;

// 用于 TensorFlow Lite (Micro) 的全局变量
tflite::MicroErrorReporter tflErrorReporter;

// 引入所有 TFLM 操作,如果您想减少
// 草图的编译大小,可以删除此行并
// 仅引入您需要的 TFLM 操作。
tflite::ops::micro::AllOpsResolver tflOpsResolver;

const tflite::Model* tflModel = nullptr;
tflite::MicroInterpreter* tflInterpreter = nullptr;
TfLiteTensor* tflInputTensor = nullptr;
TfLiteTensor* tflOutputTensor = nullptr;

// 为 TFLM 创建静态内存缓冲区,大小可能需要
// 根据您使用的模型进行调整
constexpr int tensorArenaSize = 8 * 1024;
byte tensorArena[tensorArenaSize];

// 将手势索引映射到名称的数组
const char* GESTURES[] = {
  "punch",
  "flex"
};


#define NUM_GESTURES (sizeof(GESTURES) / sizeof(GESTURES[0]))

void setup() {
  Serial.begin(9600);
//  while (!Serial);

  lis.begin(Wire1);

  // 初始化 IMU
  if (!lis) {
    Serial.println("初始化 IMU 失败!");
    while (1);
  }


  // 获取模型字节数组的 TFL 表示
  tflModel = tflite::GetModel(model);
  if (tflModel->version() != TFLITE_SCHEMA_VERSION) {
    Serial.println("模型架构不匹配!");
    while (1);
  }

  // 创建解释器来运行模型
  tflInterpreter = new tflite::MicroInterpreter(tflModel, tflOpsResolver, tensorArena, tensorArenaSize, &tflErrorReporter);

  // 为模型的输入和输出张量分配内存
  tflInterpreter->AllocateTensors();

  // 获取模型输入和输出张量的指针
  tflInputTensor = tflInterpreter->input(0);
  tflOutputTensor = tflInterpreter->output(0);
}

void loop() {
  float x, y, z;

  // 等待显著运动
  while (samplesRead == numSamples) {
    x=lis.getAccelerationX();
    y=lis.getAccelerationY();
    z=lis.getAccelerationZ();

    float aSum = fabs(x) + fabs(y) + fabs(z);

      // 检查是否超过阈值
      if (aSum >= accelerationThreshold) {
        // 重置样本读取计数
        samplesRead = 0;
        break;
      }
  }

  // 检查自上次检测到显著运动以来
  // 是否已读取所有必需的样本
  while (samplesRead < numSamples) {
    // 检查是否有新的加速度和陀螺仪数据可用
      // 读取加速度和陀螺仪数据
      x=lis.getAccelerationX();
      y=lis.getAccelerationY();
      z=lis.getAccelerationZ();


      // 将 IMU 数据标准化到 0 到 1 之间并存储在模型的
      // 输入张量中
      tflInputTensor->data.f[samplesRead * 6 + 0] = (x + 4.0) / 8.0;
      tflInputTensor->data.f[samplesRead * 6 + 1] = (y + 4.0) / 8.0;
      tflInputTensor->data.f[samplesRead * 6 + 2] = (z + 4.0) / 8.0;

      samplesRead++;

      if (samplesRead == numSamples) {
        // 运行推理
        TfLiteStatus invokeStatus = tflInterpreter->Invoke();
        if (invokeStatus != kTfLiteOk) {
          Serial.println("调用失败!");
          while (1);
          return;
        }

        // 循环遍历模型的输出张量值
        for (int i = 0; i < NUM_GESTURES; i++) {
          Serial.print(GESTURES[i]);
          Serial.print(": ");
          Serial.println(tflOutputTensor->data.f[i], 6);
        }
        Serial.println();
      }
  }
}
-
将训练好的
model.h头文件放在与 IMU_Classifier.ino 文件相同的文件夹中,并将代码上传到 Wio Terminal。 -
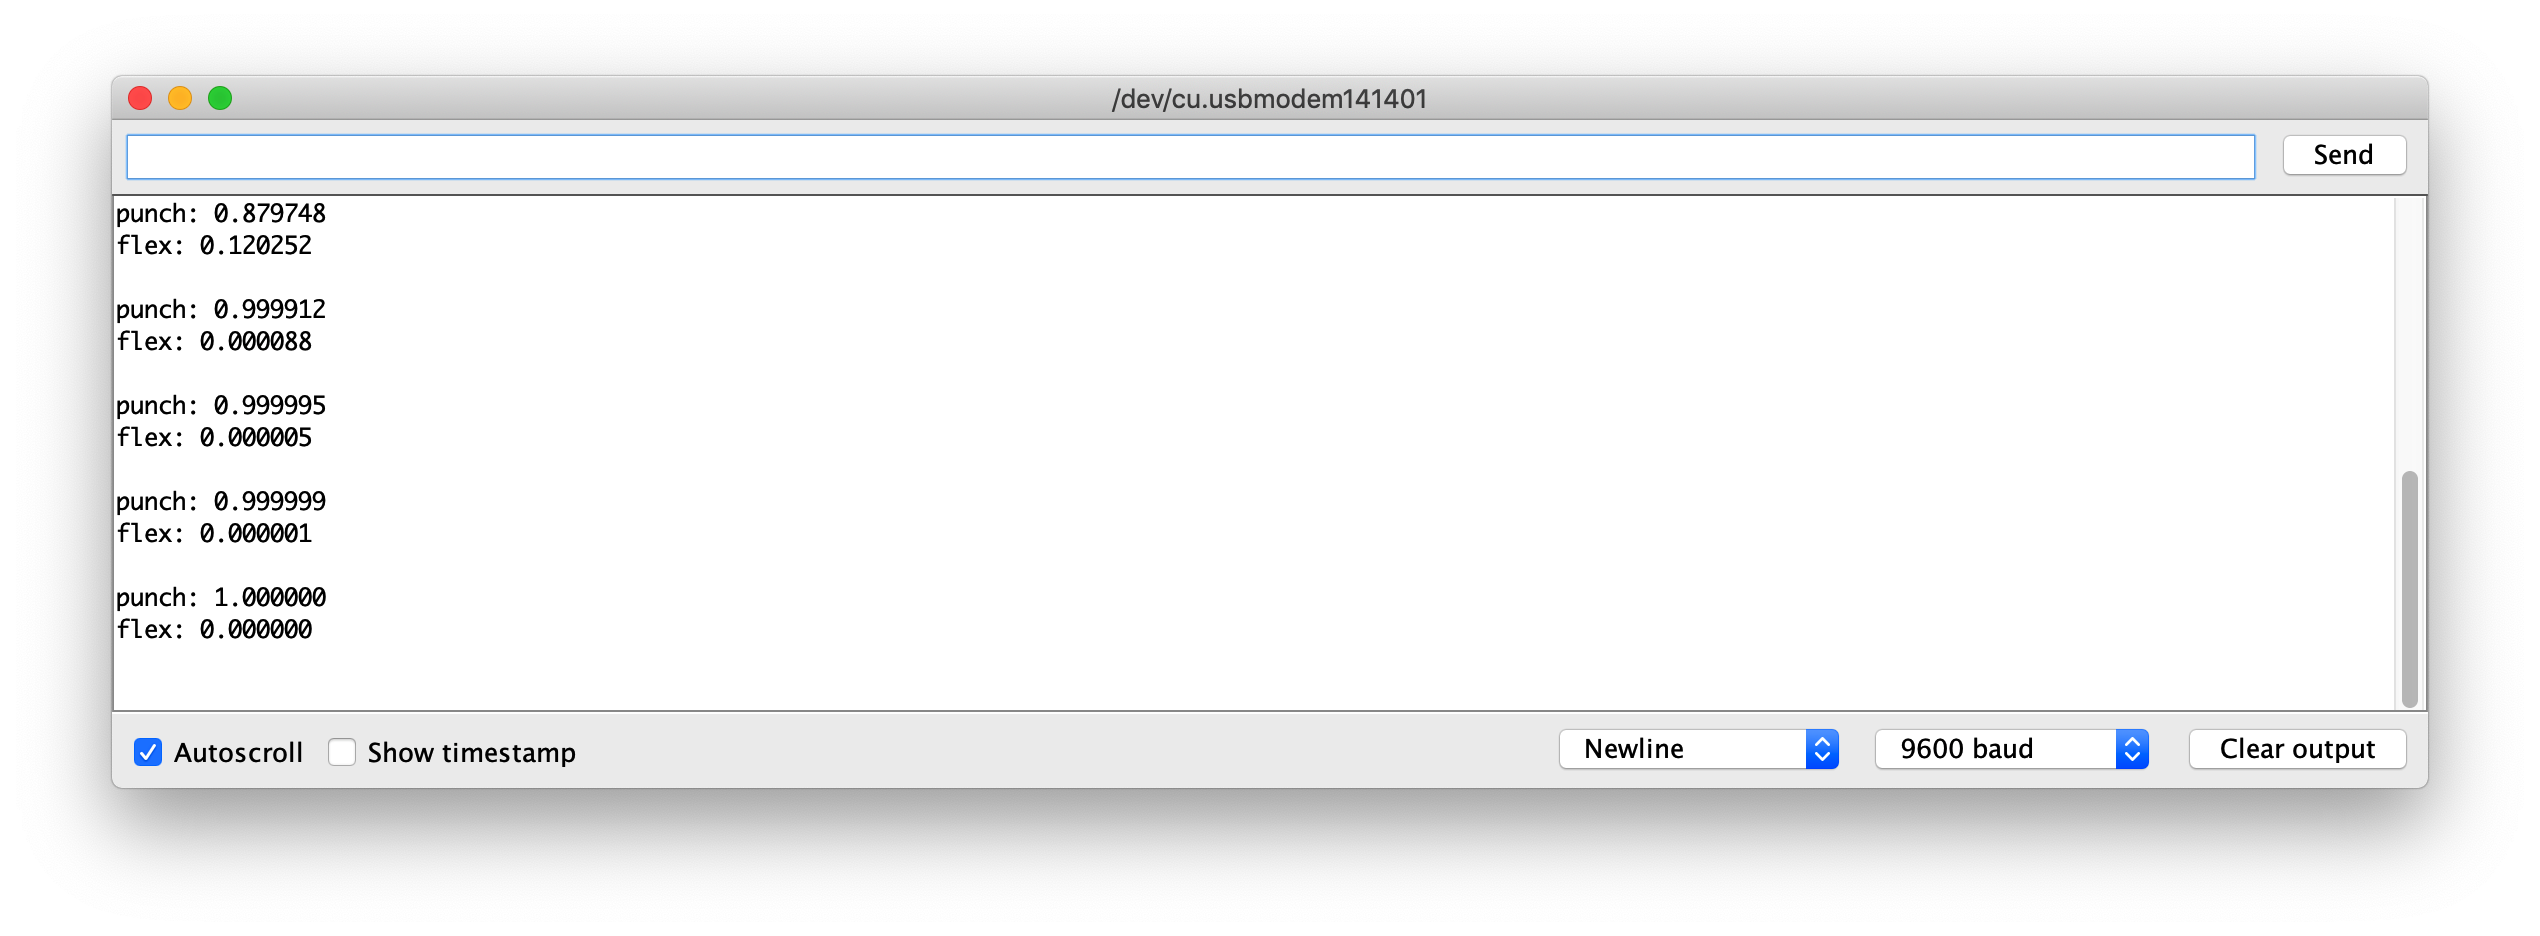
现在,打开串口监视器并执行您的手势!您应该看到每个手势的置信度被打印出来(0 = 低置信度,1 = 高置信度)。
示例模型文件
作为参考,我已经附上了训练好的模型 model.h 文件供下载。您可以将此文件与 IMU_Classifier.ino 一起使用进行测试。
进一步开发
对于进一步开发,可以通过 IMU 在 Wio Terminal 上训练更多手势,并触发不同的输出!使用 TensorFlow Lite 在微控制器上探索机器学习!