在 Seeed Studio XIAO nRF52840 Sense 上进行语音识别

本教程将演示如何在 Seeed Studio XIAO nRF52840 Sense 上使用 TensorFlow Lite,并使用板载麦克风进行语音识别。
对于嵌入式 AI 应用,我们强烈推荐使用 "Seeed nrf52 mbed-enabled Boards Library"。
软件设置
请确保首先按照 "Seeed Studio XIAO nRF52840 (Sense) 入门指南" 教程完成初始硬件和软件设置。
现在让我们继续进行其余的软件设置。
- 步骤 1. 下载 tflite-micro-arduino-examples 库 作为 zip 文件

- 步骤 2. 打开 Arduino IDE,导航到
Sketch > Include Library > Add .ZIP Library...并打开下载的 zip 文件

训练数据并生成 TensorFlow Lite 模型
现在我们将使用 Google Colab 笔记本来执行数据训练并生成 TensorFlow Lite 模型。
- 步骤 1. 打开 这个 Python 笔记本

默认情况下,它将加载 这个数据集,该数据集可以识别以下单词:"yes", "no", "up", "down", "left", "right", "on", "off", "stop", "go", "zero", "one", "two", "three", "four", "five", "six", "seven", "eight", "nine", "bed", "bird", "cat", "dog", "happy", "house", "marvin", "sheila", "tree", "wow"
- 步骤 2. 在 Configure Defaults 列下,根据您希望模型识别的单词更改 WANTED_WORDS 参数。您可以从以下单词中选择:"yes", "no", "up", "down", "left", "right", "on", "off", "stop", "go", "zero", "one", "two", "three", "four", "five", "six", "seven", "eight", "nine", "bed", "bird", "cat", "dog", "happy", "house", "marvin", "sheila", "tree", "wow"

注意: 在此示例中,选择了单词 yes,no,up,down
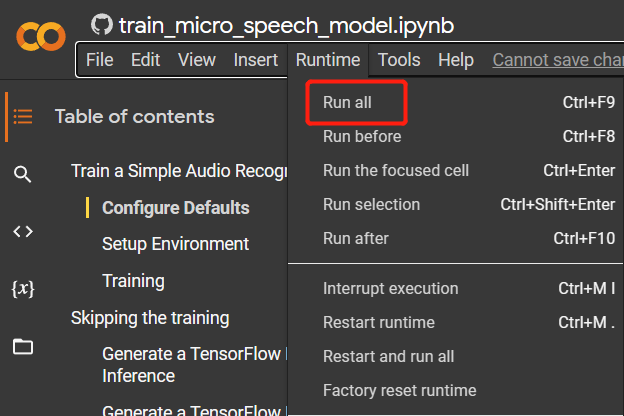
- 步骤 3. 导航到
Runtime > Run all来运行所有代码单元
- 步骤 4. 对于弹出的错误消息,点击 Run anyway

注意: 此过程大约需要 2 小时才能完成
- 步骤 5. 一旦所有代码单元执行完毕,导航到左角的 files 选项卡,您将在 models 文件夹下找到一个新生成的 model.cc 文件

注意: 如果您看不到上述 model.cc 文件,请刷新页面。
- 步骤 6. 右键点击该文件并点击 Download 将文件下载到您的电脑
推理
现在我们将使用下载的 TensorFlow Lite 模型文件 (model.cc) 来使用 Seeed Studio XIAO nRF52840 Sense 上的麦克风识别不同的单词。
- 步骤 1. 导航到 tflite-micro-arduino-examples 库的库路径(通常在 Documents > Arduino > libraries > tflite-micro-arduino-examples 下),访问 examples > micro_speech 并打开 micro_features_model.cpp

- 步骤 2. 将
const unsigned char g_model[] DATA_ALIGN_ATTRIBUTE = {下的值替换为 model.cc 文件中的新值

- 步骤 3. 根据 model.cc 中的值更改 g_model_len。这里我们得到了 26720
const int g_model_len = 26720;
- 步骤 4. 打开 micro_speech 文件夹内的 micro_features_micro_model_settings.cpp 文件,并添加我们在训练过程中定义的所有单词。这里我们使用了 yes,no,up,down
#include "micro_features_micro_model_settings.h"

const char* kCategoryLabels[kCategoryCount] = {
    "silence",
    "unknown",
    "yes",
    "no",
    "up",
    "down",
};
- 步骤 5. 打开 micro_speech 文件夹内的 micro_features_micro_model_settings.h 文件,并根据定义的类别数量更改 constexpr int kCategoryCount。这里我们有 6 个类别
constexpr int kCategoryCount = 6;
-
步骤 6. 打开 micro_speech 文件夹内的 micro_speech.ino 文件,并将代码上传到 Seeed Studio XIAO nRF52840 Sense
-
步骤 7. 打开串口监视器窗口,大声说出我们之前定义的单词。您将看到串口监视器在识别后输出正确的语音单词。

技术支持与产品讨论
感谢您选择我们的产品!我们在这里为您提供不同的支持,以确保您使用我们产品的体验尽可能顺畅。我们提供多种沟通渠道,以满足不同的偏好和需求。