Xiao ESP32C3 ESPHome 智能恒温器

本教程将逐步指导您如何制作一个 Xiao ESP32C3 ESPHome 智能恒温器。现在让我们开始吧!
硬件准备
如果您想完整地跟随本教程,您需要准备以下物品。
| Seeed Studio XIAO ESP32C3 | Seeed Studio 扩展板 | Home Assistant 设备 例如 Seeed Studio Home assistant Yellow |
|---|---|---|
 |  |  |
Grove 传感器
| Grove - 温湿度传感器专业版 (DHT22/AM2302) | Grove - 2通道SPDT继电器 | Grove - 大电流继电器 5V/10A | Grove - OLED显示屏 0.96" (SSD1315) | 瞬时按钮(任何类型都可以) |
|---|---|---|---|---|
|
|
|
|
|


软件准备
安装 Home Assistant
确保您已经安装并运行了 Home Assistant。这里有多个介绍如何将 Home Assistant 刷入产品的 wiki。我使用的是由 Raspberry Pi CM4 供电的 Home assistant Yellow,所以我可以直接使用官方方法将操作系统刷入 Home assistant Yellow。
在 Home Assistant 上安装 ESPHome
ESPHome 作为 Home Assistant 插件提供,可以通过插件商店简单安装。

- 步骤 1. 点击 INSTALL

- 步骤 2. 启用所有选项并点击 START

如果 ESPHome 成功加载,您将看到以下窗口
开始使用
一旦所有软件和硬件都准备就绪,我们现在就可以开始了。
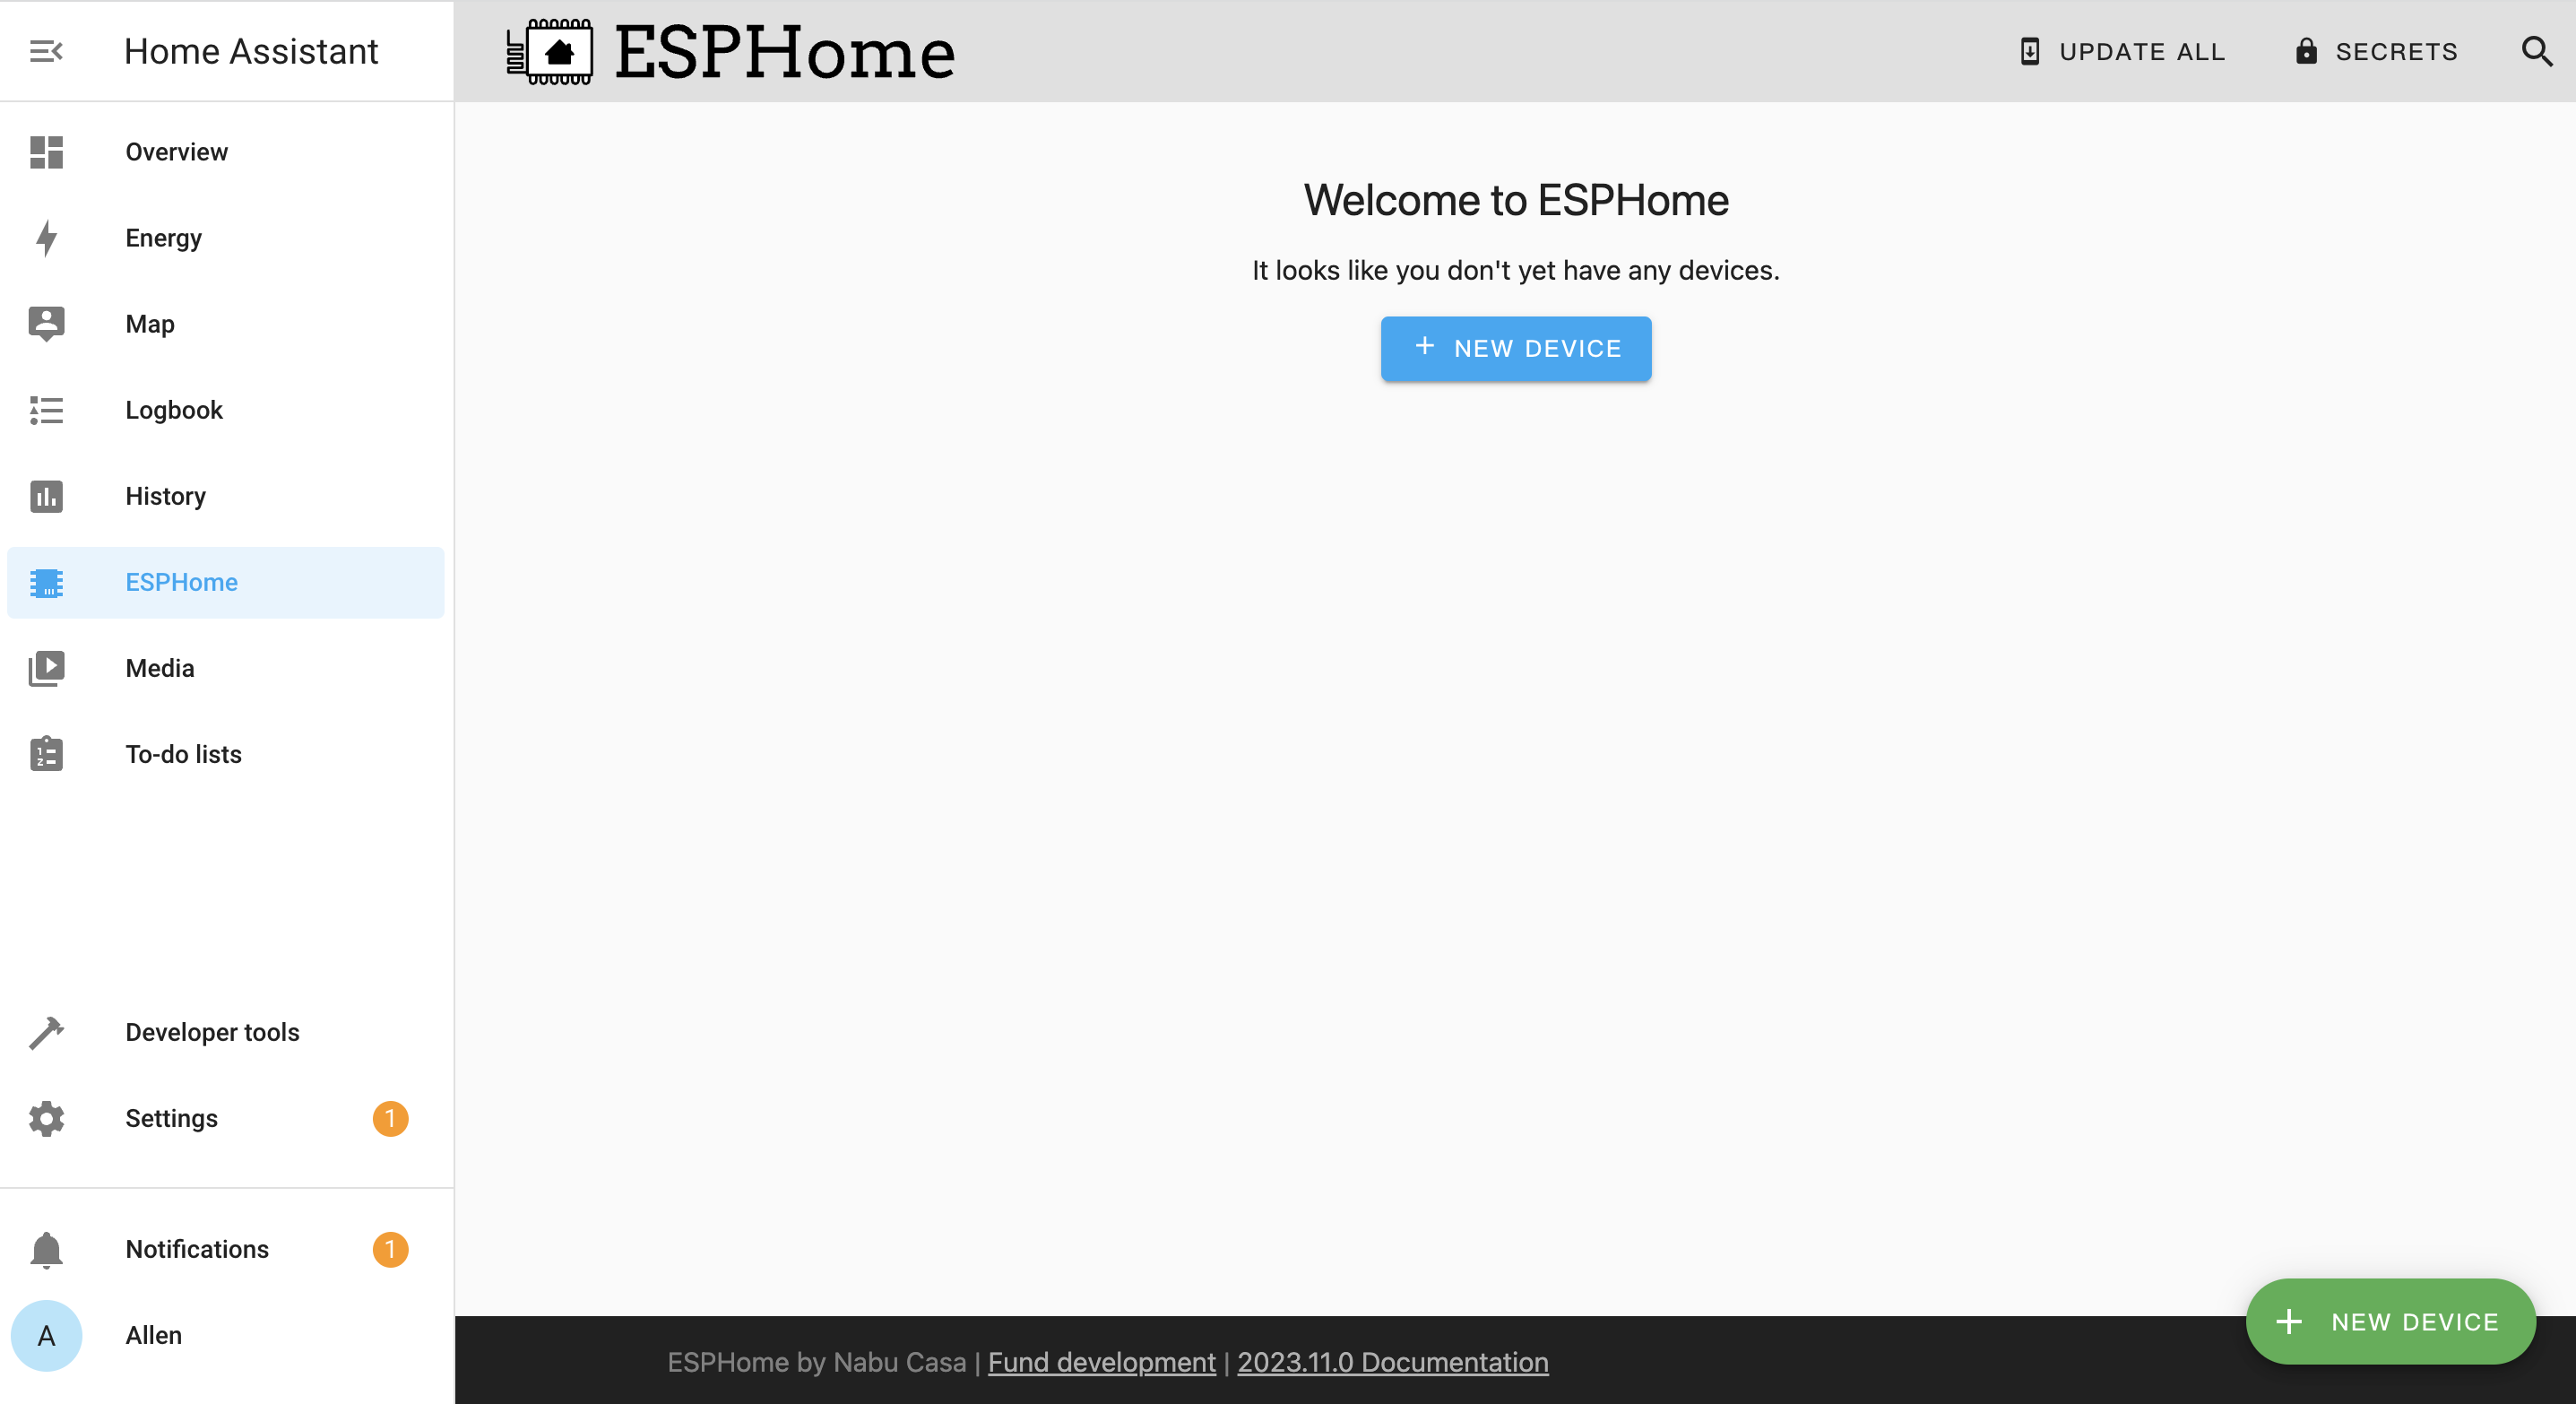
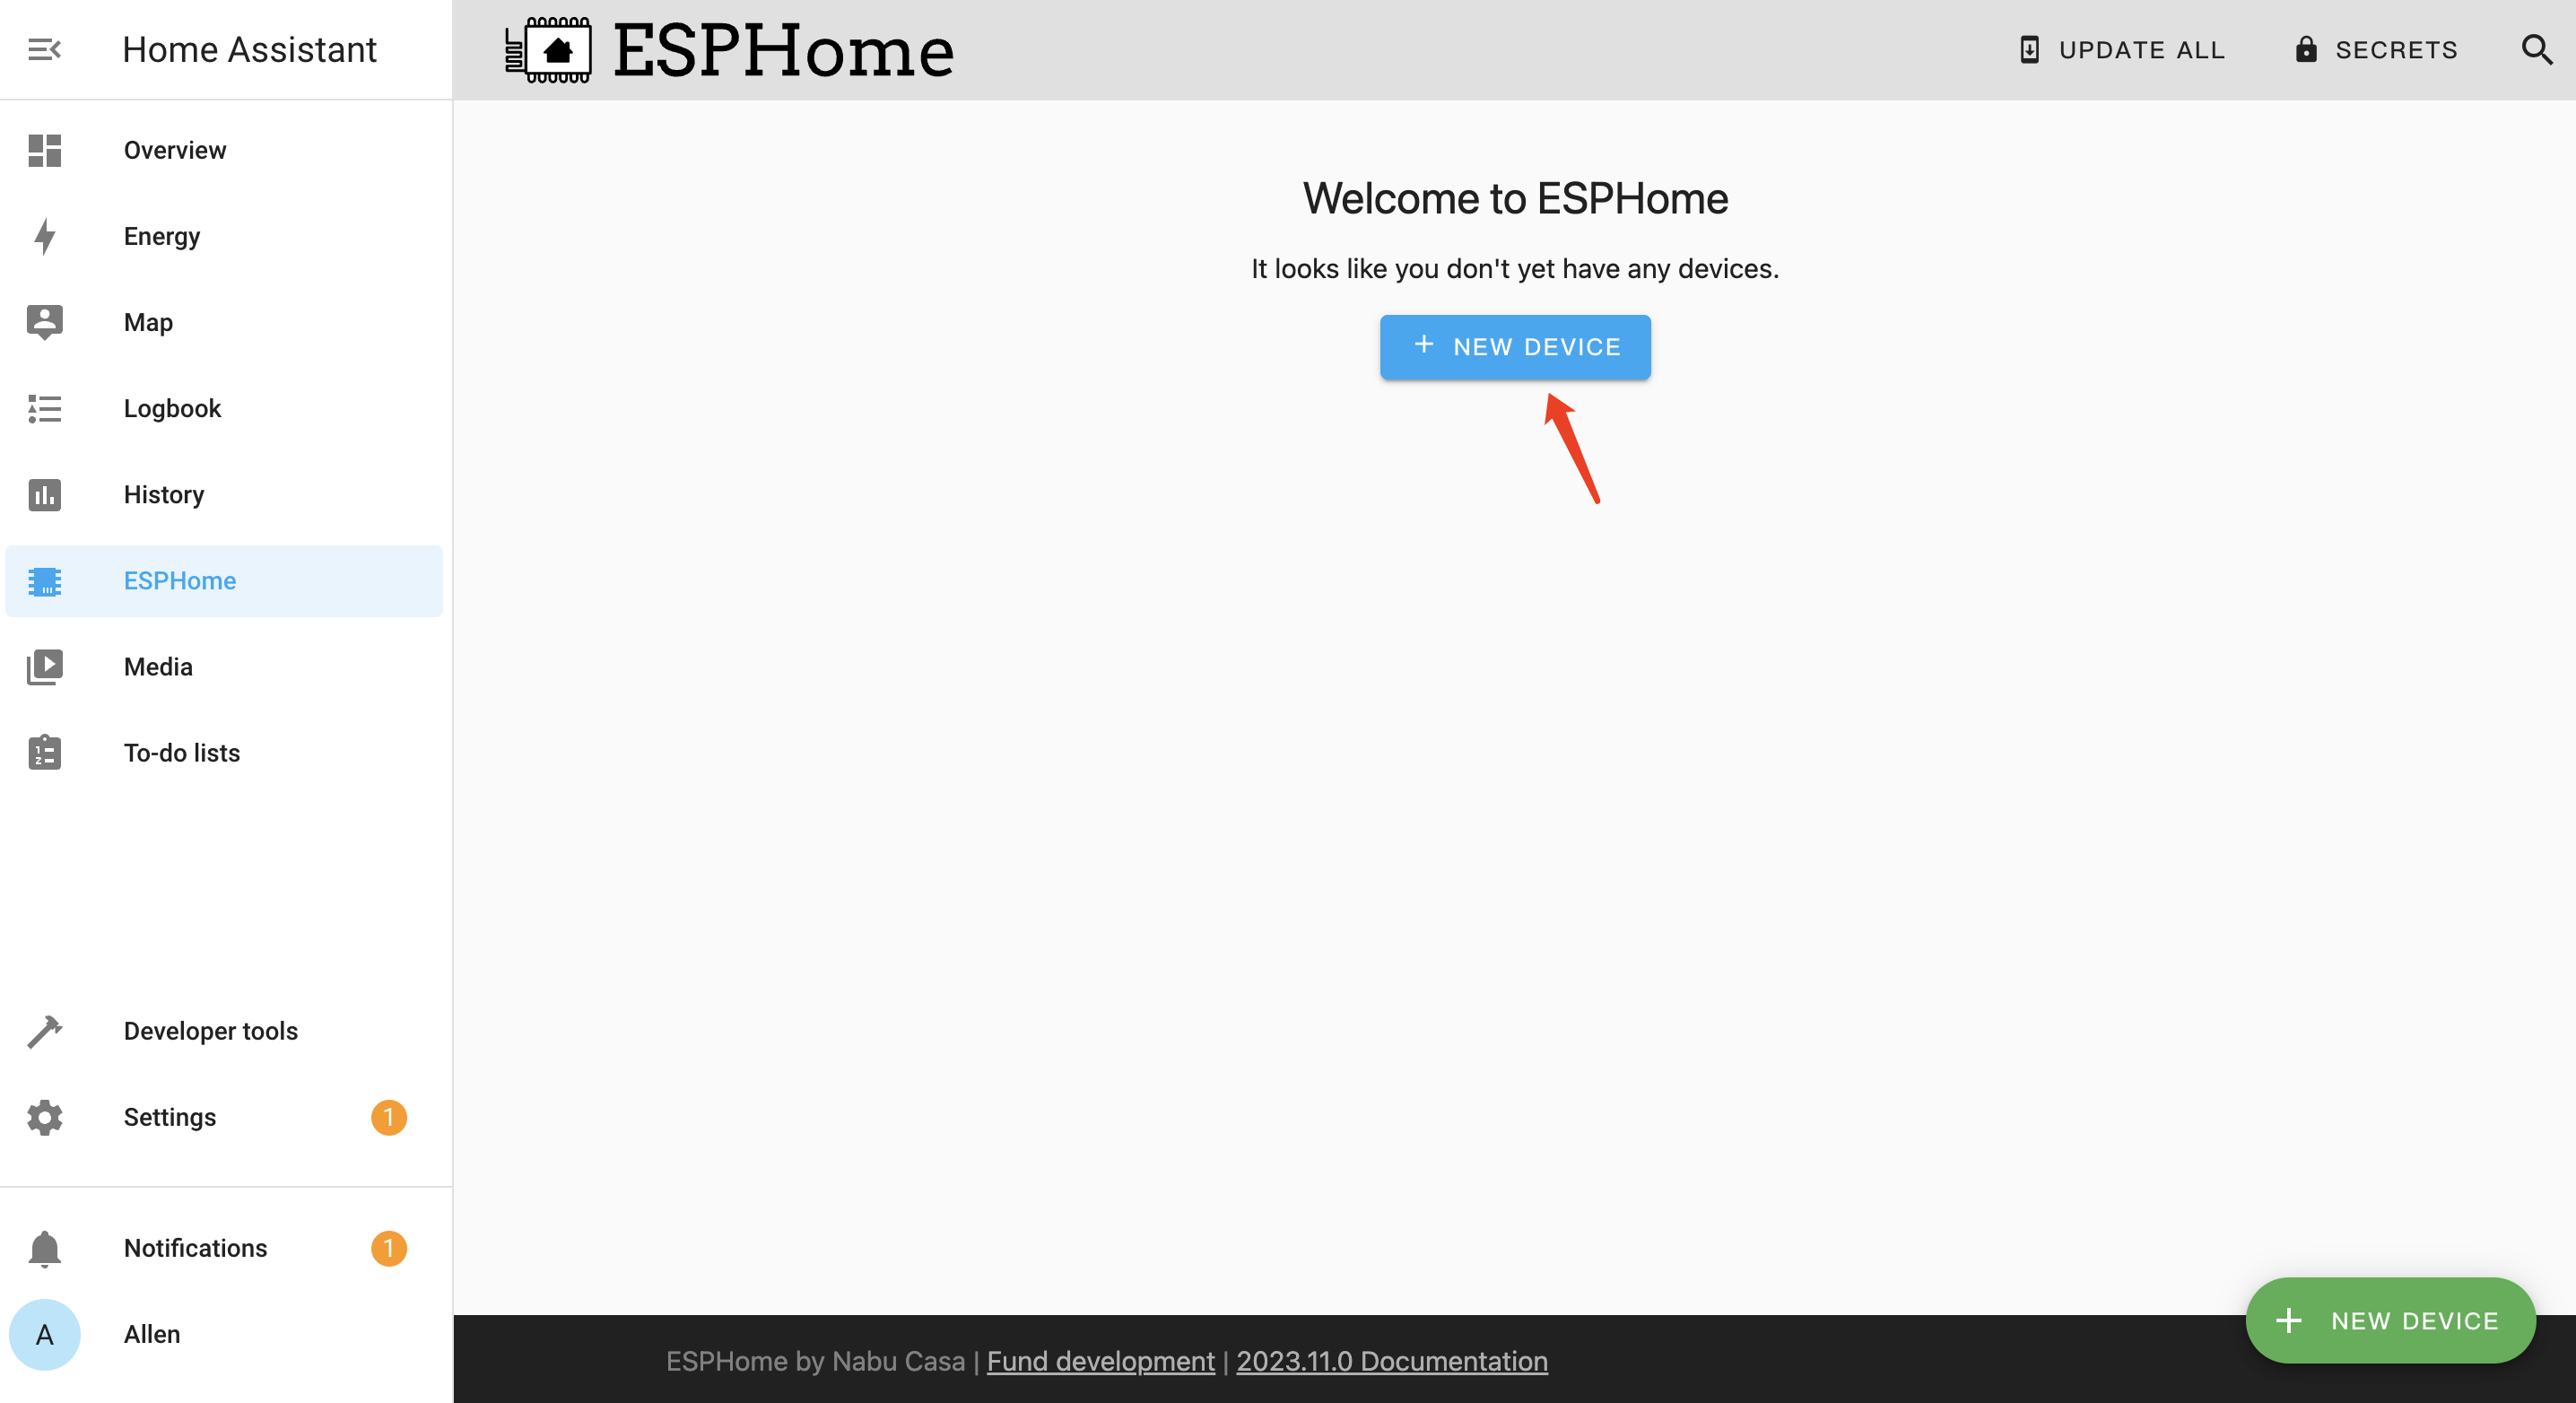
1. 将 Seeed Studio XIAO ESP32C3 添加到 ESPHome
- 步骤 1. 点击 + NEW DEVICE
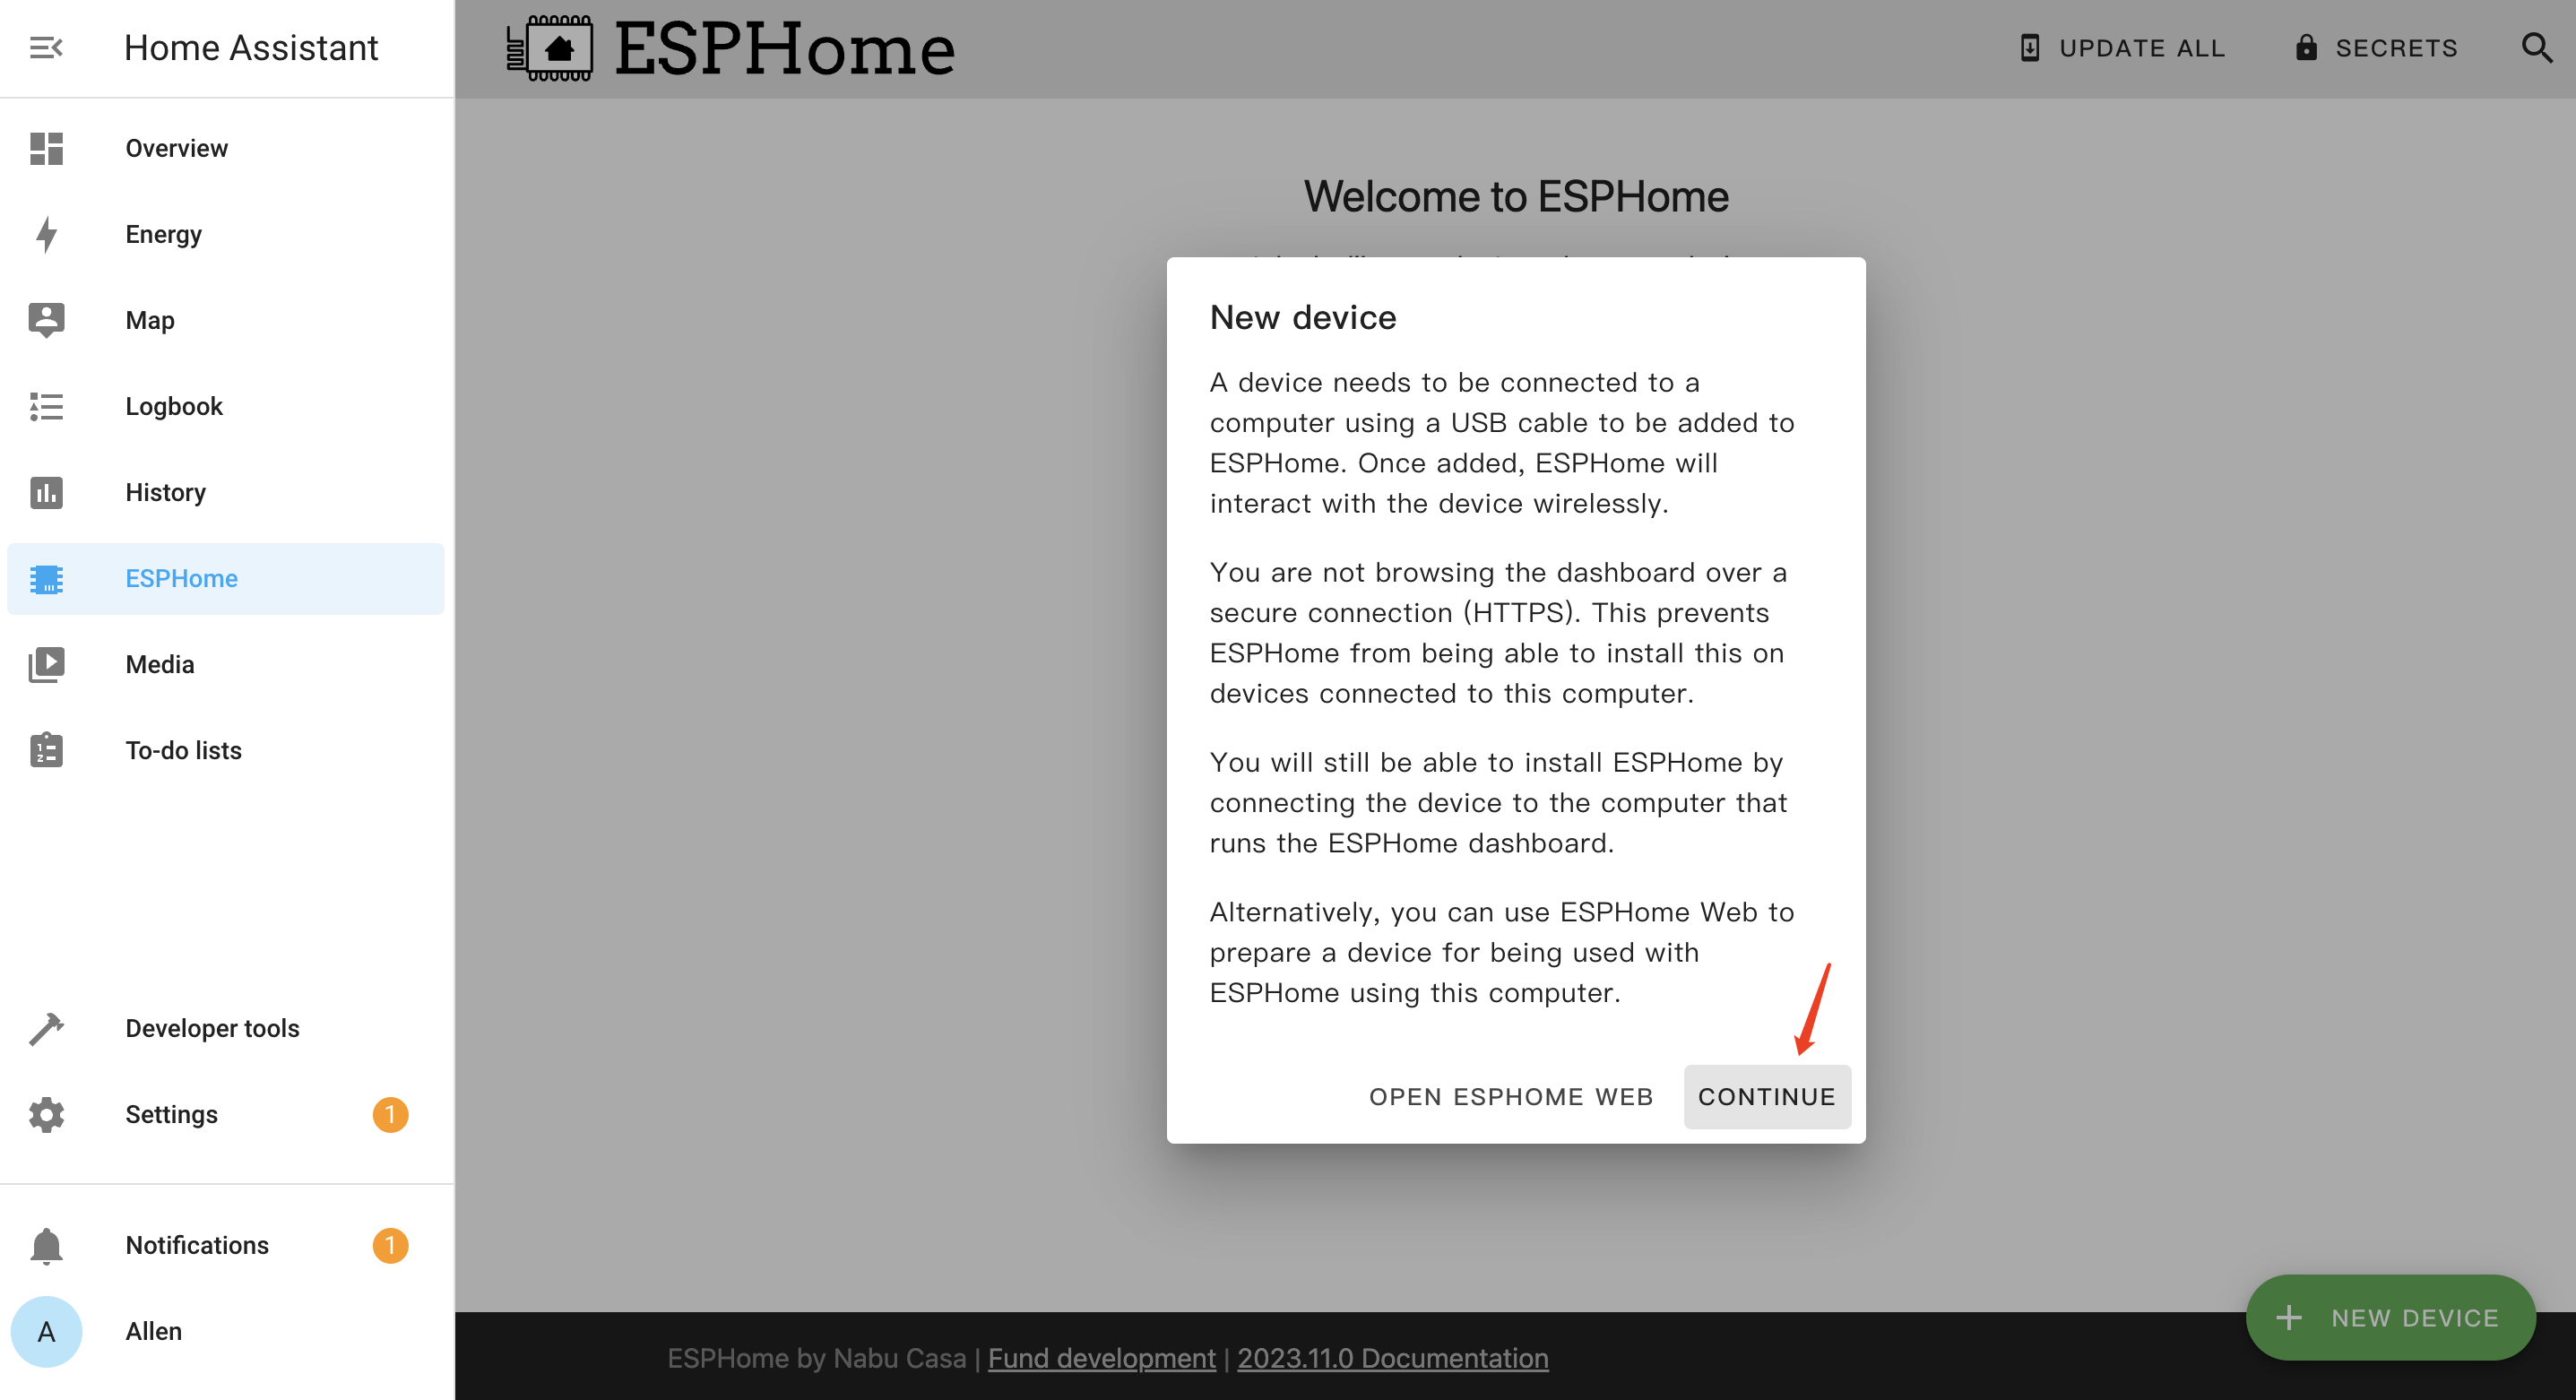
- 步骤 2. 点击 CONTINUE
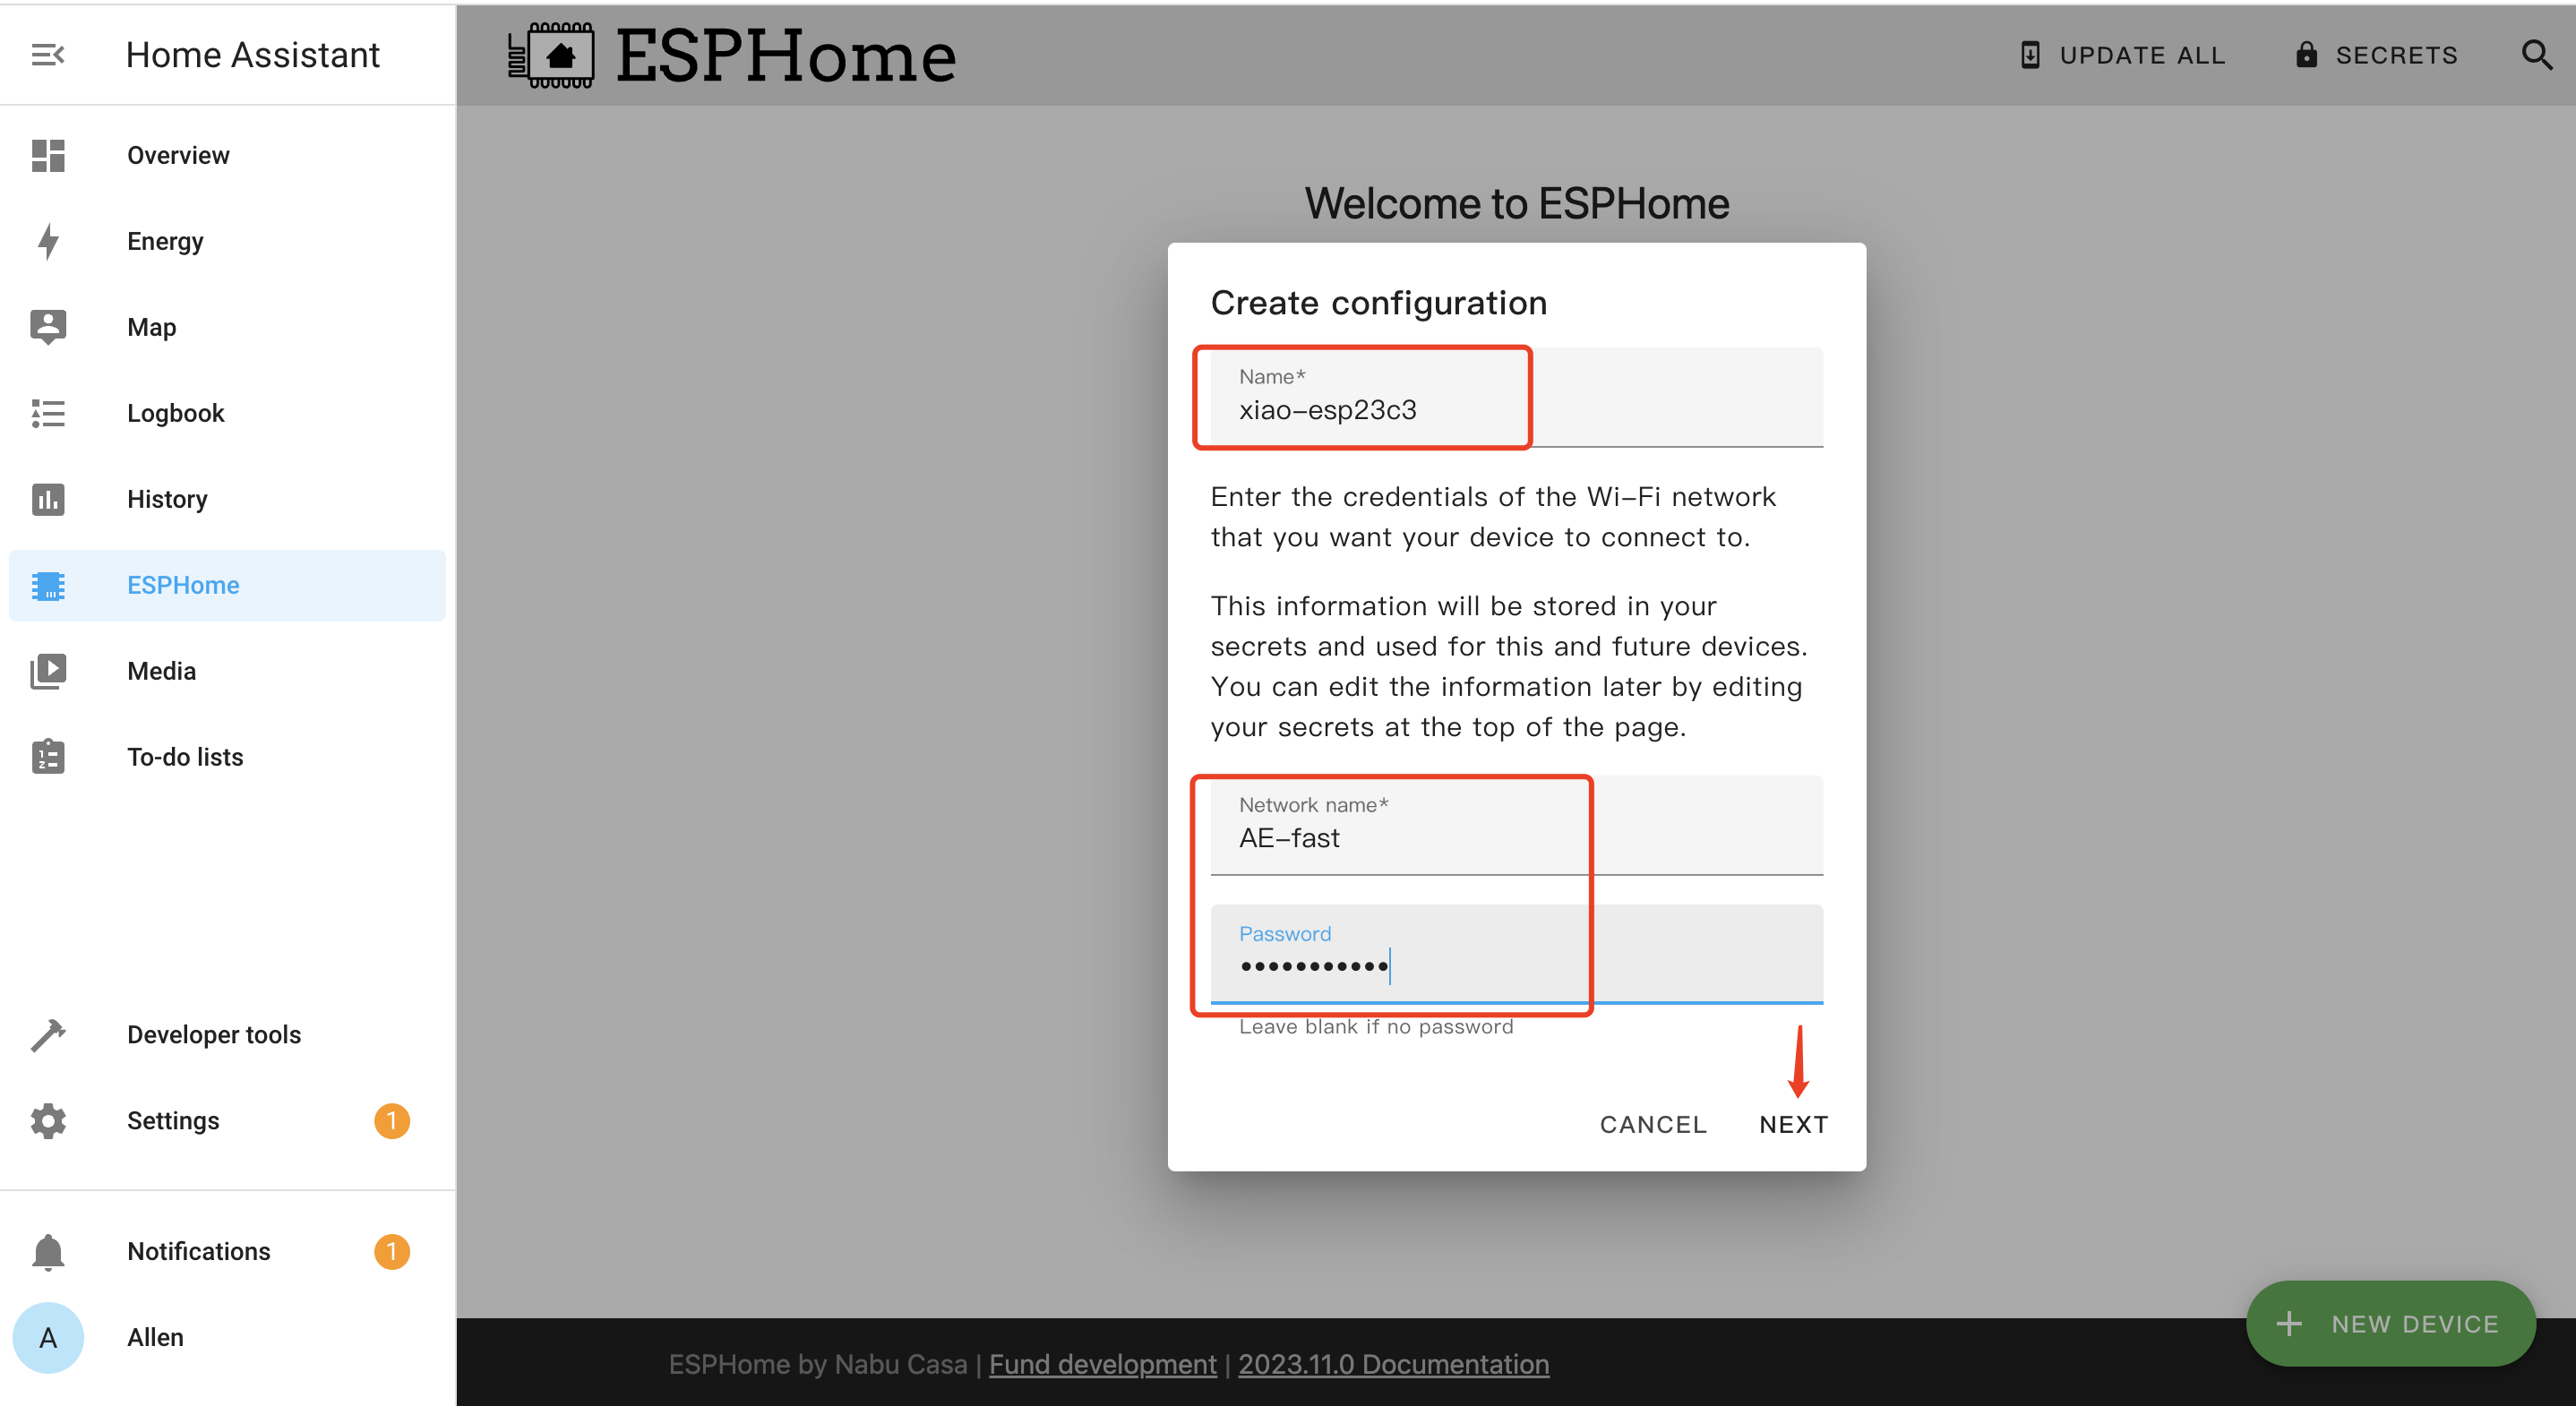
- 步骤 3. 为设备输入一个名称,并输入 WiFi 凭据,如网络名称和密码。然后点击 NEXT
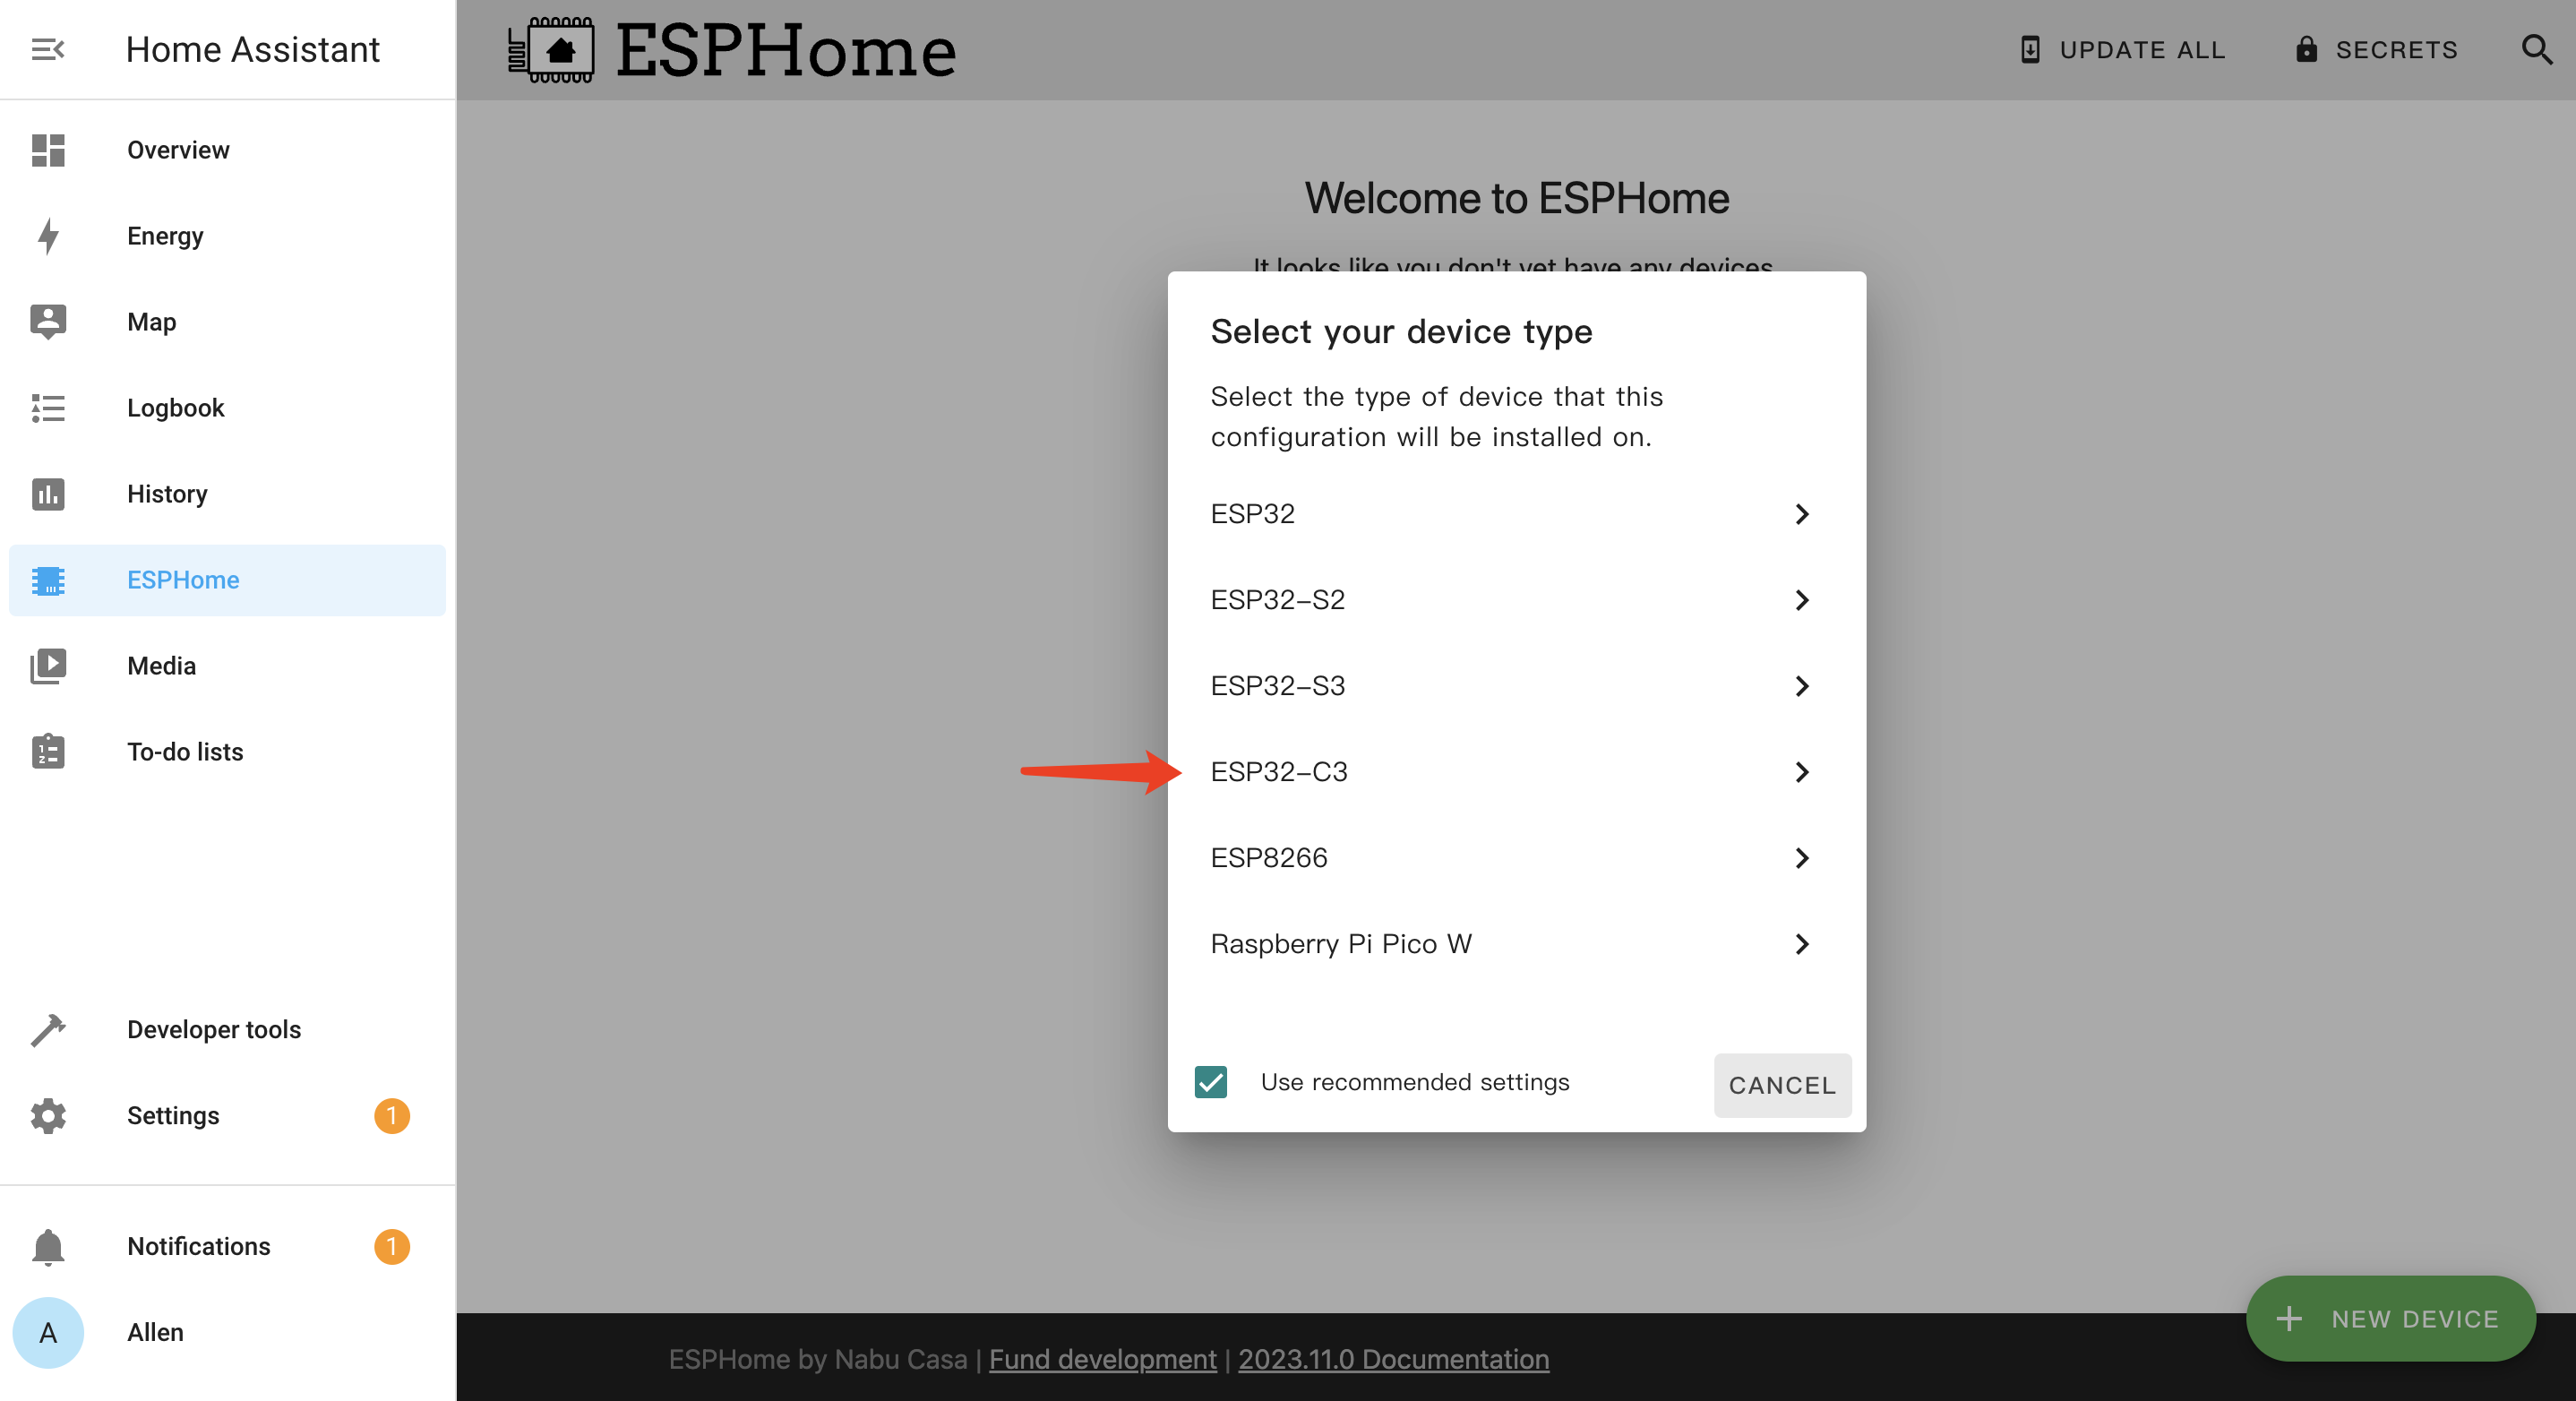
- 步骤 4. 选择 ESP32-C3 并点击
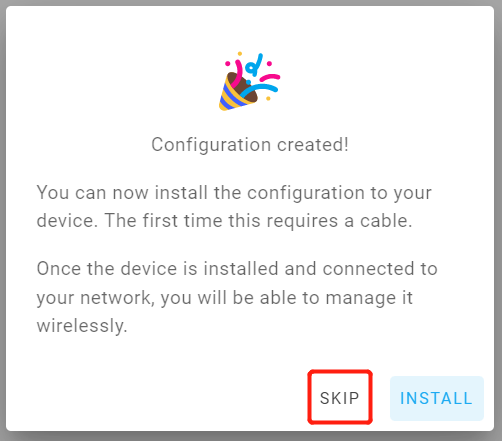
- 步骤 5. 点击 SKIP,因为我们将手动配置这个开发板
2. 创建并上传 YAML 配置
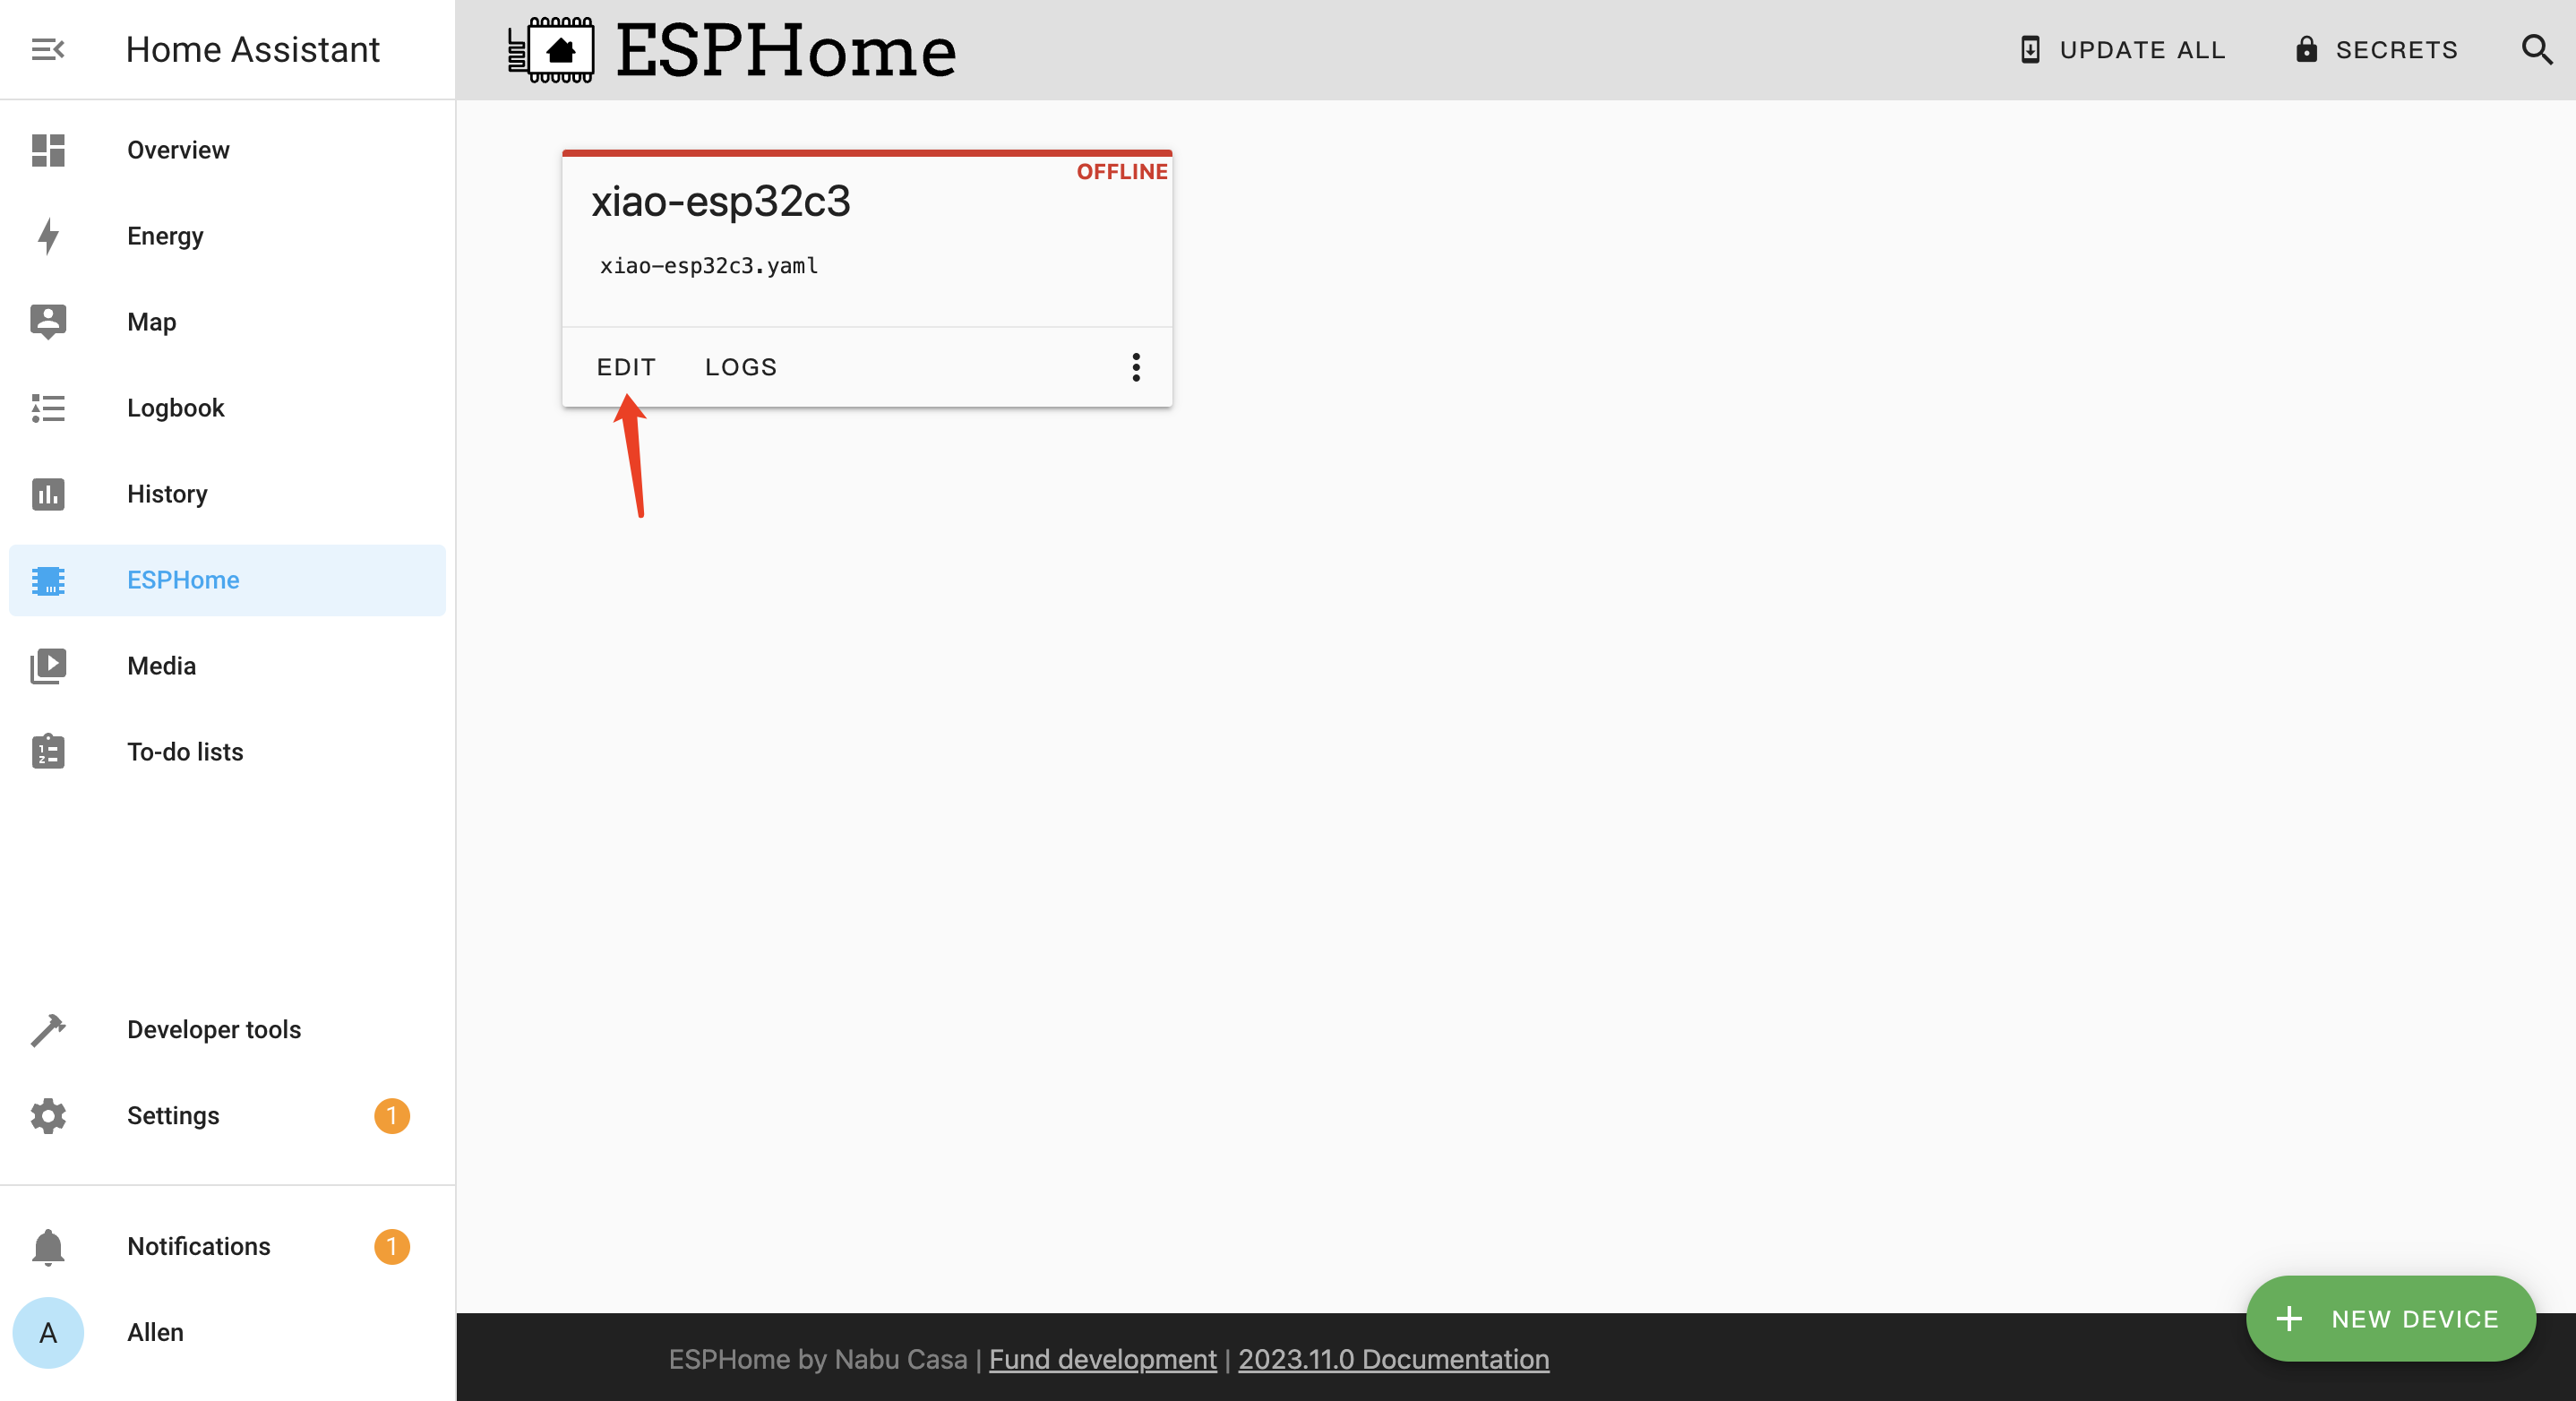
- 步骤 1. 点击新创建的开发板下方的 EDIT
-
步骤 7. 创建并上传 YAML 配置
下面代码的说明:
-
名称: "thermostat"
-
开发板配置:
闪存模式设置为 DIO。
开发板指定为"seeed_xiao_esp32c3",使用 Arduino 框架。 -
启动时操作:
显示日志消息:"Booting thermostat."
关闭三个继电器:加热、制冷和风扇。
延迟 500 毫秒。
执行名为"boot_beep"的脚本。 -
脚本配置:
启动蜂鸣脚本:
打开蜂鸣器,设置其频率以产生蜂鸣声,并在 300 毫秒后关闭。 -
API 和 OTA 配置:
API:
指定加密密钥。
OTA:
为无线更新设置密码为"13371337"。 -
蜂鸣器输出:
使用 LEDC 平台配置,引脚为 5。 -
WiFi 配置:
指定连接到 Wi-Fi 的 SSID 和密码。
配置后备热点(强制门户),SSID 为"Xiao-Esp32C3",密码为"13371337"。 -
I2C 配置:
配置 I2C 通信,SDA 引脚为 6,SCL 引脚为 7。 -
字体配置:
为显示屏定义两种不同大小的字体。 -
显示配置:
使用 SSD1315 I2C 显示屏,带有 lambda 函数来格式化和显示信息。
显示华氏温度、湿度、Wi-Fi 信号强度和 IP 地址。 -
传感器配置:
使用 DHT22 传感器进行温度和湿度读取,更新间隔为 10 秒。
包括 Wi-Fi 信号传感器,更新间隔为 20 秒。 -
文本传感器配置:
显示恒温器的 IP 地址和 ESPHome 版本。 -
开关配置:
为 relay_heat、relay_cooling 和 relay_fan 配置三个 GPIO 开关。 -
二进制传感器配置:
为循环风扇按钮按下配置二进制传感器。
按下时,它控制气候系统的风扇模式。 -
气候配置:
使用指定的温度传感器实现恒温器控制。
定义加热、制冷、风扇模式和空闲的操作。
设置温度限制、步长和默认预设。
将此内容粘贴到您的 ESPHome 设备配置 yaml 文件中。您也可以在这里下载完整的 .yaml 文件
-
esphome:
  name: ecostat
  platformio_options:
    board_build.flash_mode: dio
  on_boot:
    priority: 750
    then:
      - logger.log: "Booting EcoStat"
      - delay: 500ms
      - lambda: |-
          id(relay_heat).turn_off();
          id(relay_cooling).turn_off();
          id(relay_fan).turn_off();
          id(ecostat_control_heat).mode = CLIMATE_MODE_OFF;
          id(ecostat_control_cooling).mode = CLIMATE_MODE_OFF;
      - script.execute: boot_beep

esp32:
  board: seeed_xiao_esp32c3
  variant: esp32c3
  framework:
    type: arduino
    platform_version: 5.4.0

#logger:
 # level: VERY_VERBOSE

api:
  encryption:
    key: "YOURKEYHERE"

ota:
  password: "13371337"

script:
- id: boot_beep
  then:
    # First ^E
    - output.turn_on: buzzer
    - output.ledc.set_frequency:
        id: buzzer
        frequency: 659.25Hz  # E
    - output.set_level:
        id: buzzer
        level: "50%"
    - delay: 150ms
    - output.turn_off: buzzer
    - output.turn_on: buzzer
    - output.ledc.set_frequency:
        id: buzzer
        frequency: 1000Hz
    - output.set_level:
        id: buzzer
        level: "50%"
    - delay: 150ms
    - output.turn_off: buzzer
output:
  - platform: ledc
    pin: 5
    id: buzzer

wifi:
  ssid: YOURWIFINAME
  password: YOURWIFIPASS

  # Enable fallback hotspot (captive portal) in case wifi connection fails
  ap:
    ssid: "Xiao-Esp32C3 Fallback Hotspot"
    password: "13371337"

i2c:
  sda: 6
  scl: 7
  scan: False

font:
  # gfonts://family[@weight]
  - file: "gfonts://Roboto"
    id: roboto
    size: 20

  - file: "gfonts://Poppins@700"
    id: inter
    size: 10

display:
  - platform: SSD1315_i2c
    id: oled
    model: "SSD1315 128x64"
    address: 0x3C
    lambda: |-
      float temp_celsius = id(temp).state;
      float temp_fahrenheit = (temp_celsius * 9.0 / 5.0) + 32.0;
      char temp_str[6]; // Buffer for temperature string
      dtostrf(temp_celsius, 4, 1, temp_str); // Convert Celsius to string with 1 decimal place

      it.print(28, 0, id(inter), id(ip_address).state.c_str());
      it.printf(0, 18, id(roboto), "T: %.1f  ", temp_fahrenheit);
      it.printf(70, 18, id(roboto), "H: %d", int(id(humidity).state));
      it.printf(31, 45, id(inter), "RSSI: %d", int(id(rssi).state));

climate:
  - platform: thermostat
    name: "EcoStat Heating"
    id: ecostat_control_heat
    sensor: temp
    heat_deadband: 2 °F
    heat_overrun: 0
    min_heating_run_time: 60s
    min_heating_off_time: 120s
    min_idle_time: 3min
    visual:
      min_temperature: 60 °F
      max_temperature: 80 °F
      temperature_step:
        current_temperature: 0.1
        target_temperature: 1.0
        target_temperature_low: 65 °F
    heat_action:
      - switch.turn_on: relay_heat
    idle_action:
      - switch.turn_off: relay_heat
    default_preset: Normal
    preset:
      - name: Normal
        default_target_temperature_low: 65 °F


  - platform: thermostat
    name: "EcoStat Cooling"
    id: ecostat_control_cooling
    sensor: temp
    cool_deadband: 2 °F
    cool_overrun: 0
    min_cooling_off_time: 20s
    min_cooling_run_time: 60s
    min_idle_time: 3min
    visual:
      min_temperature: 60 °F
      max_temperature: 80 °F
      temperature_step:
        current_temperature: 0.1
        target_temperature: 1.0
        target_temperature_low: 70 °F
    cool_action:
      - switch.turn_on: relay_cooling
    idle_action:
      - switch.turn_off: relay_cooling
    min_fan_mode_switching_time: 20s
    fan_mode_on_action:
      - switch.turn_on: relay_fan
    fan_mode_off_action:
      - switch.turn_off: relay_fan
    default_preset: Normal
    preset:
      - name: Normal
        default_target_temperature_high: 70 °F

sensor:
  - platform: dht
    pin: 20
    model: DHT22
    update_interval: 10s
    temperature:
      name: "EcoStat Temperature"
      id: temp
    humidity:
      name: "EcoStat Humidity"
      id: humidity
  - platform: wifi_signal
    name: "Wi-Fi Signal Strength"
    id: rssi
    update_interval: 20s

text_sensor:
  - platform: wifi_info
    ip_address:
      name: "EcoStat IP Address"
      id: ip_address
  - platform: version
    name: "EcoStat ESPHome Version"

switch:
  - platform: gpio
    id: relay_heat
    pin:
      number: 10
      mode: OUTPUT
  - platform: gpio
    id: relay_cooling
    pin:
      number: 9
      mode: OUTPUT
  - platform: gpio
    id: relay_fan
    pin:
      number: 21
      mode: OUTPUT

binary_sensor:
  - platform: gpio
    id: tempup
    pin:
      number: 8
      mode: INPUT_PULLUP
    filters:
      - delayed_on: 50ms
      - delayed_off: 50ms
    on_press:
      then:
        - lambda: |-
            if (id(ecostat_control_heat).mode == esphome::climate::CLIMATE_MODE_HEAT) {
              auto current_target_temp = id(ecostat_control_heat).target_temperature_low;
              id(ecostat_control_heat).target_temperature_low = current_target_temp + 0.56;
              auto current_target_temp_high = id(ecostat_control_heat).target_temperature_high;
              id(ecostat_control_heat).target_temperature_high = current_target_temp_high + 0.56;
            } else if (id(ecostat_control_cooling).mode == esphome::climate::CLIMATE_MODE_COOL) {
              auto current_target_temp = id(ecostat_control_cooling).target_temperature_low;
              id(ecostat_control_cooling).target_temperature_low = current_target_temp + 0.56;
              auto current_target_temp_high = id(ecostat_control_cooling).target_temperature_high;
              id(ecostat_control_cooling).target_temperature_high = current_target_temp_high + 0.56;
            }

  - platform: gpio
    id: tempdown
    pin:
      number: 2
      mode: INPUT_PULLUP
    filters:
      - delayed_on: 50ms
      - delayed_off: 50ms
    on_press:
      then:
        - lambda: |-
            if (id(ecostat_control_heat).mode == esphome::climate::CLIMATE_MODE_HEAT) {
              auto current_target_temp = id(ecostat_control_heat).target_temperature_low;
              id(ecostat_control_heat).target_temperature_low = current_target_temp - 0.56;
              auto current_target_temp_high = id(ecostat_control_heat).target_temperature_high;
              id(ecostat_control_heat).target_temperature_high = current_target_temp_high - 0.56;
            } else if (id(ecostat_control_cooling).mode == esphome::climate::CLIMATE_MODE_COOL) {
              auto current_target_temp = id(ecostat_control_cooling).target_temperature_low;
              id(ecostat_control_cooling).target_temperature_low = current_target_temp - 0.56;
              auto current_target_temp_high = id(ecostat_control_cooling).target_temperature_high;
              id(ecostat_control_cooling).target_temperature_high = current_target_temp_high - 0.56;
            }

  - platform: gpio
    id: modeswitch
    pin:
      number: 3
      mode: INPUT_PULLUP
    filters:
      - delayed_on: 50ms
      - delayed_off: 50ms
    on_press:
      then:
        - lambda: |-
            auto current_mode = id(ecostat_control_heat).mode;
            if (current_mode == esphome::climate::CLIMATE_MODE_OFF) {
              id(ecostat_control_heat).mode = esphome::climate::CLIMATE_MODE_HEAT;
            } else if (current_mode == esphome::climate::CLIMATE_MODE_HEAT) {
              id(ecostat_control_heat).mode = esphome::climate::CLIMATE_MODE_COOL;
            } else if (current_mode == esphome::climate::CLIMATE_MODE_COOL) {
              id(ecostat_control_heat).mode = esphome::climate::CLIMATE_MODE_OFF;
            }

  - platform: gpio
    id: momentaryswitch0
    pin:
      number: 4
      mode: INPUT_PULLUP
    filters:
      - delayed_on: 50ms
      - delayed_off: 50ms
    on_press:
      then:
        - if:
            condition:
              switch.is_off: relay_fan
            then:
              - climate.control:
                  id: ecostat_control_cooling
                  fan_mode: "on"
            else:
              - climate.control:
                  id: ecostat_control_cooling
                  fan_mode: "off"
3. 组装可选外壳
这里是我在这个项目中使用的外壳的STL文件。
请随意使用或修改它们。如果您个人没有3D打印机, 网上有很多服务可以用您想要的任何材料打印这些文件。

4. 安装组件
步骤1 将所有列出的组件安装到外壳中
使用M2x4和M2x6螺丝,将所有之前列出的组件安装到外壳内相应的位置。
(DHT22传感器只需压入到位即可)。

步骤2. 将所有传感器和外设连接到前述YAML中相应的引脚
以下是我在连接过程中使用的方法:
- DHT22/SSD1315 - 使用JST连接器: 拆焊并将DHT22和SSD1315的连接器翻转到其PCB的另一面以便正确安装。
-
两种类型的继电器 - 使用JST/DuPont连接器: 对于继电器,我在一侧使用JST,另一侧使用DuPont连接器连接到扩展板上的GPIO分线头。
-
电池连接: 我还将一个3.7V锂电池插入扩展板的电池连接处,用作主电源断电时的备用电池。

步骤3. 将所需样式的瞬时按钮连接到外壳前面的内侧
我通过用一点热熔胶固定按钮来完成这项工作。然后我将导线焊接到瞬时按钮的对角相对引脚上,并在导线的另一端放置DuPont连接器,以连接到扩展板上正确的GPIO分线头。

步骤4. 将屏幕组装到前盖的后面
将屏幕组装到前盖的后面(用少量热熔胶固定到位)。然后用3个M4x6螺丝将前盖固定到外壳上,如下所示。
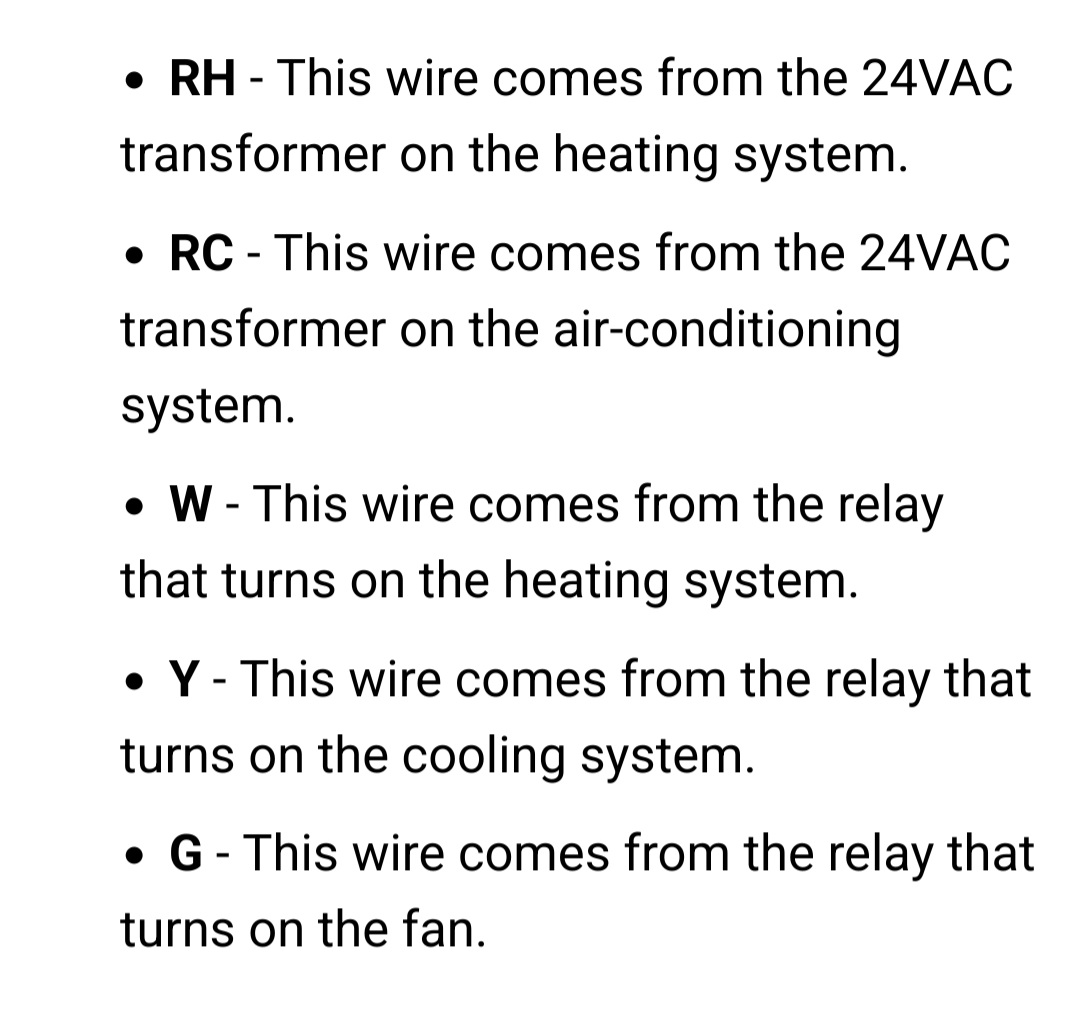
5. 将导线连接到EcoStat上相应的继电器
智能恒温器完成!只需拆除您家中现有的恒温器,并使用下面的图片将正确的导线连接到EcoStat上相应的继电器!
✨ 贡献者项目
技术支持与产品讨论
感谢您选择我们的产品!我们在这里为您提供不同的支持,以确保您使用我们产品的体验尽可能顺畅。我们提供多种沟通渠道,以满足不同的偏好和需求。