如何为 Seeed 的 Jetson BSP 构建源代码项目
本 wiki 演示如何获取 Seeed Jetson 产品的 BSP 源代码,将其组织成完整的 BSP 源代码包,并编译/刷写到 Jetson 设备上。
1. 准备工作空间
本指南以 L4T 36.4.3 为例演示如何构建源代码项目、编译并刷写到 Jetson 设备。同样的过程适用于其他版本——只需将后续示例命令中的版本号替换为您想要构建的版本。
在开始之前,您需要准备一台 Ubuntu 20.04/22.04 PC 主机。
如果您不确定 L4T 版本与 JetPack 版本之间的关系,可以参考此链接: https://developer.nvidia.com/embedded/jetpack-archive。
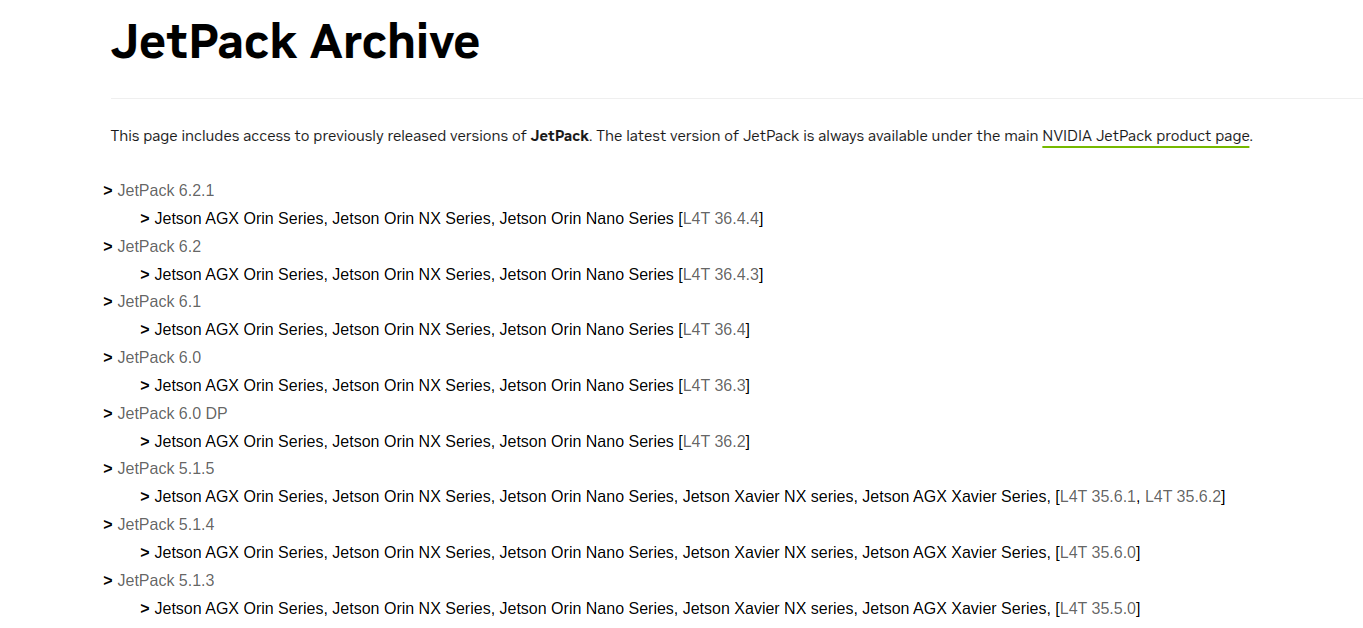
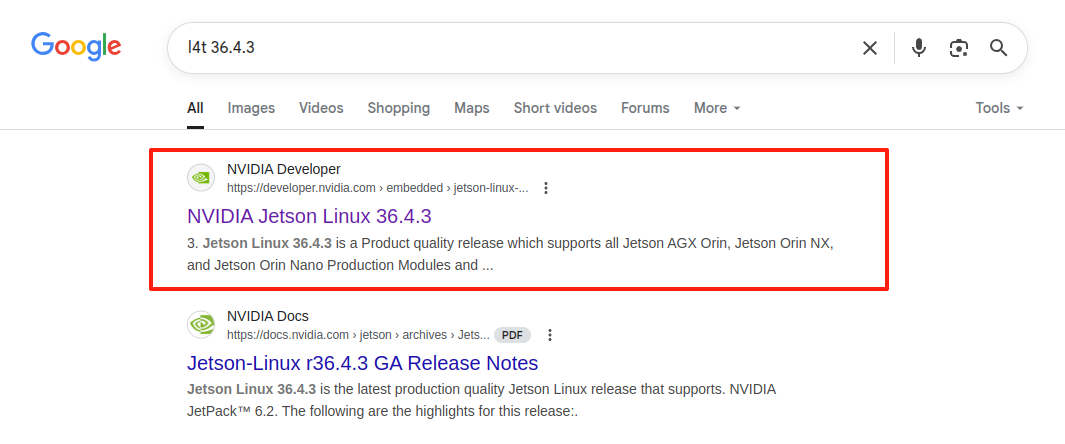
搜索您想要编译的特定 L4T (Linux for Tegra) 版本,例如:
从 NVIDIA 提取官方 BSP,您将得到一个名为 Linux_for_Tegra 的目录。然后,将根文件系统归档文件提取到官方 Linux_for_Tegra 目录中:
tar xf Jetson_Linux_r36.4.3_aarch64.tbz2
sudo tar xpf Tegra_Linux_Sample-Root-Filesystem_r36.4.3_aarch64.tbz2 -C Linux_for_Tegra/rootfs/
同步用于编译的源代码。将 -t 后的参数替换为你想要的 L4T 版本:
cd Linux_for_Tegra/source/
./source_sync.sh -t jetson_36.4.3
退出到工作区的根目录。使用以下命令将所需分支的源代码 git clone 到本地机器
(将 -b <branch name> 替换为目标分支):
sudo apt update
sudo apt install git-lfs
cd ../..
mkdir -p github/Linux_for_Tegra
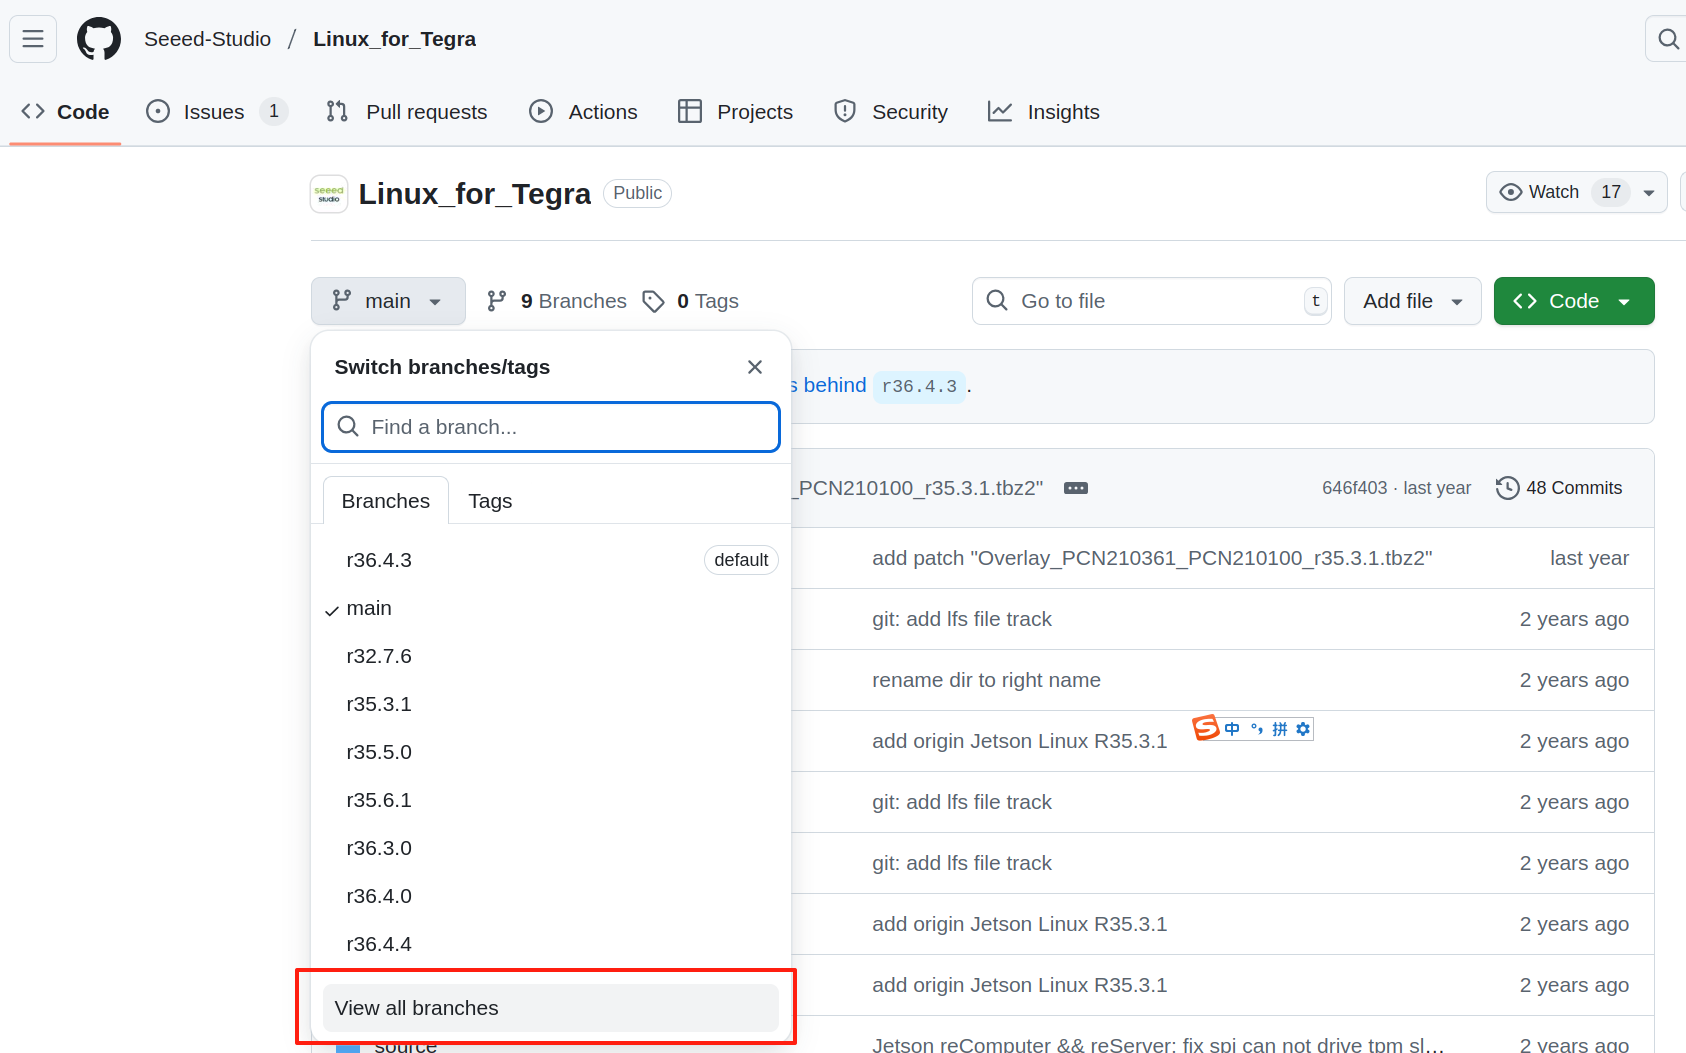
git clone https://github.com/Seeed-Studio/Linux_for_Tegra.git -b r36.4.3 --depth=1 github/Linux_for_Tegra
Seeed Jetson 的 BSP 源代码可在此 GitHub 仓库 中获取。 您可以查看不同的分支来找到您所需的 L4T 版本,因为每个分支对应不同的 L4T 发布版本。
然后覆盖原始源代码:
cp -r github/Linux_for_Tegra/* Linux_for_Tegra/
对根文件系统应用必要的更改:
cd Linux_for_Tegra
sudo ./apply_binaries.sh
在您的 PC 上安装依赖项:
sudo apt-get update
sudo apt-get install build-essential flex bison libssl-dev
sudo apt-get install sshpass
sudo apt-get install abootimg
sudo apt-get install nfs-kernel-server
sudo apt-get install libxml2-utils
sudo apt-get install qemu-user-static
为内核构建准备工作:
mkdir -p l4t-gcc
tar xf aarch64--glibc--stable-2022.08-1.tar.bz2 -C ./l4t-gcc
export ARCH=arm64
export CROSS_COMPILE=/your_path/l4t-gcc/aarch64--glibc--stable-2022.08-1/bin/aarch64-buildroot-linux-gnu-
Compile and build kernel:
cd source
./nvbuild.sh
安装新的内核 dtbs 和驱动程序:
./do_copy.sh
export INSTALL_MOD_PATH=/your_path/Linux_for_Tegra/rootfs/
./nvbuild.sh -i
对于 JetPack 5,由于文件路径不同,您需要将 -p 参数修改为:
-p "-c bootloader/t186ref/cfg/flash_t234_qspi.xml"
对于 Jetpack 6,刷写设备(以 recomputer-orin-j401 为例):
sudo ./tools/kernel_flash/l4t_initrd_flash.sh \
--external-device nvme0n1p1 -c tools/kernel_flash/flash_l4t_t234_nvme.xml \
-p "-c bootloader/generic/cfg/flash_t234_qspi.xml"  --showlogs \
--network usb0 recomputer-orin-j401 internal
将 recomputer-orin-j401 替换为您正在使用的设备名称。您需要提供一个有效的 device name 作为参数,您可以通过检查 Linux_for_Tegra 根目录中的 .conf 文件名来找到。这些文件名的前缀对应有效的 device name 参数。
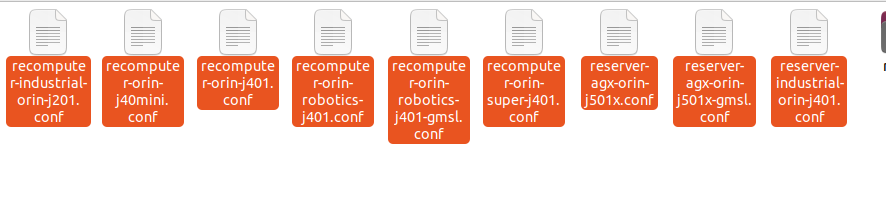
因此,L4T 36.4.3 的可用设备名称参数如下。j40 和 j30 系列使用相同的配置文件:
- recomputer-industrial-orin-j201 (recomputer-industrial-orin-j40/j30 也使用此
device name作为参数。) - recomputer-orin-j401
- reserver-agx-orin-j501x
- reserver-agx-orin-j501x-gmsl
- reserver-industrial-orin-j401
- recomputer-orin-j40mini
- recomputer-orin-robotics-j401
- recomputer-orin-super-j401
资源
技术支持与产品讨论
感谢您选择我们的产品!我们在这里为您提供不同的支持,以确保您使用我们产品的体验尽可能顺畅。我们提供多种沟通渠道,以满足不同的偏好和需求。