开始使用树莓派 4G HAT 的 GNSS 功能
简介
GNSS 集成到 4G LTE 模块中增强了其功能,使其能够为物联网应用提供精确的实时定位和可靠的通信。通过支持多星座 GNSS 系统,该模块即使在偏远或服务不足的地区,也能提供准确可靠的位置追踪。这些功能使其非常适合资产追踪、车队管理和实时远程监控等场景。
结合 4G LTE 连接,该解决方案确保数据能够无缝传输到云端或控制系统,从而高效管理关键用例,例如野生动物保护、农业自动化和应急响应。这种组合提供了一种可扩展且经济高效的基于位置的自动化方法,适用于需要移动性和可访问性的行业。
硬件准备
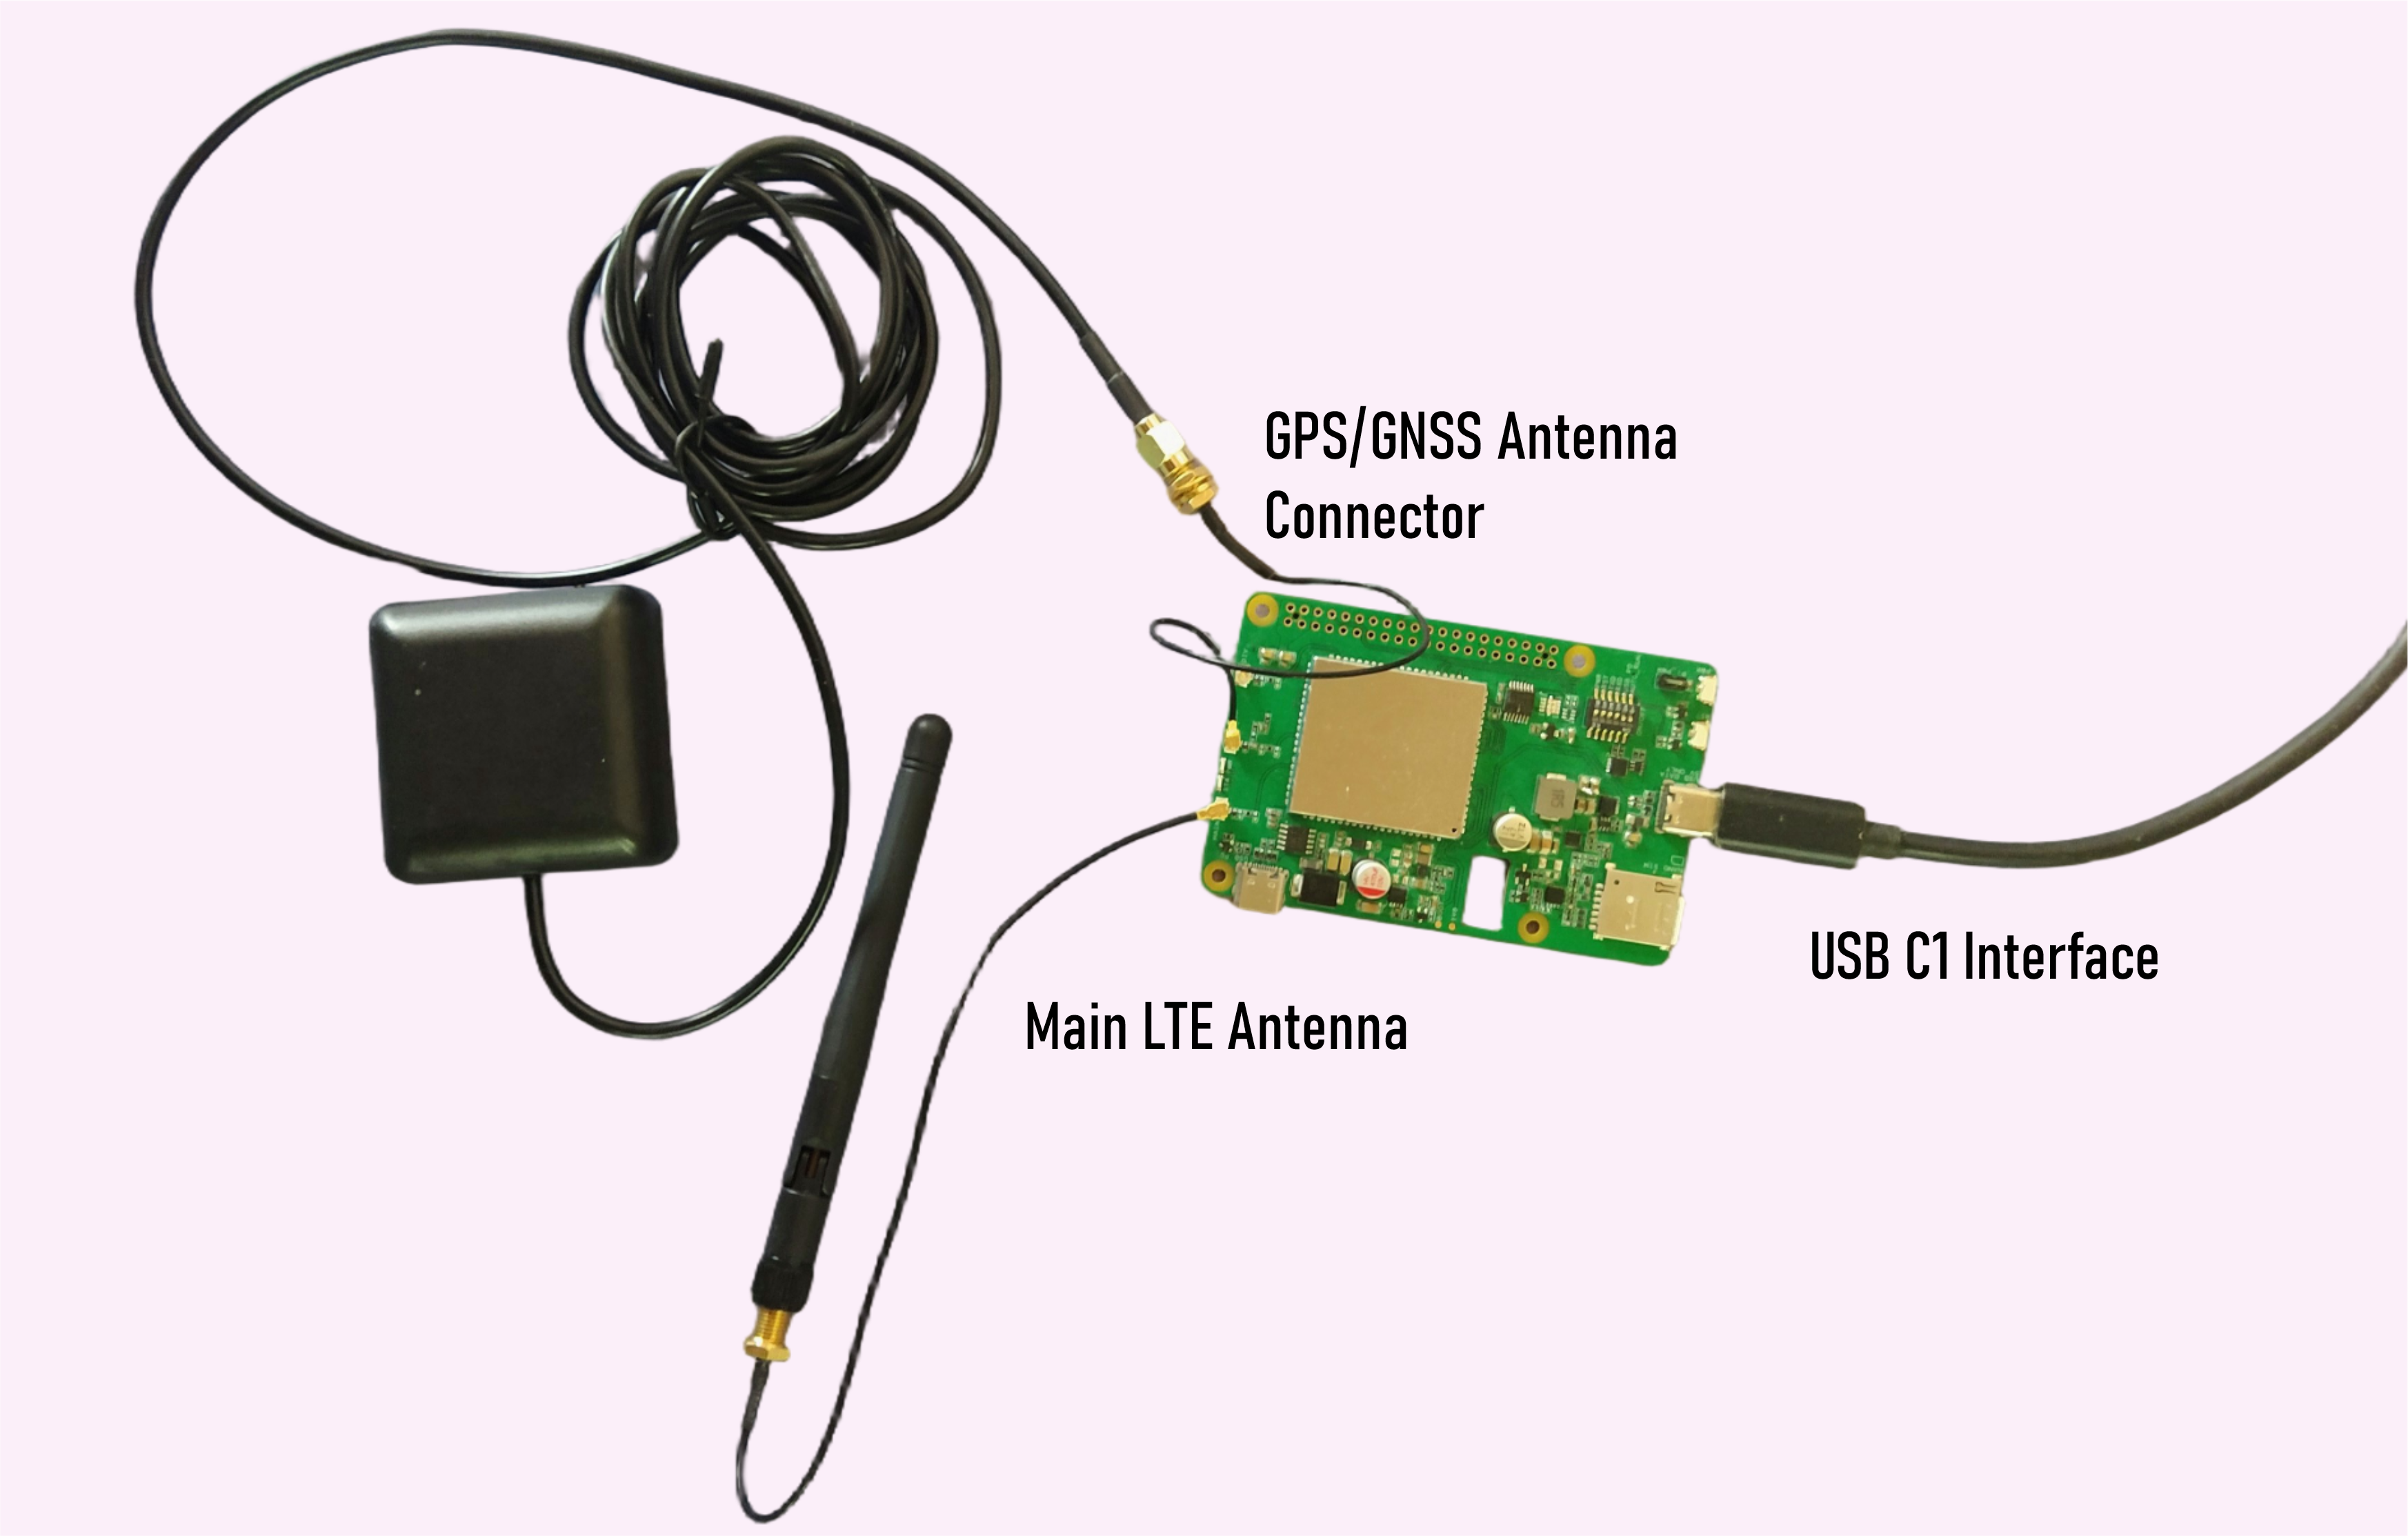
您需要连接您的 GNSS 天线。此外,我们将使用一个 Python API 来以人类可读和易于理解的格式获取精确位置。此外,还需要安装一个 4G 天线。
硬件准备
note
如果尚未安装用于与 AT 命令通信的必要驱动程序,您需要 安装它们。
设置

在 Raspberry Pi 4G LTE Hat 或 Windows Qcom Tool 上使用 GNSS
第 1 步:开启 GNSS
- 在 Raspberry Pi 上打开 Minicom 或在 Windows 上通过 USB 打开 Qcom Tool。
sudo minicom -D /dev/ttyUSB2 # 在 Raspberry Pi 上使用 minicom
- 输入以下命令以激活 GNSS:
AT+QGPS=1
预期响应:
OK
- 这将开启 GNSS 功能。
- 激活后,NMEA 数据将默认从 "usbnmea" 端口输出。
第 2 步:获取定位信息
- 要检索 GNSS 坐标和其他信息,请输入:
AT+QGPSLOC=0
示例响应:
+QGPSLOC: 063416.400,3143.2951N,11713.0655E,0.6,224.9,2,162.57,17.6,9.5,110620,07 OK
- 响应解释:
- 063416.400: UTC 时间(格式为 HHMMSS.SSS)
- 3143.2951N: 纬度(31°43.2951'N)
- 11713.0655E: 经度(117°13.0655'E)
- 0.6: 水平精度因子 (HDOP)
- 224.9: 海拔高度(单位:米)
- 2: 定位类型(2 = 2D 定位,3 = 3D 定位)
- 其他参数提供详细的 GNSS 数据。
第 3 步:关闭 GNSS
- 在获取所需数据后,输入以下命令关闭 GNSS 以节省电量:
AT+QGPSEND
预期响应
OK
- 此命令将关闭 GNSS 模块,从而节省资源。
Python 代码实现
第 1 步:准备目录和虚拟环境
- 在 Raspberry Pi 上打开终端。
- 创建一个新项目文件夹并进入该文件夹:
mkdir GNSS_EX
cd GNSS_EX
- 设置 Python 虚拟环境:
python3 -m venv --system-site-packages env
- 激活虚拟环境:
source env/bin/activate
- 安装所需的库:
pip install pyserial geopy
第 2 步:准备 Python 脚本
-
打开 Thonny Python IDE(Raspberry Pi 上预装)。
-
在 Thonny 中创建一个新文件,并将提供的代码粘贴到编辑器中。
-
更新
usb_port参数以匹配 Raspberry Pi 上 4G HAT 的串口。通常可能是/dev/ttyUSB2或/dev/ttyUSB3。示例:
usb_port = "/dev/ttyUSB2"
- 将文件保存为 test_gnss.py,存放在 GNSS_EX 文件夹中。
import serial
import time
from geopy.geocoders import Nominatim


def send_at_command(serial_port, command, delay=1):
    """发送 AT 命令并读取响应。"""
    serial_port.write((command + '\r\n').encode())
    time.sleep(delay)
    response = serial_port.read_all().decode()
    print(f"Command: {command}\nResponse: {response}")
    return response


def parse_coordinates(response):
    """从 AT+QGPSLOC 响应中解析坐标。"""
    if "+QGPSLOC:" in response:
        try:
            data = response.split(":")[1].strip().split(",")
            # 提取原始坐标(带 N/S/E/W)
            latitude_raw, longitude_raw = data[1], data[2]

            # 通过移除末尾的 N/S/E/W 进行正确解析
            latitude = convert_to_decimal(latitude_raw[:-1], 'N' in latitude_raw)
            longitude = convert_to_decimal(longitude_raw[:-1], 'E' in longitude_raw)

            print(f"Latitude: {latitude}, Longitude: {longitude}")
            return latitude, longitude
        except (IndexError, ValueError) as e:
            print(f"Error parsing coordinates: {e}")
            return None, None
    return None, None


def convert_to_decimal(coord, positive=True):
    """将 NMEA 格式的坐标转换为十进制格式。"""
    # 将坐标分为度和分
    degrees = int(float(coord) // 100)
    minutes = float(coord) % 100
    decimal = degrees + (minutes / 60)

    # 如果在南半球或西半球,则取负值
    return decimal if positive else -decimal


def get_location(lat, lon):
    """使用 geopy 获取可读位置。"""
    geolocator = Nominatim(user_agent="gnss_locator")
    try:
        location = geolocator.reverse((lat, lon), exactly_one=True)
        return location.address if location else "Location not found"
    except Exception as e:
        print(f"Geocoding error: {e}")
        return "Error retrieving location"


def automate_gnss(port, baudrate=9600):
    """自动化 GNSS 命令并获取位置。"""
    try:
        with serial.Serial(port, baudrate, timeout=1) as ser:
            print("Serial port connected.")

            # 开启 GNSS
            send_at_command(ser, "AT+QGPS=1", delay=2)

            # 获取定位信息
            response = send_at_command(ser, "AT+QGPSLOC=0", delay=2)
            latitude, longitude = parse_coordinates(response)

            if latitude and longitude:
                print(f"Coordinates: Latitude = {latitude}, Longitude = {longitude}")
                location = get_location(latitude, longitude)
                print(f"Location: {location}")
            else:
                print("Unable to retrieve coordinates.")

            # 关闭 GNSS
            send_at_command(ser, "AT+QGPSEND", delay=2)
            print("GNSS process completed.")

    except serial.SerialException as e:
        print(f"Error: {e}")


# 设置 USB 端口(例如 '/dev/ttyUSB0' 或 Windows 上的 'COM3')
usb_port = "/dev/ttyUSB2"  # 根据系统更新
automate_gnss(usb_port)
第 3 步:运行脚本
- 打开终端,确保你在项目目录下:
cd GNSS_EX
- 激活虚拟环境:
source env/bin/activate
- 使用 Python 运行脚本:
python test_gnss.py
- 输出结果
资源
-
[网页] LTE EG25-G
技术支持与产品讨论
感谢您选择我们的产品!我们致力于为您提供多种支持,确保您在使用我们的产品时拥有尽可能顺畅的体验。我们提供多种沟通渠道,以满足不同的偏好和需求。


