Raspberry Pi 5 使用 PCIe hat/dual hat
介绍
本教程主要介绍 M.2 Hat/Dual Hat 的硬件连接配置,以及如何让 Raspberry Pi 从 SSD 启动。同时还涵盖了带外壳和不带外壳两种安装方式,并在不同条件下测试 SSD 的读写速度。
入门
硬件准备


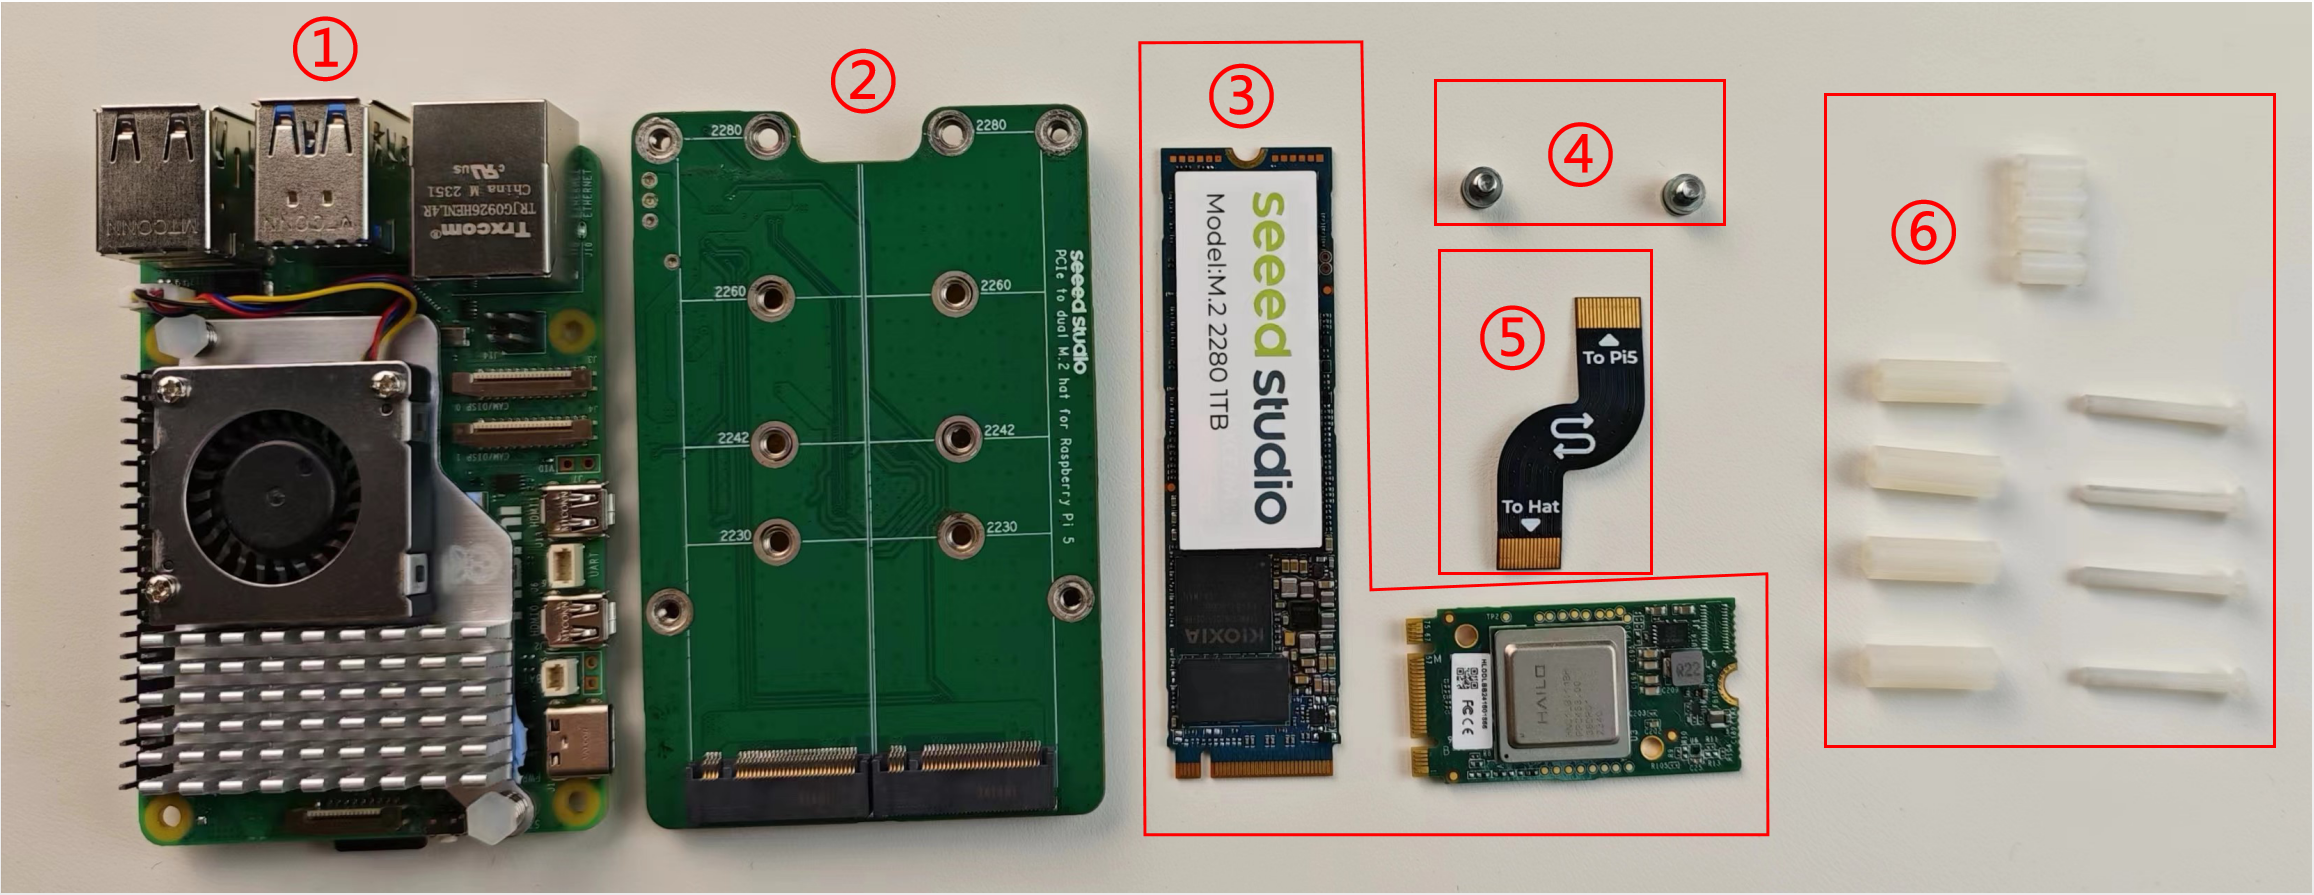
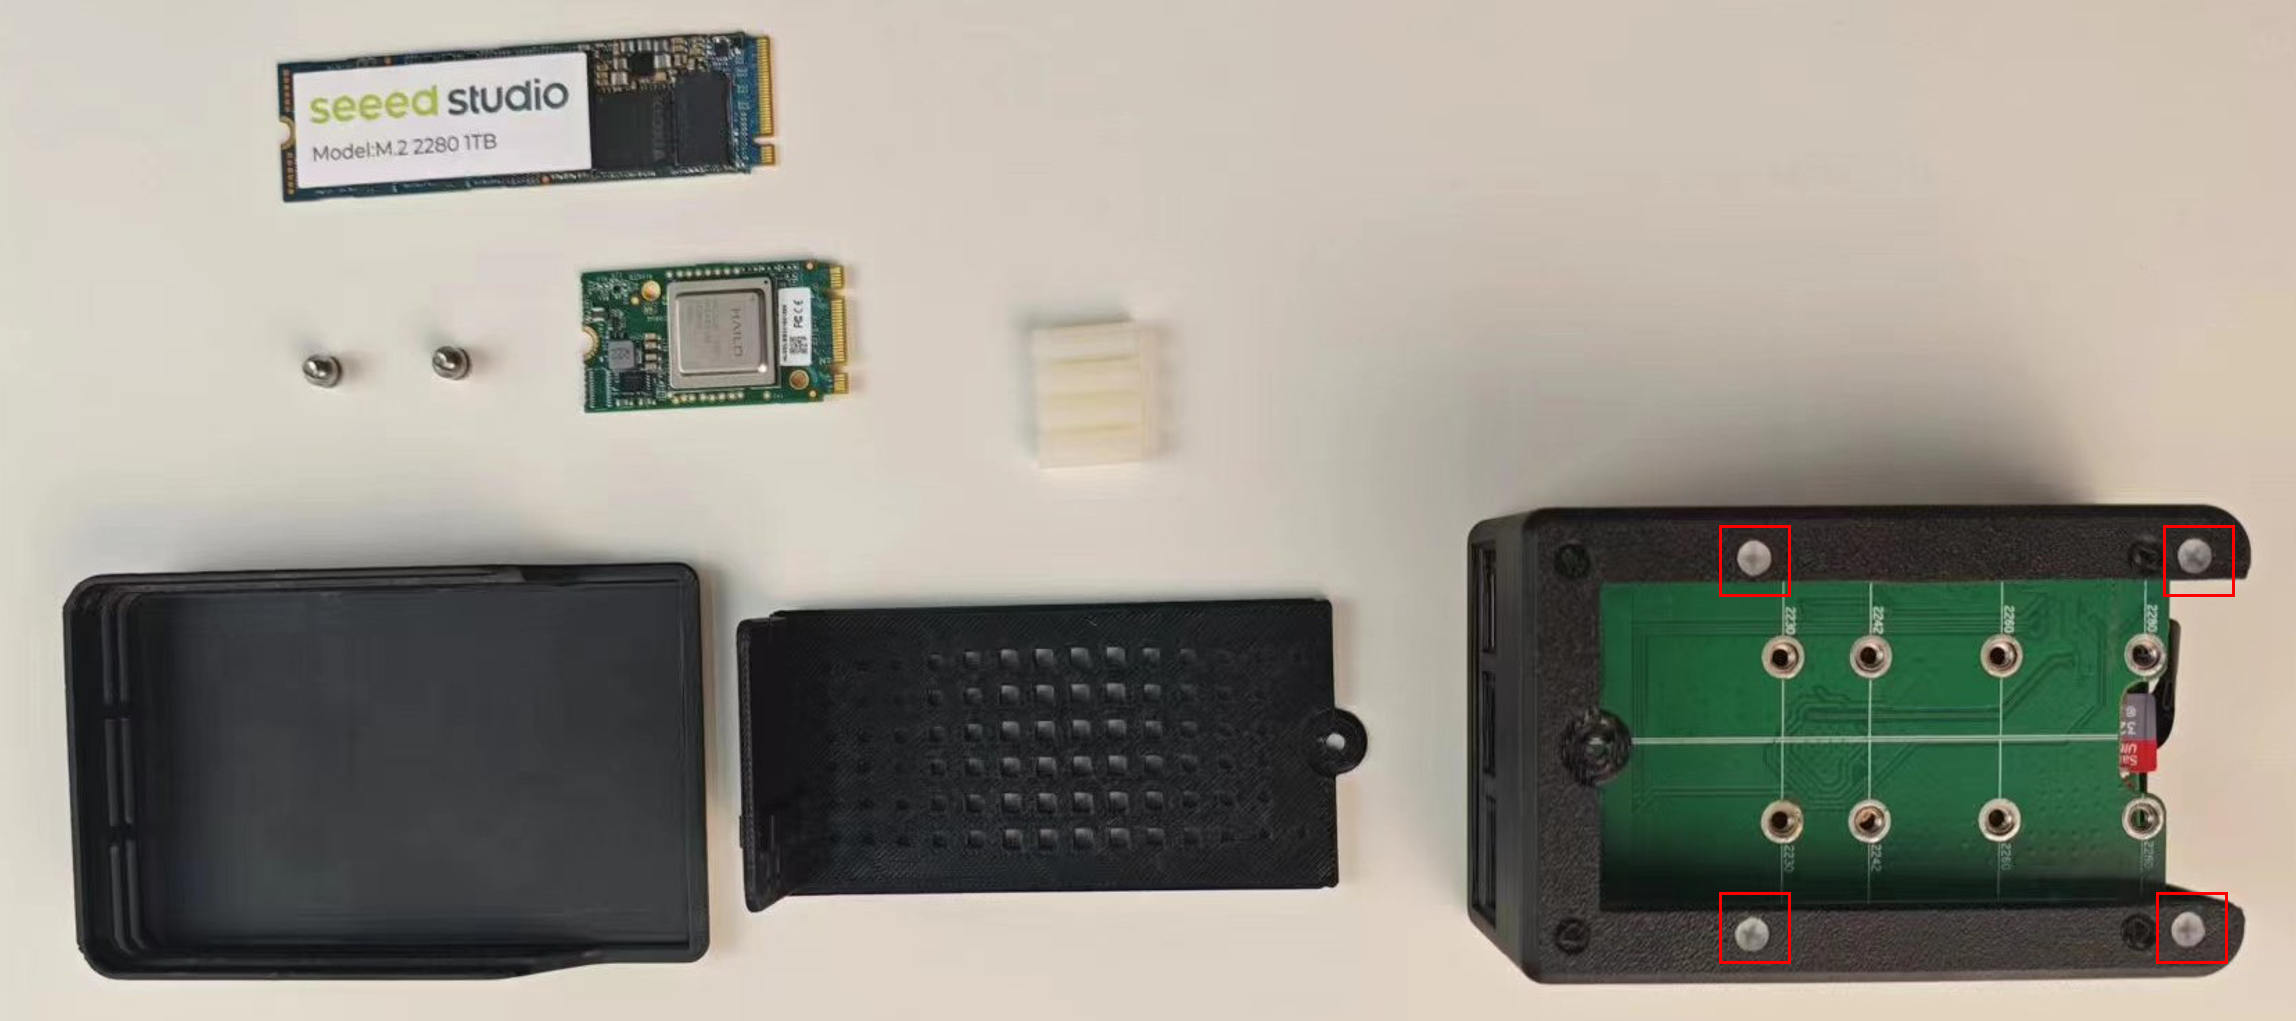
对于不带外壳的安装,你需要准备以下材料:
- ① Raspberry Pi 5
- ② M.2 Hat/dual Hat
- ③ SSD/AI Kit PCIe 设备
- ④ PCIe 设备固定螺丝
- ⑤ M.2 Hat 与 Raspberry Pi 之间的 PCIe 连接线
- ⑥ 螺母柱、长螺丝和螺母
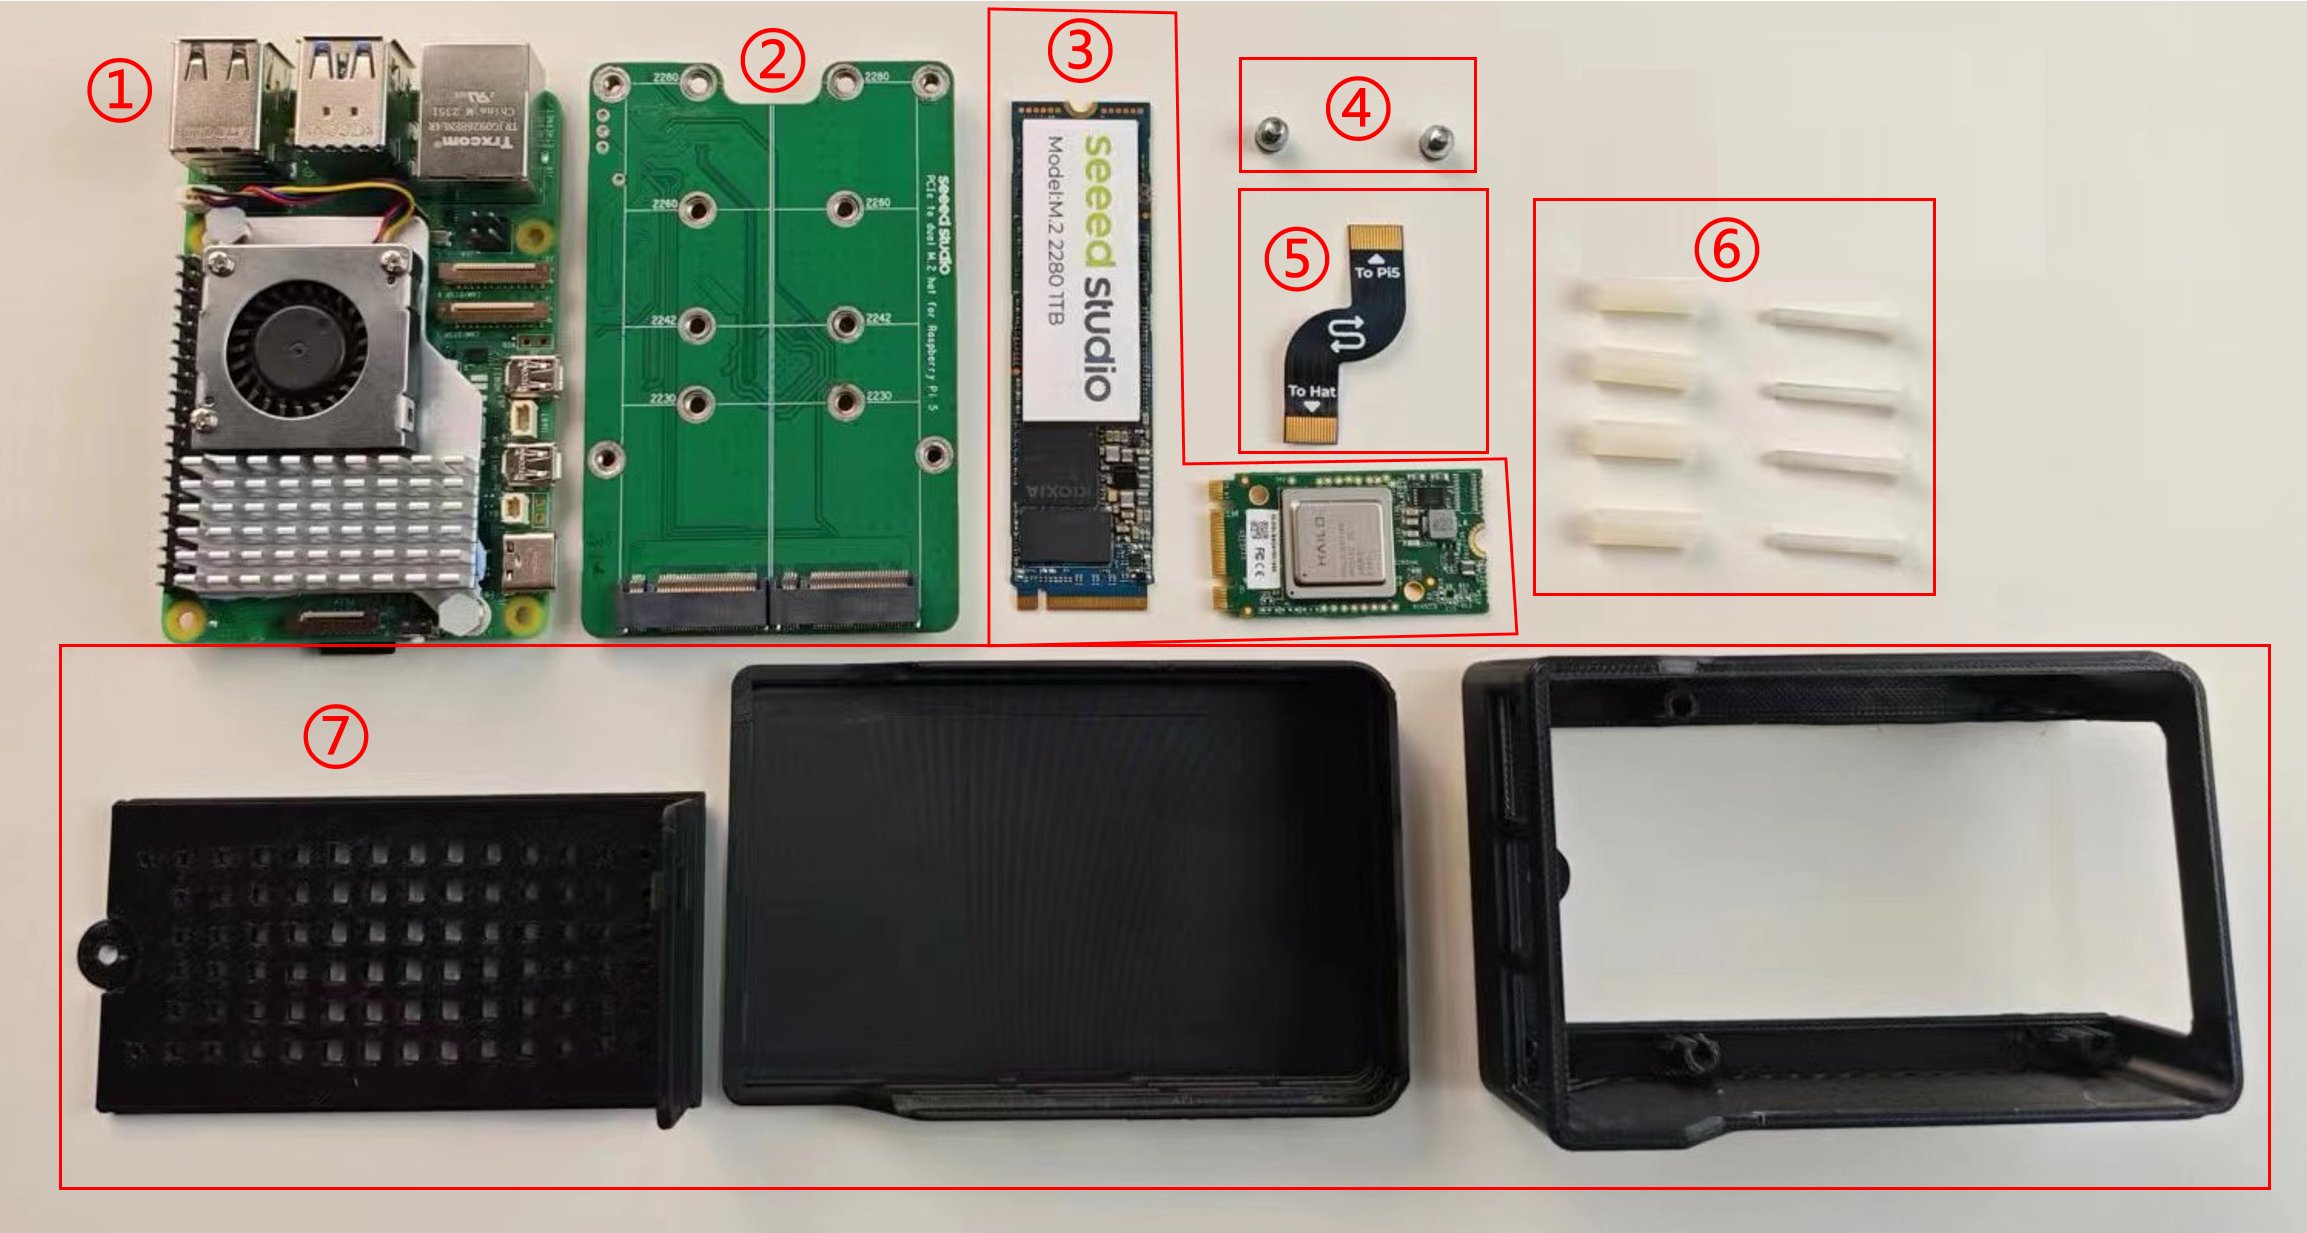
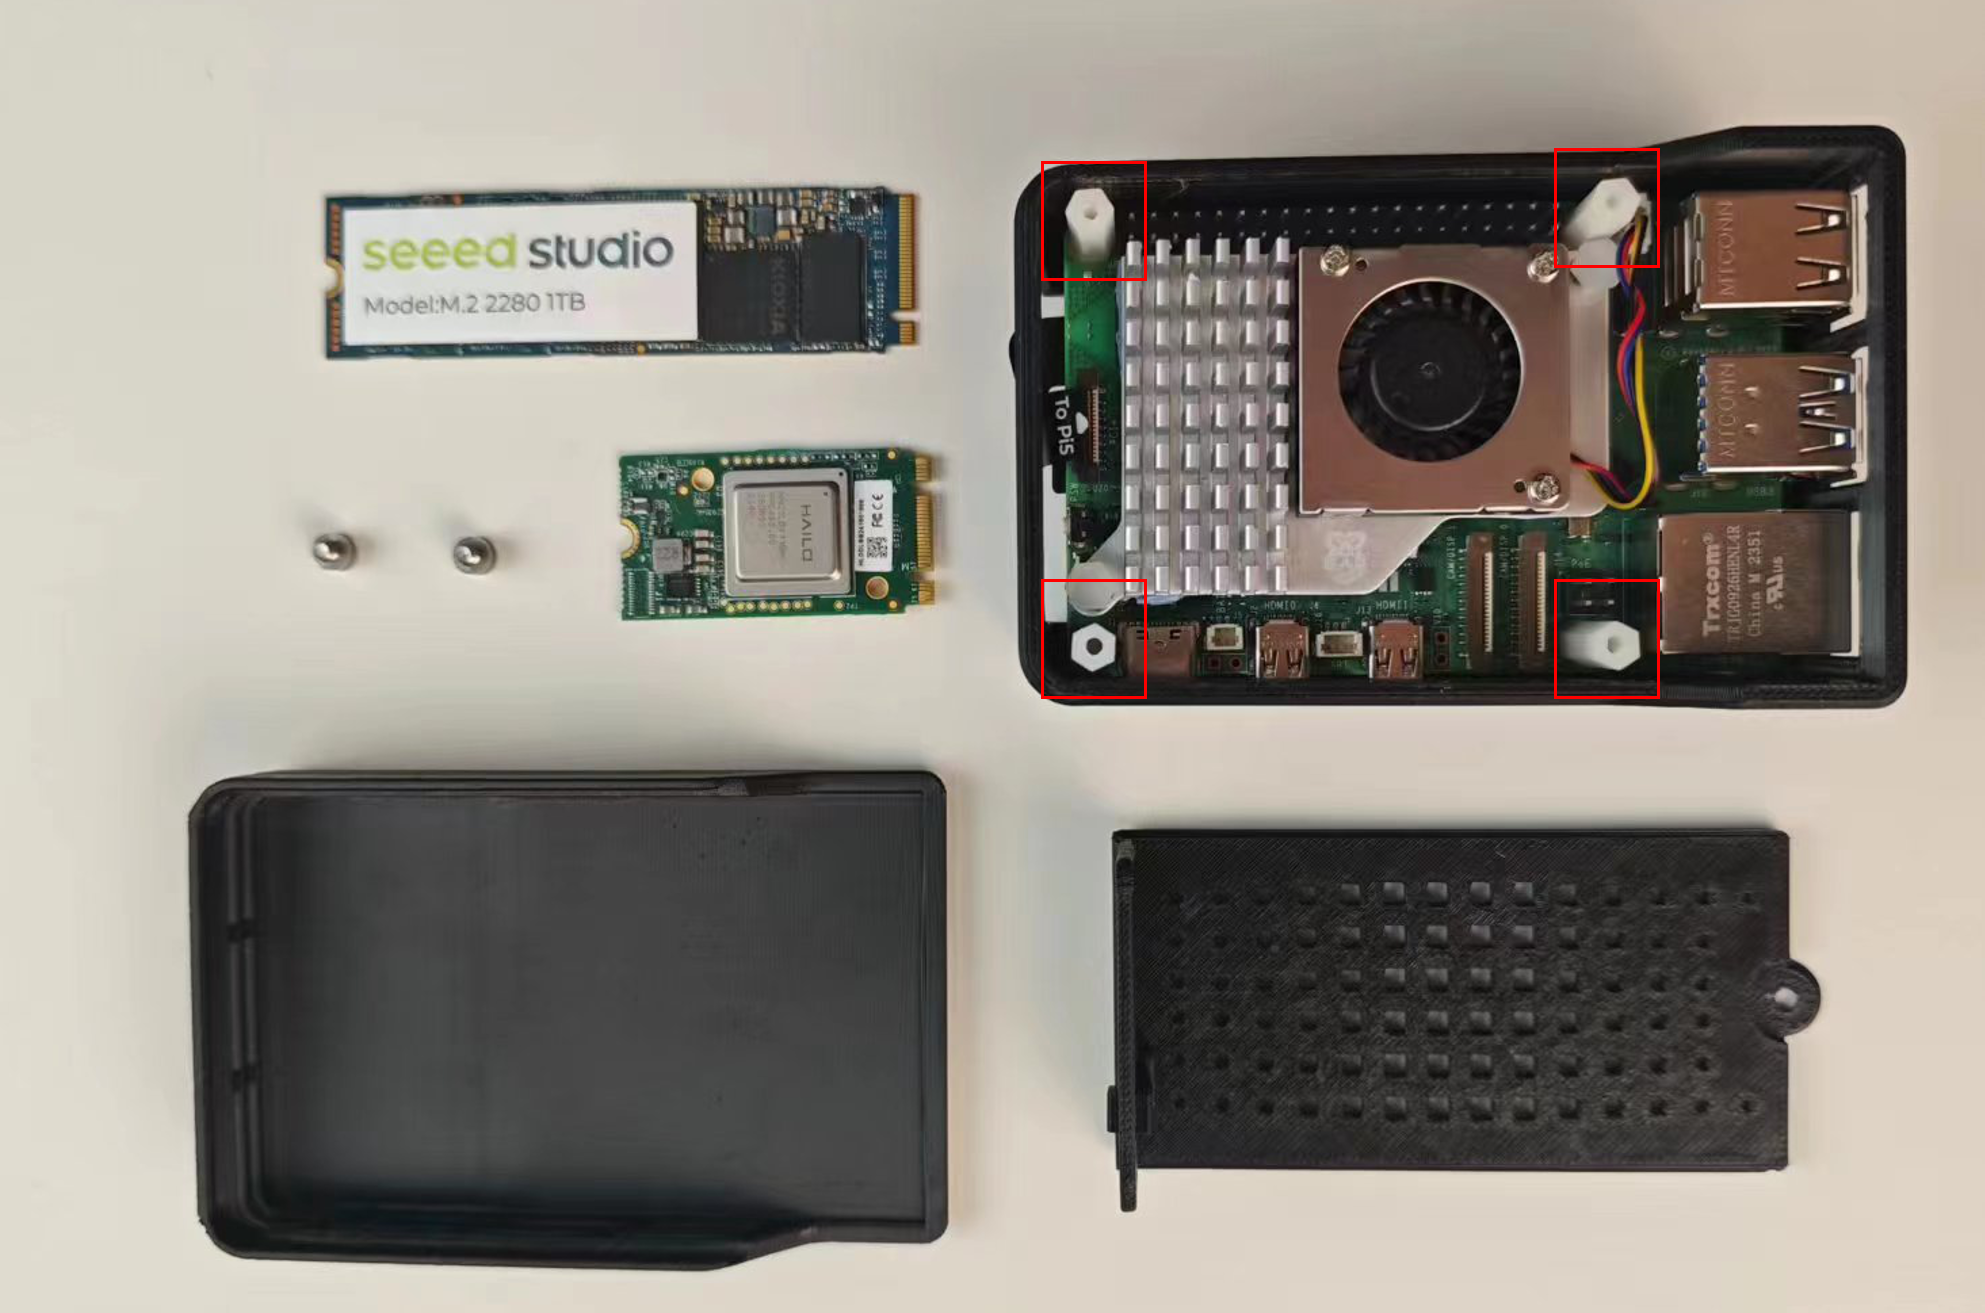
对于带外壳的安装,你需要准备以下材料:
- ① Raspberry Pi 5
- ② M.2 Hat/dual Hat
- ③ SSD/AI Kit PCIe 设备
- ④ PCIe 设备固定螺丝
- ⑤ M.2 Hat 与 Raspberry Pi 之间的 PCIe 连接线
- ⑥ 长螺丝和螺母
- ⑦ 外壳
安装
注意: 这是一条注意事项。
Wipe pogo pin and GPIO pad with alcohol cotton, and then connect it before you using M.2 dual Hat on raspberrypi

- 无外壳安装
- 带外壳安装
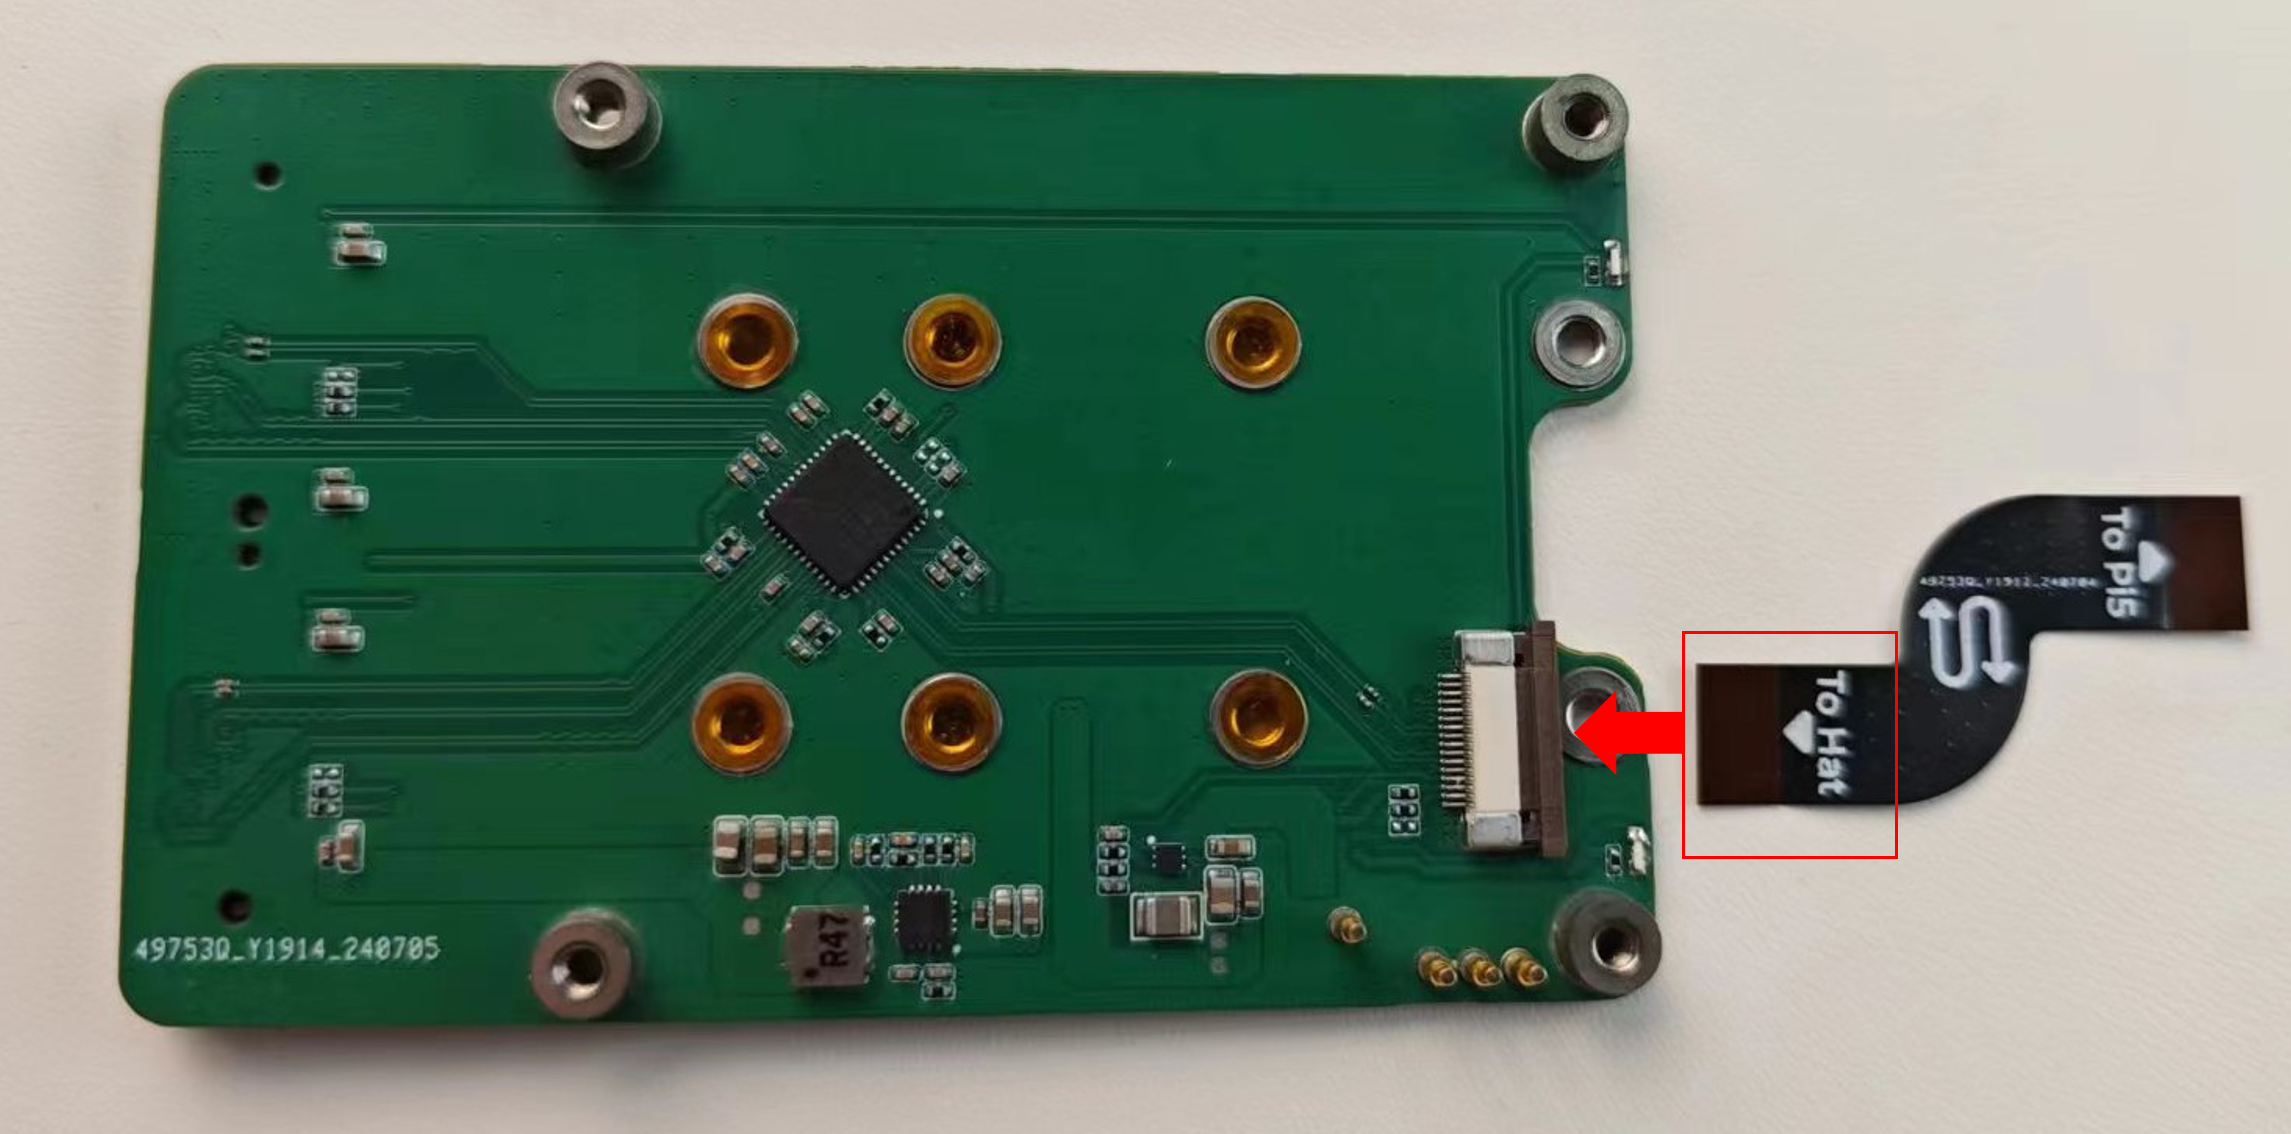
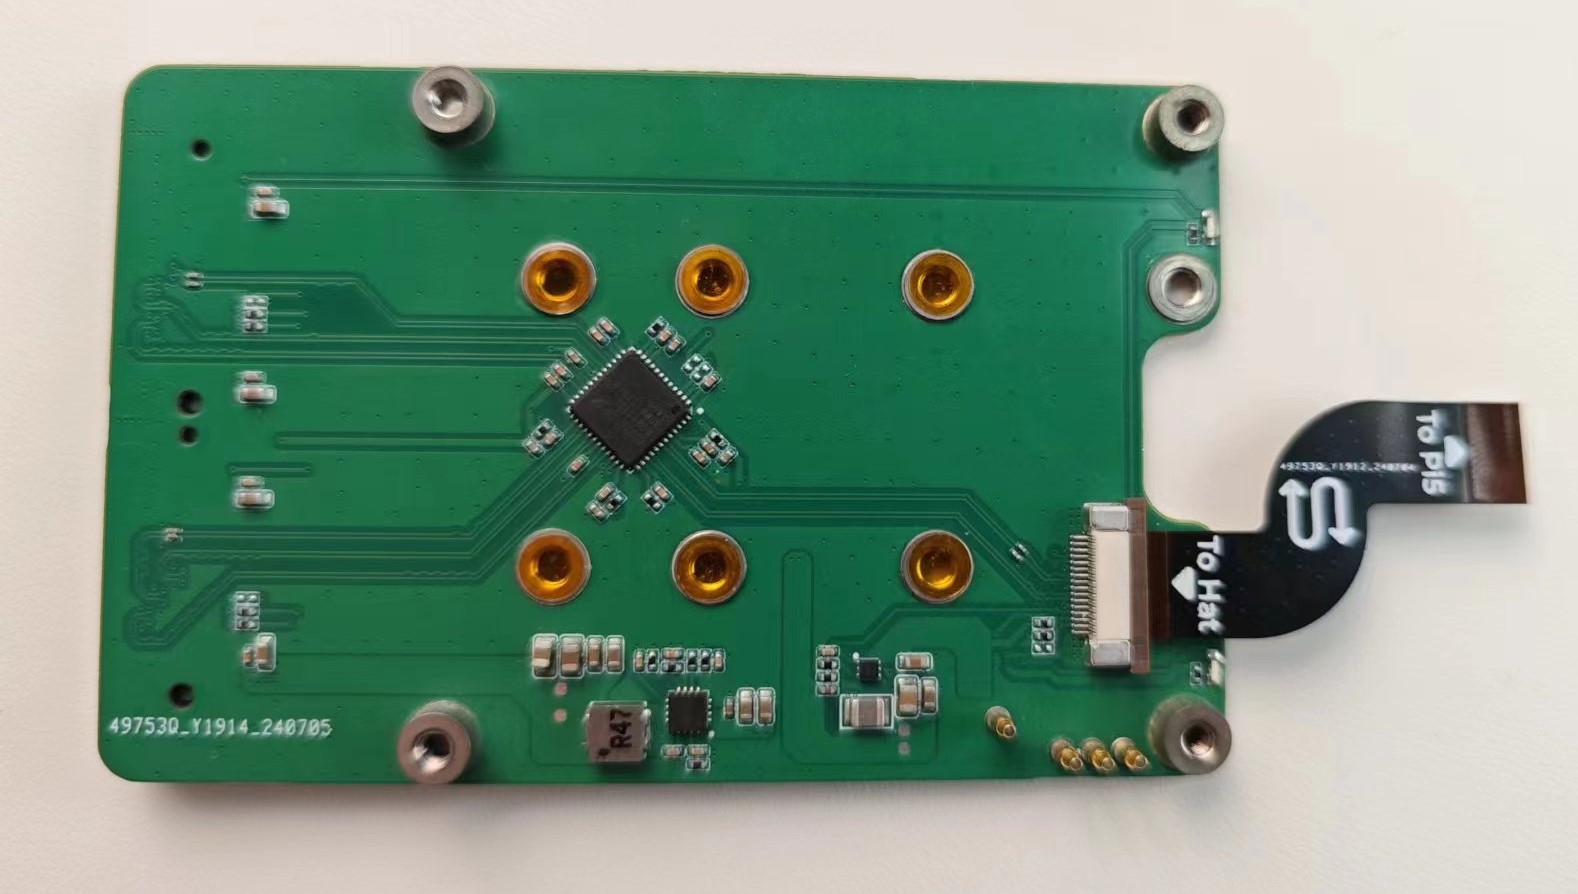
步骤 1:将 PCIe 连接线插入 M.2 Hat,注意连接线的插入方向。将金属面朝下插入 M.2 Hat 的 PCIe 接口,插入完成后如下图所示:
步骤 2:将 PCIe 连接线插入 Raspberry Pi 5。
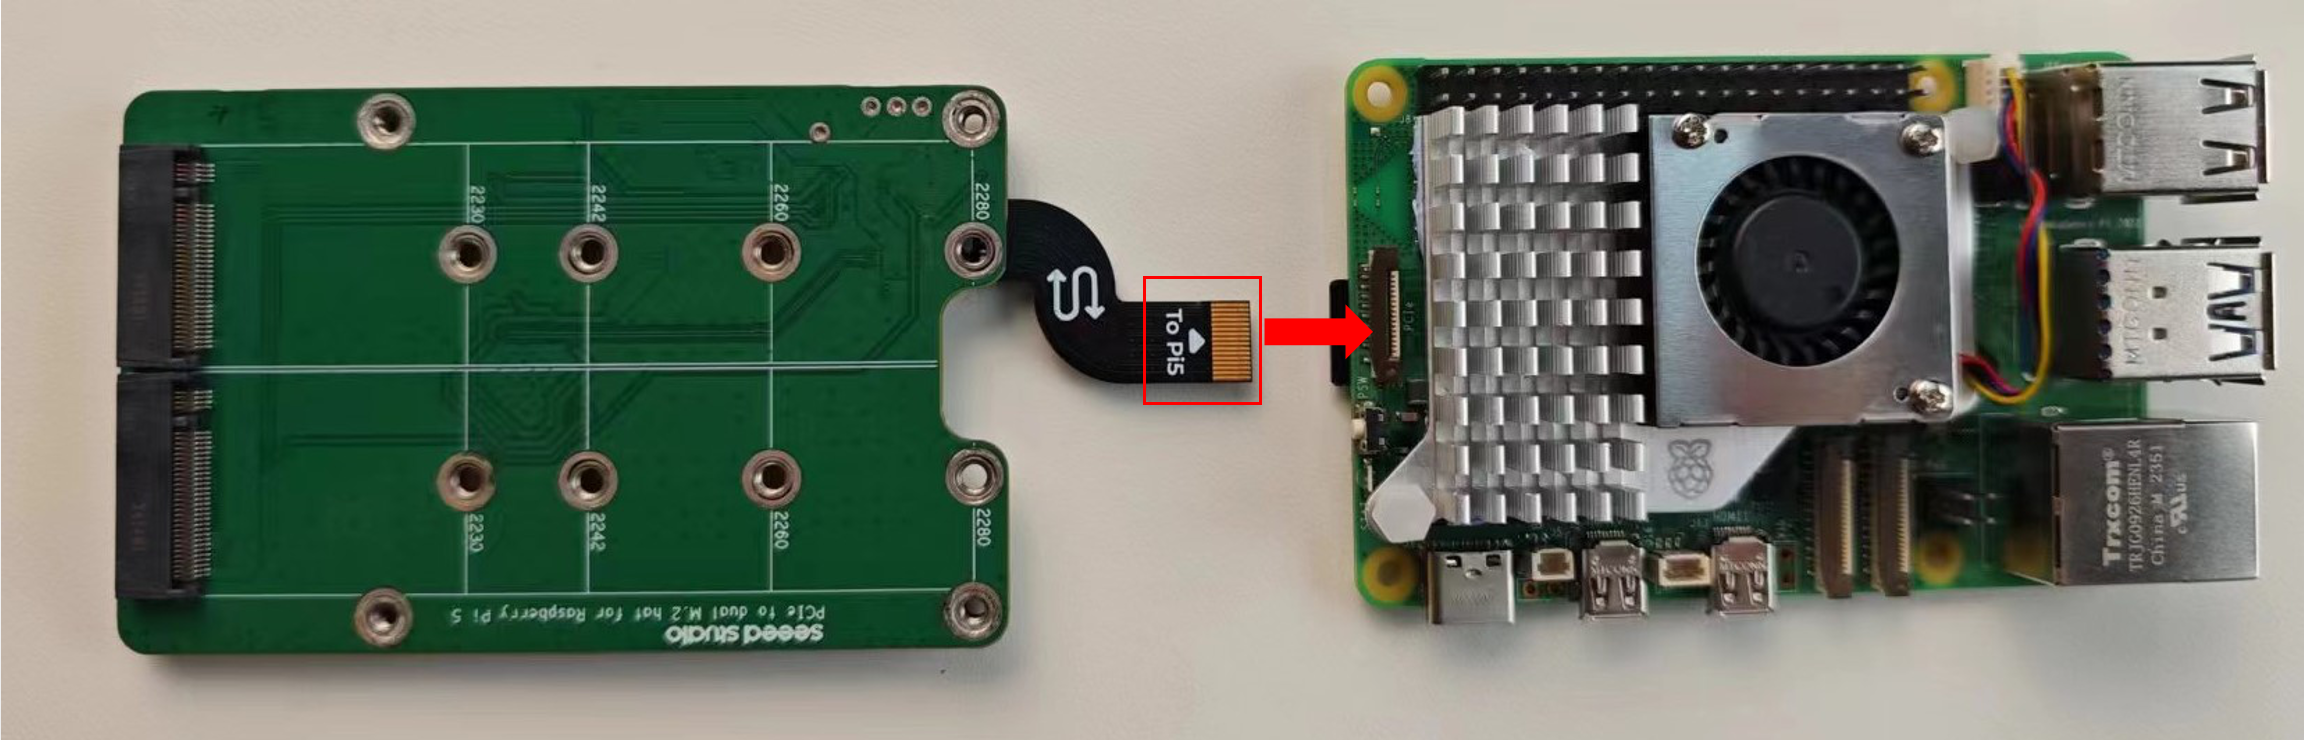
请注意连接线的插入方向。将金属面朝上插入 Raspberry Pi 5 的 PCIe 接口,插入完成后如下图所示:
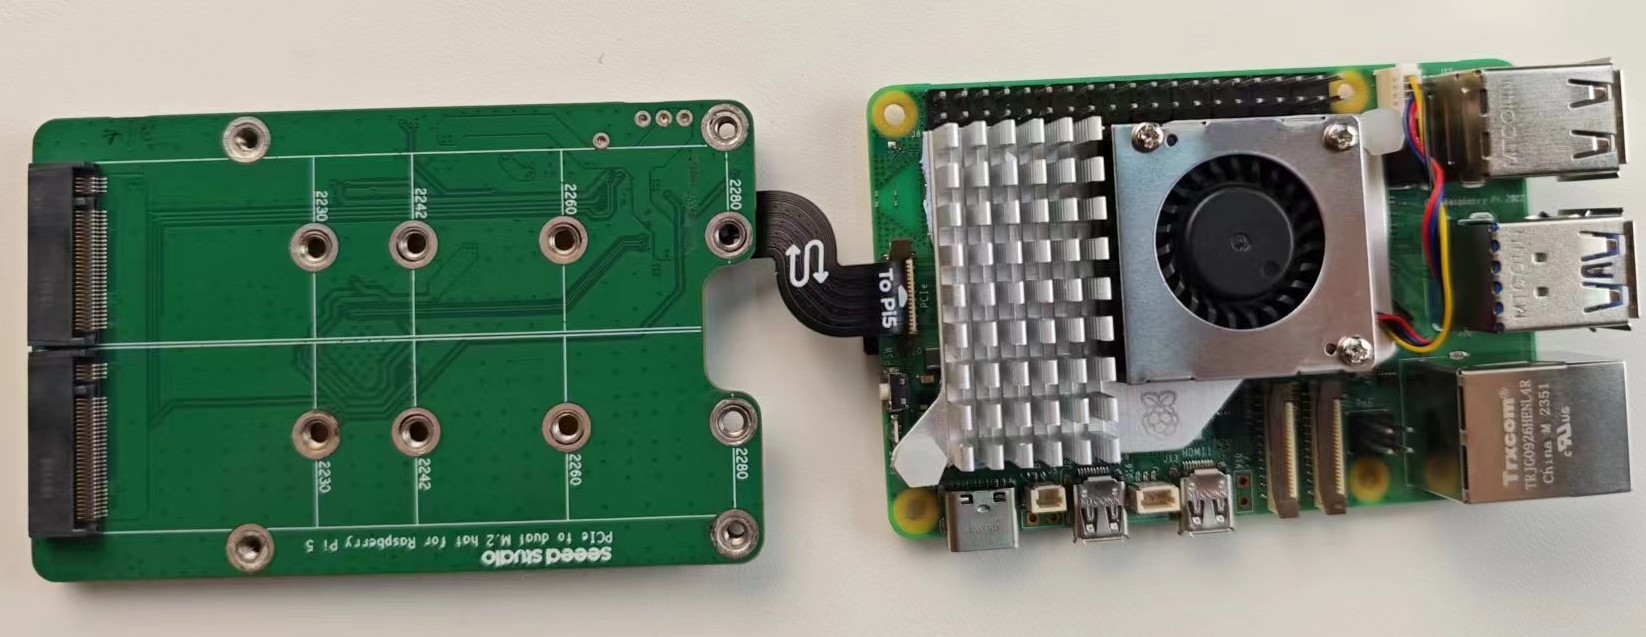
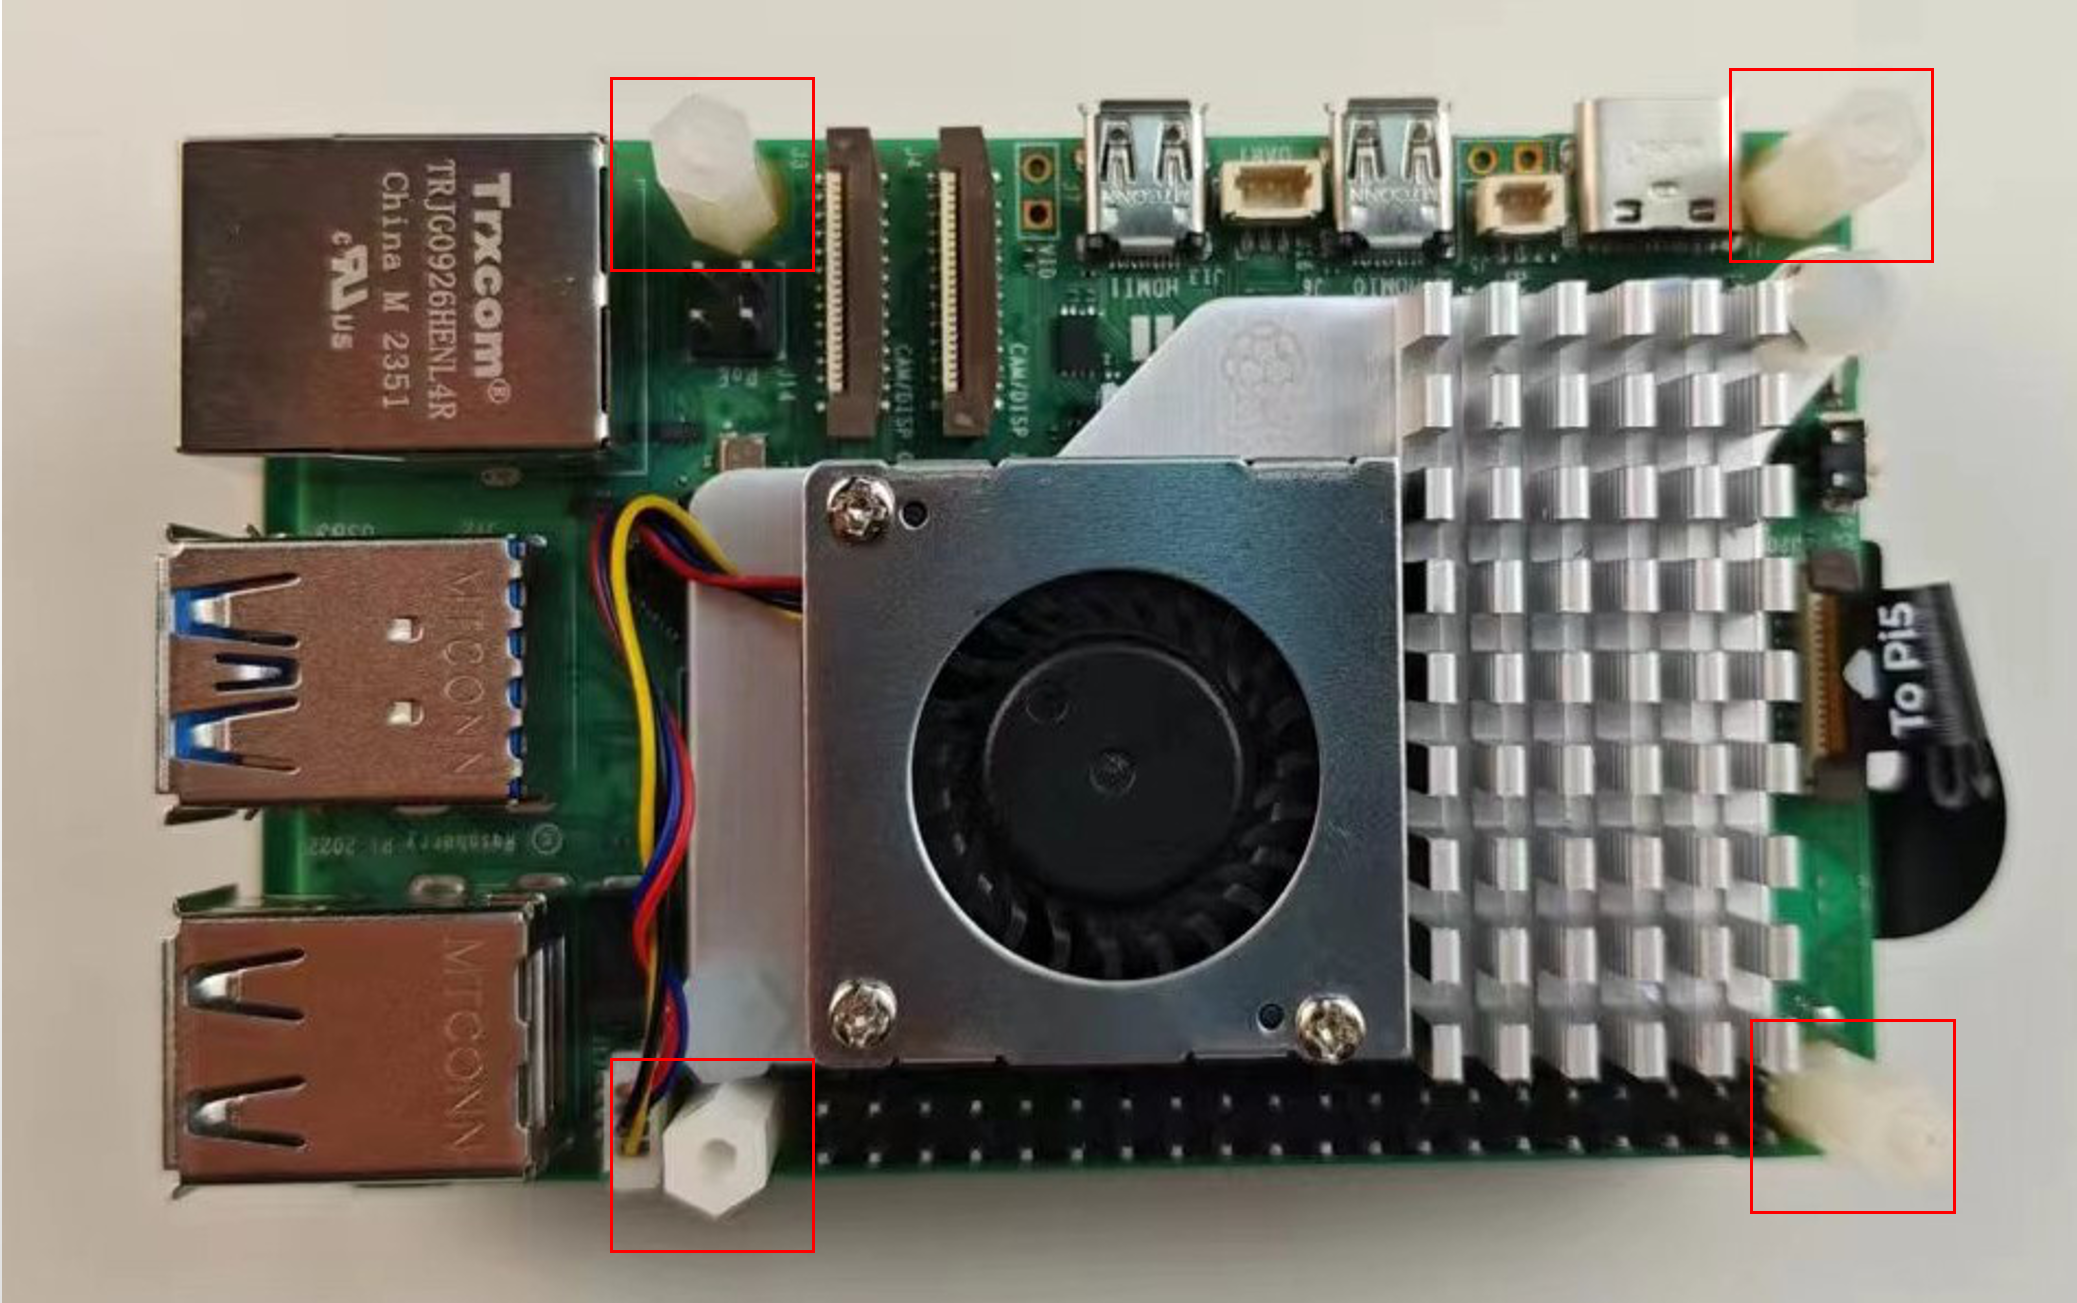
步骤 3:将 Raspberry Pi 5 与 M.2 Hat 叠放在一起,并将螺母柱插入螺丝中。
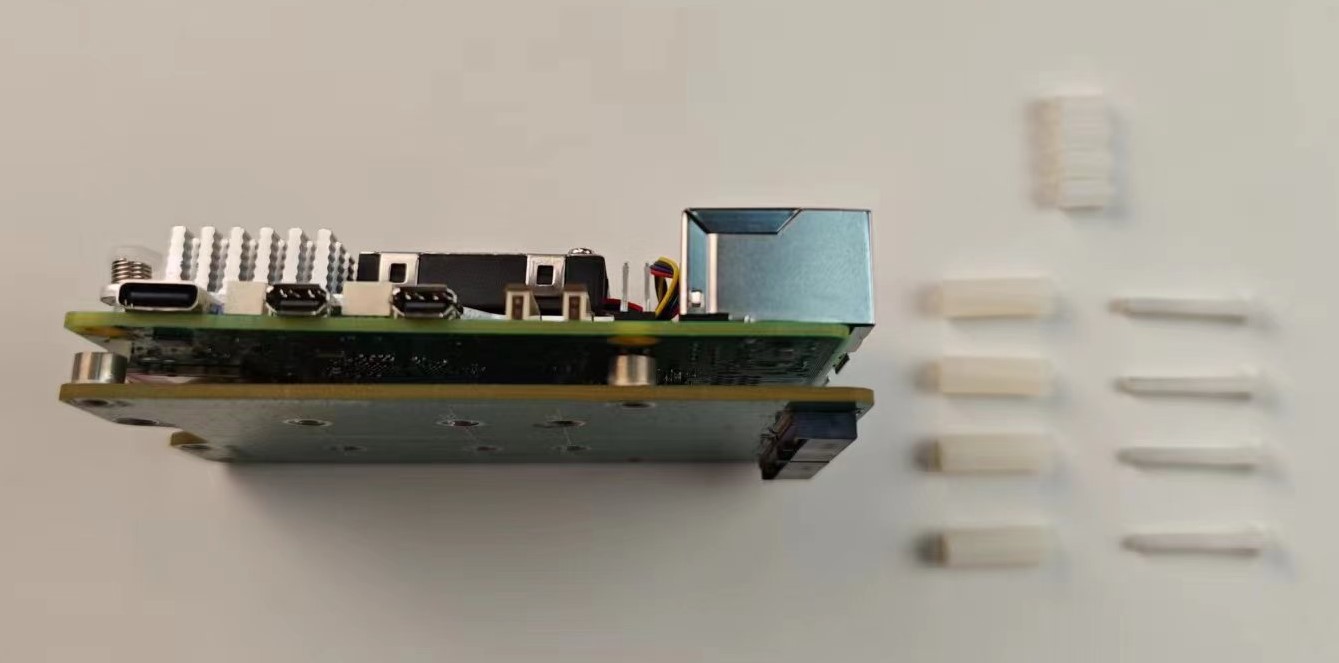
然后将螺丝插入 Raspberry Pi 5 和 M.2 Hat 的螺丝孔中,如图所示:
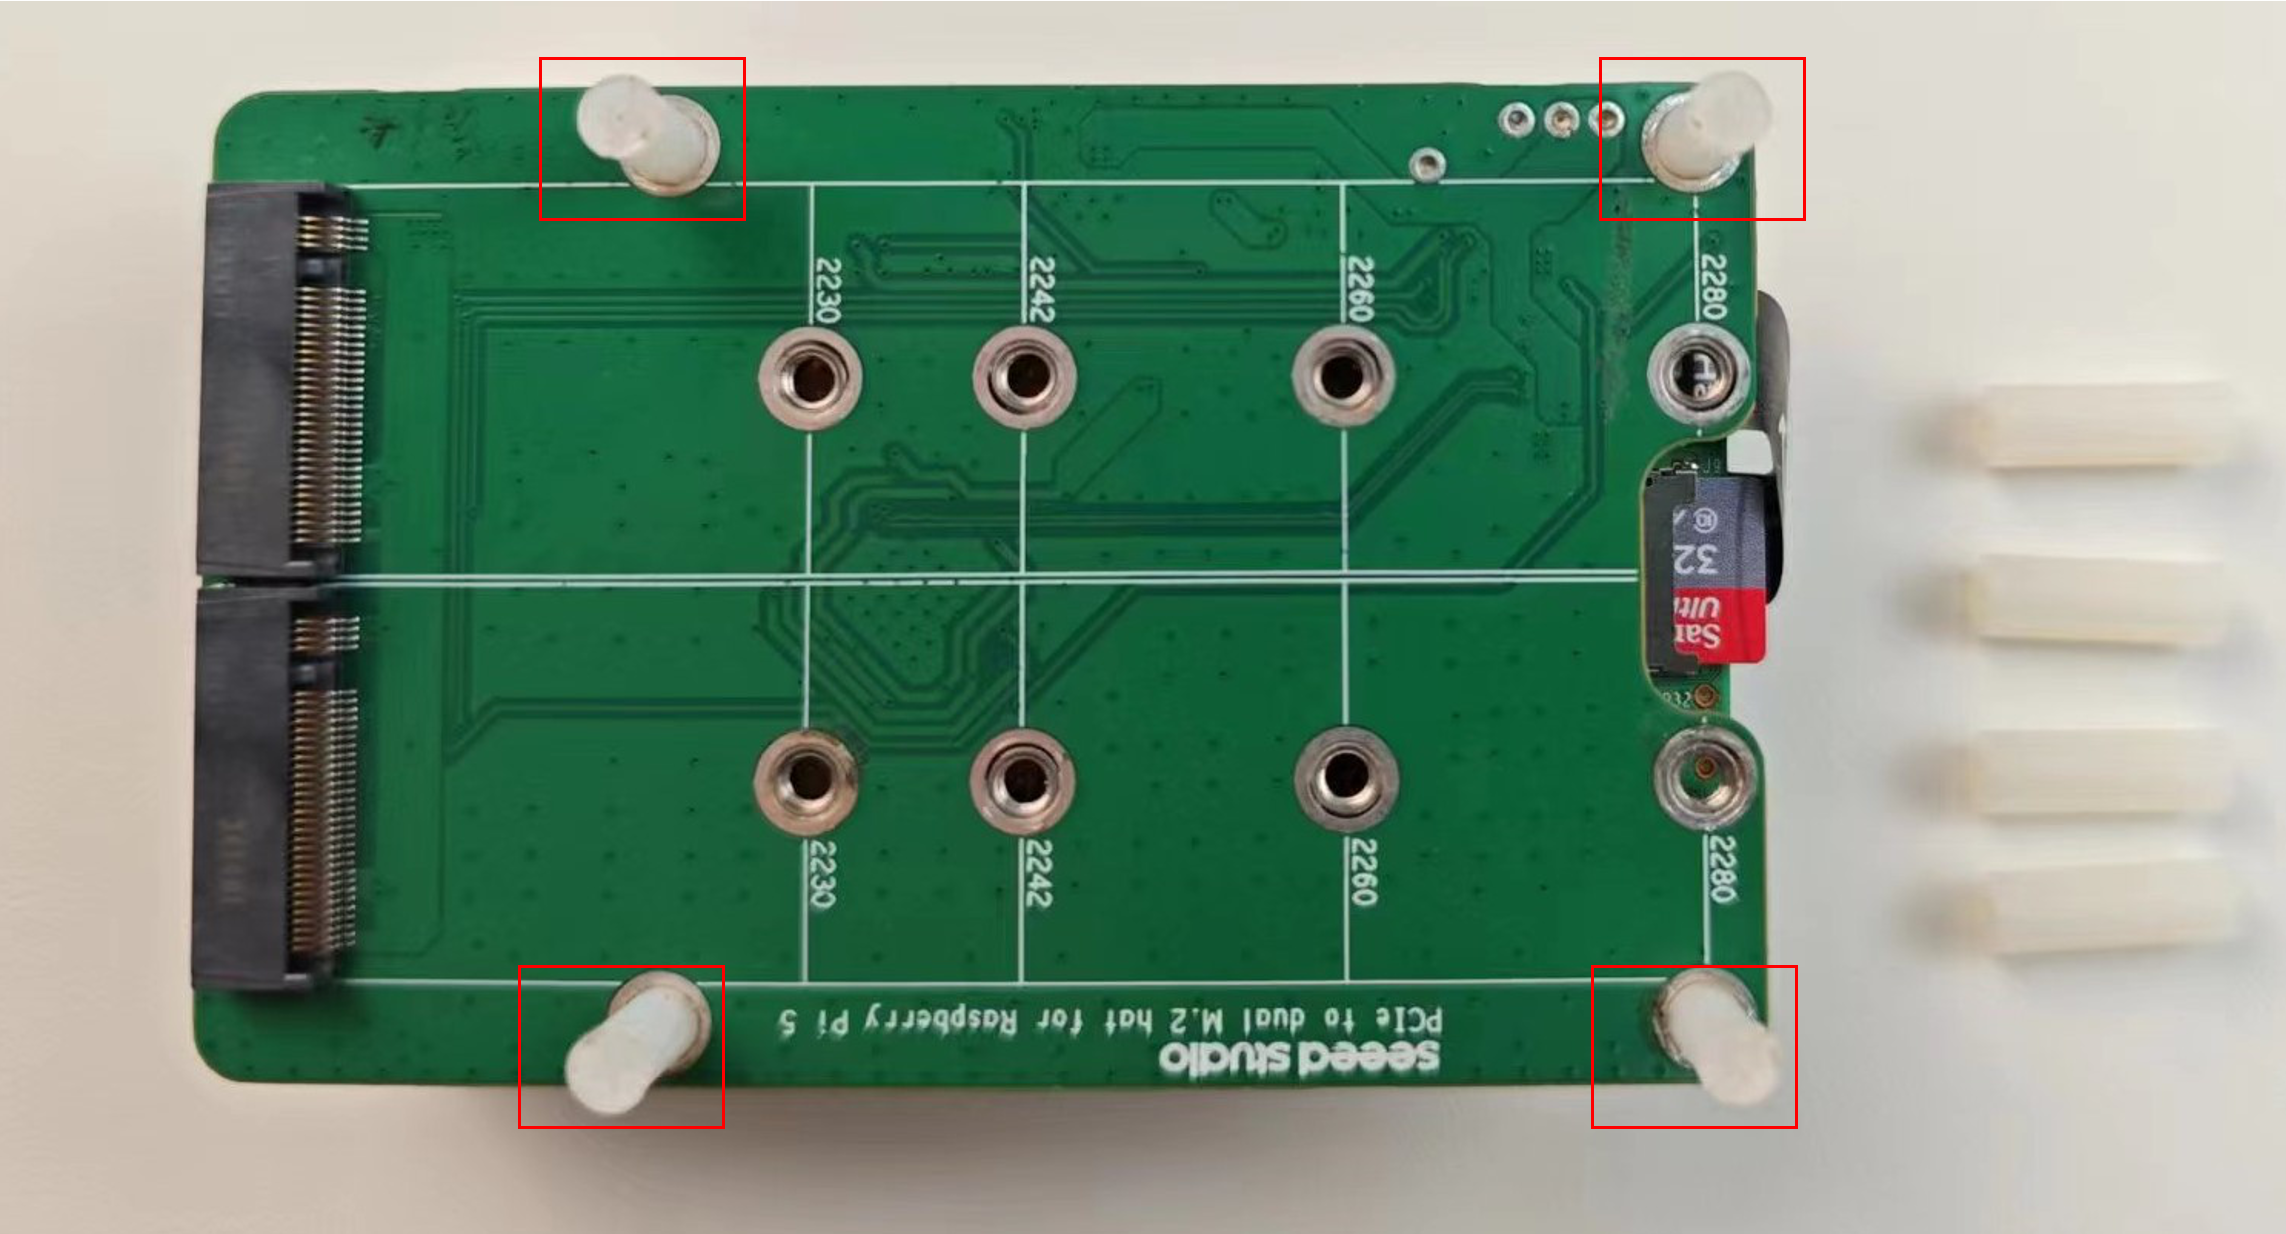
步骤 4:将螺柱拧入螺丝中,并将螺丝固定在电路板上,如图所示:
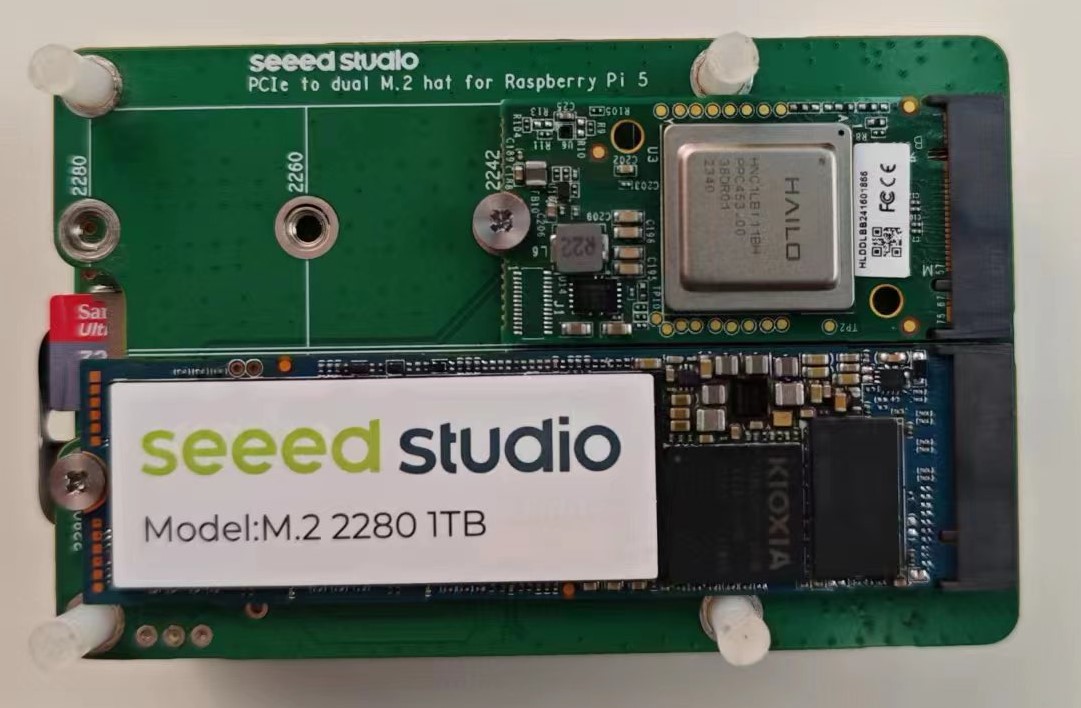
步骤 5:将 SSD 和 AI Kit 插入 M.2 dual Hat

然后插入固定螺丝,将 SSD 和 AI Kit 固定在 M.2 Hat 中,如图所示:
步骤 1:将 PCIe 连接线插入 M.2 Hat。请注意连接线的插入方向,将金属面朝下插入 M.2 Hat 的 PCIe 接口,插入完成后如下图所示:
步骤 2:将 PCIe 连接线插入 Raspberry Pi 5。
请注意连接线的插入方向,将金属面朝上插入 Raspberry Pi 5 的 PCIe 接口,插入完成后如下图所示:
步骤 3:将 Raspberry Pi 5 和 M.2 Hat 叠放在一起,并准备好外壳、螺丝、螺母和 PCIe 设备
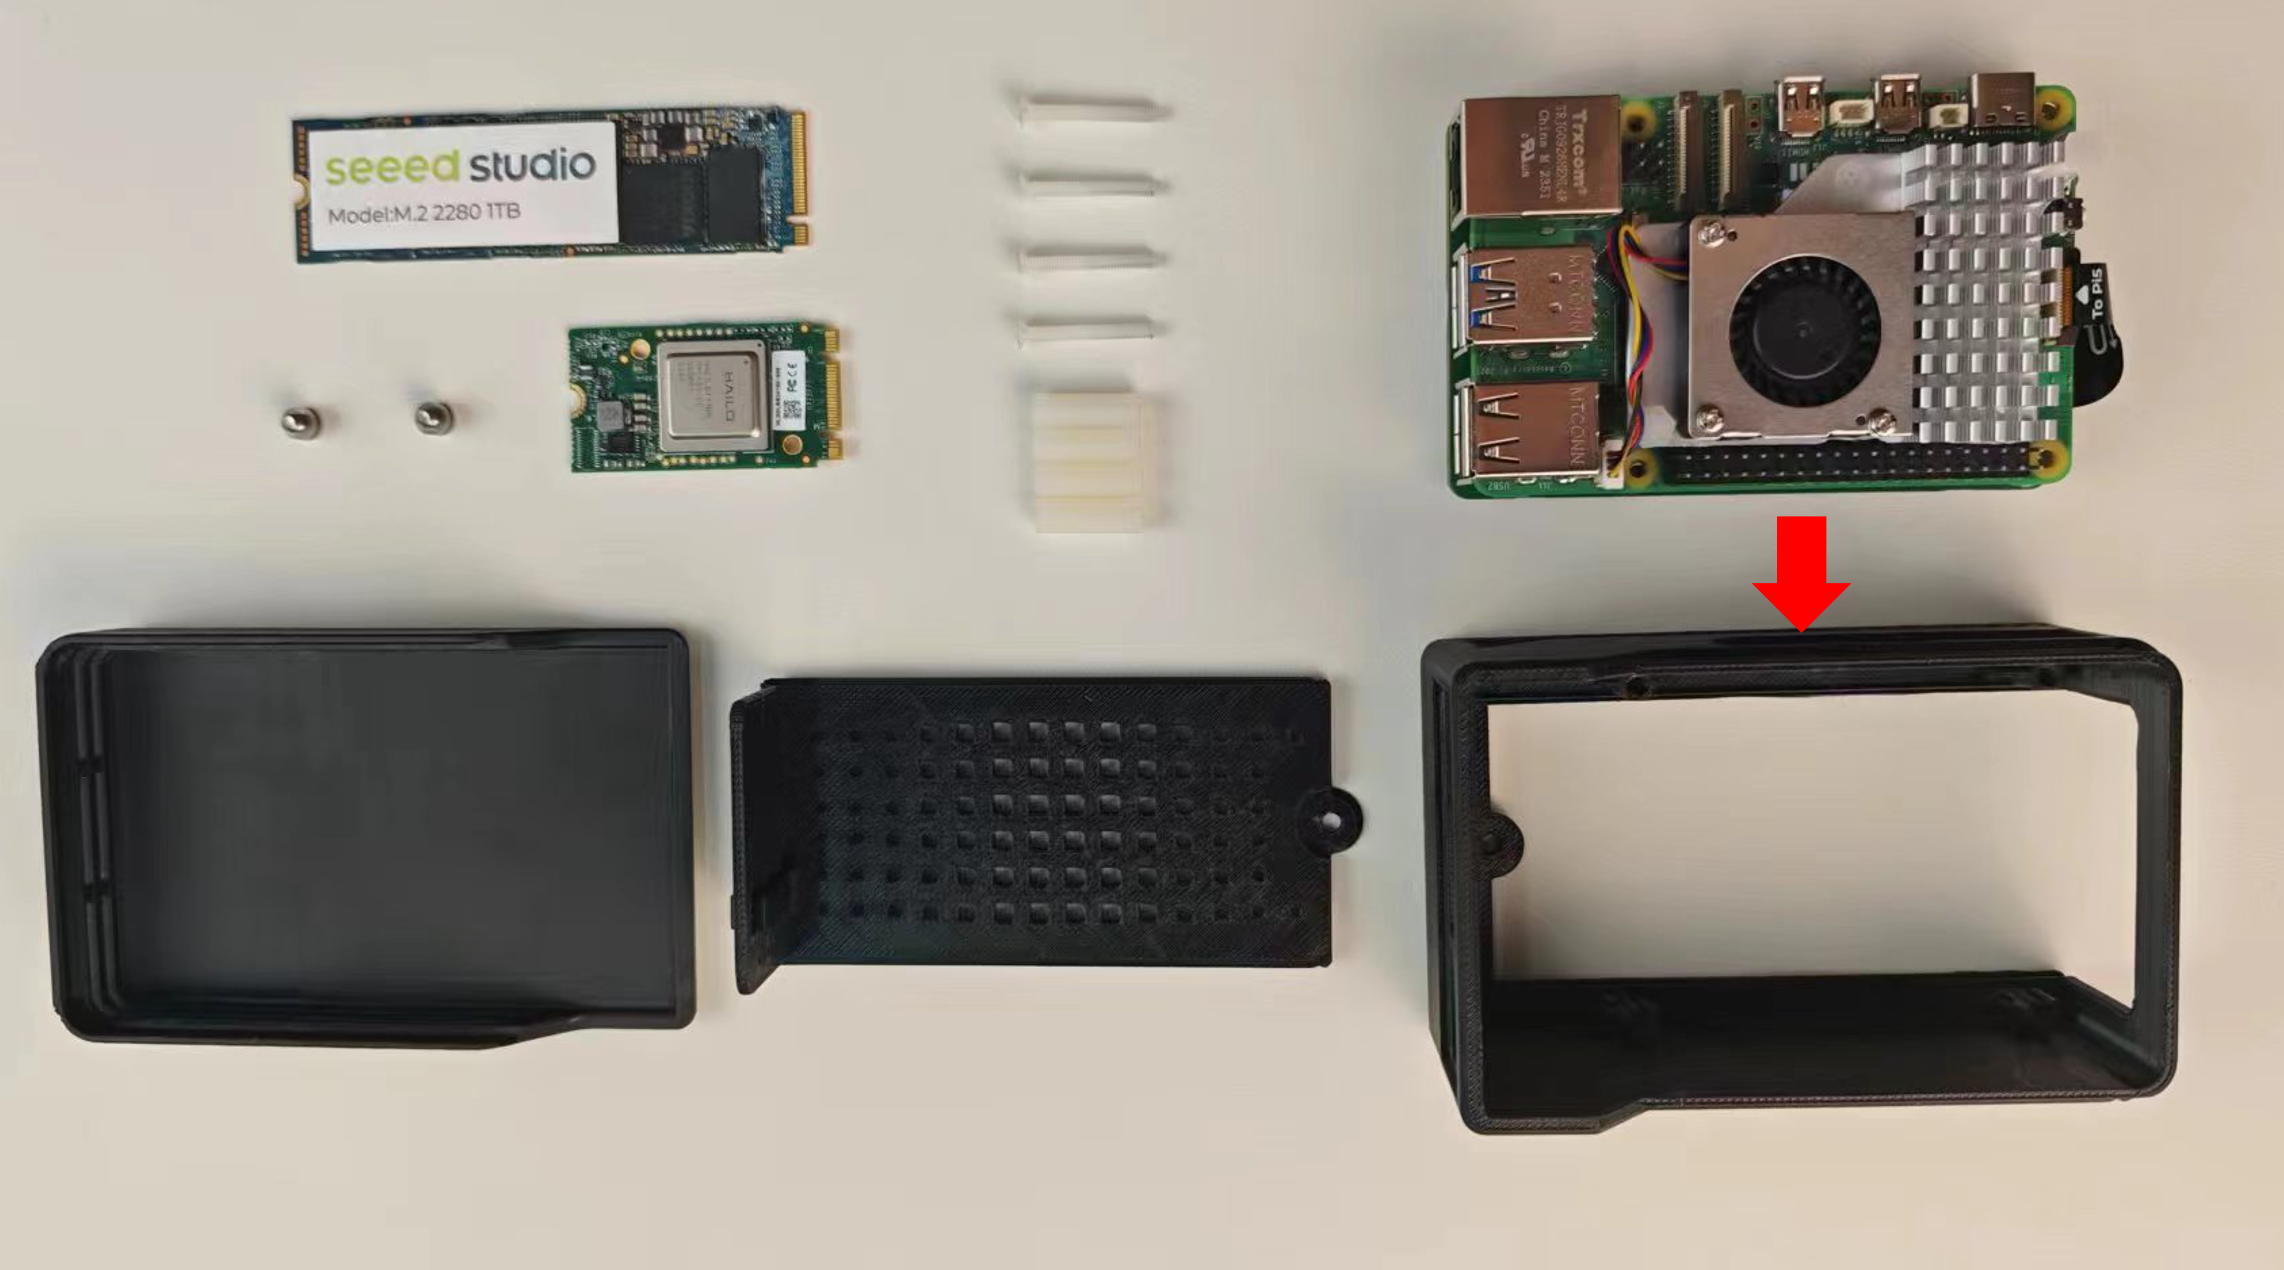
将叠放好的 M.2 Hat 和 Raspberry Pi 放入外壳中,Raspberry Pi 在上方,如图所示:
步骤 4:将螺丝拧入外壳中预留的螺丝孔。该孔会连接 M.2 Hat 和 Raspberry Pi,从而固定 M.2 Hat、Raspberry Pi 5 和外壳。
步骤 5:将螺柱拧入螺丝中,以固定 M.2 Hat、Raspberry Pi 5 和外壳
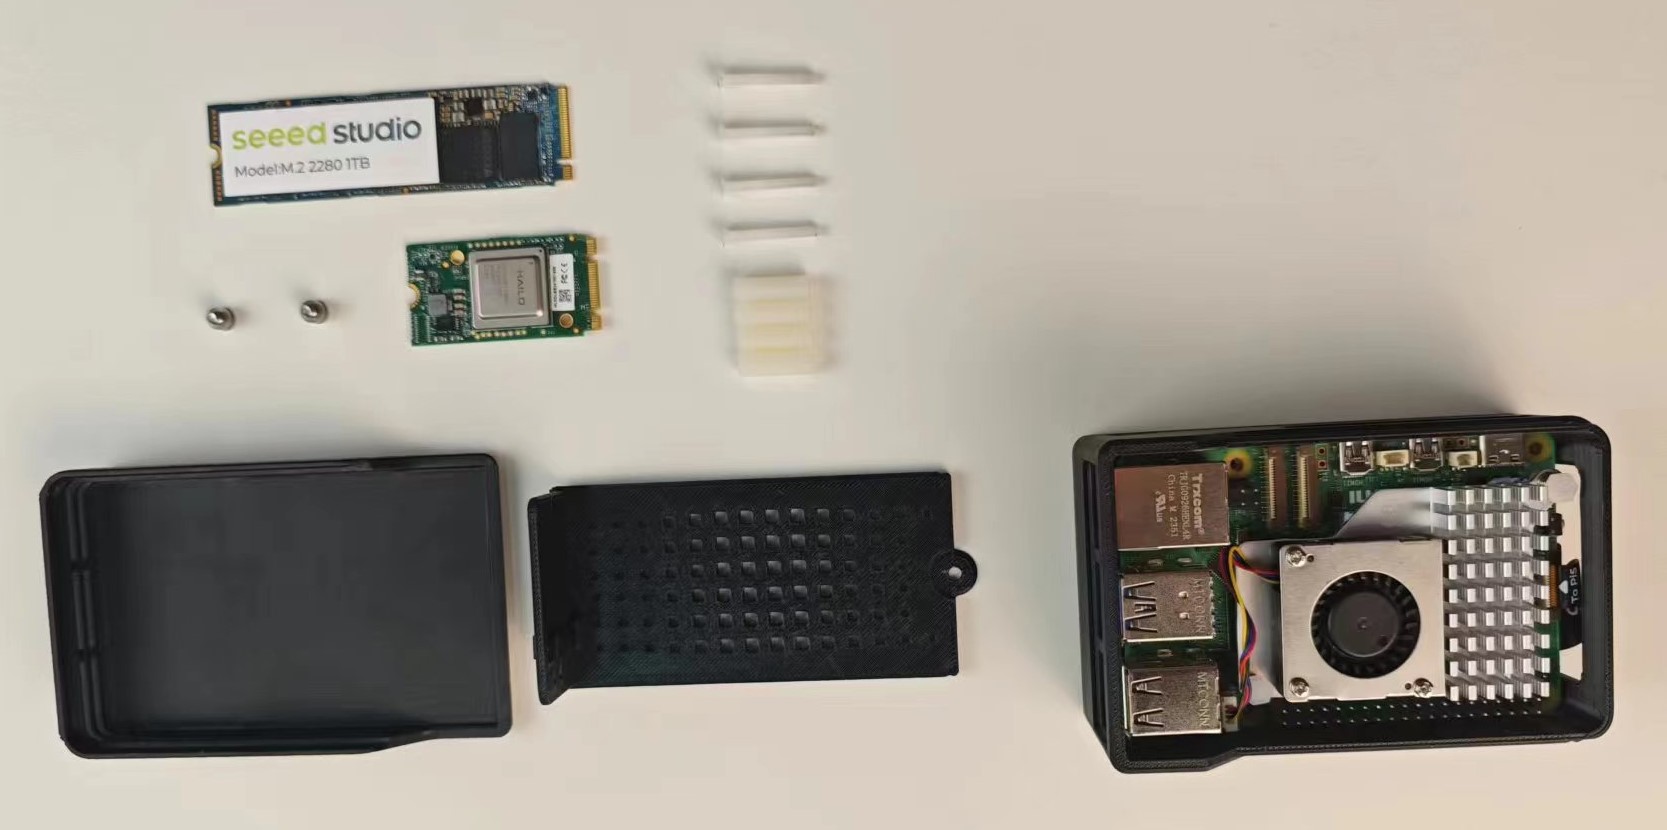
步骤 6:将 SSD 和 AI Kit 插入 M.2 Hat,如图所示:
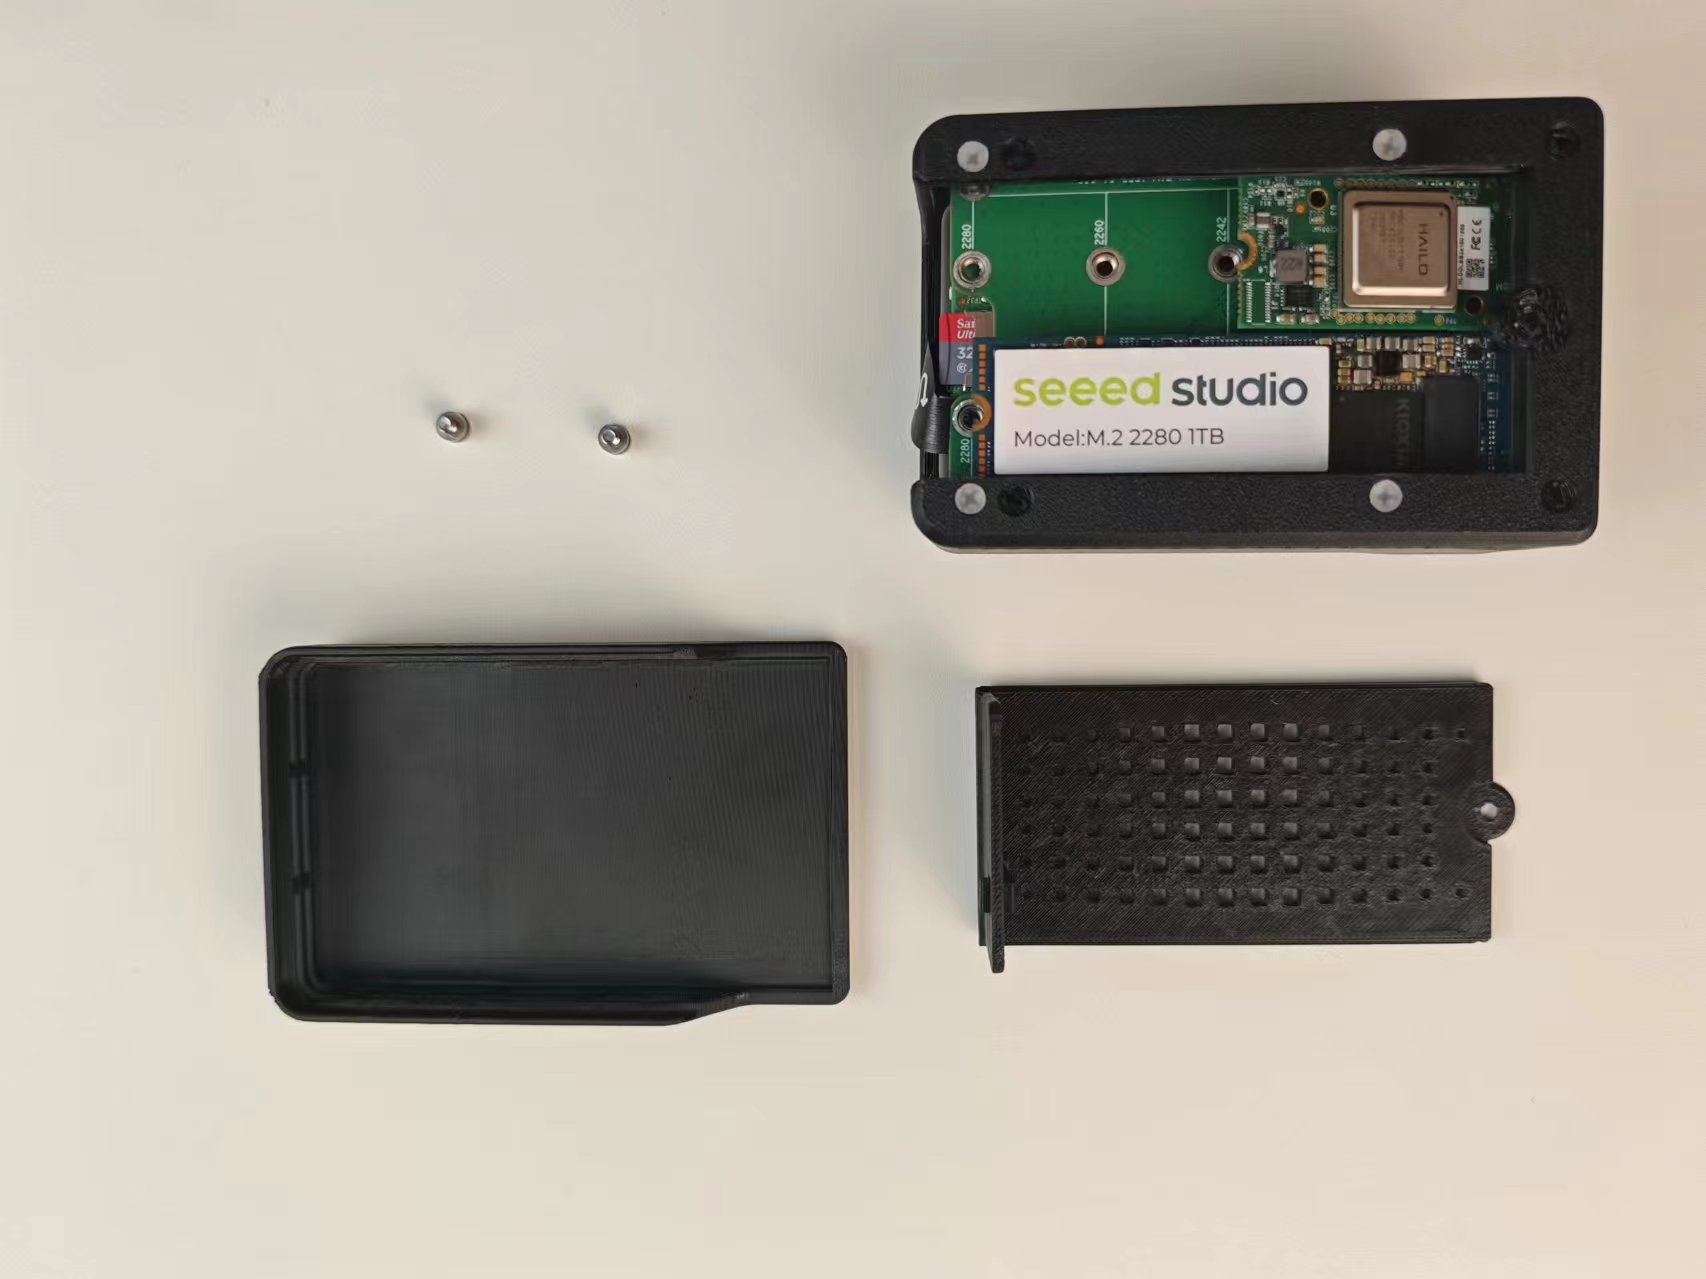
步骤 7:拧入固定螺丝,将 SSD 固定在 M.2 Hat 中
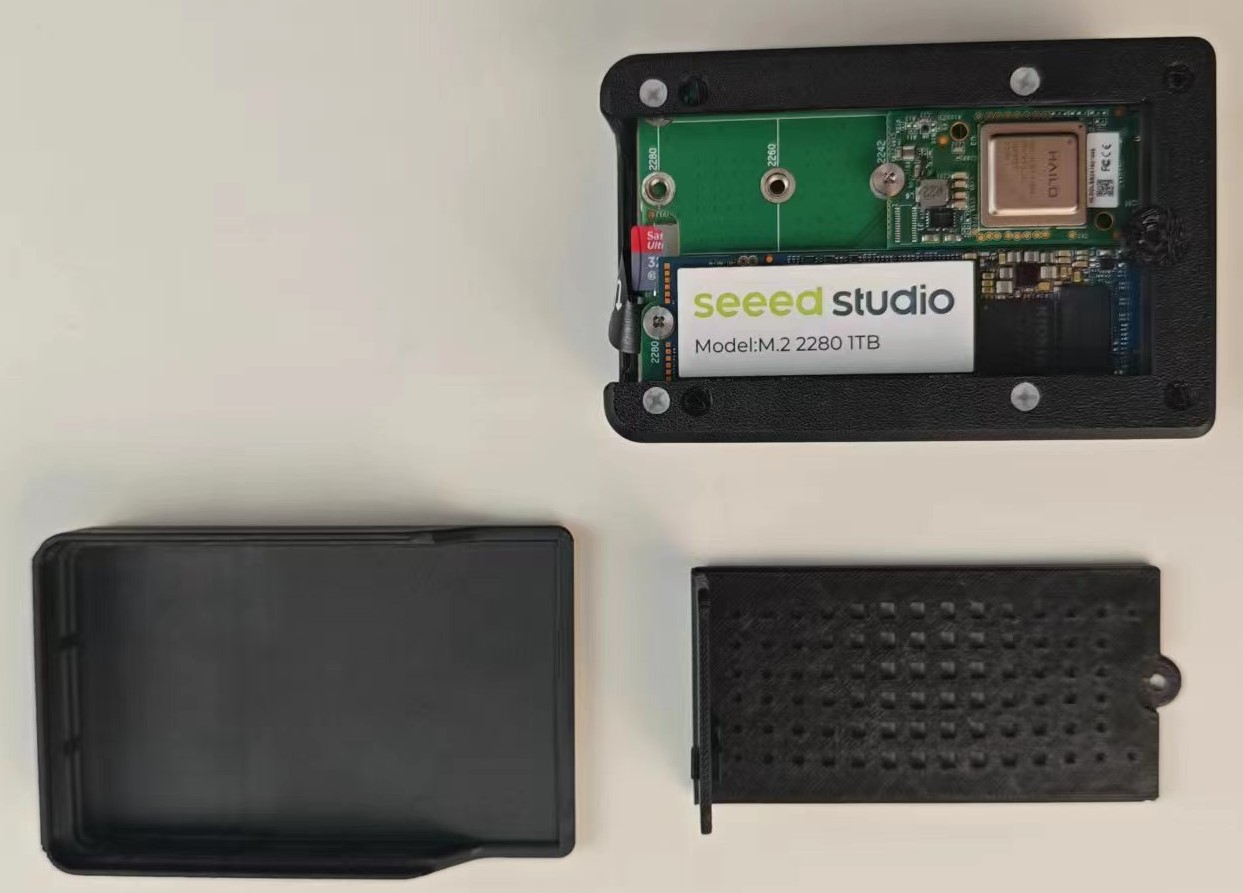
步骤 8:安装剩余的外壳

在 Raspberry Pi OS 上使用 SD Card Copier 工具将系统刷写到 NVME SSD
如果你有一张 SD 卡并已成功启动设备,则可以使用此方法。请确保你的系统是最新的 Raspberry Pi 系统(Bookworm 或更高版本),并且 RPi 5 固件已更新到 2023-12-06(12 月 6 日)或更新版本,否则可能无法识别与 NVME 相关的配置。
步骤 1:确保你的 Raspberry Pi 系统是最新的(Bookworm 或更高版本),输入以下命令更新 RPi 5 固件:
  sudo apt update && sudo apt upgrade -y
  sudo rpi-eeprom-update  # If it is not post-December 2023 type the following into a terminal to start the configuration tool
  sudo raspi-config
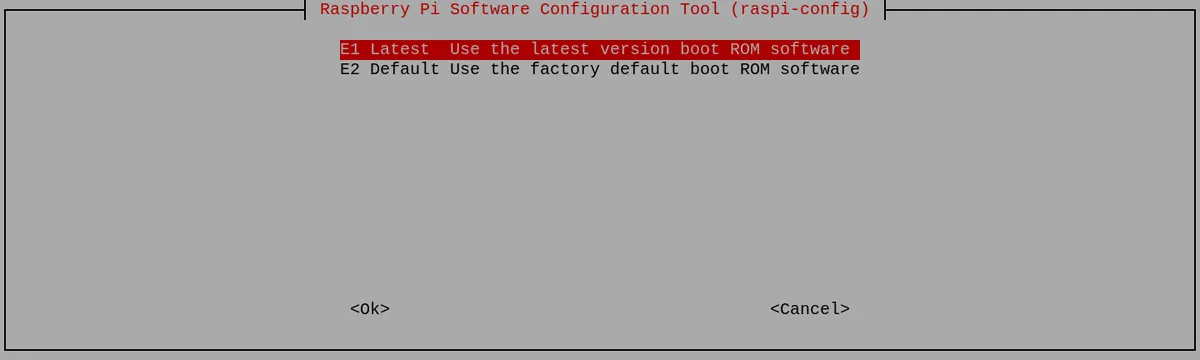
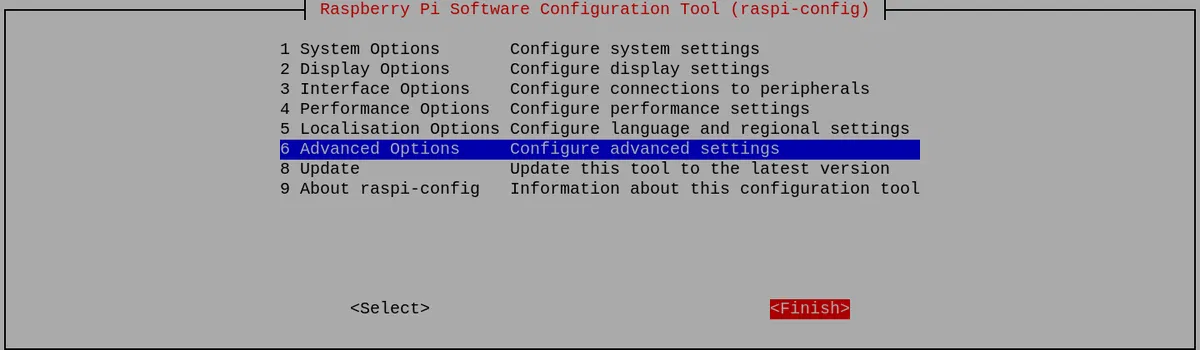
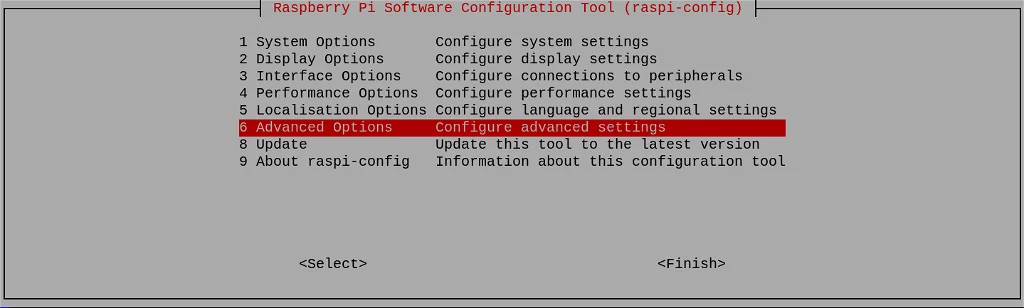
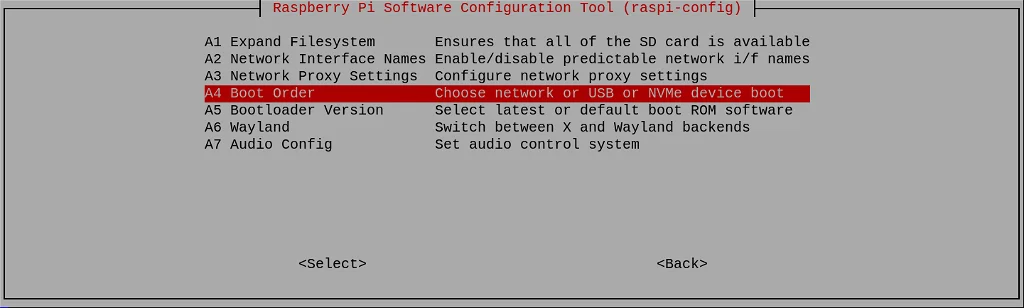
向下滚动到 Advanced Options 并按 Enter:

向下滚动到 Bootloader Version 并按 Enter:

最后选择 Latest,然后按 Enter:
这里选择 No——你需要的是 latest 引导程序。
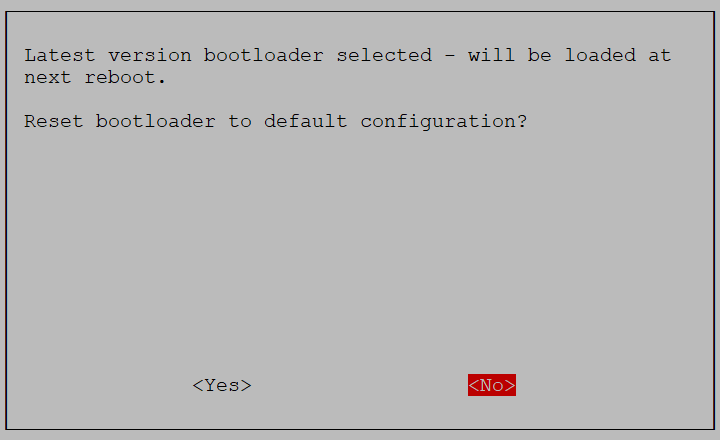
然后选择 Finish 退出该工具:
如果提示重启,请选择 Yes。

步骤 2:在主屏幕上点击 Applications =>Accessories =>SD Card Copier,运行 SD Card Copier 程序,并按照下图所示将操作系统复制到 NVME SSD。

将 Raspberry Pi 设置为从 NVMe SSD 启动
如果你可以轻松访问 SD 卡槽,可以先关闭你的 Pi,弹出 SD 卡(如果一切正常工作),那么下次启动时它应该会自动从 NVMe 硬盘启动。如果你想让 SD 卡保持插入状态但仍然从 NVMe 启动,则需要更改启动顺序。
步骤 1:输入以下命令:
sudo raspi-config
向下滚动到 Advanced Options 并按 Enter:
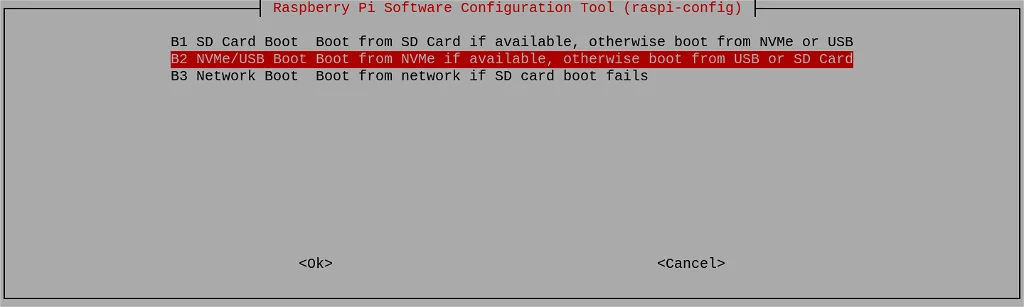
步骤 2:向下滚动到 Boot Order 并按 Enter:
步骤 3:选择 NVMe/USB Boot 并按 Enter:
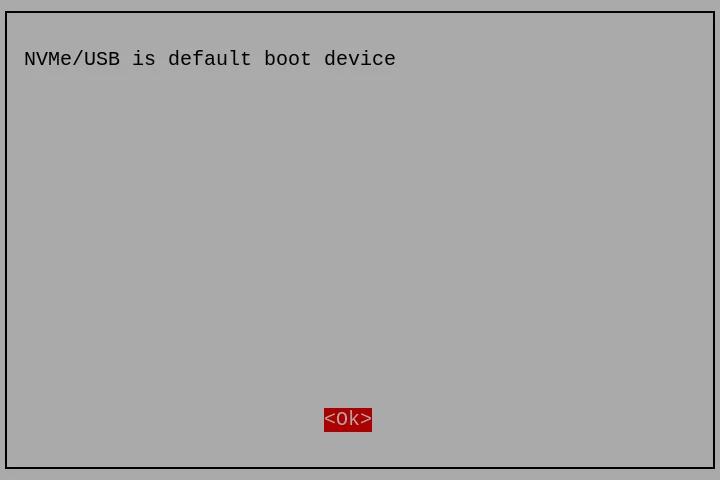
配置将会被确认。按 Enter:
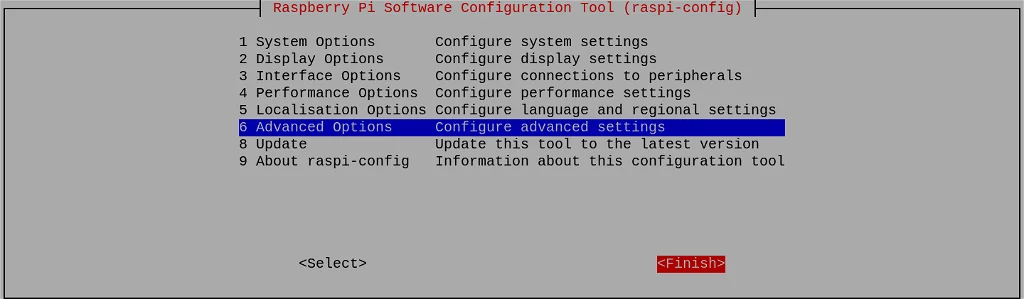
步骤 4:通过选择 Back 或按 Esc 键返回到第一个界面。然后使用右方向键移动到 Finish。
系统会询问你是否现在重启。点击 Yes:

修改 PCIe
- M.2 Hat
- M.2 dual Hat
M.2 Hat 支持 PCIe Gen 2 和 PCIe Gen 3 模式
步骤 1:输入以下命令打开 /boot/firmware/config.txt 文件
sudo nano /boot/firmware/config.txt
步骤 2:在 /boot/firmware/config.txt 文件末尾的 [all] 部分添加以下内容:
dtparam=pciex1_gen=3
保存文件并再次重启,你可能会看到速度提升!
PCIe2.0 M.2 dual Hat 支持 PCIe Gen 2,而 PCIe3.0 M.2 dual Hat 支持 PCIe Gen 2 和 PCIe 3。
步骤 1:输入以下命令打开 /boot/firmware/config.txt 文件
sudo nano /boot/firmware/config.txt
步骤 2:在 /boot/firmware/config.txt 文件末尾的 [all] 部分添加以下内容:
dtparam=pciex1
dtparam=pciex1_gen=3
dtoverlay=pciex1-compat-pi5,no-mip,mmio-hi
修复 M.2 Dual Hat 驱动
在烧录全新的操作系统镜像后,安装 pcie-fix.dtbo 覆盖文件以修复 M.2 Dual Hat 驱动。
进入已烧录的操作系统,在终端中运行以下命令:
cd /tmp
wget https://files.seeedstudio.com/wiki/reComputer-R2000/pcie-fix.dtbo
sudo cp pcie-fix.dtbo /boot/firmware/overlays/
echo "dtoverlay=pcie-fix" | sudo tee -a /boot/firmware/config.txt
sudo reboot
速度基准测试
- M.2 hat
- M.2 dual Hat
- M.2 dual Hat with hailo8
该测试表明 Raspberry Pi 从 SD 卡启动,并将 SSD 用作备份存储:
# write speed command
sudo dd if=/dev/zero of=/mnt/nvme/testfile bs=1M count=1024 oflag=direct

# read speed command
sudo dd if=/mnt/nvme/testfile of=/dev/null bs=1M iflag=direc
| M.2 hat | 读取速度 | 写入速度 |
|---|---|---|
| PCIe 3.0 | 822MB/s | 716MB/s |
| PCIe 2.0 | 431 MB/s | 389MB/s |
该测试表明 Raspberry Pi 从 SSD 启动,并使用另一块 SSD 作为备份存储:
# write speed command
dd if=/dev/zero of=tempfile bs=1M count=1024 oflag=direct
# read speed command
dd if=/dev/zero of=tempfile bs=1M count=1024
| M.2 dual Hat | 读 & 读 | 写 & 写 | 读 & 写 |
|---|---|---|---|
| PCIe 3.0 | 平均 454MB/s | 平均 407MB/s | 697MB/s 663MB/s |
| PCIe 2.0 | 平均 234MB/s | 平均 214MB/s | 414MB/s 324MB/s |
该测试表明 Raspberry Pi 从 SSD 启动并使用 Hailo8 AI 加速器:
# write speed command
dd if=/dev/zero of=tempfile bs=1M count=1024 oflag=direct
# read speed command
dd if=/dev/zero of=tempfile bs=1M count=1024
| M.2 dual Hat with hailo8 | 读 | 读 & Hailo8 | 写 | 写 & Hailo8 |
|---|---|---|---|---|
| PCIe 3.0 | 812MB/S | 416MB/S 187FPS | 701MB/s | 340MB/s 188FPS |
| PCIe 2.0 | 429MB/S | 233MB/S/s 128FPS | 372MB/S | 273MB/S 111FPS |
注意: 要测试 Hailo8 请查看此 链接 并准备一段 240 FPS 的视频。
技术支持与产品讨论
感谢你选择我们的产品!我们将为你提供多种支持,确保你在使用我们产品的过程中尽可能顺利。我们提供多种沟通渠道,以满足不同的偏好和需求。