reCamera通过HTTP连接到XIAO
本文档演示了如何通过HTTP实现reCamera与XIAO之间的通信,将数据传输到XIAO,以便您可以将reCamera集成到自己的项目中。

准备工作
reCamera
HTTP API和网络连接
首先,准备您的reCamera C++监督项目和运行环境。
-
步骤1. 下载Supervisor_add_detection_http项目,编译它并将**.exe**文件复制到reCamera终端目录中。(详细说明请参考wiki:基于Cpp使用reCamera进行实时YOLO目标检测 / 环境准备 / 预编译。)这是一个监督项目,我们将仅使用照片YOLO检测接口进行演示。如果您有自己的项目,可以在此项目中添加新的HTTP API和项目代码。
-
步骤2. 使用USB线将reCamera连接到PC,使用MobaXterm访问reCamera终端(192.168.42.1),导航到**/etc/init.d/**目录,移除三个自启动程序:S93sscma-supervisor、S03node-red和S91sscma-node。(详细说明请参考wiki:基于Cpp使用reCamera进行实时YOLO目标检测 / 环境准备 / reCamera准备。)
其次,reCamera和XIAO必须在同一个2.4GHz局域网(LAN)中才能通信。ReCamera内置无线网卡,可以连接WiFi。通常,您可以通过相机的Node-RED网页连接WiFi。但是,当运行自定义C++项目时,必须禁用Node-RED并重启reCamera。(参考:Seeed Studio Wiki)。因此,我们需要通过Linux终端建立WiFi连接。
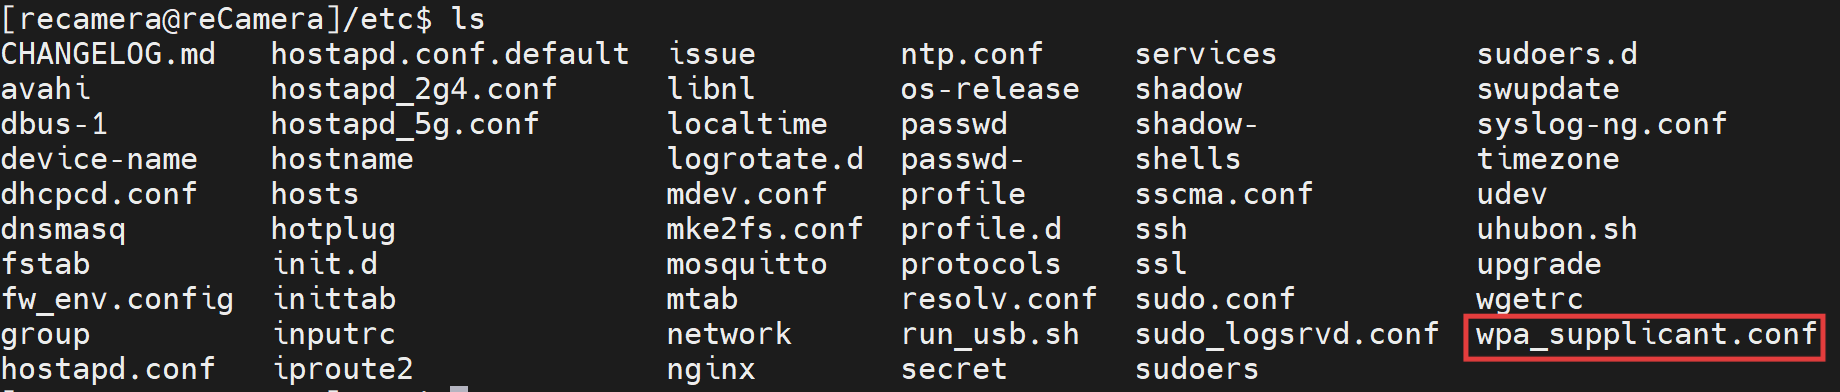
cd /etc/
ls
您可以看到 wpa_supplicant.conf :
您也可以在左侧文件目录中查看它:
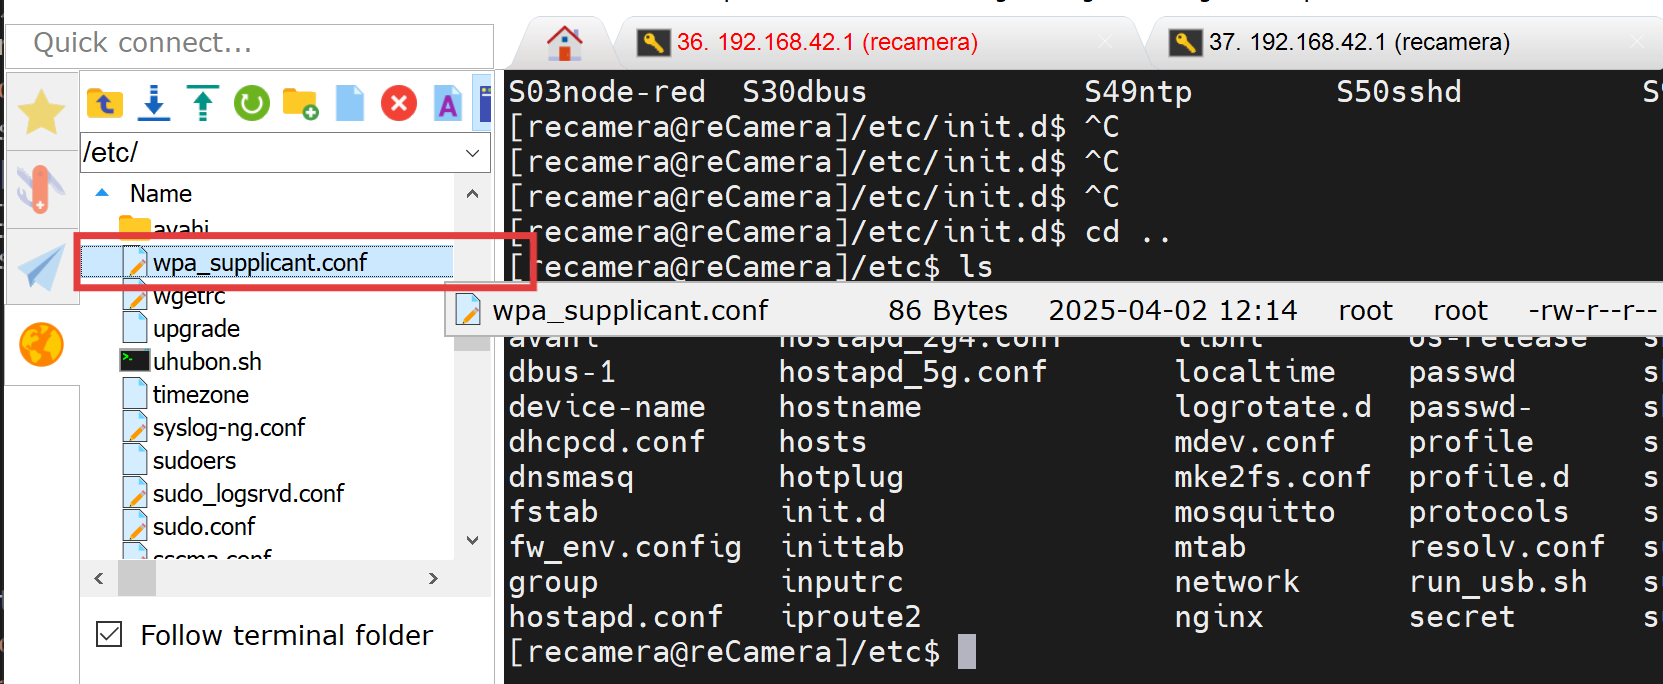
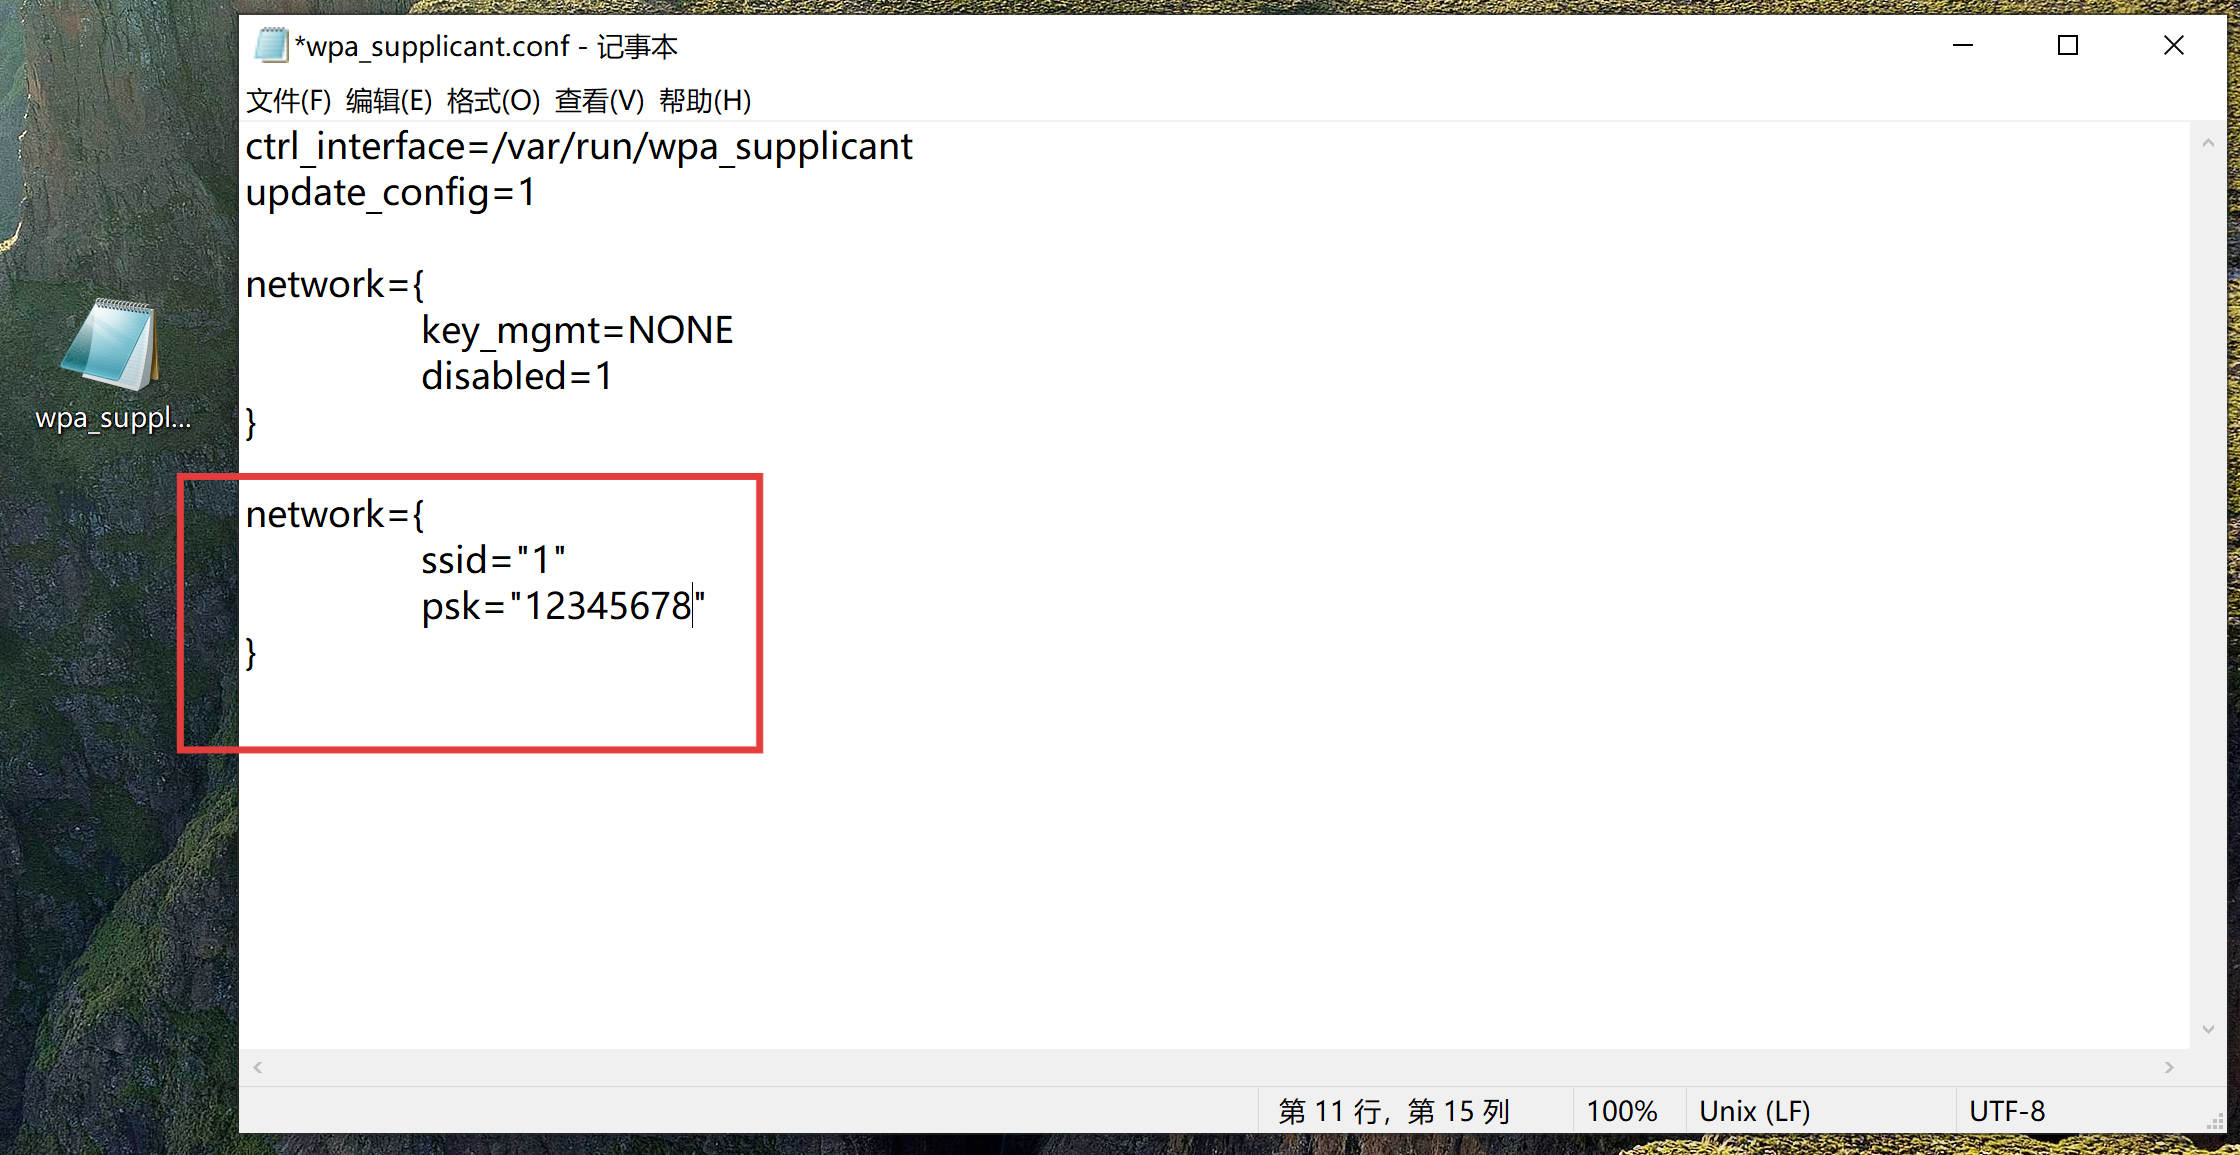
将文件拖拽到桌面并用记事本打开。如图所示添加网络,并将其更改为您的 SSID 和密码。 注意:等号两边不要包含多余的空格。
删除 reCamera 终端中的原始文件:/etc/。
sudo rm wpa_supplicant.conf
打开您的 PC windows powershell 并将文件复制到 reCamera 终端:/home/recamera/:
scp "C:\Users\{your username}\Desktop\wpa_supplicant.conf" [email protected]:/home/recamera
将文件从 /home/recamera/ 复制到:/etc/:
sudo scp wpa_supplicant.conf /etc/
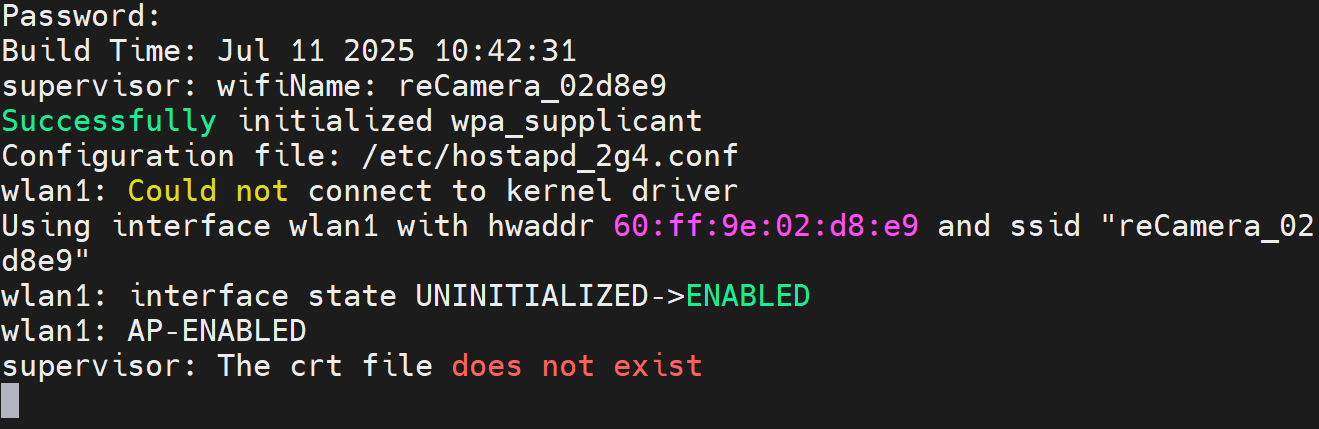
重启 reCamera。然后,运行程序。
sudo ./Supervisor_add_detection_http
确保您的 reCamera 已连接到您的 WiFi 网络。
XIAO
网络连接和发送 HTTP 请求
需要下载 Arduino 来为 XIAO (ESP32-C3) 刷写程序。
步骤 1. 根据您的操作系统下载并安装最新版本的 Arduino IDE。启动 Arduino 应用程序。
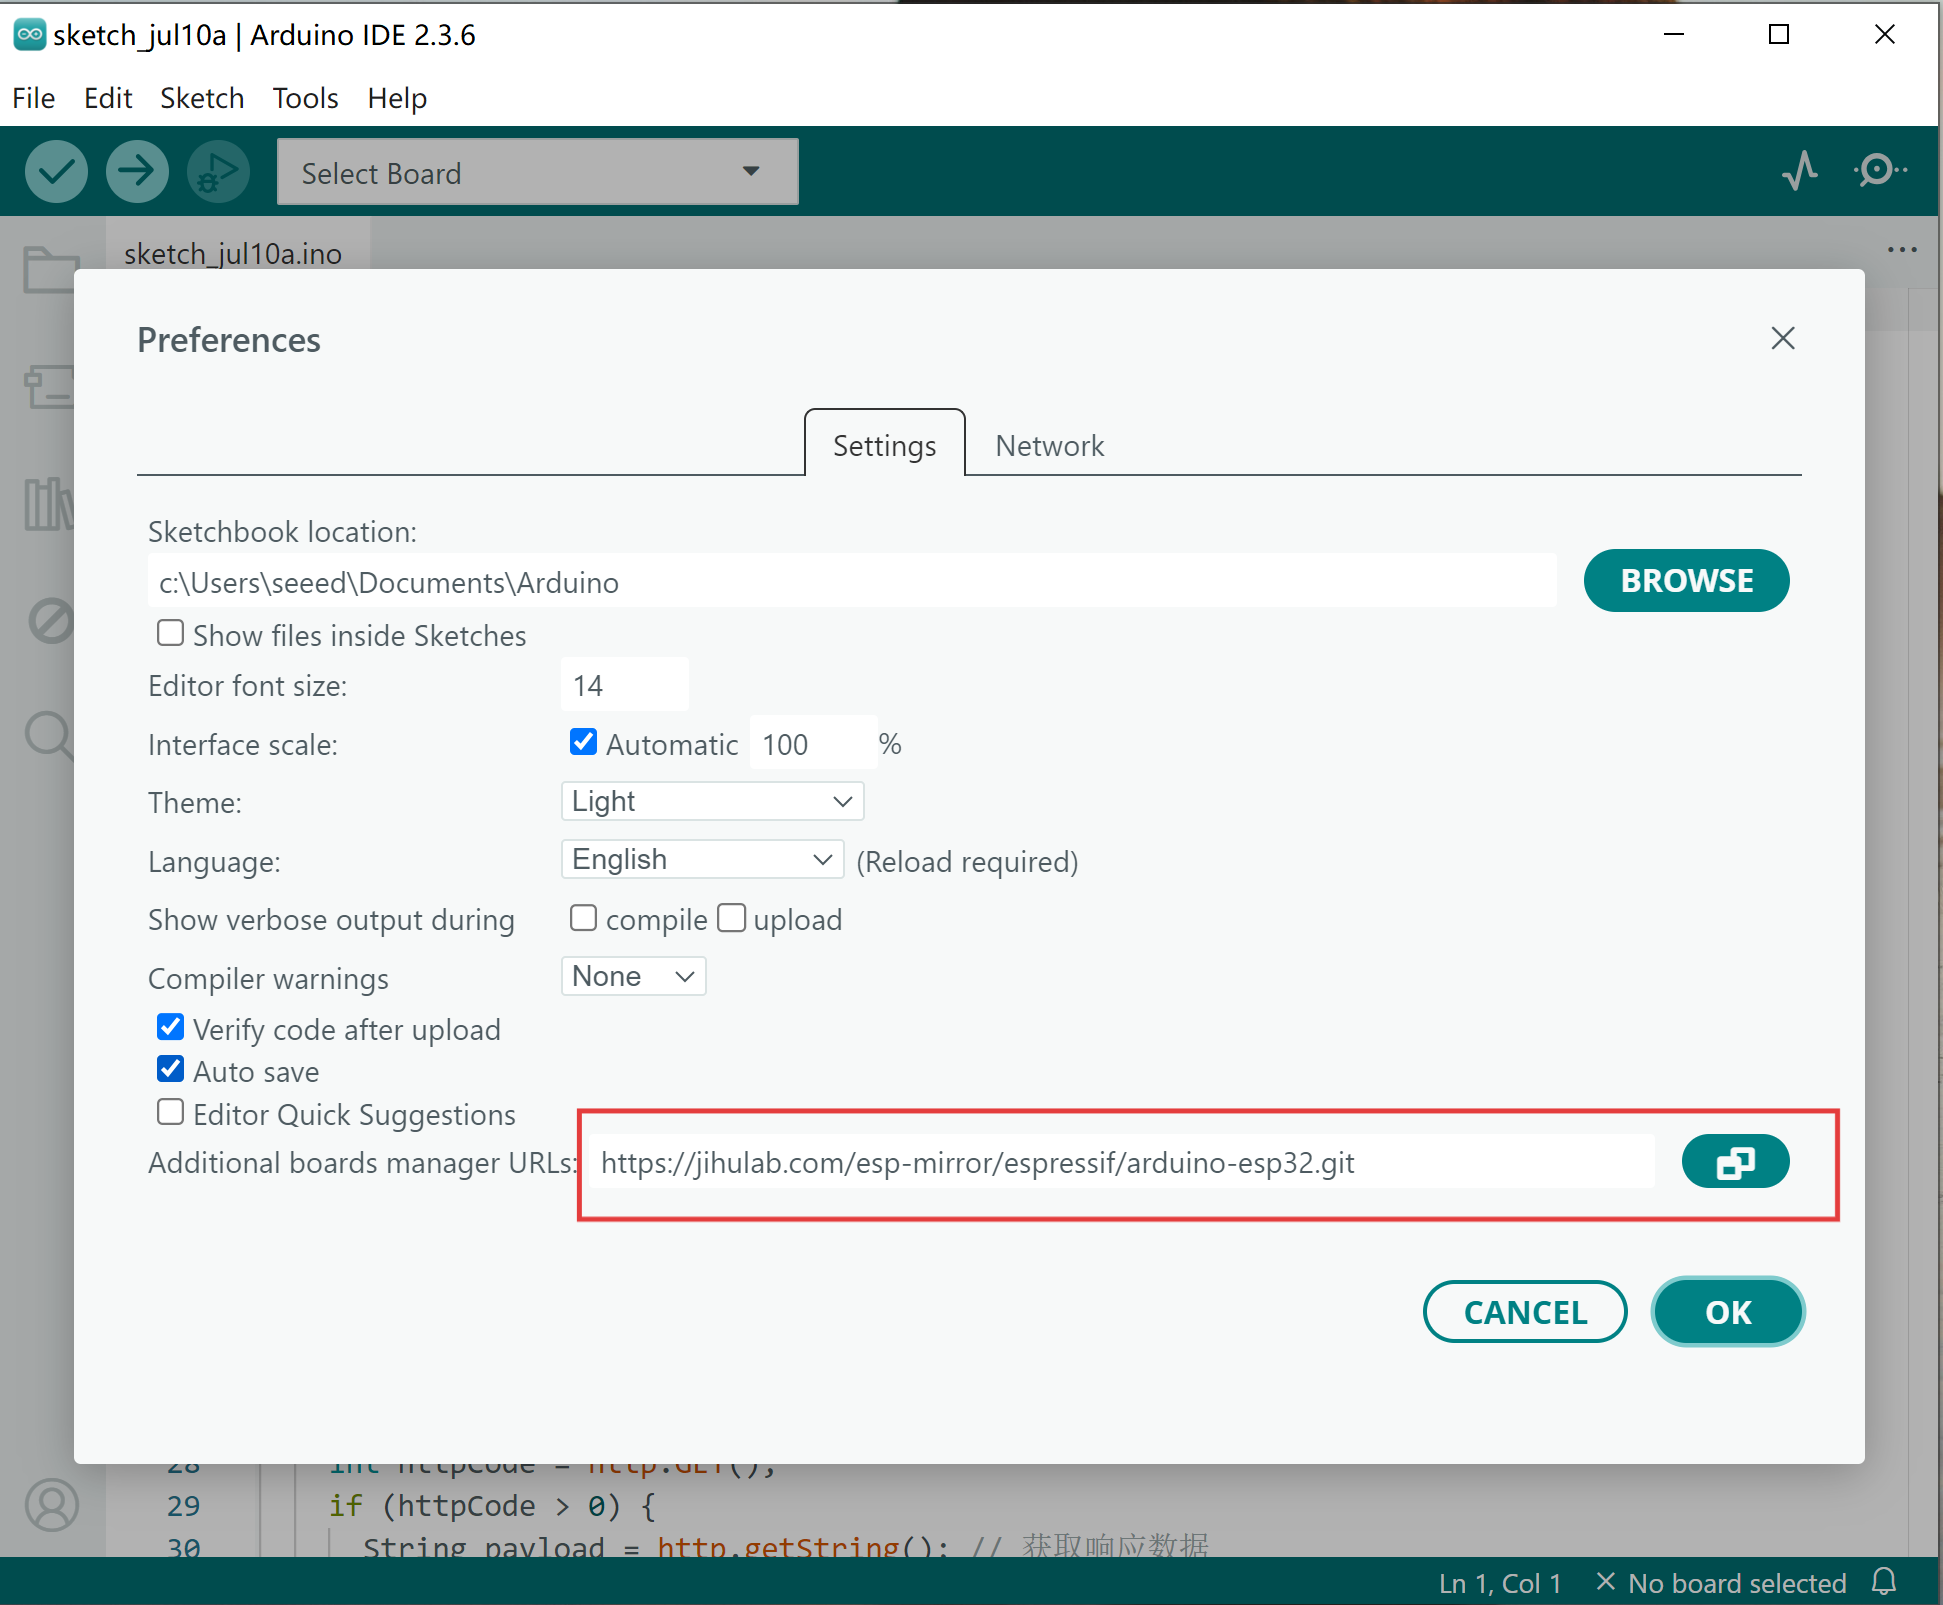
步骤 2. 将 ESP32 开发板包添加到您的 Arduino IDE 导航到 File > Preferences,并在 "Additional Boards Manager URLs" 中填入以下网址: https://jihulab.com/esp-mirror/espressif/arduino-esp32.git
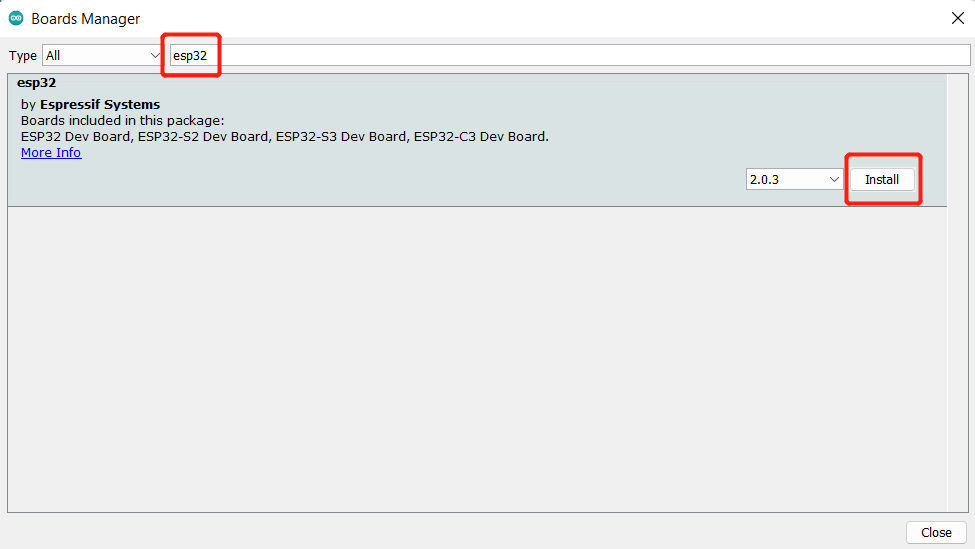
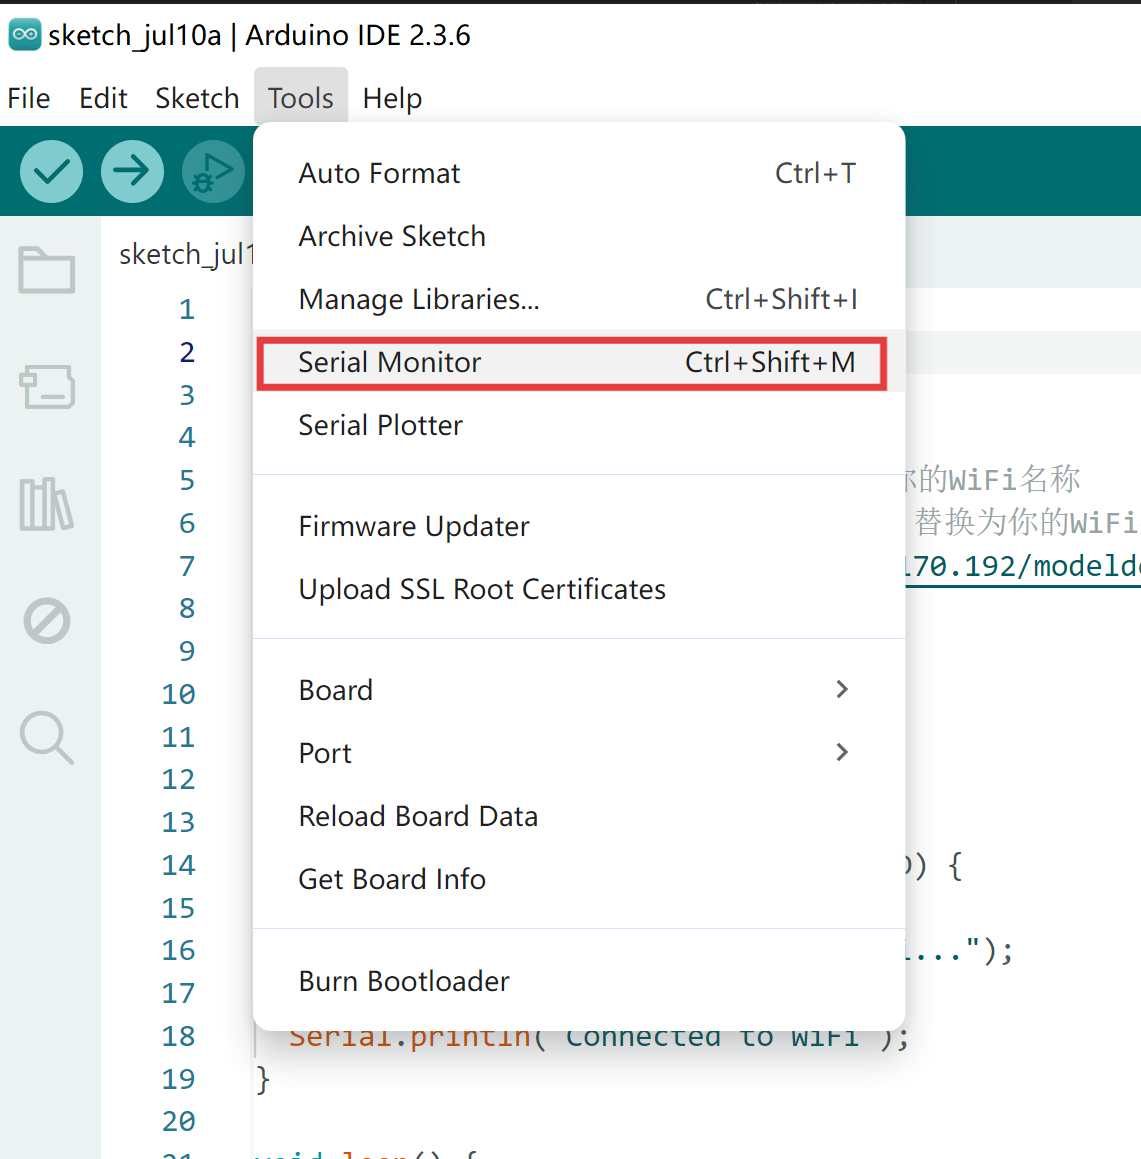
导航到 Tools > Board > Boards Manager...,在搜索框中输入关键词 "esp32",选择最新版本的 esp32,然后安装它。
步骤 3. 选择您的开发板和端口
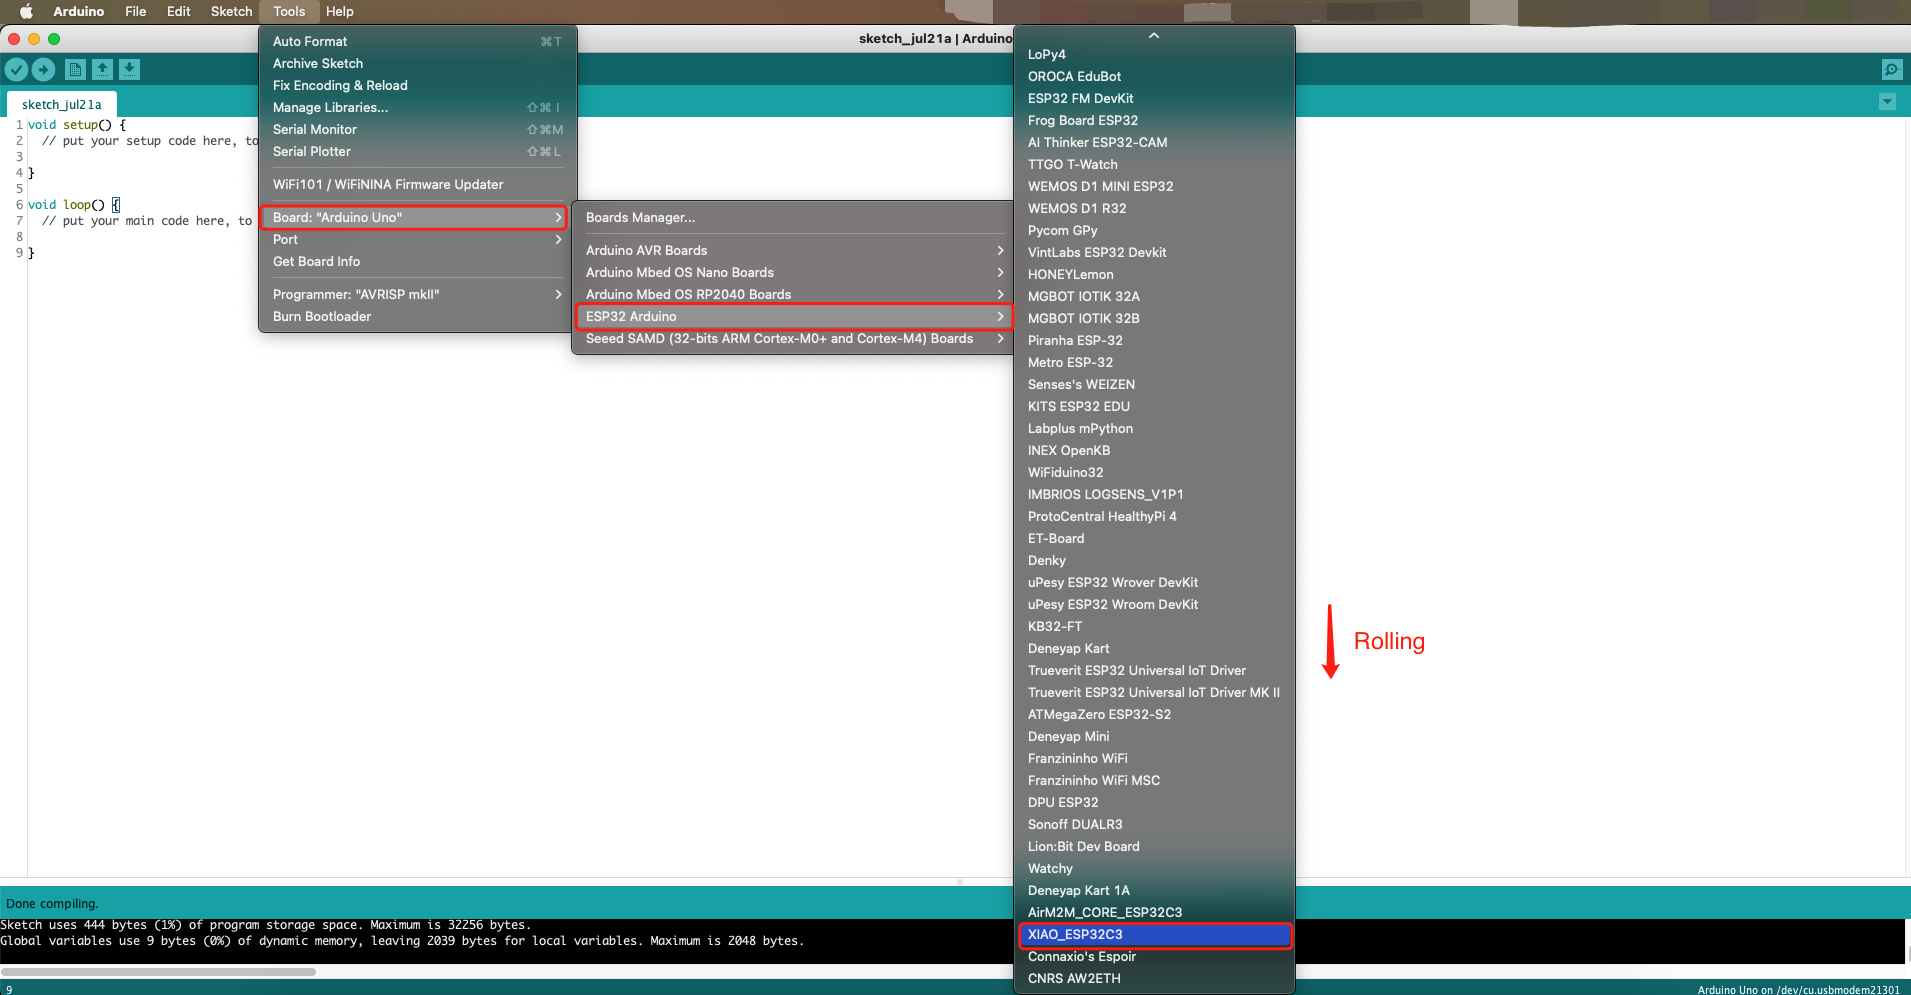
开发板 导航到 Tools > Board > ESP32 Arduino 并选择 "XIAO_ESP32C3"。开发板列表比较长,您需要滚动到底部才能找到它。
端口 导航到 Tools > Port 并选择已连接的 XIAO ESP32C3 的串口名称。这通常是 COM3 或更高(COM1 和 COM2 通常保留给硬件串口)。
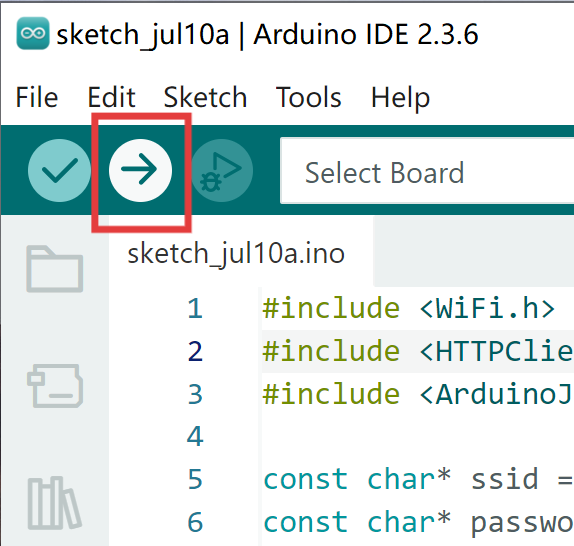
步骤 4. 编写以下程序并点击上传按钮进行编译和上传。reCamera 和 XIAO 必须在同一个 2.4GHz 局域网 (LAN) 中才能通信。
#include <WiFi.h>
#include <HTTPClient.h>
#include <ArduinoJson.h>
#include <Adafruit_NeoPixel.h>
#ifdef __AVR__
#include <avr/power.h> // Required for 16 MHz Adafruit Trinket
#endif
// Which pin on the Arduino is connected to the NeoPixels?
#define PIN A0 // On Trinket or Gemma, suggest changing this to 1
// How many NeoPixels are attached to the Arduino?
#define NUMPIXELS 60 // Popular NeoPixel ring size
Adafruit_NeoPixel pixels(NUMPIXELS, PIN, NEO_GRB + NEO_KHZ800);
#define DELAYVAL 500
const char* ssid = {"your wifi name"};
const char* password = {"your wifi password"};
const char* apiUrl = "http://{"your wifi ip"}/modeldetector";
void setup() {
Serial.begin(115200);
WiFi.begin(ssid, password);
while (WiFi.status() != WL_CONNECTED) {
delay(1000);
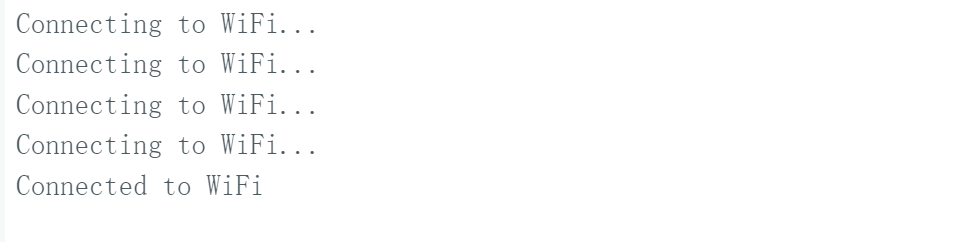
Serial.println("Connecting to WiFi...");
}
Serial.println("Connected to WiFi");
#if defined(__AVR_ATtiny85__) && (F_CPU == 16000000)
clock_prescale_set(clock_div_1);
#endif
// END of Trinket-specific code.
pixels.begin();
}
void loop() {
if (WiFi.status() == WL_CONNECTED) {
HTTPClient http;
http.begin(apiUrl);
http.addHeader("Content-Type", "application/json");
int httpCode = http.GET();
if (httpCode > 0) {
String payload = http.getString();
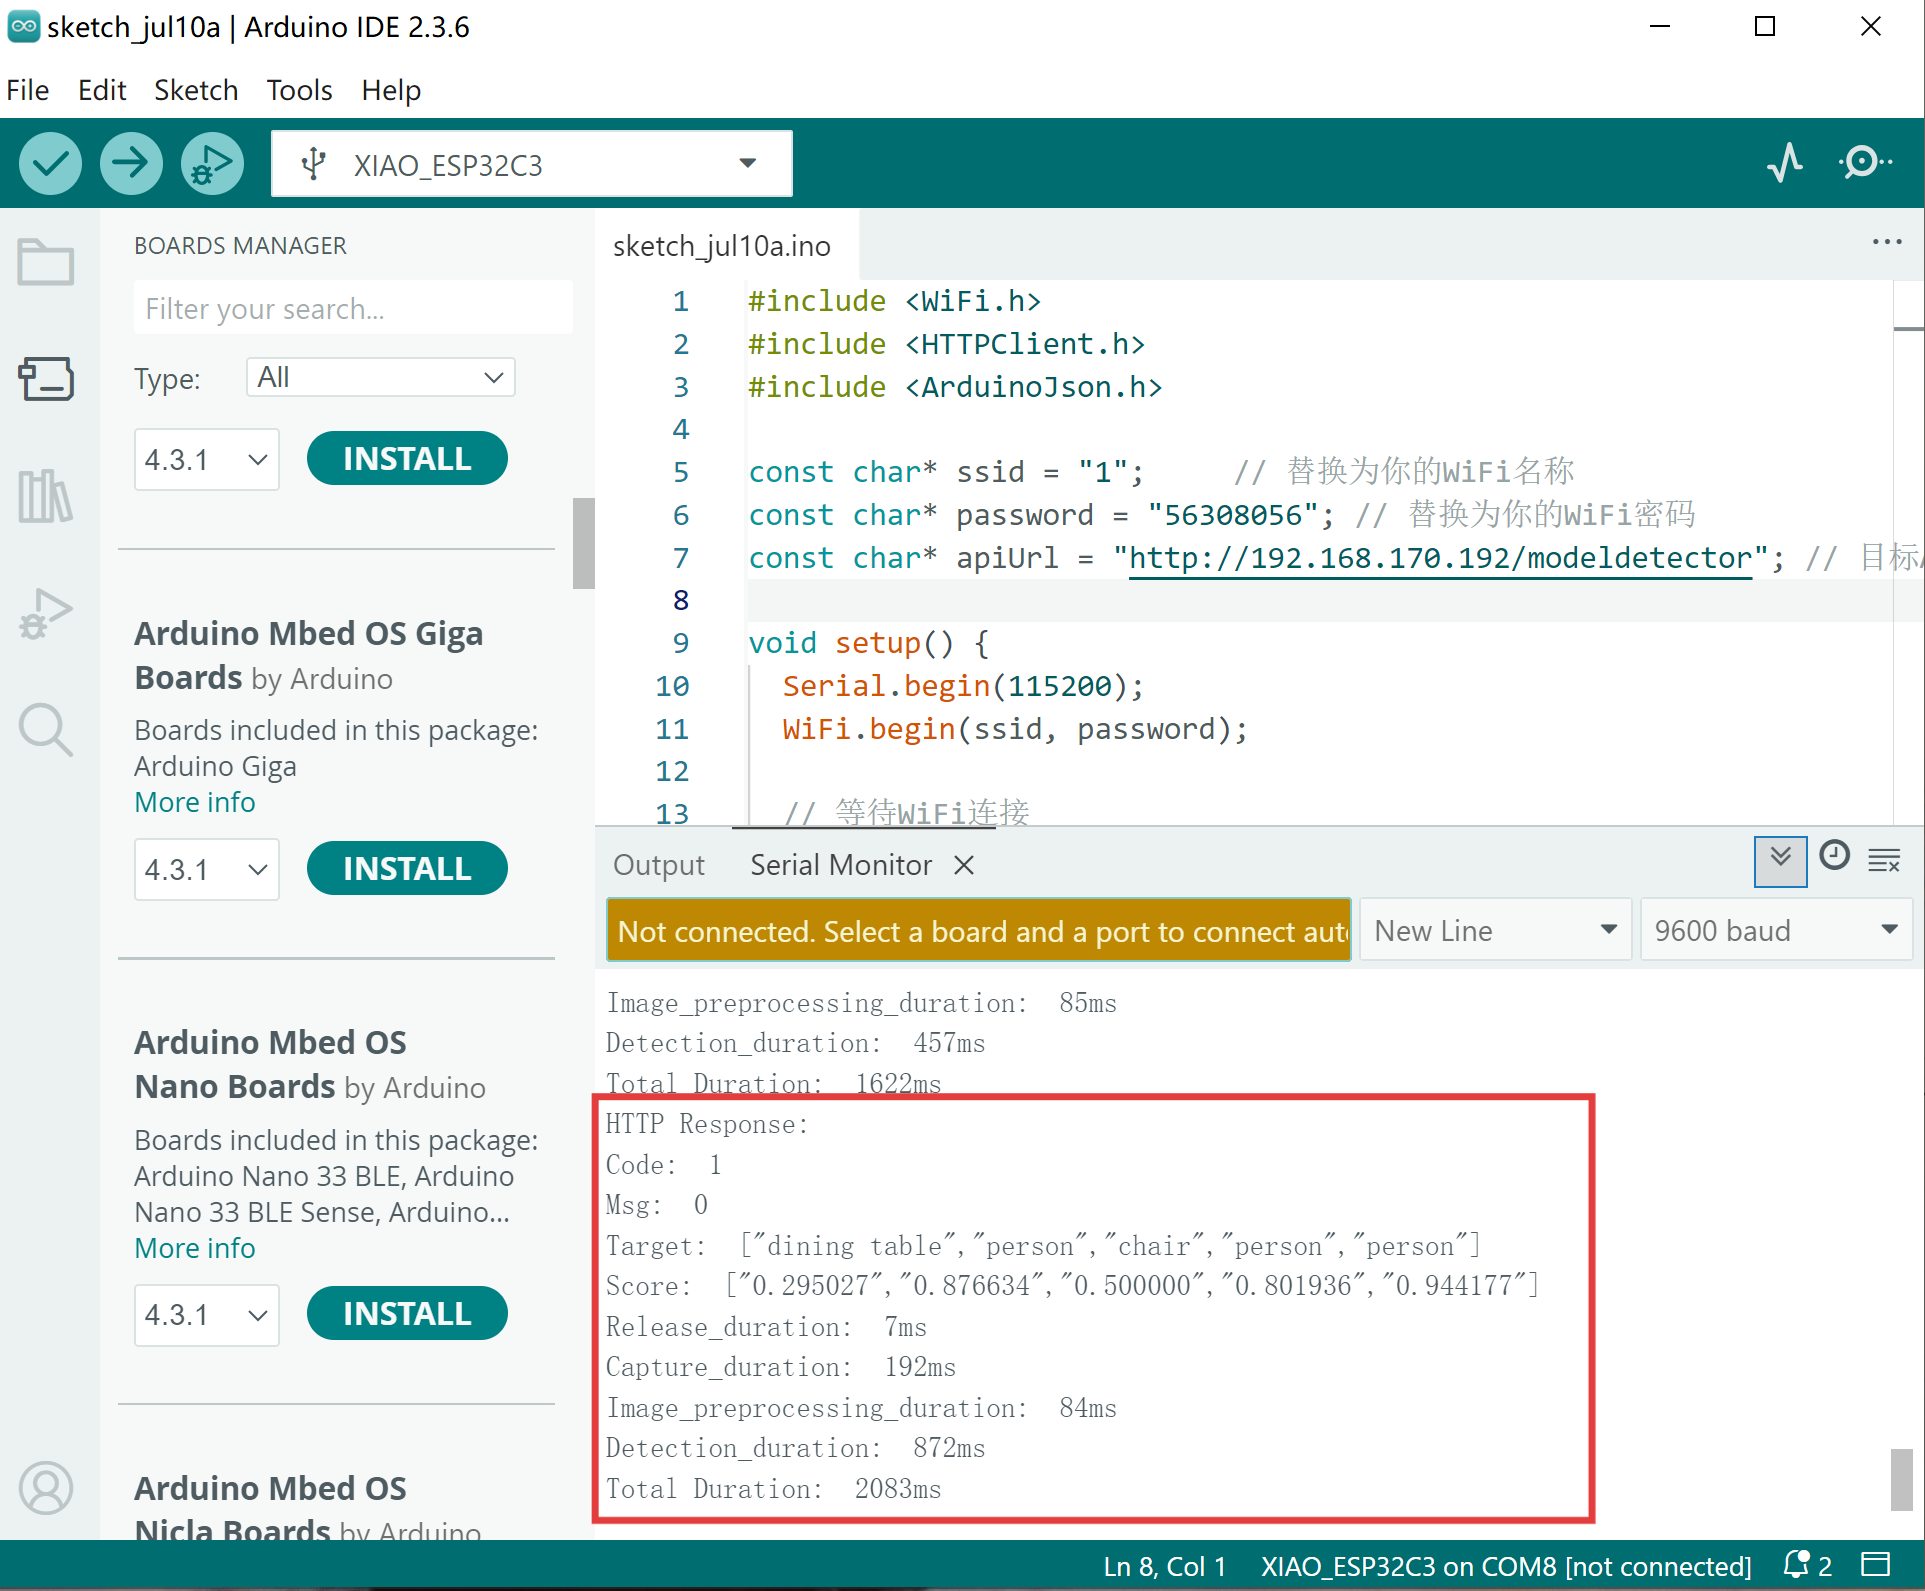
Serial.println("HTTP Response:");
// Serial.println(payload);
DynamicJsonDocument doc(1024);
DeserializationError error = deserializeJson(doc, payload);
if (error) {
Serial.print("JSON read failed: ");
Serial.println(error.c_str());
}
else {
Serial.print("Code: ");
Serial.println(doc["Code"].as<String>());
Serial.print("Msg: ");
Serial.println(doc["Msg"].as<String>());
Serial.print("Target: ");
Serial.println(doc["Target"].as<String>());
Serial.print("Score: ");
Serial.println(doc["Score"].as<String>());
Serial.print("Release_duration: ");
Serial.print(doc["Release_duration"].as<String>());
Serial.println("ms");
Serial.print("Capture_duration: ");
Serial.print(doc["Capture_duration"].as<String>());
Serial.println("ms");
Serial.print("Image_preprocessing_duration: ");
Serial.print(doc["Image_preprocessing_duration"].as<String>());
Serial.println("ms");
Serial.print("Detection_duration: ");
Serial.print(doc["Detection_duration"].as<String>());
Serial.println("ms");
Serial.print("Total Duration: ");
Serial.print(doc["Duration"].as<String>());
Serial.println("ms");
if (doc["Target"].as<String>().indexOf("person") != -1){
pixels.clear();
pixels.show();
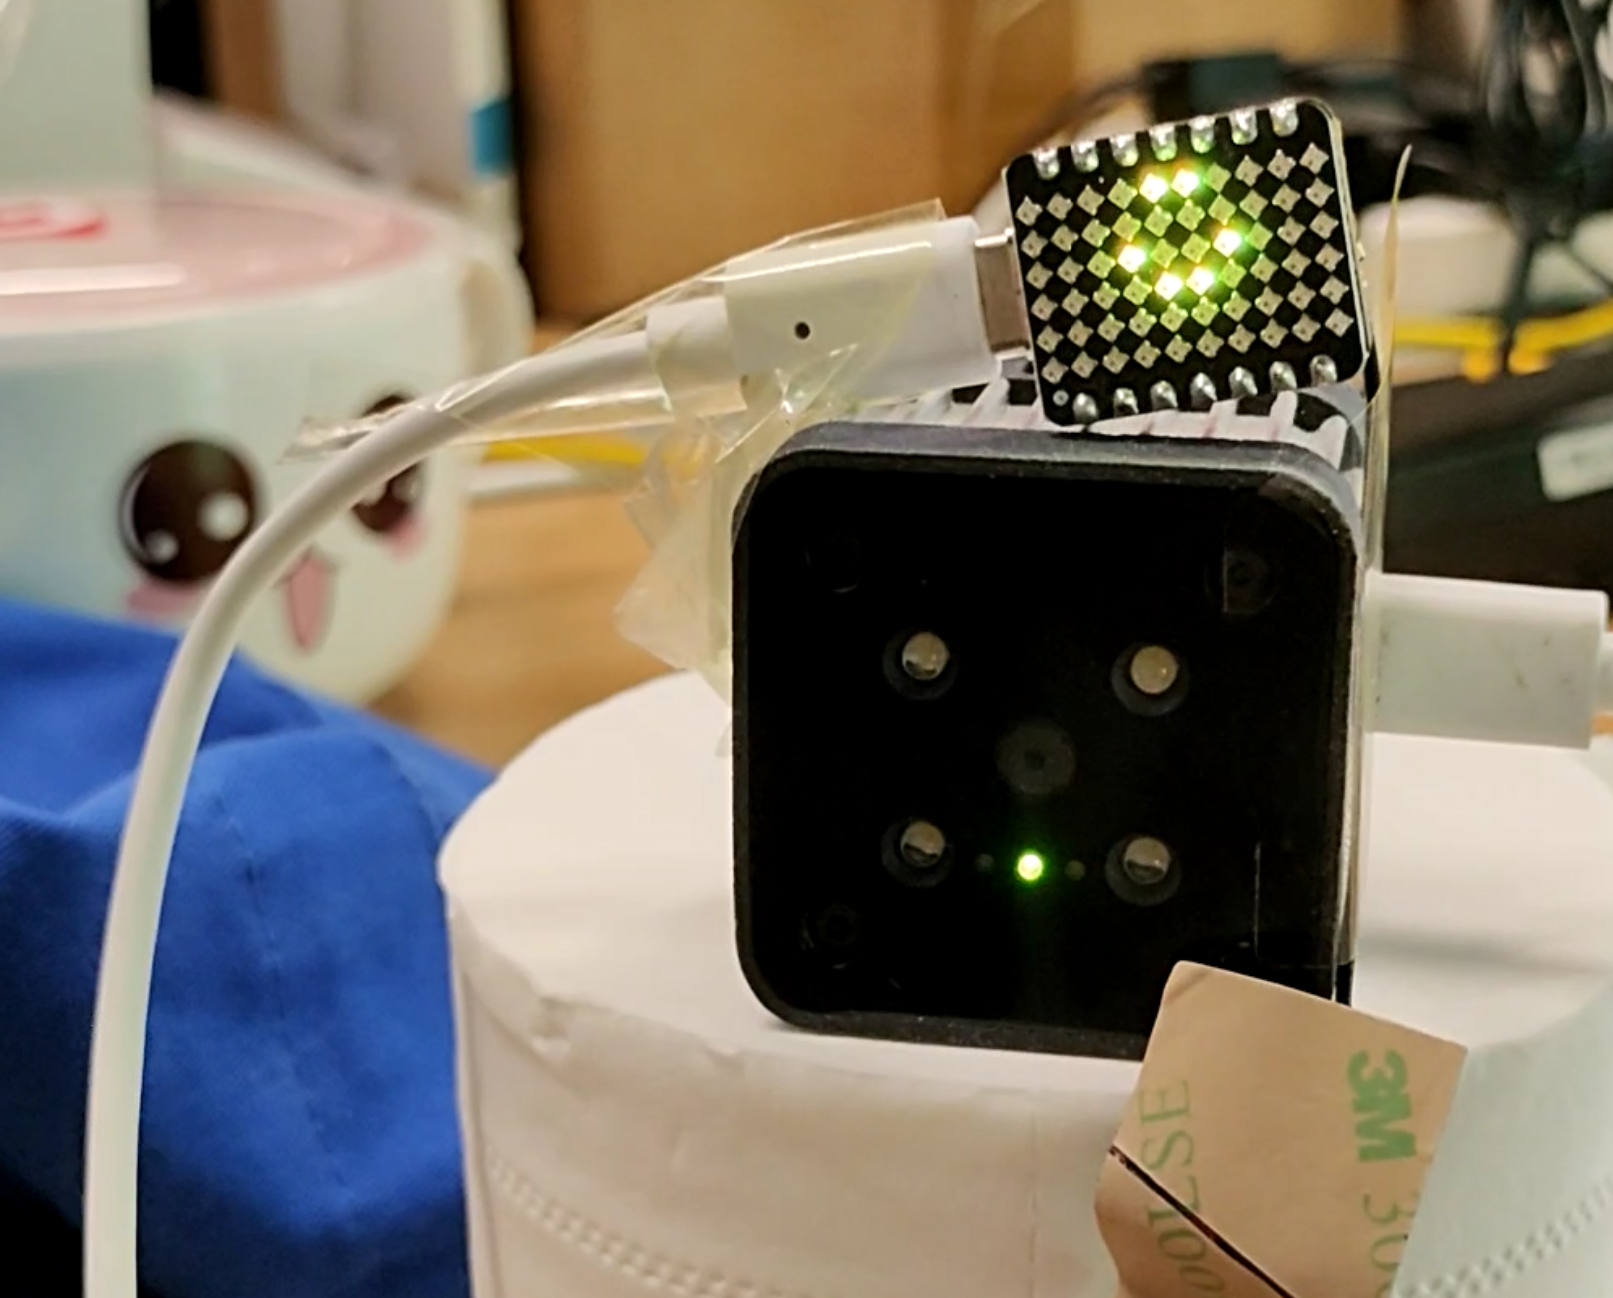
int smileyLEDs[] = {21,26,29,32,35,39};
int numLEDs = sizeof(smileyLEDs) / sizeof(smileyLEDs[0]);
for (int i = 0; i < numLEDs; i++) {
pixels.setPixelColor(smileyLEDs[i], pixels.Color(2, 2, 0)); // yellow
}
pixels.show();
printf("Target contains 'person'\n");
} else {
pixels.clear();
pixels.show();
printf("Target does not contain 'person'\n");
}
}
} else {
pixels.clear();
pixels.show();
Serial.print("HTTP get failed: ");
Serial.println(httpCode);
}
http.end();
} else {
pixels.clear();
pixels.show();
Serial.println("WiFi disconnected");
}
delay(5000);
}
注意:修改为您的WiFi名称(SSID)、密码和reCamera wlan0 IP地址。
等待上传完成,您可以在串口监视器中看到XIAO已成功连接到WiFi。
运行
确保您的reCamera正在运行Supervisor项目并已成功连接到WiFi。
sudo ./Supervisor_add_detection_http
您可以在 XIAO 的串口监视器中看到 HTTP 服务的 Json 结果。
当人脸对着摄像头时,XIAO 显示一个笑脸,从而实现了一个您可以自己 DIY 的笑脸相机。
更多详细信息,请参考我们的 GitHub 仓库。
技术支持与产品讨论
感谢您选择我们的产品!我们在这里为您提供不同的支持,以确保您使用我们产品的体验尽可能顺畅。我们提供多种沟通渠道,以满足不同的偏好和需求。