如何使用 CODESYS 配置 R1000 的 Modbus rtu 功能
介绍
本文主要介绍如何基于 CODESYS 使用 reComputer R1000 的 modbus rtu 功能。我们将使用 reComputer R1000 的两个 rs485 端口,一个端口用作 Modbus 主站,另一个端口用作 Modbus 从站。本文将详细介绍如何在 CODESYS 上配置 Modbus 主站和 Modbus 从站,并展示如何将它们部署到 reComputer R1000 上。
硬件准备
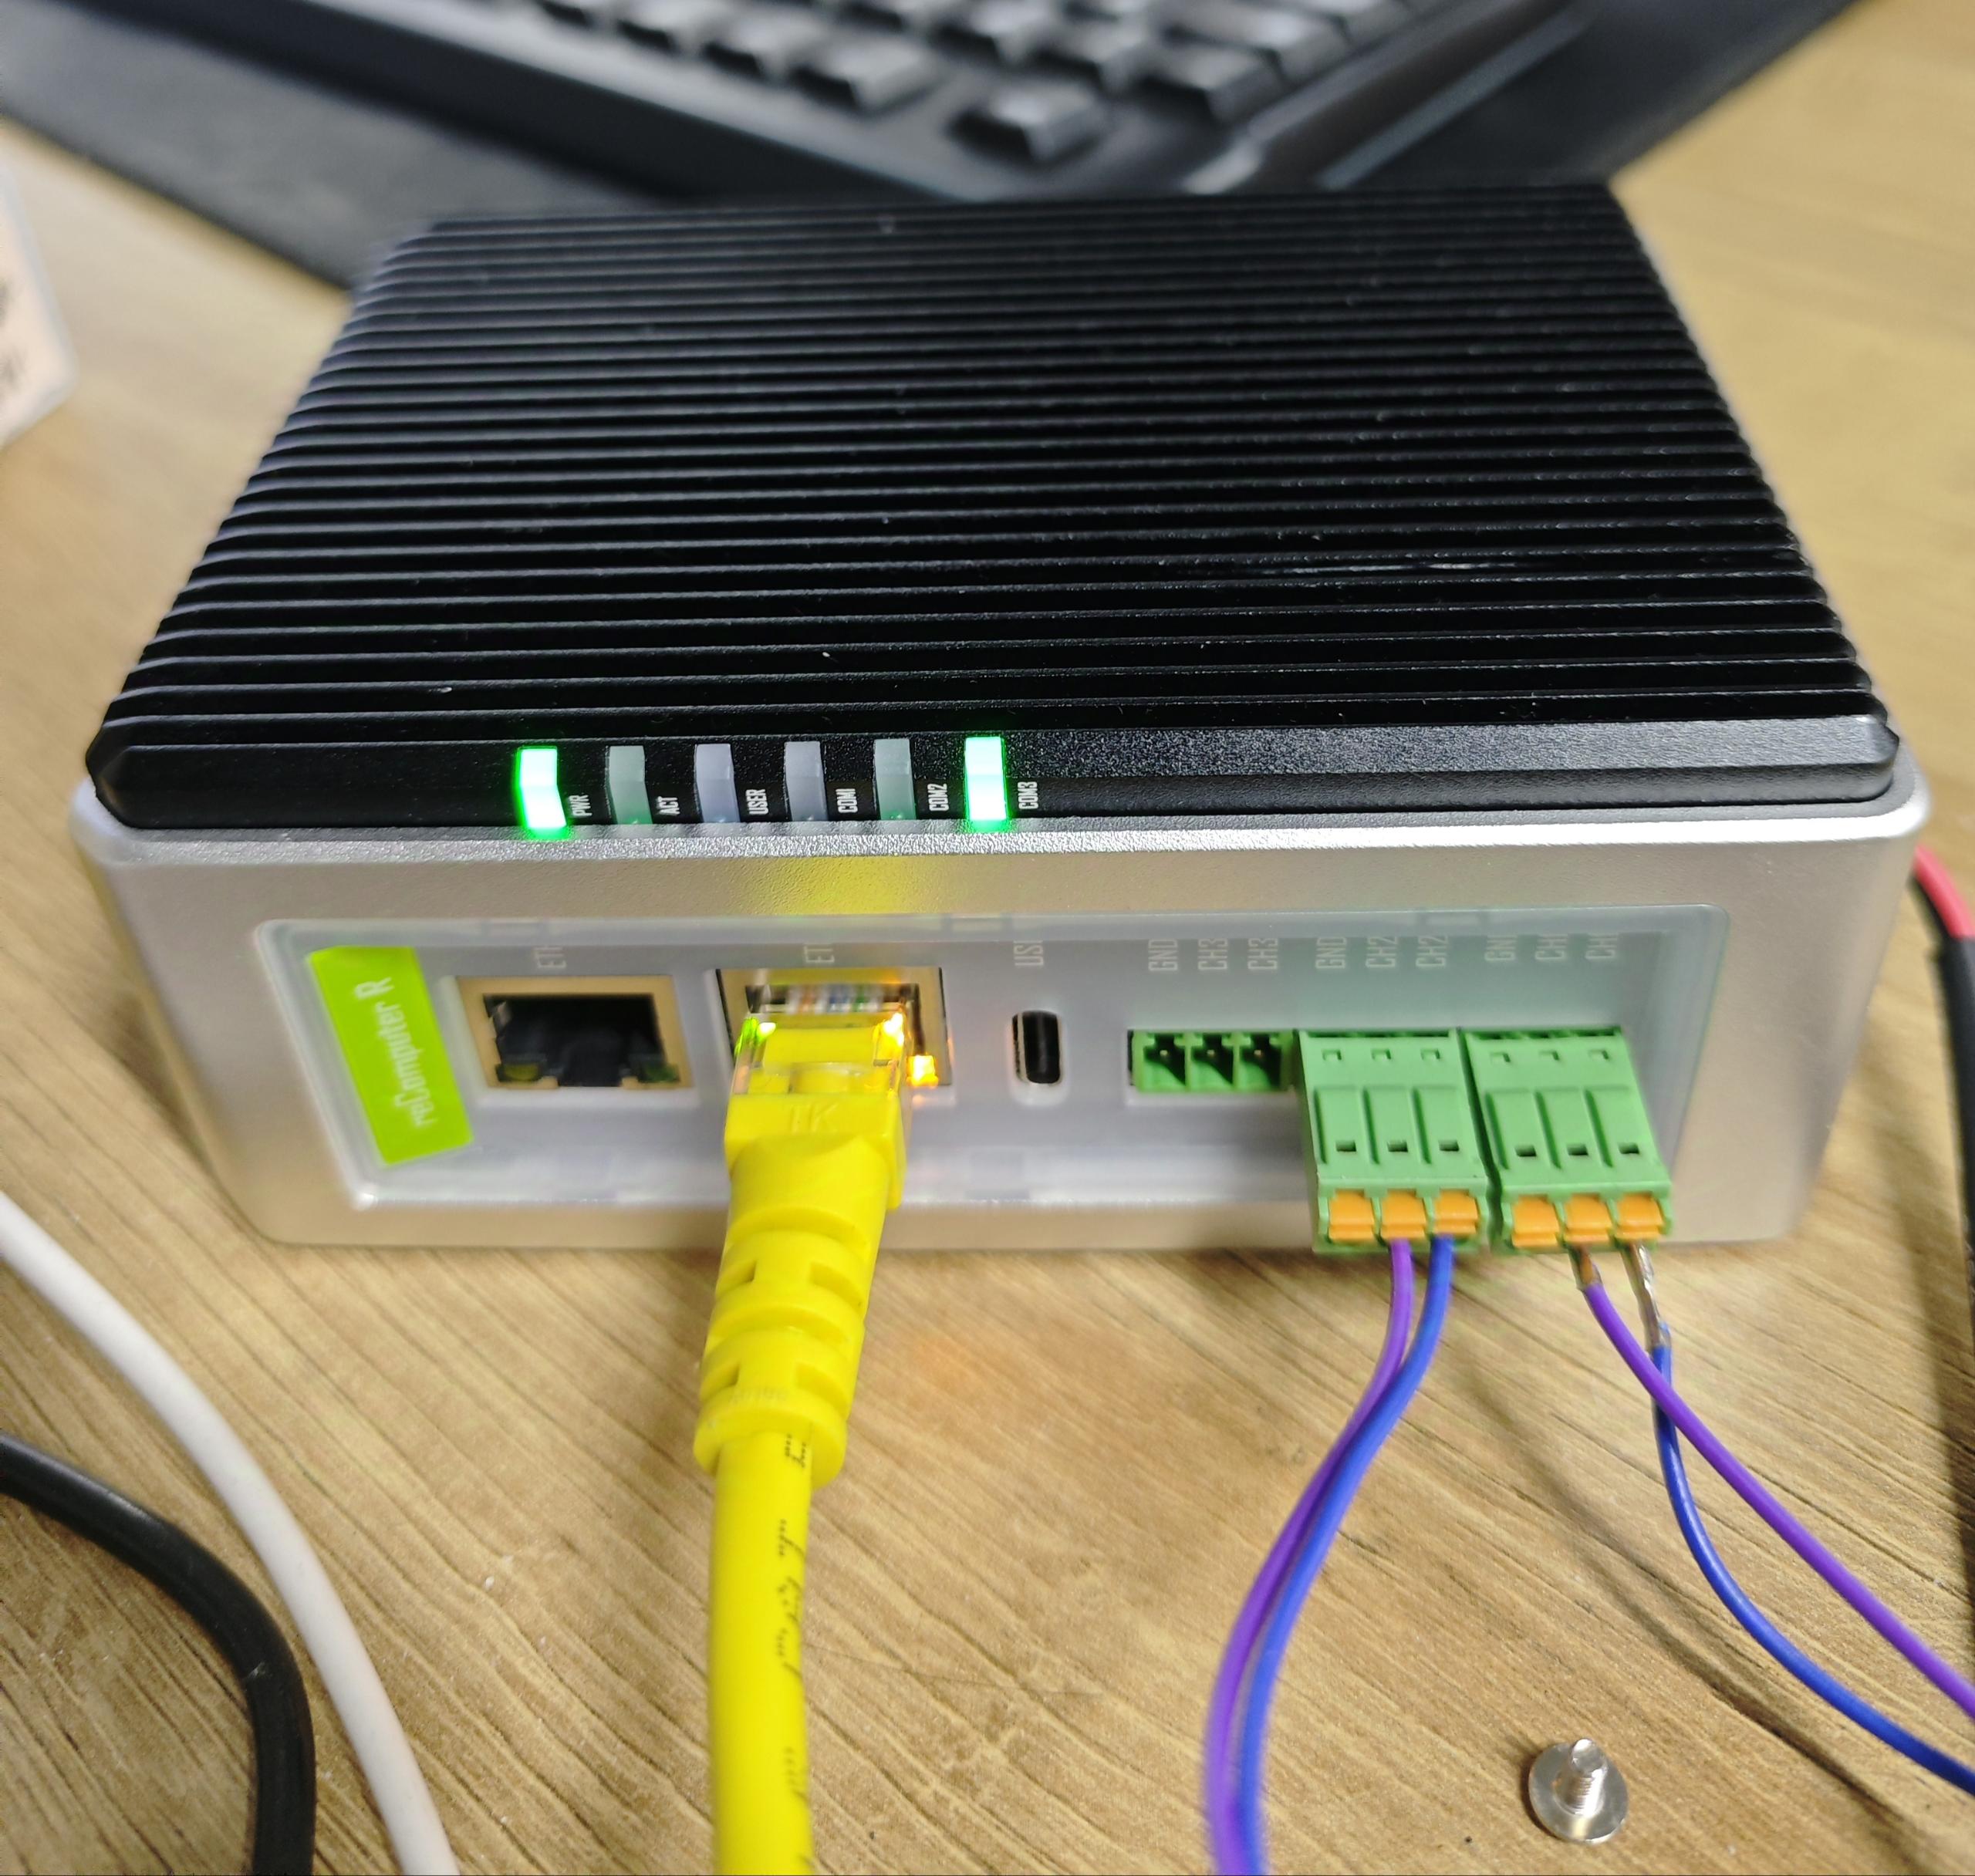
| reComputer R1000 |
|---|
 |
软件准备
开始使用
在开始之前,请确保您的 reComputer R1000 与主机在同一网段内,并且您已在 reComputer R1000 上部署了 CODESYS run-time。有关如何部署 CODESYS run-time 的信息,请参考 wiki
硬件配置
R1000 的两个 RS485 端口相连,一个作为 Modbus 主站,另一个作为 Modbus 从站
修改 R1000 的配置文件
输入命令:
sudo nano /etc/codesyscontrol/CODESYSControl.cfg
Add the following content:
# Add the following content to the end of the file, where ttyAMAx is the serial port number of reComputer R1000. Linux.Devicefile.1~3 represents the serial port number in CODESYS. Here, the serial port number of CODESYS is bound to the serial port number of reComputer R1000, otherwise CODESYS cannot identify the correct serial port
    [SysCom]
    Linux.Devicefile.1=/dev/ttyAMAx
    Linux.Devicefile.2=/dev/ttyAMAx
    Linux.Devicefile.3=/dev/ttyAMAx
然后输入以下命令重启 CODESYS 服务:
    sudo systemctl restart codesyscontrol.service
    sudo systemctl restart codesysedge.service
Modbus 主站配置
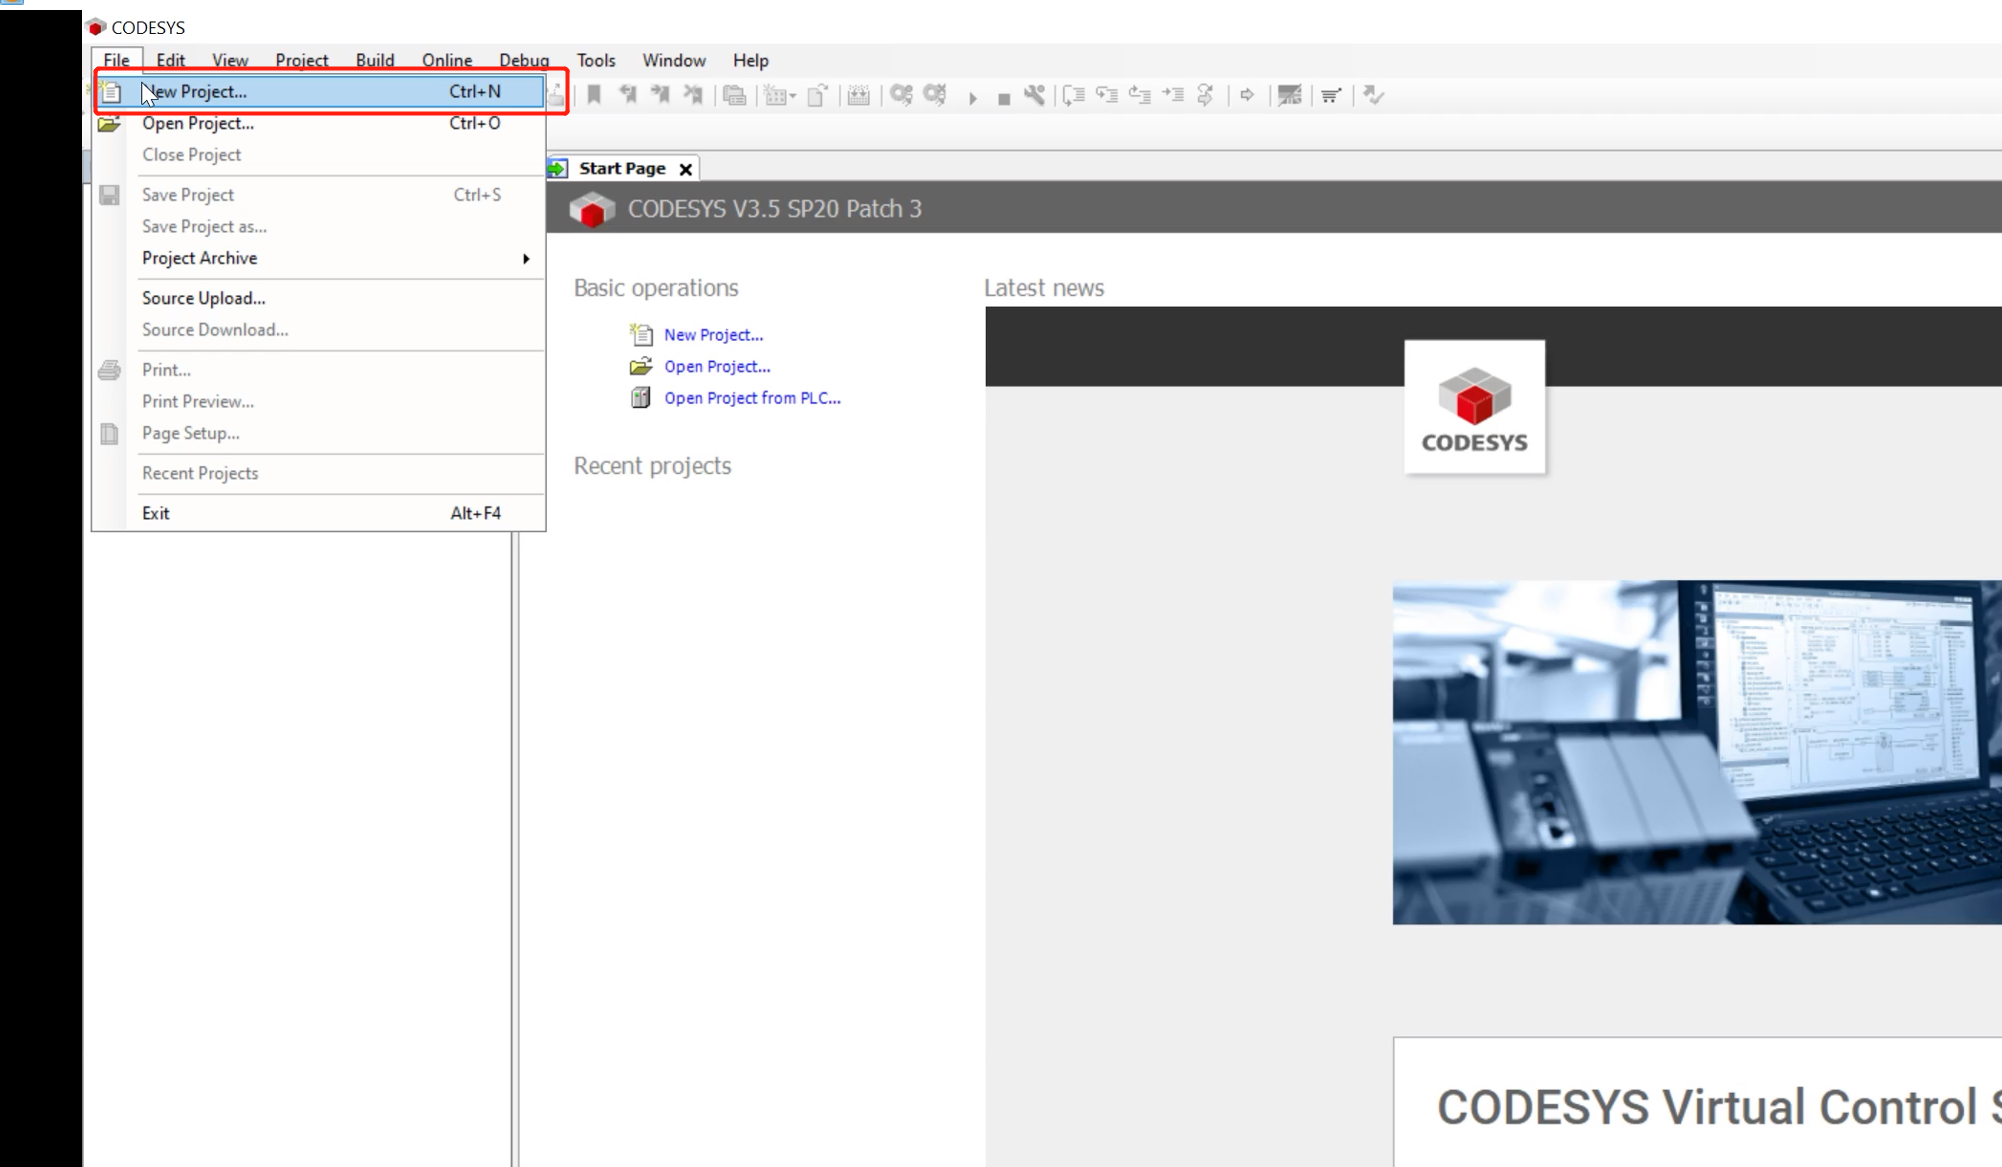
步骤 1:打开 CODESYS,点击 File--->NEW Project 创建新项目
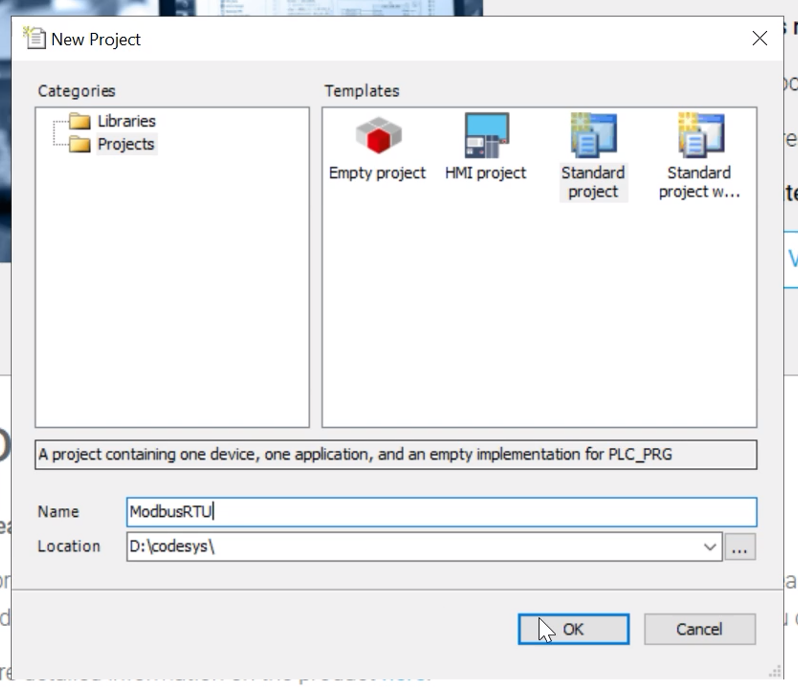
步骤 2:输入项目名称,选择 Standard project,然后点击 OK
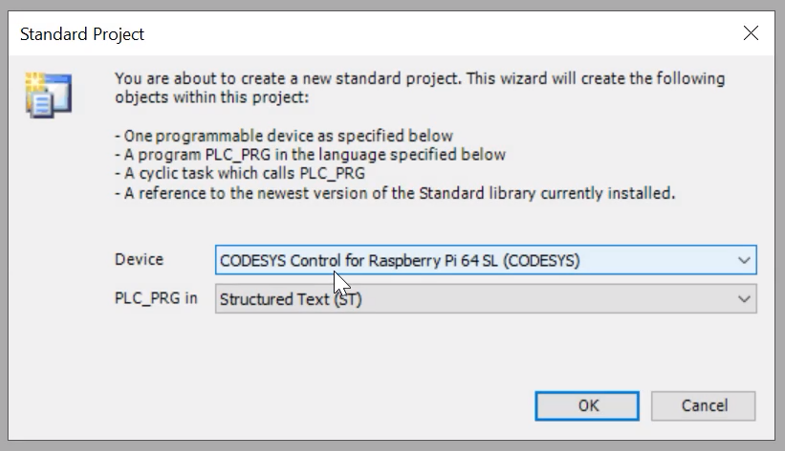
步骤 3:在 Device 列中选择 CODESYS Control for Raspberry Pi 64 SL (CODESYS),在 PLC_PRG in 中选择 Structured Text (ST),然后点击 OK
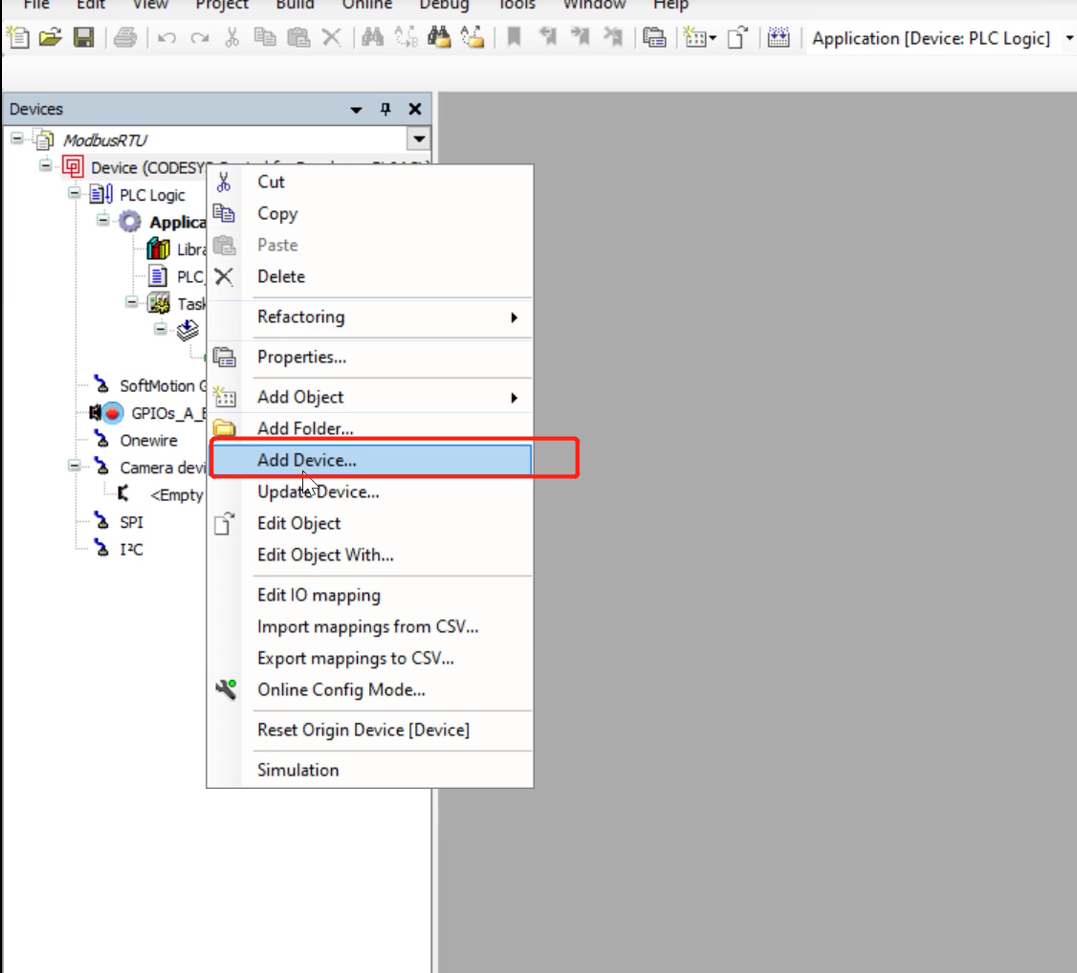
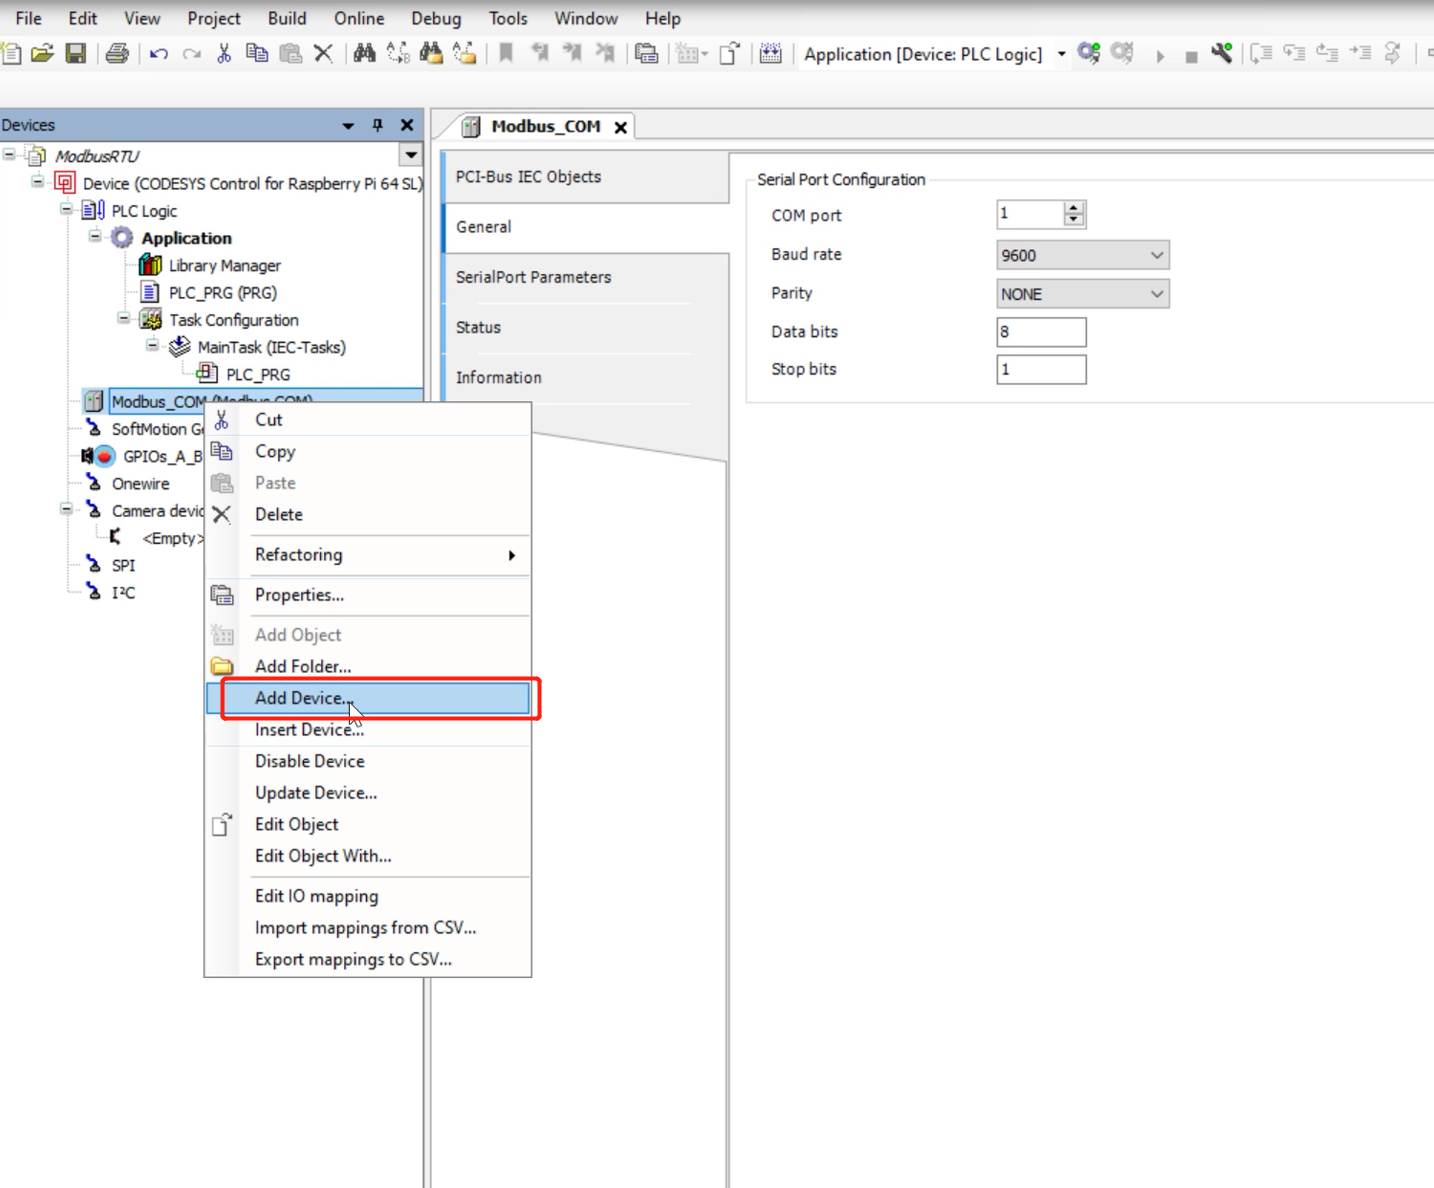
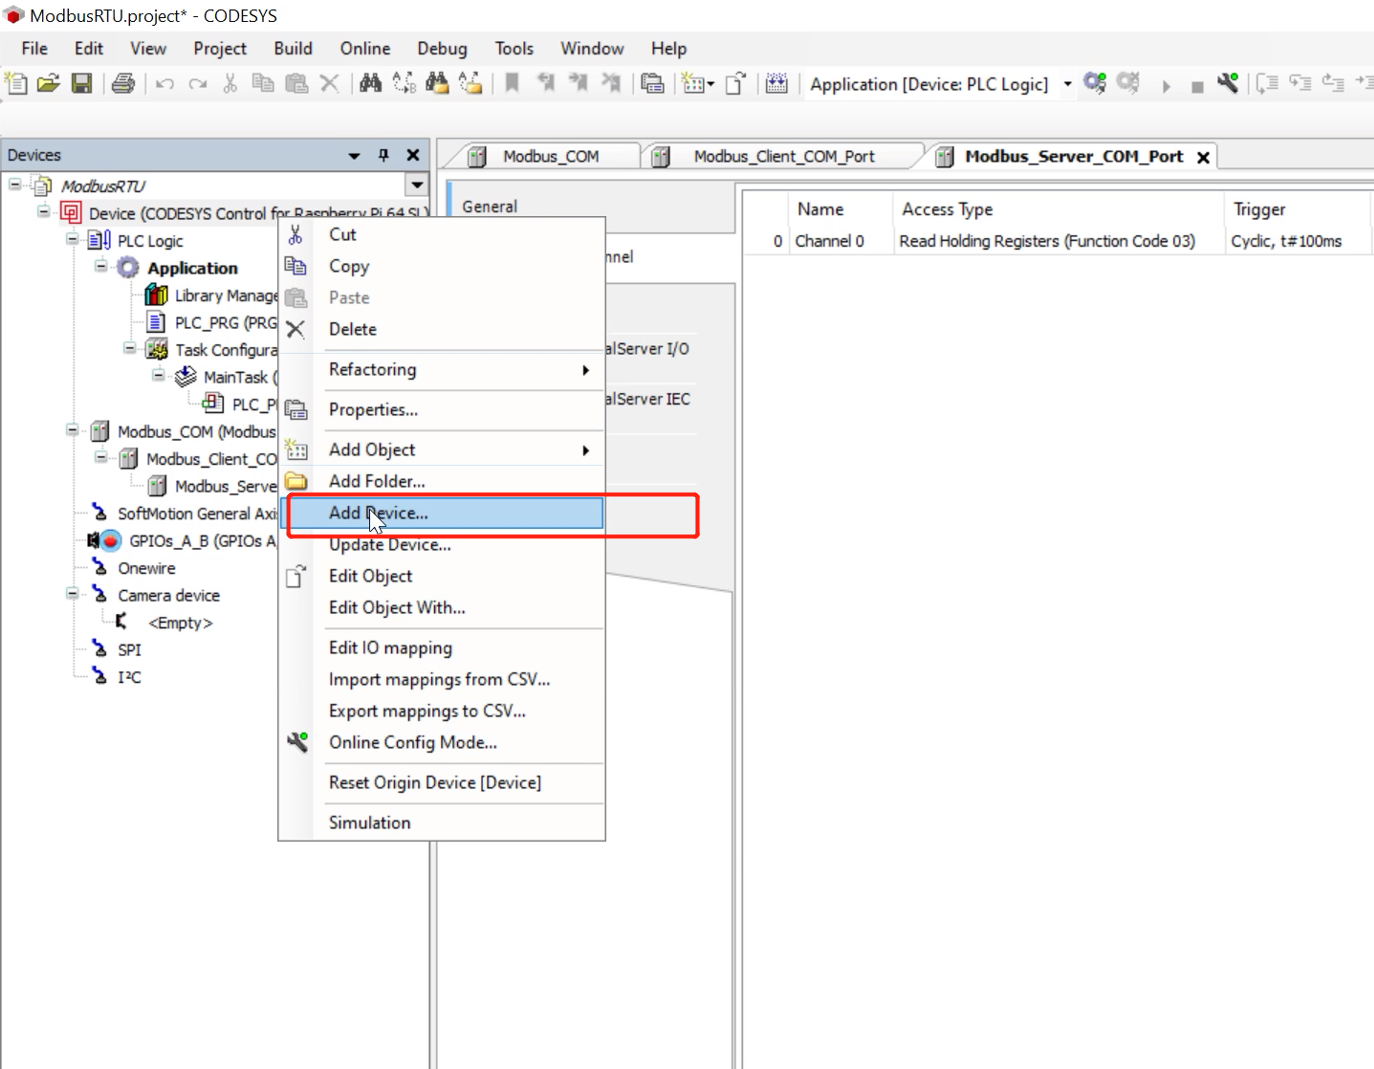
步骤 4:右键点击项目并选择 Add Device 添加设备
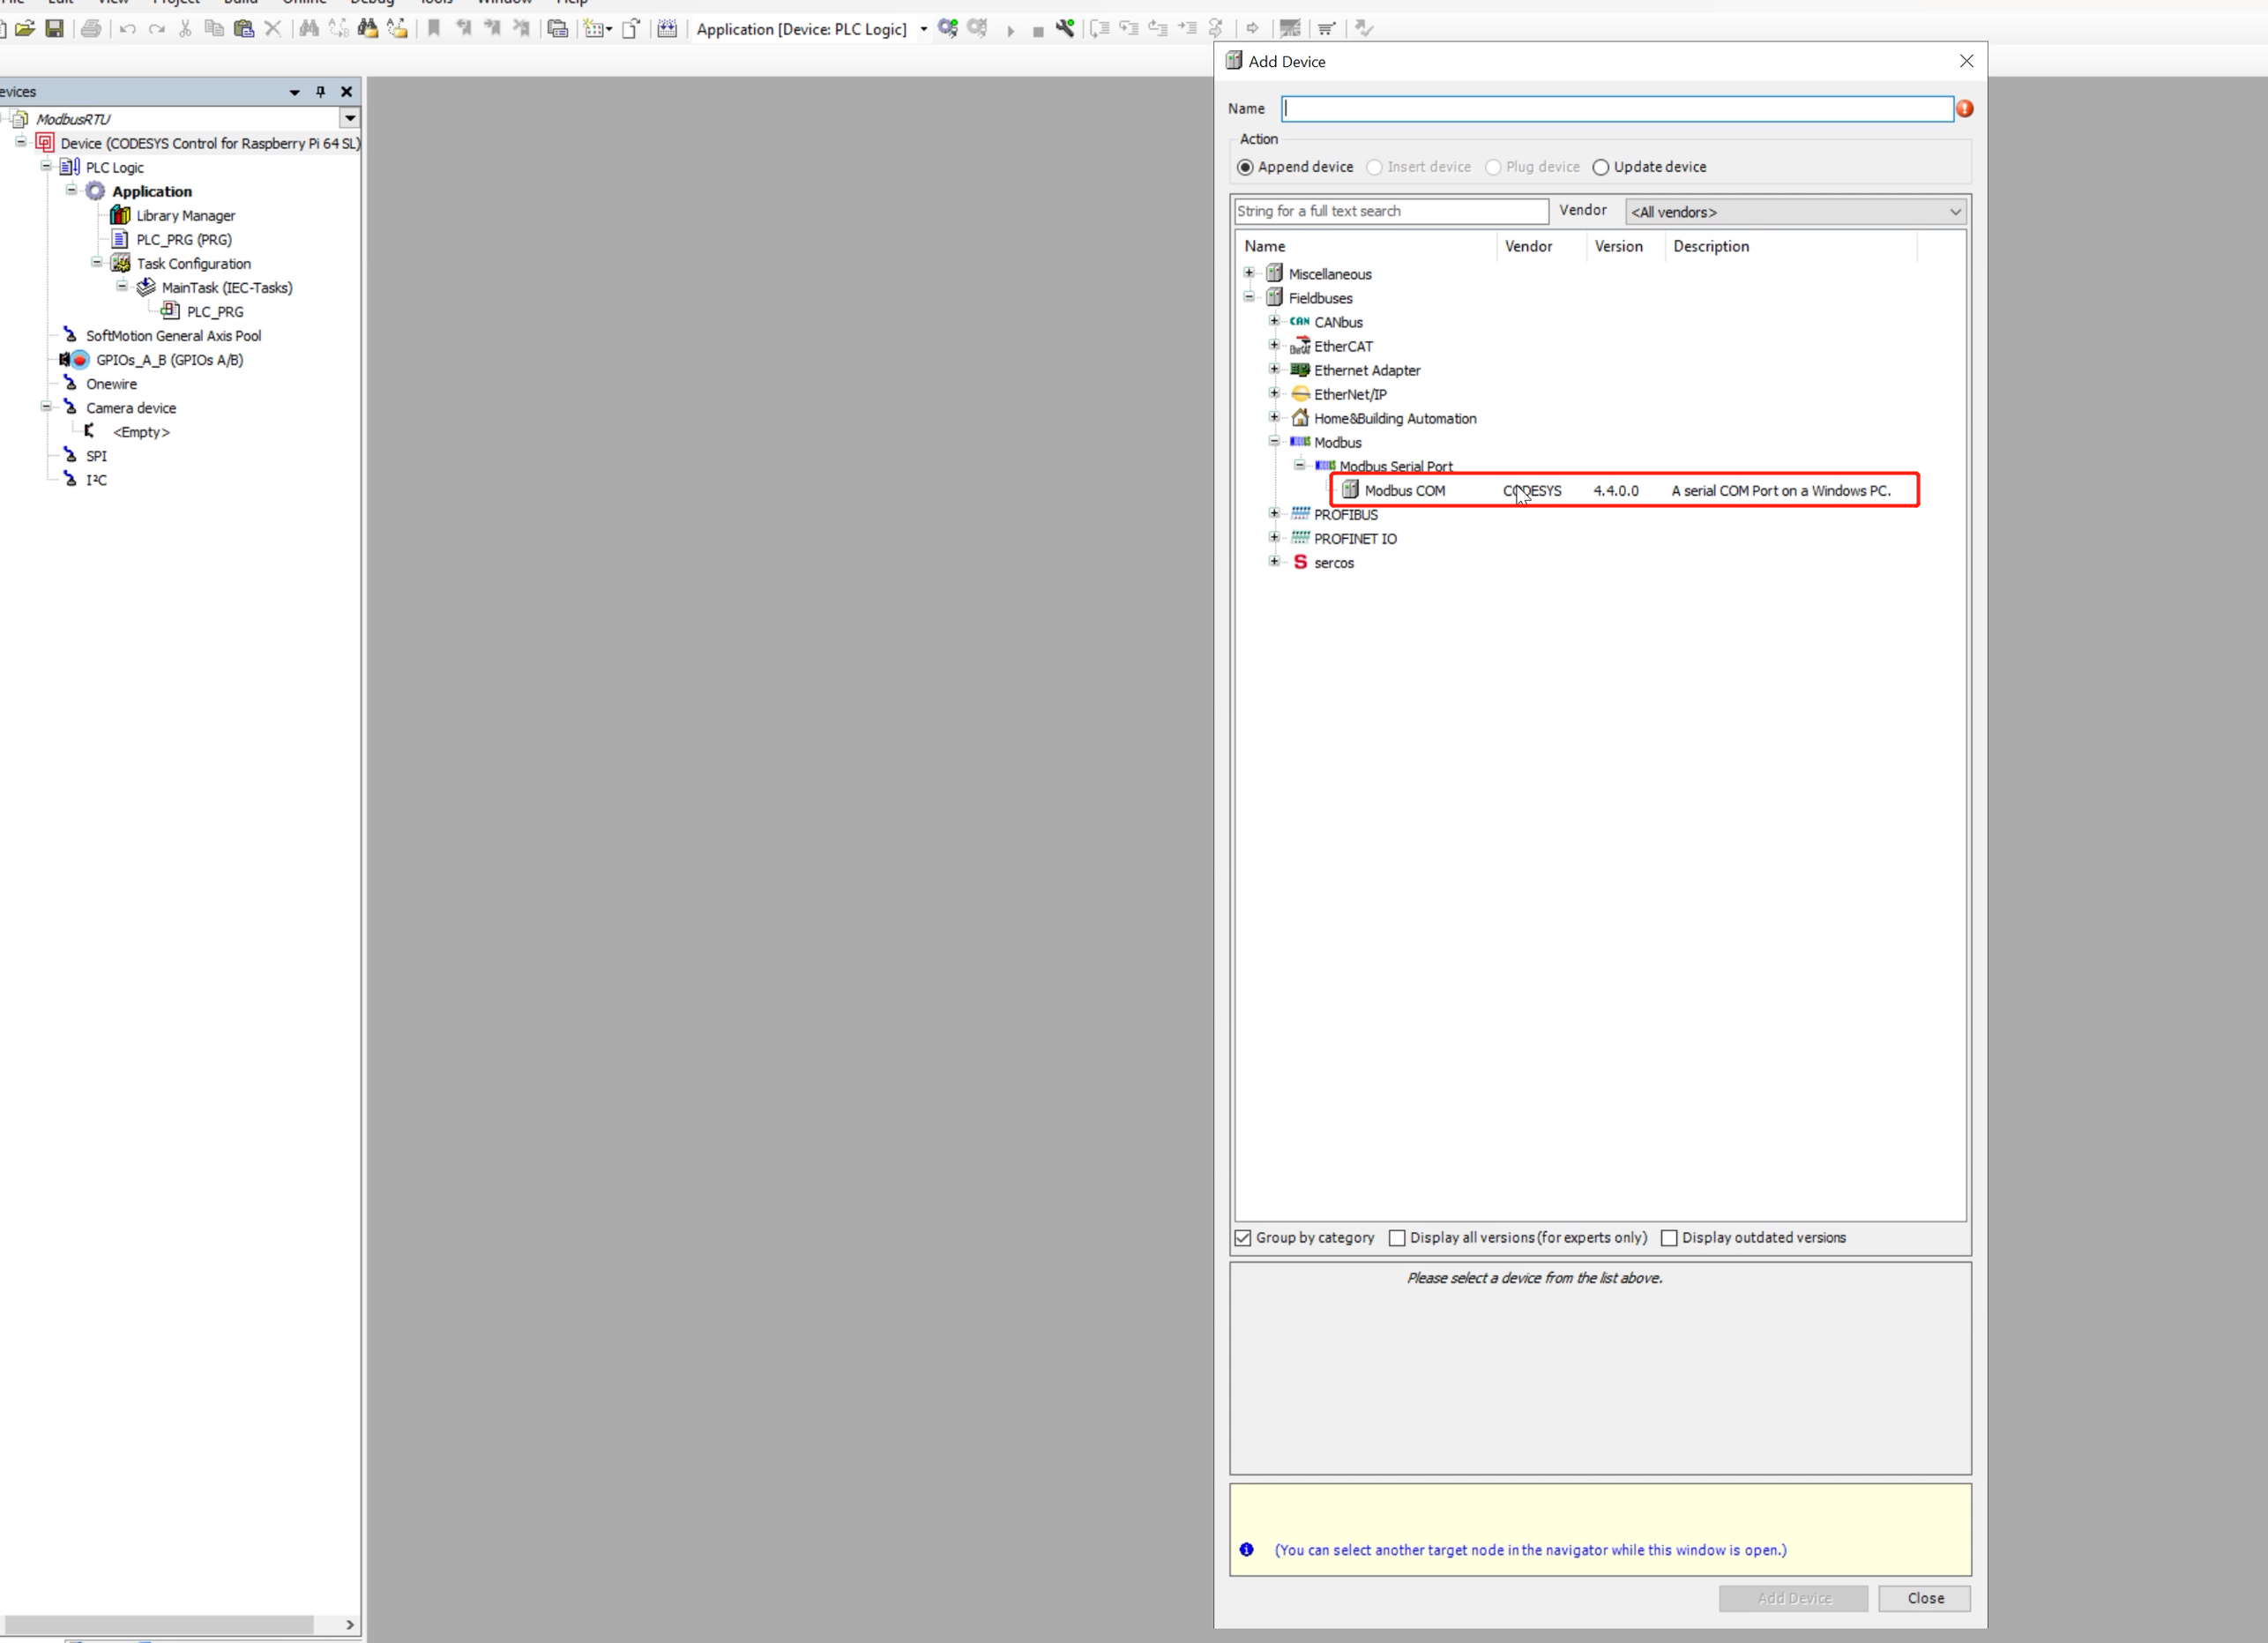
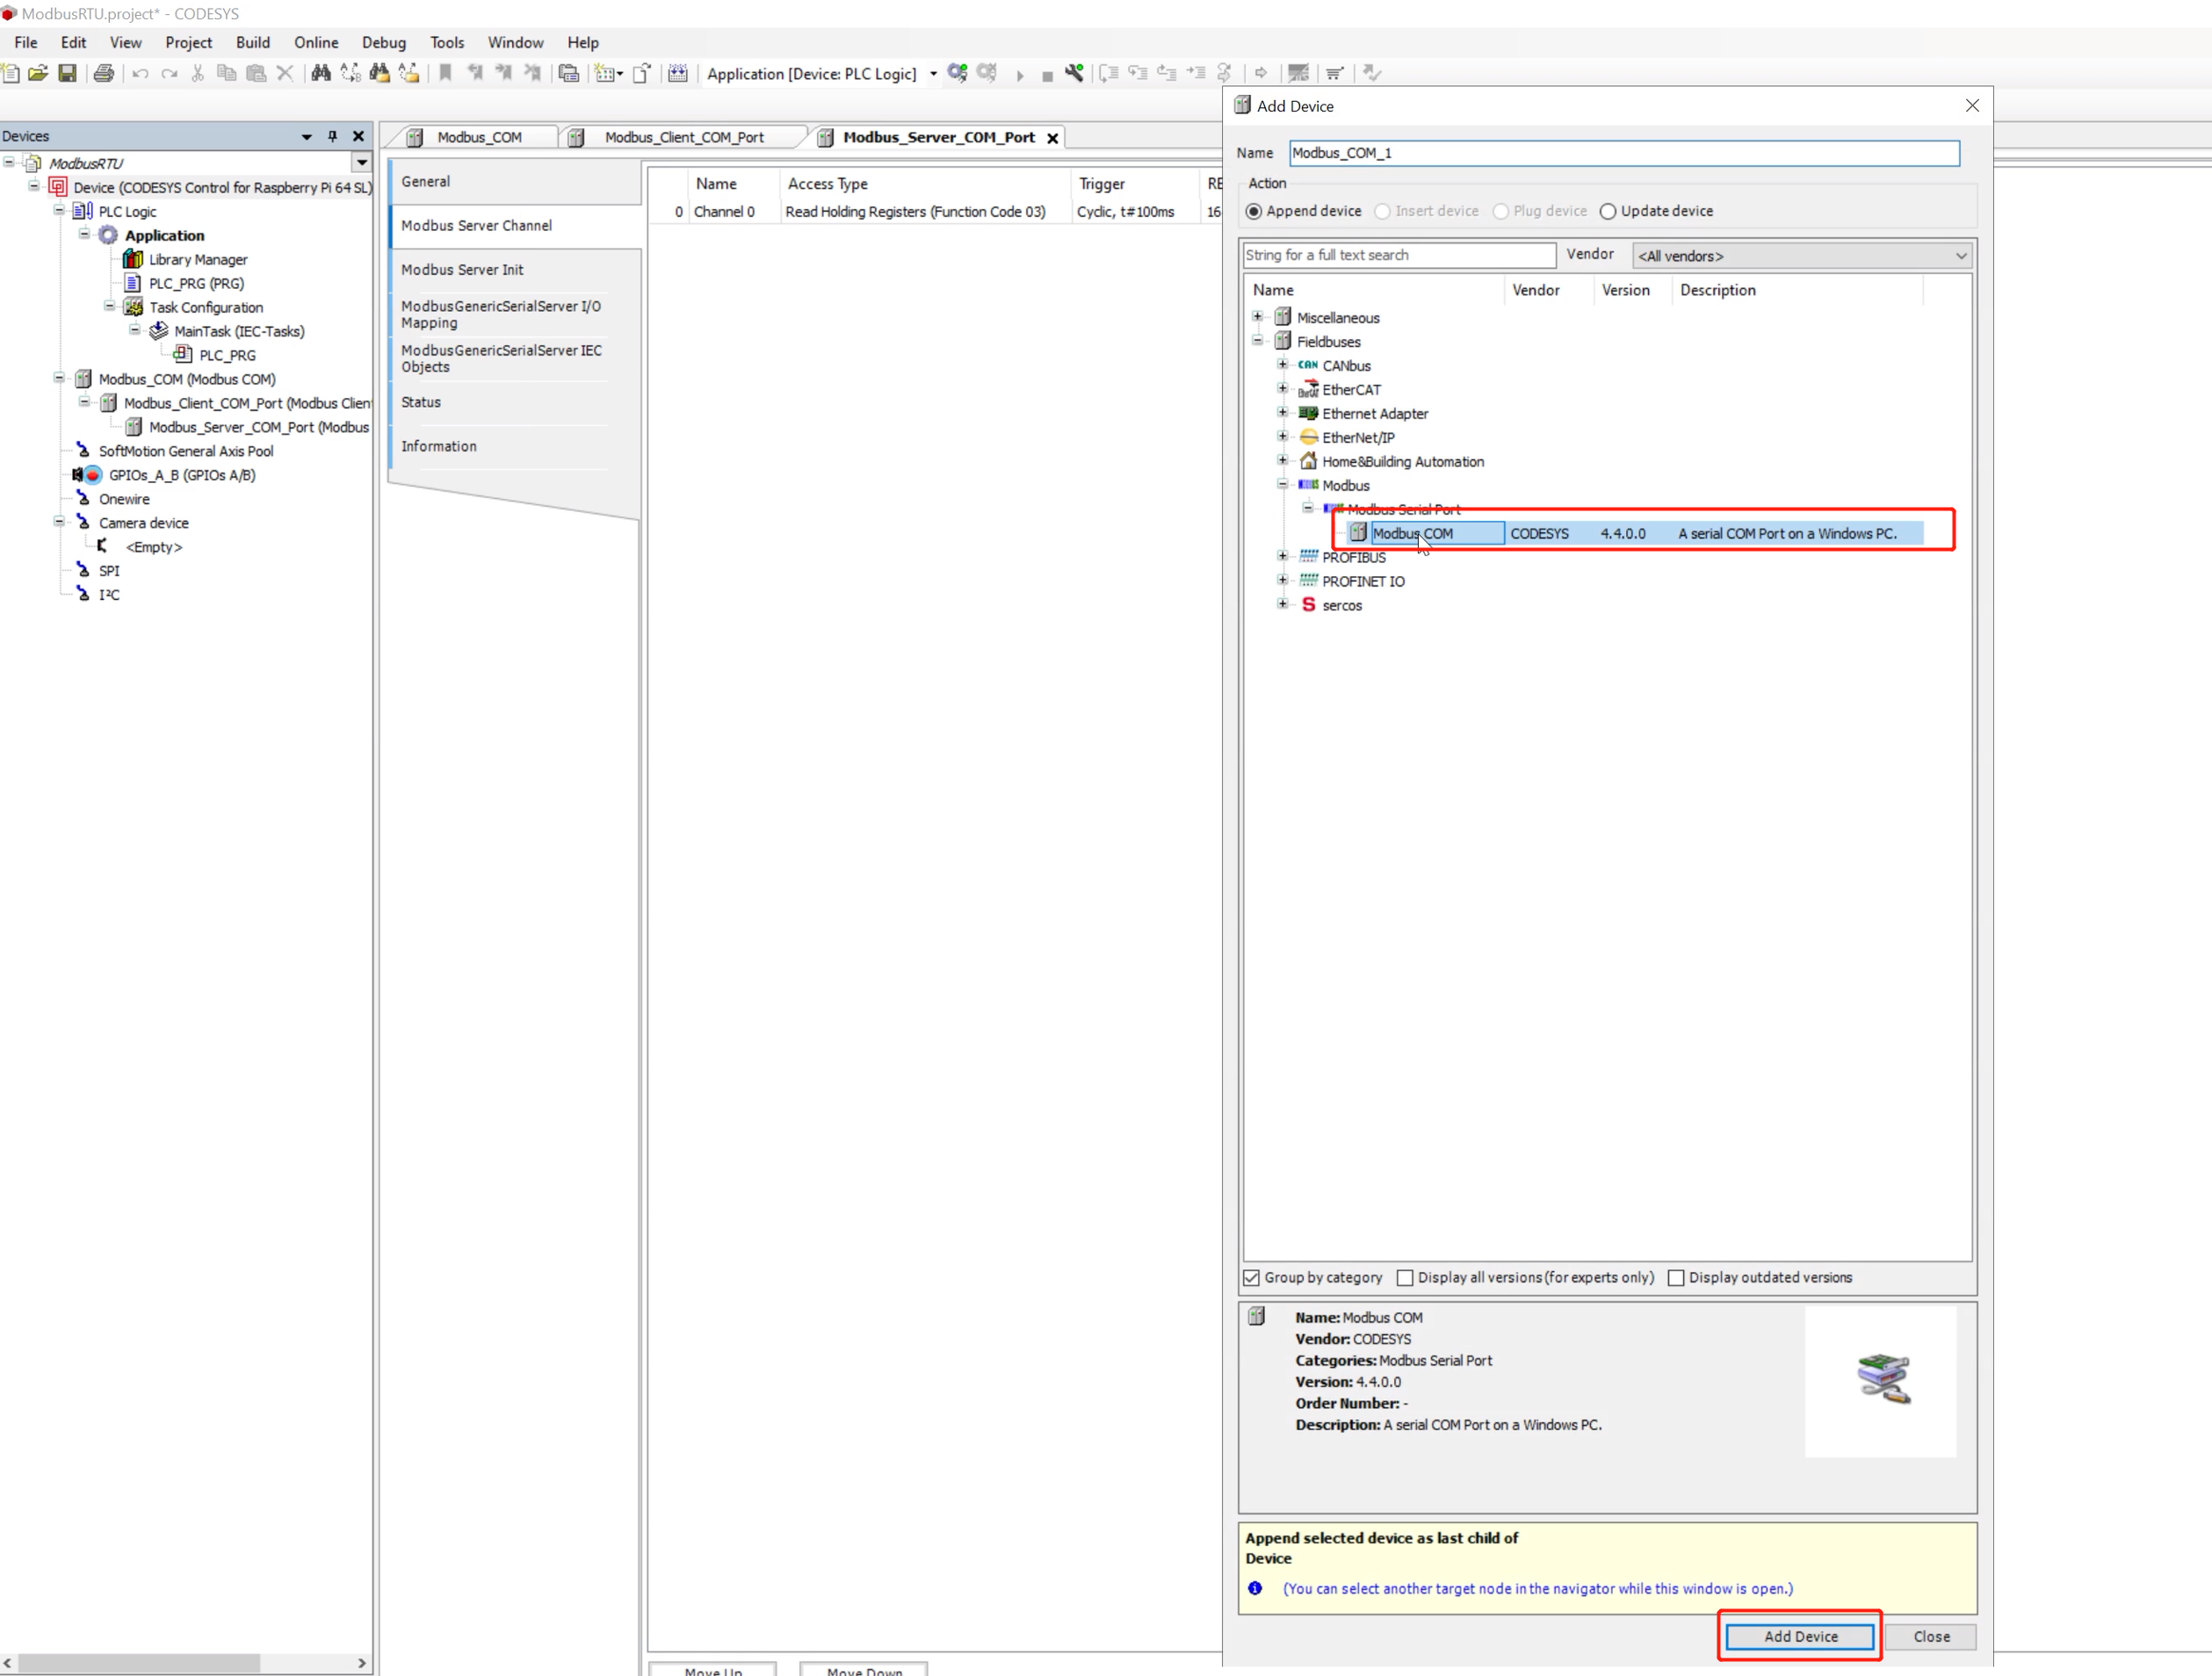
步骤 5:点击 Modbus--->Modbus serial Port--->Modbus COM 添加 Modbus 串口设备
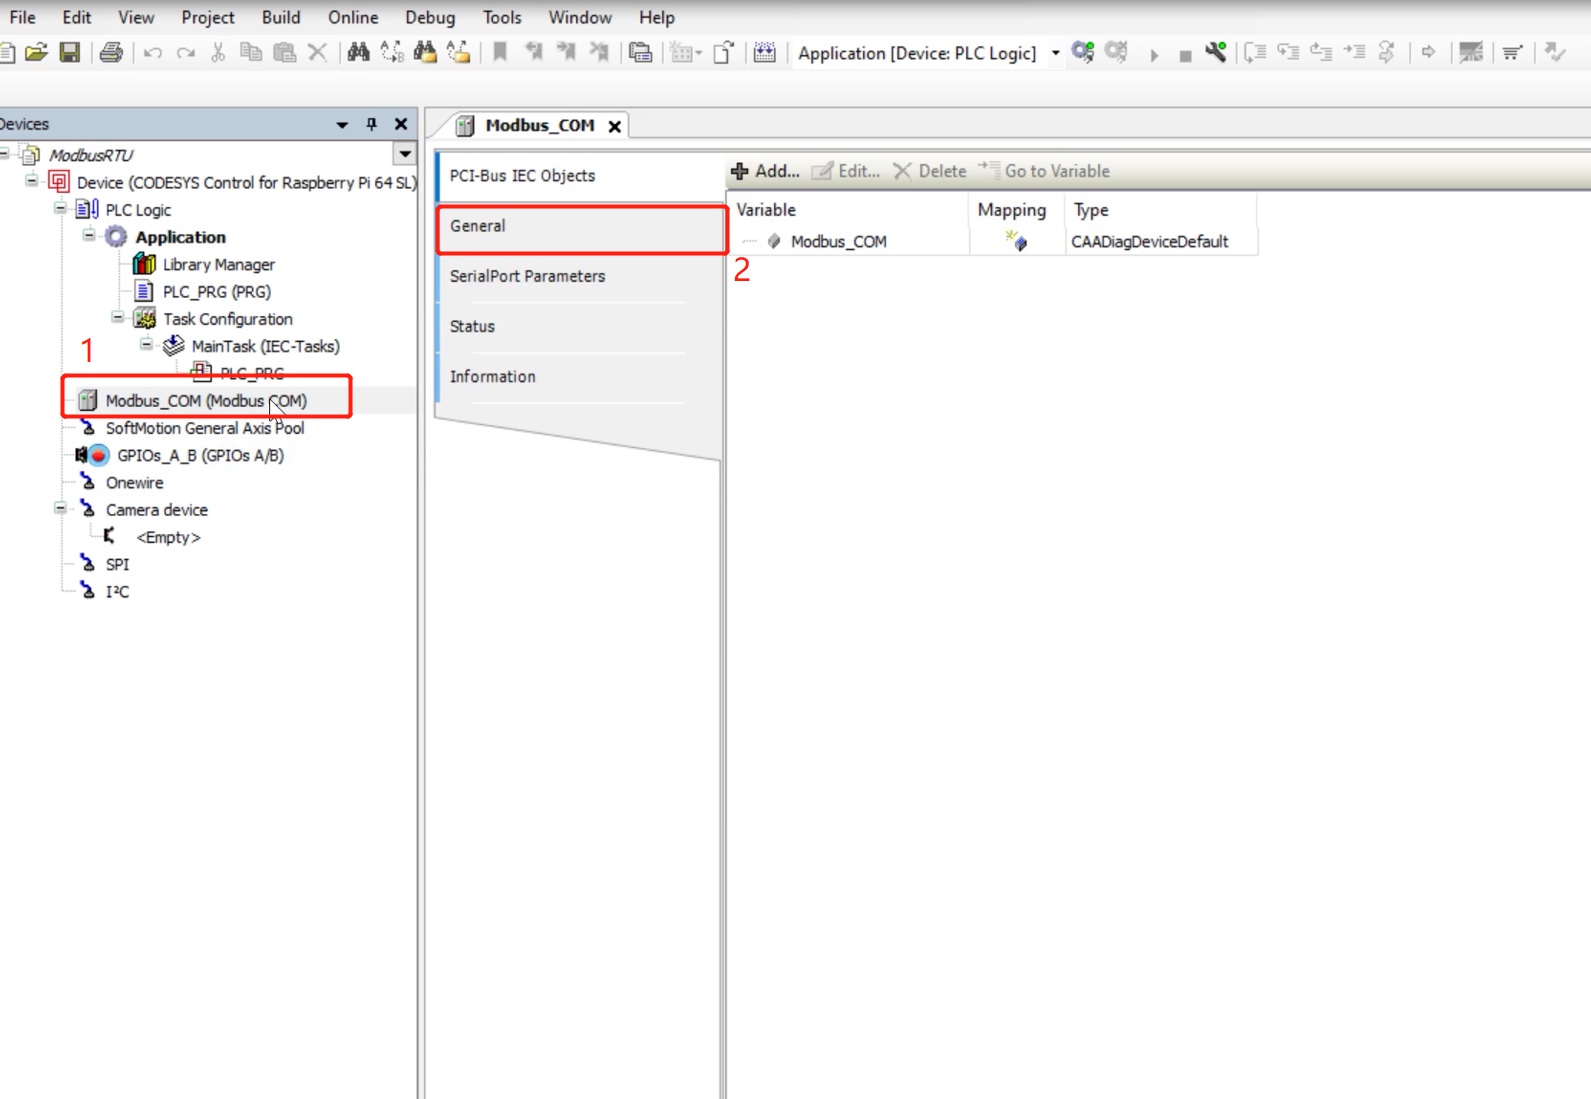
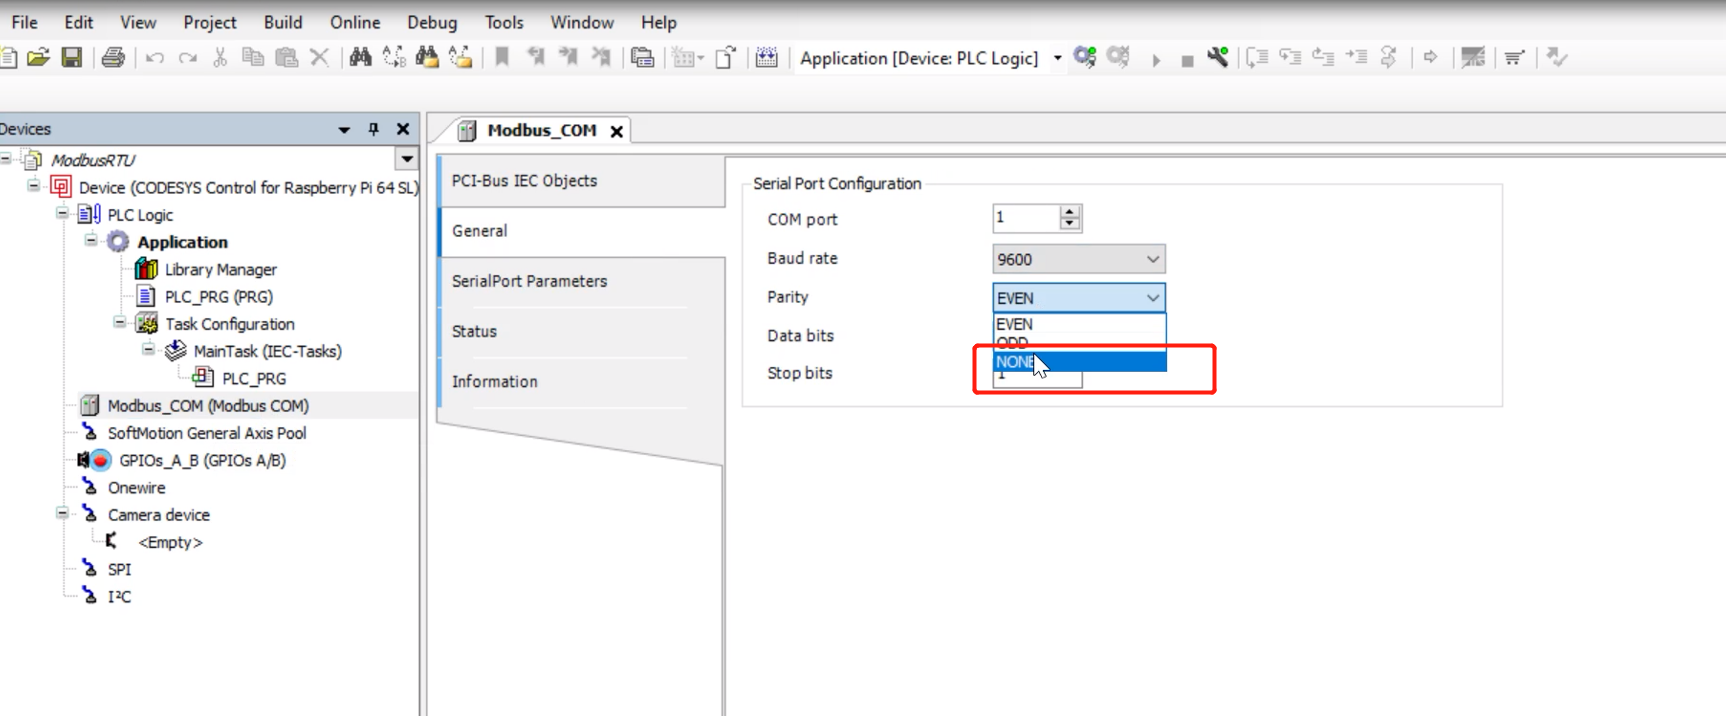
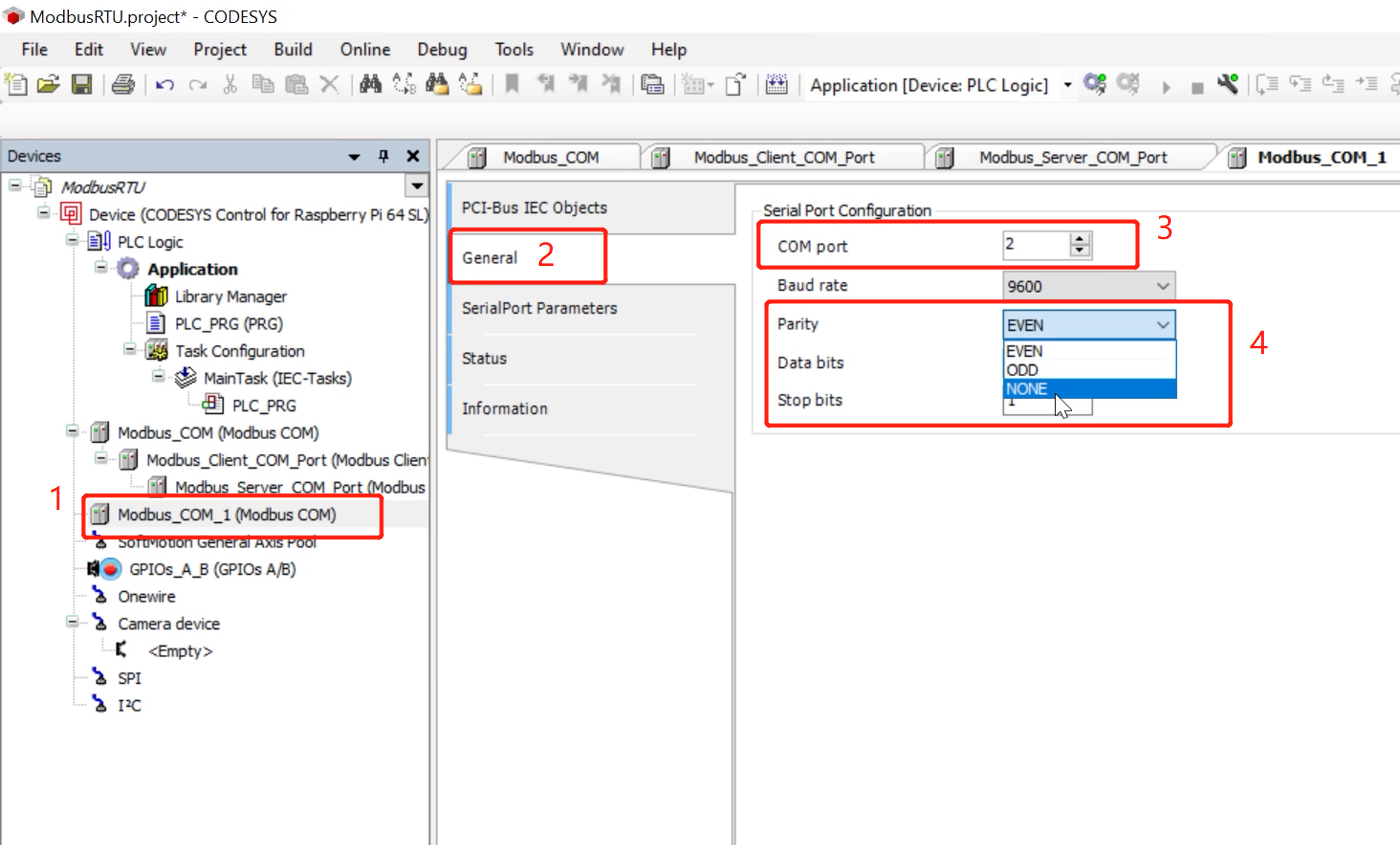
步骤 6:双击新添加的 Modbus_COM,点击 General,可以设置串口号和波特率等信息
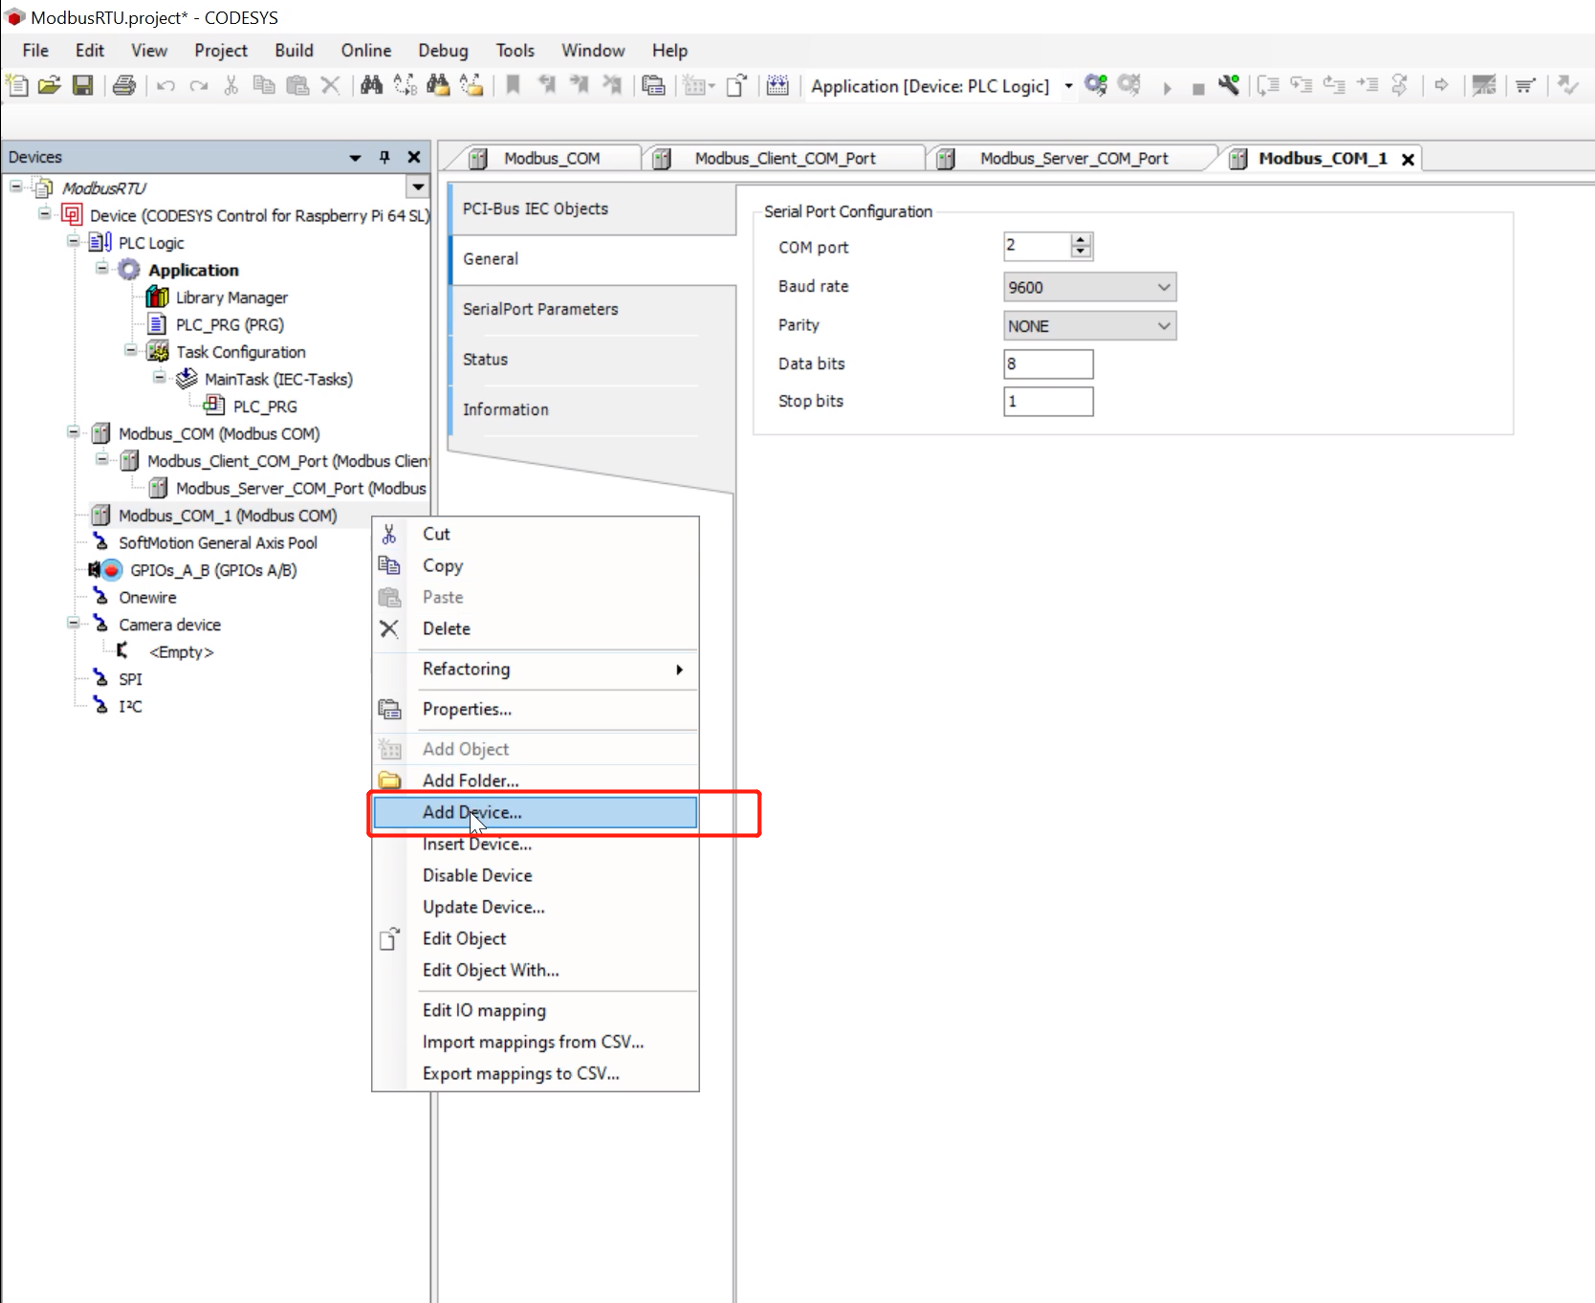
步骤 7:右键点击 Modbus_COM 并点击 Add Device 为此端口添加 Modbus 设备
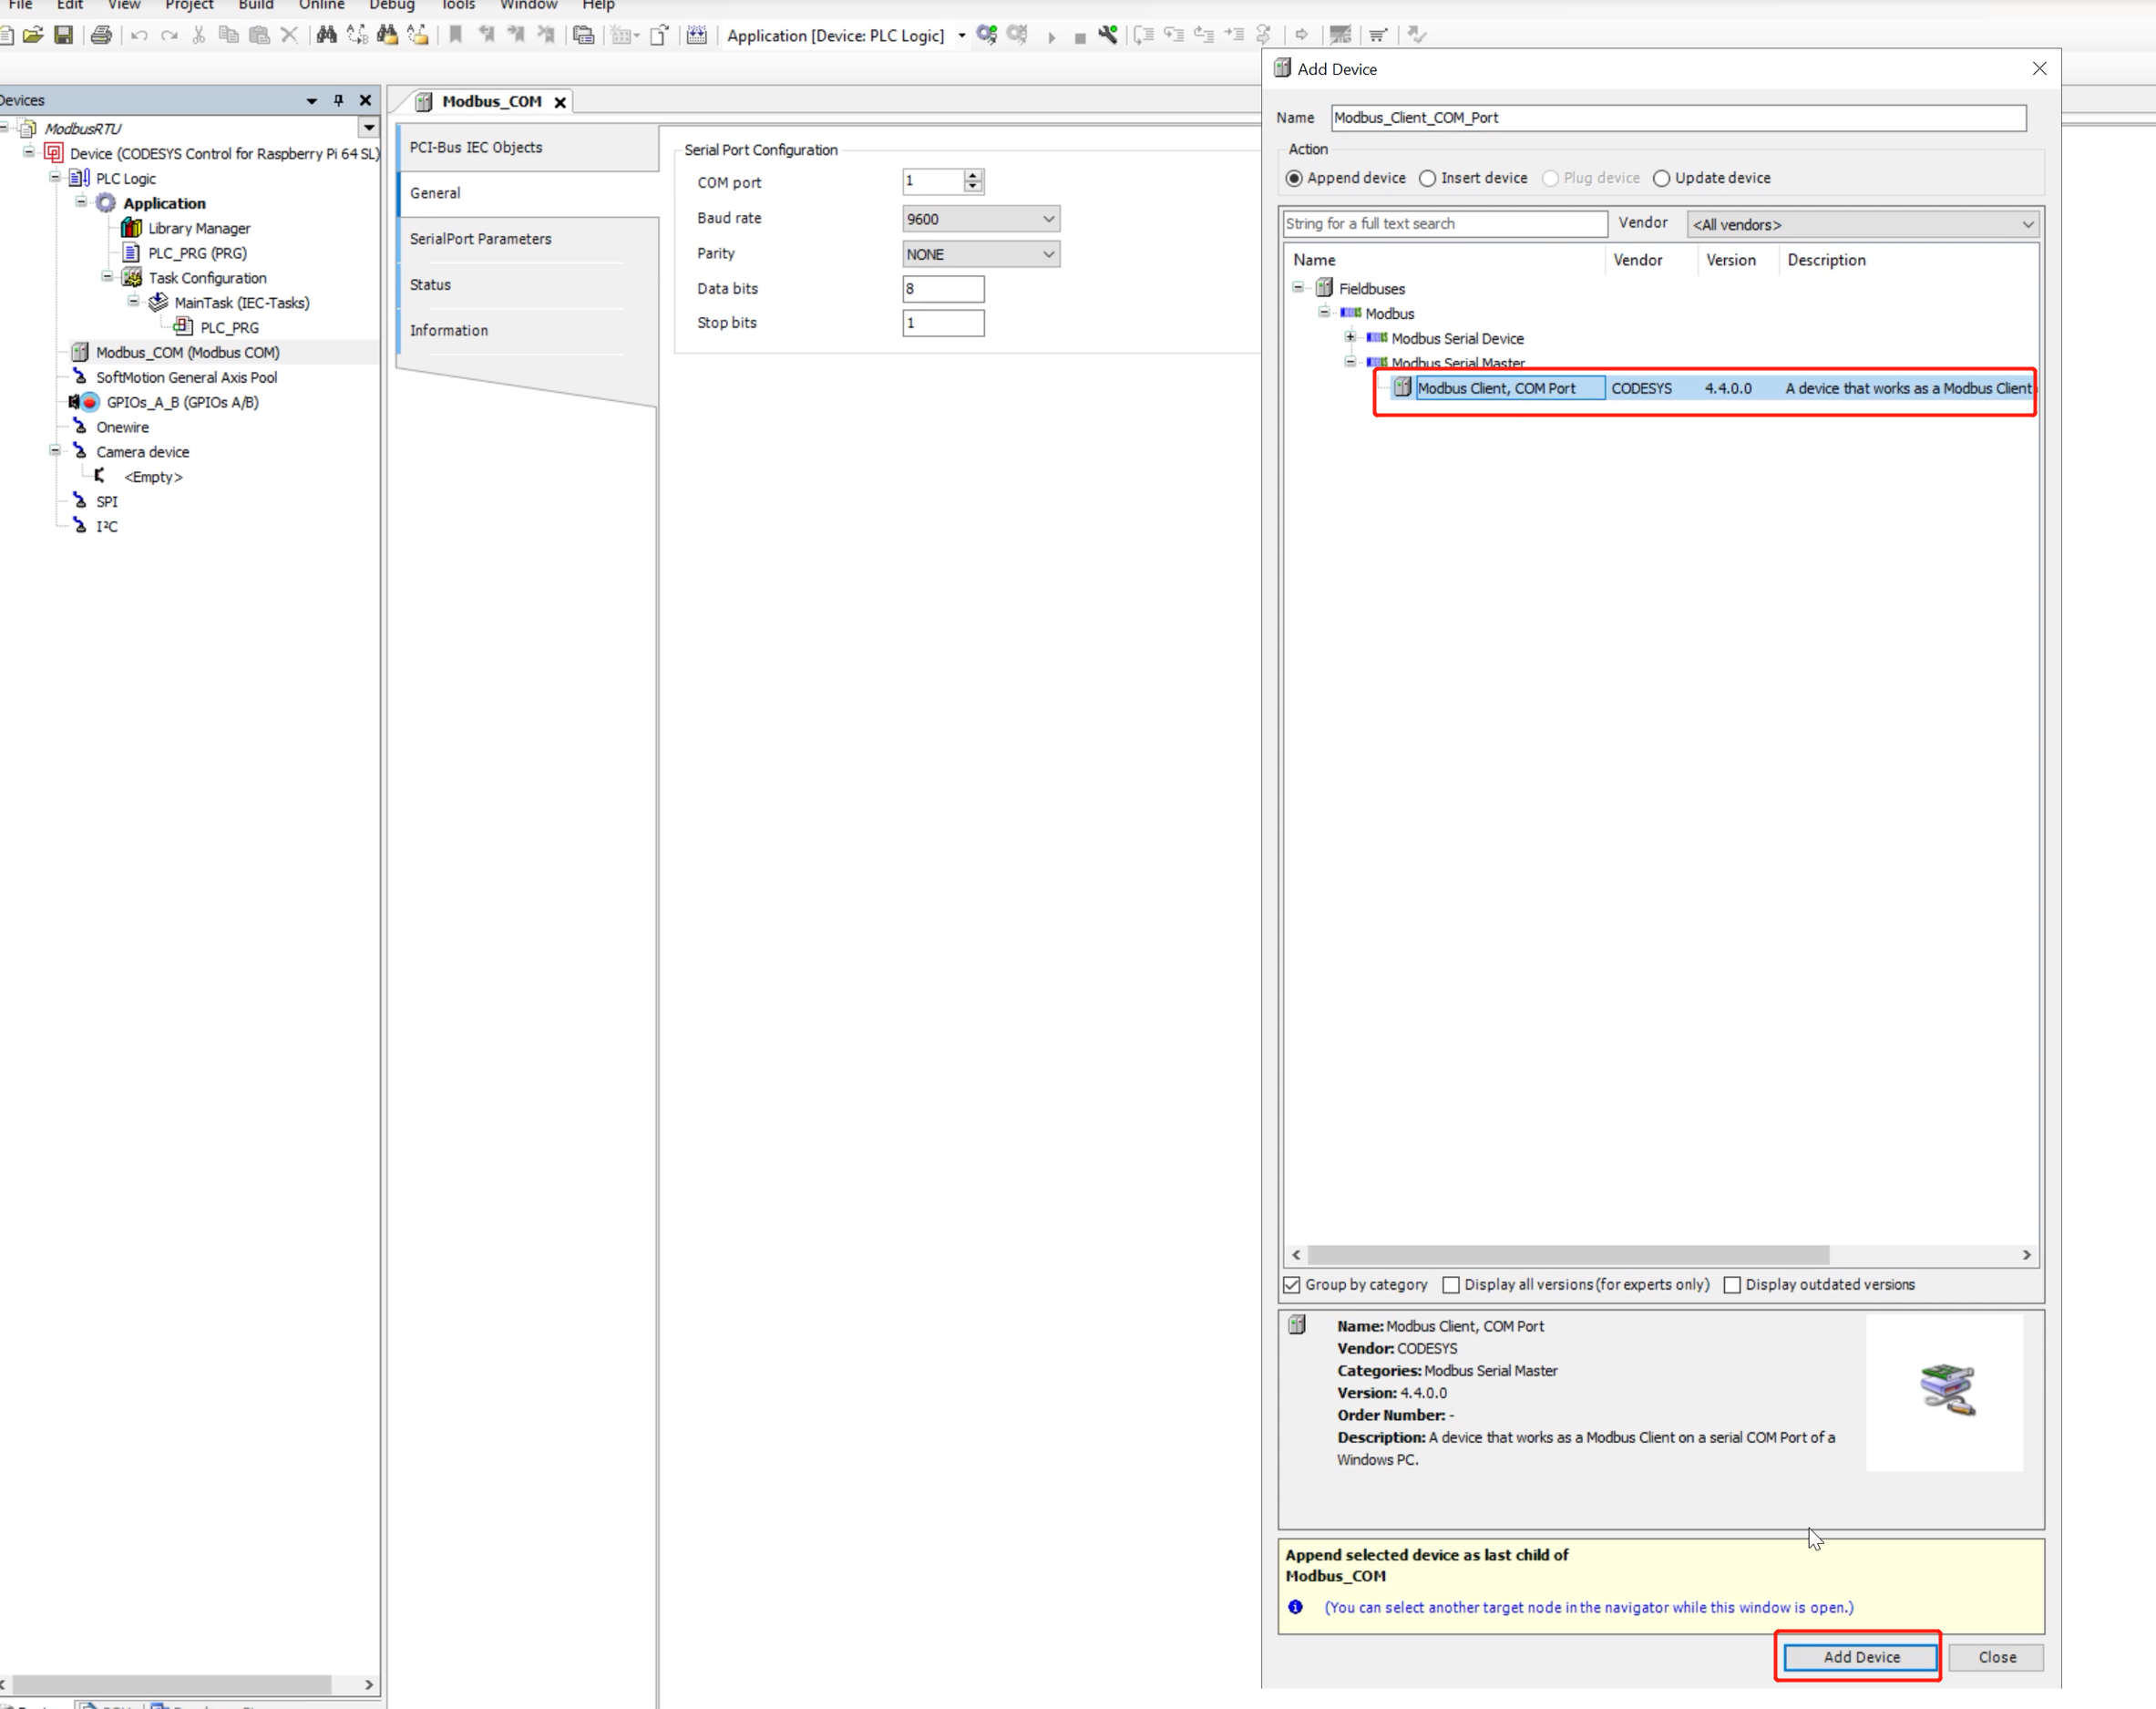
步骤 8:选择 Modbus Serial Master ---> Modbus Client, COM Port 为此串口绑定 Modbus 主站设备
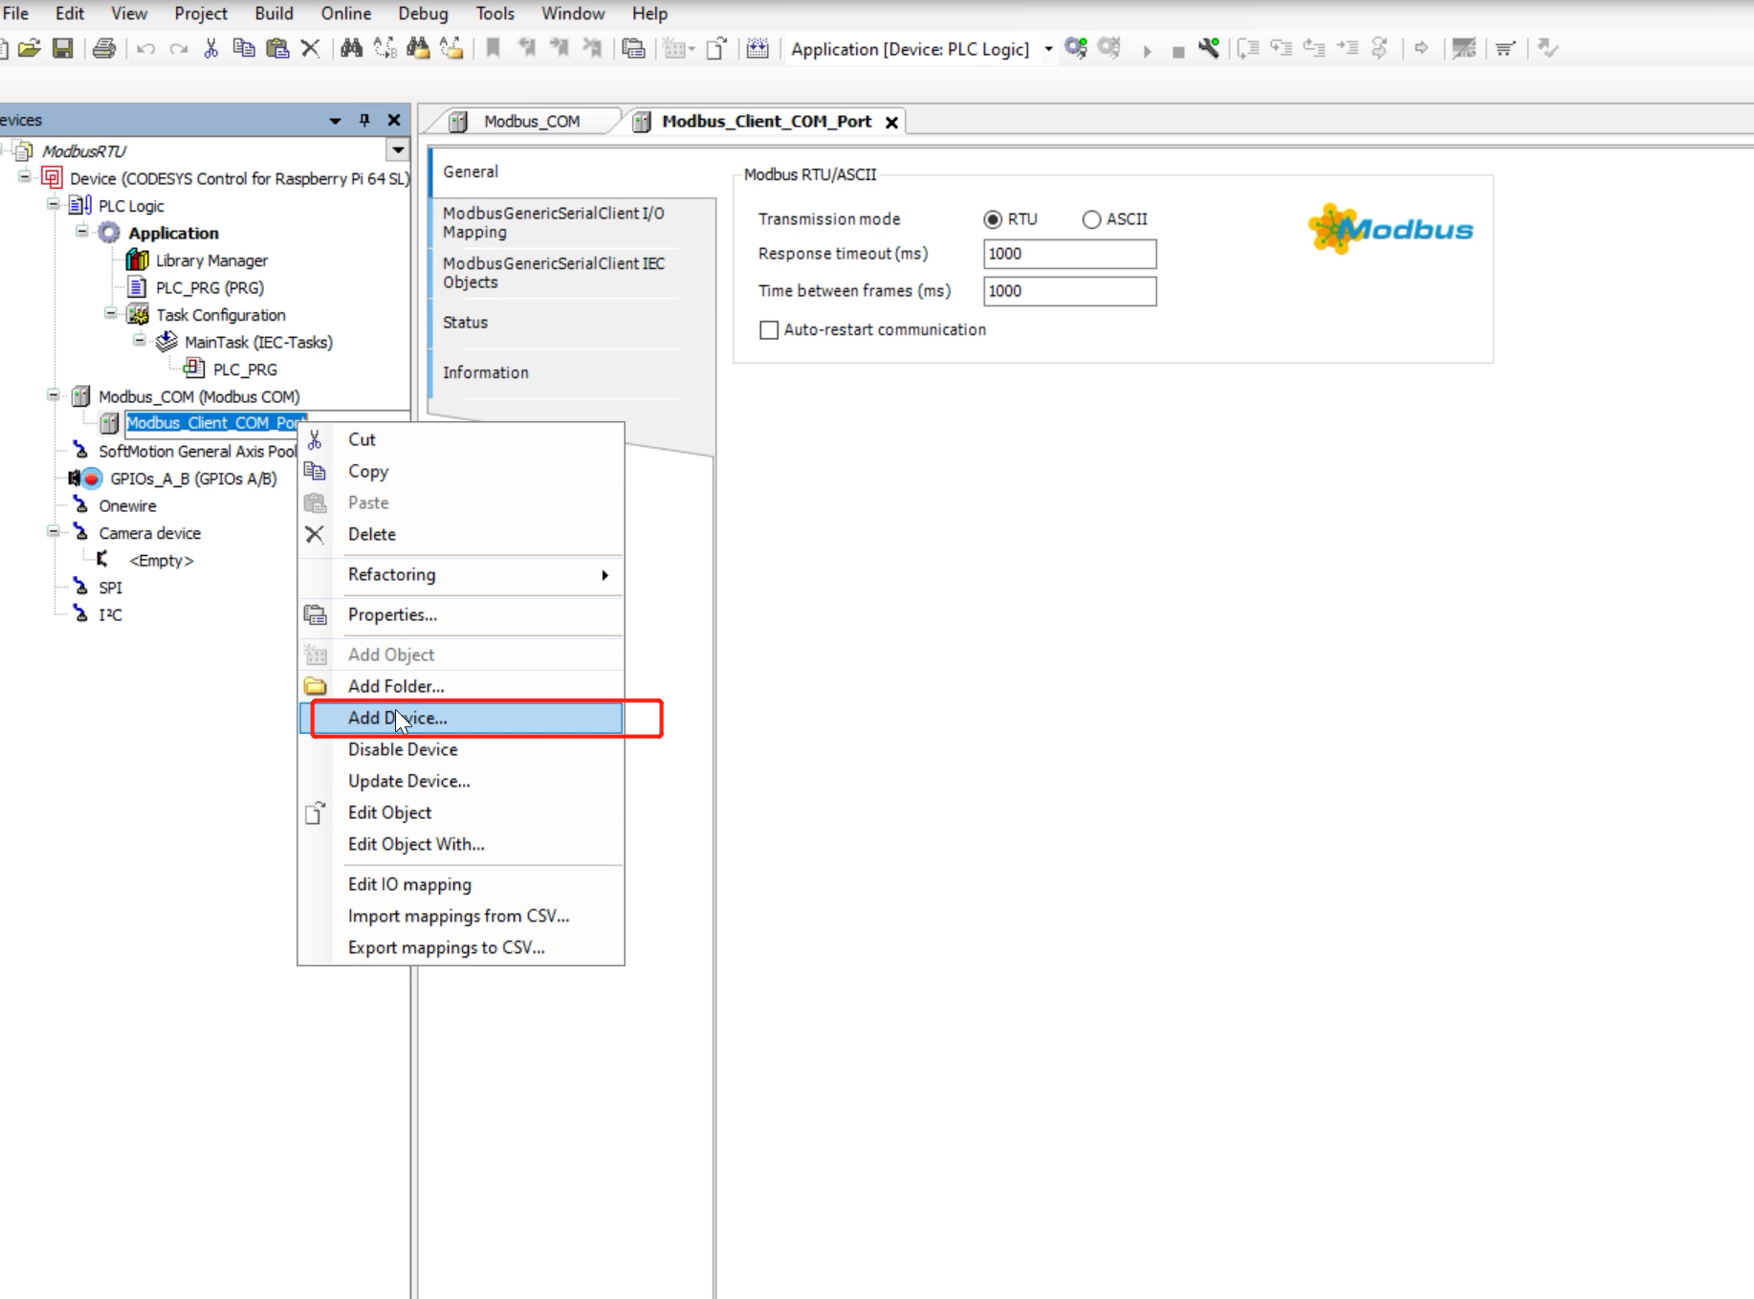
步骤 9:右键点击 Modbus_Clent_COM_Port 并选择 Add Device 为此 Modbus 主站添加要操作的从站设备。这里可以添加多个从站设备。这里的从站设备代表主站要操作的从站设备。稍后需要配置主站将对这些从站执行的操作。
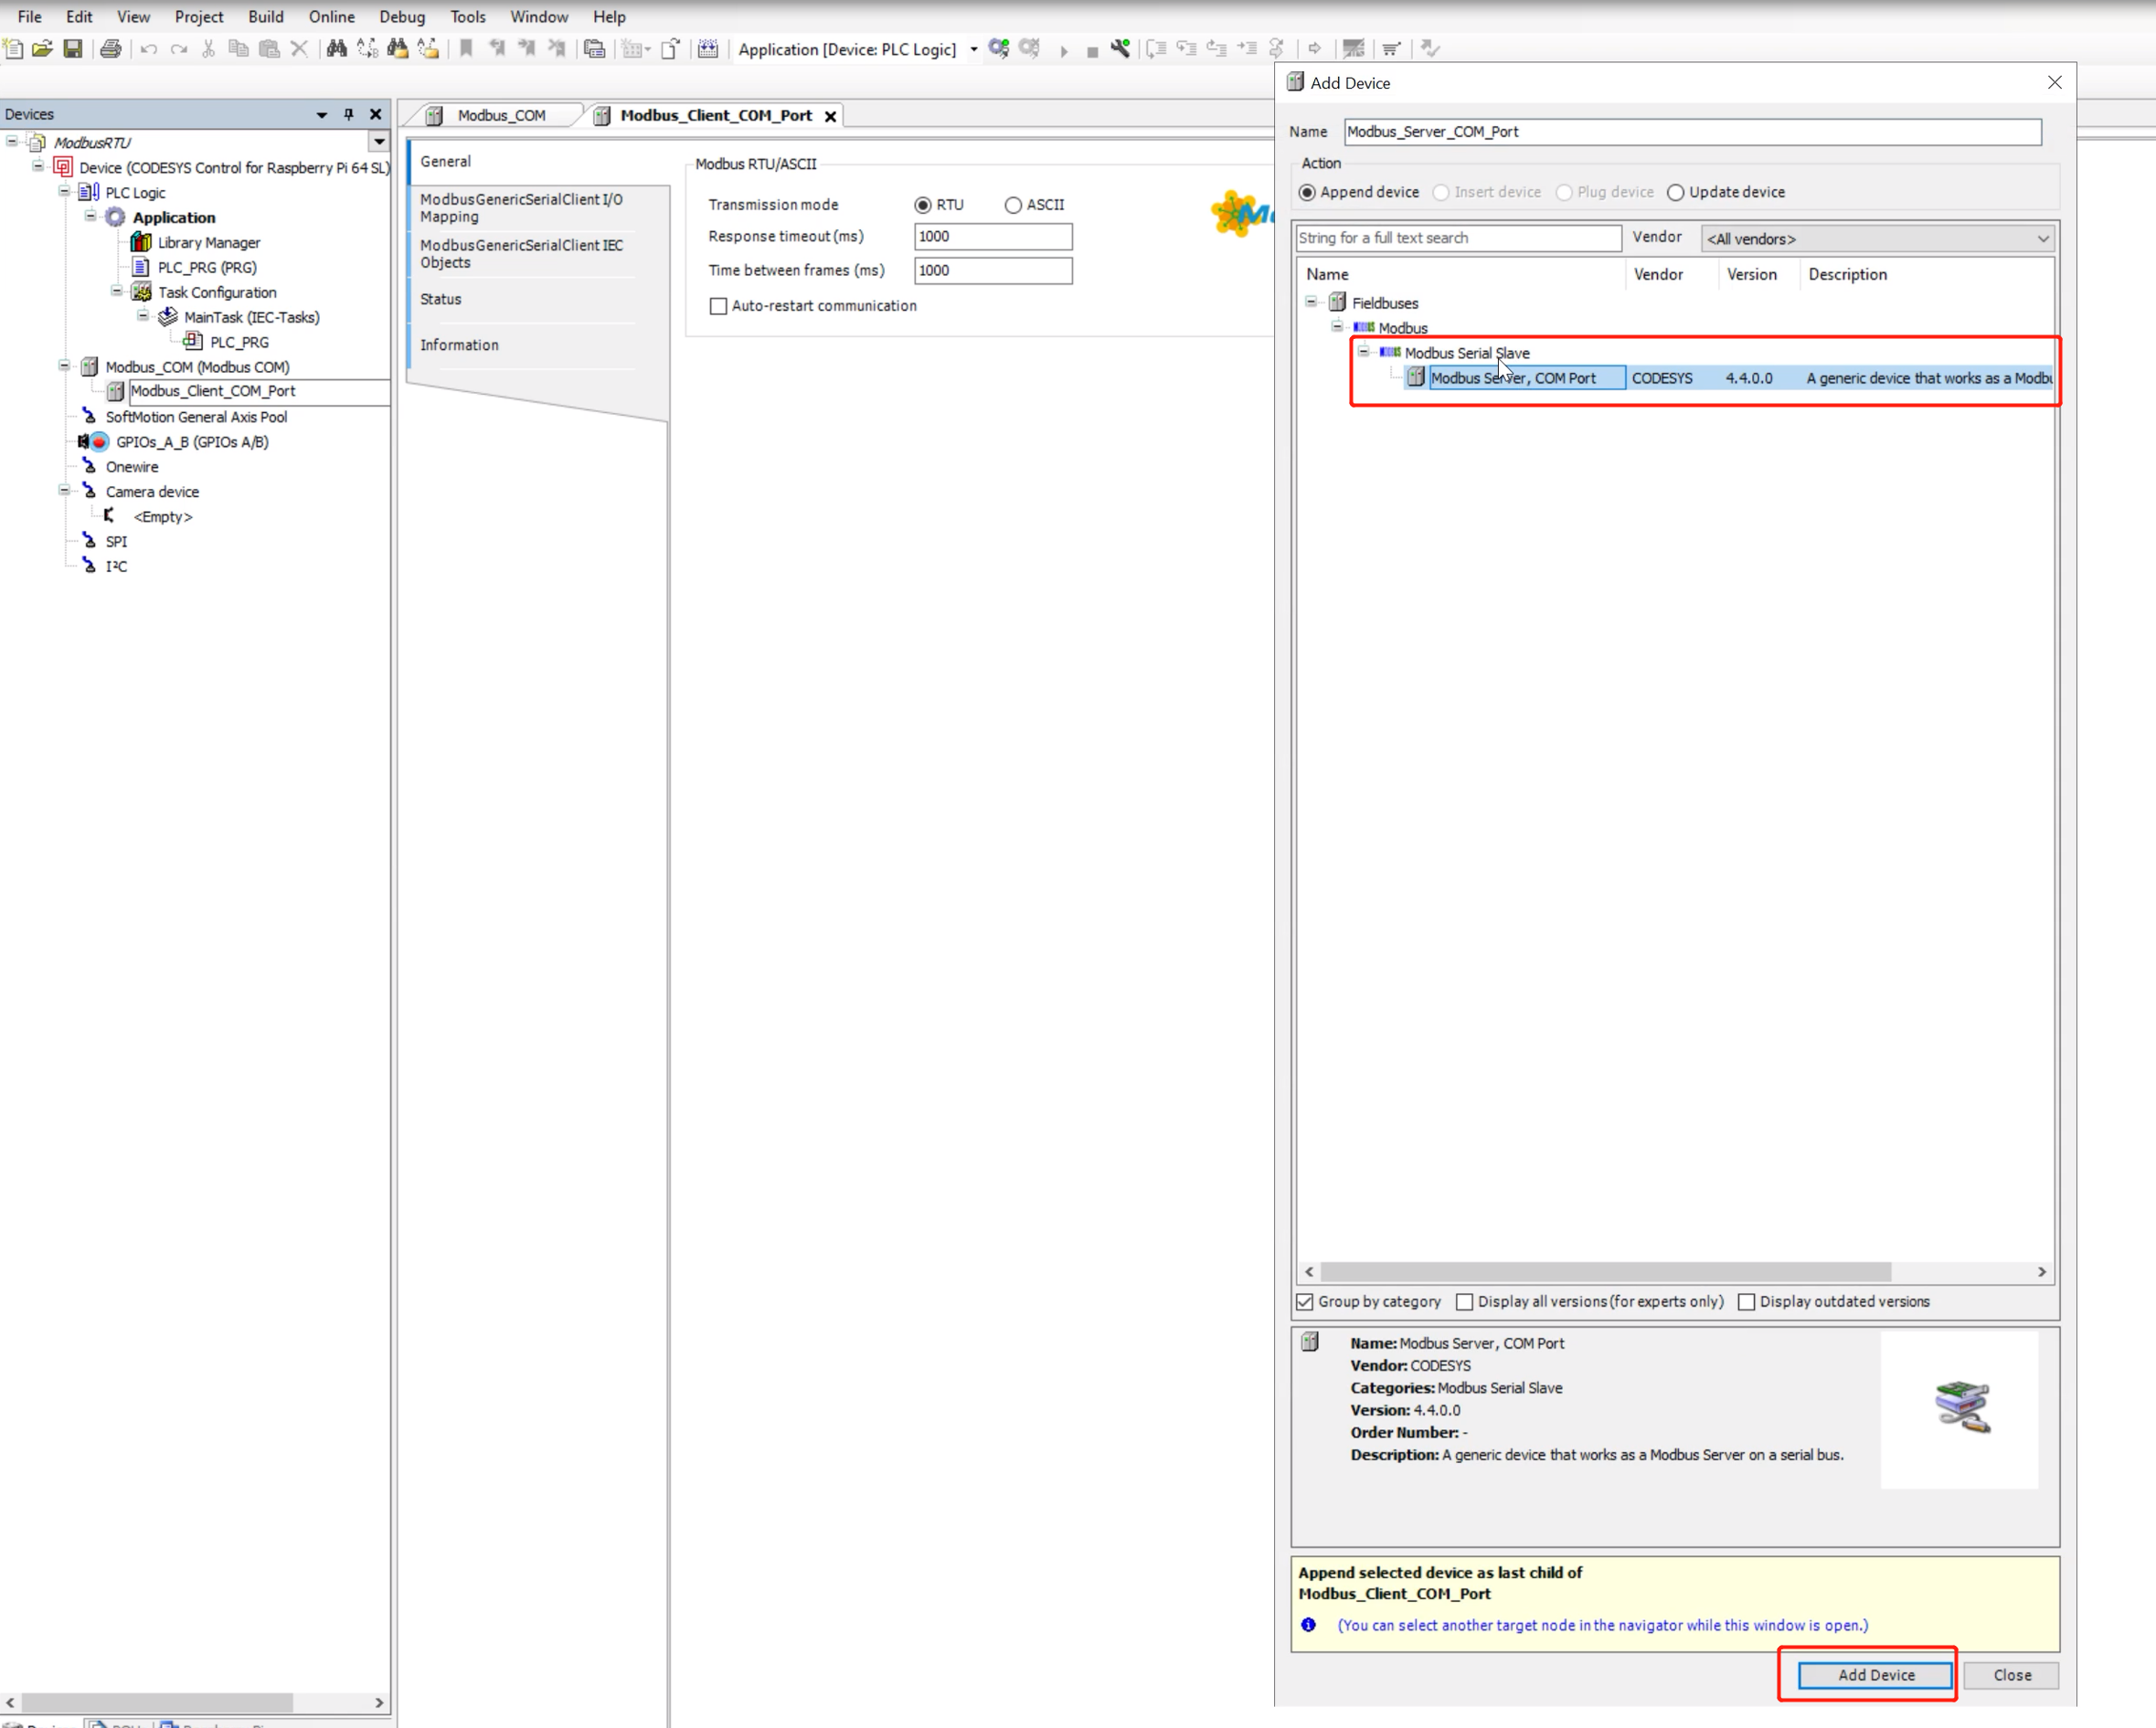
步骤 10:选择 Modbus Serial Slave ---> Modbus Server, COM Port 添加 Modbus 从站设备
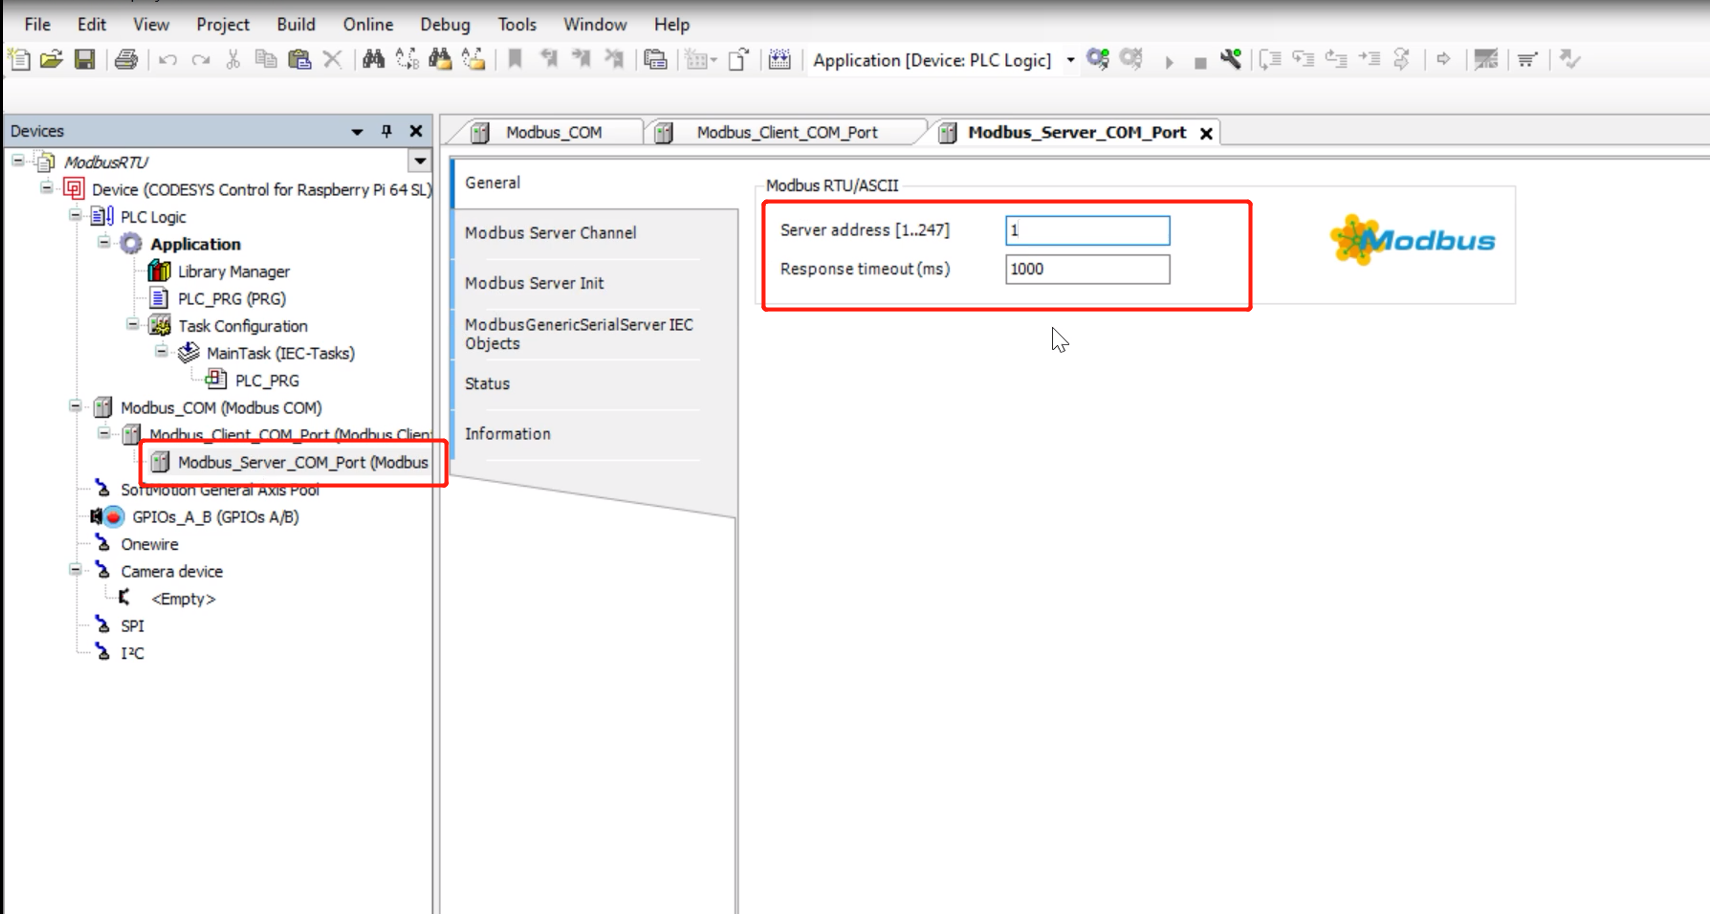
步骤 11:双击新添加的从站设备,在 General 中可以设置 Server address 和 Response timeout 属性
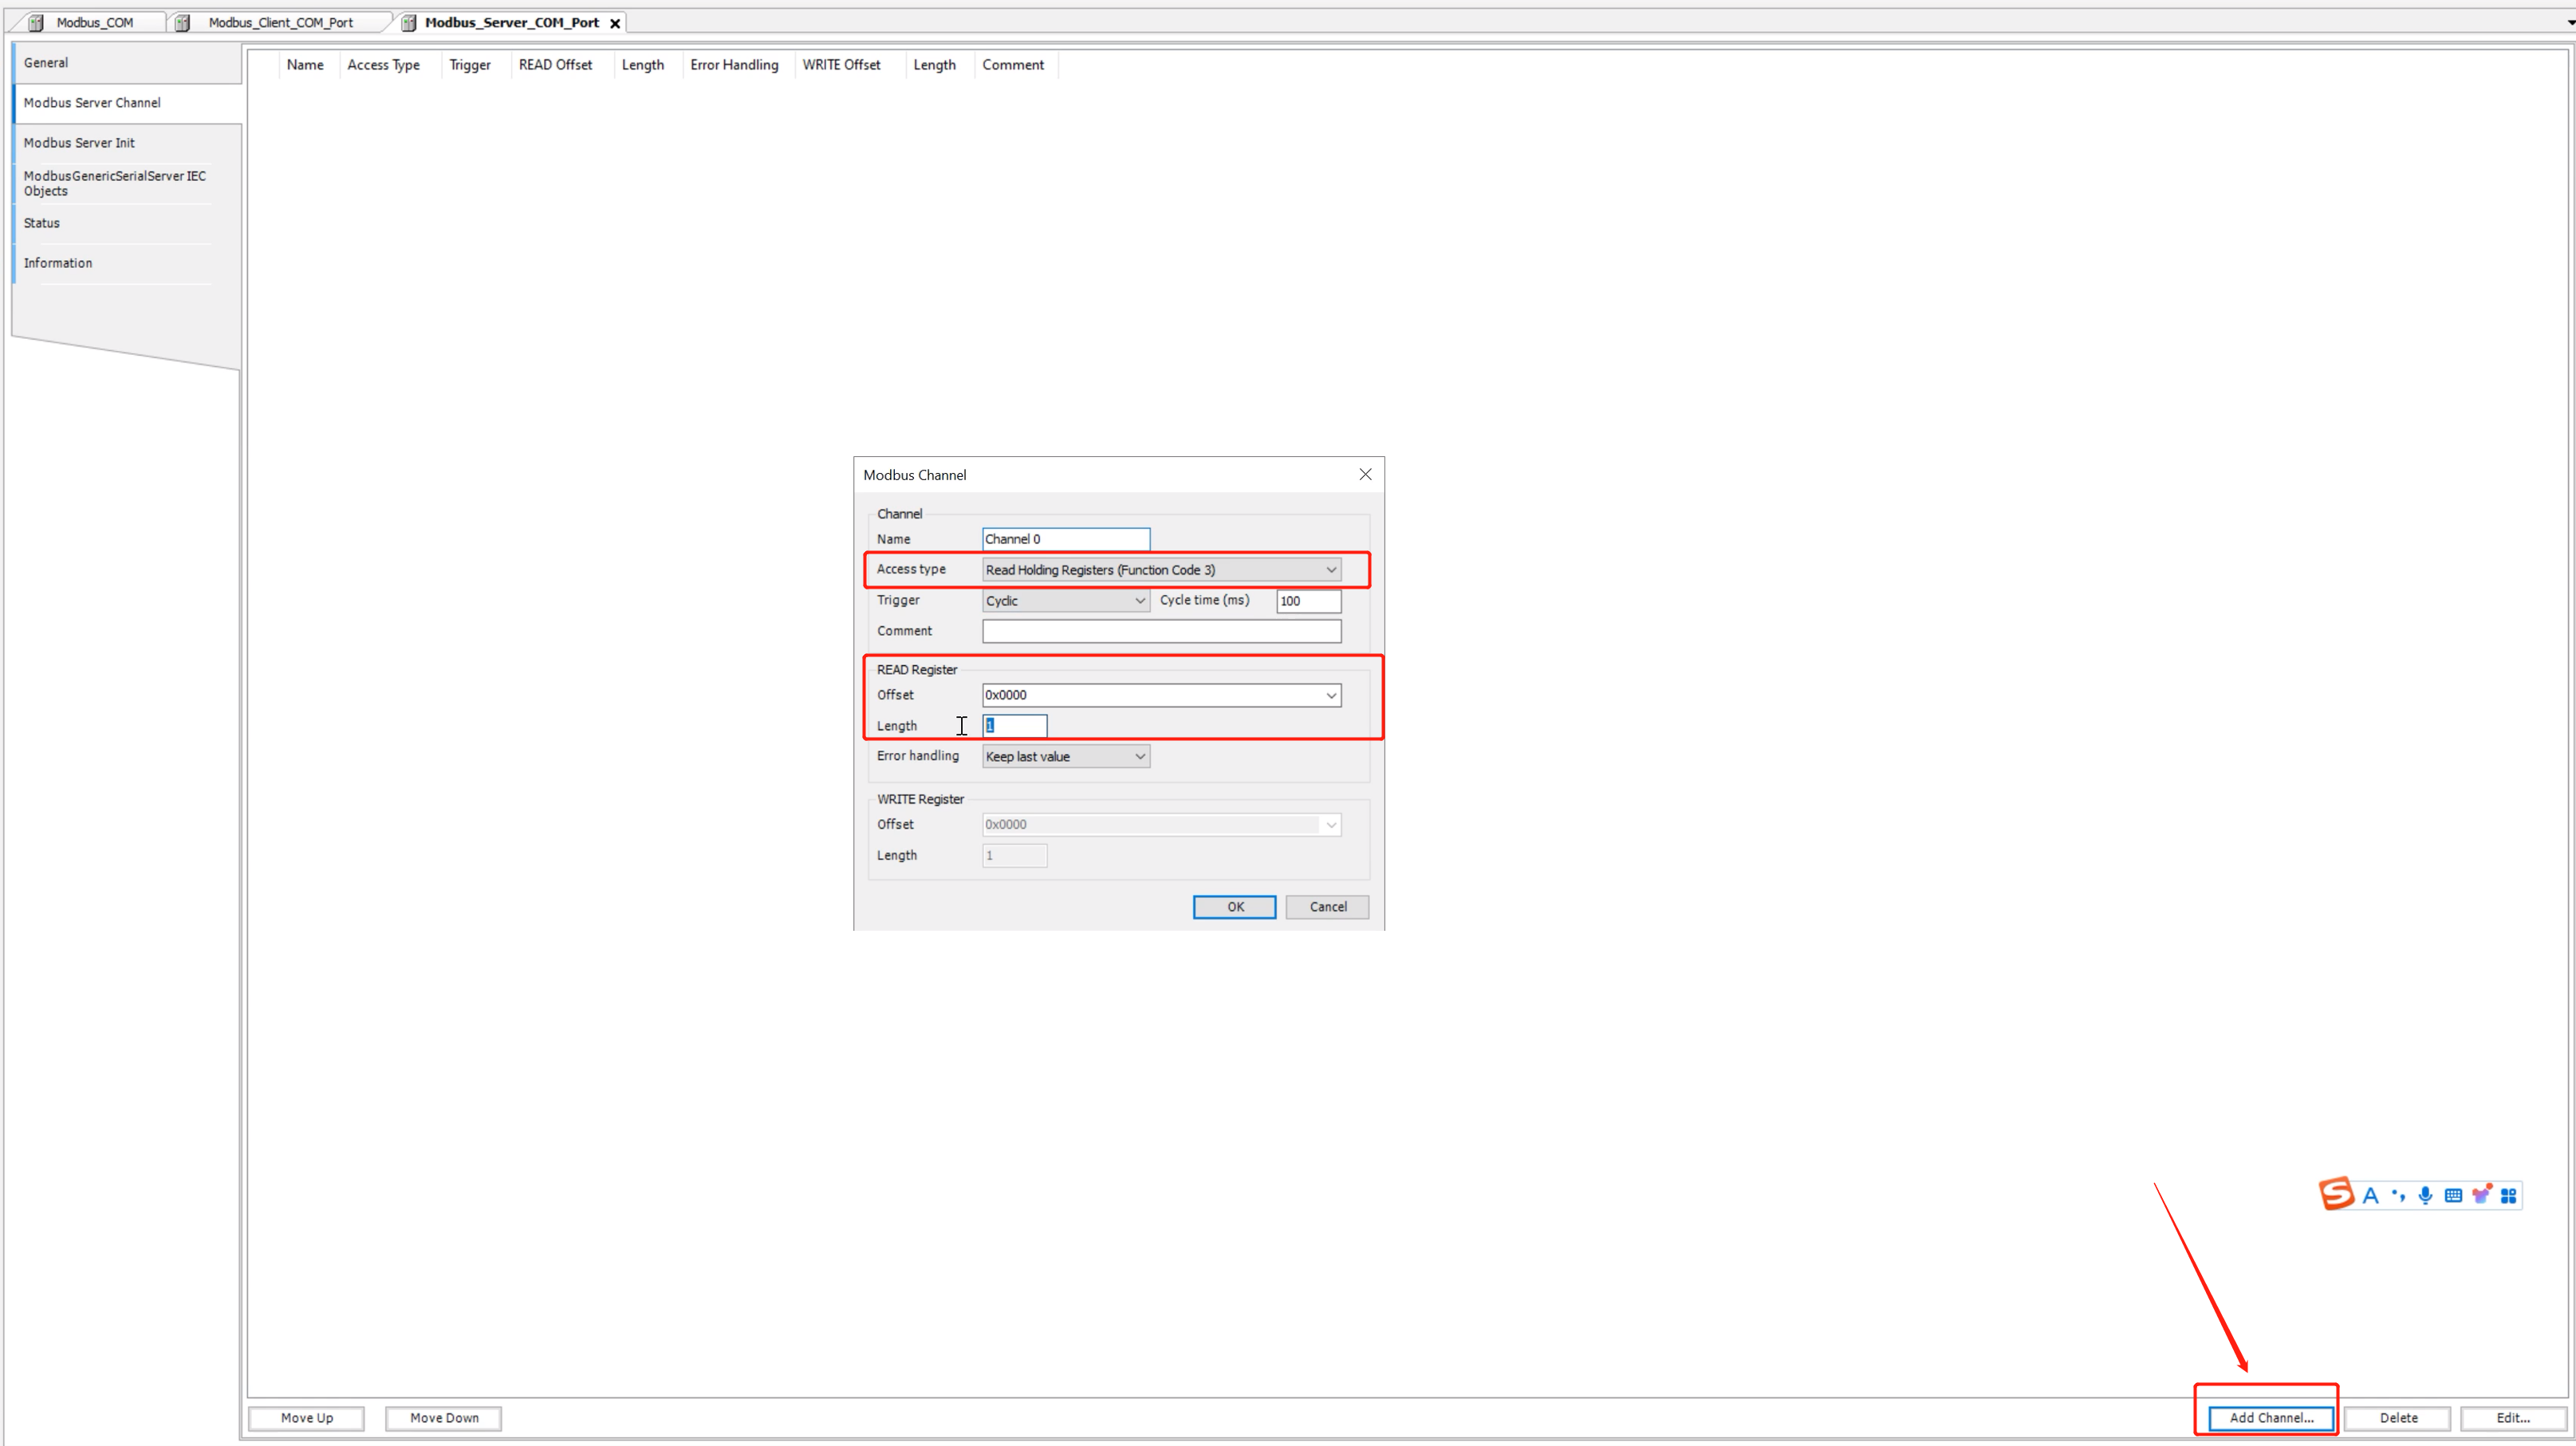
步骤 12:点击 Modbus Server Channel,然后在右下角点击 Add Channel 配置主站将对从站执行的操作,如选择功能码、要操作的寄存器数量等。可以点击 Add Channel 添加多个操作
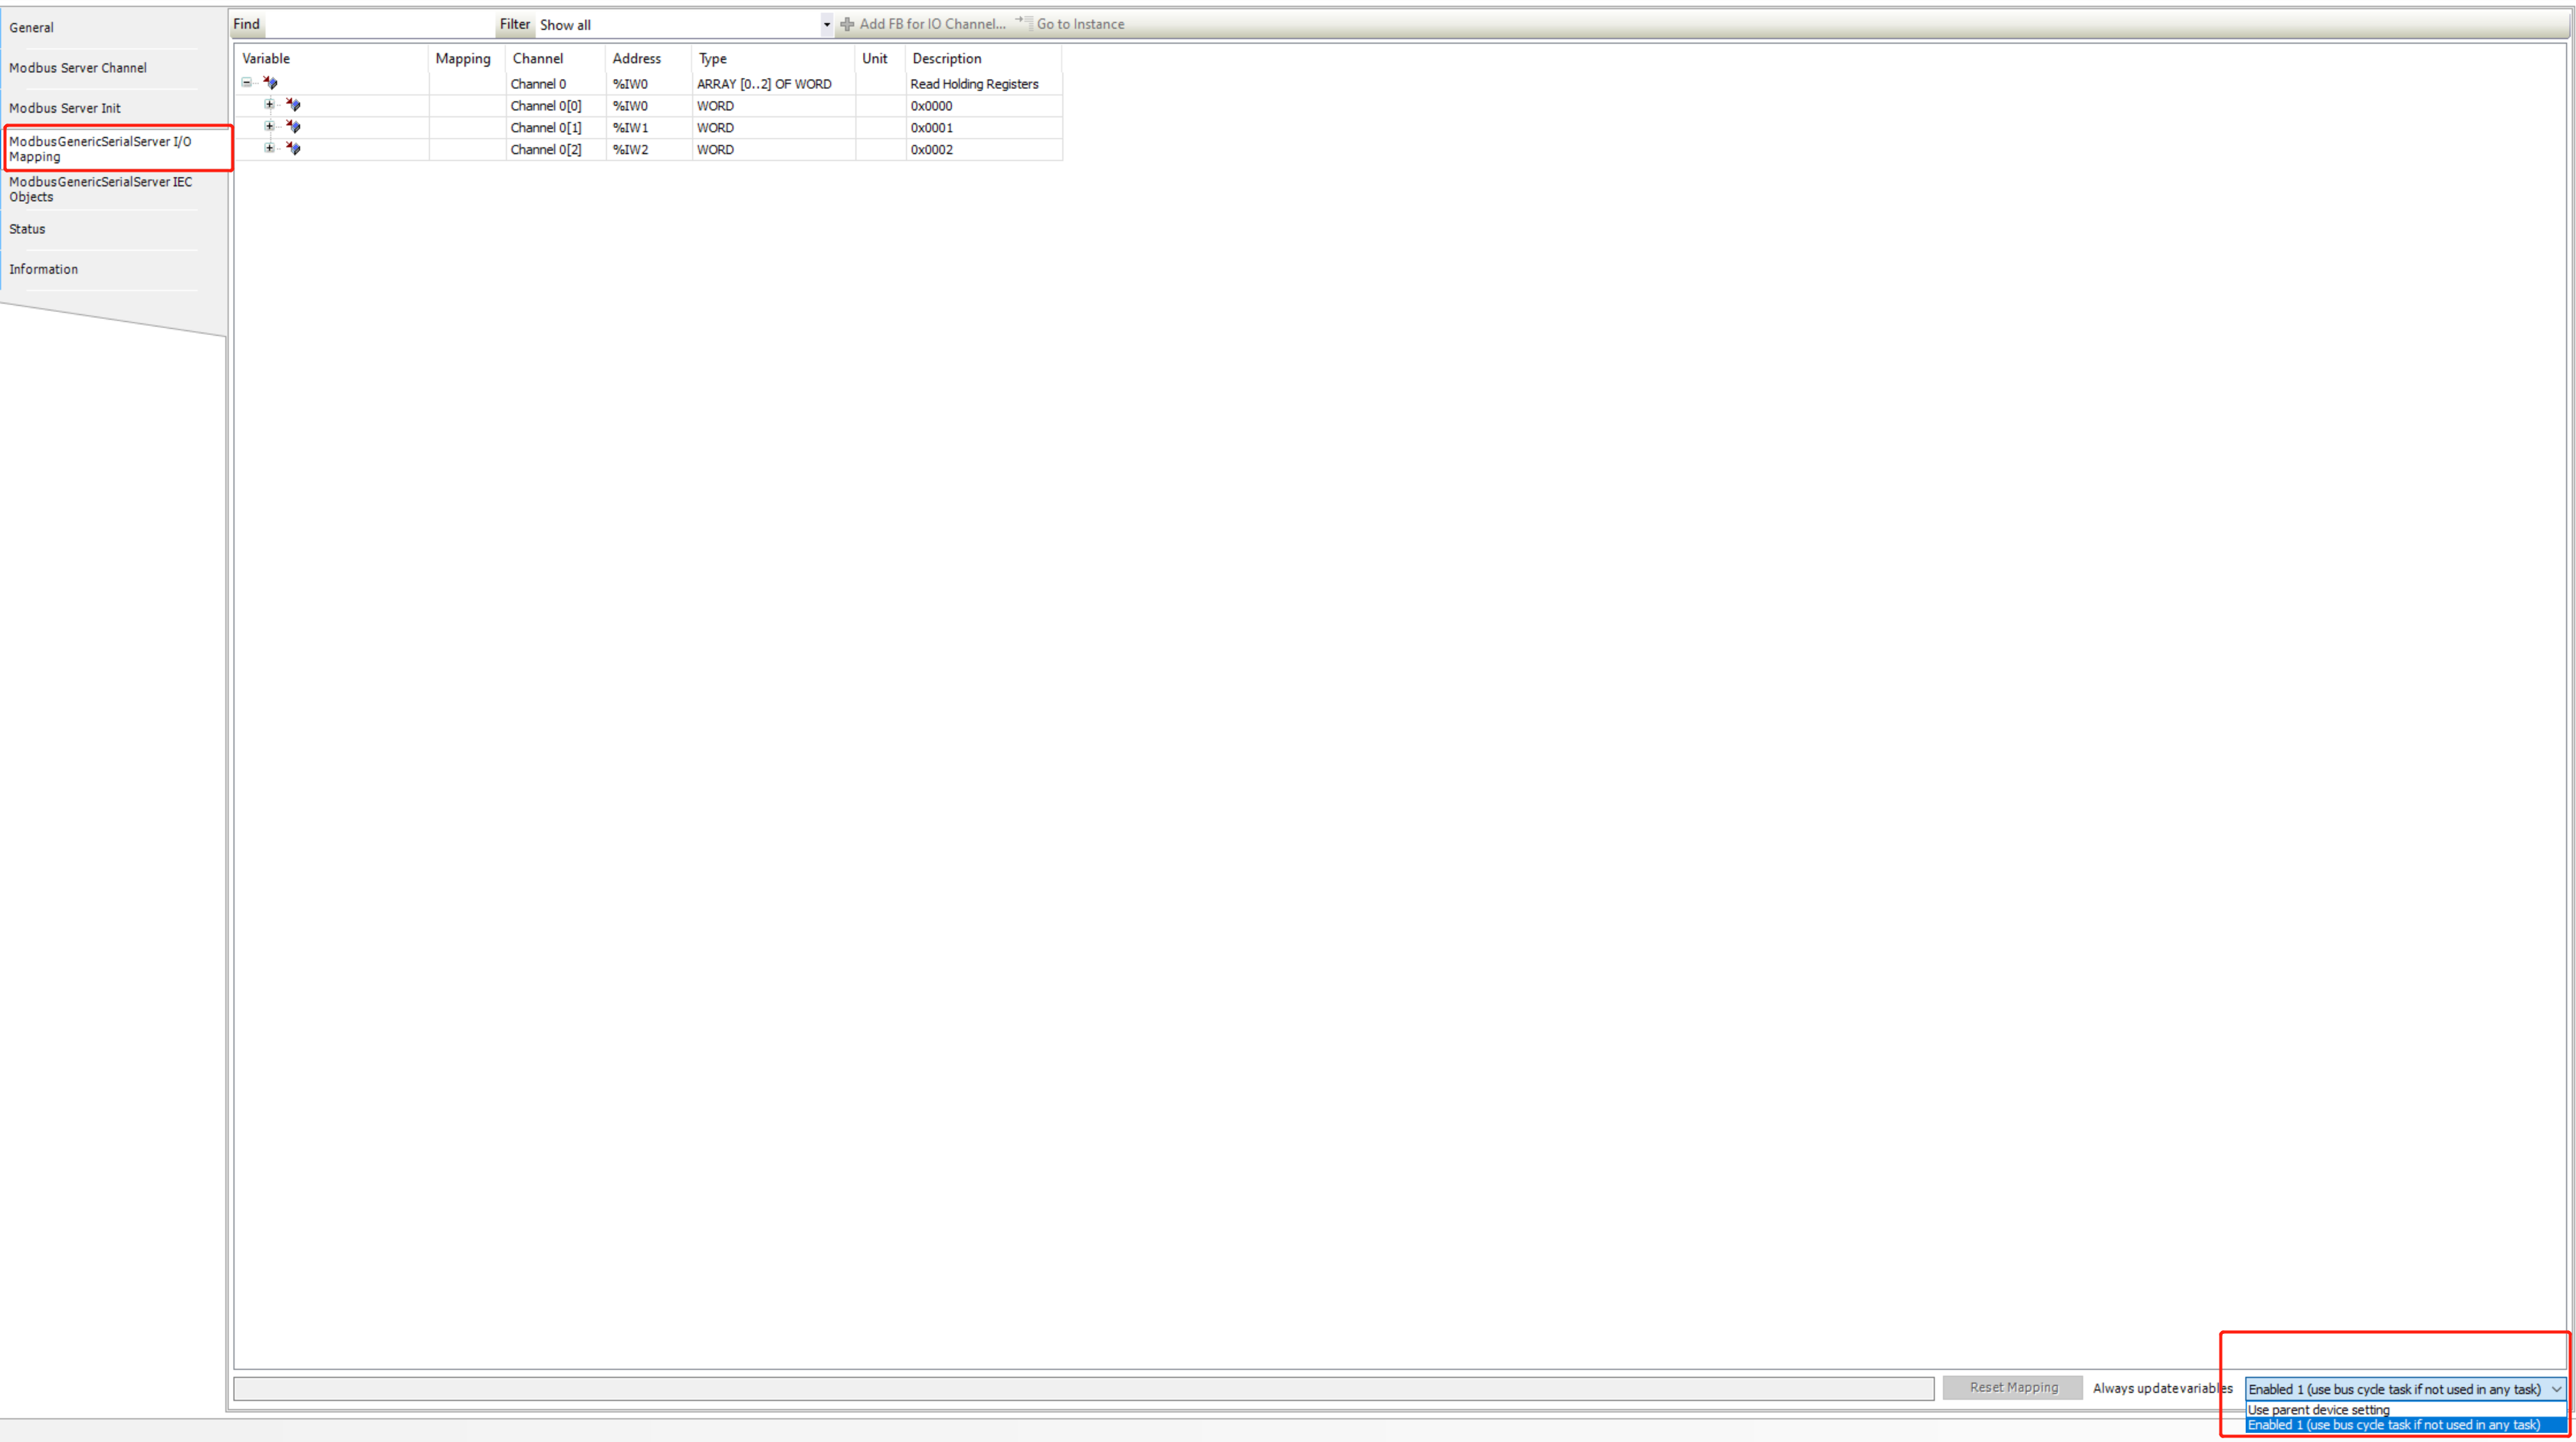
步骤 13:点击 ModbusGenericSerialServer I/O Mapping,在这里可以将数据映射到指定变量,并在右下角的 Always update variables 列中选择 Enable 1。至此,Modbus 主站配置完成。
Modbus 从站配置
步骤 1:右键点击项目并选择 Add Device 添加设备
步骤 2:选择 Modbus ---> Modbus Serial Port ---> Modbus COM 添加 Modbus 串口
步骤 3:点击新添加的 Modbus 串口,选择 General,配置串口号、波特率等信息
步骤 4:右键点击新添加的 Modbus 串口,选择 Add Device,添加 Modbus 从站设备
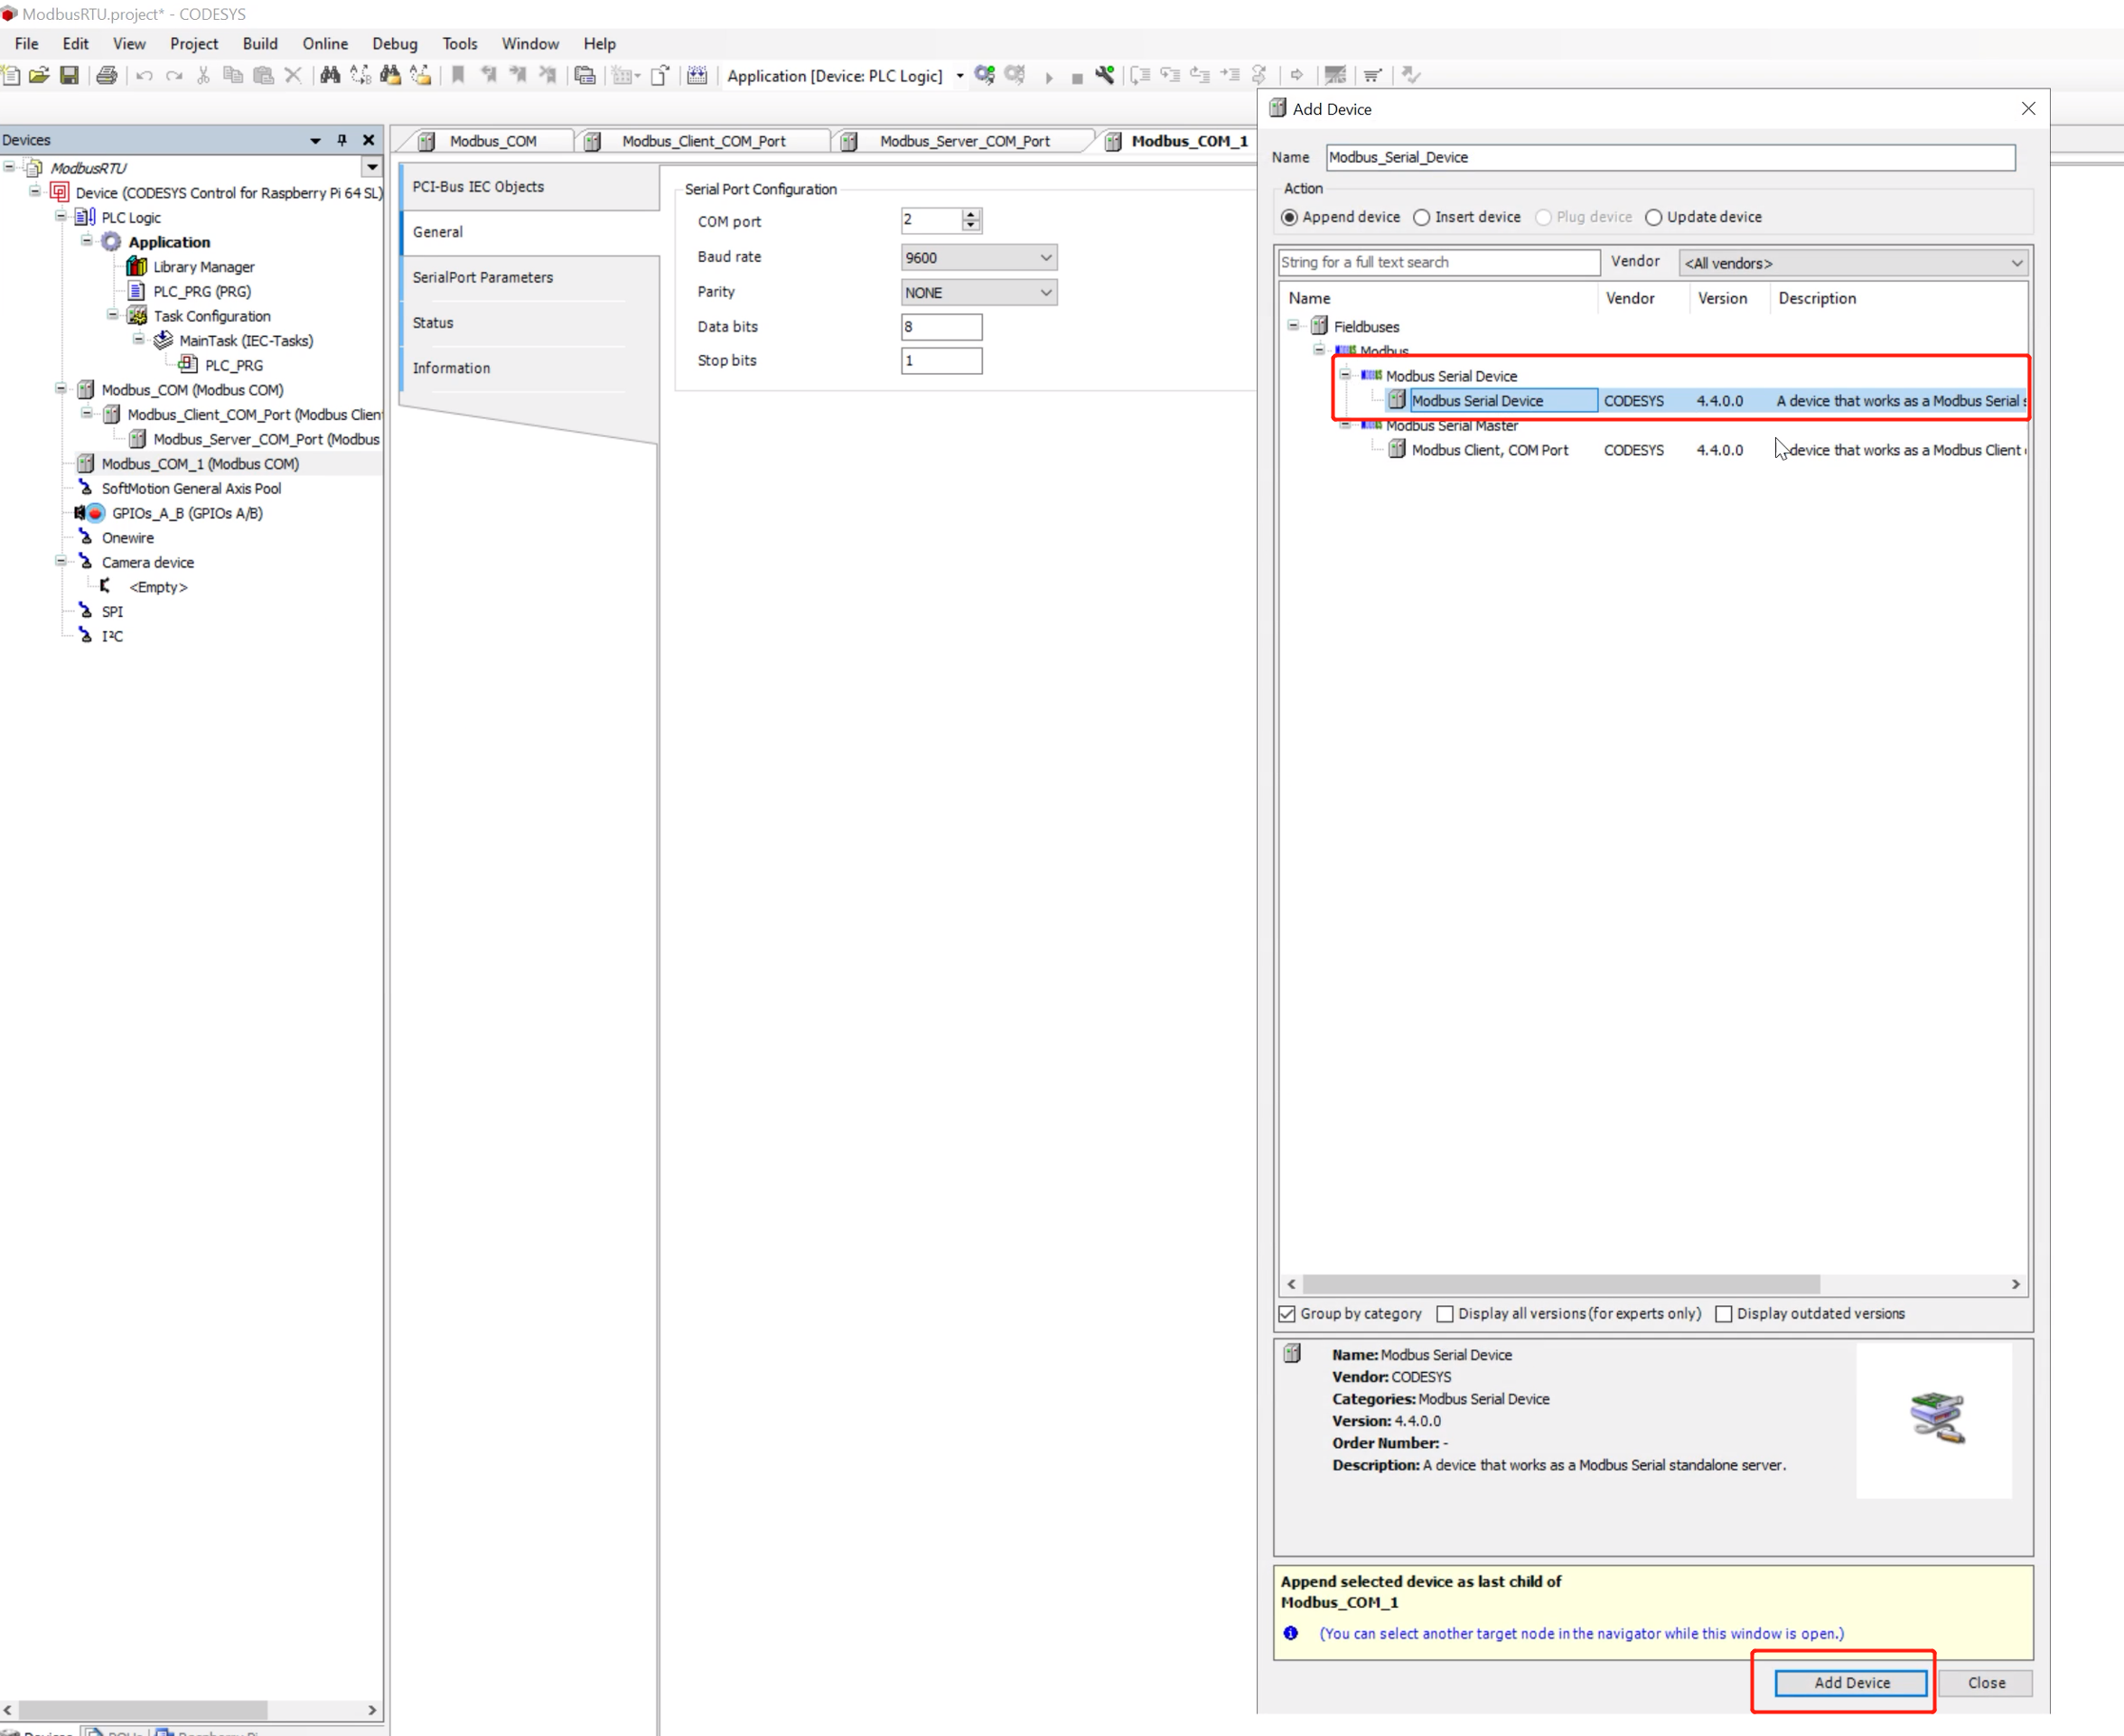
步骤 5:选择 Modbus ---> Modbus Serial Device ---> Modbus Serial Device 添加从站设备
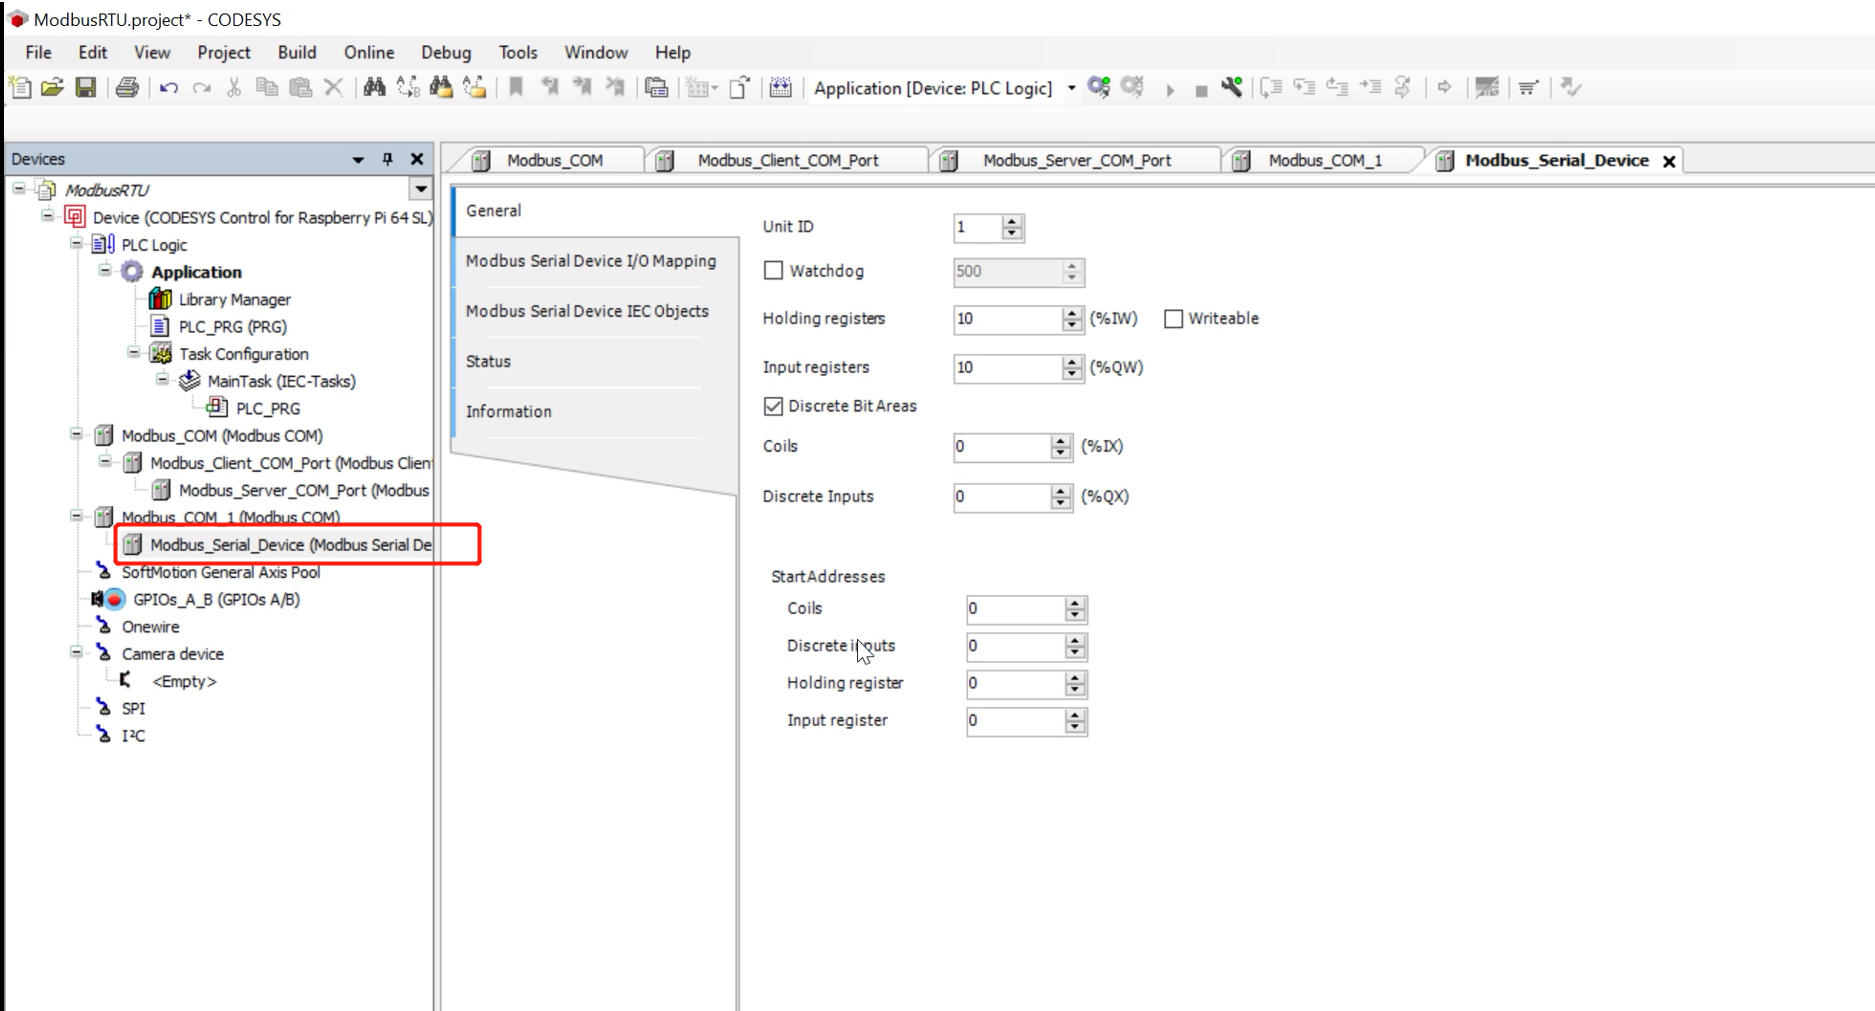
步骤 6:双击新添加的从站设备。在 General 中,可以配置此从站的属性,如寄存器和线圈数量、地址等。
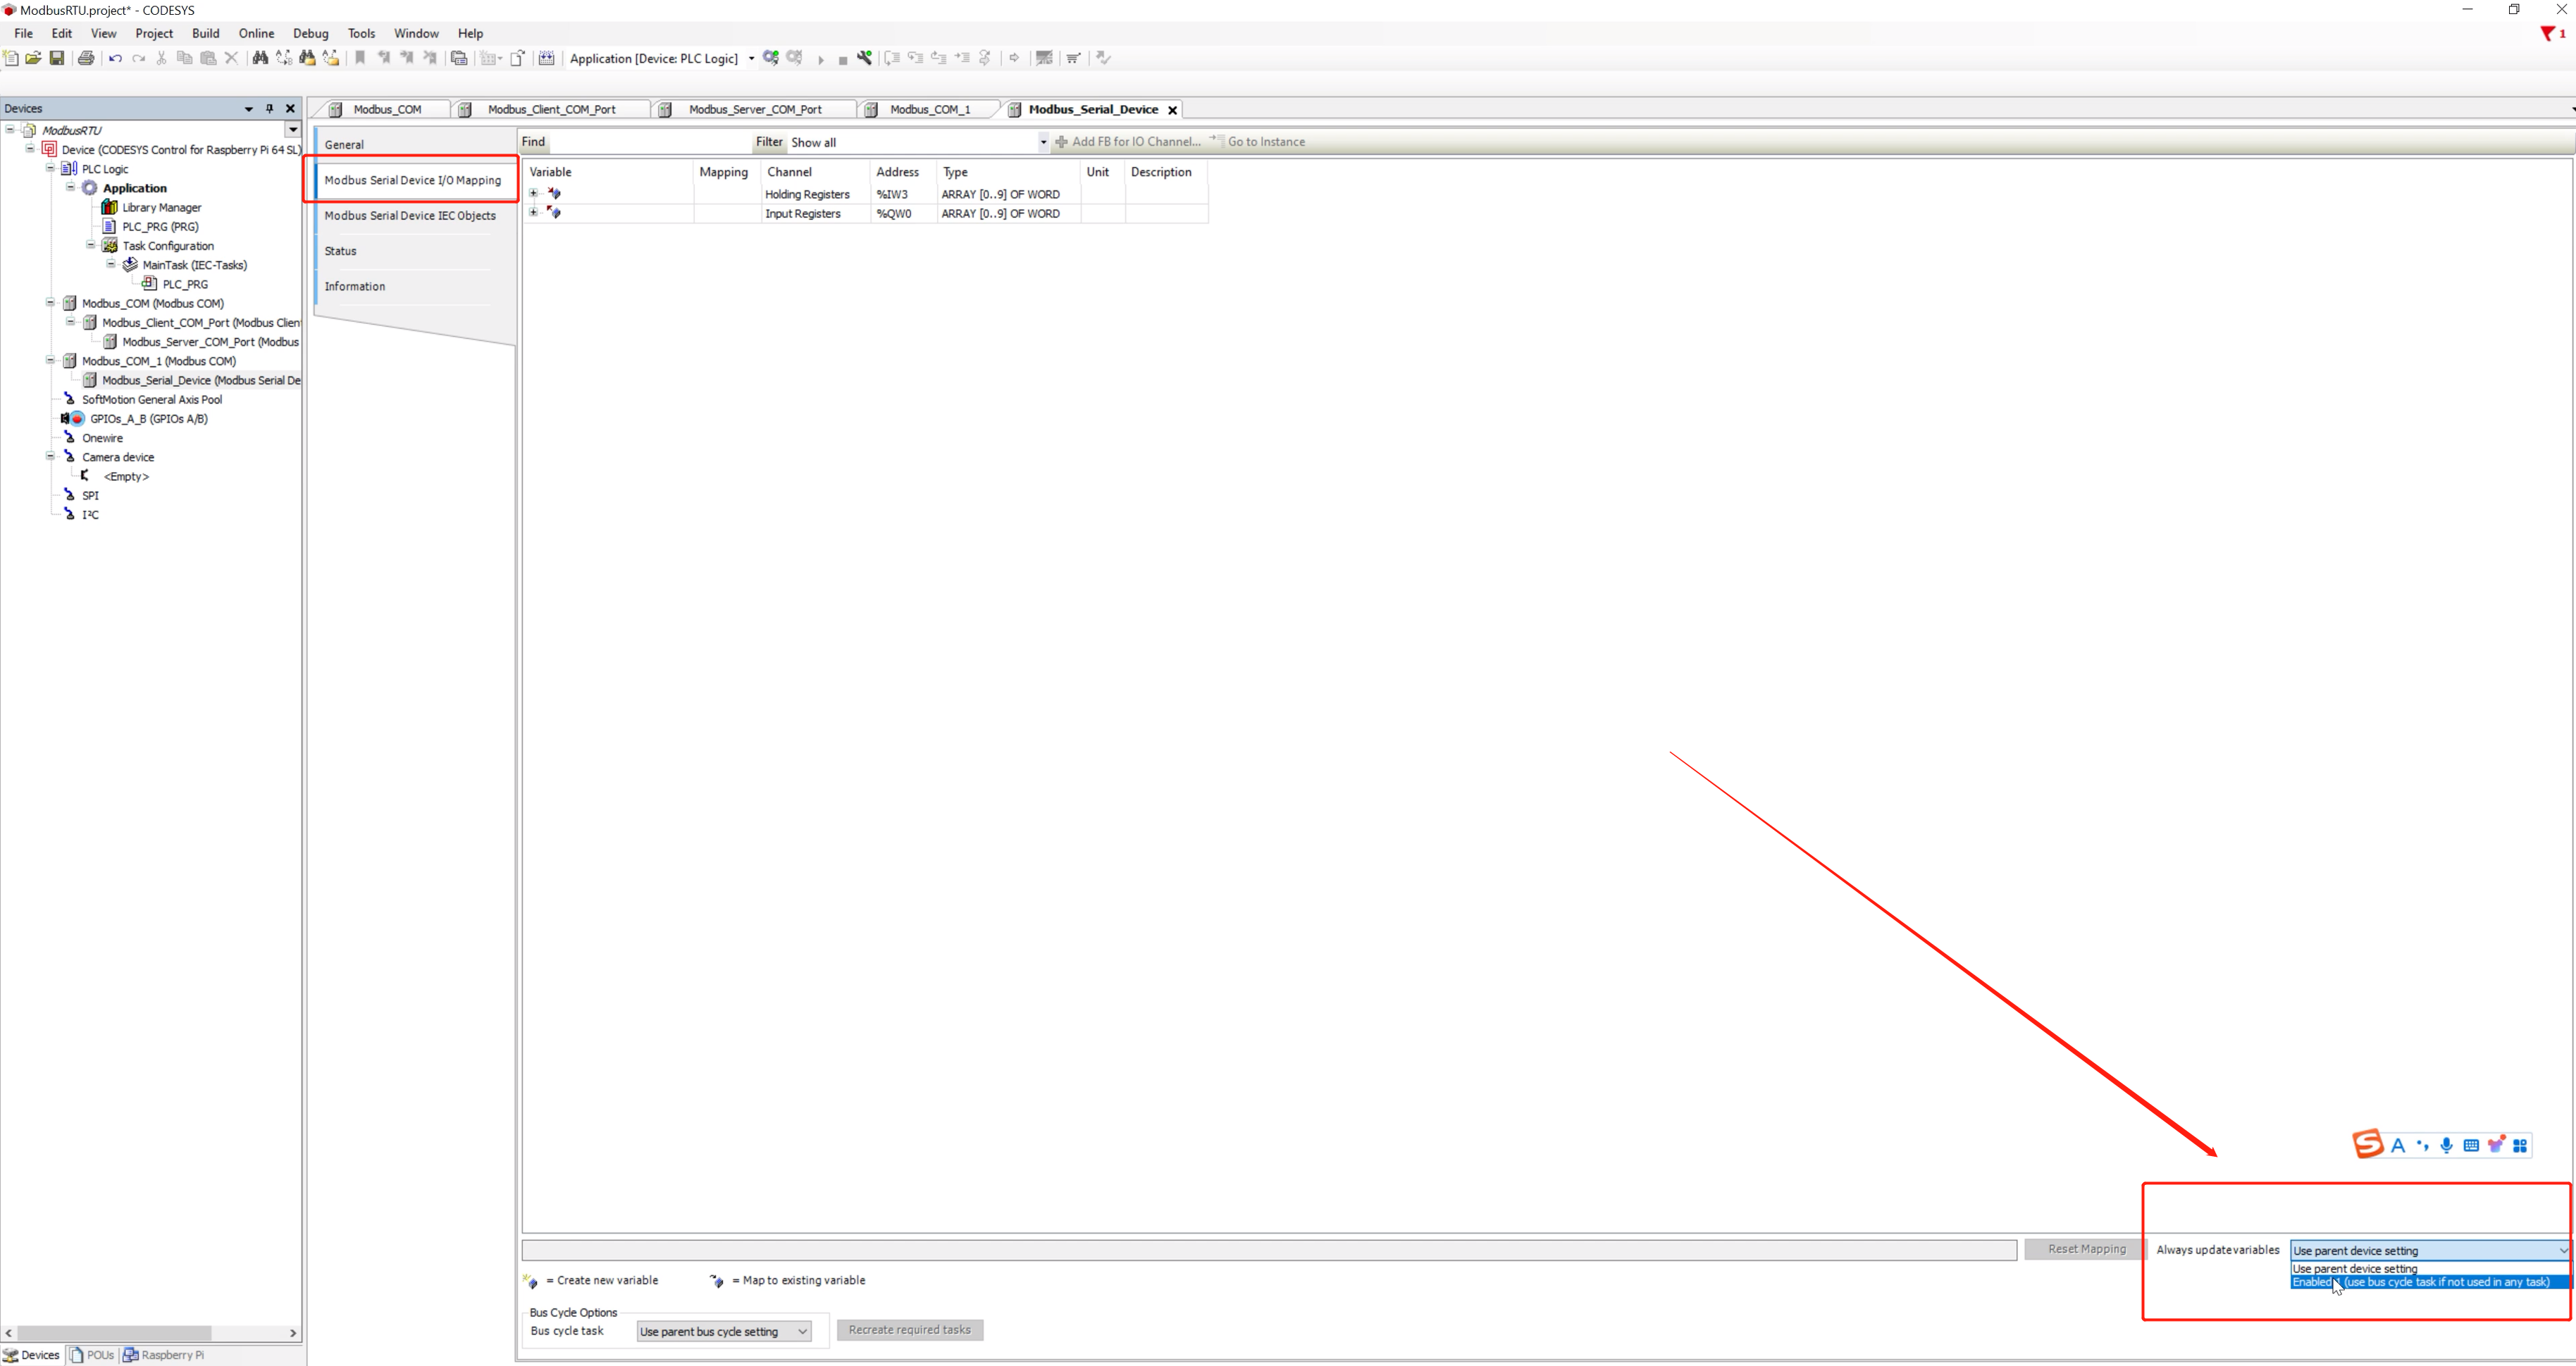
步骤 7:点击 Modbus Serial Device I/O Mapping,并在右下角的 Always update variable 中选择 Enable 1。Modbus 从站配置现已完成
Modbus 部署
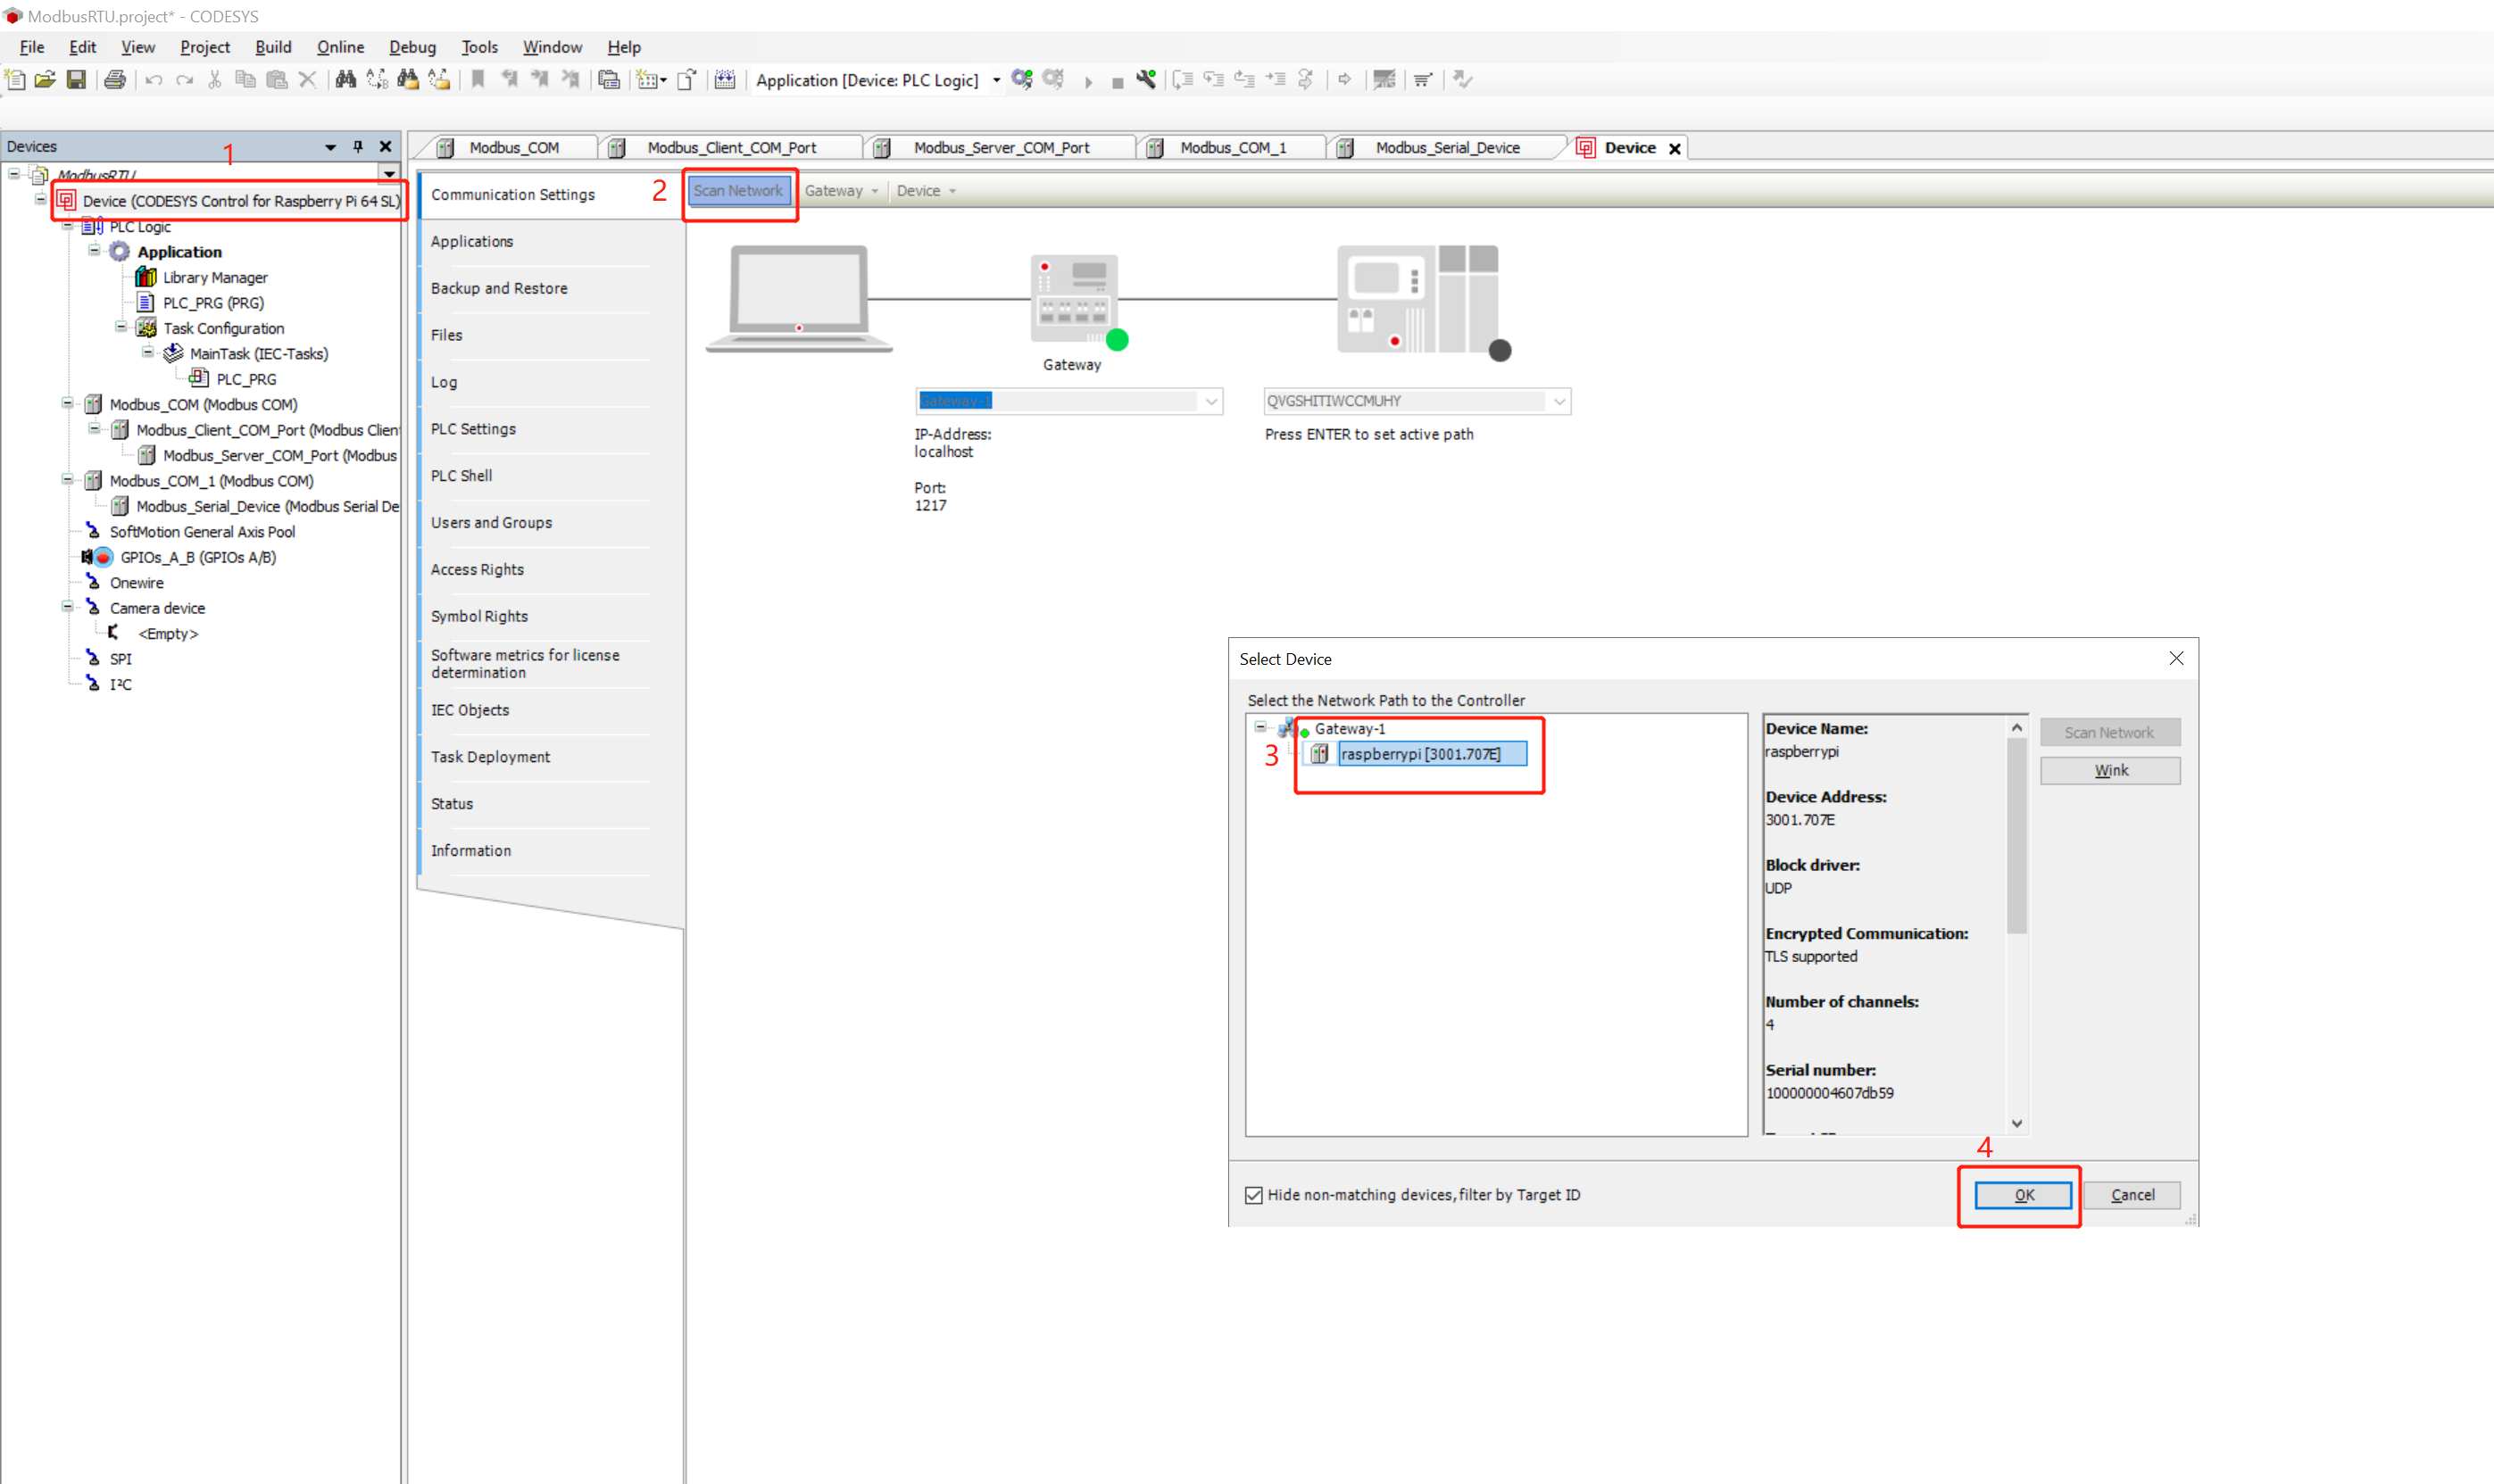
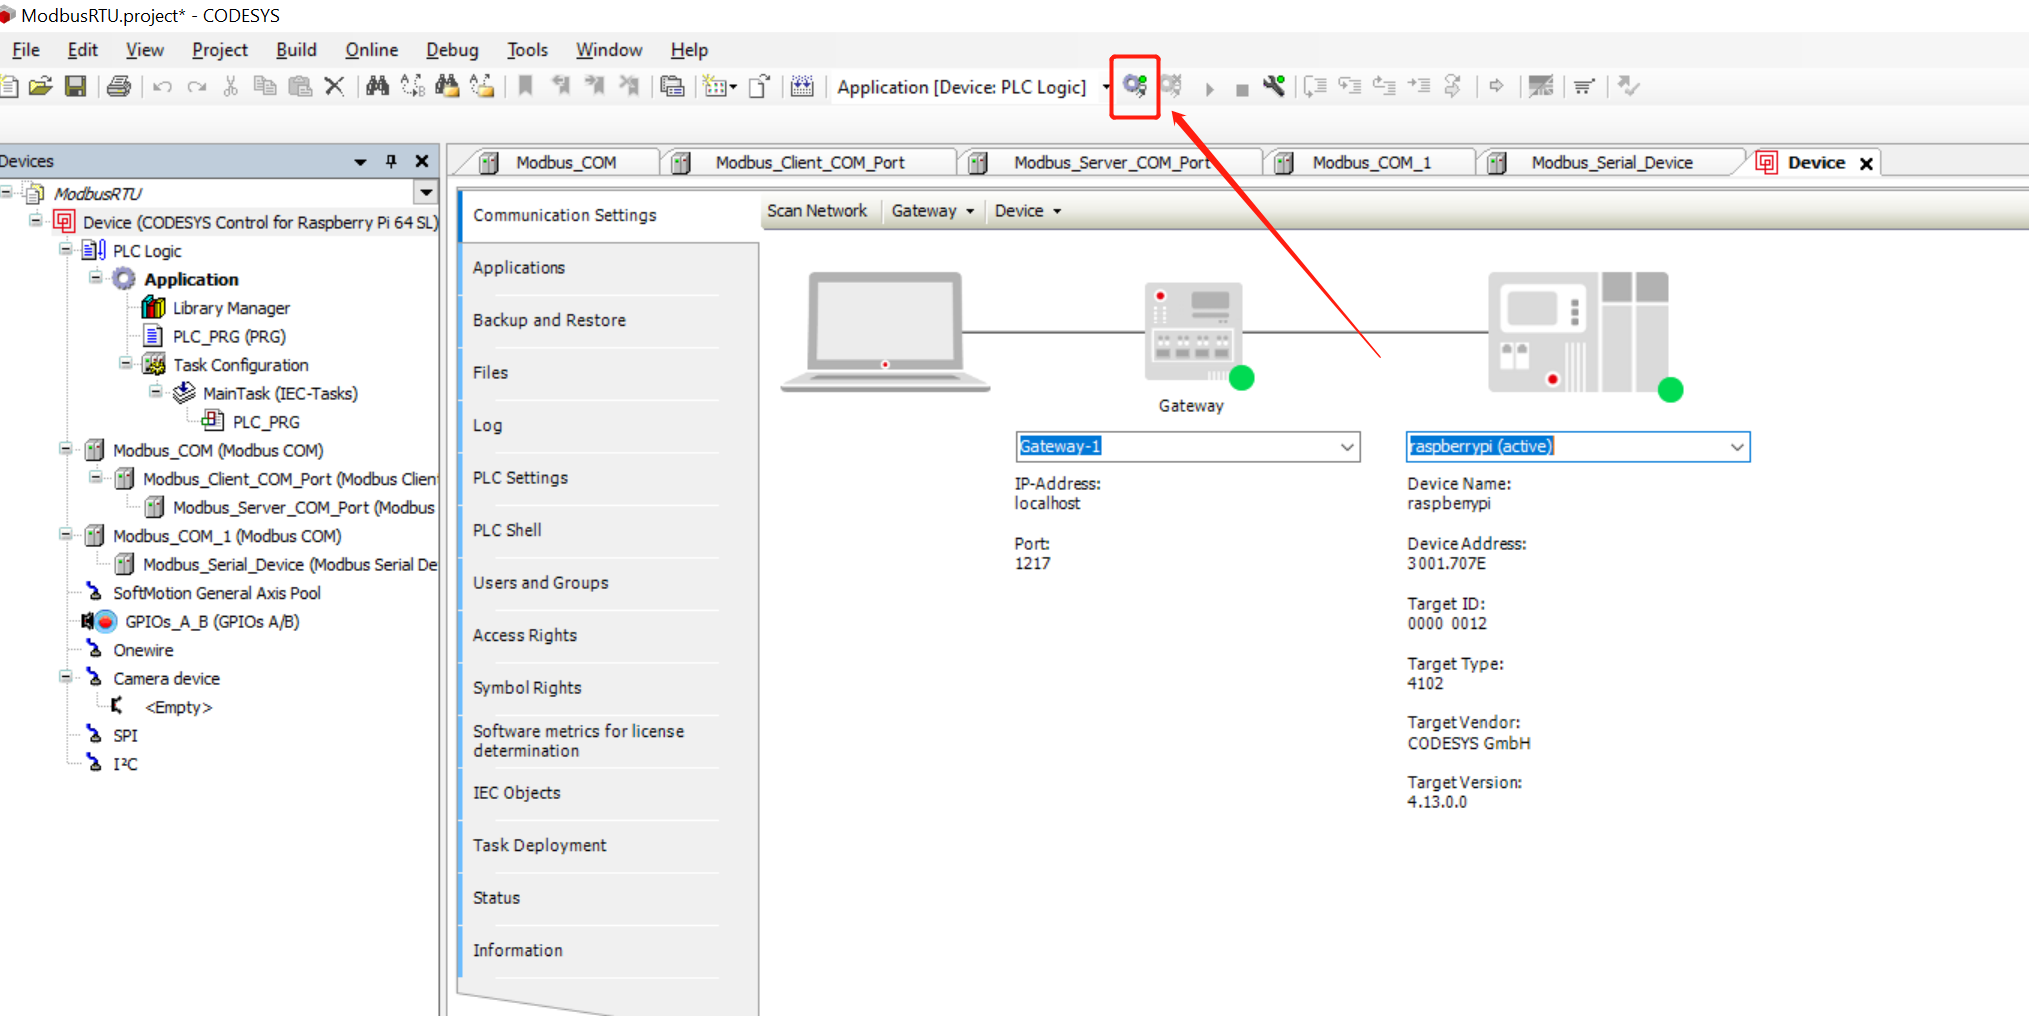
步骤 1:双击项目,点击 Scan Network,然后选择您的设备,并点击 OK
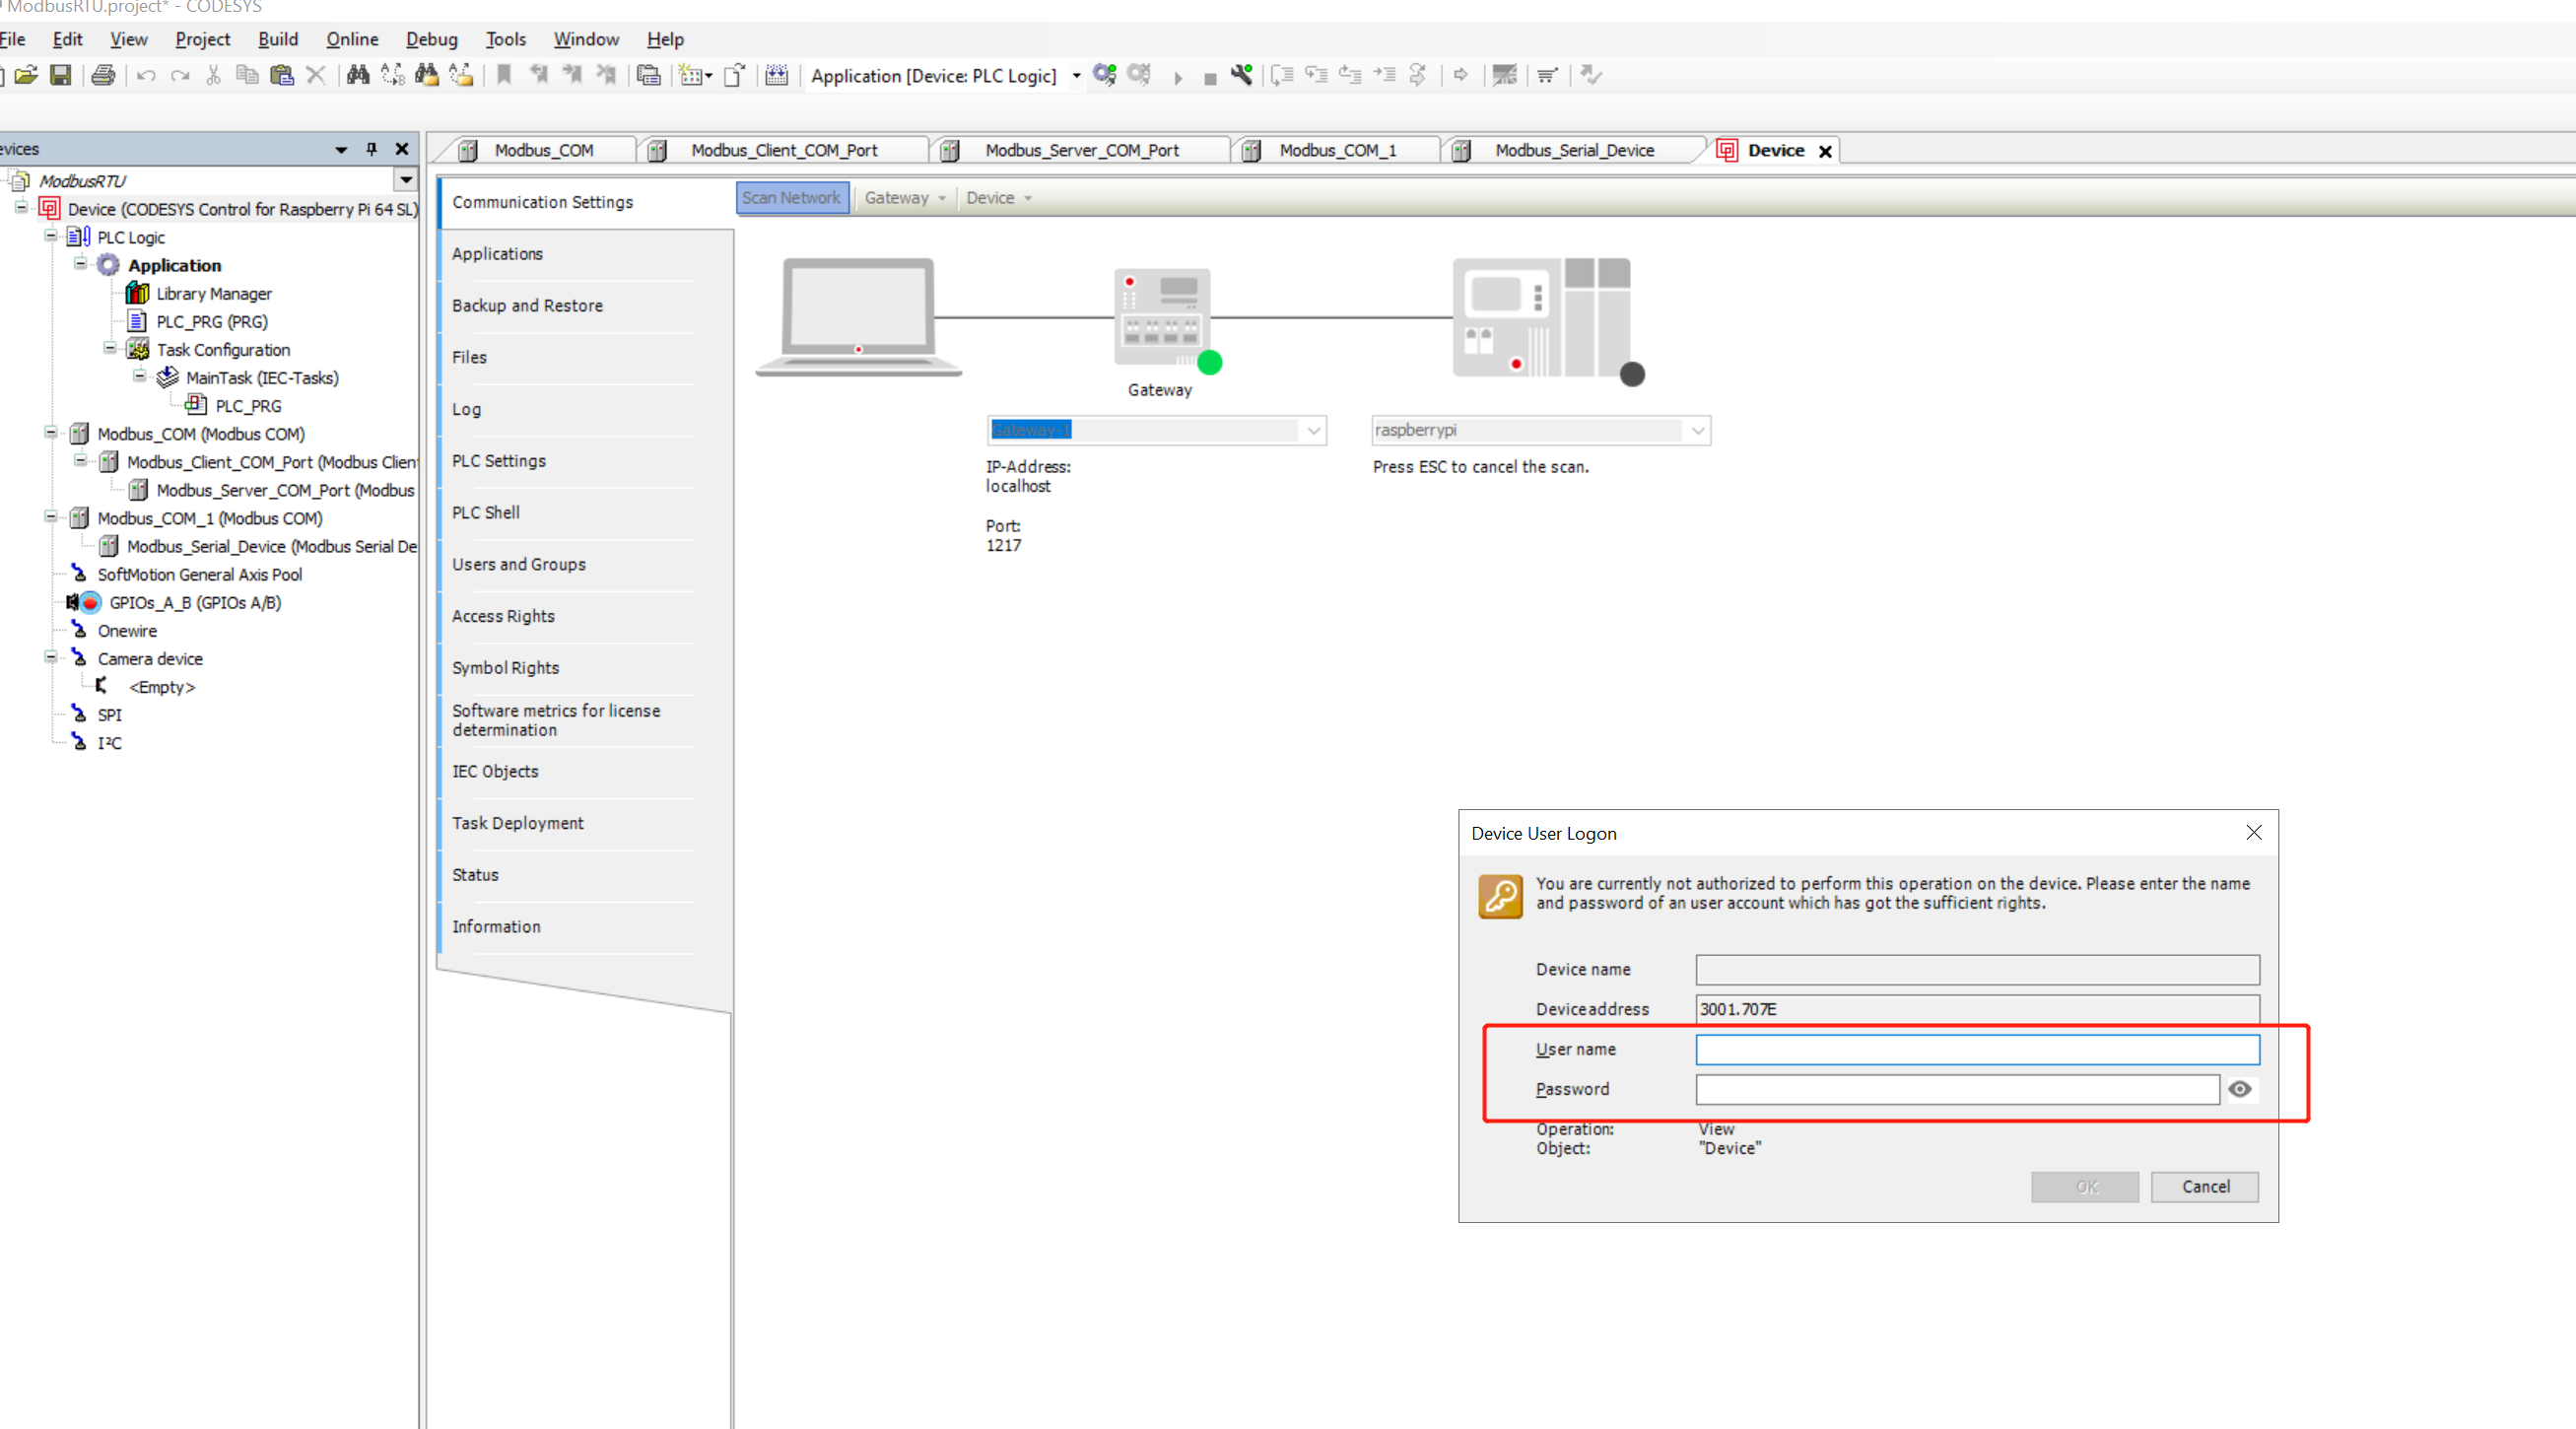
步骤 2:输入 reComputer R1000 用户名和密码以连接到设备
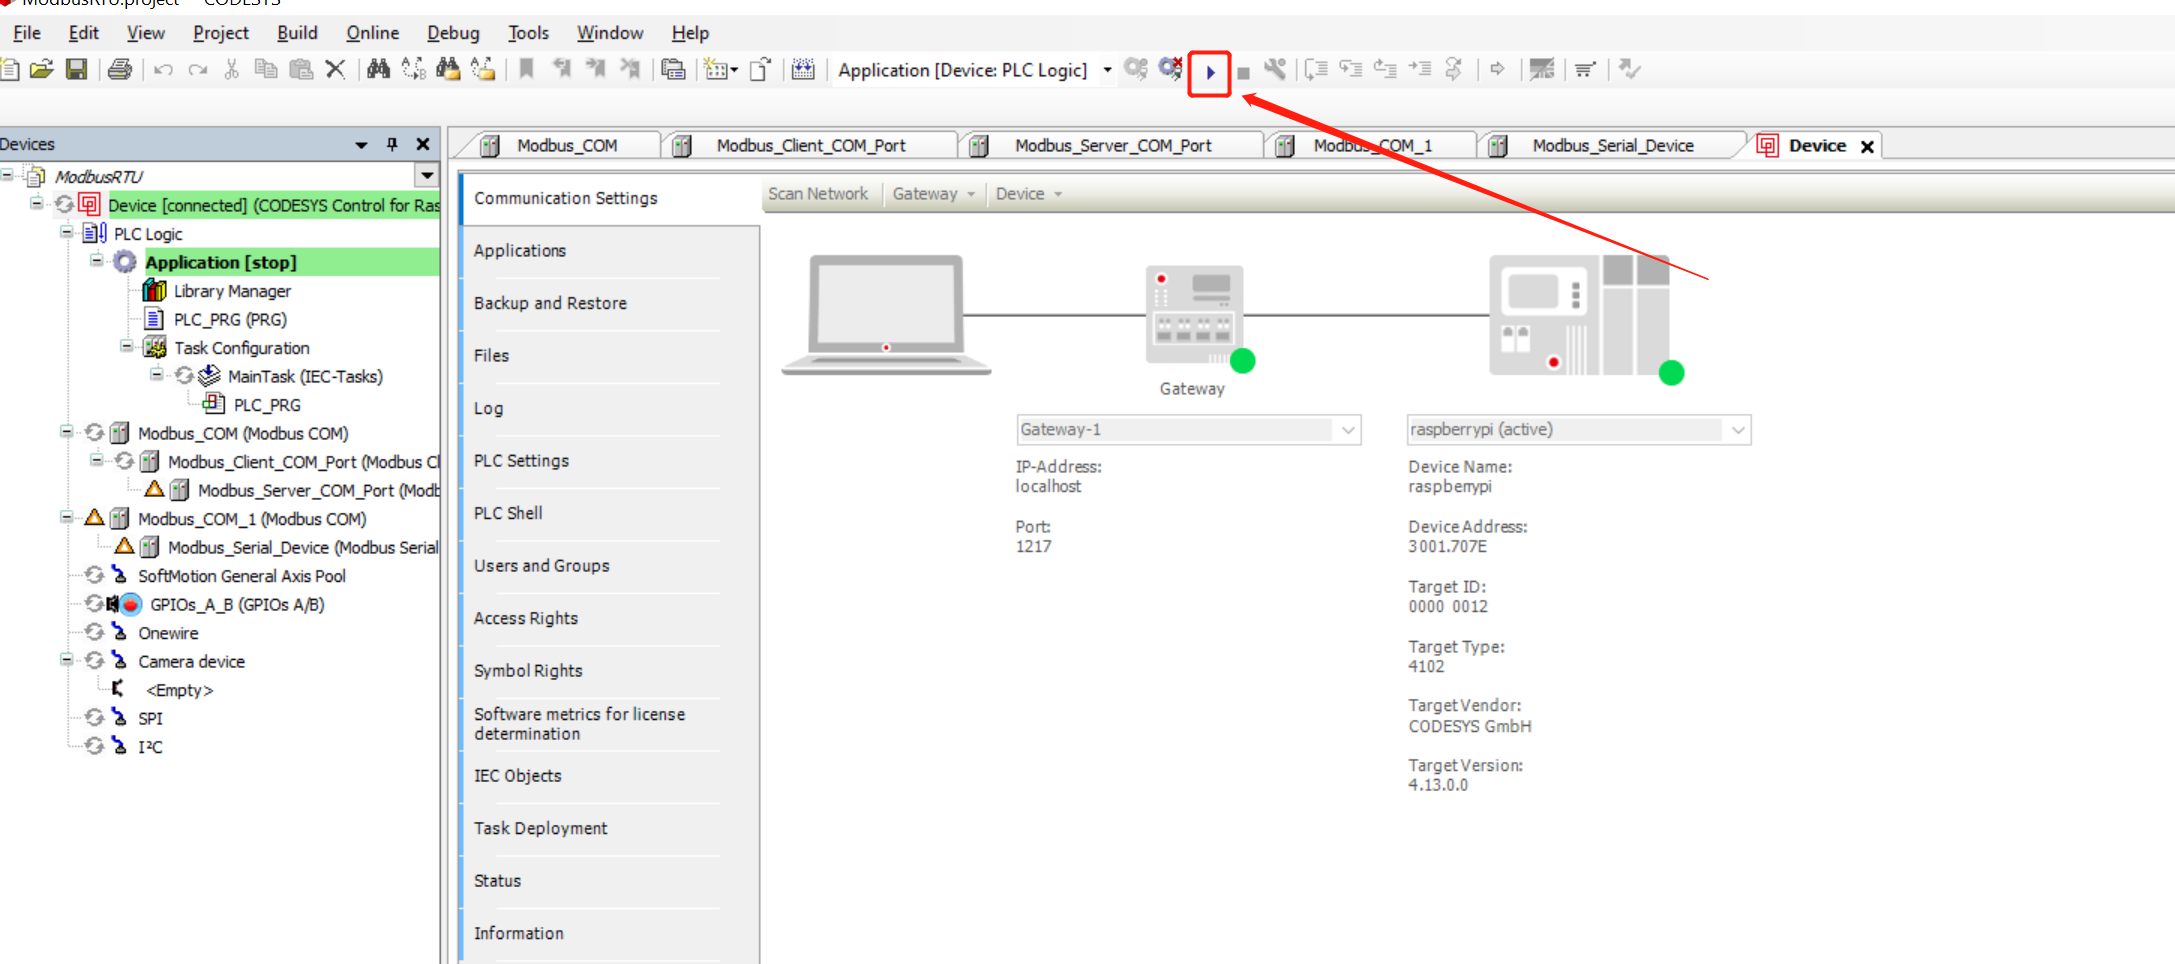
步骤 3:点击如图所示的按钮,将项目部署到 reComputer R1000
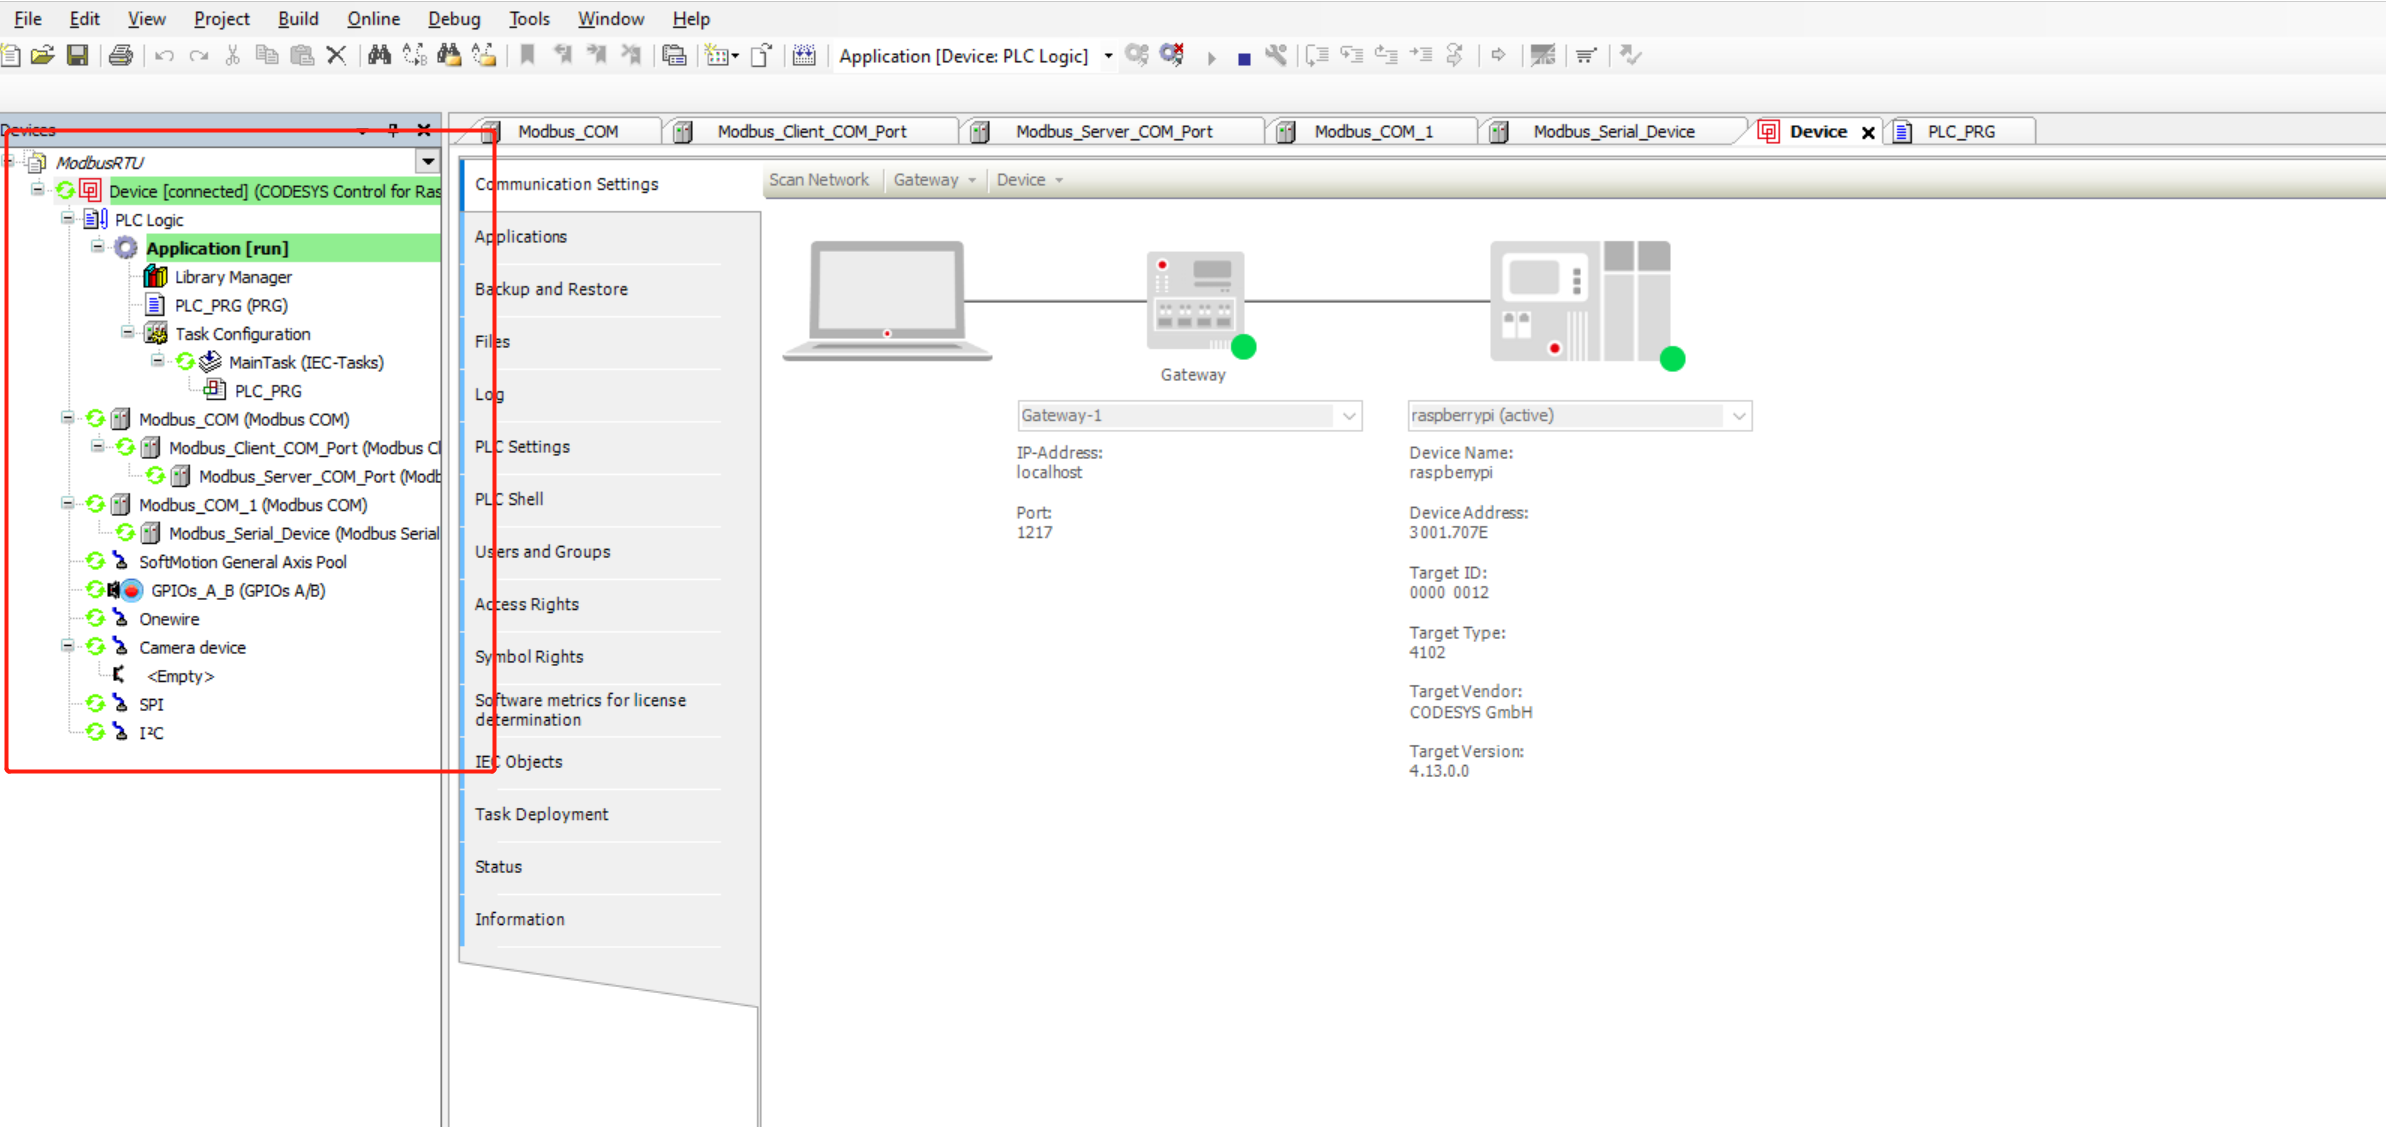
步骤 4:点击开始按钮启动项目。您可以看到 Modbus 主站和从站的指示灯都是绿色,表明 Modbus 通信正常
技术支持与产品讨论
感谢您选择我们的产品!我们在这里为您提供不同的支持,以确保您使用我们产品的体验尽可能顺畅。我们提供多种沟通渠道,以满足不同的偏好和需求。