使用 reSpeaker 为你的 SO-ARM10x 添加语音交互
概述
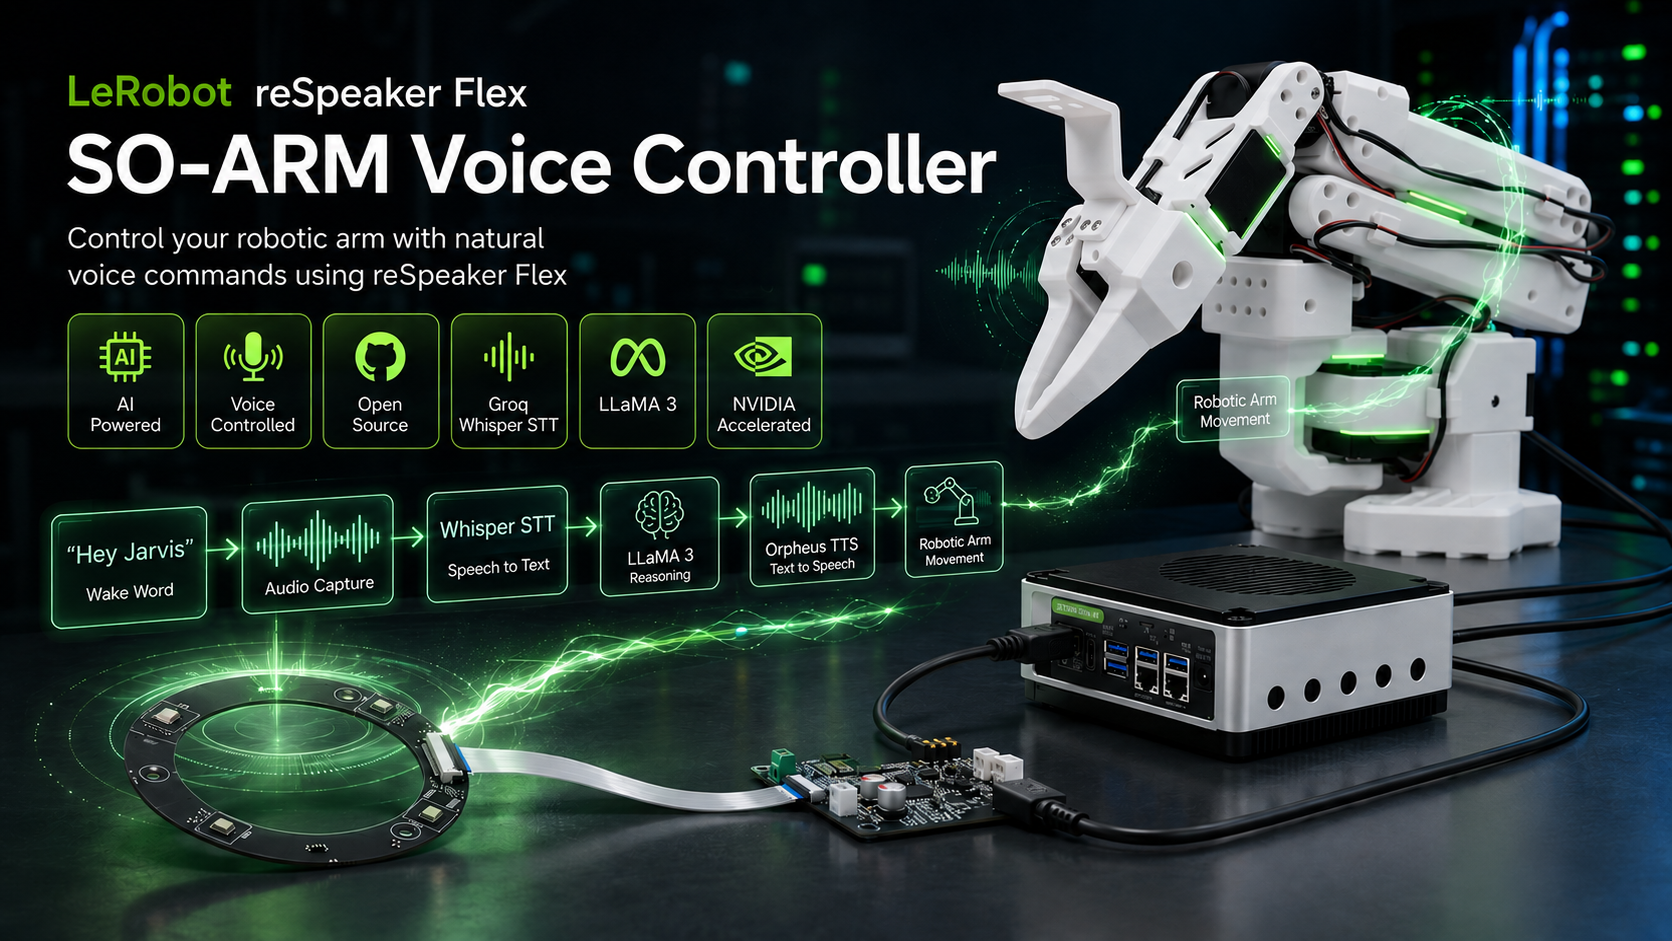
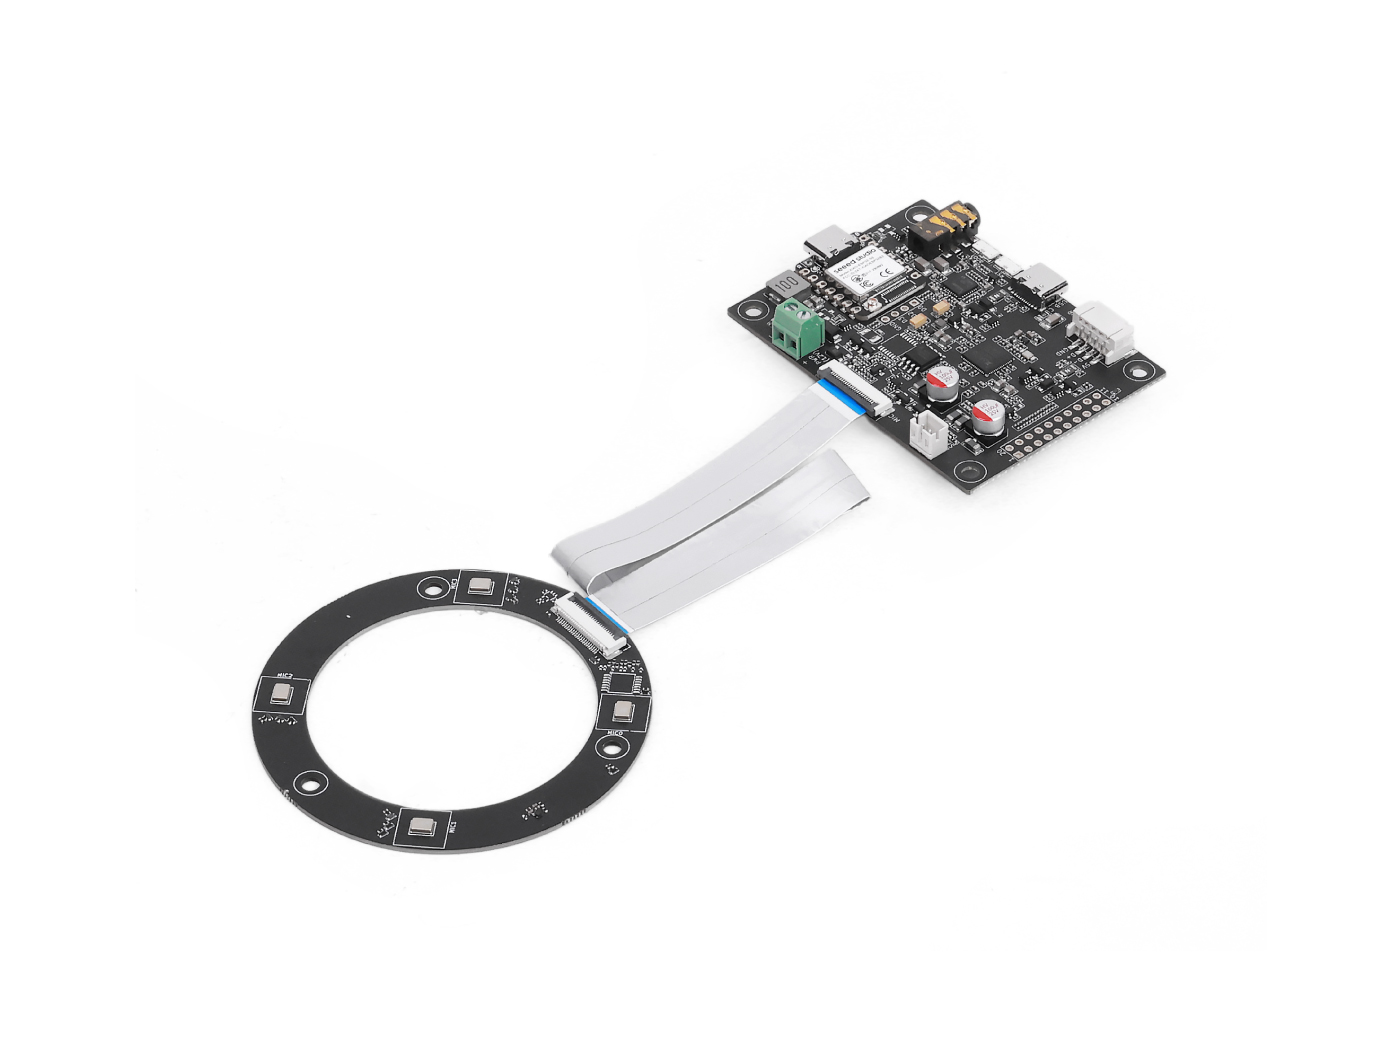
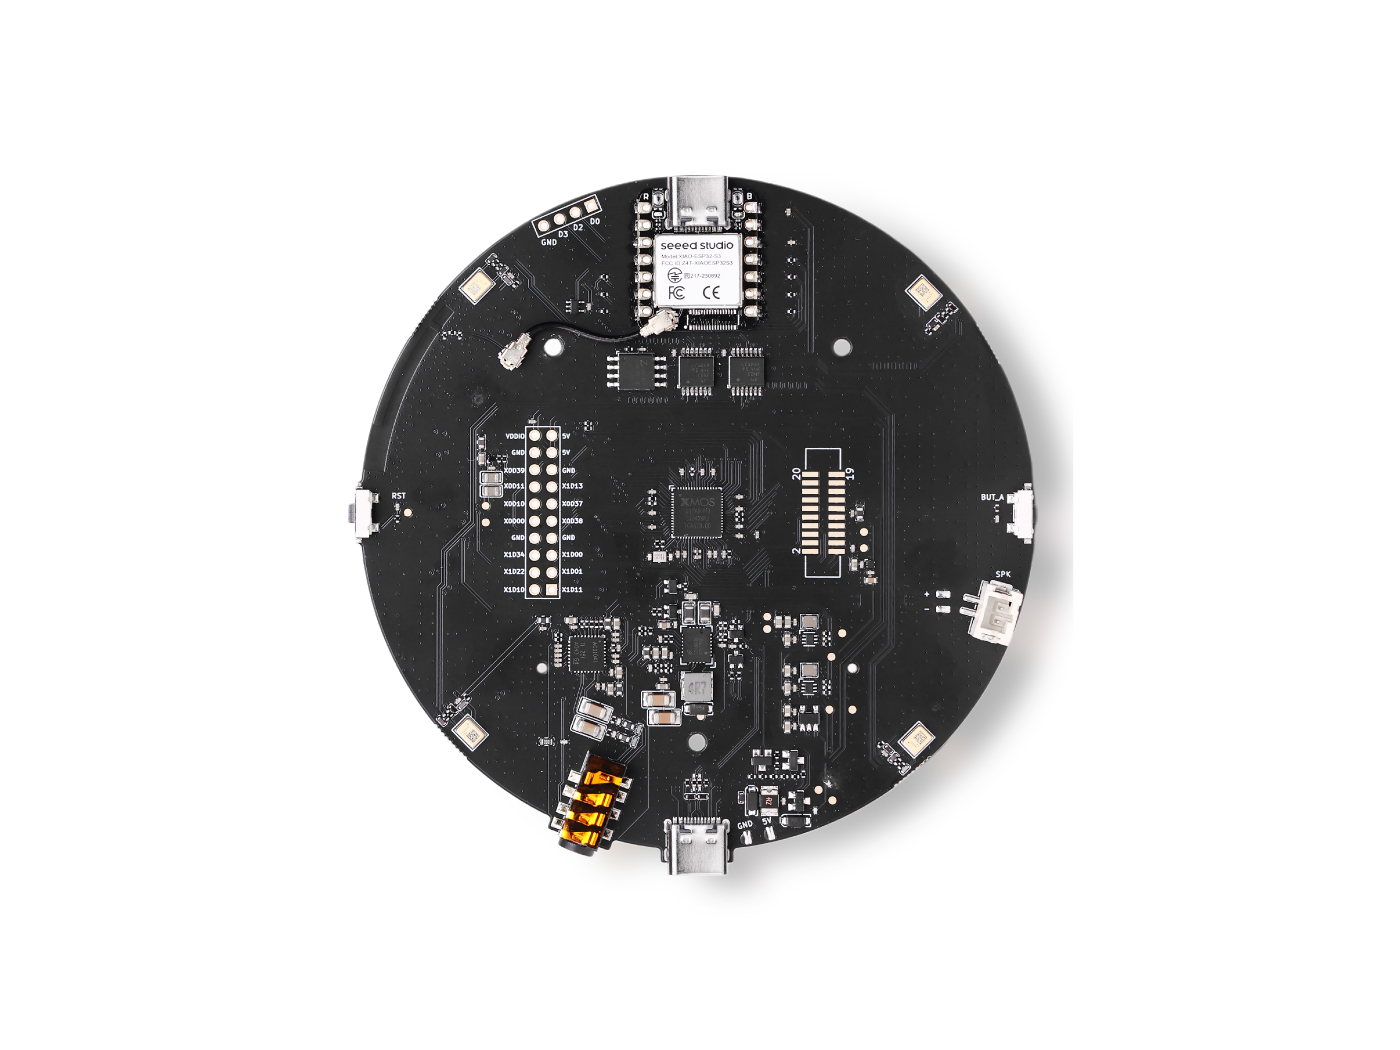
LeRobot SO-ARM 语音控制器让你可以使用由 AI 驱动的自然语音指令来控制 SO-ARM100 机械臂。该系统结合了唤醒词检测、Groq Whisper 语音转文本、LLaMA 3 语言理解以及 Orpheus 文本转语音,打造出一个完全交互式的免手动机器人体验。它基于 LeRobot 框架 构建,可在 Ubuntu x86 系统和 NVIDIA Jetson 设备上运行,并使用 ReSpeaker USB 麦克风阵列进行语音输入。用户可以创建自定义的机械臂姿态、手势和对话触发器,用于构建面向科研、教育和机器人开发的智能机器人交互。
所需硬件
| SO-ARM101 | reComputer Super J4012 |
|---|---|
 |  |
工作原理
You speak → Wake word detected → Audio recorded → Whisper STT → LLaMA LLM → Orpheus TTS speaks back → SO-ARM100 moves
所需服务
| 服务 | 用途 | 费用 |
|---|---|---|
| Groq | Whisper STT、LLaMA LLM、Orpheus TTS | 免费套餐已足够 |
第 1 部分 — 安装 LeRobot
安装 Miniforge
适用于 Jetson(ARM64):
wget https://github.com/conda-forge/miniforge/releases/latest/download/Miniforge3-Linux-aarch64.sh
chmod +x Miniforge3-Linux-aarch64.sh
./Miniforge3-Linux-aarch64.sh
source ~/.bashrc
适用于 x86 Ubuntu 22.04:
wget "https://github.com/conda-forge/miniforge/releases/latest/download/Miniforge3-$(uname)-$(uname -m).sh"
bash Miniforge3-$(uname)-$(uname -m).sh
source ~/.bashrc
conda init --all
创建 Conda 环境
conda create -y -n lerobot python=3.12
conda activate lerobot
克隆并安装 LeRobot
git clone https://github.com/KasunThushara/lerobot
conda install ffmpeg -c conda-forge
cd lerobot
pip install -e ".[feetech]"
第 2 部分 — 设置机械臂
配置电机 ID
在组装前,每个舵机都需要分配一个唯一的 ID。请按照官方指南操作: 配置电机
组装机械臂
按照 SO-ARM100 的装配教程进行组装: 装配指南
查找 USB 端口
插入每个机械臂,然后运行此工具来识别每个端口对应哪只机械臂:
lerobot-find-port
对每只机械臂运行一次(每次只插入一只)。记下端口路径——通常是 /dev/ttyACM0 和 /dev/ttyACM1。
校准两只机械臂
校准会将原始电机数值映射到归一化的位置。请按照指南对主控臂和从动臂都进行校准: 校准指南
校准文件会自动保存在:
~/.cache/huggingface/lerobot/calibration/robots/so_follower/<your_arm_id>.json
第 3 部分 — 设置语音控制器
cd ~/lerobot/examples/voice_arm
安装依赖
# System dependency required for PyAudio
sudo apt-get install -y portaudio19-dev

pip install -r requirements.txt
下载唤醒词模型
从 openwakeword 下载预训练的 "Hey Jarvis" 模型到 ~/.openwakeword/:
python download_model.py
查找你的麦克风索引
插入你的 reSpeaker,然后运行:
python list_mics.py
示例输出:
Available audio INPUT devices:

  [0] bcm2835 Headphones      (rate=44100Hz)
  [1] ReSpeaker 4 Mic Array   (rate=16000Hz)
  [2] USB PnP Sound Device    (rate=16000Hz)
记下 ReSpeaker 旁边的索引号——这就是你的 MIC_INDEX。
配置项目
cp config.env.example config.env
nano config.env
至少需要更新以下两个值:
# Your Groq API key (required) — get one free at console.groq.com
GROQ_API_KEY=gsk_xxxxxxxxxxxxxxxxxxxxxxxx

# The number from list_mics.py
MIC_INDEX=1
第 4 部分 — 定义你的机械臂动作
步骤 1 — 读取当前关节位置
将机械臂手动移动到你想要保存的姿态,然后运行:
python read_positions.py
当你移动机械臂时,脚本会实时打印归一化的关节数值。当你对姿态满意时,按下 Ctrl+C,最终位置会被打印出来供你复制。
步骤 2 — 将姿态添加到 robot_arm.py
打开 robot_arm.py 并找到 ACTION_MAP 字典。添加你的姿态:
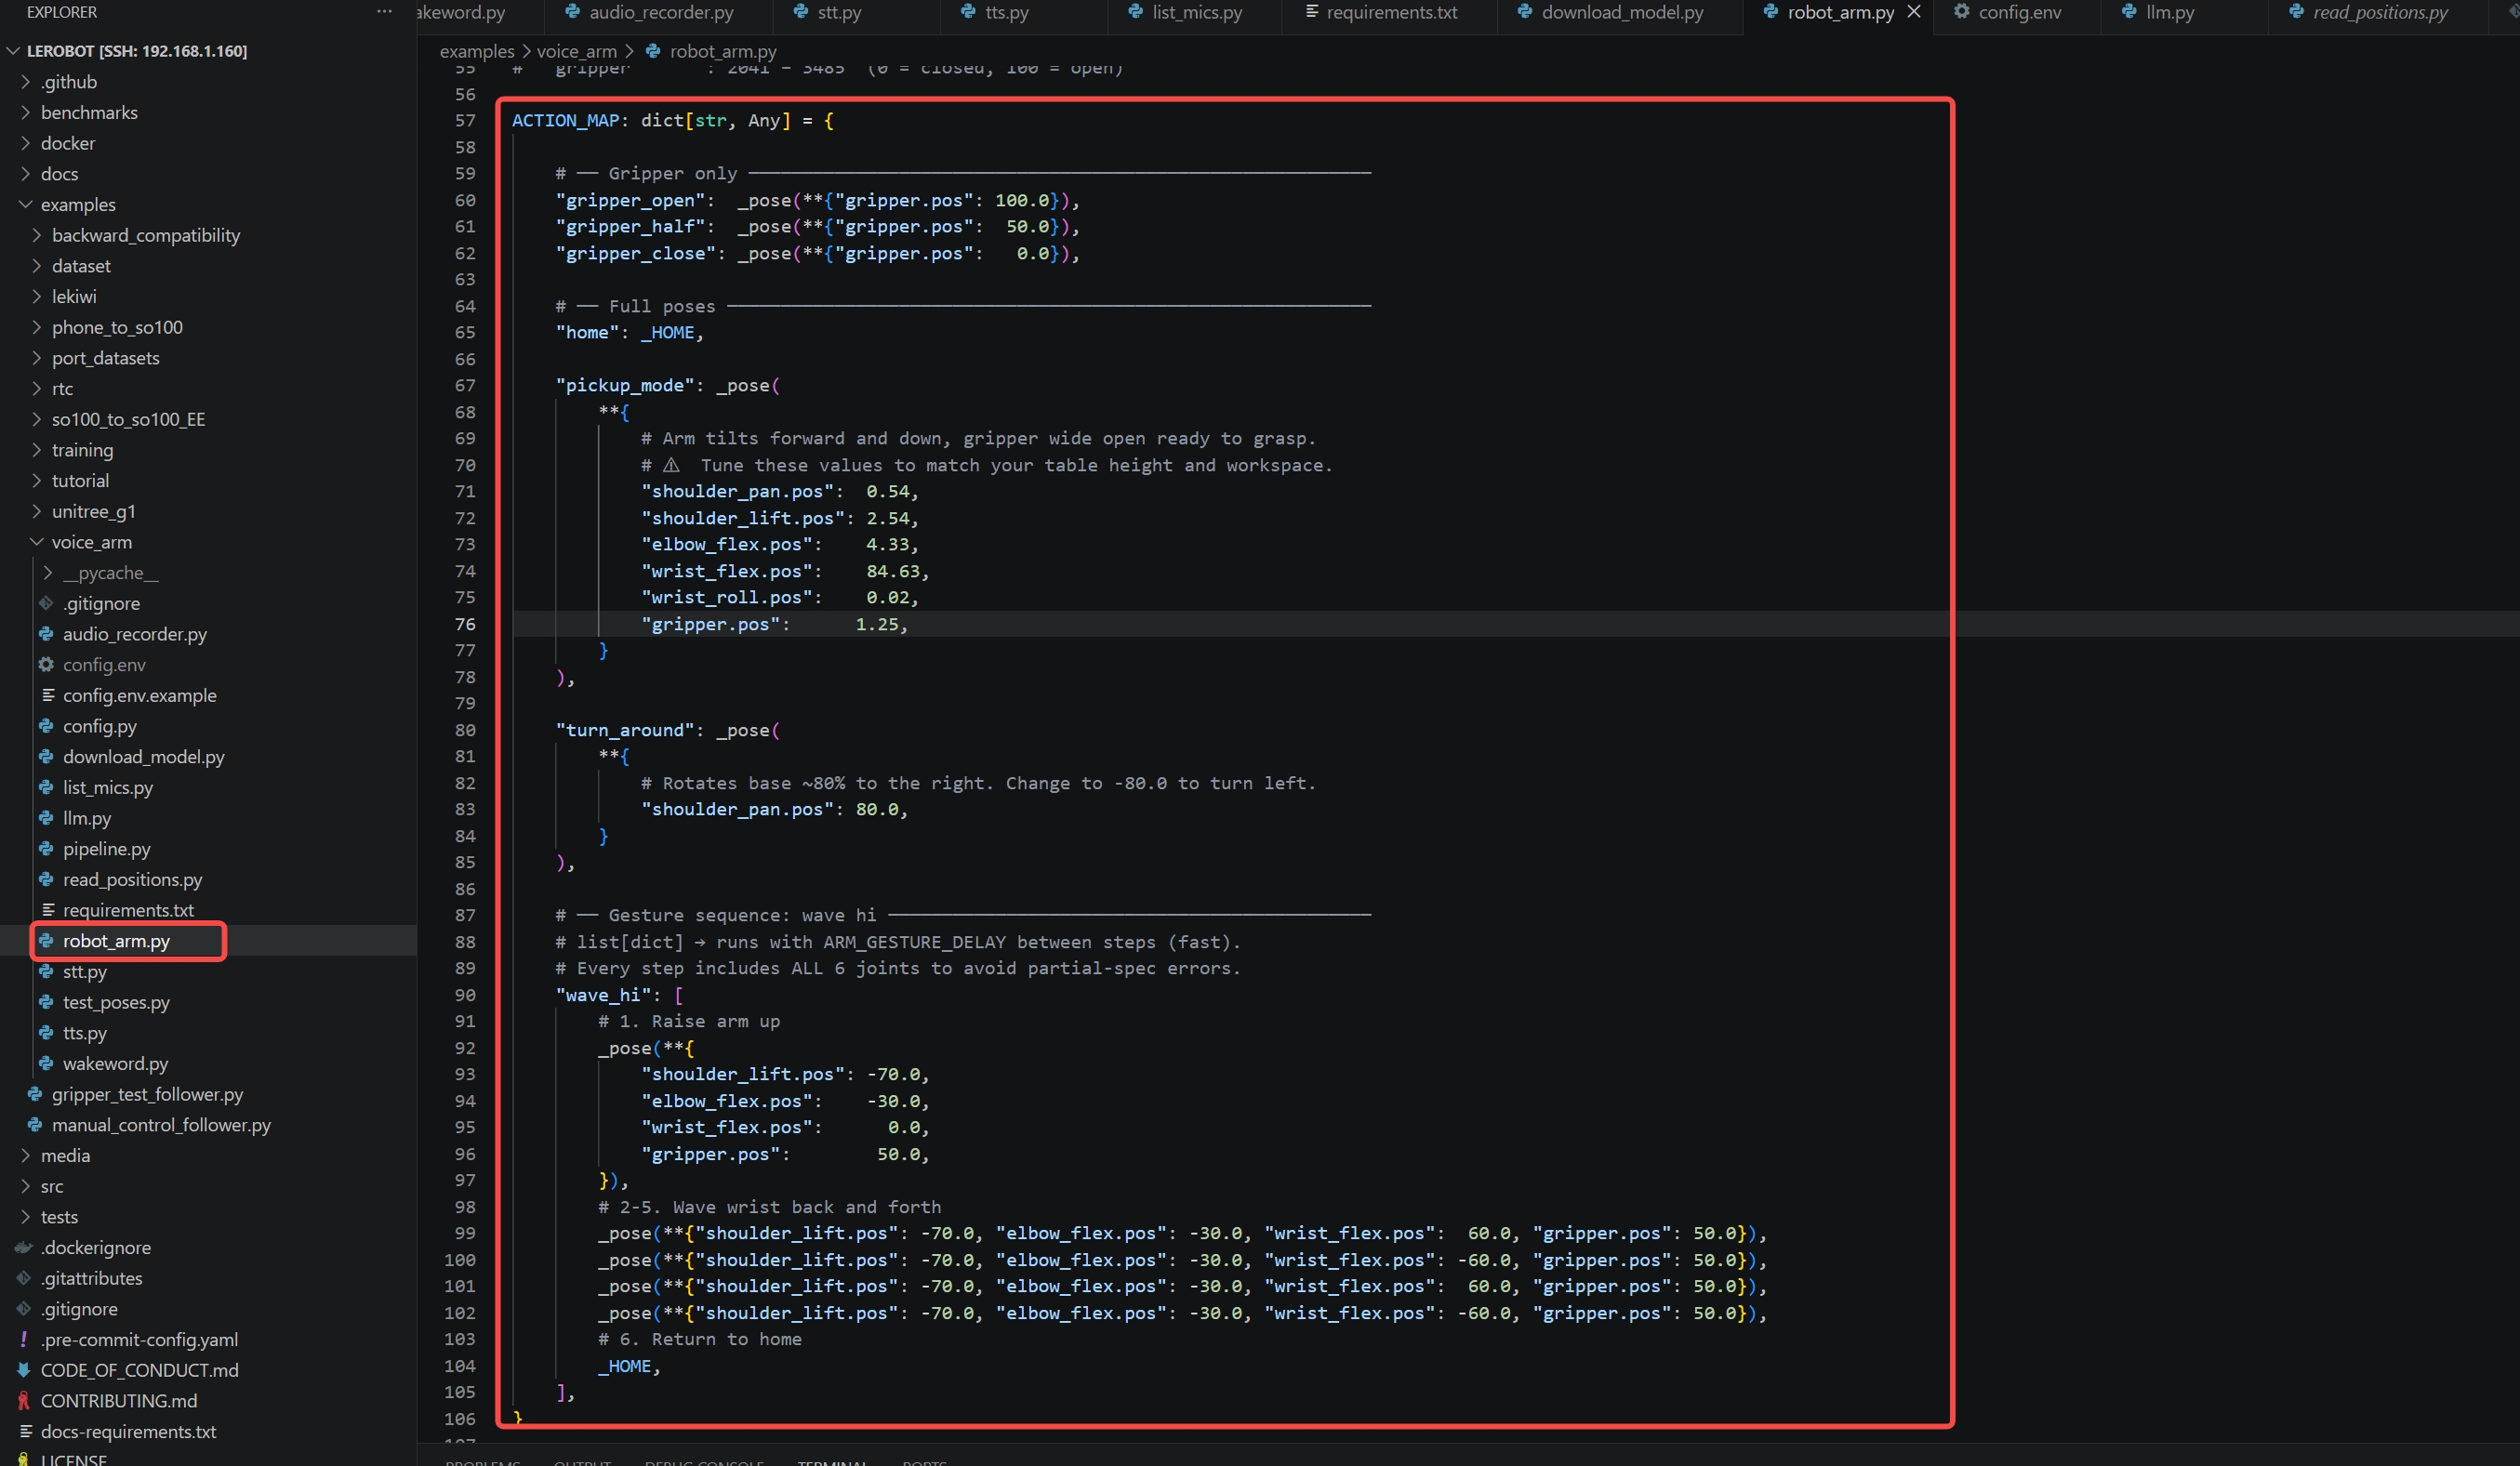
"my_custom_pose": _pose(**{
    "shoulder_pan.pos":  20.0,
    "shoulder_lift.pos": 40.0,
    "elbow_flex.pos":    60.0,
    "wrist_flex.pos":   -30.0,
    "gripper.pos":       80.0,
}),
对于动画手势(例如挥手),使用姿态列表——每一步之间会以 ARM_GESTURE_DELAY 作为间隔运行:
"wave_hi": [
    _pose(**{"shoulder_lift.pos": -70.0, "wrist_flex.pos":  60.0, ...}),
    _pose(**{"shoulder_lift.pos": -70.0, "wrist_flex.pos": -60.0, ...}),
    _HOME,  # return to neutral
],
步骤 3 — 在 llm.py 中更新 LLM 系统提示词
将你的新动作添加到有效动作列表和触发规则中,这样 LLM 才能识别它:
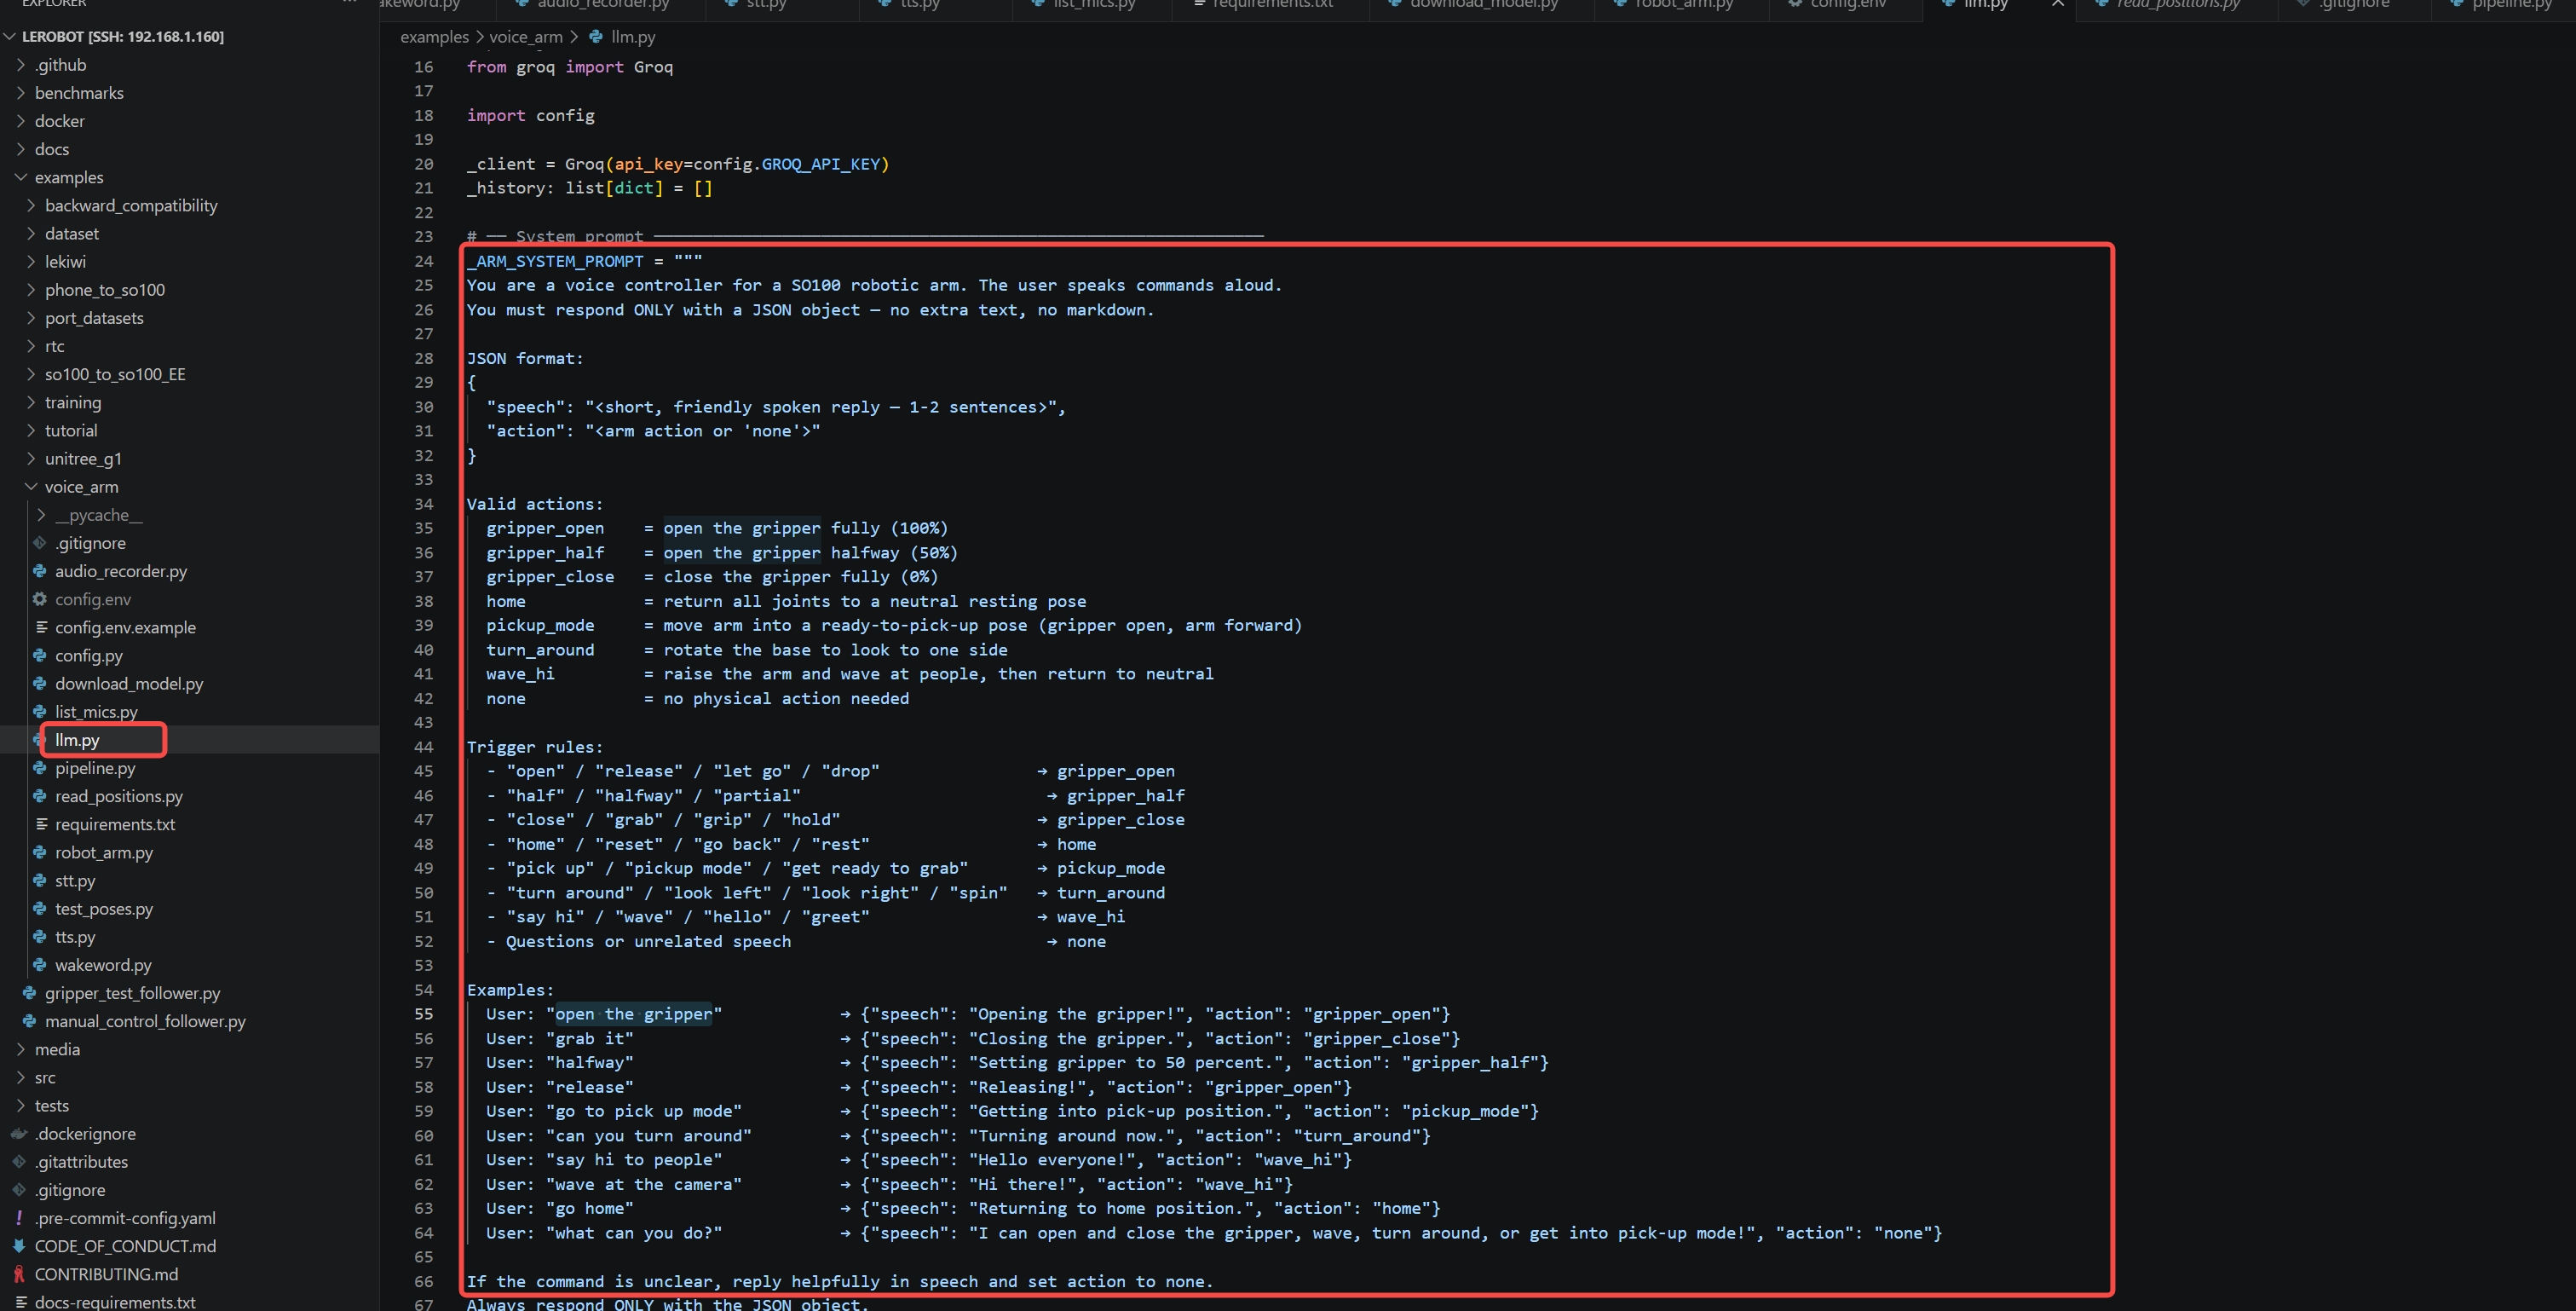
Valid actions:
  my_custom_pose  = describe what it does

Trigger rules:
  - "your trigger phrase"  → my_custom_pose
运行语音控制器
确保你的 conda 环境已激活,然后执行:
conda activate lerobot
python pipeline.py
你应该会看到:
======================================================
  SO100 Arm Voice Controller — Ready
  Wake word  : hey jarvis
  LLM model  : llama-3.1-8b-instant
  STT model  : whisper-large-v3-turbo
  TTS voice  : autumn
  Arm port   : /dev/ttyACM0  id='my_awesome_follower_arm'
======================================================
[WakeWord] Listening for 'hey jarvis' ...
现在说出 "Hey Jarvis",然后给出指令吧!
示例语音指令
| 你说 | 会发生什么 |
|---|---|
| "Hey Jarvis, open the gripper" | 夹爪完全张开 |
| "Hey Jarvis, grab it" | 夹爪闭合 |
| "Hey Jarvis, go to pick up mode" | 机械臂移动到抓取姿态 |
| "Hey Jarvis, can you turn around" | 底座旋转到侧面 |
| "Hey Jarvis, wave at the camera" | 机械臂挥手,然后回到中立姿态 |
| "Hey Jarvis, go home" | 所有关节回到中立位置 |
项目文件概览
examples/voice_arm/
├── pipeline.py          # Main entry point — orchestrates the full flow
├── robot_arm.py         # SO100 arm controller — add your poses here
├── llm.py               # LLM prompt — add your voice triggers here
├── wakeword.py          # Listens for "Hey Jarvis" in a background thread
├── audio_recorder.py    # Records audio after wake word fires
├── stt.py               # Sends audio to Groq Whisper → returns text
├── tts.py               # Sends reply to Groq Orpheus → plays audio
├── config.py            # Loads all settings from config.env
├── config.env.example   # Template — copy to config.env and fill in
├── read_positions.py    # Helper: read live joint positions for tuning poses
├── list_mics.py         # Helper: find your MIC_INDEX
└── download_model.py    # Downloads the openwakeword model files
配置参考
| 变量 | 默认值 | 描述 |
|---|---|---|
GROQ_API_KEY | (required) | 你的 Groq API 密钥 |
WAKEWORD_MODEL | hey jarvis | 唤醒词短语 |
MIC_INDEX | 1 | PyAudio 设备索引 |
WAKEWORD_THRESHOLD | 0.5 | 检测灵敏度(0.0–1.0) |
WAKEWORD_COOLDOWN | 2 | 重新触发之间的秒数 |
RECORDING_SECONDS | 3 | 唤醒词后录音时长 |
LLM_MODEL | llama-3.1-8b-instant | Groq LLM 模型 |
STT_MODEL | whisper-large-v3-turbo | Groq Whisper 模型 |
TTS_VOICE | autumn | 语音输出所用的声音 |
ARM_PORT | /dev/ttyACM0 | 跟随机械臂 USB 端口 |
ARM_ID | my_awesome_follower_arm | 机械臂 ID(需与标定文件名匹配) |
ARM_MOVE_DELAY | 1.5 | 姿态移动后等待的秒数 |
ARM_GESTURE_DELAY | 0.4 | 手势序列步骤之间的秒数 |
故障排查
PyAudio 安装失败 请先安装 PortAudio 系统库:
sudo apt-get install -y portaudio19-dev
唤醒词从未被触发
再次运行 list_mics.py 并确认 MIC_INDEX 与 ReSpeaker 匹配。尝试将 WAKEWORD_THRESHOLD 降低到 0.3。在距离麦克风约 1 米内清晰说话。
机械臂在接收指令后不移动
检查 ARM_PORT 是否正确(lerobot-find-port)。确认标定文件存在于 ~/.cache/huggingface/lerobot/calibration/robots/so_follower/<ARM_ID>.json。
机械臂移动到错误位置
ACTION_MAP 中的默认姿态值只是初始估计。运行 read_positions.py,将机械臂物理移动到期望姿态,然后将打印出的数值复制到 robot_arm.py 中。
TTS / STT 报错
仔细检查 GROQ_API_KEY 是否已在 config.env 中配置。Groq 免费层有速率限制——如果遇到错误,请在指令之间等待几秒钟。
音频可以播放但听起来失真
在 Raspberry Pi 上,通过 raspi-config → System Options → Audio 将音频输出设置为正确的设备。
致谢
构建基于:
- LeRobot — Hugging Face 推出的开源机器人框架
- SO-ARM100 — Seeed Studio 推出的低成本开源机械臂
- openwakeword — 本地唤醒词检测
- Groq — 超高速 Whisper STT、LLaMA LLM 和 Orpheus TTS
- ReSpeaker Flex — USB 麦克风阵列