Seeed Studio XIAO 圆形显示屏圣诞球
在本教程中,我将向您展示如何制作一个带有飘落雪花和变化背景图像的圣诞球。
该程序执行以下功能:
- 显示存储为 C 数组的背景图像。
- 模拟雪花粒子在图像上飘落,带有风效果。
- 检测触摸输入并循环切换一组背景图像。
- 使用双缓冲实现流畅的动画。
环境准备
硬件
对于这个项目,我们需要:
我使用 XIAO ESP32S3 是因为内存的原因。PNGDEC 需要一些内存来运行,大约 40KB。
软件准备
要使用圆形显示屏,请前往XIAO 圆形显示屏入门指南安装必要的库。
尝试一些示例,看看是否一切正常工作。
库
对于这个项目,我们将使用Seeed Studio XIAO 圆形显示屏附带的库。
按照教程XIAO 圆形显示屏入门指南中指定的方式安装所有库。 之后,您需要以下内容:
- PNGdec 库。
- 更新 LVGL 库(或者不安装 Seeed Studio github 上的版本)
图像
我们的图像是存储在闪存数组中的 PNG 图像。它们使用 PNGdec 库显示。
所有图像必须是 PNG 格式
以下是我使用的图像 - 全部由 AI 生成


我们的背景图像需要准备好,以便 TFT_eSPI 可以显示它们,并且它们能很好地适配 XIAO 圆形显示屏。
准备图像
调整图像大小
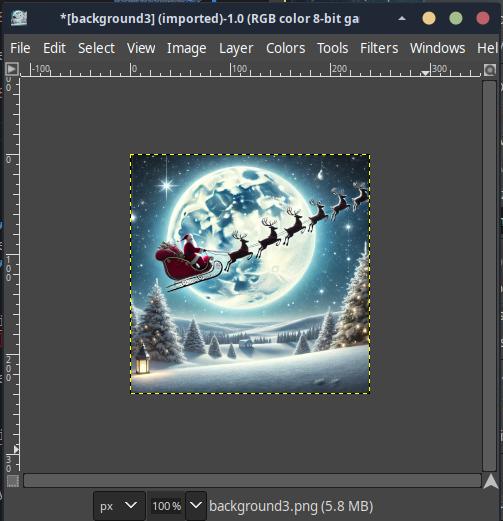
我们的 XIAO 圆形显示屏分辨率为 240x240。我们需要调整图像大小。我将展示如何使用 GIMP 来完成。
- 打开图像
- 转到 图像 > 缩放图像

- 将宽度和高度设置为 240。因为选择了保持比例(链条图标),一旦您更改宽度,高度也应该随之更改。
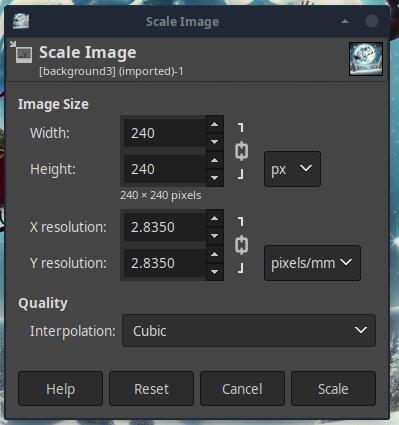
- 按缩放按钮。
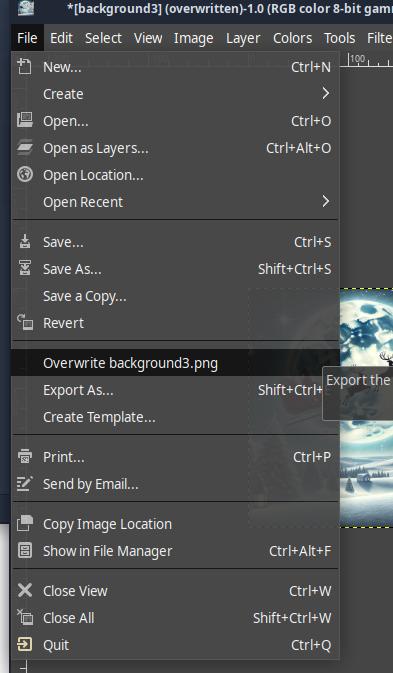
- 保存图像(我将覆盖旧的图像)
创建闪存数组
注意: 这些说明在 TFT_eSPI Flash_PNG 示例中。
要创建闪存数组,请转到文件到 C 风格数组转换器
现在的步骤是:
- 使用浏览上传图像。上传图像后
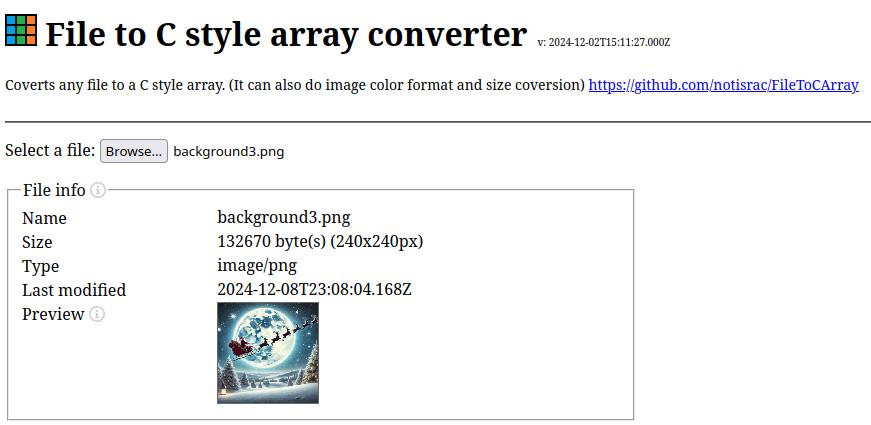
- 我们需要设置一些选项
- 作为二进制处理

所有其他选项都变灰。
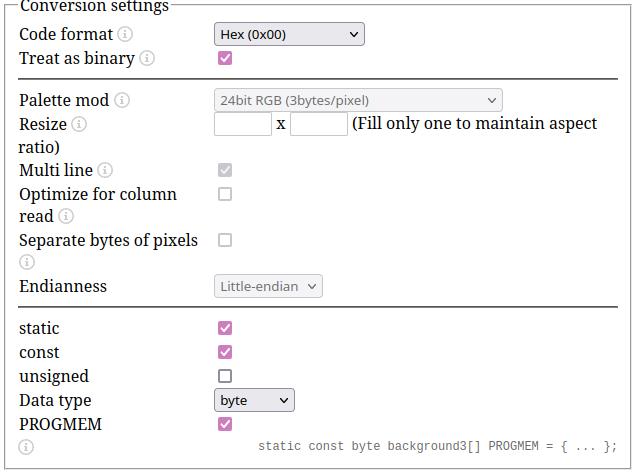
- 让我们将数据类型更改为 char
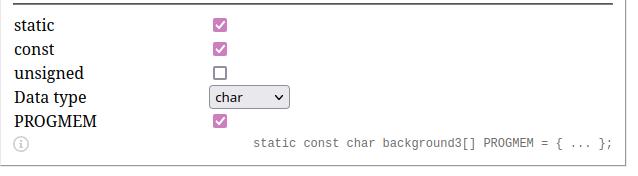
- 按转换。这将把图像转换为数组。
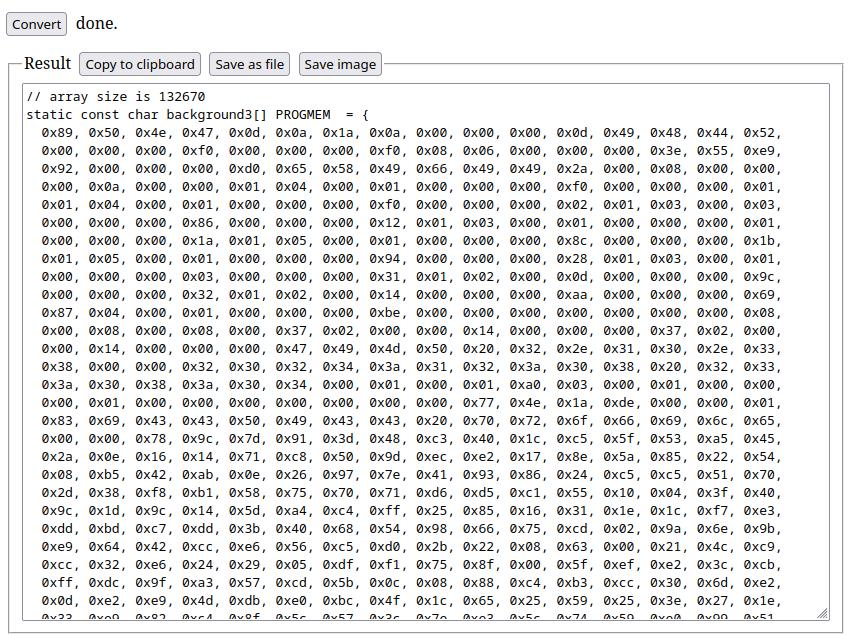
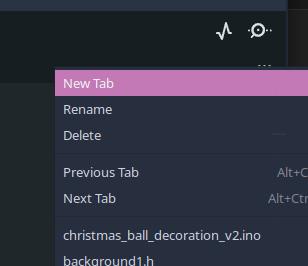
- 您现在可以按保存为文件按钮保存您的图像并将其添加到您的 Arduino 草图中,或按复制到剪贴板按钮 如果您复制到剪贴板,您必须按 Arduino 编辑器右侧的 3 个点并选择新建选项卡
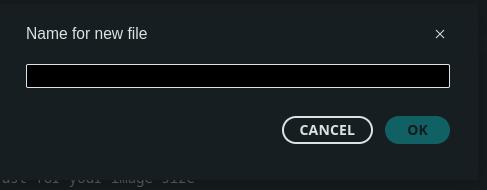
给它一个名称(通常是您的图像名称加上 .h 扩展名)
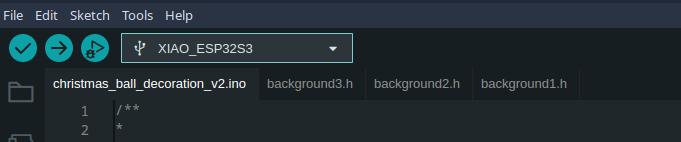
您最终会得到所有图像作为 .h 文件。
代码
这是圣诞球的代码。 对代码主要功能的简单解释。代码还包含一些注释。
头文件和库
我们首先包含一些库。
#include <PNGdec.h>
#include <TFT_eSPI.h>
#include <Wire.h>

#include "background1.h"
#include "background2.h"
#include "background3.h"

#define USE_TFT_ESPI_LIBRARY
#include "lv_xiao_round_screen.h"
请记住,您需要安装 Seeed Studio 库。
背景图片
以下是管理背景图片的函数
struct Background {
  const uint8_t *data;
  size_t size;
};

const Background backgrounds[] = {
    {(const uint8_t *)background1, sizeof(background1)},
    {(const uint8_t *)background2, sizeof(background2)},
    {(const uint8_t *)background3, sizeof(background3)},
};
-
结构体:每个背景图像都存储为一个 Background 结构体,包含:
- data:指向 PNG 数据的指针。
- size:PNG 文件的大小。
-
数组:backgrounds 数组存储所有背景图像。currentBackground 变量跟踪当前显示的背景。
雪花粒子模拟
- 粒子初始化
void initParticles() {
  for (int i = 0; i < numParticles; i++) {
    particles[i].x = random(0, sprite.width());
    particles[i].y = random(0, sprite.height());
    particles[i].speed = random(3, 8);
  }
}
- 它用随机位置和速度初始化 numParticles。
- Particle updates
void updateParticles() {
  for (int i = 0; i < numParticles; i++) {
    particles[i].speed += random(-1, 2); // Speed variation
    particles[i].speed = constrain(particles[i].speed, 3, 8);
    particles[i].y += particles[i].speed; // Move down
    particles[i].x += random(-1, 2);      // Wind effect
    // Wrap-around logic
    if (particles[i].y > sprite.height()) {
      particles[i].y = 0;
      particles[i].x = random(0, sprite.width());
      particles[i].speed = random(3, 8);
    }
    if (particles[i].x < 0) particles[i].x = sprite.width();
    if (particles[i].x > sprite.width()) particles[i].x = 0;
  }
}
- 更新粒子位置:
- 下落效果:每个粒子向下移动。
- 风力效果:添加轻微的水平漂移。
- 循环回绕:粒子从底部退出时重置到顶部。
- 渲染粒子:
void renderParticlesToSprite() {
  for (int i = 0; i < numParticles; i++) {
    sprite.fillCircle(particles[i].x, particles[i].y, 2, TFT_WHITE);
  }
}
- 它将每个粒子渲染为一个小白圆
PNG Decoding
int16_t rc = png.openFLASH((uint8_t *)backgrounds[currentBackground].data,
                           backgrounds[currentBackground].size,
                           pngDrawToSprite);
if (rc != PNG_SUCCESS) {
  Serial.println("Failed to open PNG file!");
  return;
}
png.decode(NULL, 0);
- 使用 png.openFLASH() 函数加载并解码当前背景 PNG
Touch interaction
if (chsc6x_is_pressed()) {
  currentBackground = (currentBackground + 1) % numBackgrounds; // Cycle backgrounds
  delay(300); // Debounce
}
- 使用 chsc6x_is_pressed() 检测触摸事件,并通过递增 currentBackground 来改变背景图像
设置和循环
- 设置:
void setup() {
  Serial.begin(115200);
  tft.begin();
  tft.fillScreen(TFT_BLACK);
  sprite.createSprite(240, 240); // Match display size
  pinMode(TOUCH_INT, INPUT_PULLUP);
  Wire.begin();
  initParticles();
}
-
初始化显示器、触摸输入和雪花粒子
-
Main loop:
void loop() {
  sprite.fillScreen(TFT_BLACK);
  // Render background and snow
  int16_t rc = png.openFLASH((uint8_t *)backgrounds[currentBackground].data,
                             backgrounds[currentBackground].size,
                             pngDrawToSprite);
  if (rc == PNG_SUCCESS) {
    png.decode(NULL, 0);
    updateParticles();
    renderParticlesToSprite();
    sprite.pushSprite(0, 0);
  }
  // Handle touch input
  if (chsc6x_is_pressed()) {
    currentBackground = (currentBackground + 1) % numBackgrounds;
    delay(300);
  }
  delay(10); // ~100 FPS
}
- 清除精灵,渲染当前帧(背景 + 粒子),并检查用户输入。
双缓冲
为了减少雪花的闪烁并改善动画的流畅性,我们使用双缓冲。
这允许我们在屏幕外缓冲区中绘制,然后再显示到屏幕上。
这里的双缓冲
在这个项目中,TFT_eSPI 库的 TFT_eSprite 类实现了双缓冲。
- 精灵创建
- 精灵(屏幕外缓冲区)在 setup() 函数中创建:
sprite.createSprite(240, 240); // Match display size
- 绘制缓冲区
- 所有绘制操作(背景渲染和雪花粒子动画)都在精灵上完成:
sprite.fillScreen(TFT_BLACK); // Clear the sprite
renderParticlesToSprite();   // Draw snow particles
- 更新显示
- 在精灵中完全绘制帧后,它会在一次操作中推送到显示器:
sprite.pushSprite(0, 0);
- 这会立即将缓冲区的内容传输到屏幕上。
- 重用
- 通过在 loop() 开始时清除精灵来为每一帧重用精灵:
sprite.fillScreen(TFT_BLACK);
使用双缓冲的优势
- 流畅的雪花动画:下落的雪花粒子更新无缝,没有闪烁。
- 动态背景切换:触摸触发的背景变化没有可见的延迟或伪影。
- 高效渲染:在内存(RAM)中绘制比逐行直接更新显示更快。
以下是该项目的完整代码:
/**
*
* To create the images as C arrays, visit:
* https://notisrac.github.io/FileToCArray/
*
*/
#include <PNGdec.h>
#include <TFT_eSPI.h>

#include "background1.h"
#include "background2.h"
#include "background3.h"

#define USE_TFT_ESPI_LIBRARY
#include "lv_xiao_round_screen.h"

// PNG decoder and TFT display instances
PNG png;
//TFT_eSPI tft = TFT_eSPI();
TFT_eSprite sprite = TFT_eSprite(&tft); // Off-screen buffer

#define MAX_IMAGE_WIDTH 240

// Backgrounds for the snow globe
struct Background {
  const uint8_t *data;
  size_t size;
};

// Define the backgrounds with explicit casting
const Background backgrounds[] = {
    {(const uint8_t *)background1, sizeof(background1)},
    {(const uint8_t *)background2, sizeof(background2)},
    {(const uint8_t *)background3, sizeof(background3)},
};
const size_t numBackgrounds = sizeof(backgrounds) / sizeof(backgrounds[0]);

int currentBackground = 0; // Index of the current background

// Snow particle properties
const int numParticles = 100; // Number of snow particles
struct Particle {
  int16_t x, y;   // Position
  int16_t speed;  // Vertical speed
};
Particle particles[numParticles];

// Function to draw PNG to the sprite (callback for PNG decoder)
void pngDrawToSprite(PNGDRAW *pDraw) {
  uint16_t lineBuffer[MAX_IMAGE_WIDTH];
  png.getLineAsRGB565(pDraw, lineBuffer, PNG_RGB565_BIG_ENDIAN, 0xffffffff);
  sprite.pushImage(0, pDraw->y, pDraw->iWidth, 1, lineBuffer);
}

// Initialize snow particles
void initParticles() {
  for (int i = 0; i < numParticles; i++) {
    particles[i].x = random(0, sprite.width());
    particles[i].y = random(0, sprite.height());
    particles[i].speed = random(3, 8); // Random speed for each snowflake
  }
}

// Update snow particle positions
void updateParticles() {
  for (int i = 0; i < numParticles; i++) {
    particles[i].speed += random(-1, 2); // Random variation in speed
    particles[i].speed = constrain(particles[i].speed, 3, 8);
    particles[i].y += particles[i].speed;
    particles[i].x += random(-1, 2); // Wind effect

    // Wrap around screen
    if (particles[i].y > sprite.height()) {
      particles[i].y = 0;
      particles[i].x = random(0, sprite.width());
      particles[i].speed = random(3, 8);
    }
    if (particles[i].x < 0) particles[i].x = sprite.width();
    if (particles[i].x > sprite.width()) particles[i].x = 0;
  }
}

// Render snow particles to the sprite
void renderParticlesToSprite() {
  for (int i = 0; i < numParticles; i++) {
    sprite.fillCircle(particles[i].x, particles[i].y, 2, TFT_WHITE);
  }
}

void setup() {
  Serial.begin(115200);
  Serial.println("\n\nUsing the PNGdec library with touch interaction");

  // Initialize TFT
  tft.begin();
  tft.fillScreen(TFT_BLACK);
  sprite.createSprite(240, 240); // Match display size

  // Initialize touch interrupt pin
  pinMode(TOUCH_INT, INPUT_PULLUP);
  Wire.begin();

  // Initialize particles
  initParticles();

  Serial.println("Setup complete.");
}

void loop() {
  // Clear the sprite for the new frame
  sprite.fillScreen(TFT_BLACK);

  // Render the current background to the sprite
  int16_t rc = png.openFLASH((uint8_t *)backgrounds[currentBackground].data,
                           backgrounds[currentBackground].size,
                           pngDrawToSprite);


  if (rc != PNG_SUCCESS) {
    Serial.println("Failed to open PNG file!");
    return;
  }
  png.decode(NULL, 0); // Decode and render background

  // Update and render snow particles
  updateParticles();
  renderParticlesToSprite();

  // Push the sprite to the display
  sprite.pushSprite(0, 0);

  // Check for touch input using chsc6x_is_pressed
  if (chsc6x_is_pressed()) {
    currentBackground = (currentBackground + 1) % numBackgrounds; // Cycle through backgrounds
    delay(300); // Debounce delay
  }

  delay(10); // ~100 FPS
}
现在您可以使用自己的图片来创建一个神奇的圣诞球。
✨ 贡献者项目
- 此项目由 Seeed Studio 贡献者项目支持。
- 感谢 Bruno Santos,您的作品将会被展示。
技术支持与产品讨论
感谢您选择我们的产品!我们在这里为您提供不同的支持,以确保您使用我们产品的体验尽可能顺畅。我们提供多种沟通渠道,以满足不同的偏好和需求。