在 Seeed Studio XIAO ESP32-C5 上使用 Platform IO
PlatformIO 介绍
PlatformIO 是一个功能强大且高度可扩展的嵌入式系统开发生态。它无缝集成了对大量开发板和微控制器的支持,提供了极高的灵活性。PlatformIO 的突出优势在于其卓越的可扩展性:即使你的特定开发板未被原生支持,也可以通过其架构轻松自定义开发板定义。
更重要的是,PlatformIO 为熟悉 Arduino 的开发者架起了桥梁,只需引入相关库,即可编译和烧录 Arduino 风格的代码。
在 XIAO ESP32-C5 上使用 PlatformIO
接下来,我们将基于 PlatformIO 对 XIAO ESP32-C5 进行开发,帮助你了解 PlatformIO 的开发流程。
硬件准备
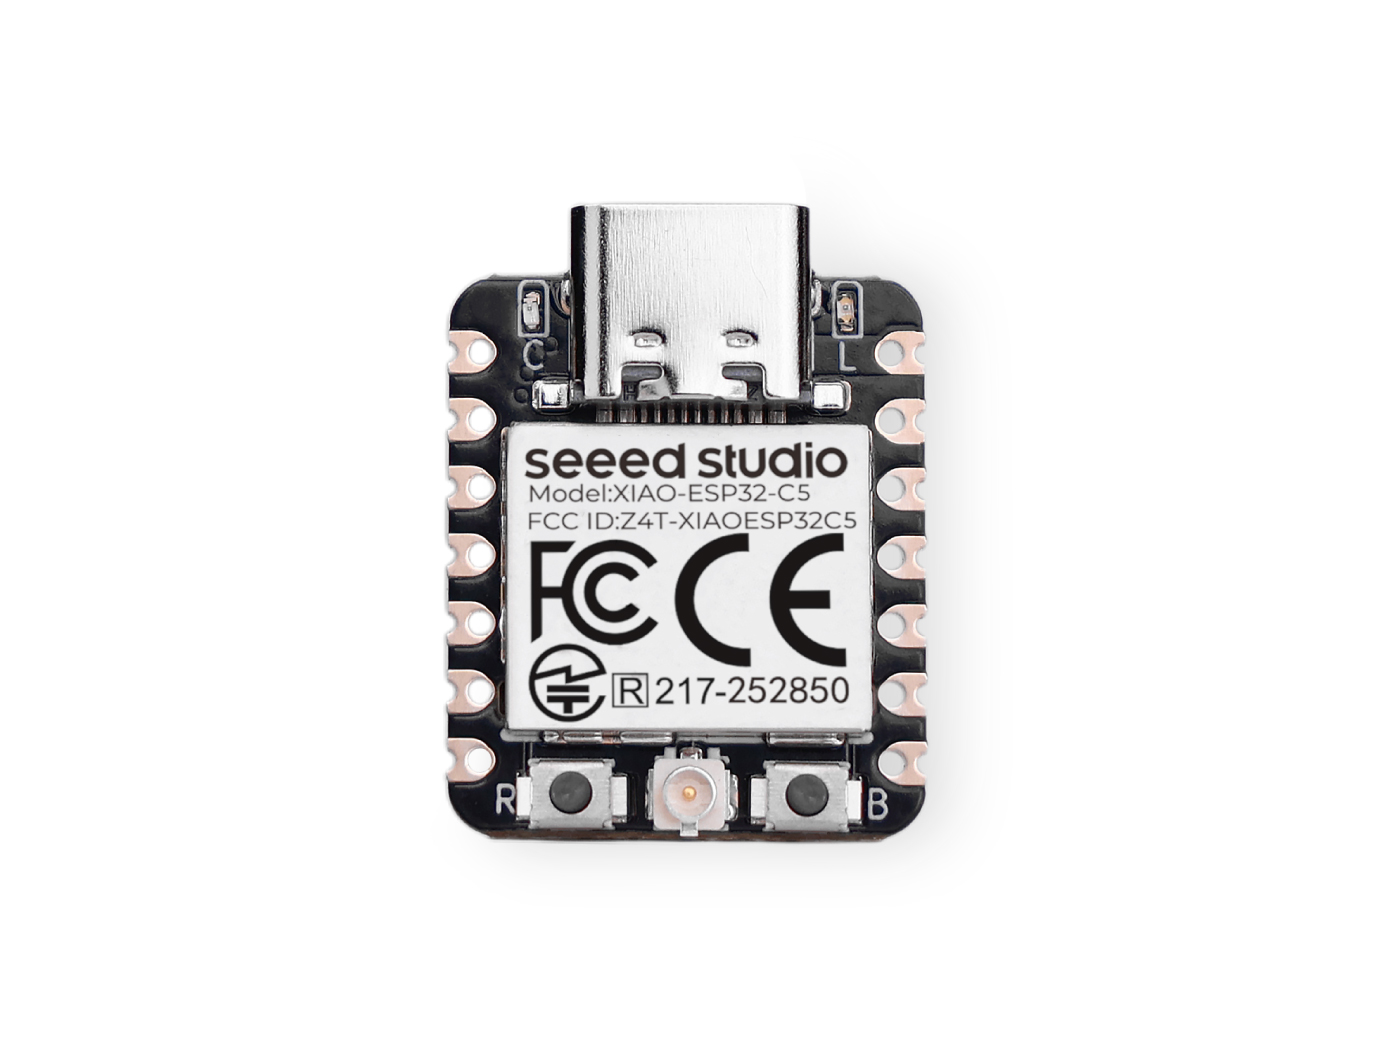
你需要提前准备一块 XIAO ESP32-C5。
| Seeed Studio XIAO ESP32-C5 |
|---|
 |
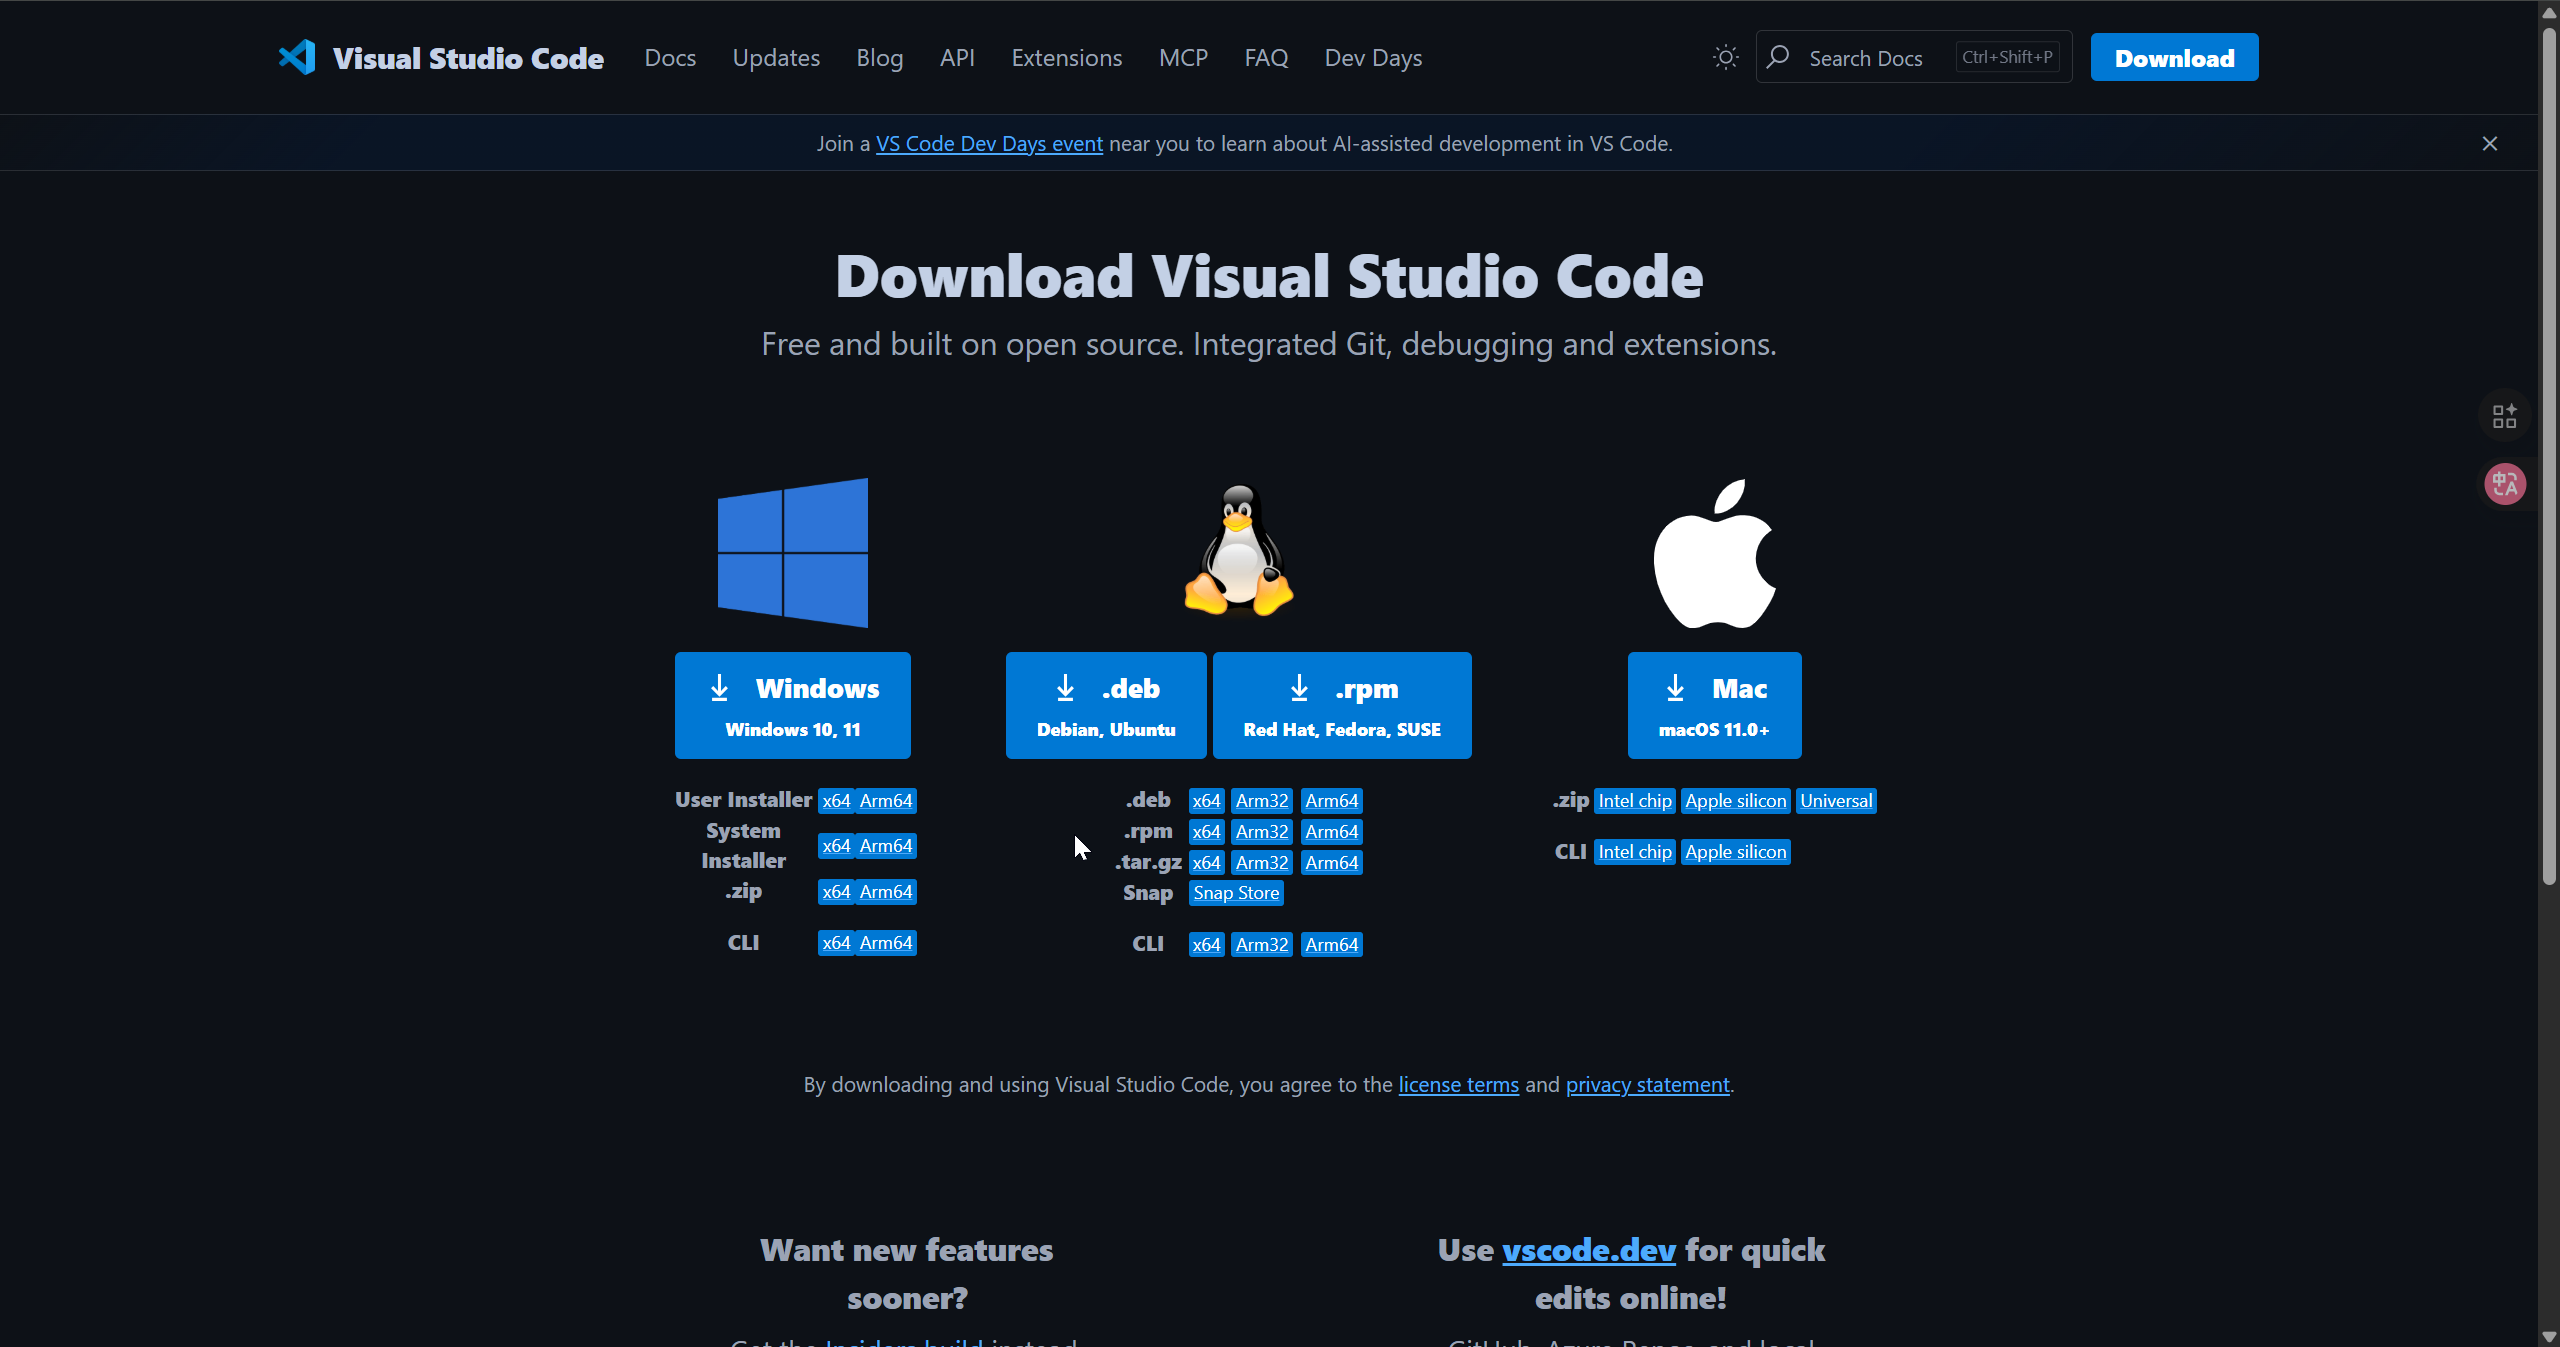
下载 VS Code
根据你所使用的系统下载 VS Code
安装 PlatformIO
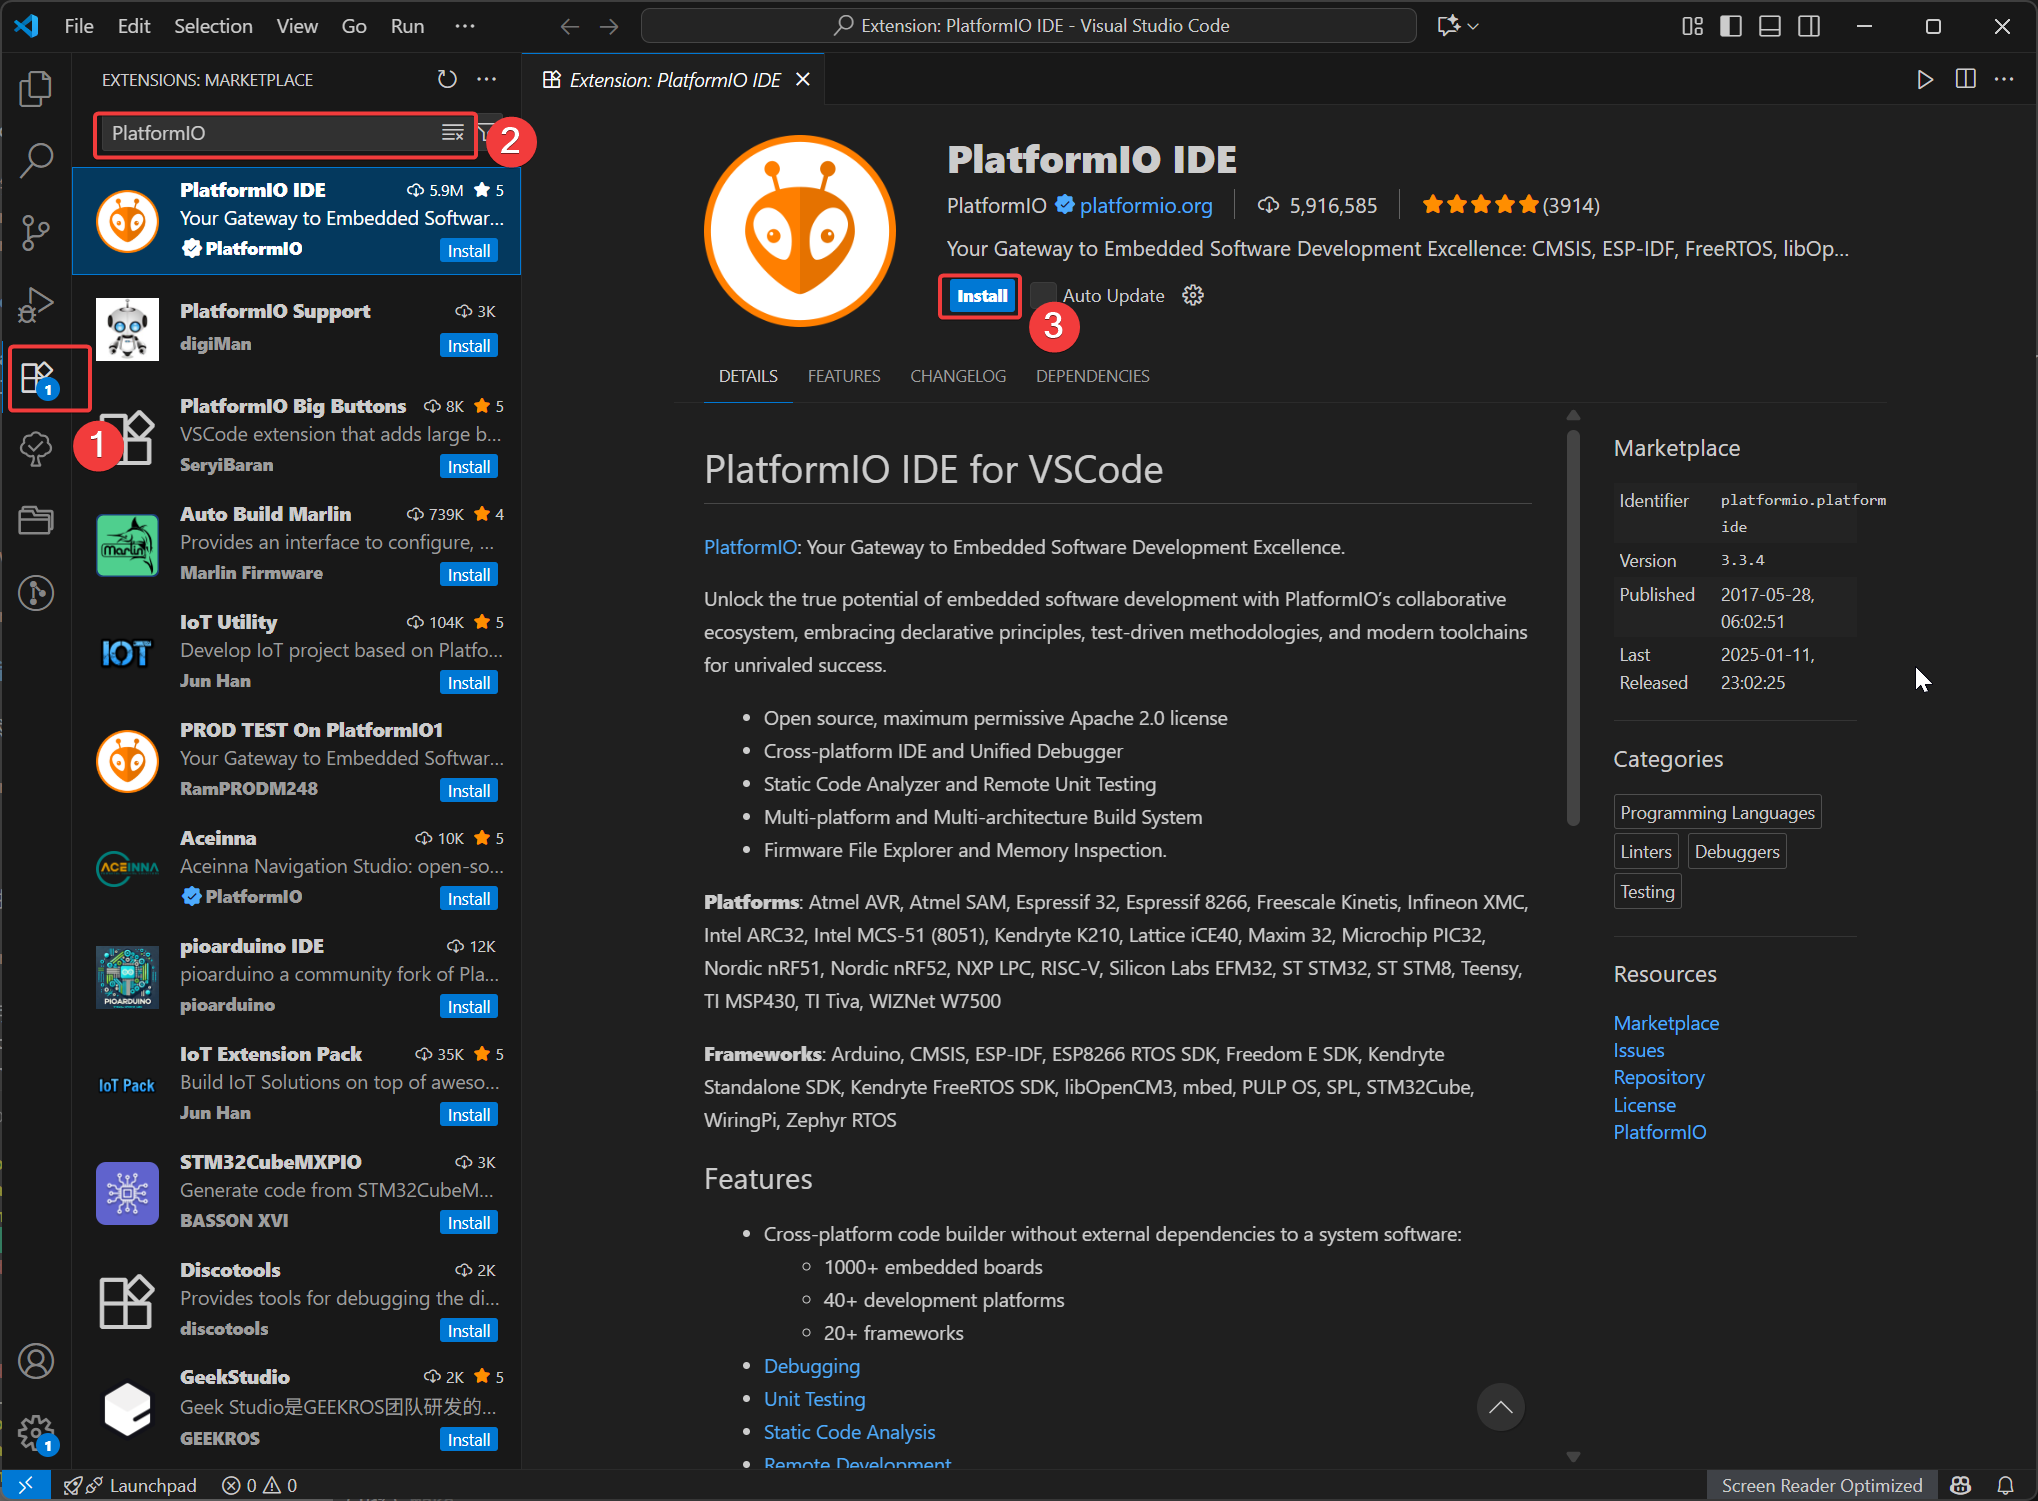
打开 VSCode,点击 Extensions,然后搜索 PlatformIO 并选择安装。安装完成后,重启 VSCode。
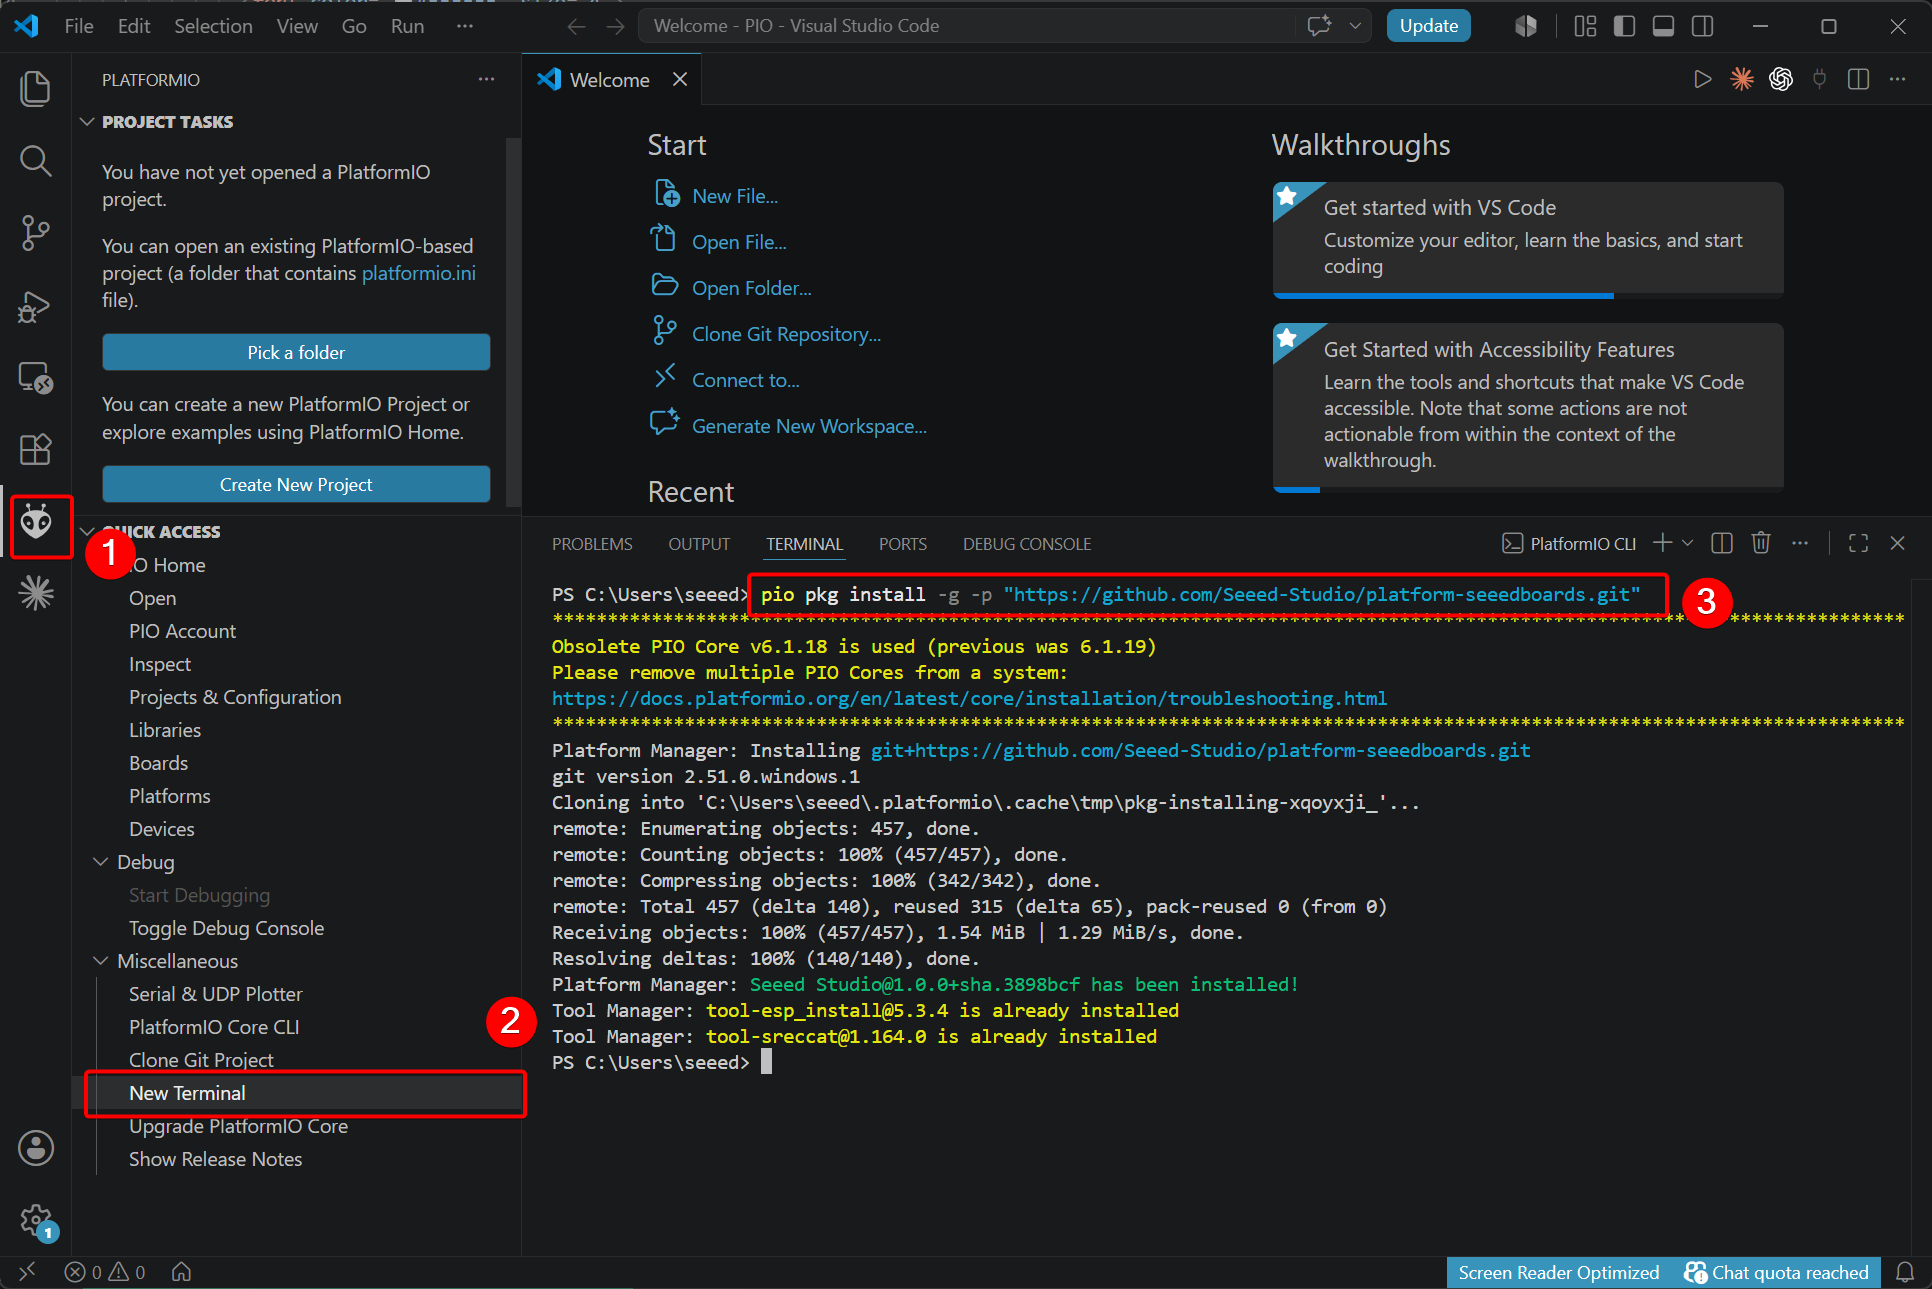
安装 platform-seeedboards 平台包
Seeed Studio XIAO 系列开发板使用自定义的 PlatformIO 平台,因此你需要手动安装对应的平台包。
- 进行全新安装时,运行以下命令:
pio pkg install -g -p "https://github.com/Seeed-Studio/platform-seeedboards.git"
- 如果你之前已经在 PlatformIO 中使用过 Seeed Studio XIAO 系列开发板,请运行下面的命令进行更新:
# for Windows
pio pkg update -g -p "https://github.com/Seeed-Studio/platform-seeedboards.git"

# for macOS/Linux
pio pkg uninstall -g -p "SeeedStudio" && pio pkg install -g -p "SeeedStudio=https://github.com/Seeed-Studio/platform-seeedboards.git" --force
如果你想使用已有的 PlatformIO 项目,请将 platformio.ini 的内容替换为如下所示:
[env:seeed-xiao-esp32-c5]
platform = https://github.com/Seeed-Studio/platform-seeedboards.git
framework = arduino
board = seeed-xiao-esp32-c5
monitor_speed = 115200
新建项目
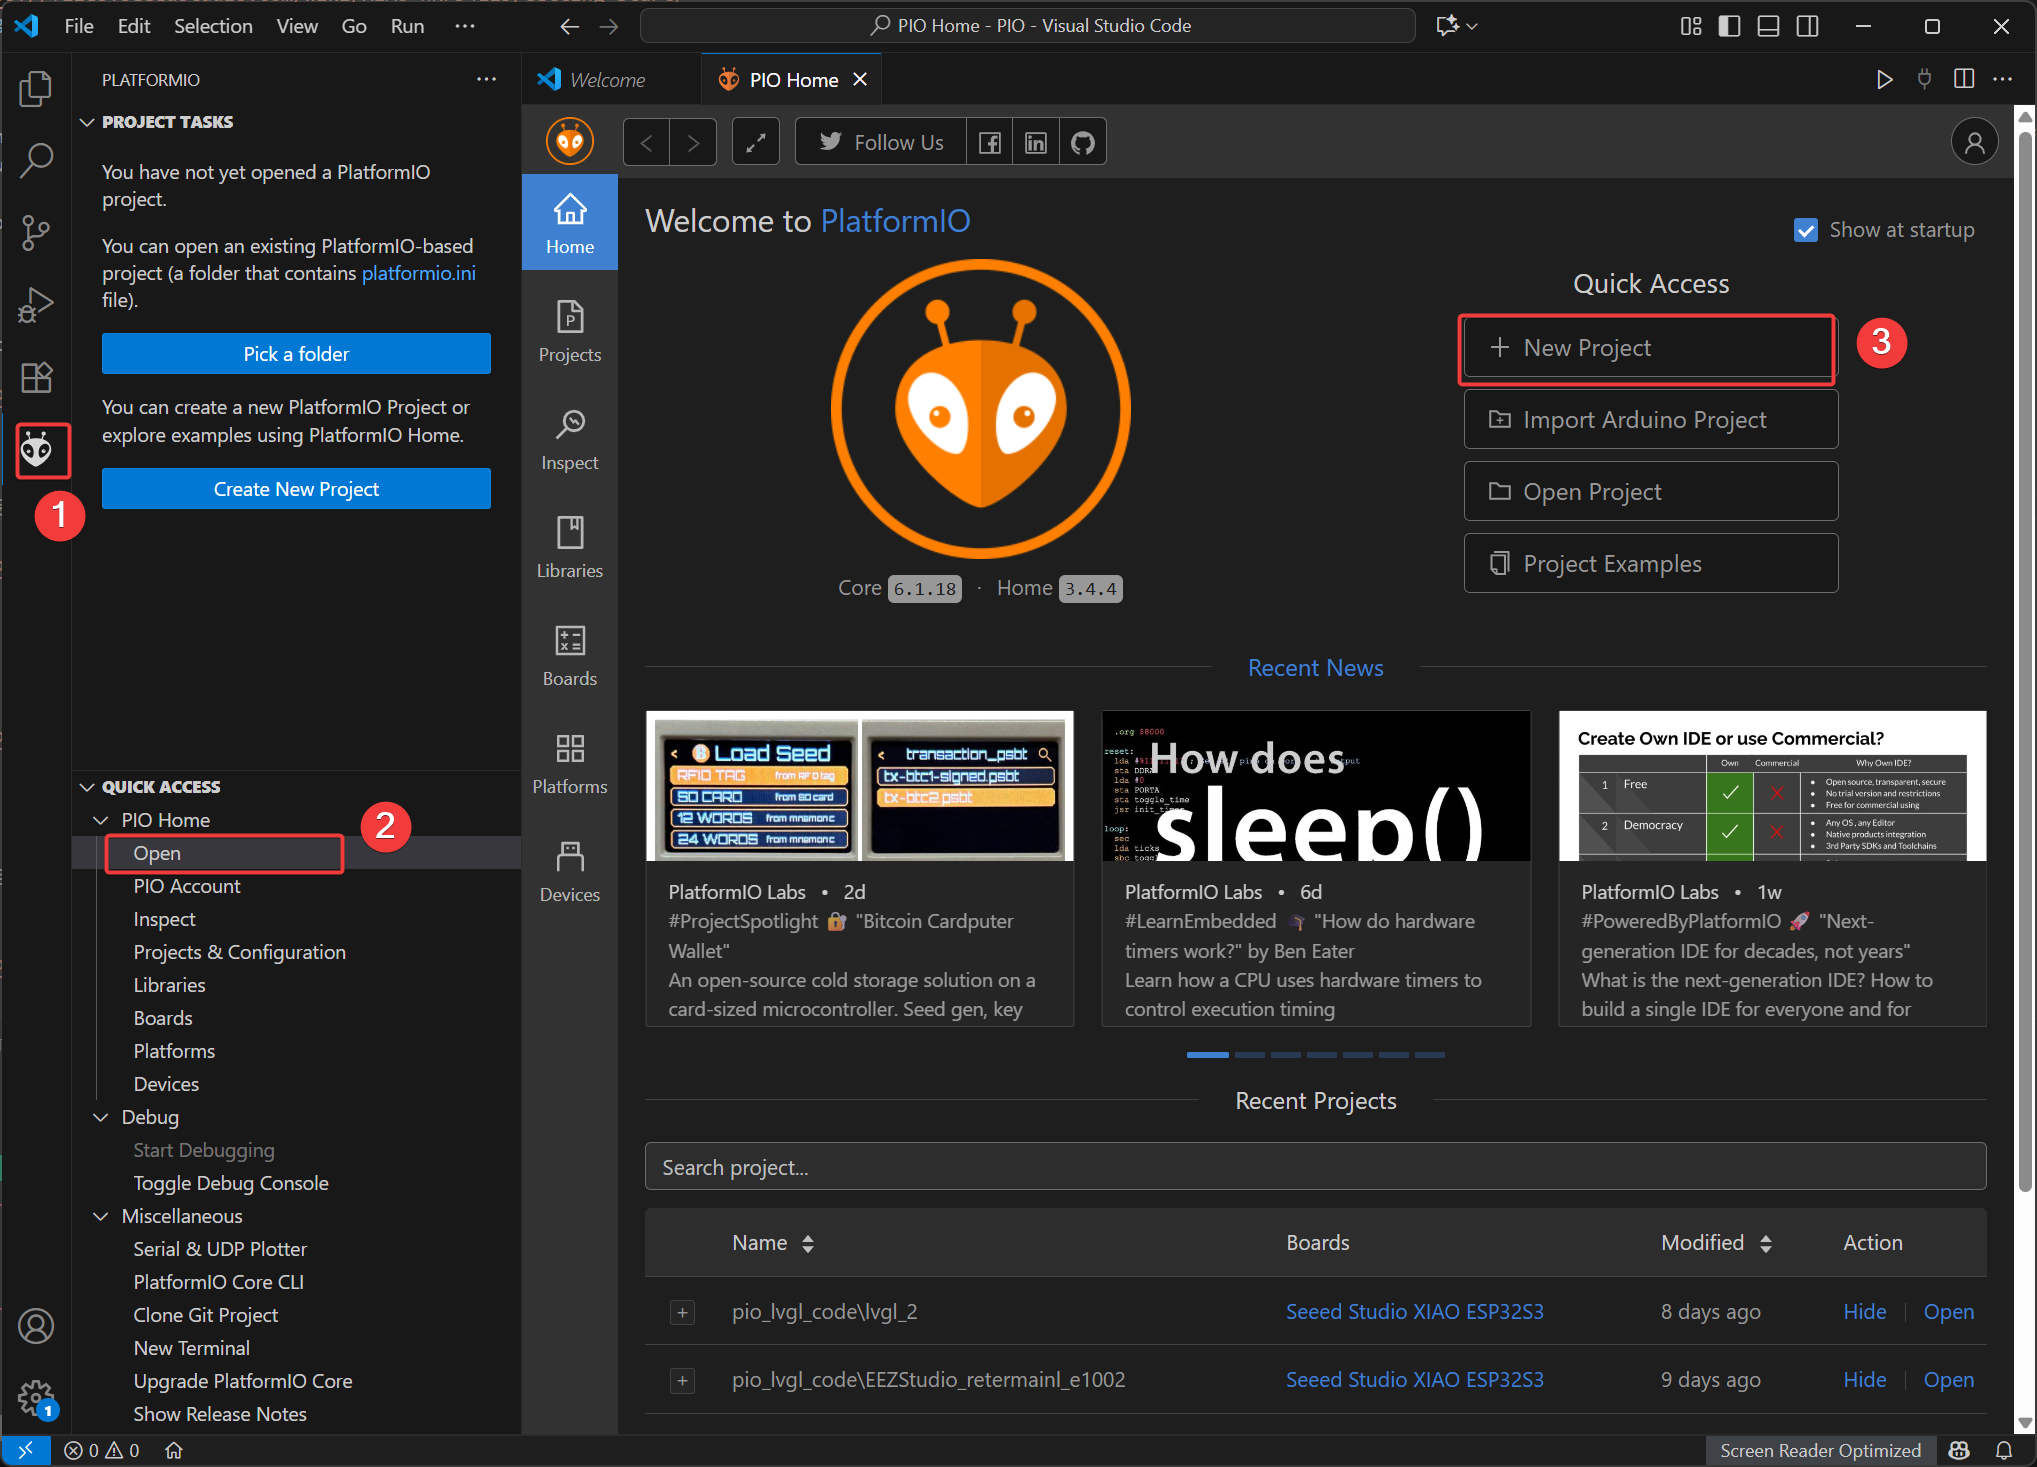
- 打开 PIO Home 界面并选择
New Project
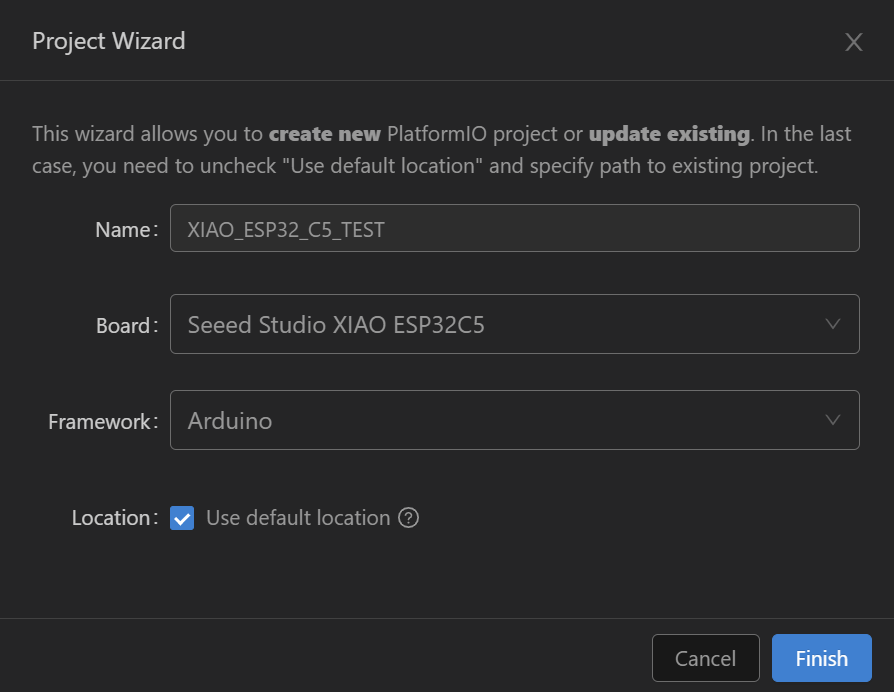
- Name:为你的项目命名
- Board:选择 Seeed Studio XIAO ESP32-C5
- Framework:选择 Ardunio
- Location:工程文件的路径可以设置为自定义路径,也可以选择默认路径。
- 点击 Finish 并等待创建完成。然后在工作区中打开项目文件。
LED 闪烁示例
在这个 LED 闪烁示例中,我们将引导你通过 PlatformIO 进行编译和上传文件。
步骤 1. 复制示例代码
#include <Arduino.h>

void setup()
{
  // put your setup code here, to run once:
  pinMode(LED_BUILTIN, OUTPUT);
  Serial.begin(115200);
}

void loop()
{
  // put your main code here, to run repeatedly:
  digitalWrite(LED_BUILTIN, LOW);
  Serial.print("LED ON \n");
  delay(1000);
  digitalWrite(LED_BUILTIN, HIGH);
  Serial.print("LED OFF \n");
  delay(1000);
}
步骤 2. 构建项目
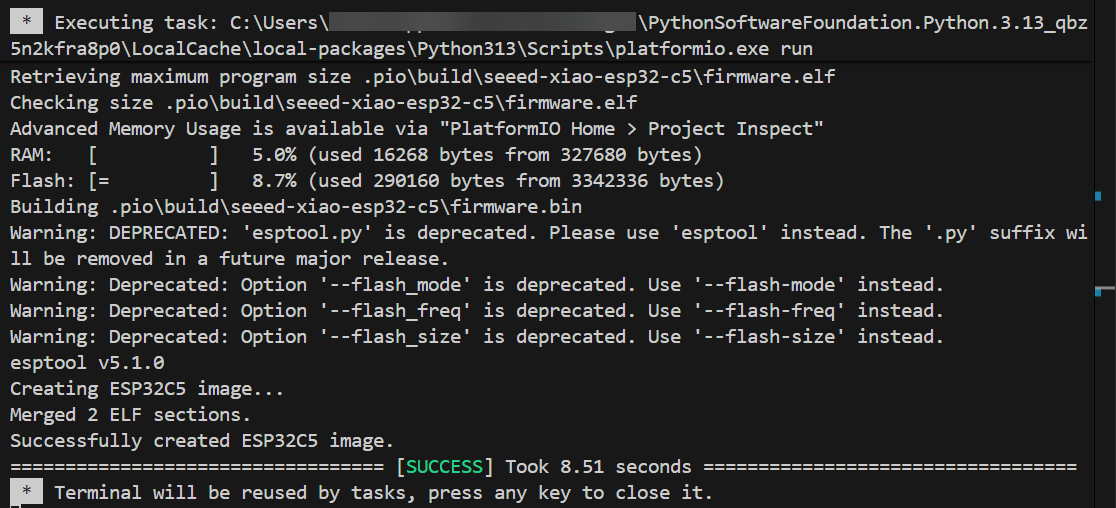
点击 VS Code 底部状态栏中的 √ 图标进行构建。
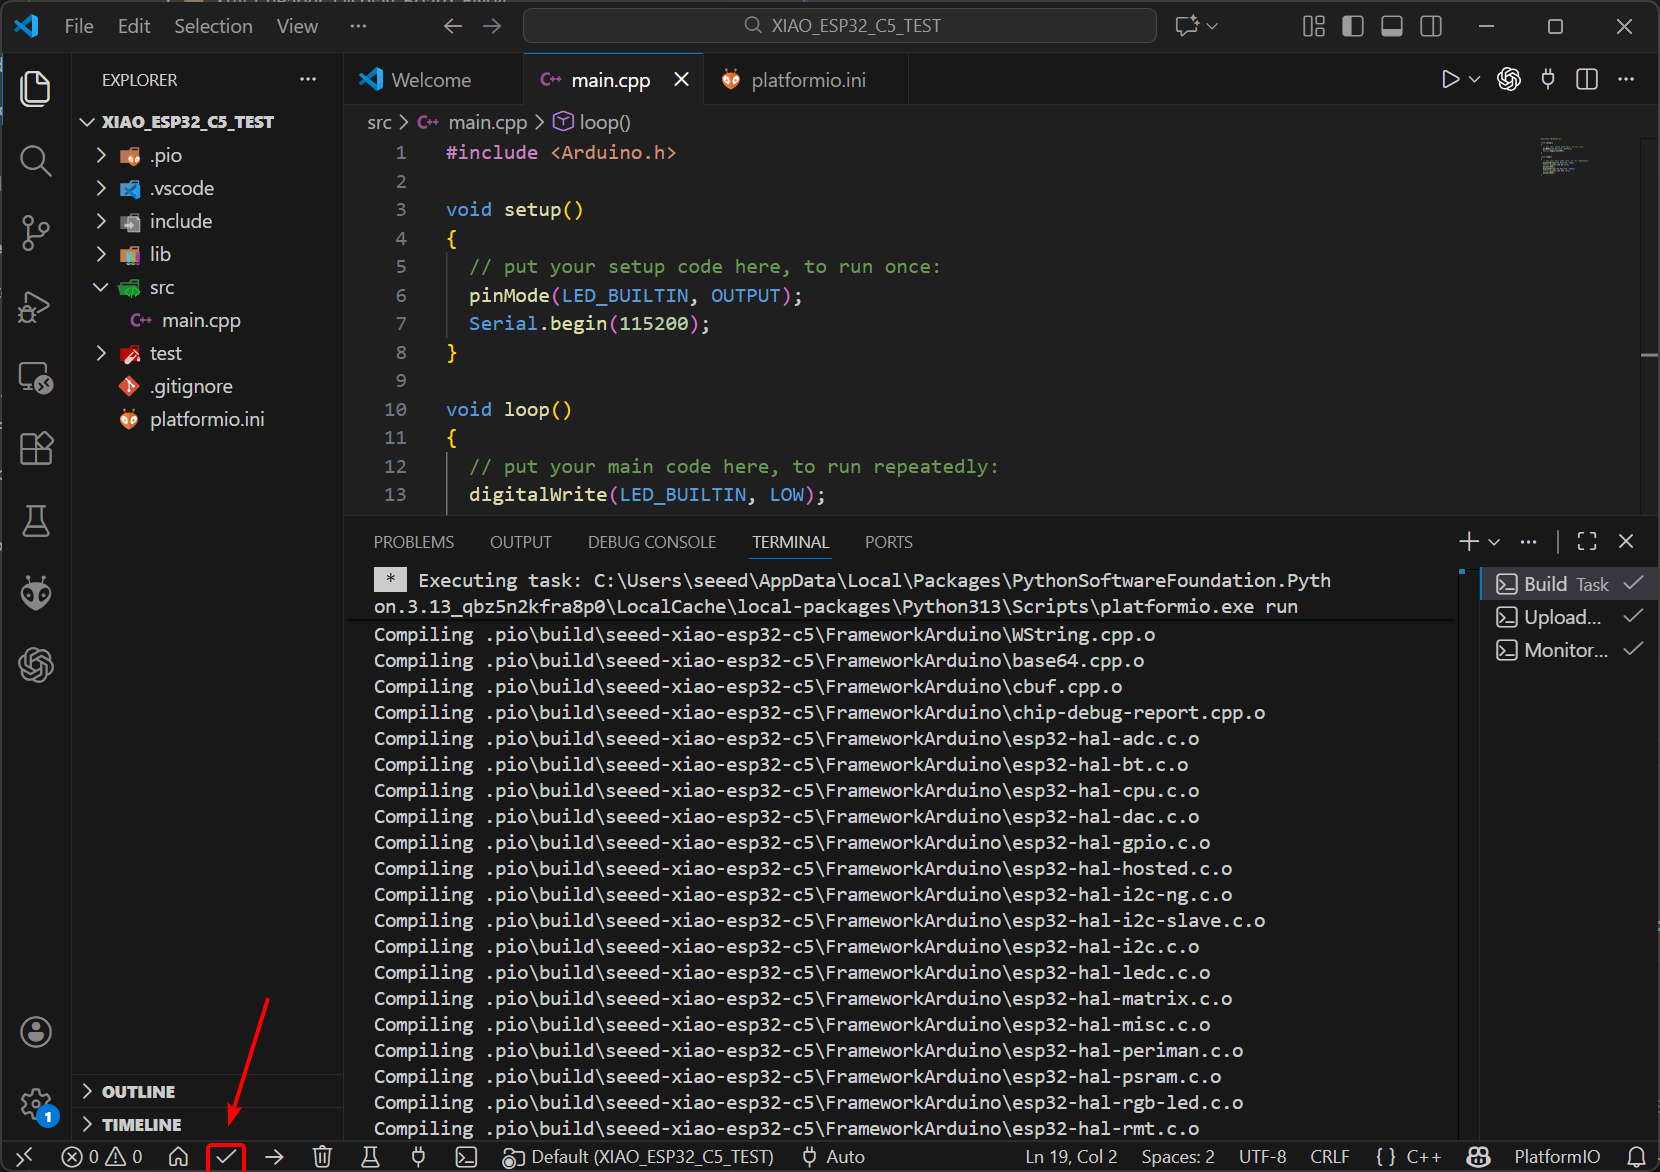
如果构建成功,将会显示如下图所示的内容。
步骤 3. 上传
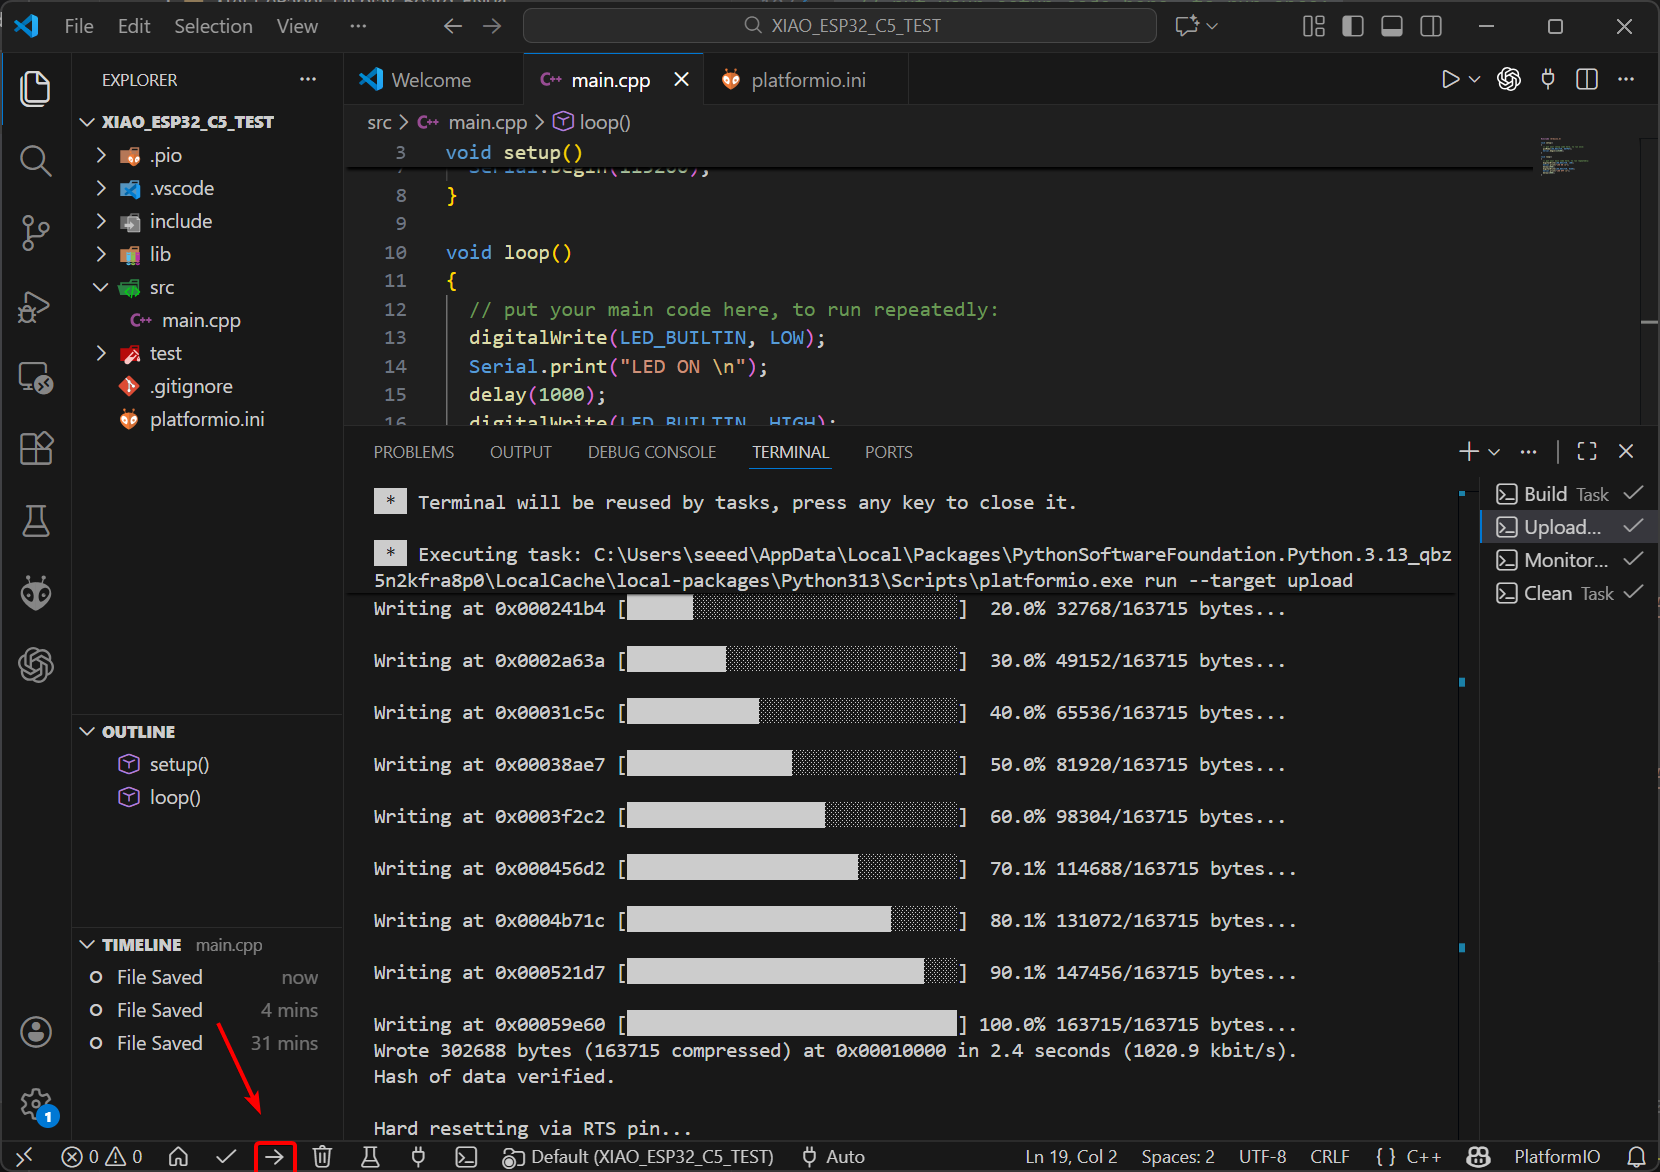
点击 VS Code 底部状态栏中的 → 图标进行上传。
步骤 4. 查看程序效果
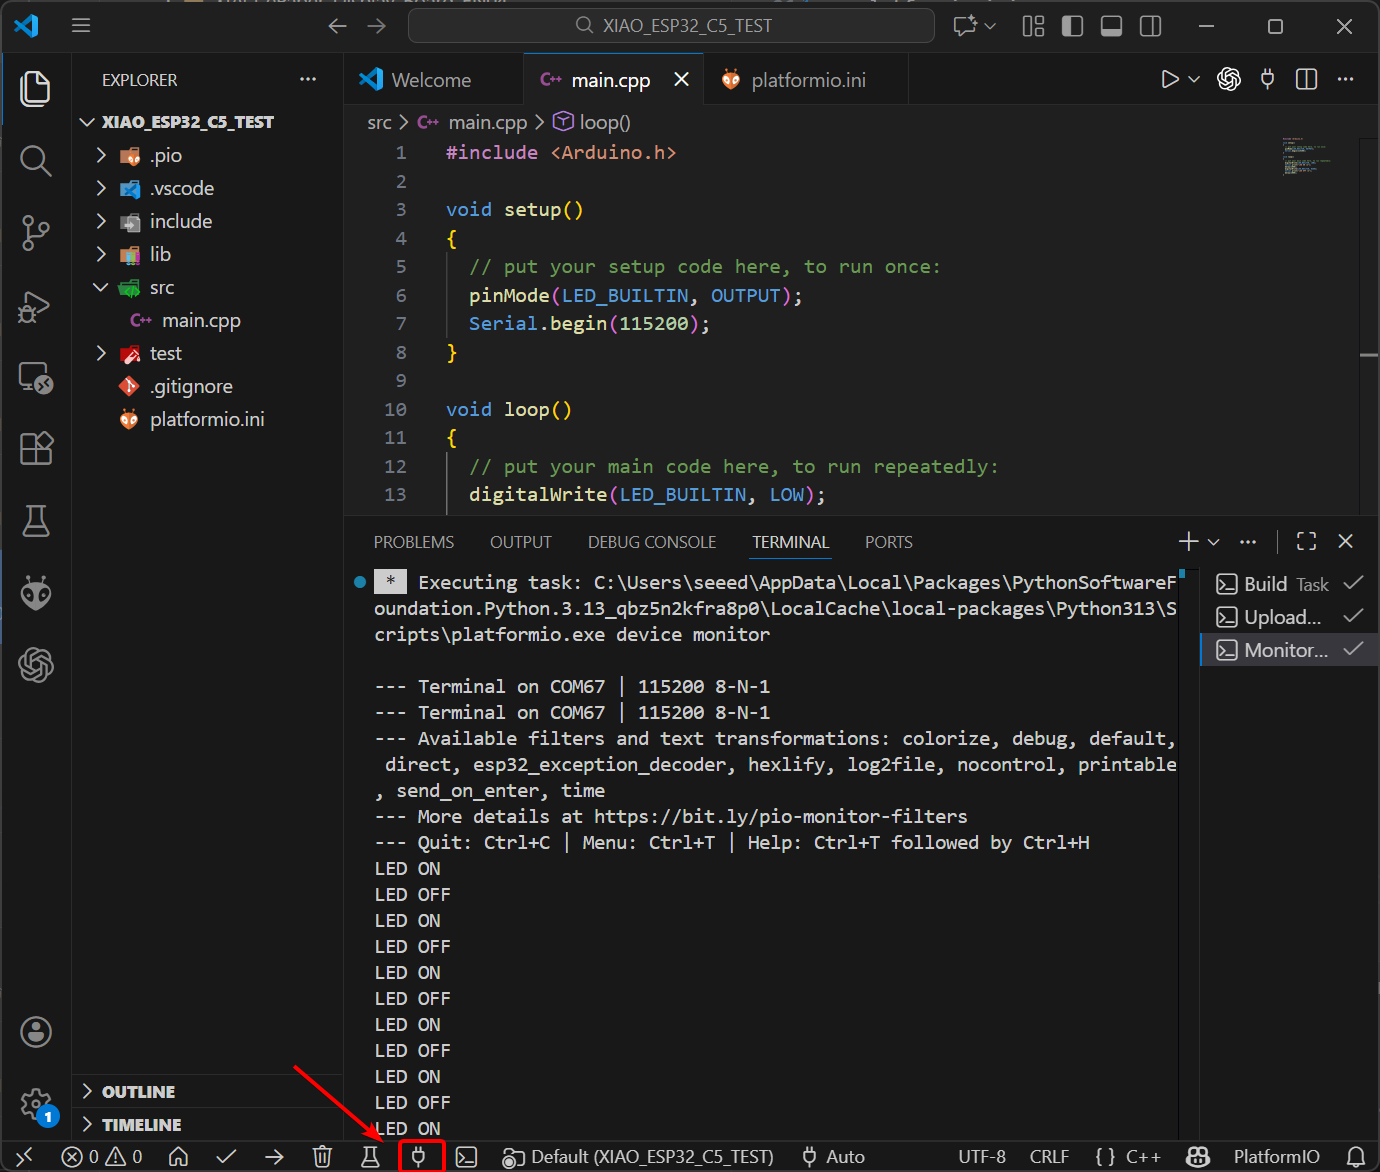
按照下图所示打开 Serial Monitor。它会以 1 秒的间隔打印 LED 的开/关状态。
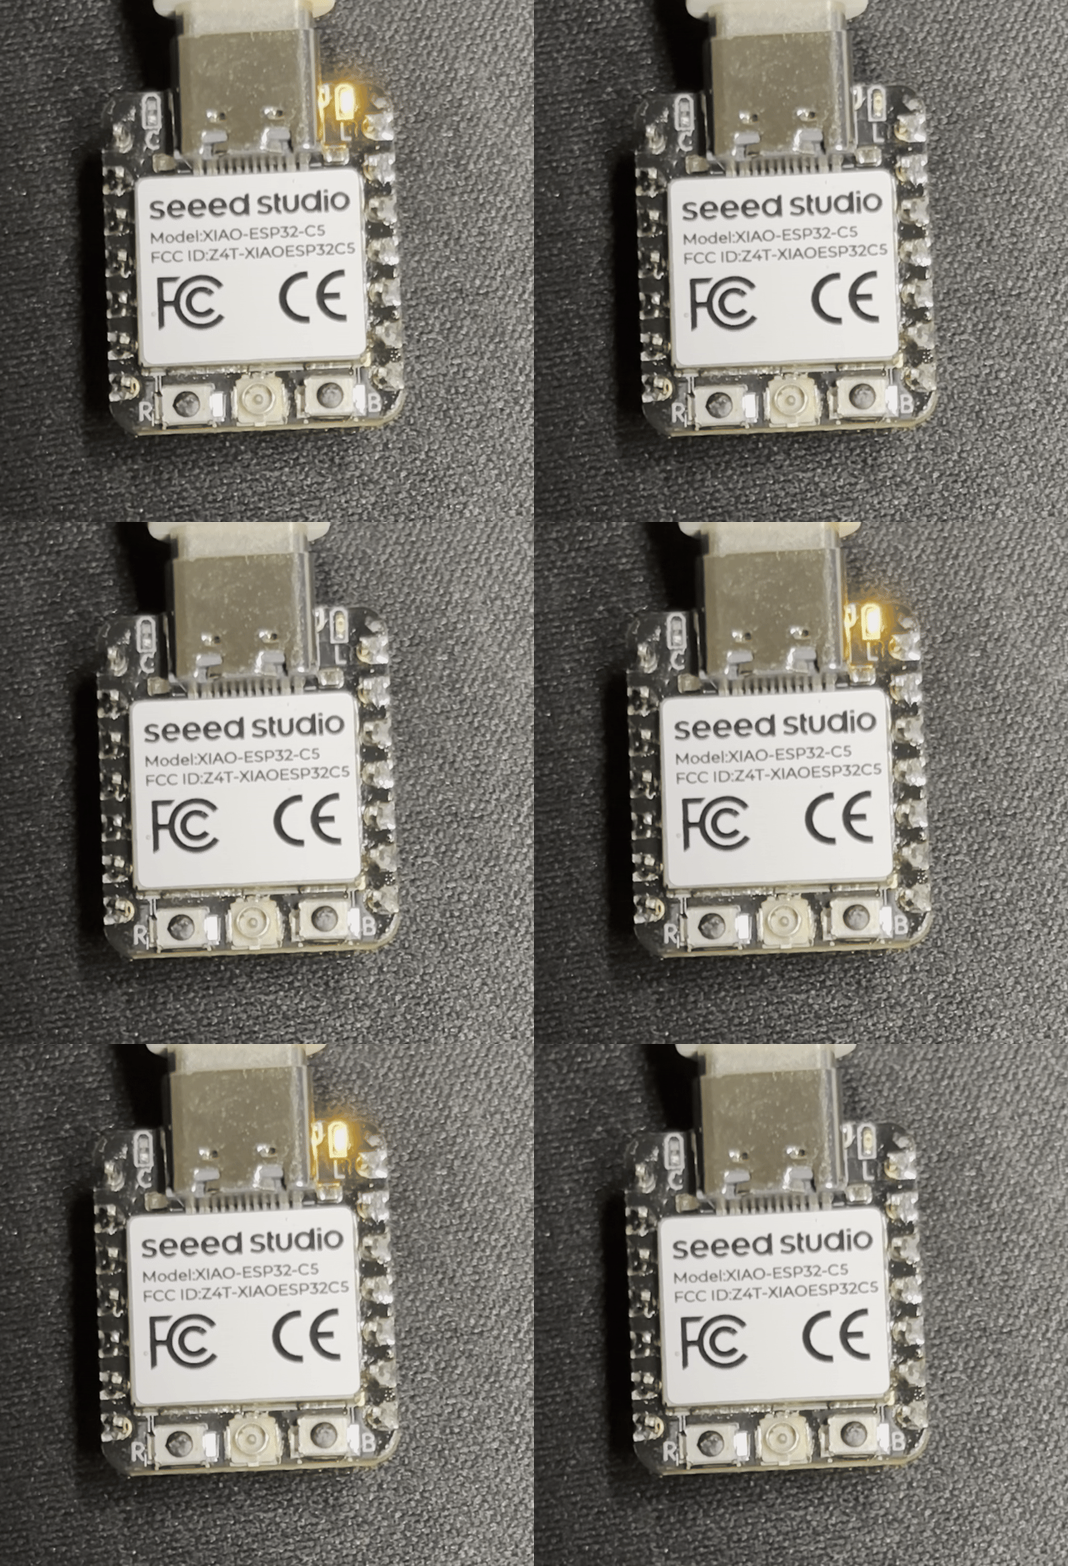
LED 将以同样 1 秒的间隔闪烁。
5 GHz Wi-Fi 连接示例
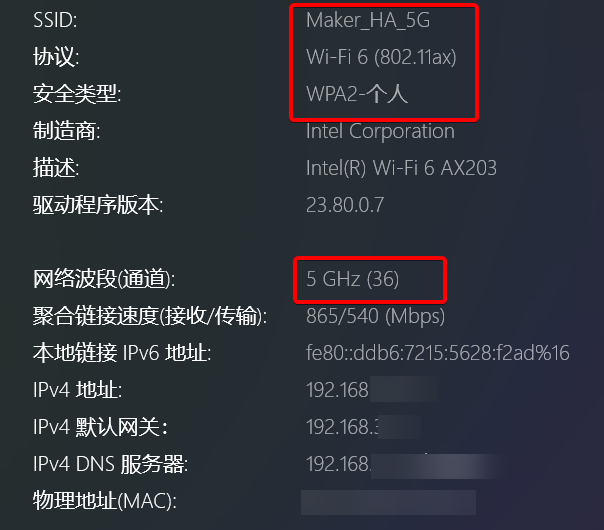
XIAO ESP-C5 支持 2.4 GHz 与 5 GHz 双频 Wi-Fi 6。本示例将演示连接到 5 GHz Wi-Fi 网络的效果。
将以下代码复制到你的 PlatformIO 项目中。
WiFi 连接参考代码
#include <Arduino.h>
#include <WiFi.h>

// ----------------------------------------------------------------
// Modify your WiFi SSID and Password here
// ----------------------------------------------------------------
const char* ssid     = "YOUR_WIFI_SSID";      // e.g., "MyHomeWiFi"
const char* password = "YOUR_WIFI_PASSWORD";  // e.g., "12345678"

void setup() {
  // Initialize serial communication at 115200 baud
  Serial.begin(115200);
  delay(5000); // Wait for serial to stabilize

  Serial.println("\nStarting ESP32 WiFi Connection Demo...");

  // 1. Set WiFi mode to Station (connect to a router as a client)
  WiFi.mode(WIFI_STA);

  // 2. Start connection
  Serial.printf("Connecting to SSID: %s ", ssid);
  WiFi.begin(ssid, password);

  // 3. Wait for connection to be established
  // This loop waits until the status becomes WL_CONNECTED
  while (WiFi.status() != WL_CONNECTED) {
    delay(500);
    Serial.print(".");
  }

  // ----------------------------------------------------------------
  // Connection successful, print detailed information
  // ----------------------------------------------------------------
  Serial.println("\n\n---------------------------------------");
  Serial.println("WiFi Connected Successfully!");
  Serial.println("---------------------------------------");

  // Print IP Address
  Serial.print("IPv4 Address:   ");
  Serial.println(WiFi.localIP());

  // Print Signal Strength (RSSI)
  // Unit is dBm, usually between -30 (Excellent) and -90 (Unusable)
  long rssi = WiFi.RSSI();
  Serial.print("Signal (RSSI):  ");
  Serial.print(rssi);
  Serial.println(" dBm");

  // Simple signal quality check based on RSSI value
  Serial.print("Signal Quality: ");
  if(rssi > -50) Serial.println("Excellent");
  else if(rssi > -60) Serial.println("Good");
  else if(rssi > -70) Serial.println("Fair");
  else if(rssi > -80) Serial.println("Weak");
  else Serial.println("Unstable/Very Poor");

  // Print MAC Address (Hardware ID)
  Serial.print("MAC Address:    ");
  Serial.println(WiFi.macAddress());

  // Print Gateway IP
  Serial.print("Gateway IP:     ");
  Serial.println(WiFi.gatewayIP());

  Serial.println("---------------------------------------");
}

void loop() {
  // In the main loop, we can periodically check the connection status
  // If the connection is lost, attempt to reconnect

  if (WiFi.status() != WL_CONNECTED) {
    Serial.println("WiFi Connection Lost! Reconnecting...");
    WiFi.disconnect();
    WiFi.reconnect();
    delay(5000); // Wait a bit before checking again to avoid spamming
  }

  // Your other application logic goes here
  // ...

  delay(10000); // Loop every 10 seconds
}
构建并上传代码
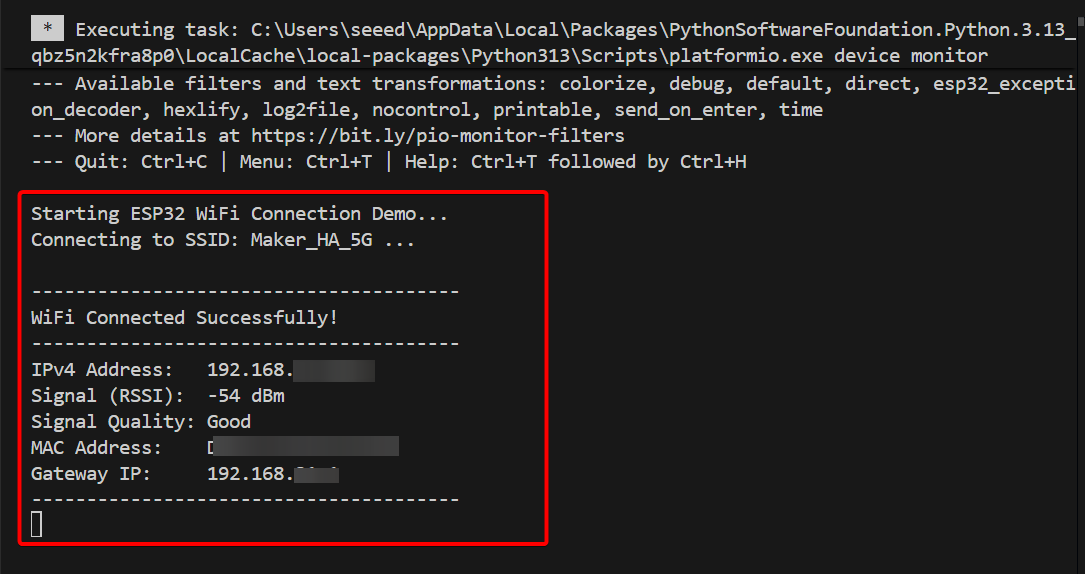
当 XIAO ESP32-C5 成功连接到 WiFi 后,Serial Monitor 会打印所连接 WiFi 网络的信号强度等信息。
同时也可以清楚地看到,XIAO ESP32-C5 具备很强的 5 GHz Wi-Fi 网络连接能力。
通过以上两个示例,你应该已经掌握了 PlatformIO 的基本开发操作。我们期待你使用 XIAO ESP32-C5 创作出更多有趣的项目!
技术支持与产品讨论
感谢你选择我们的产品!我们将为你提供多种支持,确保你在使用我们产品的过程中尽可能顺畅。我们提供了多种交流渠道,以满足不同的偏好和需求。