由 Seeed Studio XIAO RA4M1 驱动的镂空时钟
灵感来源
镂空时钟 在一段时间前在 YouTube 上获得了巨大的人气,原始设计来自 sh1ura,酷炫的演示视频 以及 Thingsverse 上的 3D 设计。向 sh1ura 致敬,感谢这个伟大的灵感。 站在巨人的肩膀上,我们现在使用拇指大小的 XIAO RA4M1 和定制的更小的电机驱动板重新制作了一个版本!
硬件概述
MCU
| Seeed Studio XIAO RA4M1 |
|---|
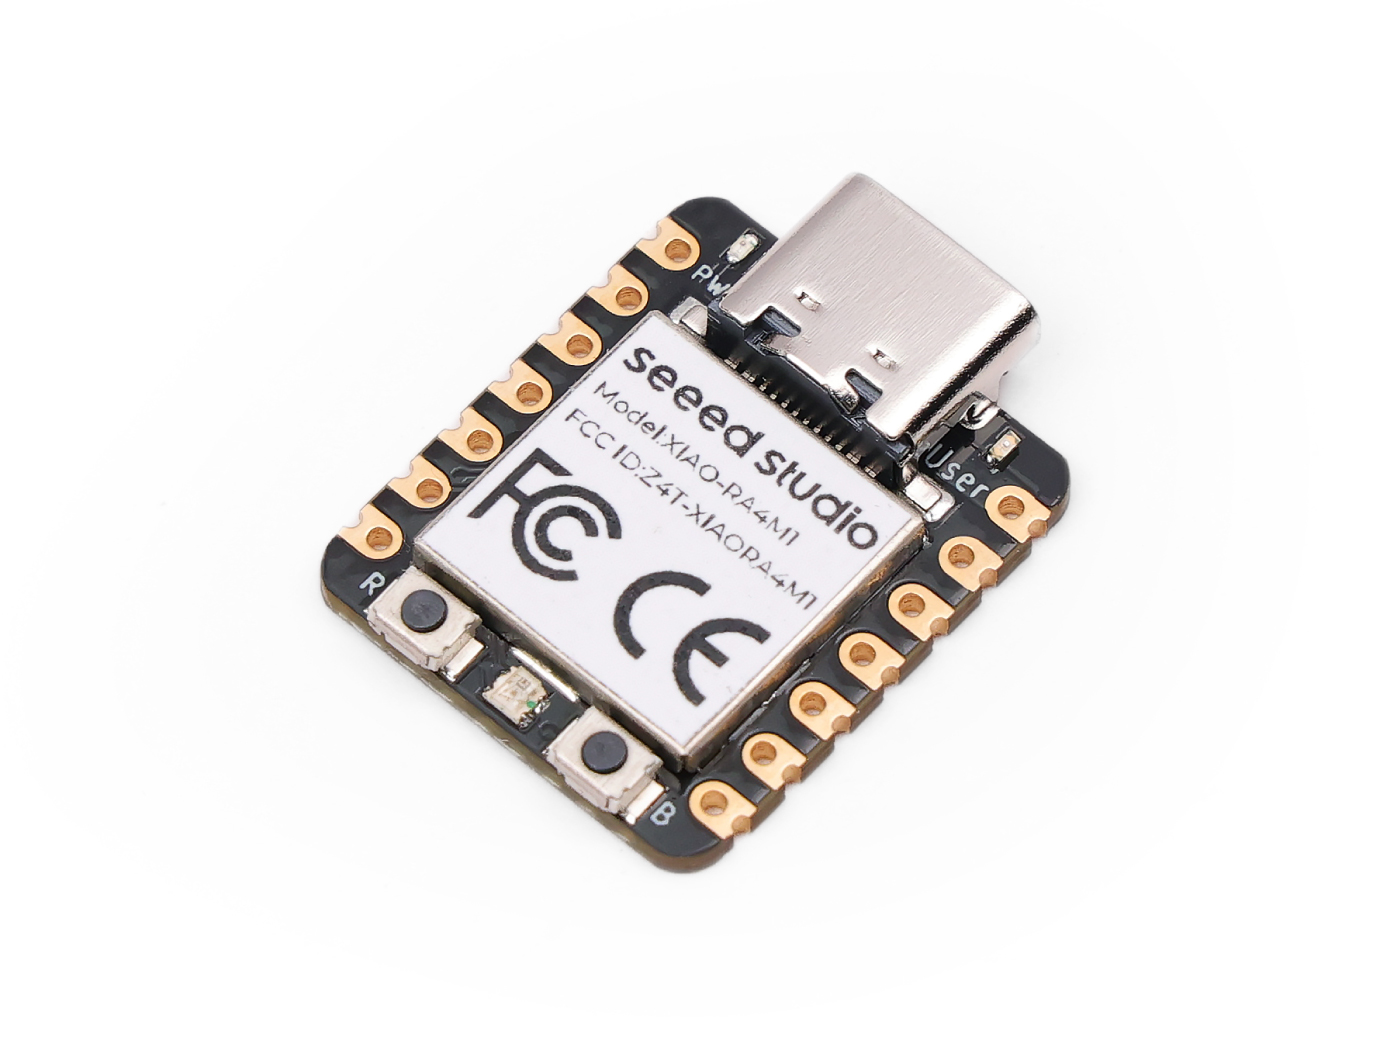 |
电路板
与 XIAO 相同的体积,只需焊接母座并插入 XIAO 和电机即可操作。
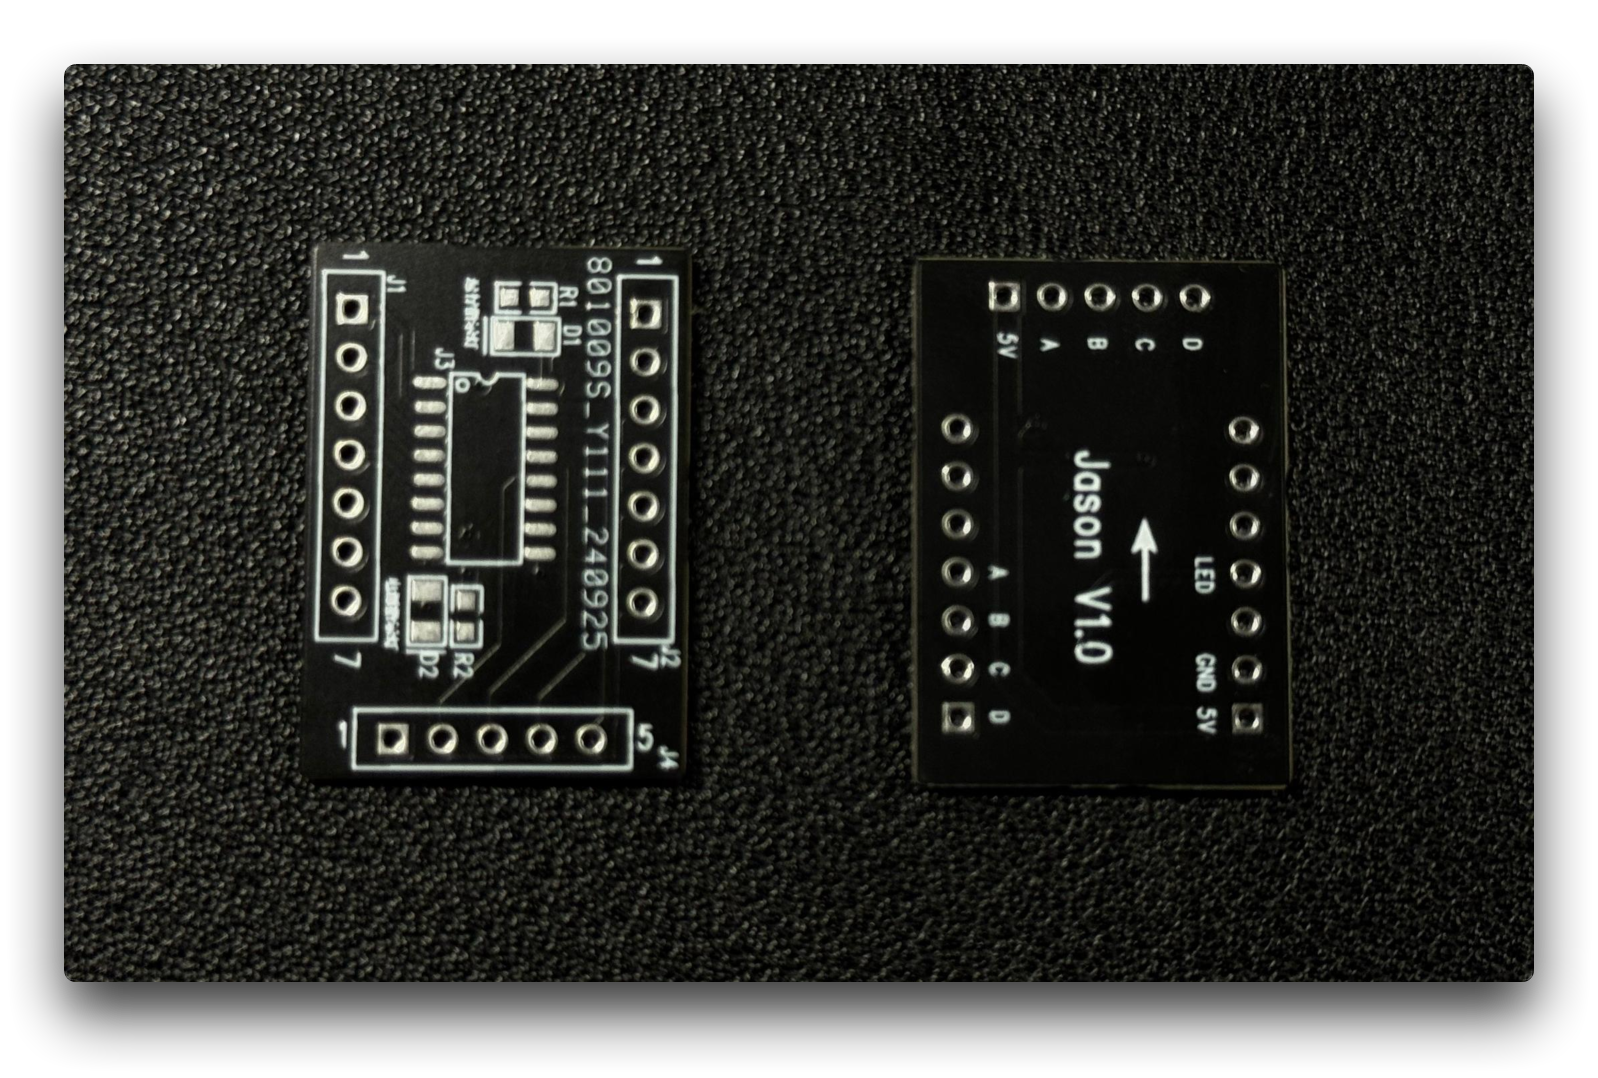
具体信息在最后的资源中。
电机和元件都需要自行购买。
软件概述
// This code controls a stepper motor for a clock project,
// allowing the minute hand to rotate accurately based on time.

// Please tune the following value if the clock gains or loses time.
// Theoretically, the standard value is 60000 milliseconds per minute.
#define MILLIS_PER_MIN 60000 // milliseconds per a minute

// Motor and clock parameters
// Total steps for a full turn of the minute rotor
// Calculated as 4096 steps per revolution * 90 degrees / 12 hours
#define STEPS_PER_ROTATION 30720 // steps for a full turn of minute rotor

// Wait time for a single step of the stepper motor
int delaytime = 2;

// Ports used to control the stepper motor
// If your motor rotates in the opposite direction,
// change the order of the port numbers as needed.
int port[4] = {0, 1, 2, 3};

// Sequence of stepper motor control
// This array defines the control sequence for the motor phases.
int seq[8][4] = {
  {  LOW, HIGH, HIGH,  LOW},
  {  LOW,  LOW, HIGH,  LOW},
  {  LOW,  LOW, HIGH, HIGH},
  {  LOW,  LOW,  LOW, HIGH},
  { HIGH,  LOW,  LOW, HIGH},
  { HIGH,  LOW,  LOW,  LOW},
  { HIGH, HIGH,  LOW,  LOW},
  {  LOW, HIGH,  LOW,  LOW}
};

// Function to rotate the stepper motor based on the specified number of steps
void rotate(int step) {
  static int phase = 0;
  int i, j;
  int delta = (step > 0) ? 1 : 7; // Determine direction of rotation
  int dt = 20; // Initial delay time

  step = (step > 0) ? step : -step; // Convert to positive step count
  for(j = 0; j < step; j++) {
    phase = (phase + delta) % 8; // Update phase
    for(i = 0; i < 4; i++) {
      digitalWrite(port[i], seq[phase][i]); // Control the motor
    }
    delay(dt); // Wait for the specified delay
    if(dt > delaytime) dt--; // Gradually decrease delay
  }
  // Power cut: stop the motor
  for(i = 0; i < 4; i++) {
    digitalWrite(port[i], LOW);
  }
}

// Setup function, runs once at startup
void setup() {
  // Initialize motor control ports as outputs
  pinMode(port[0], OUTPUT);
  pinMode(port[1], OUTPUT);
  pinMode(port[2], OUTPUT);
  pinMode(port[3], OUTPUT);

  // Perform initial approach runs to position the minute hand
  rotate(-20); // Approach run in one direction
  rotate(20);  // Approach run in the opposite direction
  rotate(STEPS_PER_ROTATION / 60); // Position the minute hand
}

// Main loop, runs continuously
void loop() {
  static long prev_min = 0, prev_pos = 0; // Track previous minute and position
  long min;
  static long pos;

  min = millis() / MILLIS_PER_MIN; // Get the current minute
  if(prev_min == min) {
    return; // Exit if the minute hasn't changed
  }
  prev_min = min; // Update previous minute
  pos = (STEPS_PER_ROTATION * min) / 60; // Calculate target position
  rotate(-20); // Approach run in one direction
  rotate(20);  // Approach run in the opposite direction
  if(pos - prev_pos > 0) {
    rotate(pos - prev_pos); // Rotate to the new position if needed
  }
  prev_pos = pos; // Update previous position
}
-
确保步进电机连接: 将步进电机的四根控制线连接到端口数组中指定的端口(0、1、2、3)。
-
调整时间设置: 根据实际情况调整 MILLIS_PER_MIN 值以确保时钟准确。如果时钟走快或走慢,请相应调整此值。
-
确认步数计算: 确保 STEPS_PER_ROTATION 值根据您的电机实际步数和系统设计正确计算。
-
调整延迟时间: delaytime 控制每步之间的延迟。根据电机性能和要求微调此参数以优化电机运行。
-
控制序列设置: seq 数组定义步进电机的控制序列。如果电机旋转方向错误,您可以调整此数组中的值。
-
函数说明: rotate(int step):控制电机旋转指定步数。您可以传递正值或负值来控制方向。电机在每次旋转后会逐渐减少延迟以提高速度。
-
setup(): 在启动时运行一次,用于初始化控制端口并执行初始定位。这是设置电机的必要步骤。
-
loop(): 持续运行的主循环,用于计算当前分钟并更新分针位置。此函数将在每次分钟更新时调用 rotate() 函数来旋转指针。
-
确保电源适合您的步进电机,并检查所有连接是否正确。
-
在测试期间,监控电机的运行以确保其按预期工作,并根据需要进行调整。
如果您有更多想法和修改,欢迎使用 XIAO 系列来展示它们!
资源
技术支持与产品讨论
感谢您选择我们的产品!我们在这里为您提供不同的支持,以确保您使用我们产品的体验尽可能顺畅。我们提供多种沟通渠道,以满足不同的偏好和需求。